child seat MERCEDES-BENZ GLE COUPE 2015 Owners Manual
[x] Cancel search | Manufacturer: MERCEDES-BENZ, Model Year: 2015, Model line: GLE COUPE, Model: MERCEDES-BENZ GLE COUPE 2015Pages: 393, PDF Size: 12.71 MB
Page 9 of 393
Roof linin
g ...................................... 330
Se at belt ........................................ 330
Seat cover .................................... .330
Sensors ......................................... 327
Side running board ........................ 327
Steering wheel ............................... 329
Trim pieces ................................... .329
Washing by hand ........................... 325
Wheels .......................................... .326
Windows ........................................ 326
Wiper blades .................................. 327
Wooden trim .................................. 329
CD player (on-board computer) ........241
Central locking
Automatic locking (on-board com-
puter) ............................................. 247
Locking/unlocking (key ).................. 79
Centre console
Lower section .................................. 34
Upper section .................................. 33
Child
Restraint system .............................. 53
Child seat
Forward-facing restraint system ...... 57
ISOFIX .............................................. 54
On the front-passenger sea t............ 56
Rearward-facing restraint system .... 57
Recommendations ........................... 61
Suitable positions ............................ 57
Top Tether ....................................... 54
Child-proof locks
Important safety notes .................... 62
Rear doors ....................................... 63
Cigarette lighter ................................ 309
Cleaning
Mirror turn signal ........................... 327
Trailer tow hitch ............................. 328
Climate control
Auxiliary heating/ventilation .......... 138
Controlling automaticall y............... 132
Convenience opening/closing
(air-recirculation mode) ................. 136
Cooling with air dehumidification .. 130
Demisting the windows .................. 134
Demisting the windscreen ............. 134
Indicator lamp ................................ 132 Information about using
THERMATIC automatic climate
control ........................................... 128
Information on using
THERMOTRONIC automatic cli-
mate control .................................. 130
Ionisation ....................................... 137
Overview of systems ...................... 126
Problem with the rear window
heating .......................................... 136
Problems with cooling with air
dehumidification ............................ 132
Rear control panel ......................... 129
Setting the air distribution ............. 133
Setting the air vents ...................... 142
Setting the airflow ......................... 133
Setting the climate mode (AIR
FLOW) ............................................ 132
Setting the temperature ................ 132
Switching air-recirculation mode
on/of f............................................ 136
Switching on/of f........................... 130
Switching residual heat on/off ...... 137
Switching the rear window heat-
ing on/of f...................................... 135
Switching the ZONE function on/
off .................................................. 134
THERMATIC automatic climate
control (2-zone) ............................. 127
THERMOTRONIC (3-zone) auto-
matic climate control ..................... 129
Coat hooks ......................................... 304
Cockpit
Overview .......................................... 27
see Instrument cluster
Collapsible emergency spare
wheel
see Emergency spare wheel
COLLISION PREVENTION ASSIST
PLUS
Activating/deactivating ................. 244
Display message ............................ 260
Operation/note s.............................. 67
COMAND display
Cleaning ......................................... 329
Combination switch .......................... 117
Consumption statistics (on-board
computer) .......................................... 238 6
Index
Page 14 of 393
Problem (malfunction) ...................1
64
Fuses
Allocation chart ............................ .346
Before changing ............................ .346
Dashboard fuse box ....................... 346
Fuse box in the engine compart-
ment .............................................. 347
Fuse box under rear bench sea t.... 347
Important safety notes .................. 346 G
Garage door opener Clearing the memory ..................... 313
Frequencies ................................... 314
General notes ................................ 311
Important safety notes .................. 312
Opening/closing the garage doo r..3 13
Programming (button in the rear-
view mirror) ................................... 312
Synchronising the rolling code ....... 313
Gear indicator (on-board com-
puter, Mercedes-AMG vehicles) ....... 250
Gearshift paddles
see Steering wheel gearshift paddles
Gearshift program
SETUP (on-board computer) .......... 250
Genuine Mercedes-Benz parts ........... 22
Glove compartment .......................... 300H
Hazard warning lamps ......................117
Head restraints
Adjusting ....................................... 103
Adjusting (electrically) ................... 104
Adjusting (rear) .............................. 104
Fitting/removing (rear) .................. 105
Luxury ............................................ 104
Headlamps
Misting up ...................................... 120
see Automatic headlamp mode
Heating
see Climate control
High-pressure cleaners .................... 325
Hill start assist .................................. 149
HOLD function
Deactivating ................................... 192 Display message ............................ 274
Function/notes ............................
.191
Horn ...................................................... 27 I
Ignition lock see Key positions
Immobiliser .......................................... 75
Indicator and warning lamp
Restraint system ............................ 294
Indicator and warning lamps
Coolant .......................................... 295
DISTRONIC PLUS ........................... 297
Engine diagnostics ......................... 294
Indicator lamps
Display message ............................ 266
see Warning and indicator lamps
Insect protection on the radiator .... 319
Instrument cluster
Overview .......................................... 29
Warning and indicator lamps ........... 31
Instrument cluster lighting .............. 235
Intelligent Light System
Activating/deactivating ................. 246
Display message ............................ 267
Overview ........................................ 117
Setting the dipped-beam head-
lamps for driving on the right/left .. 246
Interior lighting
Automatic control system .............. 121
Emergency lighting ........................ 121
Manual control ............................... 121
Overview ........................................ 120
Reading lamp ................................. 120
Interior motion sensor
Deactivating ..................................... 77
Function .......................................... .76
Priming ............................................ 76
Switching off .................................... 76
ISOFIX child seat securing system ....54 J
Jack Storage location ............................3 32
Using ............................................. 358
Jump starting (engine) ......................341 Index
11
Page 19 of 393
Replacing the battery (auxiliary
heating remote control)
.................... 141
Rescue card ......................................... 25
Reserve (fuel tank)
see Fuel
Reserve fuel
Display messag e............................ 271
Warning lamp ................................. 294
Residual heat (climate control) ........ 137
Restraint system
Display message ............................ 262
Introduction ..................................... 37
Warning lamp ................................. 294
Warning lamp (function) ................... 38
Rev counter ........................................ 235
Reversing camera
Cleaning instructions ..................... 328
Display in the multimedia system .. 207
Function/note s............................. 206
Switching on/of f........................... 207
Reversing feature
Panorama sliding sunroo f................ 97
Side windows ................................... 92
Tailgate ............................................ 88
Reversing function
Roller sunblind ................................. 98
Reversing lamp (display message) .. 267
Roller sunblind
Panorama sliding sunroo f................ 98
Roof carrier ........................................ 305
Roof lining and carpets (cleaning
instructions) ...................................... 330
Roof load (maximum) ........................ 381
Route (navigation)
see Route guidance (navigation)
Route guidance (navigation) ............ 239S
Safety Children in the vehicle ..................... 52
see Occupant safety
SD memory card
Selecting ........................................ 241
Seat belt
Correct usage .................................. 40
Switching belt adjustment on/off
(on-board computer) ...................... 249 Seat belts
Adjusting the driver's and front-
passenger seat belt ......................... 41
Adjusting the height ......................... 41
Cleaning ......................................... 330
Display message ............................ 261
Fastening ......................................... 41
Important safety guidelines ............. 39
Introduction ..................................... 39
Rear seat belt status indicator ......... 42
Releasing ......................................... 41
Warning lamp ................................. 286
Warning lamp (function) ................... 41
Seats
Adjusting (electrically) ................... 103
Adjusting the head restraint .......... 103
Cleaning the cover ......................... 330
Correct driver's seat position ........ 101
Folding the rear bench seat for-
wards/back ................................... 302
Important safety notes .................. 102
Overview ........................................ 102
Seat heating problem .................... 107
Seat ventilation problem ................ 108
Storing settings (memory func-
tion) ............................................... 114
Switching seat heating on/of f....... 105
Switching the seat ventilation on/ off .................................................. 107
Section
Sliding sunroof ................................. 96
Selector lever
Cleaning ......................................... 329
Sensors (cleaning instructions) ....... 327
Service menu (on-board com-
puter) .................................................. 245
Service message
see ASSYST PLUS
Service products
AdBlue ®
special additive s.............. 377
Brake fluid ..................................... 380
Coolant (engine) ............................ 380
Engine oil ....................................... 378
Fuel ................................................ 375
Important safety notes .................. 374
Washer fluid ................................... 381
Setting the air distribution ............... 13316
Index
Page 40 of 393
Useful information
i This Owner's Manual describes all models,
series and optional equipment for your vehi-
cle that were available at the time of going to
press. National variations are possible. Note
that your vehicle may not be equipped with all
of the functions described. This is also the
case for systems and functions relevant to
safety.
i Read the information on qualified specialist
workshops: (Y page 25). Panic alarm
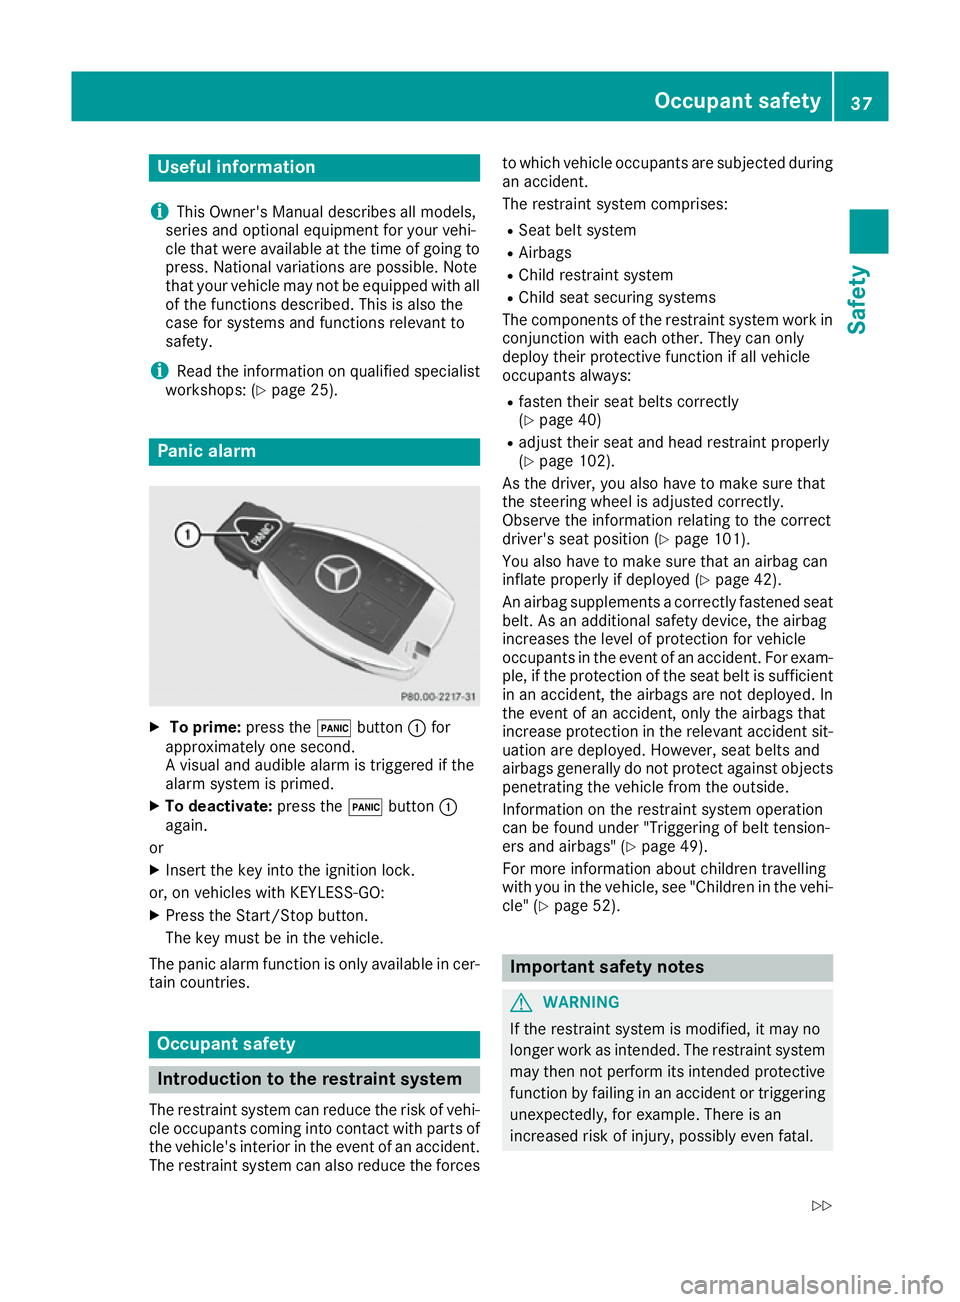
X
To prime: press the!button :for
approximately one second.
A visual and audible alarm is triggered if the
alarm system is primed.
X To deactivate: press the!button :
again.
or
X Insert the key into the ignition lock.
or, on vehicles with KEYLESS‑GO: X Press the Start/Stop button.
The key must be in the vehicle.
The panic alarm function is only available in cer- tain countries. Occupant safety
Introduction to the restraint system
The restraint system can reduce the risk of vehi- cle occupants coming into contact with parts of
the vehicle's interior in the event of an accident.
The restraint system can also reduce the forces to which vehicle occupants are subjected during
an accident.
The restraint system comprises:
R Seat belt system
R Airbags
R Child restraint system
R Child seat securing systems
The components of the restraint system work in
conjunction with each other. They can only
deploy their protective function if all vehicle
occupants always:
R fasten their seat belts correctly
(Y page 40)
R adjust their seat and head restraint properly
(Y page 102).
As the driver, you also have to make sure that
the steering wheel is adjusted correctly.
Observe the information relating to the correct
driver's seat position (Y page 101).
You also have to make sure that an airbag can
inflate properly if deployed (Y page 42).
An airbag supplements a correctly fastened seat belt. As an additional safety device, the airbag
increases the level of protection for vehicle
occupants in the event of an accident. For exam-
ple, if the protection of the seat belt is sufficient in an accident, the airbags are not deployed. In
the event of an accident, only the airbags that
increase protection in the relevant accident sit- uation are deployed. However, seat belts and
airbags generally do not protect against objects penetrating the vehicle from the outside.
Information on the restraint system operation
can be found under "Triggering of belt tension-
ers and airbags" (Y page 49).
For more information about children travelling
with you in the vehicle, see "Children in the vehi-
cle" (Y page 52). Important safety notes
G
WARNING
If the restraint system is modified, it may no
longer work as intended. The restraint system
may then not perform its intended protective function by failing in an accident or triggering
unexpectedly, for example. There is an
increased risk of injury, possibly even fatal. Occupant safety
37Safety
Z
Page 41 of 393
Never modify parts of the restraint system. Do
not attempt to modify the wiring as well as
electronic components or their software.
If it is necessary to modify an airbag system to
accommodate a person with disabilities, con-
tact a Mercedes-Benz Service Centre. Restraint system warning lamp
The functions of the restraint system are
checked after the ignition is switched on and at
regular intervals while the engine is running.
Therefore, malfunctions can be detected in
good time.
The 6 restraint system warning lamp in the
instrument cluster lights up when the ignition is switched on. It goes out no later than a few sec-
onds after the vehicle is started. The compo-
nents of the restraint system are in operational
readiness.
A malfunction has occurred if the 6restraint
system warning lamp:
R does not light up after the ignition is switched
on
R does not go out after a few seconds with the
engine running
R lights up again while the engine is running G
WARNING
If the restraint system is malfunctioning,
restraint system components may be trig-
gered unintentionally or might not be trig-
gered at all in the event of an accident with a high rate of vehicle deceleration. This can
effect belt tensioners or airbags, for example. There is an increased risk of serious or even
fatal injuries.
Have the restraint system checked and
repaired immediately at a qualified specialist
workshop. PASSENGER AIR BAG indicator lamp
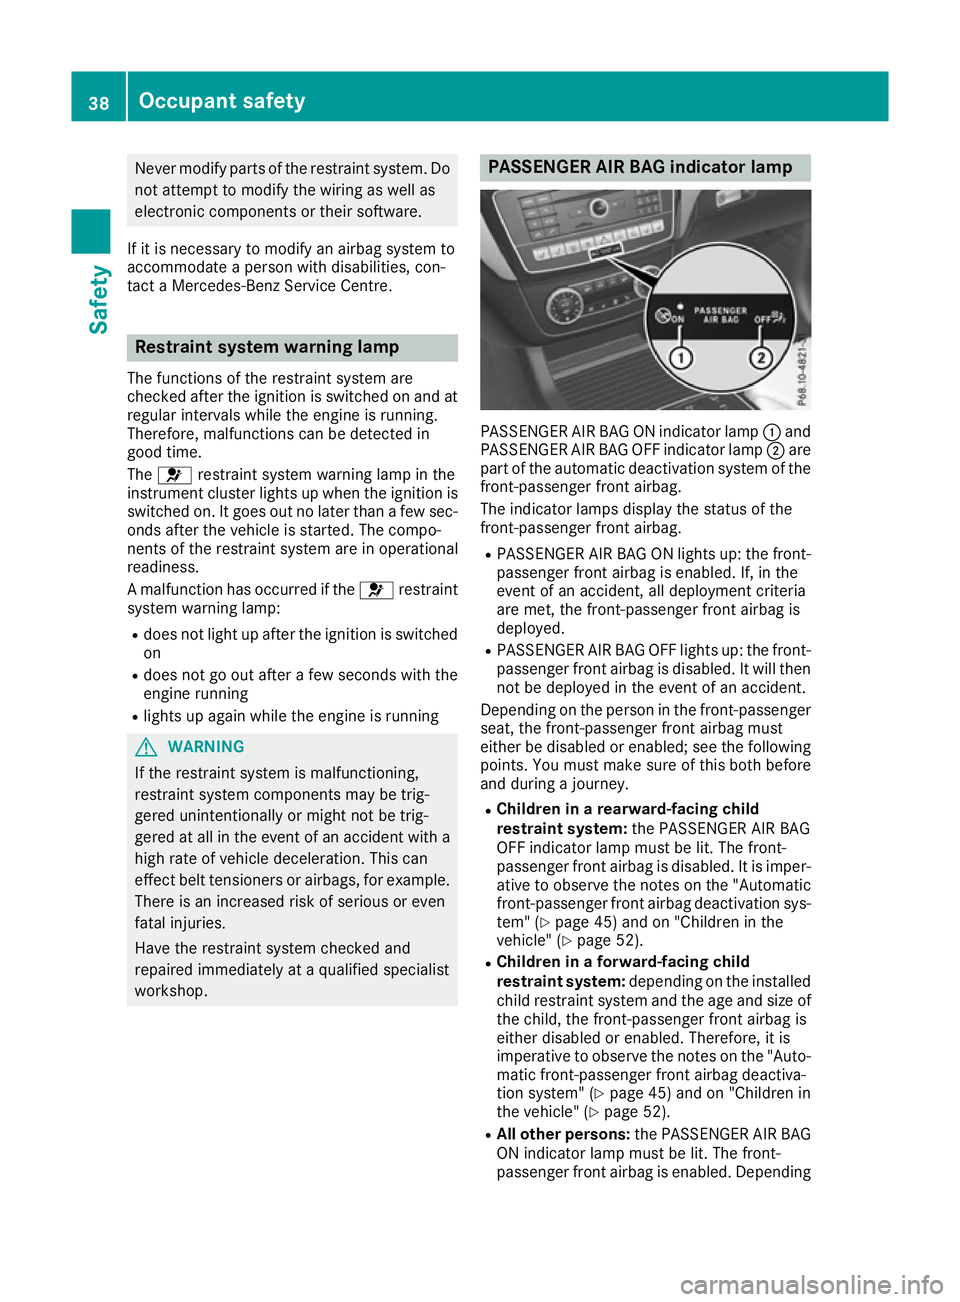
PASSENGER AIR BAG ON indicator lamp
:and
PASSENGER AIR BAG OFF indicator lamp ;are
part of the automatic deactivation system of the front-passenger front airbag.
The indicator lamps display the status of the
front-passenger front airbag.
R PASSENGER AIR BAG ON lights up: the front-
passenger front airbag is enabled. If, in the
event of an accident, all deployment criteria
are met, the front-passenger front airbag is
deployed.
R PASSENGER AIR BAG OFF lights up: the front-
passenger front airbag is disabled. It will then
not be deployed in the event of an accident.
Depending on the person in the front-passenger seat, the front-passenger front airbag must
either be disabled or enabled; see the following
points. You must make sure of this both before
and during a journey.
R Children in a rearward-facing child
restraint system: the PASSENGER AIR BAG
OFF indicator lamp must be lit. The front-
passenger front airbag is disabled. It is imper-
ative to observe the notes on the "Automatic front-passenger front airbag deactivation sys-
tem" (Y page 45) and on "Children in the
vehicle" (Y page 52).
R Children in a forward-facing child
restraint system: depending on the installed
child restraint system and the age and size of the child, the front-passenger front airbag is
either disabled or enabled. Therefore, it is
imperative to observe the notes on the "Auto-
matic front-passenger front airbag deactiva-
tion system" (Y page 45) and on "Children in
the vehicle" (Y page 52).
R All other persons: the PASSENGER AIR BAG
ON indicator lamp must be lit. The front-
passenger front airbag is enabled. Depending 38
Occupant safetySafety
Page 43 of 393
If a child younger than twelve years old and
under 1.50 m in height is travelling in the vehi-
cle:
R always secure the child in a child restraint
system suitable for this Mercedes-Benz vehi-
cle. The child restraint system must be appro-
priate to the age, weight and size of the child.
R always observe the instructions and safety
notes on the "Automatic front-passenger
front airbag deactivation system".
(Y page 45)
R always observe the instructions and safety
notes on "Children in the vehicle"
(Y page 52) in addition to the child restraint
system manufacturer's installation and oper-
ating instructions. G
WARNING
Seat belts cannot protect as intended, if:
R they are damaged, have been modified, are
extremely dirty, bleached or dyed
R the seat belt buckle is damaged or
extremely dirty
R modifications have been made to the belt
tensioners, belt anchorages or inertia reels
Seat belts may sustain non-visible damage in an accident, e.g. due to glass splinters. Modi-
fied or damaged seat belts can tear or fail, for example in the event of an accident. Modified
seat belt tensioners may be deployed unin-
tentionally or fail to be deployed when
required. There is an increased risk of injury,
possibly even fatal.
Never modify safety belts, seat belt tension-
ers, seat belt anchorages and inertia reels.
Ensure that seat belts are not damaged or
worn and are clean. After an accident, have
the seat belts checked immediately at a quali- fied specialist workshop.
Mercedes-Benz recommends that you only use
seat belts which have been approved specifi-
cally for your vehicle by Mercedes-Benz. Other- wise, your vehicle's general operating permit
could be invalidated. Correct seat belt use Pay attention to the safety notes about the seat
belt (Y page 39).
All vehicle occupants must fasten their seat
belts correctly before you start driving. You
must also make sure that all vehicle occupants
have fastened their seat belts correctly during
the journey.
When fastening your seat belt, always make
sure that:
R the seat belt tongue is inserted into the belt
buckle that belongs to the seat.
R the seat belt is tightened across your body.
Avoid wearing bulky clothing, e.g. a winter
coat.
R the seat belt is not twisted.
Only then can the forces which occur be dis-
tributed over the area of the belt.
R the shoulder section of the belt is routed
across the centre of your shoulder.
The shoulder section of the belt must not
come into contact with your neck or be routed
under your arm. Where possible, adjust the
seat belt to the appropriate height.
R The lap belt must be taut and as low as pos-
sible over your lap.
The lap belt must always be routed across
your hip joints and not across your abdomen.
Pregnant women must take particular care
with this. If necessary, push the lap belt down to your hip joint and pull it tight using the
shoulder section of the belt.
R The seat belt is not routed over sharp, pointed
or fragile objects.
If such objects are located on or in your cloth- ing, e.g. pens, keys, spectacles, etc. stow
these in a suitable location.
R Only one person should use each seat belt at
any one time.
Babies and children must never travel sitting
on the lap of another vehicle occupant. In the event of an accident, they could be crushed
between the vehicle occupant and seat belt.
R Do not secure any objects with a seat belt if
the seat belt is being used by one of the vehi-
cle's occupants.
Also ensure that no objects are placed
between a person and the seat. e.g. a cush-
ion.
Seat belts are solely intended to secure and
restrain persons. To secure objects, luggage or 40
Occupant safetySafety
Page 45 of 393
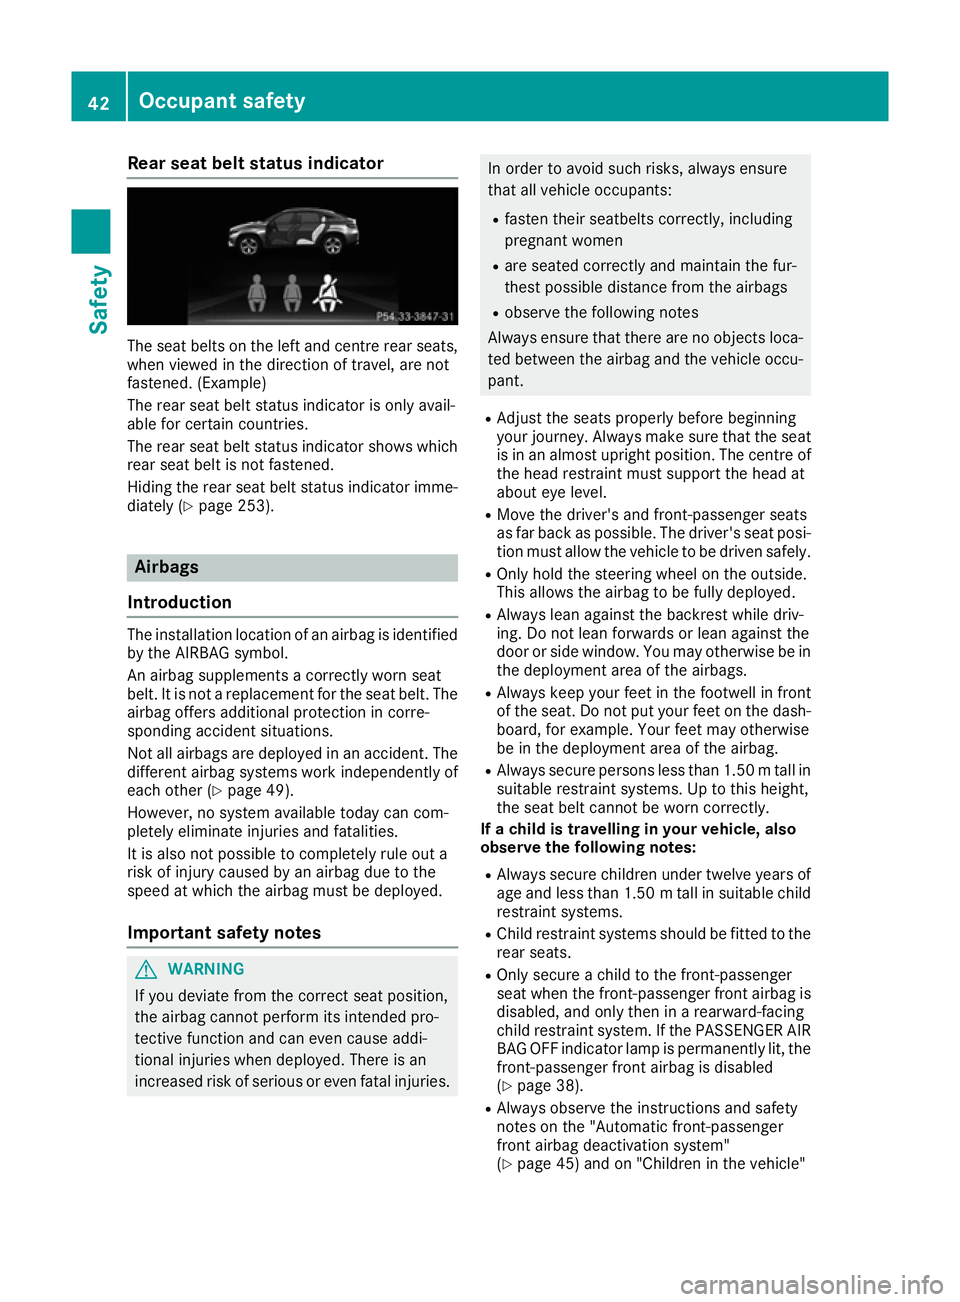
Rear seat belt status indicator
The seat belts on the left and centre rear seats,
when viewed in the direction of travel, are not
fastened. (Example)
The rear seat belt status indicator is only avail-
able for certain countries.
The rear seat belt status indicator shows which rear seat belt is not fastened.
Hiding the rear seat belt status indicator imme-
diately (Y page 253). Airbags
Introduction The installation location of an airbag is identified
by the AIRBAG symbol.
An airbag supplements a correctly worn seat
belt. It is not a replacement for the seat belt. The airbag offers additional protection in corre-
sponding accident situations.
Not all airbags are deployed in an accident. The
different airbag systems work independently of
each other (Y page 49).
However, no system available today can com-
pletely eliminate injuries and fatalities.
It is also not possible to completely rule out a
risk of injury caused by an airbag due to the
speed at which the airbag must be deployed.
Important safety notes G
WARNING
If you deviate from the correct seat position,
the airbag cannot perform its intended pro-
tective function and can even cause addi-
tional injuries when deployed. There is an
increased risk of serious or even fatal injuries. In order to avoid such risks, always ensure
that all vehicle occupants:
R fasten their seatbelts correctly, including
pregnant women
R are seated correctly and maintain the fur-
thest possible distance from the airbags
R observe the following notes
Always ensure that there are no objects loca-
ted between the airbag and the vehicle occu-
pant.
R Adjust the seats properly before beginning
your journey. Always make sure that the seat is in an almost upright position. The centre of
the head restraint must support the head at
about eye level.
R Move the driver's and front-passenger seats
as far back as possible. The driver's seat posi-
tion must allow the vehicle to be driven safely.
R Only hold the steering wheel on the outside.
This allows the airbag to be fully deployed.
R Always lean against the backrest while driv-
ing. Do not lean forwards or lean against the
door or side window. You may otherwise be in
the deployment area of the airbags.
R Always keep your feet in the footwell in front
of the seat. Do not put your feet on the dash-
board, for example. Your feet may otherwise
be in the deployment area of the airbag.
R Always secure persons less than 1.50 mtall in
suitable restraint systems. Up to this height,
the seat belt cannot be worn correctly.
If a child is travelling in your vehicle, also
observe the following notes:
R Always secure children under twelve years of
age and less than 1.50 mtall in suitable child
restraint systems.
R Child restraint systems should be fitted to the
rear seats.
R Only secure a child to the front-passenger
seat when the front-passenger front airbag is
disabled, and only then in a rearward-facing
child restraint system. If the PASSENGER AIR BAG OFF indicator lamp is permanently lit, the
front-passenger front airbag is disabled
(Y page 38).
R Always observe the instructions and safety
notes on the "Automatic front-passenger
front airbag deactivation system"
(Y page 45) and on "Children in the vehicle" 42
Occupant safetySafety
Page 46 of 393
(Y
page 52) in addition to the child restraint
system manufacturer's installation and oper-
ating instructions.
Objects in the vehicle interior may prevent
the airbag from functioning correctly. Before
starting your journey and to avoid risks resulting
from the speed of the airbag as it deploys, make sure that:
R there are no people, animals or objects
between the vehicle occupants and an airbag.
R there are no objects between the seat, door
and B-pillar.
R no hard objects, e.g. coat hangers, are hang-
ing on the grab handles or coat hooks.
R no accessories, such as cup holders, are
attached to the vehicle within the deployment
area of an airbag, e.g. to doors, side windows, rear side trim or side walls.
R no heavy, sharp-edged or fragile objects are in
the pockets of your clothing. Store such
objects in a suitable place. G
WARNING
If you modify an airbag cover or affix objects
such as stickers to it, the airbag can no longer function correctly. There is an increased risk
of injury.
Never modify an airbag cover or affix objects
to it. G
WARNING
Sensors to control the airbags are located in
the doors. Modifications or work not per-
formed correctly to the doors or door panel-
ling, as well as damaged doors, can lead to the function of the sensors being impaired. The
airbags might therefore not function properly any more. Consequently, the airbags cannot
protect vehicle occupants as they are
designed to do. This poses an increased risk
of injury.
Never modify the doors or parts of the doors.
Always have work on the doors or door pan-
elling carried out at a qualified specialist
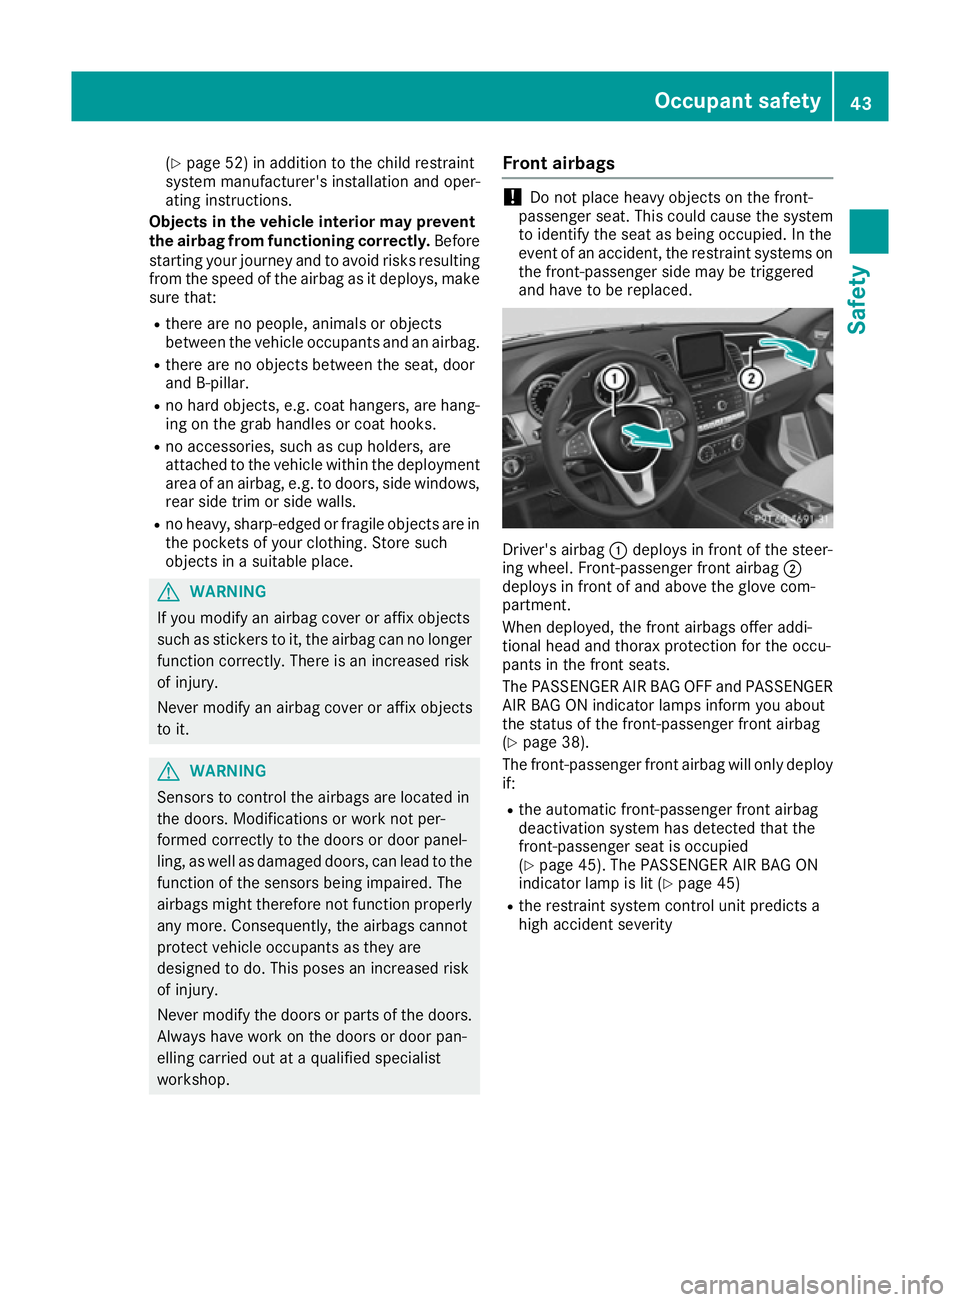
workshop. Front airbags !
Do not place heavy objects on the front-
passenger seat. This could cause the system
to identify the seat as being occupied. In the
event of an accident, the restraint systems on the front-passenger side may be triggered
and have to be replaced. Driver's airbag
:deploys in front of the steer-
ing wheel. Front-passenger front airbag ;
deploys in front of and above the glove com-
partment.
When deployed, the front airbags offer addi-
tional head and thorax protection for the occu-
pants in the front seats.
The PASSENGER AIR BAG OFF and PASSENGER
AIR BAG ON indicator lamps inform you about
the status of the front-passenger front airbag
(Y page 38).
The front-passenger front airbag will only deploy if:
R the automatic front-passenger front airbag
deactivation system has detected that the
front-passenger seat is occupied
(Y page 45). The PASSENGER AIR BAG ON
indicator lamp is lit (Y page 45)
R the restraint system control unit predicts a
high accident severity Occupant safety
43Safety Z
Page 48 of 393
seat belt, a windowbag may be deployed in other
accident situations (Y page 49).Automatic front-passenger front air-
bag deactivation
Introduction In order to recognise a child restraint system on
the front-passenger seat, the automatic front-
passenger front airbag deactivation system cat-
egorises the person in the front-passenger seat. Depending on that result, the front-passenger
front airbag is either enabled or disabled. If a
rearward-facing child restraint system is fitted
to the front-passenger seat, the PASSENGER
AIR BAG OFF indicator lamp must light up after
the system self-test and remain lit. The front-
passenger front airbag is disabled.
The system does not disable:
R the sidebag
R the windowbag
R the seat belt tensioner
In the following situation, the sidebag and the
seat belt tensioner are deactivated:
R the automatic front-passenger front airbag
deactivation system has not categorised the
person on the front-passenger seat as an
adult or a person of corresponding stature
and
R the seat belt tongue of the seat belt is not
inserted into the front-passenger seat belt
buckle
Make sure that your vehicle is equipped with the automatic front-passenger front airbag deacti-
vation system (Y page 56). If this is not the
case, always install a child restraint system on a suitable rear seat (Y page 57).
If it is absolutely necessary to install a child
restraint system on the front-passenger seat, be
sure to observe the correct positioning of the
child restraint system. Never place objects
under or behind the child restraint system, e.g. a
cushion. The entire base of the child restraint
system must always rest on the seat cushion of
the front-passenger seat. The backrest of the
forward-facing child restraint system must, as
far as possible, be resting on the backrest of the
front-passenger seat. The child restraint system must not touch the roof or be put under strain bythe head restraint. Adjust the angle of the seat
backrest and the head restraint position accord- ingly. Only then is the correct function of the
automatic front-passenger front airbag deacti-
vation system guaranteed. Always observe the
information on suitable positioning of the child
restraint system (Y
page 57) in addition to the
child restraint system manufacturer's installa-
tion instructions.
Operation of automatic front-passenger
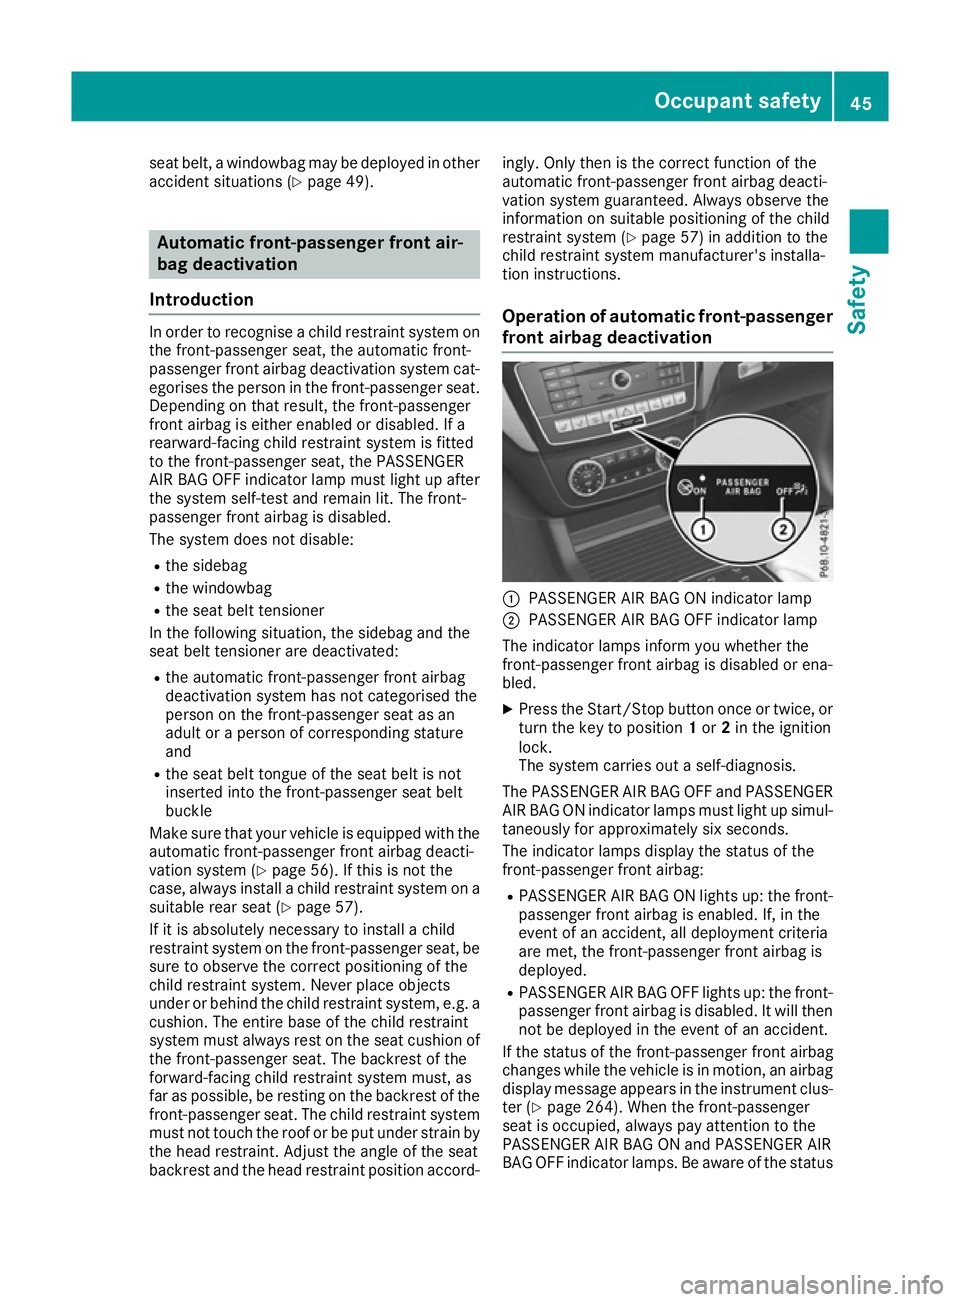
front airbag deactivation :
PASSENGER AIR BAG ON indicator lamp
; PASSENGER AIR BAG OFF indicator lamp
The indicator lamps inform you whether the
front-passenger front airbag is disabled or ena-
bled. X Press the Start/Stop button once or twice, or
turn the key to position 1or 2in the ignition
lock.
The system carries out a self-diagnosis.
The PASSENGER AIR BAG OFF and PASSENGER AIR BAG ON indicator lamps must light up simul-
taneously for approximately six seconds.
The indicator lamps display the status of the
front-passenger front airbag:
R PASSENGER AIR BAG ON lights up: the front-
passenger front airbag is enabled. If, in the
event of an accident, all deployment criteria
are met, the front-passenger front airbag is
deployed.
R PASSENGER AIR BAG OFF lights up: the front-
passenger front airbag is disabled. It will then
not be deployed in the event of an accident.
If the status of the front-passenger front airbag
changes while the vehicle is in motion, an airbag display message appears in the instrument clus-
ter (Y page 264). When the front-passenger
seat is occupied, always pay attention to the
PASSENGER AIR BAG ON and PASSENGER AIR
BAG OFF indicator lamps. Be aware of the status Occupant safety
45Safety Z
Page 49 of 393
of the front-passenger front airbag both before
and during the journey.
If a person sits in the passenger seat, they must
be:
R seated with the seat belt fastened correctly
R in an almost upright position with their back
against the seat backrest
R with their feet resting on the floor, if possible
If the front passenger does not observe these
conditions, the automatic front-passenger front
airbag deactivation system may be influenced,
e.g. because the front passenger:
R transfers their weight by supporting them-
selves on a vehicle armrest
R sits in such a way that their weight is raised
from the seat cushion
The front-passenger front airbag may be disa-
bled by mistake as a result of these or similar
actions. In this case, the PASSENGER AIR BAG
OFF indicator lamp lights up permanently. The
front-passenger front airbag does not then
deploy during an accident. G
WARNING
If the PASSENGER AIRBAG OFF indicator lamp is lit, the front-passenger front airbag is disa-
bled. It will not be deployed in the event of an
accident and cannot perform its intended pro-
tective function. A person in the front-
passenger seat could then, for example, come
into contact with the vehicle's interior, espe-
cially if the person is sitting too close to the
dashboard. This poses an increased risk of
injury or even fatal injury.
When the front-passenger seat is occupied,
always make sure that:
R the classification of the person in the front-
passenger seat is correct and that the front-
passenger front airbag is enabled or disa-
bled in accordance with the person in the
front-passenger seat.
R the front-passenger seat has been moved
back as far back as possible.
R the person is seated correctly.
Make sure, both before and during the jour-
ney, that the status of the front-passenger
front airbag is correct. G
WARNING
If you secure a child on the co-driver's seat in a rearward-facing child restraint system and
the PASSENGER AIR BAG ON indicator lamp
lights up, the co-driver's airbag could be
deployed in the event of an accident. The child could be struck by the airbag. There is an
increased risk of injury, possibly even fatal.
In this case, always ensure that the co-driver's
airbag is disabled. The PASSENGER AIRBAG
OFF indicator lamp must light up.
If the PASSENGER AIR BAG OFF indicator lamp
remains off and/or the PASSENGER AIR BAG
ON indicator lamp lights up, do not install a rear- ward-facing child restraint system on the front-
passenger seat. Further information can be
found under "Problems with the automatic front-
passenger front airbag deactivation system"
(Y page 49). G
WARNING
If you secure a child in a forward-facing child
restraint system on the front-passenger seat
and you position the front-passenger seat too close to the dashboard, in the event of an
accident, the child could:
R come into contact with the vehicle's inte-
rior if the PASSENGER AIR BAG OFF indi-
cator lamp is lit, for example
R be struck by the airbag if the PASSENGER
AIR BAG ON is lit up
This poses an increased risk of injury or even fatal injury.
Move the front-passenger seat as far back as
possible. Always make sure that the shoulder belt strap is correctly routed from the vehicle
belt outlet to the shoulder belt guide on the
child restraint system. The shoulder belt strap
must be routed forwards and downwards
from the vehicle belt outlet. If necessary,
adjust the vehicle belt outlet and the front-
passenger seat accordingly. Always observe
the information in this Owner's Manual on
suitable positioning of the child restraint sys- tem in addition to the child restraint system
manufacturer's installation instructions. 46
Occupant safetySafety