interior lights MERCEDES-BENZ GLE COUPE 2015 Owners Manual
[x] Cancel search | Manufacturer: MERCEDES-BENZ, Model Year: 2015, Model line: GLE COUPE, Model: MERCEDES-BENZ GLE COUPE 2015Pages: 393, PDF Size: 12.71 MB
Page 15 of 393
K
Key Changing the battery ...................... .81
Checking the battery ...................... .81
Convenience closing feature ............ 94
Convenience opening feature .......... 93
Display message ............................ 285
Door central locking/unlocking ...... .79
Emergency key element ................... 80
Important safety note s.................... 78
KEYLESS-GO start function .............. 80
Loss ................................................. 83
Modifying the programming ............. 80
Overview .......................................... 78
Positions (ignition lock) ................. 146
Problem (malfunction) ..................... 83
Starting the engine ........................ 148
Key positions
Key ................................................ 146
Start/Stop button .......................... 146
KEYLESS-GO
Convenience closing ........................ 94
Deactivation ..................................... 79
Display message ............................ 285
Locking ............................................ 79
Start function ................................... 80
Starting the engine ........................ 148
Unlocking ......................................... 79
Kickdown
Driving tip s.................................... 157
Manual gearshifting ....................... 160
Kneebag ............................................... 44 L
Lamps see Warning and indicator lamps
Lane Keeping Assist
Activating/deactivating ................. 245
Display message ............................ 274
Function/information .................... 220
see Active Lane Keeping Assist
Lap time (RACETIMER) ...................... 250
Lashing eyelets ................................. 303
Level control (display message) ...... 273
Licence plate lamp (display mes-
sage) ................................................... 267 Light sensor (display message)
....... 268
Lights
Activating/deactivating the Intel-
ligent Light System ........................ 246
Active light function ....................... 118
Adaptive Highbeam Assist PLUS .... 119
Automatic headlamp mode ............ 115
Cornering light function ................. 118
Dipped-beam headlamp s............... 116
Driving abroad ............................... 115
Foglamps (extended range) ........... 119
Hazard warning lamps ................... 117
Headlamp flashe r........................... 117
Light switch ................................... 115
Main-beam headlamp s................... 117
Motorway mode ............................. 118
Parking lamps ................................ 116
Rear foglamp ................................. 116
Side lamps ..................................... 116
Turn signals ................................... 117
see Interior lighting
LIM indicator lamp
Cruise control ................................ 179
DISTRONIC PLUS ........................... 184
Variable SPEEDTRONIC ................. 181
Limiting the speed
see SPEEDTRONIC
Loading guidelines ............................ 299
Locking
see Central locking
Locking (doors)
Automatic ........................................ 86
Emergency locking ........................... 87
From inside (central locking but-
ton) .................................................. 85
Locking centrally
see Central locking
Locking verification signal (on-
board computer) ............................... 247
Luggage compartment enlarge-
ment
Important safety notes .................. 302
Luggage compartment floor
Important safety notes .................. 305
opening/closing ............................ 305
stowage well, under ....................... 305
Lumbar support
Adjusting (on the seat) .................. 105 12
Index
Page 49 of 393
of the front-passenger front airbag both before
and during the journey.
If a person sits in the passenger seat, they must
be:
R seated with the seat belt fastened correctly
R in an almost upright position with their back
against the seat backrest
R with their feet resting on the floor, if possible
If the front passenger does not observe these
conditions, the automatic front-passenger front
airbag deactivation system may be influenced,
e.g. because the front passenger:
R transfers their weight by supporting them-
selves on a vehicle armrest
R sits in such a way that their weight is raised
from the seat cushion
The front-passenger front airbag may be disa-
bled by mistake as a result of these or similar
actions. In this case, the PASSENGER AIR BAG
OFF indicator lamp lights up permanently. The
front-passenger front airbag does not then
deploy during an accident. G
WARNING
If the PASSENGER AIRBAG OFF indicator lamp is lit, the front-passenger front airbag is disa-
bled. It will not be deployed in the event of an
accident and cannot perform its intended pro-
tective function. A person in the front-
passenger seat could then, for example, come
into contact with the vehicle's interior, espe-
cially if the person is sitting too close to the
dashboard. This poses an increased risk of
injury or even fatal injury.
When the front-passenger seat is occupied,
always make sure that:
R the classification of the person in the front-
passenger seat is correct and that the front-
passenger front airbag is enabled or disa-
bled in accordance with the person in the
front-passenger seat.
R the front-passenger seat has been moved
back as far back as possible.
R the person is seated correctly.
Make sure, both before and during the jour-
ney, that the status of the front-passenger
front airbag is correct. G
WARNING
If you secure a child on the co-driver's seat in a rearward-facing child restraint system and
the PASSENGER AIR BAG ON indicator lamp
lights up, the co-driver's airbag could be
deployed in the event of an accident. The child could be struck by the airbag. There is an
increased risk of injury, possibly even fatal.
In this case, always ensure that the co-driver's
airbag is disabled. The PASSENGER AIRBAG
OFF indicator lamp must light up.
If the PASSENGER AIR BAG OFF indicator lamp
remains off and/or the PASSENGER AIR BAG
ON indicator lamp lights up, do not install a rear- ward-facing child restraint system on the front-
passenger seat. Further information can be
found under "Problems with the automatic front-
passenger front airbag deactivation system"
(Y page 49). G
WARNING
If you secure a child in a forward-facing child
restraint system on the front-passenger seat
and you position the front-passenger seat too close to the dashboard, in the event of an
accident, the child could:
R come into contact with the vehicle's inte-
rior if the PASSENGER AIR BAG OFF indi-
cator lamp is lit, for example
R be struck by the airbag if the PASSENGER
AIR BAG ON is lit up
This poses an increased risk of injury or even fatal injury.
Move the front-passenger seat as far back as
possible. Always make sure that the shoulder belt strap is correctly routed from the vehicle
belt outlet to the shoulder belt guide on the
child restraint system. The shoulder belt strap
must be routed forwards and downwards
from the vehicle belt outlet. If necessary,
adjust the vehicle belt outlet and the front-
passenger seat accordingly. Always observe
the information in this Owner's Manual on
suitable positioning of the child restraint sys- tem in addition to the child restraint system
manufacturer's installation instructions. 46
Occupant safetySafety
Page 79 of 393
R
the doors are closed
R the tailgate is closed
Only then is tow-away protection primed.
X Lock the vehicle with the key or KEYLESS-GO.
Tow-away protection is primed after approx-
imately 30 seconds.
Switching off X
Unlock the vehicle with the key or KEYLESS-
GO.
or X Insert the key into the ignition lock.
Tow-away protection is switched off automat- ically.
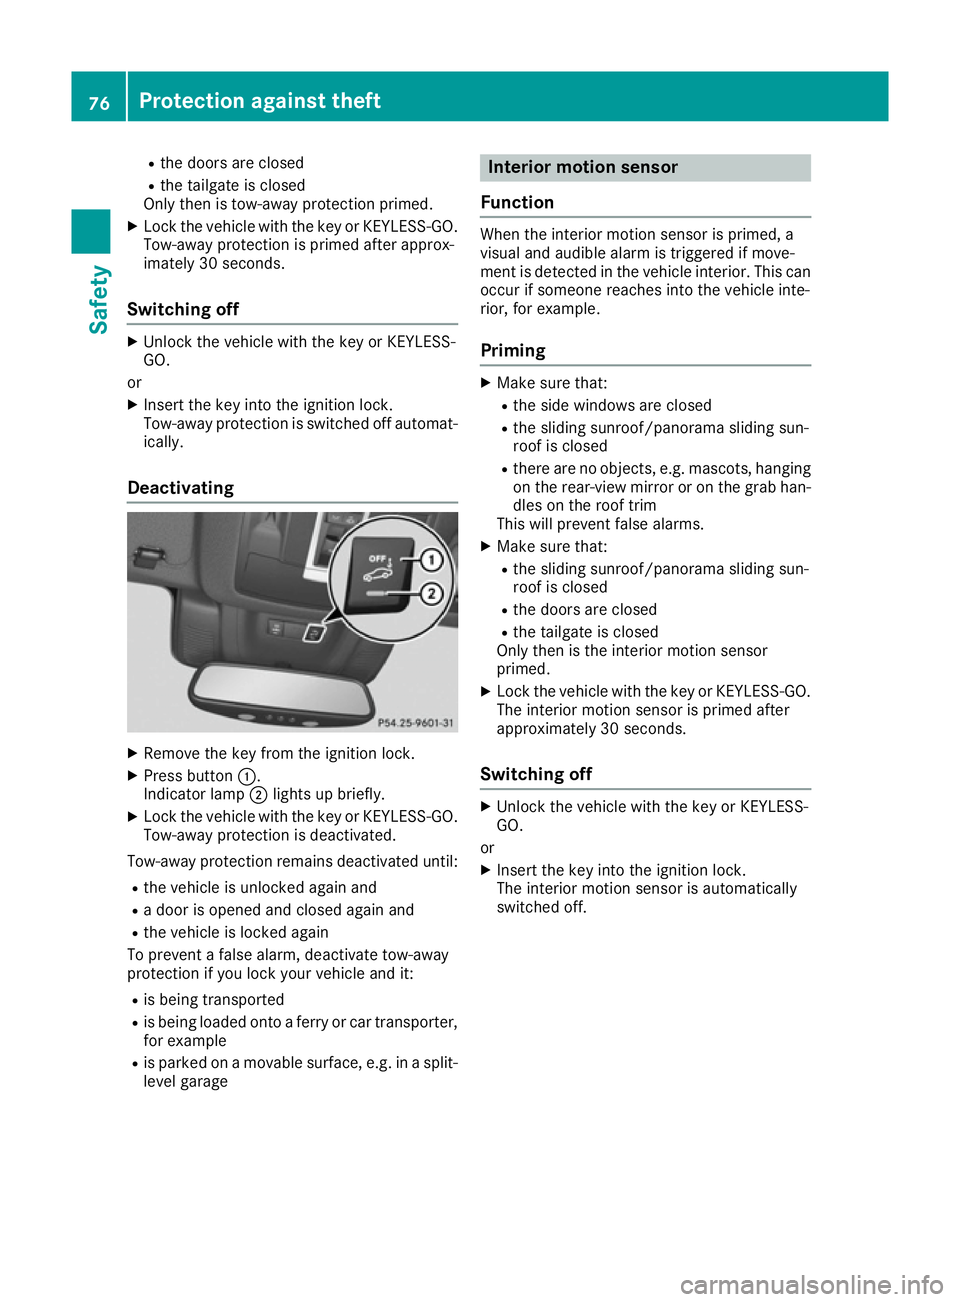
Deactivating X
Remove the key from the ignition lock.
X Press button :.
Indicator lamp ;lights up briefly.
X Lock the vehicle with the key or KEYLESS-GO.
Tow-away protection is deactivated.
Tow-away protection remains deactivated until:
R the vehicle is unlocked again and
R a door is opened and closed again and
R the vehicle is locked again
To prevent a false alarm, deactivate tow-away
protection if you lock your vehicle and it:
R is being transported
R is being loaded onto a ferry or car transporter,
for example
R is parked on a movable surface, e.g. in a split-
level garage Interior motion sensor
Function When the interior motion sensor is primed, a
visual and audible alarm is triggered if move-
ment is detected in the vehicle interior. This can
occur if someone reaches into the vehicle inte-
rior, for example.
Priming X
Make sure that:
R the side windows are closed
R the sliding sunroof/panorama sliding sun-
roof is closed
R there are no objects, e.g. mascots, hanging
on the rear-view mirror or on the grab han-
dles on the roof trim
This will prevent false alarms.
X Make sure that:
R the sliding sunroof/panorama sliding sun-
roof is closed
R the doors are closed
R the tailgate is closed
Only then is the interior motion sensor
primed.
X Lock the vehicle with the key or KEYLESS-GO.
The interior motion sensor is primed after
approximately 30 seconds.
Switching off X
Unlock the vehicle with the key or KEYLESS-
GO.
or X Insert the key into the ignition lock.
The interior motion sensor is automatically
switched off. 76
Protection against theftSafety
Page 123 of 393
Important safety notes
G
WARNING
Adaptive Highbeam Assist Plus does not rec-
ognise road users:
R who have no lights, e.g. pedestrians
R who have poor lighting, e.g. cyclists
R whose lighting is blocked, e.g. by a barrier
In very rare cases, Adaptive Highbeam Assist
Plus may not recognise road users who do
have lights, or may recognise them too late. In this, or in similar situations, the automatic
main-beam headlamps will not be deactivated
or will be activated despite the presence of
other road users. There is a risk of an acci-
dent.
Always carefully observe the traffic conditions and switch off the main-beam headlamps in
good time.
Adaptive Highbeam Assist Plus cannot take into
account road, weather or traffic conditions.
Adaptive Highbeam Assist Plus is only an aid.
You are responsible for adjusting the vehicle's
lighting to the prevailing light, visibility and traf-
fic conditions.
In particular, the detection of obstacles can be
restricted if there is:
R poor visibility, e.g. due to fog, heavy rain or
snow
R dirt on the sensors or if the sensors are
obscured
Switching Adaptive Highbeam Assist
Plus on/off X
To switch on: turn the light switch to Ã.
X Press the combination switch beyond the
pressure point in the direction of arrow :.
The _ indicator lamp in the multifunction
display lights up when it is dark and the light
sensor switches on the dipped-beam head-
lamps.
At speeds above approx. 25 km/h: the
headlamp range is automatically controlled
according to the distance to other road users. At speeds above approx. 30 km/h:
R If no other road users are detected, the
main-beam headlamps are automatically
switched on.
R If other road users are detected, the partial
main-beam headlamps are automatically
switched on.
The K indicator lamp in the instrument
cluster also lights up.
At speeds below approx. 25 km/h or
when there is sufficient street lighting:
R The partial main-beam headlamps are
switched off automatically.
R The main-beam headlamps are switched off
automatically.
The K indicator lamp in the instrument
cluster goes out. The _indicator lamp in
the multifunction display remains lit.
X To switch off: move the combination switch
back to its normal position or move the light
switch to another position.
The _ indicator lamp in the multifunction
display goes out. Headlamps misted up on the inside
Under certain climatic and physical conditions,
moisture may form in the headlamp. This mois-
ture will not impair the function of the headlamp. Interior lighting
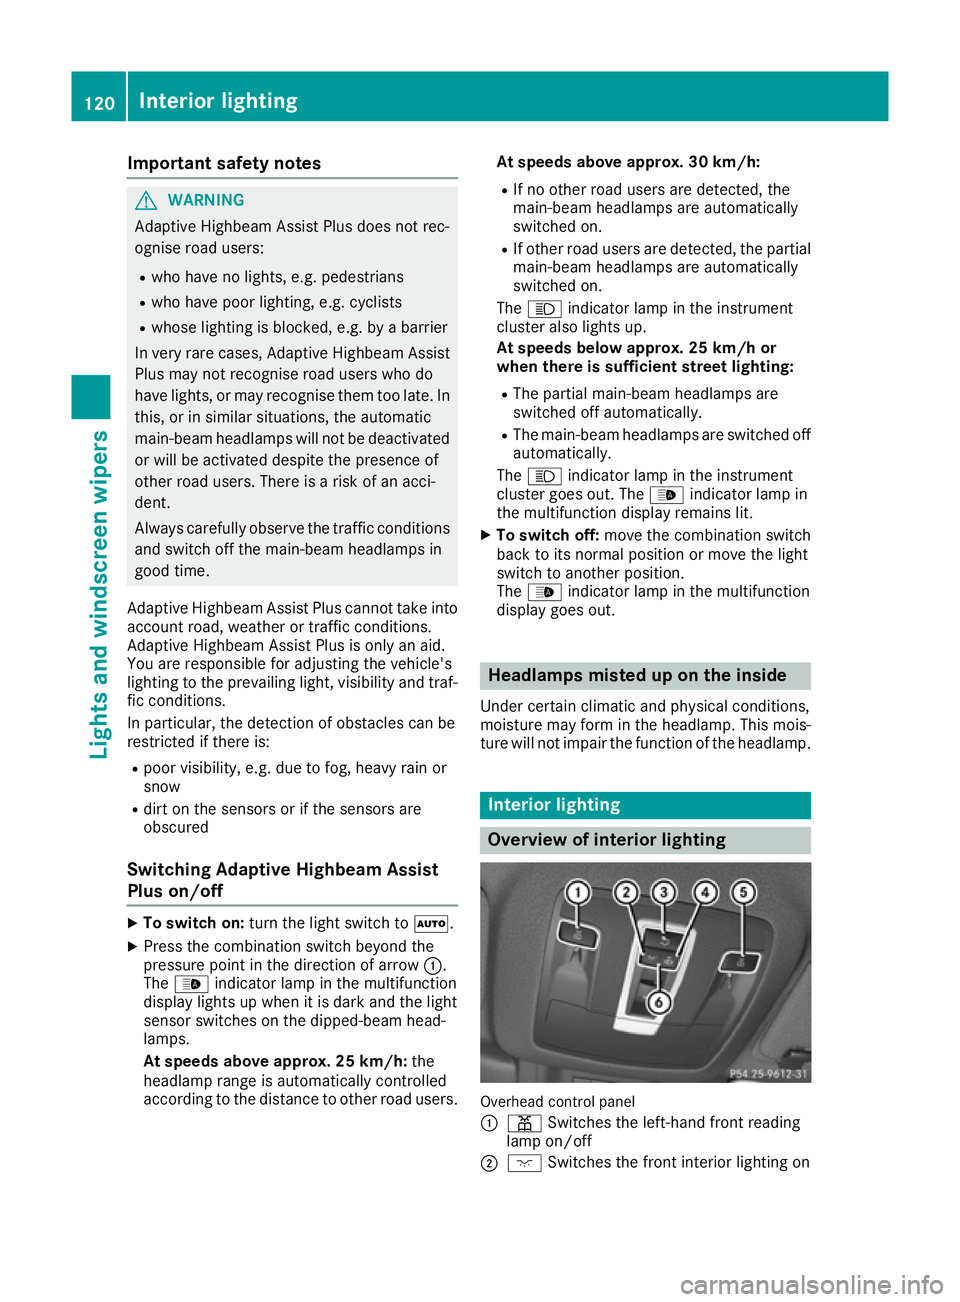
Overview of interior lighting
Overhead control panel
:
p Switches the left-hand front reading
lamp on/off
; c Switches the front interior lighting on 120
Interior lightingLights and windscreen wipers
Page 124 of 393
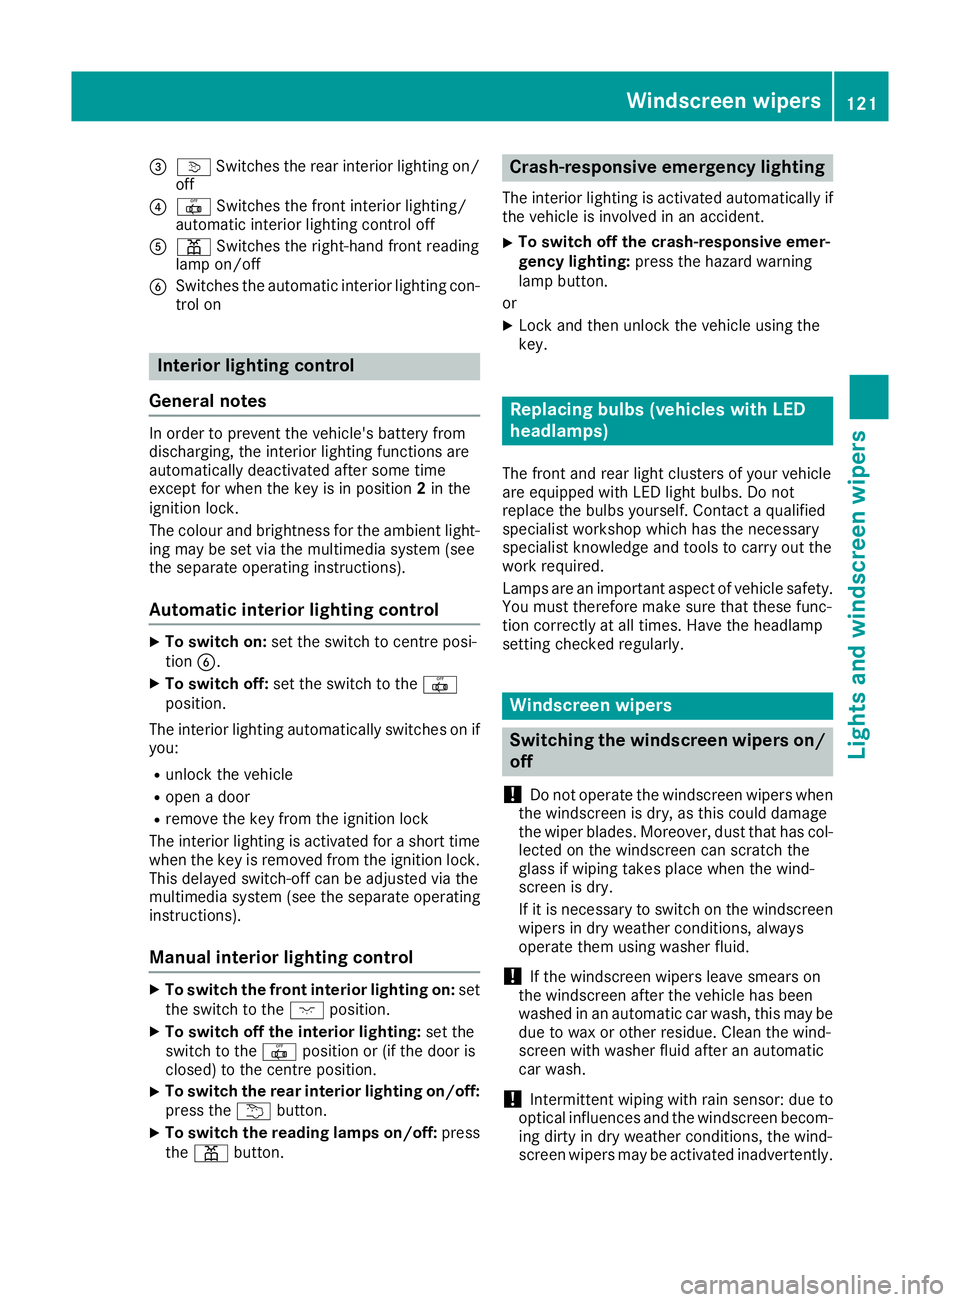
=
v Switches the rear interior lighting on/
off
? | Switches the front interior lighting/
automatic interior lighting control off
A p Switches the right-hand front reading
lamp on/off
B Switches the automatic interior lighting con-
trol on Interior lighting control
General notes In order to prevent the vehicle's battery from
discharging, the interior lighting functions are
automatically deactivated after some time
except for when the key is in position 2in the
ignition lock.
The colour and brightness for the ambient light-
ing may be set via the multimedia system (see
the separate operating instructions).
Automatic interior lighting control X
To switch on: set the switch to centre posi-
tion B.
X To switch off: set the switch to the |
position.
The interior lighting automatically switches on if you:
R unlock the vehicle
R open a door
R remove the key from the ignition lock
The interior lighting is activated for a short time
when the key is removed from the ignition lock.
This delayed switch-off can be adjusted via the
multimedia system (see the separate operating
instructions).
Manual interior lighting control X
To switch the front interior lighting on: set
the switch to the cposition.
X To switch off the interior lighting: set the
switch to the |position or (if the door is
closed) to the centre position.
X To switch the rear interior lighting on/off:
press the ubutton.
X To switch the reading lamps on/off: press
the p button. Crash-responsive emergency lighting
The interior lighting is activated automatically if
the vehicle is involved in an accident.
X To switch off the crash-responsive emer-
gency lighting: press the hazard warning
lamp button.
or X Lock and then unlock the vehicle using the
key. Replacing bulbs (vehicles with LED
headlamps)
The front and rear light clusters of your vehicle
are equipped with LED light bulbs. Do not
replace the bulbs yourself. Contact a qualified
specialist workshop which has the necessary
specialist knowledge and tools to carry out the
work required.
Lamps are an important aspect of vehicle safety.
You must therefore make sure that these func-
tion correctly at all times. Have the headlamp
setting checked regularly. Windscreen wipers
Switching the windscreen wipers on/
off
! Do not operate the windscreen wipers when
the windscreen is dry, as this could damage
the wiper blades. Moreover, dust that has col- lected on the windscreen can scratch the
glass if wiping takes place when the wind-
screen is dry.
If it is necessary to switch on the windscreen
wipers in dry weather conditions, always
operate them using washer fluid.
! If the windscreen wipers leave smears on
the windscreen after the vehicle has been
washed in an automatic car wash, this may be
due to wax or other residue. Clean the wind-
screen with washer fluid after an automatic
car wash.
! Intermittent wiping with rain sensor: due to
optical influences and the windscreen becom- ing dirty in dry weather conditions, the wind-
screen wipers may be activated inadvertently. Windscreen wipers
121Lights and windscreen wipers Z
Page 133 of 393
Information on using THERMOTRONIC
automatic climate control
The following contains instructions and recom-
mendations to enable you to get the most out of your THERMOTRONIC automatic climate con-
trol.
R Activate climate control using the Ãand
¿ buttons. The indicator lamps above the
à and¿ buttons light up.
R In automatic mode, you can also use the ñ
button to set a climate mode (FOCUS/
MEDIUM/DIFFUSE). The MEDIUM level is
recommended.
R Set the temperature to 22 †.
R Only use the "Windscreen demisting" function
briefly until the windscreen is clear again.
R Only use air-recirculation mode briefly, e.g. if
there are unpleasant outside odours or when
in a tunnel. The windows could otherwise mist up as no fresh air is drawn into the vehicle inair-recirculation mode.
R Use the ZONE function to adopt the temper-
ature settings on the driver's side for the
front-passenger side and the rear compart-
ment as well. The indicator lamp above the
á button goes out.
R Use the residual heat function if you want to
heat or ventilate the vehicle interior when the
ignition is switched off. The residual heat
function can only be activated or deactivated with the ignition switched off.
R If you change the settings of the climate con-
trol system, the climate status display
appears for approximately three seconds at
the bottom of the screen in the multimedia
system display. You will see the current set-
tings of the various climate control functions.
During automatic engine switch-off, the climate
control only operates at a reduced capacity. If
you require the full climate control output, you
can switch off the ECO start/stop function by
pressing the ECO button (Y page 151). Operating the climate control system
Switching the climate control on/off
General notes When the climate control is switched off, the air
supply and air circulation are also switched off.
The windows could mist up. Therefore, only
switch off climate control briefly.
i Switch on climate control primarily using
the à button (Y page 132).
In the rear-compartment, you can also switch
climate control on/off using the Ãand^
buttons.
Activating/deactivating X
Turn the key to position 2in the ignition lock
(Y page 146).
X To activate: press theÃbutton.
The indicator lamp in the Ãbutton lights
up. Airflow and air distribution are set to auto-
matic mode.
or X Press the ^button.
The indicator lamp in the ^button goes
out. The previous settings are reactivated.
X To deactivate: press the^button.
The indicator lamp in the ^button lights
up. Activating/deactivating cooling with
air dehumidification
General notes If you deactivate the "Cooling with air dehumid-
ification" function, the air inside the vehicle will
not be cooled. The air inside the vehicle will also
not be dehumidified. The windows can mist up
more quickly. Therefore, only deactivate the
"Cooling with air dehumidification" function
briefly.
The "Cooling with air dehumidification" function
is only available when the engine is running. The air inside the vehicle is cooled and dehumidified
according to the temperature selected.
Condensation may drip from the underside of
the vehicle when cooling mode is active. This is
normal and not a sign that there is a malfunc-
tion. 130
Operating the climate control systemClimate cont
rol
Page 139 of 393
Problems with the rear window heating
Problem
Possible causes/consequences and
M
MSolutions The rear window heating
has switched off prema-
turely or cannot be
switched on. The battery has not been sufficiently charged.
X Switch off any consumers that are not required, e.g. reading lamps,
interior lighting or the seat heating.
When the battery is sufficiently charged, the rear window heating
can be switched on again. Switching air-recirculation mode
on/off
General notes You can deactivate the flow of fresh air tempo-
rarily if unpleasant odours are entering the vehi-
cle from outside. The air already inside the vehi- cle will then be recirculated.
If you switch on air-recirculation mode, the win-
dows can mist up more quickly, in particular at
low temperatures. Only use air-recirculation
mode briefly to prevent the windows from mist- ing up.
Switching on/off X
Turn the key to position 2in the ignition lock
(Y page 146).
X To activate: press thedbutton.
The indicator lamp in the dbutton lights
up.
i In the event of high pollution levels
(THERMOTRONIC automatic climate control
only) or at high outside temperatures, air-
recirculation mode is automatically activated.
When air-recirculation mode is activated
automatically, the indicator lamp in the d
button is not lit.
Outside air is added after about 30 minutes.
X To deactivate: press thedbutton.
The indicator lamp in the dbutton goes
out.
i Air-recirculation mode is deactivated auto-
matically:
R after approximately five minutes at outside
temperatures below approximately 5 †
R after approximately five minutes if cooling
with air dehumidification is deactivated
R after approximately 30 minutes at outside
temperatures above approximately 5 † if the "Cooling with air dehumidification"
function is activated Convenience opening/closing using
the air-recirculation button
G
WARNING
When the convenience closing feature is oper- ating, parts of the body could become trapped
in the closing area of the side window and the
sliding sunroof. There is a risk of injury.
Observe the complete closing procedure
when the convenience closing feature is oper-
ating. When closing make sure that no parts of the body are in the closing area. G
WARNING
During convenience opening parts of the body could be drawn in or become trapped
between the side window and window frame.
There is a risk of injury.
When opening, make sure that nobody is
touching the side window. If someone
becomes trapped, immediately press
the W switch in the door to stop the move-
ment of the side windows. To continue closing
the side window, pull on the Wswitch.
X Convenience closing feature (vehicles
with panorama sliding sunroof):
press and
hold the dbutton until the side windows
and the panorama sliding sunroof are closed. The indicator lamp in the dbutton lights
up. Air-recirculation mode is activated.
X Convenience closing feature (vehicles
without panorama sliding sunroof):
press136
Operating the climate control systemClimate control
Page 140 of 393
and hold the
dbutton until the side win-
dows are closed.
The indicator lamp in the dbutton lights
up. Air-recirculation mode is activated.
If parts of the body are in the closing area during convenience closing, proceed as follows:
X Press the Wbutton to stop the side win-
dows.
The side windows stop.
X To then open the side window, press the W
button again.
or
X Press and hold the dbutton again for at
least two seconds.
The side windows move in the opposite direc- tion.
X Only vehicles with panorama sliding sun-
roof:
press the 3switch for stopping the
panorama sliding sunroof.
The panorama sliding sunroof stops.
X To then open the panorama sliding sunroof,
pull back on the 3switch.
i Notes on the automatic reversing feature
for:
R the side windows (Y page 92)
R the panorama sliding sunroof (Y page 97)
X Convenience opening feature (vehicles
with panorama sliding sunroof): press and
hold the dbutton until the side windows
and the panorama sliding sunroof are open.
The side windows and the panorama sliding
sunroof move back to their original position.
The indicator lamp in the dbutton goes
out. Air-recirculation mode is deactivated.
X Convenience opening feature (vehicles
without panorama sliding sunroof):
press
and hold the dbutton until the side win-
dows are open. The side windows move back to their original positions.
The indicator lamp in the dbutton goes
out. Air-recirculation mode is deactivated.
i If you open the side windows or the pano-
rama sliding sunroof manually after closing
with the convenience closing feature, they
will remain in this position when opened using
the convenience opening feature. Switching the residual heat on/off
General notes It is possible to make use of the residual heat of
the engine to continue heating the stationary
vehicle for up to 30 minutesafter the engine has
been switched off. The heating time depends on
the set interior temperature.
Switching on/off X
To switch on: press theÌorÁ button.
The indicator lamp in the ÌorÁ button
lights up.
i The blower will run at a low speed regardless
of the airflow setting.
i If you activate the residual heat function at
high temperatures, only the ventilation will be
activated. The blower runs at medium speed.
X To switch off: press theÌorÁ but-
ton.
The indicator lamp in the ÌorÁ button
goes out.
Residual heat is deactivated automatically:
R after approximately 30 minutes
R when the ignition is switched on
R if the battery voltage drops
R when the auxiliary heating is switched on Ionisation
Ionisation is used to purify and freshen the air in
the vehicle interior, which is conducive to a
pleasant climate.
The ionisation of the interior air is odourless and cannot, directly, be perceived in the vehicle inte-
rior.
You can switch ionisation on and off via the mul- timedia system (see the separate operating
instructions).
Ionisation can only be operated when the auto-
matic climate control is switched on. The side air vent on the driver's side must be open. Operating the climate control system
137Climate control Z
Page 154 of 393
R
the vehicle starts to roll
R the brake system requires this
R the temperature in the vehicle interior devi-
ates from the set range
R the system detects moisture on the wind-
screen when the air-conditioning system is
switched on
R the battery's charge status is too low
Shifting the transmission to position Pdoes not
start the engine.
If you shift the transmission from Rto D, the
ECO start/stop function is available again once the è ECO symbol reappears in green in the
multifunction display.
Switching the ECO start/stop function
off/on All vehicles (except Mercedes-AMG vehi-
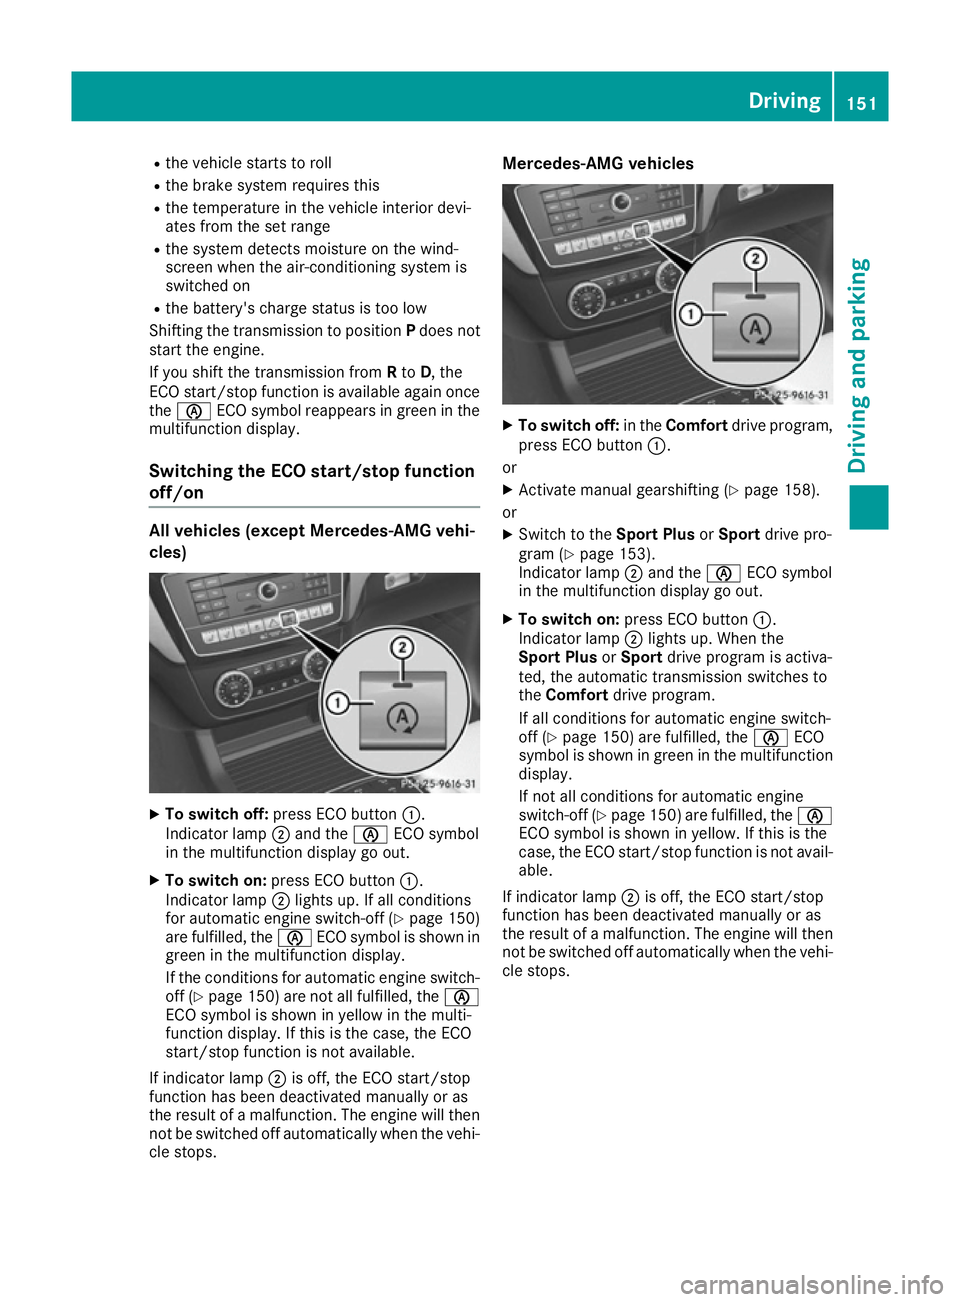
cles) X
To switch off: press ECO button :.
Indicator lamp ;and the èECO symbol
in the multifunction display go out.
X To switch on: press ECO button :.
Indicator lamp ;lights up. If all conditions
for automatic engine switch-off (Y page 150)
are fulfilled, the èECO symbol is shown in
green in the multifunction display.
If the conditions for automatic engine switch-
off (Y page 150) are not all fulfilled, the è
ECO symbol is shown in yellow in the multi-
function display. If this is the case, the ECO
start/stop function is not available.
If indicator lamp ;is off, the ECO start/stop
function has been deactivated manually or as
the result of a malfunction. The engine will then
not be switched off automatically when the vehi-
cle stops. Mercedes-AMG vehicles
X
To switch off: in theComfort drive program,
press ECO button :.
or X Activate manual gearshifting (Y page 158).
or X Switch to the Sport PlusorSport drive pro-
gram (Y page 153).
Indicator lamp ;and the èECO symbol
in the multifunction display go out.
X To switch on: press ECO button :.
Indicator lamp ;lights up. When the
Sport Plus orSport drive program is activa-
ted, the automatic transmission switches to
the Comfort drive program.
If all conditions for automatic engine switch-
off (Y page 150) are fulfilled, the èECO
symbol is shown in green in the multifunction display.
If not all conditions for automatic engine
switch-off (Y page 150)are fulfilled, the è
ECO symbol is shown in yellow. If this is the
case, the ECO start/stop function is not avail- able.
If indicator lamp ;is off, the ECO start/stop
function has been deactivated manually or as
the result of a malfunction. The engine will then
not be switched off automatically when the vehi-
cle stops. Driving
151Driving and parking Z