interior lights MERCEDES-BENZ GLK-CLASS SUV 2013 Owners Manual
[x] Cancel search | Manufacturer: MERCEDES-BENZ, Model Year: 2013, Model line: GLK-CLASS SUV, Model: MERCEDES-BENZ GLK-CLASS SUV 2013Pages: 380, PDF Size: 19.54 MB
Page 8 of 380
Maintenance
.................................. 165
Parking brake ........................ 161, 165
Warning lamp ................................. 259
Breakdown
see Flat tire
see Towing away/tow-starting
Bulbs
see Changing bulbs C
California Important notice for retail
customers and lessees ....................24
Calling up a malfunction
see Display messages
Car
see Vehicle
Care
Carpets .......................................... 310
Car wash ........................................ 304
Display ........................................... 308
Exterior lights ................................ 307
Gear or selector lever ....................308
Interior ........................................... 308
Matte finish ................................... 305
Notes ............................................. 303
Paint .............................................. 305
Plastic trim .................................... 308
Power washer ................................ 304
Rear view camera .......................... 307
Roof lining ...................................... 310
Seat belt ........................................ 309
Seat cover ..................................... 309
Sensors ......................................... 307
Steering wheel ............................... 308
Tail pipes ....................................... 307
Trim pieces .................................... 309
Washing by hand ........................... 304
Wheels ........................................... 305
Windows ........................................ 306
Wiper blades .................................. 306
Wooden trim .................................. 309
Cargo compartment cover ...............274
Cargo compartment
enlargement ...................................... 272Cargo compartment floor
Opening/closing ............................ 277
Stowage well (under) ..................... 277
Cargo net
Attaching ....................................... 276
Important safety information
.........275
Cargo tie down rings .........................273
Car wash (care) ................................. 304
CD player/CD changer (on-board
computer) .......................................... 222
Center console Lower section .................................. 35
Upper section .................................. 34
Central locking
Automatic locking (on-board
computer) ...................................... 228
Locking/unlocking (SmartKey) ........ 74
Changing bulbs
Cornering light function .................118
High-beam headlamps ...................118
Important safety notes .................. 116
Low-beam headlamps .................... 118
Overview of bulb types ..................117
Parking lamps ................................ 118
Reversing lamps ............................ 120
Standing lamps (front) ...................118
Turn signals (front) ......................... 119
Child-proof locks
Important safety notes .................... 63
Rear doors ....................................... 63
Children
In the vehicle ................................... 58
Restraint systems ............................ 58
Special seat belt retractor ............... 61
Child seat
LATCH-type (ISOFIX) child seat
anchors ............................................ 61
Top Tether ....................................... 62
Cigarette lighter ................................ 280
Cleaning Mirror turn signal ........................... 307
Trailer tow hitch ............................. 308
Climate control
Adjusting the airflow (AIR FLOW) ... 132
Automatic climate control (3-
zone) .............................................. 130
Controlling automatically ...............132
Cooling with air dehumidification ..1316
Index
Page 10 of 380
DEF
Adding ........................................... 158
Display message ............................ 246
Filling capacity ............................... 369
Important safety notes
..................369
Delayed switch-off
Exterior lighting (on-board
computer) ...................................... 227
Interior lighting .............................. 228
Diagnostics connection ......................26
Diesel .................................................. 368
Digital speedometer .........................220
DIRECT SELECT lever see Automatic transmission
Display (cleaning instructions) ........308
Display messages ASSYST PLUS ................................ 298
Calling up (on-board computer) ..... 231
Driving systems ............................. 247
Engine ............................................ 243
General notes ................................ 231
Hiding (on-board computer) ........... 231
KEYLESS-GO .................................. 256
Lights ............................................. 239
Safety systems .............................. 232
SmartKey ....................................... 256
Tires ............................................... 252
Vehicle ........................................... 254
Distance display (on-board
computer) .......................................... 224
Distance recorder ............................. 219
see Trip odometer
Distance warning (warning lamp) ....267
DISTRONIC PLUS Activation conditions .....................173
Deactivating ................................... 177
Display message ............................ 250
Displays in the multifunction
display ........................................... 176
Driving tips .................................... 177
Function/notes ............................. 171
Important safety notes .................. 171
Setting the specified minimum
distance ......................................... 175
Warning lamp ................................. 267 Doors
Automatic locking (on-board
computer) ...................................... 228
Automatic locking (switch) ............... 80
Central locking/unlocking
(SmartKey) ....................................... 74
Control panel ................................... 37
Display message ............................ 255
Emergency locking ...........................
81
Emergency unlocking .......................81
Important safety notes .................... 79
Opening (from inside) ......................79
Drinking and driving .........................162
Drinks holder see Cup holder
Drive program
Automatic ...................................... 152
Display ........................................... 149
Display (DIRECT SELECT lever) ...... 149
Driver's door
see Doors
Driving abroad
Mercedes-Benz Service .................299
Symmetrical low beam .................. 110
Driving in mountainous terrain
Approach/departure angle ............ 168
Driving lamps
see Daytime running lamps
Driving off-road
see Off-road driving
Driving safety systems
ABS (Anti-lock Braking System) ....... 64
BAS (Brake Assist System) ..............65
BAS PLUS (Brake Assist System
PLUS) ............................................... 65
Electronic brake force distribution ... 69
ESP ®
(Electronic Stability
Program) .................................... 66, 67
ETS/4ETS (Electronic Traction
System) ........................................... 66
Important safety information ........... 64
Overview .......................................... 64
PRE-SAFE ®
Brake ............................. 69
Driving systems
360°camera .................................. 193
Active Blind Spot Assist ................. 2028
Index
Page 14 of 380
J
Jack Storage location ............................ 312
Using ............................................. 354
Jump starting (engine) ...................... 318K
KEYLESS-GO Convenience closing feature ............ 88
Display message ............................ 256
Locking ............................................ 75
Start/Stop button .......................... 141
Starting the engine
........................143
Unlocking ......................................... 75
Key positions
KEYLESS-GO .................................. 141
SmartKey ....................................... 141
Kickdown
Driving tips .................................... 151
Knee bag .............................................. 44L
Lamps see Warning and indicator lamps
Lane Keeping Assist
Activating/deactivating .................
225
Display message ............................ 248
Function/information
....................200
Lane Tracking package .....................198
LATCH-type (ISOFIX) child seat
anchors ................................................ 61
License plate lamp (display
message) ............................................ 241
Light function, active Display message ............................ 242
Lights
Activating/deactivating the
interior lighting delayed switch-off . 228
Active light function .......................113
Automatic headlamp mode ............ 111
Cornering light function .................114
Display message ............................ 239
Driving abroad ............................... 110
Fog lamps ...................................... 111
Hazard warning lamps ................... 113
High beam flasher .......................... 113 High-beam headlamps
...................113
Light switch ................................... 110
Low-beam headlamps ....................111
Parking lamps ................................ 112
Rear fog lamp ................................ 112
Setting the brightness of the
display/switch (on-board
computer) ...................................... 227
Standing lamps
.............................. 112
Switching Adaptive Highbeam
Assist on/off ................................. 227
Switching the daytime running
lamps on/off (on-board
computer) ...................................... 227
Switching the daytime running
lamps on/off (switch) .................... 111
Switching the exterior lighting
delayed switch-off on/off (on-
board computer) ............................ 227
Switching the surround lighting
on/off (on-board computer) ..........227
Turn signals ................................... 112
see Changing bulbs
see Interior lighting
see Lights
Light sensor (display message) .......242
Loading guidelines ............................270
Locking see Central locking
Locking (doors)
Automatic ........................................ 80
Emergency locking ........................... 81
From inside (central locking
button) ............................................. 80
Locking centrally
see Central locking
Locking verification signal (on-
board computer) ............................... 228
Low-beam headlamps Changing bulbs .............................. 118
Display message ............................ 239
Setting for driving abroad
(symmetrical) ................................. 110
Switching on/off ........................... 111
Lumbar support
Adjusting ....................................... 100
Adjusting the 4-way lumbar
support .......................................... 10112
Index
Page 43 of 380
SRS (Supplemental Restraint System)
Introduction SRS consists of:
R
The 0075 SRS warning lamp
R Air bags
R Air bag control unit (with crash sensors)
R Emergency Tensioning Devices
R Belt force limiters
SRS reduces the risk of occupants coming
into contact with the vehicle's interior in the
event of an accident. It can also reduce the
effect of the forces to which occupants are
subjected during an accident.
SRS warning lamp SRS functions are checked regularly when
you switch on the ignition and when the
engine is running. Therefore, malfunctions
can be detected in good time.
The
0075 SRS warning lamp in
the instrument
cluster lights up when the ignition is switched
on. It goes out no later than a few seconds
after the engine is started.
The SRS components are in operational
readiness when the 0075 SRS warning lamp
goes out while the engine is running. G
WARNING
The SRS self-check has detected a
malfunction if the 0075 SRS indicator lamp:
R does not light up at all
R does not go out after approximately four
seconds after the engine is started
R comes on after the engine was started or
while driving.
For your safety, Mercedes-Benz strongly
recommends that you have the system
checked as soon as
possible
at an authorized
Mercedes-Benz Center. SRS may otherwise
fail to activate when it is needed in the event
of an accident, which could lead to serious or
fatal injuries. SRS might also be activated unexpectedly and unnecessarily, which could
also result in injury.
In addition, work carried out improperly on
SRS may render SRS inoperative or cause
unintended air bag deployment. Work on the
SRS system should only be carried out by
qualified specialist personnel. Consult an
authorized Mercedes-Benz Center.
If it is necessary to modify an air bag system
to accommodate a person with disabilities,
contact an authorized Mercedes-Benz
Center
for details. USA only: for further information
contact our Customer Assistance center at
1-800-FOR-MERCedes (1-800-367-6372).
Safety guidelines for seat belts,
Emergency Tensioning Devices (ETDs)
and air bags G
WARNING
R Damaged seat belts or seat
belts that have
been subjected to stress in an accident
must be replaced. Their anchoring points
must also be checked. Only use seat belts
installed or supplied by an authorized
Mercedes-Benz Center.
R Air bags and pyrotechnic Emergency
Tensioning Devices (ETDs) contain
perchlorate material, which may require
special handling and regard for the
environment. Check your national disposal
guidelines. California residents, see
www.dtsc.ca.gov/HazardousWaste/
Perchlorate/index.cfm.
R Air bags and ETDs are designed to function
on a one-time-only basis. An air bag or ETD
that has deployed must be replaced.
R Do not pass seat belts over sharp edges.
They could tear.
R Do not make any modification that could
change the effectiveness of the seat belts.
R Do not bleach or dye seat belts as this may
severely weaken them. In a crash they may
not be able to provide adequate protection.
R No modifications of any kind may be made
to any components or wiring of the SRS. Occupant safety
41
Safety
Z
Page 111 of 380
Useful information ............................
110
Exterior lighting ................................ 110
Interior lighting ................................. 115
Replacing bulbs ................................. 116
Windshield wipers ............................120 109Lights and windshield wipers
Page 117 of 380
X
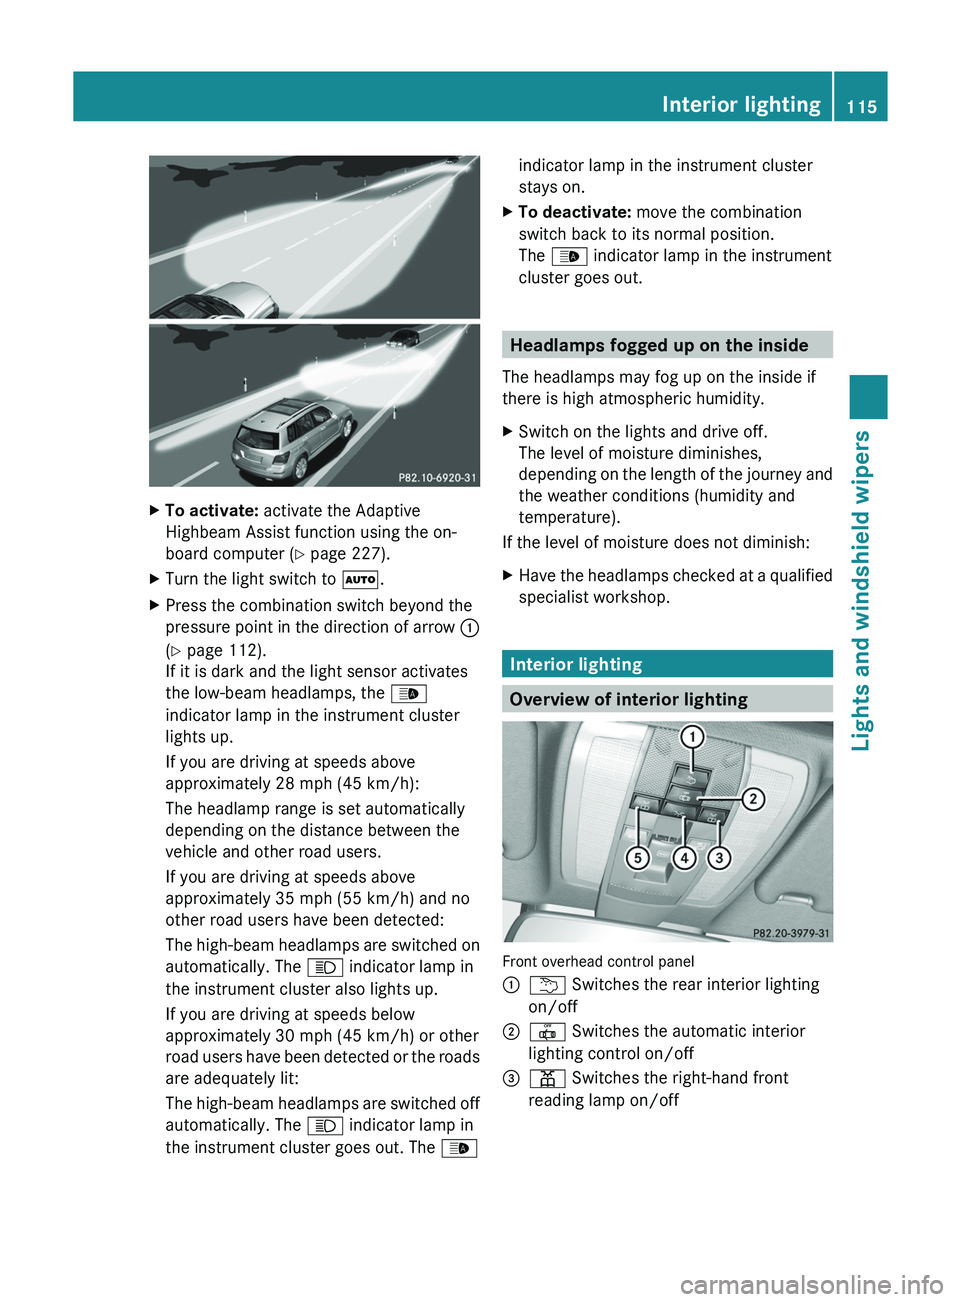
To activate: activate the Adaptive
Highbeam Assist function using the on-
board computer ( Y page 227).
X Turn the light switch to 0058.
X Press the combination switch beyond the
pressure point in the direction
of arrow 0043
(Y page 112).
If it is dark and the light sensor activates
the low-beam headlamps, the 00CE
indicator lamp in the instrument cluster
lights up.
If you are driving at speeds above
approximately 28 mph (45 km/h):
The headlamp range is set automatically
depending on the distance between the
vehicle and other road users.
If you are driving at speeds above
approximately 35 mph (55 km/h) and no
other road users have been detected:
The high-beam headlamps are switched on
automatically. The 0057 indicator lamp in
the instrument cluster also lights up.
If you are driving at speeds below
approximately 30 mph (45 km/h) or other
road users have been detected or the roads
are adequately lit:
The high-beam headlamps are switched off
automatically. The 0057 indicator lamp in
the instrument cluster goes out. The 00CEindicator lamp in the instrument cluster
stays on.
X To deactivate: move the combination
switch back to its normal position.
The 00CE indicator lamp in the instrument
cluster goes out. Headlamps fogged up on the inside
The headlamps may fog up on the inside if
there is high atmospheric humidity.
X Switch on the lights and drive off.
The level of moisture diminishes,
depending on the length of
the journey and
the weather conditions (humidity and
temperature).
If the level of moisture does not diminish:
X Have the headlamps checked at a qualified
specialist workshop. Interior lighting
Overview of interior lighting
Front overhead control panel
0043
0042 Switches the rear interior lighting
on/off
0044 0033 Switches the automatic interior
lighting control on/off
0087 003D Switches the right-hand front
reading lamp on/off Interior lighting
115
Lights and windshield wipers Z
Page 118 of 380
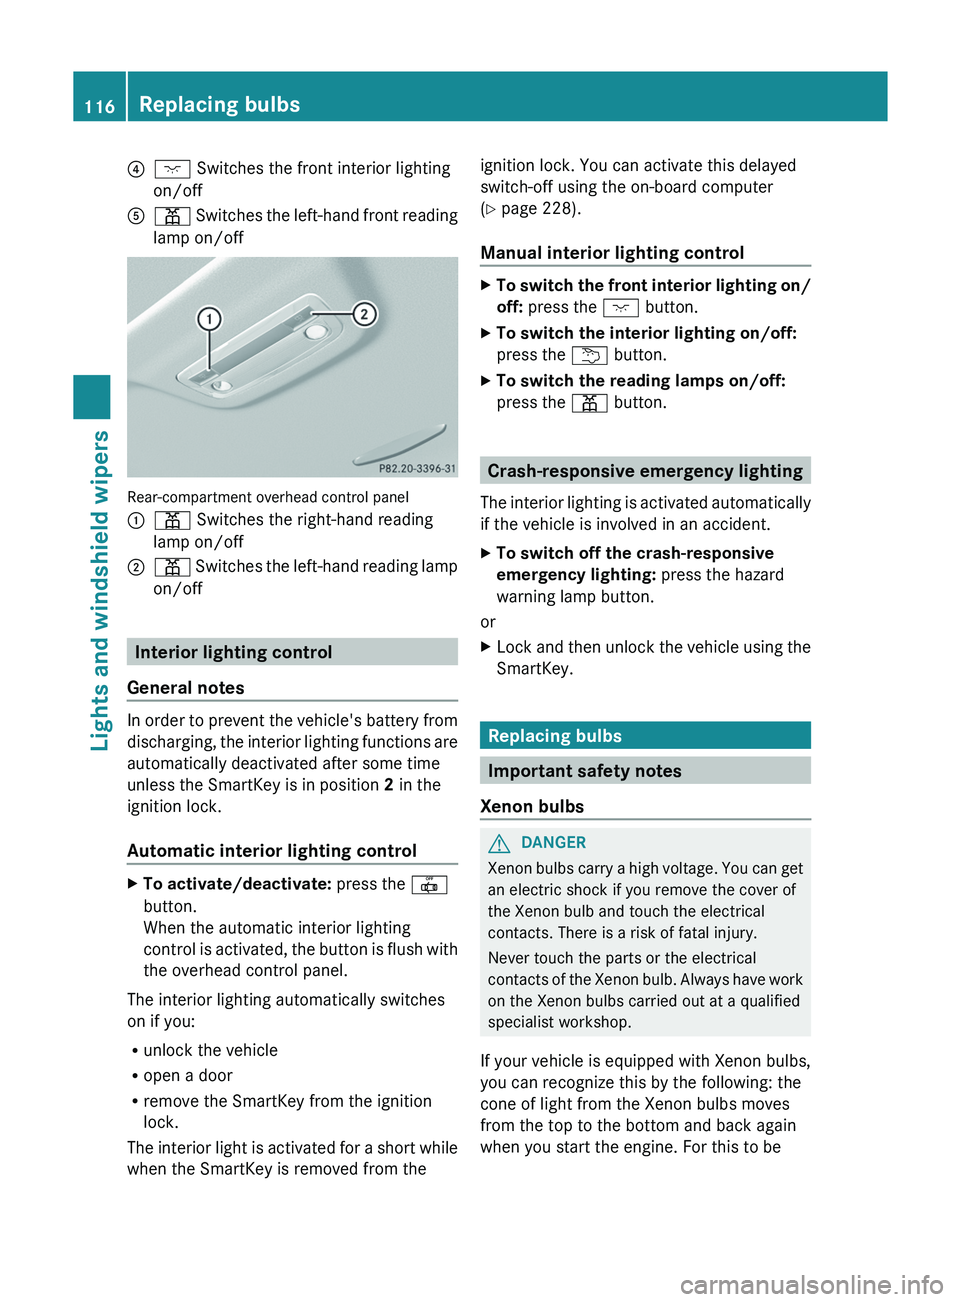
0085
004A Switches the front interior lighting
on/off
0083 003D Switches the left-hand front reading
lamp on/off Rear-compartment overhead control panel
0043
003D Switches the right-hand reading
lamp on/off
0044 003D Switches the left-hand reading lamp
on/off Interior lighting control
General notes In order to prevent the vehicle's battery from
discharging, the interior lighting
functions
are
automatically deactivated after some time
unless the SmartKey is in position 2 in the
ignition lock.
Automatic interior lighting control X
To activate/deactivate: press the 0033
button.
When the automatic interior lighting
control is activated, the button
is flush with
the overhead control panel.
The interior lighting automatically switches
on if you:
R unlock the vehicle
R open a door
R remove the SmartKey from the ignition
lock.
The interior light is activated
for a short while
when the SmartKey is removed from the ignition lock. You can activate this delayed
switch-off using the on-board computer
(Y page 228).
Manual interior lighting control
X
To switch the front interior lighting on/
off: press the 004A button.
X To switch the interior lighting on/off:
press the 0042 button.
X To switch the reading lamps on/off:
press the 003D button. Crash-responsive emergency lighting
The interior lighting is activated
automatically
if the vehicle is involved in an accident.
X To switch off the crash-responsive
emergency lighting: press the hazard
warning lamp button.
or
X Lock and then unlock the vehicle using the
SmartKey. Replacing bulbs
Important safety notes
Xenon bulbs G
DANGER
Xenon bulbs carry a high voltage. You can get
an electric shock if you remove the cover of
the Xenon bulb and touch the electrical
contacts. There is a risk of fatal injury.
Never touch the parts or the electrical
contacts of the Xenon bulb.
Always have work
on the Xenon bulbs carried out at a qualified
specialist workshop.
If your vehicle is equipped with Xenon bulbs,
you can recognize this by the following: the
cone of light from the Xenon bulbs moves
from the top to the bottom and back again
when you start the engine. For this to be 116
Replacing bulbs
Lights and windshield wipers
Page 133 of 380
Notes on using 3-zone automatic
climate control
Automatic climate control The following contains instructions and
recommendations to enable you to get the
most out of your automatic climate control.
R
Activate climate control using the 0058
and
005A buttons. The indicator lamps in the
0058 and 005A buttons light up.
R In automatic mode, you can also use the
00F0 button to adjust airflow (FOCUS/
MEDIUM/DIFFUSE). The MEDIUM level is
recommended.
R Set the temperature to 72 ‡ (22 †).
R Only use the "windshield defrosting"
function briefly until the windshield is clear
again.
R Only use air-recirculation mode briefly, e.g.
if there are unpleasant outside odors or
when in a tunnel. The windows could
otherwise fog up, since no fresh air is drawn
into the vehicle in air-recirculation mode.
R Use the ZONE function to adopt the
temperature settings on the driver's side
for the front-passenger side and the rear
compartment as well. The indicator lamp in
the 00D6 button goes out.
R Use the residual heat function if you want
to heat or ventilate the vehicle interior
when the ignition is switched off. The
residual heat function can only be activated
or deactivated with the ignition switched
off.
ECO start/stop function During automatic engine switch-off, the ECO
start/stop function only operates at a
reduced capacity. If you require the full
climate control output, you can
switch off the
ECO start/stop function by pressing the ECO
button ( Y page 146). Operating the climate control
systems
Switching climate control on/off
Points to observe before use When the climate control is switched off, the
air supply and air circulation are also
switched off. Only use this setting for a brief
period. The windows could otherwise fog up.
Only switch off climate control briefly to
prevent the windows from fogging up.
i
Switch on climate control primarily using
the 0058 button ( Y page 132).
Activating/deactivating X
Turn the SmartKey to position 2 in the
ignition lock (Y page 141).
X To activate: press the 0058 button.
The indicator lamp
in the
0058
button lights
up. Airflow and air distribution are set to
automatic mode.
or
X Press the 0078 button.
The indicator lamp in the 0078
button goes
out. The previously selected settings are
restored.
X To deactivate: press the 0078 button.
The indicator lamp in the 0078
button lights
up. Activating/deactivating cooling with
air dehumidification
Points to observe before use If you switch off the cooling function, the
vehicle will not be cooled when weather
conditions
are
warm. The
windows
can fog up
more quickly. Only deactivate the cooling
with air dehumidification function for a short
time to prevent the windows from fogging up.
The cooling with air dehumidification function
is only available when the engine is running.
The air inside the vehicle is cooled and Operating the climate control systems
131
Climate control
Page 138 of 380
Problems with the rear window defroster
Problem Possible causes/consequences and
0050 SolutionsThe rear window
defroster has
deactivated
prematurely or cannot
be activated. The battery has not been sufficiently charged.
X
Switch off any consumers that are not required, e.g. reading
lamps, interior lighting or the seat heating.
When the battery is sufficiently charged, the rear window
defroster can be activated again. Activating/deactivating air-
recirculation mode
If you switch on air-recirculation mode, the
windows can fog up more quickly, in
particular at low temperatures. Only use air-
recirculation mode briefly to prevent the
windows from fogging up.
You can deactivate the flow of fresh air if
unpleasant odors are entering the vehicle
from outside. The air already inside the
vehicle will then be recirculated.
The operation of air-recirculation mode
is the
same for all control panels.
X Turn the SmartKey to position 2 in the
ignition lock (Y page 141).
X To activate: press the 0072 button.
The indicator lamp
in the
0072
button lights
up.
i In the event of high
pollution levels12
or at
high outside temperatures, air-
recirculation mode is automatically
activated. When air-recirculation mode is
activated automatically, the indicator lamp
in the 0072 button is not lit.
Outside air is added after about
30 minutes.
X To deactivate: press the 0072 button.
The indicator lamp in the 0072
button goes
out. i
Air-recirculation mode deactivates
automatically:
R after approximately five minutes at
outside temperatures below
approximately 41 ‡ (5 †)
R after approximately five minutes if
cooling with air dehumidification is
deactivated
R after approximately 30 minutes at
outside temperatures above
approximately 41 ‡(5
†) if the "Cooling
with air dehumidification" function is
activated Activating/deactivating the residual
heat function
The residual heat function is
only available in
vehicles for Canada with 3-zone automatic
climate control.
It is possible to make use of the residual heat
of the engine to continue heating the vehicle
for approximately 30 minutes after the engine
has been switched off. The heating time
depends on the temperature that has been
set.
i The blower will run at a low speed
regardless of the airflow setting.
i If you activate the residual heat function
at high temperatures, only the ventilation
will be activated. The blower runs at
medium speed.
12 3-zone automatic climate control only.136
Operating the climate control systems
Climate control
Page 139 of 380
X
Turn the SmartKey to position 0 in the
ignition lock (Y page 141) or remove it.
X To activate: press the 004B button.
The indicator lamp in the 004B
button lights
up.
i If the residual heat function is activated,
the windows may fog up on the inside.
X To deactivate: press the 004B button.
The indicator lamp in the 004B
button goes
out.
i Residual heat is deactivated
automatically:
R after approximately 30 minutes
R when the ignition is switched on
R if the battery voltage drops
R when the auxiliary heating is activated Setting the air vents
Important safety notes
G
WARNING
Very hot or very cold air can flow from the air
vents. This could result in
burns or frostbite in
the immediate vicinity of the air vents. There
is a risk of injury.
Make sure that all vehicle occupants always
maintain a sufficient distance to the air
outlets. If necessary, redirect the airflow to
another area of the vehicle interior.
In order to ensure the direct flow of fresh air
through the air vents into the vehicle interior,
please observe the following notes:
R keep the air inlet between the windshield
and the hood free of blockages, such as ice,
snow or leaves.
R never cover the air vents or air intake grilles
in the vehicle interior.
i For virtually draft-free ventilation, adjust
the sliders of the air vents to the center
position. Setting the center air vents
X
To open the center air vent: turn the
adjuster in one of center air vents 0043
counter-clockwise.
X To close the center air vent: turn the
adjuster in one of center air vents 0043
clockwise until it engages. Setting the side air vents
0043
Side window defroster vent
0044 Side air vent
X To open a side air vent: turn the adjuster
in side air vent 0044 counter-clockwise.
X To close a side air vent: turn the adjuster
in side air vent 0044
clockwise until it
engages. Setting the glove box air vent
When automatic climate control is activated,
the glove box can be ventilated, for instance Setting the air vents
137
Climate control Z