interior lights MERCEDES-BENZ GLK-CLASS SUV 2015 Owners Manual
[x] Cancel search | Manufacturer: MERCEDES-BENZ, Model Year: 2015, Model line: GLK-CLASS SUV, Model: MERCEDES-BENZ GLK-CLASS SUV 2015Pages: 386, PDF Size: 26 MB
Page 8 of 386
Brake fluidDisplay message ............................ 238
Notes ............................................. 37 7
Brake lamps
Display message ............................ 244
Brakes
ABS ................................................ .. 68
BAS ................................................ .. 69
BAS PLUS ........................................ 69
Brake fluid (notes) ......................... 377
Display message ............................ 236
Important safety notes .................. 172
Maintenance .................................. 172
Parking brake ........................ 169, 173
Riding tips ...................................... 172
Warning lamp ................................. 262
Breakdown
see Flat tire
see Towing away/tow-starting
Brightness control knob (instru-
ment cluster lighting, multifunc-
tion steering wheel with 12 but-
tons) ................................................... .. 33
Bulbs
see Replacing bulbs
C
CaliforniaImportant notice for retail cus-
tomers and lessees .......................... 24
Calling up a malfunction
see Display messages
Car
see Vehicle
Care
Car wash ........................................ 306
Carpets .......................................... 312
Display ........................................... 31 0
Exterior lights ................................ 309
Gear or selector lever .................... 311
Interior ........................................... 310
Matte finish ................................... 308
Notes ............................................. 3 05
Paint .............................................. 307
Plastic trim .................................... 310
Power washer ................................ 306
Rear view camera .......................... 309 Roof lining ...................................... 312
Seat belt ........................................ 312
Seat cover ..................................... 311
Sensors ......................................... 309
Steering wheel ............................... 311
Tail pipes ....................................... 309
Trim pieces .................................... 311
Washing by hand ........................... 306
Wheels ........................................... 307
Windows ........................................ 308
Wiper blades .................................. 308
Wooden trim .................................. 311
Cargo compartment cover
Important safety notes .................. 278
Cargo compartment enlarge-
ment ................................................... 276
Cargo compartment floor
Opening/closing ............................ 281
Stowage well (under) ..................... 281
Cargo net
Attaching ....................................... 280
Important safety information ......... 279
Cargo tie down rings ......................... 277
CD player/CD changer (on-board
computer) .......................................... 226
Center console
Lower section .................................. 37
Upper section .................................. 36
Central locking
Automatic locking (on-board com-puter) ............................................. 232
Locking/unlocking (SmartKey) ........ 78
Changing bulbs
Cornering light function ................. 124
High-beam headlamps ................... 124
Low-beam headlamps .................... 124
Parking lamps ................................ 124
Reversing lamps ............................ 125
Standing lamps (front) ................... 124
Turn signals (front) ......................... 124
Child seat
LATCH-type (ISOFIX) child seat
anchors ............................................ 64
Top Tether ....................................... 65
Child-proof locks
Important safety notes .................... 66
Rear doors ....................................... 67
6Index
Page 10 of 386
D
Dashboardsee Instrument cluster
Data
see Technical data
Daytime running lamps
Display message ............................ 246
Switching on/off (on-board com-
puter) ............................................. 231
Switching on/off (switch) .............. 116
Declarations of conformity ................. 26
DEF
Adding ........................................... 16 5
Display message ............................ 249
Filling capacity ............................... 376
Important safety notes .................. 376
Delayed switch-off
Exterior lighting (on-board com-
puter) ............................................. 231
Interior lighting .............................. 232
Diagnostics connection ...................... 26
Diesel .................................................. 3 75
Digital speedometer ......................... 224
DIRECT SELECT lever
Automatic transmission ................. 156
Display (cleaning instructions) ........ 310
Display messages
ASSYST PLUS ................................ 304
Calling up (on-board computer) ..... 235
Driving systems ............................. 250
Engine ............................................ 2 46
General notes ................................ 235
Hiding (on-board computer) ........... 235
KEYLESS-GO .................................. 258
Lights ............................................. 24 3
Safety systems .............................. 236
SmartKey ....................................... 258
Tires .............................................. . 255
Vehicle ........................................... 257
Distance recorder ............................. 223
see Odometer
see Trip odometer
Distance warning (warning lamp) .... 270
DISTRONIC PLUS
Activation conditions ..................... 178
Deactivating ................................... 182
Display message ............................ 253 Displays in the multifunction dis-
play ...............................................
. 181
Driving tips .................................... 182
Function/notes ............................. 176
Important safety notes .................. 176
Setting the specified minimum
distance ......................................... 180
Warning lamp ................................. 270
Doors
Automatic locking (on-board com-
puter) ............................................. 232
Automatic locking (switch) ............... 86
Central locking/unlocking
(SmartKey) ....................................... 78
Control panel ................................... 39
Display message ............................ 257
Emergency locking ........................... 86
Emergency unlocking ....................... 86
Important safety notes .................... 84
Opening (from inside) ...................... 84
Drinking and driving ......................... 170
Drive program
Automatic ...................................... 160
Display ........................................... 15 7
Display (DIRECT SELECT lever) ...... 157
Manual ........................................... 160
Driver's door
see Doors
Driving abroad
Mercedes-Benz Service ................. 305
Driving lamps
see Daytime running lamps
Driving safety systems
ABS (Anti-lock Braking System) ....... 68
BAS (Brake Assist System) .............. 69
BAS PLUS (Brake Assist System
PLUS) ............................................... 69
EBD (electronic brake force distri- bution) ............................................ . 73
ESP ®
(Electronic Stability Pro-
gram) .............................................. . 70
ETS/4ETS (Electronic Traction
System) ........................................... 70
Important safety information ........... 68
Overview .......................................... 68
PRE-SAFE ®
Brake ............................. 73
8Index
Page 14 of 386
Display message ............................ 258
Locking ............................................79
Start/Stop button .......................... 149
Starting the engine ........................ 151
Unlocking ......................................... 79
Kickdown
Driving tips .................................... 159
Knee bag .............................................. 47
L
Lamps
see Warning and indicator lamps
Lane Keeping Assist
Activating/deactivating ................. 230
Display message ............................ 251
Function/information .................... 205
Lane Tracking package ..................... 203
LATCH-type (ISOFIX) child seat
anchors ................................................ 64
License plate lamp (display mes-
sage) ................................................... 245
Light function, active
Display message ............................ 246
Light sensor (display message) ....... 246
Lights
Activating/deactivating the inte-
rior lighting delayed switch-off ....... 232
Active light function ....................... 119
Automatic headlamp mode ............ 116
Cornering light function ................. 120
Display message ............................ 243
Fog lamps ...................................... 117
Hazard warning lamps ................... 119
High beam flasher .......................... 119
High-beam headlamps ................... 118
Light switch ................................... 116
Low-beam headlamps .................... 117
Parking lamps ................................ 118
Rear fog lamp ................................ 118
Setting the brightness of the dis-
play/switch (on-board computer) .. 231
Standing lamps .............................. 118
Switching the daytime running
lamps on/off (on-board com-
puter) ............................................. 231
Switching the daytime running
lamps on/off (switch) .................... 116 Switching the exterior lighting
delayed switch-off on/off (on-
board computer) ............................ 231
Switching the surround lighting
on/off (on-board computer) .......... 231
Turn signals ................................... 118
see Interior lighting
see Replacing bulbs
Loading guidelines ............................ 274
Locking
see Central locking
Locking (doors)
Automatic ........................................ 86
Emergency locking ........................... 86
From inside (central locking but-
ton) ............................................... ... 85
Locking centrally
see Central locking
Locking verification signal (on-
board computer) ............................... 232
Low-beam headlamps
Changing bulbs .............................. 124
Display message ............................ 243
Switching on/off ........................... 117
Lumbar support
Adjusting ....................................... 104
Adjusting the 4-way lumbar sup-
port ............................................... . 104
Luxury head restraints ..................... 103
M
M+S tires ............................................ 335
Malfunction message
see Display messages
Matte finish (cleaning instruc-
tions) .................................................. 3 08
mbrace
Call priority .................................... 291
Display message ............................ 238
Downloading destinations
(COMAND) ..................................... 291
Downloading routes ....................... 294
Emergency call .............................. 288
General notes ................................ 287
Geo fencing ................................... 294
Locating a stolen vehicle ............... 293
MB info call button ........................ 290
12Index
Page 45 of 386
SRS (Supplemental Restraint System)
Introduction
Supplemental Restraint System (SRS) with:
R The 6 SRS warning lamp
R Air bags
R Air bag control unit (with crash sensors)
R Emergency Tensioning Device (ETD) for
seat belts
R Seat belt force limiters
SRS reduces the risk of vehicle occupants
coming into contact with parts of the vehi-
cle's interior in the event of an accident. It can also reduce the forces to which vehicle occu-
pants are subjected during an accident.
SRS warning lamp
GWARNING
If SRS is malfunctioning, restraint system
components may be triggered unintentionally
or might not be triggered at all in the event of
an accident with a high rate of vehicle decel-
eration. There is an increased risk of injury,
possibly even fatal.
Have SRS checked and repaired immediately
at a qualified specialist workshop.
SRS functions are checked regularly when
you switch on the ignition and when the
engine is running. Therefore, malfunctions
can be detected in good time.
The 6 SRS warning lamp in the instrument
cluster lights up when the ignition is switched
on. It goes out no later than a few seconds
after the engine is started.
The SRS components are in operational read-
iness when the 6 SRS warning lamp goes
out while the engine is running. There is a malfunction if: R
the 6 SRS warning lamp does not light
up when the ignition is switched on
R the engine is running and the 6 SRS
warning lamp does not go out after a few
seconds
R the engine is running and the 6 SRS
warning lamp lights up again
Safety guidelines for seat belts, Emer-
gency Tensioning Devices (ETDs) and
air bags
GWARNING
R Damaged seat belts or seat belts that have
been subjected to stress in an accident
must be replaced. Their anchoring points
must also be checked. Only use seat belts
installed or supplied by an authorized
Mercedes-Benz Center.
R Air bags and pyrotechnic Emergency Ten-
sioning Devices (ETDs) contain perchlorate
material, which may require special han-
dling and regard for the environment.
Check your national disposal guidelines.
California residents, see
www.dtsc.ca.gov/HazardousWaste/
Perchlorate/index.cfm .
R Air bags and ETDs are designed to function
on a one-time-only basis. An air bag or ETDthat has deployed must be replaced.
R Do not pass seat belts over sharp edges.
They could tear.
R Do not make any modification that could
change the effectiveness of the seat belts.
R Do not bleach or dye seat belts as this may
severely weaken them. In a crash they may
not be able to provide adequate protection.
R No modifications of any kind may be made
to any components or wiring of the SRS.
R Do not change or remove any component or
part of the SRS.
R Do not install additional trim material, seat
covers, badges, etc. over the steering
wheel hub, front-passenger front air bag
Occupant safety43
Safety
Z
Page 109 of 386
wheel up or down or try to move it in the
fore-and-aft direction.
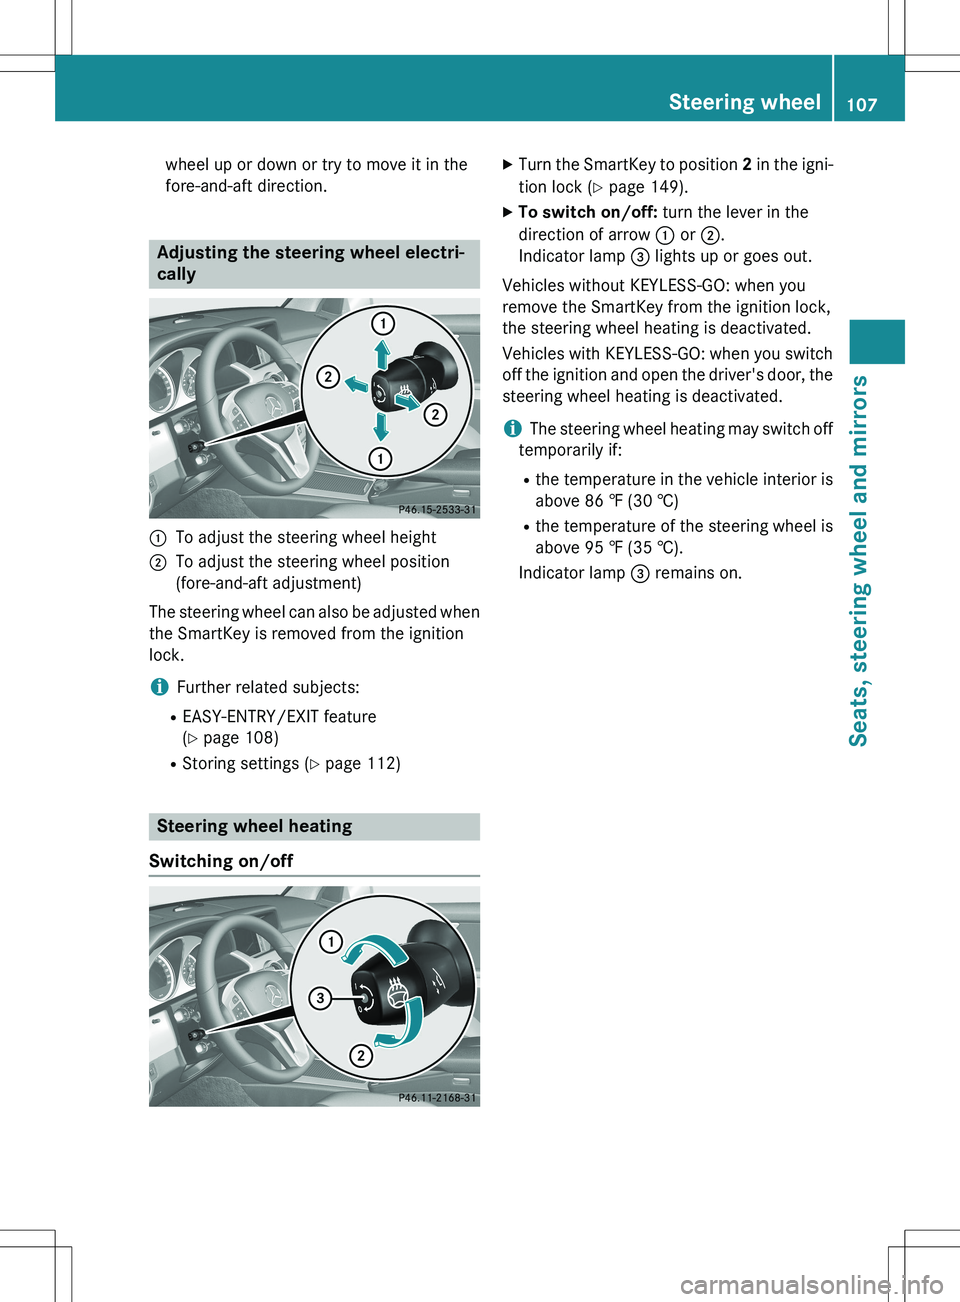
Adjusting the steering wheel electri-
cally
:To adjust the steering wheel height
;To adjust the steering wheel position
(fore-and-aft adjustment)
The steering wheel can also be adjusted when the SmartKey is removed from the ignition
lock.
iFurther related subjects:
R EASY-ENTRY/EXIT feature
(Y page 108)
R Storing settings ( Y page 112)
Steering wheel heating
Switching on/off
X Turn the SmartKey to position 2 in the igni-
tion lock ( Y page 149).
X To switch on/off: turn the lever in the
direction of arrow : or ;.
Indicator lamp = lights up or goes out.
Vehicles without KEYLESS-GO: when you
remove the SmartKey from the ignition lock,
the steering wheel heating is deactivated.
Vehicles with KEYLESS-GO: when you switch
off the ignition and open the driver's door, the steering wheel heating is deactivated.
iThe steering wheel heating may switch off
temporarily if:
R the temperature in the vehicle interior is
above 86 ‡ (30 †)
R the temperature of the steering wheel is
above 95 ‡ (35 †).
Indicator lamp = remains on.
Steering wheel107
Seats, steering wheel and mirrors
Z
Page 117 of 386
Useful information............................116
Exterior lighting ................................ 116
Interior lighting ................................. 121
Replacing bulbs ................................. 122
Windshield wipers ............................126
115
Lights and windshield wipers
Page 123 of 386
In particular, the detection of obstacles can
be restricted if there is: Rpoor visibility, e.g. due to fog, heavy rain or
snow
R dirt on the sensors or the sensors are
obscured
Switching Adaptive Highbeam Assist
on/off
XTo activate: turn the light switch to Ã.
X Press the combination switch beyond the
pressure point in the direction of arrow :
( Y page 118).
The _ indicator lamp in the multifunc-
tion display lights up if it is dark and the
light sensor activates the low-beam head-
lamps.
If you are driving at speeds above approx-
imately 28 mph (45 km/h):
The headlamp range is set automatically
depending on the distance between the
vehicle and other road users.
If you are driving at speeds above approx-
imately 35 mph (55 km/h) and no other
road users have been detected:
The high-beam headlamps are switched on
automatically. The K indicator lamp in
the instrument cluster also lights up.
If you are driving at speeds below approx-
imately 30 mph (45 km/h) or other road
users have been detected or the roads are adequately lit:
The high-beam headlamps are switched off
automatically. The K indicator lamp in
the instrument cluster goes out. The _
indicator lamp in the multifunction display
remains lit.
X To deactivate: move the combination
switch back to its normal position.
The _ indicator lamp in the multifunc-
tion display goes out.
Headlamps fogged up on the inside
Certain climatic and physical conditions may
cause moisture to form in the headlamp. This moisture does not affect the functionality of
the headlamp.
Interior lighting
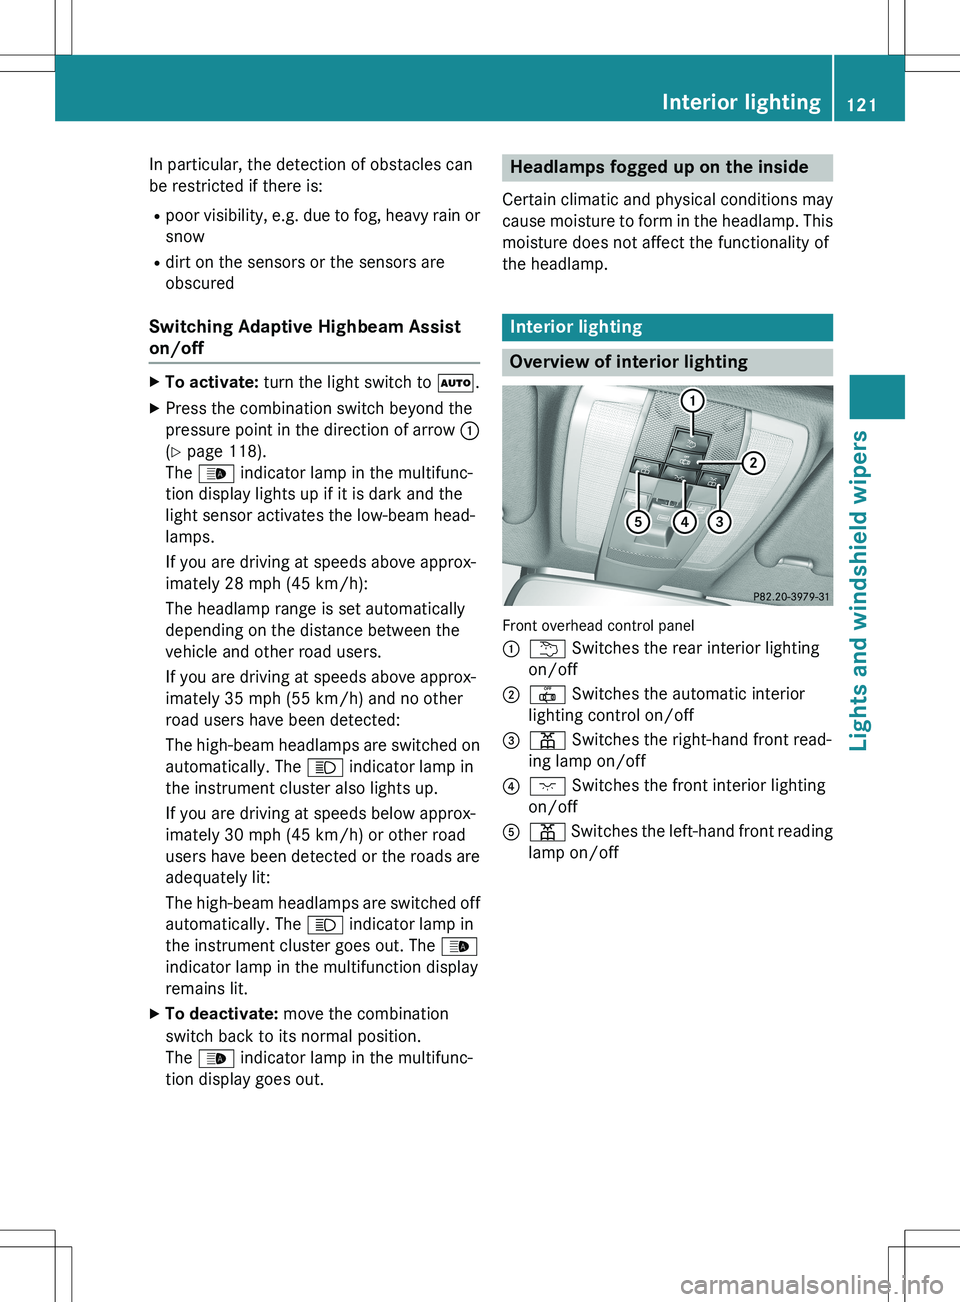
Overview of interior lighting
Front overhead control panel :
u Switches the rear interior lighting
on/off
;| Switches the automatic interior
lighting control on/off
=p Switches the right-hand front read-
ing lamp on/off
?c Switches the front interior lighting
on/off
Ap Switches the left-hand front reading
lamp on/off
Interior lighting121
Lights and windshield wipers
Z
Page 124 of 386
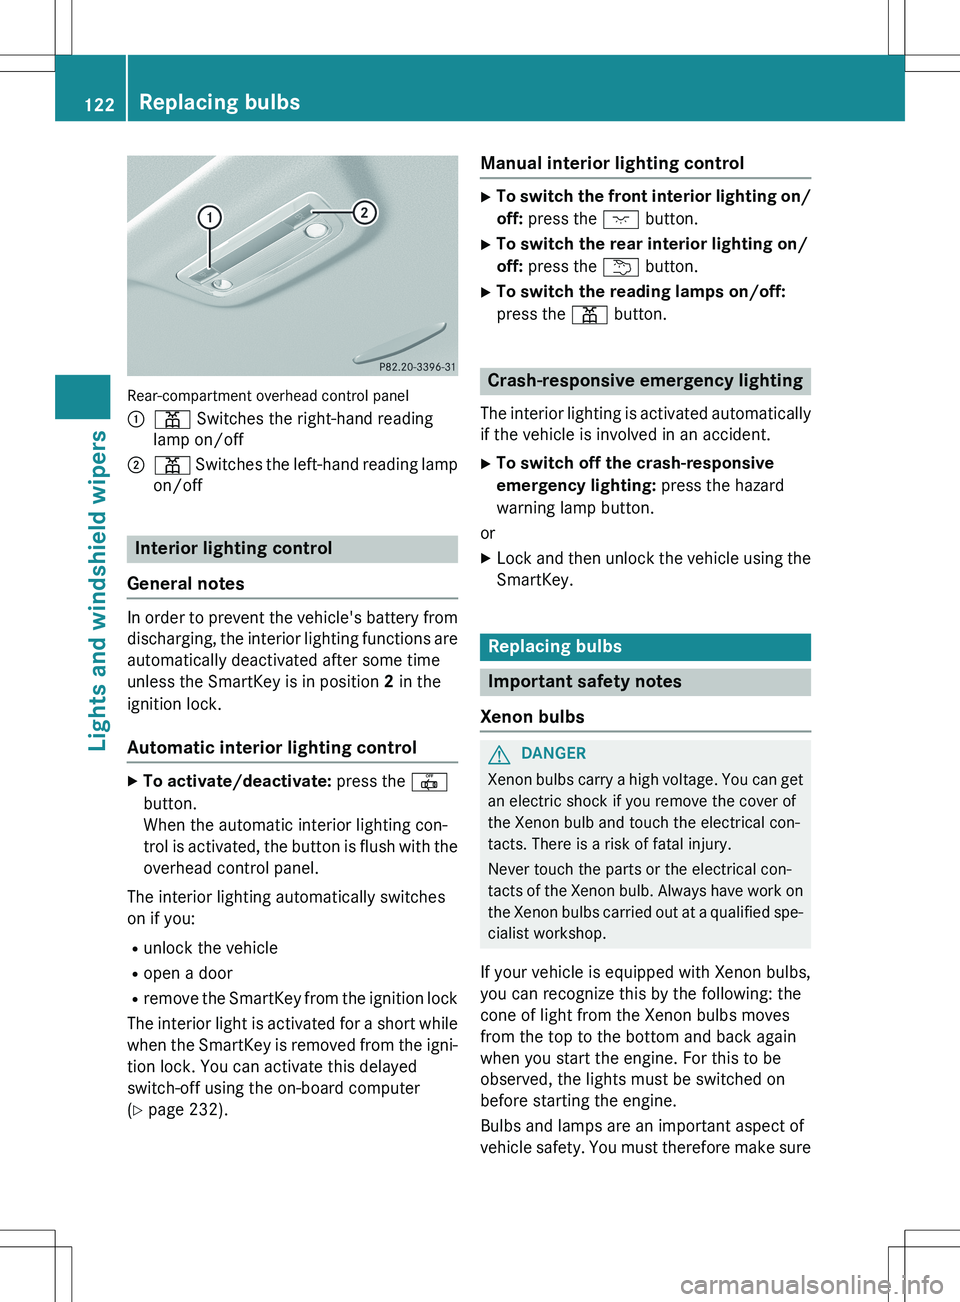
Rear-compartment overhead control panel :
p Switches the right-hand reading
lamp on/off
;p Switches the left-hand reading lamp
on/off
Interior lighting control
General notes
In order to prevent the vehicle's battery from discharging, the interior lighting functions are
automatically deactivated after some time
unless the SmartKey is in position 2 in the
ignition lock.
Automatic interior lighting control
X To activate/deactivate: press the |
button.
When the automatic interior lighting con-
trol is activated, the button is flush with the
overhead control panel.
The interior lighting automatically switches
on if you: R unlock the vehicle
R open a door
R remove the SmartKey from the ignition lock
The interior light is activated for a short while when the SmartKey is removed from the igni-
tion lock. You can activate this delayed
switch-off using the on-board computer
( Y page 232).
Manual interior lighting control
X
To switch the front interior lighting on/
off: press the c button.
X To switch the rear interior lighting on/
off: press the u button.
X To switch the reading lamps on/off:
press the p button.
Crash-responsive emergency lighting
The interior lighting is activated automatically
if the vehicle is involved in an accident.
X To switch off the crash-responsive
emergency lighting: press the hazard
warning lamp button.
or X Lock and then unlock the vehicle using the
SmartKey.
Replacing bulbs
Important safety notes
Xenon bulbs
GDANGER
Xenon bulbs carry a high voltage. You can get an electric shock if you remove the cover of
the Xenon bulb and touch the electrical con-
tacts. There is a risk of fatal injury.
Never touch the parts or the electrical con-
tacts of the Xenon bulb. Always have work on
the Xenon bulbs carried out at a qualified spe-
cialist workshop.
If your vehicle is equipped with Xenon bulbs,
you can recognize this by the following: the
cone of light from the Xenon bulbs moves
from the top to the bottom and back again
when you start the engine. For this to be
observed, the lights must be switched on
before starting the engine.
Bulbs and lamps are an important aspect of
vehicle safety. You must therefore make sure
122Replacing bulbs
Lights and windshield wipers
Page 139 of 386
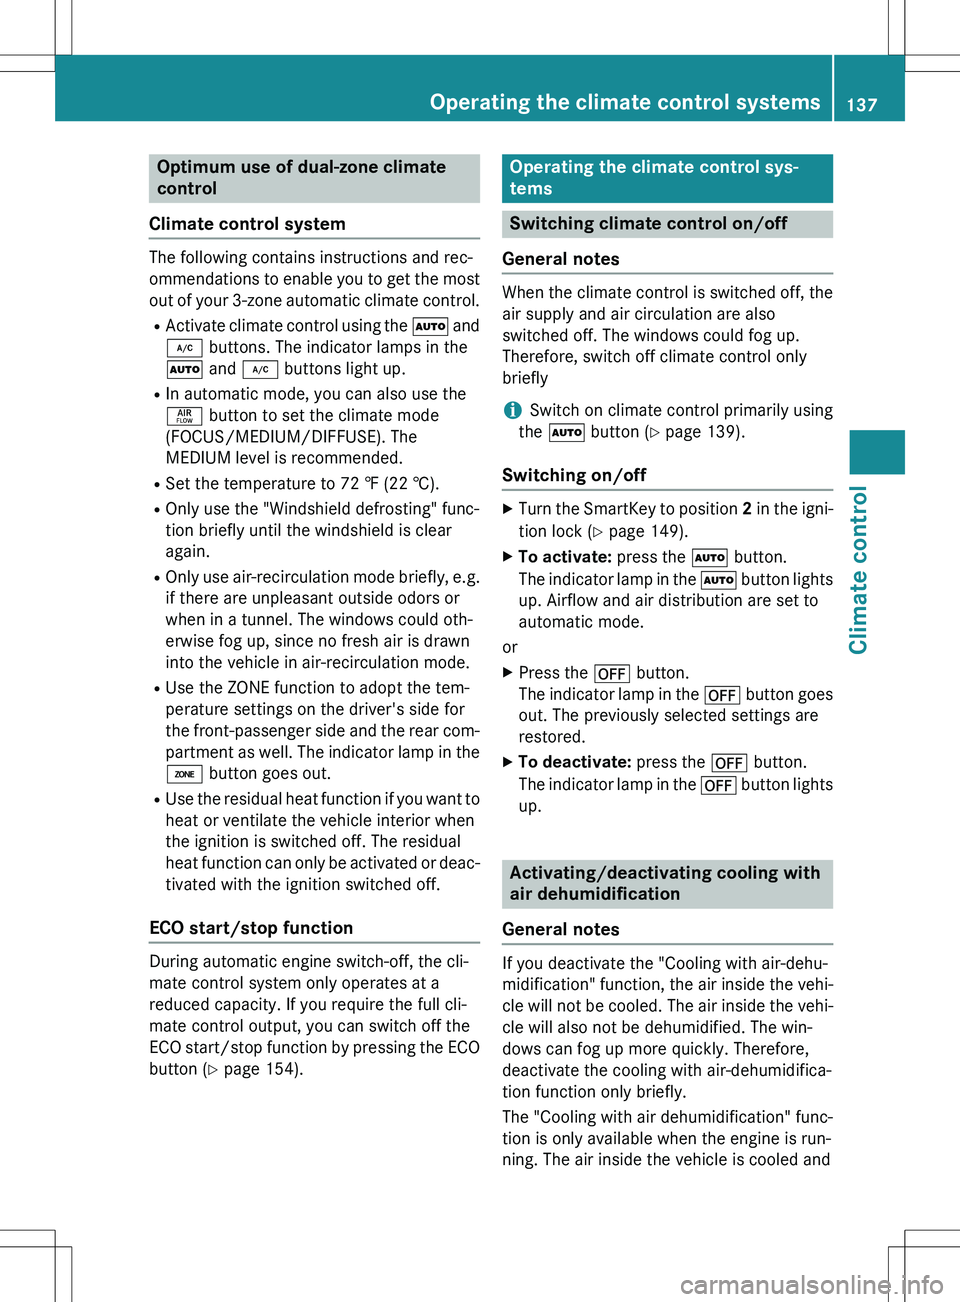
Optimum use of dual-zone climate
control
Climate control system
The following contains instructions and rec-
ommendations to enable you to get the most
out of your 3-zone automatic climate control.
R Activate climate control using the à and
¿ buttons. The indicator lamps in the
à and ¿ buttons light up.
R In automatic mode, you can also use theñ button to set the climate mode
(FOCUS/MEDIUM/DIFFUSE). The
MEDIUM level is recommended.
R Set the temperature to 72 ‡ (22 †).
R Only use the "Windshield defrosting" func-
tion briefly until the windshield is clear
again.
R Only use air-recirculation mode briefly, e.g.
if there are unpleasant outside odors or
when in a tunnel. The windows could oth-
erwise fog up, since no fresh air is drawn
into the vehicle in air-recirculation mode.
R Use the ZONE function to adopt the tem-
perature settings on the driver's side for
the front-passenger side and the rear com-
partment as well. The indicator lamp in the
á button goes out.
R Use the residual heat function if you want to
heat or ventilate the vehicle interior when
the ignition is switched off. The residual
heat function can only be activated or deac- tivated with the ignition switched off.
ECO start/stop function
During automatic engine switch-off, the cli-
mate control system only operates at a
reduced capacity. If you require the full cli-
mate control output, you can switch off the
ECO start/stop function by pressing the ECObutton ( Y page 154).
Operating the climate control sys-
tems
Switching climate control on/off
General notes
When the climate control is switched off, the air supply and air circulation are also
switched off. The windows could fog up.
Therefore, switch off climate control only
briefly
iSwitch on climate control primarily using
the à button ( Y page 139).
Switching on/off
X
Turn the SmartKey to position 2 in the igni-
tion lock ( Y page 149).
X To activate: press the à button.
The indicator lamp in the à button lights
up. Airflow and air distribution are set to
automatic mode.
or
X Press the ^ button.
The indicator lamp in the ^ button goes
out. The previously selected settings are
restored.
X To deactivate: press the ^ button.
The indicator lamp in the ^ button lights
up.
Activating/deactivating cooling with
air dehumidification
General notes
If you deactivate the "Cooling with air-dehu-
midification" function, the air inside the vehi- cle will not be cooled. The air inside the vehi-
cle will also not be dehumidified. The win-
dows can fog up more quickly. Therefore,
deactivate the cooling with air-dehumidifica-
tion function only briefly.
The "Cooling with air dehumidification" func-
tion is only available when the engine is run-
ning. The air inside the vehicle is cooled and
Operating the climate control systems137
Climate control
Page 145 of 386
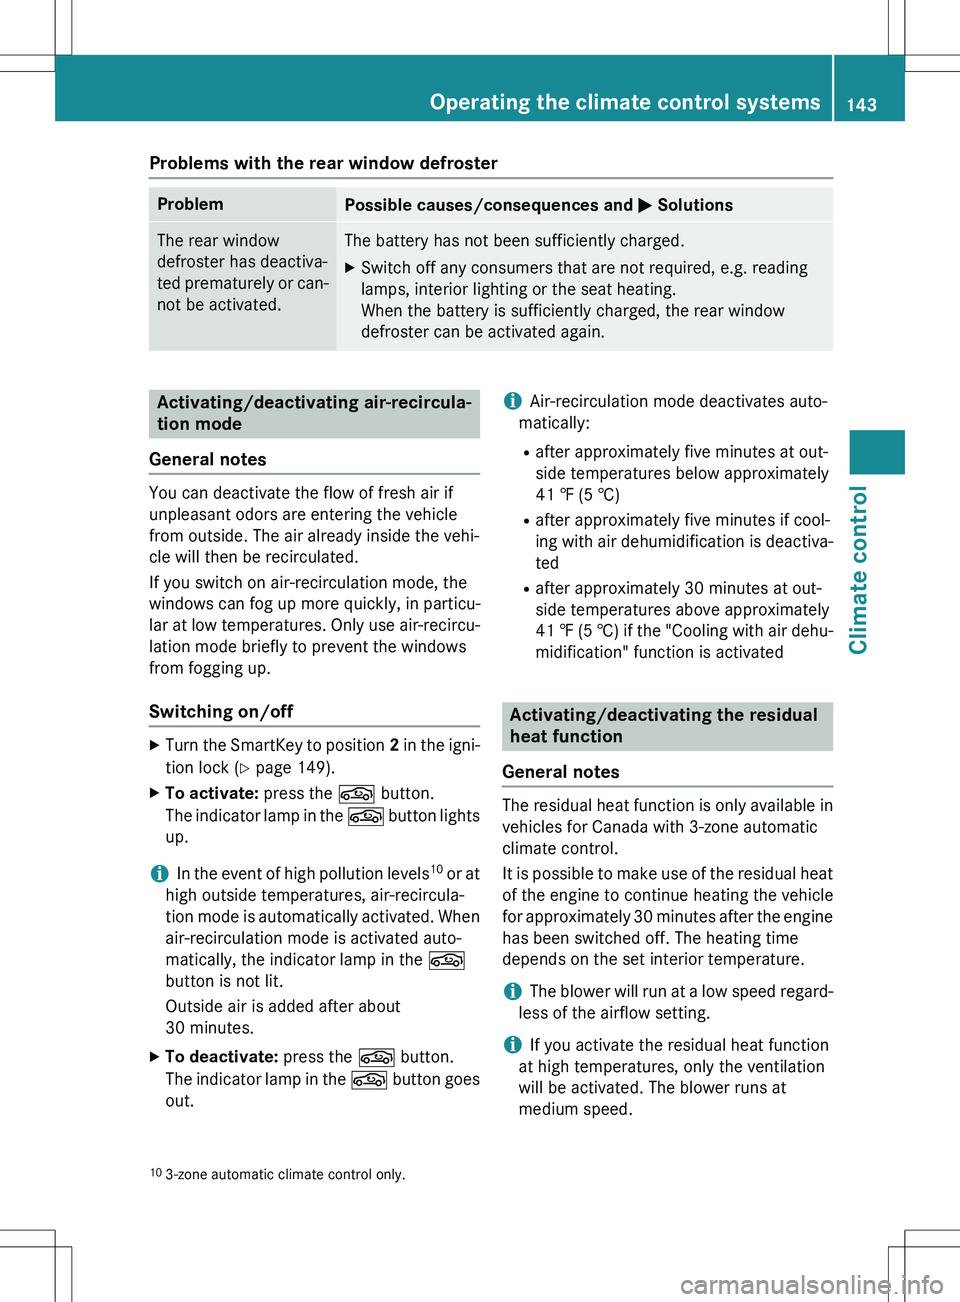
Problems with the rear window defroster
ProblemPossible causes/consequences and M Solutions
The rear window
defroster has deactiva-
ted prematurely or can-
not be activated.The battery has not been sufficiently charged.
X Switch off any consumers that are not required, e.g. reading
lamps, interior lighting or the seat heating.
When the battery is sufficiently charged, the rear window
defroster can be activated again.
Activating/deactivating air-recircula-
tion mode
General notes
You can deactivate the flow of fresh air if
unpleasant odors are entering the vehicle
from outside. The air already inside the vehi-
cle will then be recirculated.
If you switch on air-recirculation mode, the
windows can fog up more quickly, in particu-
lar at low temperatures. Only use air-recircu-
lation mode briefly to prevent the windows
from fogging up.
Switching on/off
X Turn the SmartKey to position 2 in the igni-
tion lock ( Y page 149).
X To activate: press the g button.
The indicator lamp in the g button lights
up.
iIn the event of high pollution levels 10
or at
high outside temperatures, air-recircula-
tion mode is automatically activated. When
air-recirculation mode is activated auto-
matically, the indicator lamp in the g
button is not lit.
Outside air is added after about
30 minutes.
X To deactivate: press the g button.
The indicator lamp in the g button goes
out.
iAir-recirculation mode deactivates auto-
matically:
R after approximately five minutes at out-
side temperatures below approximately
41 ‡ (5 †)
R after approximately five minutes if cool-
ing with air dehumidification is deactiva-
ted
R after approximately 30 minutes at out-
side temperatures above approximately
41 ‡ (5 †) if the "Cooling with air dehu-
midification" function is activated
Activating/deactivating the residual
heat function
General notes
The residual heat function is only available in vehicles for Canada with 3-zone automatic
climate control.
It is possible to make use of the residual heat
of the engine to continue heating the vehicle
for approximately 30 minutes after the engine
has been switched off. The heating time
depends on the set interior temperature.
iThe blower will run at a low speed regard-
less of the airflow setting.
iIf you activate the residual heat function
at high temperatures, only the ventilation
will be activated. The blower runs at
medium speed.
10 3-zone automatic climate control only.
Operating the climate control systems143
Climate control