alarm MERCEDES-BENZ GLK SUV 2012 Owners Manual
[x] Cancel search | Manufacturer: MERCEDES-BENZ, Model Year: 2012, Model line: GLK SUV, Model: MERCEDES-BENZ GLK SUV 2012Pages: 381, PDF Size: 12.68 MB
Page 8 of 381
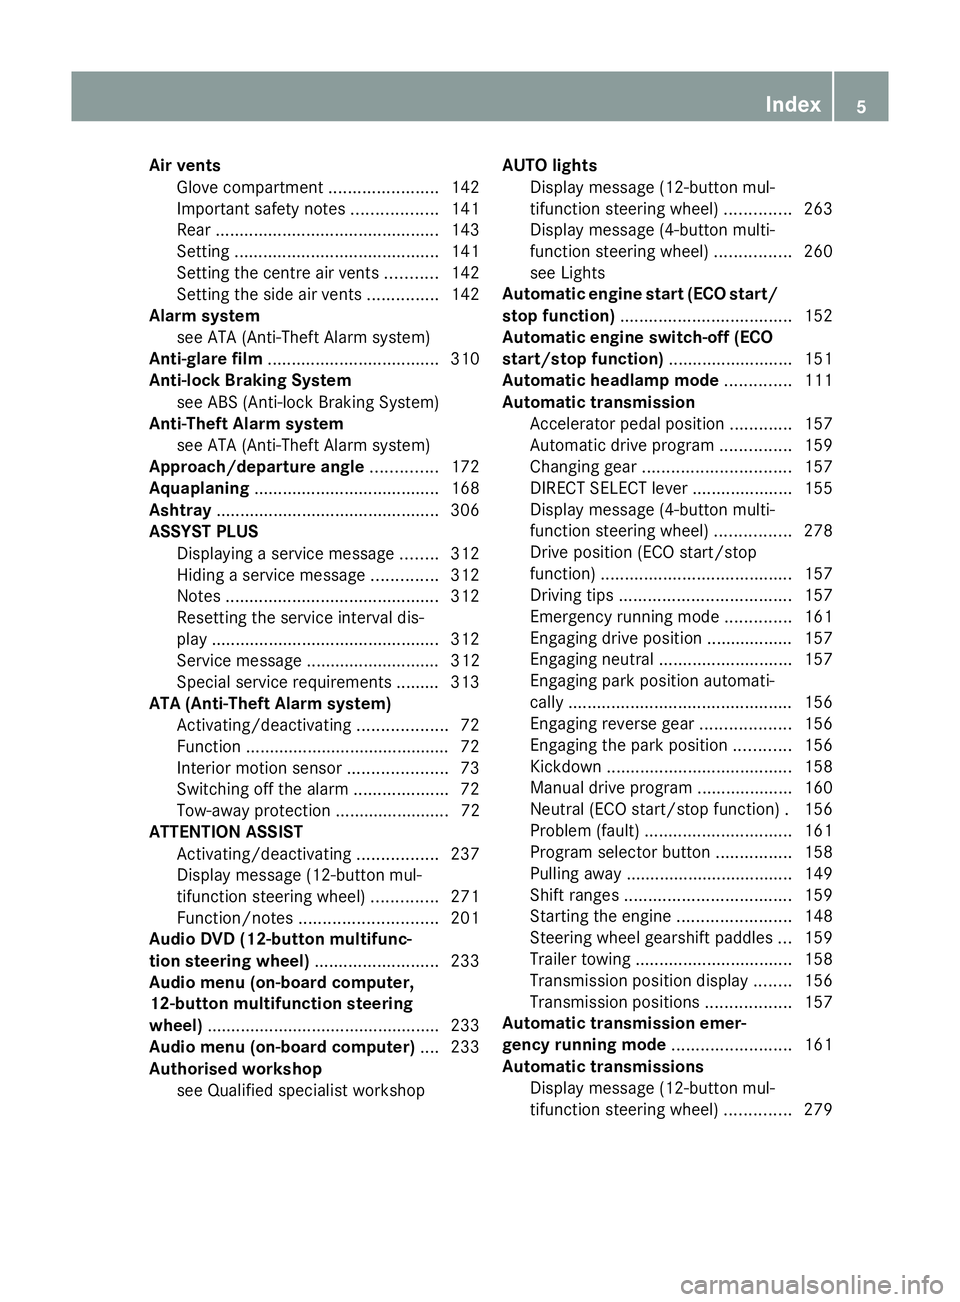
Air vents
Glove compartment .......................142
Important safety notes ..................141
Rear ............................................... 143
Setting ........................................... 141
Setting the centre air vents ...........142
Setting the side air vents ...............142
Alarm system
see ATA (Anti-Theft Alarm system)
Anti-glare film .................................... 310
Anti-lock Braking System see ABS (Anti-lock Braking System)
Anti-Theft Alarm system
see ATA (Anti-Theft Alarm system)
Approach/departure angle ..............172
Aquaplaning ....................................... 168
Ashtray ............................................... 306
ASSYST PLUS Displaying a service message ........312
Hiding a service message ..............312
Notes ............................................. 312
Resetting the service interval dis-
pla y................................................ 312
Service message ............................ 312
Special service requirements ......... 313
ATA (Anti-Theft Alarm system)
Activating/deactivating ...................72
Function .......................................... .72
Interior motion sensor .....................73
Switching off the alarm ....................72
Tow-away protection ........................ 72
ATTENTION ASSIST
Activating/deactivating .................237
Display message (12-button mul-
tifunction steering wheel) ..............271
Function/notes ............................. 201
Audio DVD (12-button multifunc-
tion steering wheel) ..........................233
Audio menu (on-board computer,
12-button multifunction steering
wheel) ................................................ .233
Audio menu (on-board computer) ....233
Authorised workshop see Qualified specialist workshop AUTO lights
Display message (12-button mul-
tifunction steering wheel) ..............263
Display message (4-button multi-
function steering wheel) ................260
see Lights
Automatic engine start (ECO start/
stop function) .................................... 152
Automatic engine switch-off (ECO
start/stop function) ..........................151
Automatic headlamp mode ..............111
Automatic transmission Accelerator pedal position .............157
Automatic drive program ...............159
Changing gea r............................... 157
DIRECT SELECT lever .....................155
Display message (4-button multi-
function steering wheel) ................278
Drive position (ECO start/stop
function) ........................................ 157
Driving tips .................................... 157
Emergency running mode ..............161
Engaging drive position .................. 157
Engaging neutral ............................ 157
Engaging park position automati-
call y............................................... 156
Engaging reverse gear ...................156
Engaging the park position ............156
Kickdown ....................................... 158
Manual drive program ....................160
Neutral (ECO start/stop function) .156
Problem (fault) ............................... 161
Program selector button ................158
Pulling away ................................... 149
Shift ranges ................................... 159
Starting the engine ........................148
Steering wheel gearshift paddle s... 159
Trailer towing ................................. 158
Transmission position displa y........ 156
Transmission positions ..................157
Automatic transmission emer-
gency running mode .........................161
Automatic transmissions Display message (12-button mul-
tifunction steering wheel) ..............279 Index
5
Page 20 of 381
On-board computer (4-button mul-
tifunction steering wheel)
Displaying service messages .........312
Display messages ..........................245
Individual vehicle settings ..............225
Message memory .......................... 245
Operating ...................................... .225
Range ............................................ 226
Standard displa y............................ 226
Time/date ..................................... 227
Trip computer ................................ 226
Opening and closing the side trim
panels ................................................. 121
Operating safety Diagnostics connection ...................26
Operating system
see On-board computer
Outside temperature
Display (12-button multifunction
steering wheel) .............................. 227
Display (4-button multifunction
steering wheel) .............................. 225
Overhead control panel ......................39
Override feature Rear side windows ...........................64 P
Paint code .......................................... 364
Paintwork (cleaning instructions) ...319
Panic alarm .......................................... 42
Panorama sliding sunroof Important safety information ...........92
Opening/closing .............................. 92
Opening/closing the roller sun-
blind ................................................. 93
Problem (malfunction) .....................94
Rain closing feature .........................92
Resetting ......................................... 93
Parking ............................................... 164
Important safety notes ..................164
Parking brake ................................ 165
Position of exterior mirror, front-
passenger side ............................... 105
Reversing camera ..........................196
see PARKTRONIC Parking aid
Active Parking Assist .....................192
see Exterior mirrors
see PARKTRONIC
Parking brake .................................... 165
Display message (12-button mul-
tifunction steering wheel) ..............253
Display message (4-button multi-
function steering wheel) ................248
Notes/function .............................. 165
Warning lamp ................................. 291
Parking lamp
Display message (12-button mul-
tifunction steering wheel) ..............262
Display message (4-button multi-
function steering wheel) ................259
Parking lamps
Changing bulbs .............................. 120
Switching on/off ........................... 112
PARKTRONIC
Deactivating/activating .................190
Driving system ............................... 188
Function/notes ............................. 188
Important safety notes ..................188
Problem (fault) ............................... 192
Sensor range ................................. 188
Trailer towing ................................. 191
Warning displa y............................. 189
PASSENGER AIRBAG OFF warning
lamp ...................................................... 56
Petrol .................................................. 366
Plastic trim (cleaning instructions) .322
Power windows see Side windows
PRE-SAFE ®
(preventative occupant
protection) Display message (12-button mul-
tifunction steering wheel) ..............254
Display message (4-button multi-
function steering wheel) ................249
PRE-SAFE ®
(preventive occupant
safety system) Operation ........................................ .48
PRE-SAFE ®
Brake
Activating/deactivating .................237
Display message (12-button mul-
tifunction steering wheel) ..............255 Index
17
Page 24 of 381
Rear
............................................... 298
Under driver's seat/front-
passenger seat .............................. 298
Stowage net ....................................... 298
Stowage space Stowage net ................................... 298
Summer opening
see Convenience opening feature
Summer tyres .................................... 352
Sun visor ............................................ 305
Supplement Restraint System see SRS (Supplemental Restraint
System)
Surround lighting (12-button mul-
tifunction steering wheel) ................240
Switching off the alarm (ATA) ............72 T
Tailgate Display message (12-button mul-
tifunction steering wheel) ..............279
Display message (4-button multi-
function steering wheel) ................278
Emergency unlocking .......................88
Important safety notes ....................85
Limiting the opening angle ...............88
Opening/closing (automatically
from inside) ...................................... 87
Opening/closing (automatically
from outside) ................................... 86
Opening/closing (from outside) .......85
Opening dimensions ......................372
Tail lamp
Display message (12-button mul-
tifunction steering wheel) ..............261
Display message (4-button multi-
function steering wheel) ................258
Tank
see Fuel tank
Tank content
Displaying the range (12-button
multifunction steering wheel) ........231
Displaying the range (4-button
multifunction steering wheel) ........226 Fuel gauge (12-button multifunc-
tion steering wheel)
.........................33
Fuel gauge (4-button multifunc-
tion steering wheel) .........................31
Technical data
Capacities ...................................... 365
Information .................................... 362
Trailer loads ................................... 374
Tyres/wheels ................................. 357
Vehicle data ................................... 372
Telephone
Accepting a call ............................. 235
Display message (12-button mul-
tifunction steering wheel) ..............281
Menu (on-board computer) ............234
Number from the phone book ....... .235
Redialling ....................................... 236
Rejecting/ending a call .................235
Telephone compartment ................297
Temperature
Coolant (12-button multifunction
steering wheel) .............................. 227
Coolant (4-button multifunction
steering wheel) .............................. 224
Outside temperature (12-button
multifunction steering wheel) ........227
Outside temperature (4-button
multifunction steering wheel) ........225
Setting (climate control) ................132
TEMPOMAT
Function/notes ............................. 173
Theft-deterrent system
ATA (Anti-Theft Alarm system) .........72
Immobiliser ...................................... 71
Time
Setting the clock (4-button multi-
function steering wheel) ................227
see Separate Owner's manual
TIREFIT kit .......................................... 329
Top Tether ............................................ 58
Total distance recorder Displaying (12-button multifunc-
tion steering wheel) .......................230
Displaying (4-button multifunc-
tion steering wheel) .......................226
Tow-away protection ..........................72 Index
21
Page 44 of 381
Useful information
..............................42
Panic alarm .......................................... 42
Occupant safety .................................. 42
Children in the vehicle ........................54
Driving safety systems .......................65
Anti-theft systems .............................. 71 41Safety
Page 45 of 381
Useful information
i This Owner's Manual describes all mod-
els, series and optional equipment for your
vehicle that were available at the time of
going to press. National variations are pos-
sible. Note that your vehicle may not be
equipped with all of the functions descri-
bed. This is also the case for systems and
functions relevant to safety.
i Read the information on qualified special-
ist workshops: (Y page 27). Panic alarm
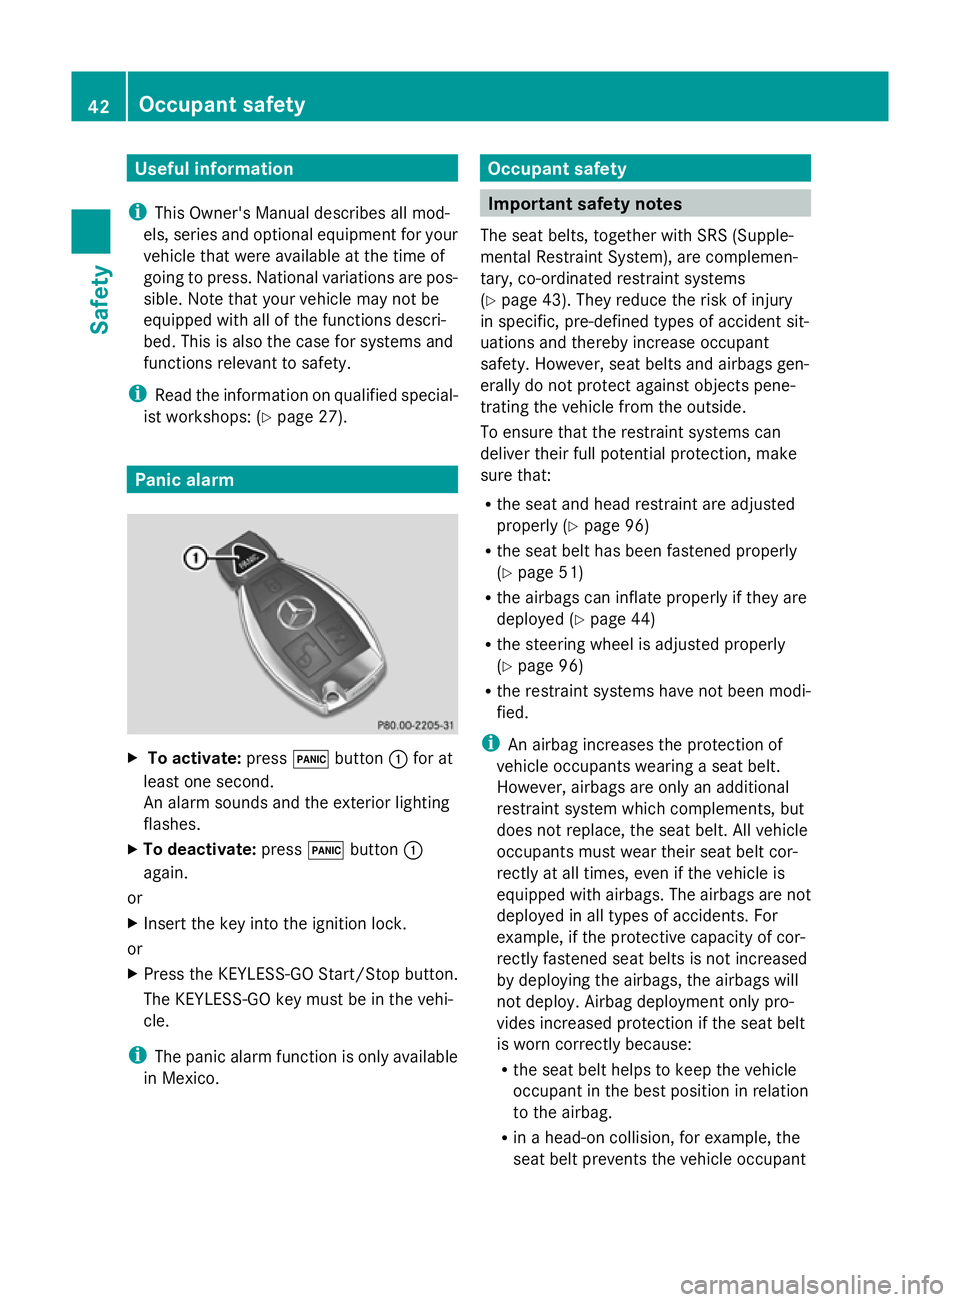
X
To activate: press!button :for at
least one second.
An alarm sounds and the exterior lighting
flashes.
X To deactivate: press!button :
again.
or
X Insert the key into the ignition lock.
or
X Press the KEYLESS-GO Start/Stop button.
The KEYLESS-GO key must be in the vehi-
cle.
i The panic alarm function is only available
in Mexico. Occupant safety
Important safety notes
The seat belts, together with SRS (Supple-
mental Restraint System), are complemen-
tary, co-ordinated restraint systems
(Y page 43). They reduce the risk of injury
in specific, pre-defined types of accident sit-
uations and thereby increase occupant
safety. However, seat belts and airbags gen-
erally do not protect against objects pene-
trating the vehicle from the outside.
To ensure that the restraint systems can
deliver their full potential protection, make
sure that:
R the seat and head restraint are adjusted
properly (Y page 96)
R the seat belt has been fastened properly
(Y page 51)
R the airbags can inflate properly if they are
deployed (Y page 44)
R the steering wheel is adjusted properly
(Y page 96)
R the restraint systems have not been modi-
fied.
i An airbag increases the protection of
vehicle occupants wearing a seat belt.
However, airbags are only an additional
restraint system which complements, but
does not replace, the seat belt. All vehicle
occupants must wear their seat belt cor-
rectly at all times, even if the vehicle is
equipped with airbags. The airbags are not
deployed in all types of accidents. For
example, if the protective capacity of cor-
rectly fastened seat belts is not increased
by deploying the airbags, the airbags will
not deploy. Airbag deployment only pro-
vides increased protection if the seat belt
is worn correctly because:
R the seat belt helps to keep the vehicle
occupant in the best position in relation
to the airbag.
R in a head-on collision, for example, the
seat belt prevents the vehicle occupant 42
Occupant safetySafety
Page 75 of 381
ATA (Anti-Theft Alarm system)
A visual and audible alarm is triggered if the
alarm system is primed and you open:
R a door
R the vehicle with the emergency key ele-
ment
R the tailgate
R the bonnet
The alarm is not switched off, even if you
close the open door that has triggered it, for
example. X
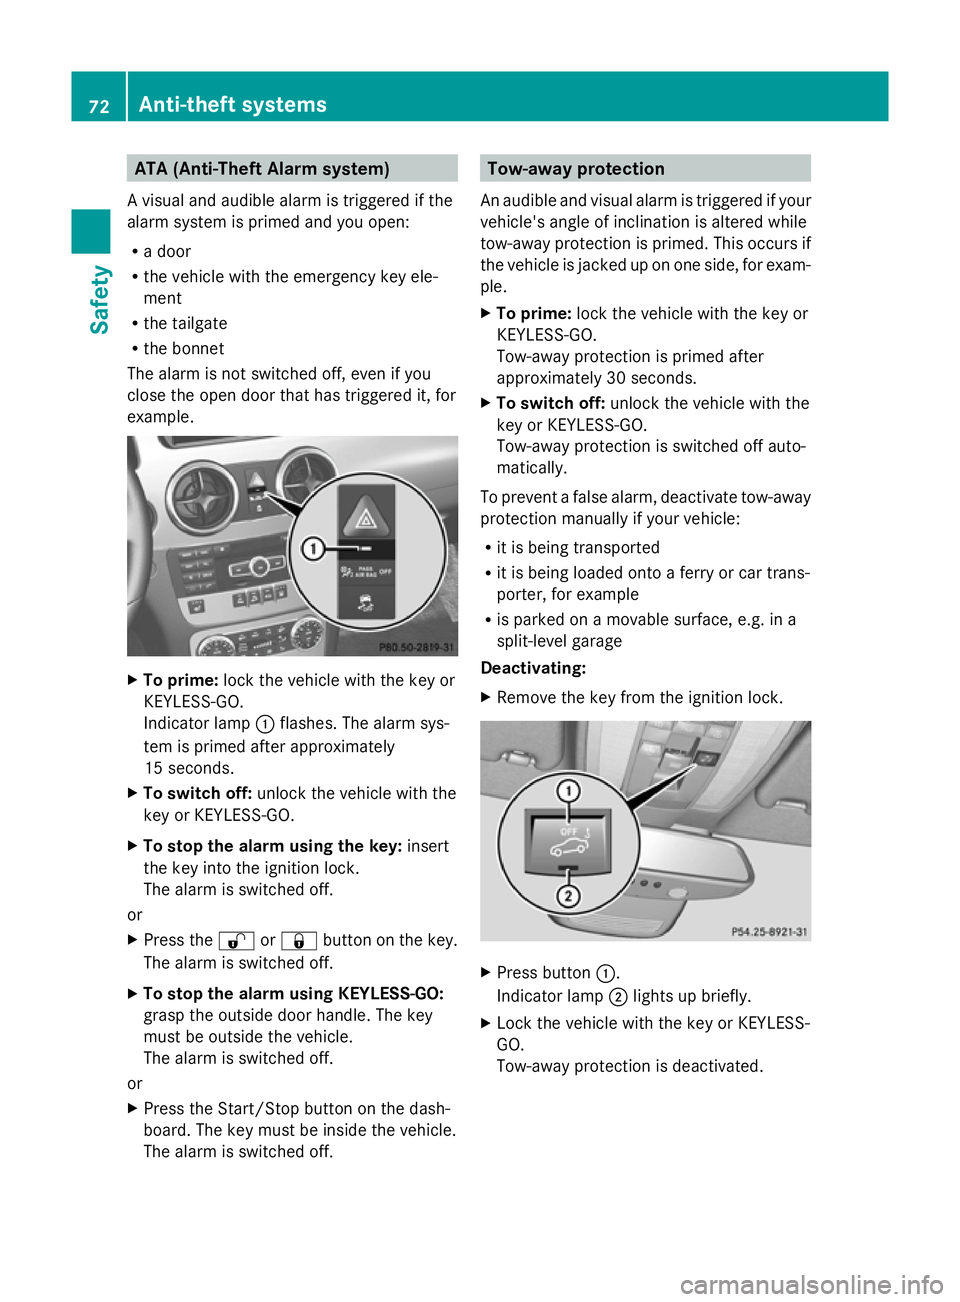
To prime: lock the vehicle with the key or
KEYLESS-GO.
Indicator lamp :flashes. The alarm sys-
tem is primed after approximately
15 seconds.
X To switch off: unlock the vehicle with the
key or KEYLESS-GO.
X To stop the alarm using the key: insert
the key into the ignition lock.
The alarm is switched off.
or
X Press the %or& button on the key.
The alarm is switched off.
X To stop the alarm using KEYLESS-GO:
grasp the outside door handle. The key
must be outside the vehicle.
The alarm is switched off.
or
X Press the Start/Stop button on the dash-
board. The key must be inside the vehicle.
The alarm is switched off. Tow-away protection
An audible and visual alarm is triggered if your
vehicle's angle of inclination is altered while
tow-away protection is primed. This occurs if
the vehicle is jacked up on one side, for exam-
ple.
X To prime: lock the vehicle with the key or
KEYLESS-GO.
Tow-away protection is primed after
approximately 30 seconds.
X To switch off: unlock the vehicle with the
key or KEYLESS-GO.
Tow-away protection is switched off auto-
matically.
To prevent a false alarm, deactivate tow-away
protection manually if your vehicle:
R it is being transported
R it is being loaded onto a ferry or car trans-
porter, for example
R is parked on a movable surface, e.g. in a
split-level garage
Deactivating:
X Remove the key from the ignition lock. X
Press button :.
Indicator lamp ;lights up briefly.
X Lock the vehicle with the key or KEYLESS-
GO.
Tow-away protection is deactivated. 72
Anti-theft systemsSafety
Page 76 of 381
Tow-away protection remains deactivated
until:
R
the vehicle is unlocked again
R a door is opened and closed again
R the vehicle is locked again Interior motion sensor
When the interior motion sensor is primed, a
visual and audible alarm is triggered if move-
ment is detected in the vehicle interior. This
occurs if someone reaches into the vehicle
interior, for example.
Priming:
X Make sure that:
R
the side windows are closed.
R the panorama sliding sunroof is closed.
R there are no objects, e.g. mascots, hang-
ing on the rear-view mirror or on the grab
handles on the roof trim.
This will prevent false alarms.
X Lock the vehicle with the key or KEYLESS-
GO.
The interior motion sensor is primed after
approximately 30 seconds.
Switching off:
X Unlock the vehicle with the key or KEY-
LESS-GO.
The interior motion sensor is switched off
automatically.
To prevent a false alarm, deactivate the inte-
rior motion sensor if you lock your vehicle
and:
R people or animals remain in the vehicle.
R the side windows remain open.
R the panorama sliding sunroof remains
open.
Deactivating:
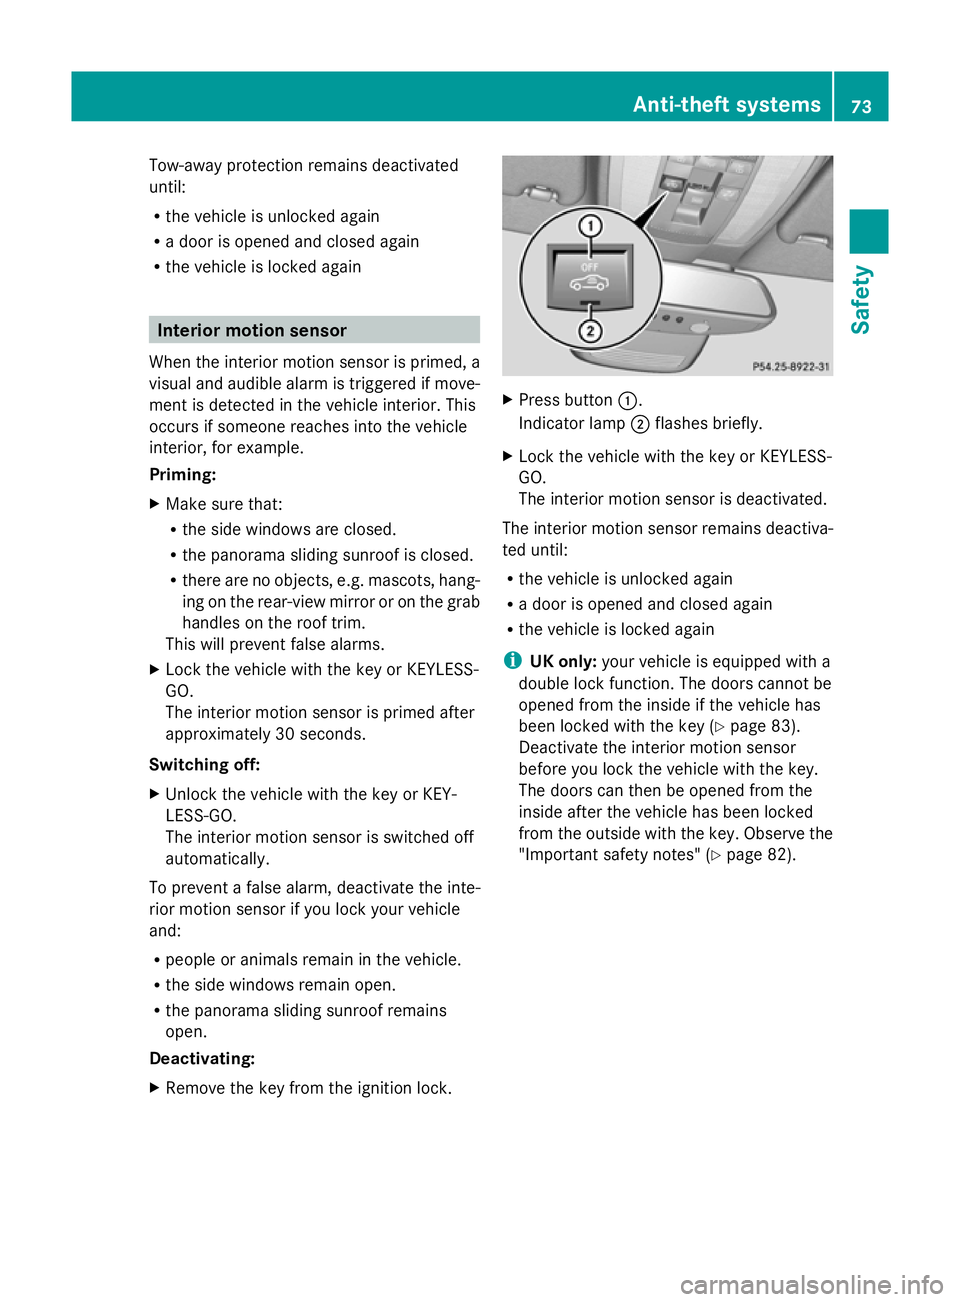
X Remove the key from the ignition lock. X
Press button :.
Indicator lamp ;flashes briefly.
X Lock the vehicle with the key or KEYLESS-
GO.
The interior motion sensor is deactivated.
The interior motion sensor remains deactiva-
ted until:
R the vehicle is unlocked again
R a door is opened and closed again
R the vehicle is locked again
i UK only: your vehicle is equipped with a
double lock function. The doors cannot be
opened from the inside if the vehicle has
been locked with the key (Y page 83).
Deactivate the interior motion sensor
before you lock the vehicle with the key.
The doors can then be opened from the
inside after the vehicle has been locked
from the outside with the key. Observe the
"Important safety notes" (Y page 82). Anti-theft systems
73Safety Z
Page 81 of 381
Changing the settings of the locking
system
You can change the settings of the locking
system. This means that only the driver's door
and the fuel filler flap are unlocked when the
vehicle is unlocked. This is useful if you fre-
quently travel on your own.
X To change the setting: press and hold
down the %and& buttons simulta-
neously for approximately six seconds until
the battery check lamp (Y page 79)
flashes twice.
i If the setting of the locking system is
changed within the signal range of the vehi-
cle, pressing the &or% button:
R locks or
R unlocks the vehicle
The key now functions as follows:
X To unlock the driver's door: press the
% button once.
X To unlock centrally: press the%but-
ton twice.
X To lock centrally: press the&button.
The KEYLESS-GO function is changed as fol-
lows:
X To unlock the driver's door: touch the
inner surface of the door handle on the
driver's door.
X To unlock centrally: touch the inner sur-
face of the door handle on the front-
passenger door or the rear door.
X To lock centrally: touch the outer sensor
surface on one of the door handles
(Y page 77).
X To restore the factory settings: press
and hold down the %and& buttons
simultaneously for approximately six sec-
onds until the battery check lamp flashes
twice. Emergency key element
General notes If the vehicle can no longer be locked or
unlocked with the key, use the emergency
key element.
If you use the emergency key element to
unlock and open the driver's door, the anti-
theft alarm system will be triggered
(Y
page 72).
There are several ways to turn off the alarm:
X To turn the alarm off with the key: press
the % or& button on the key.
or
X Insert the key into the ignition lock.
or
X To deactivate the alarm with KEYLESS-
GO: press the Start/Stop button in the igni-
tion lock. The key must be in the vehicle.
or
X Lock or unlock the vehicle using KEYLESS-
GO. The key must be outside the vehicle.
If you unlock the vehicle using the emergency
key element, the fuel filler flap will not be
unlocked automatically.
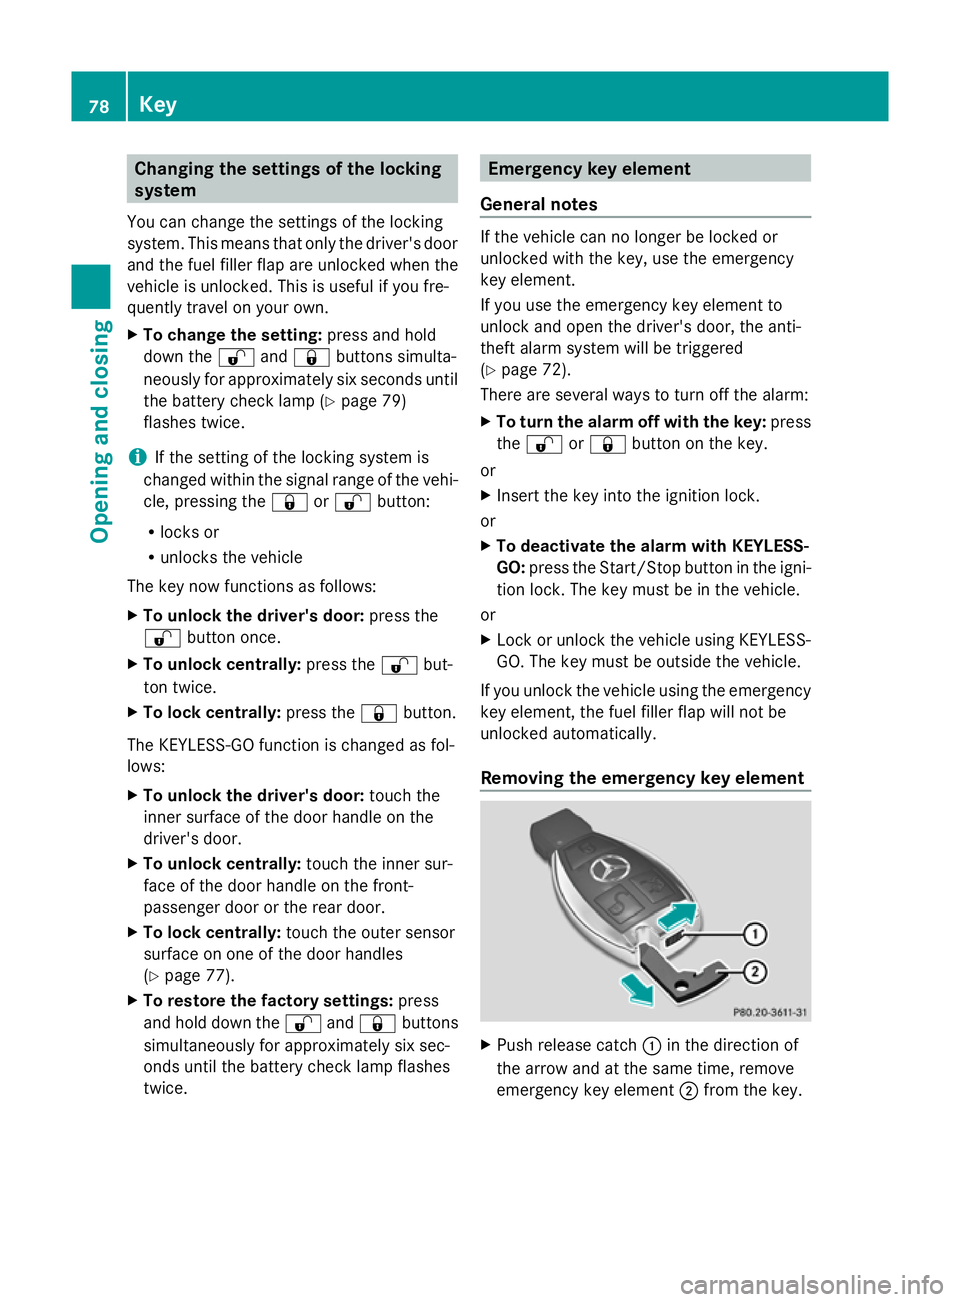
Removing the emergency key element X
Push release catch :in the direction of
the arrow and at the same time, remove
emergency key element ;from the key. 78
KeyOpening and closing
Page 87 of 381
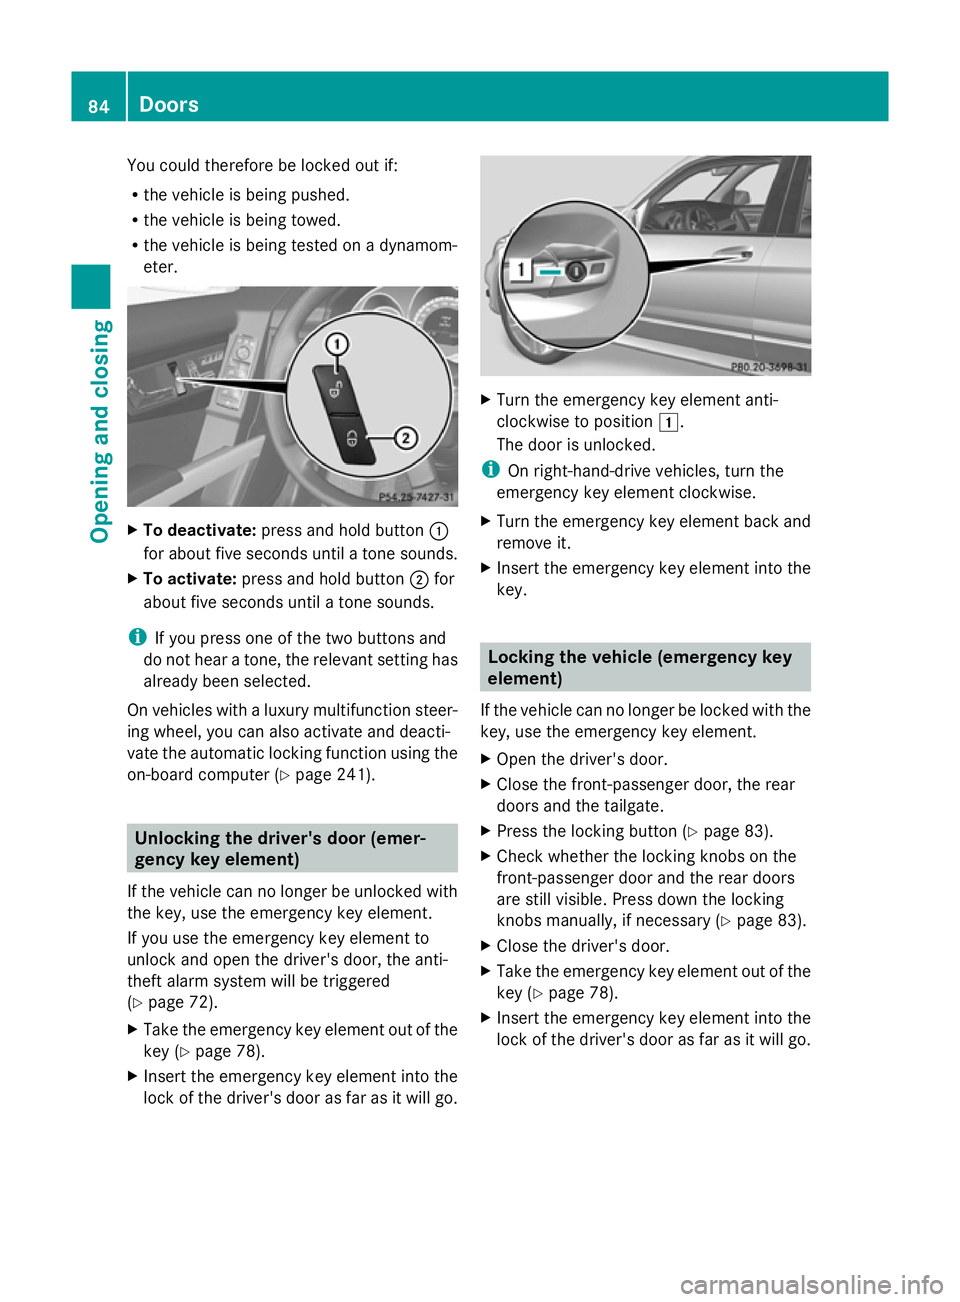
You could therefore be locked out if:
R the vehicle is being pushed.
R the vehicle is being towed.
R the vehicle is being tested on a dynamom-
eter. X
To deactivate: press and hold button :
for about five seconds until a tone sounds.
X To activate: press and hold button ;for
about five seconds until a tone sounds.
i If you press one of the two buttons and
do not hear a tone, the relevant setting has
already been selected.
On vehicles with a luxury multifunction steer-
ing wheel, you can also activate and deacti-
vate the automatic locking function using the
on-board computer (Y page 241).Unlocking the driver's door (emer-
gency key element)
If the vehicle can no longer be unlocked with
the key, use the emergency key element.
If you use the emergency key element to
unlock and open the driver's door, the anti-
theft alarm system will be triggered
(Y page 72).
X Take the emergency key element out of the
key (Y page 78).
X Insert the emergency key element into the
lock of the driver's door as far as it will go. X
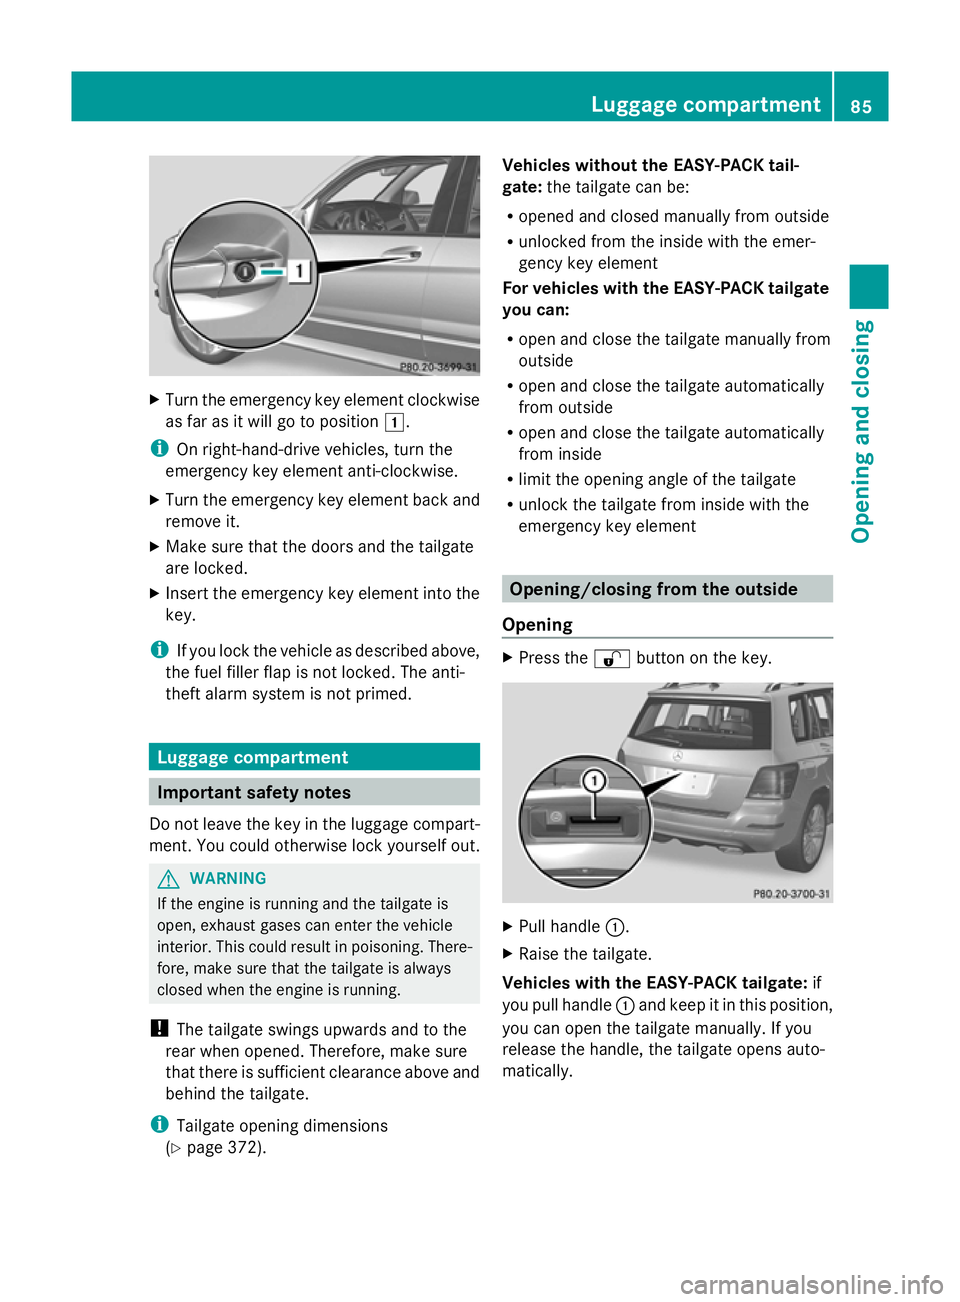
Turn the emergency key element anti-
clockwise to position 1.
The door is unlocked.
i On right-hand-drive vehicles, turn the
emergency key element clockwise.
X Turn the emergency key element back and
remove it.
X Insert the emergency key element into the
key. Locking the vehicle (emergency key
element)
If the vehicle can no longer be locked with the
key, use the emergency key element.
X Open the driver's door.
X Close the front-passenger door, the rear
doors and the tailgate.
X Press the locking button (Y page 83).
X Check whether the locking knobs on the
front-passenger door and the rear doors
are still visible. Press down the locking
knobs manually, if necessary ( Ypage 83).
X Close the driver's door.
X Take the emergency key element out of the
key (Y page 78).
X Insert the emergency key element into the
lock of the driver's door as far as it will go. 84
DoorsOpening and closing
Page 88 of 381
X
Turn the emergency key element clockwise
as far as it will go to position 1.
i On right-hand-drive vehicles, turn the
emergency key element anti-clockwise.
X Turn the emergency key element back and
remove it.
X Make sure that the doors and the tailgate
are locked.
X Insert the emergency key element into the
key.
i If you lock the vehicle as described above,
the fuel filler flap is not locked. The anti-
theft alarm system is not primed. Luggage compartment
Important safety notes
Do not leave the key in the luggage compart-
ment. You could otherwise lock yourself out. G
WARNING
If the engine is running and the tailgate is
open, exhaust gases can enter the vehicle
interior. This could result in poisoning. There-
fore, make sure that the tailgate is always
closed when the engine is running.
! The tailgate swings upwards and to the
rear when opened. Therefore, make sure
that there is sufficient clearance above and
behind the tailgate.
i Tailgate opening dimensions
(Y page 372). Vehicles without the EASY-PACK tail-
gate:
the tailgate can be:
R opened and closed manually from outside
R unlocked from the inside with the emer-
gency key element
For vehicles with the EASY-PACK tailgate
you can:
R open and close the tailgate manually from
outside
R open and close the tailgate automatically
from outside
R open and close the tailgate automatically
from inside
R limit the opening angle of the tailgate
R unlock the tailgate from inside with the
emergency key element Opening/closing from the outside
Opening X
Press the %button on the key. X
Pull handle :.
X Raise the tailgate.
Vehicles with the EASY-PACK tailgate: if
you pull handle :and keep it in this position,
you can open the tailgate manually. If you
release the handle, the tailgate opens auto-
matically. Luggage compartment
85Opening and closing Z