MERCEDES-BENZ GLS SUV 2016 Owners Manual
Manufacturer: MERCEDES-BENZ, Model Year: 2016, Model line: GLS SUV, Model: MERCEDES-BENZ GLS SUV 2016Pages: 397, PDF Size: 14.21 MB
Page 131 of 397

X
Simultaneously press bulb holder ;and pull
lever =downwards.
X Press on housing cover :and turn it to the
right. Turn signals
X
Switch off the lights.
X Open the bonnet.
X Turn housing cover :anti-clockwise and
remove it.
X Turn bulb holder ;anti-clockwise and pull
out.
X Pull the bulb out of bulb holder ;.
X Insert new bulb into bulb holder ;.
X Insert bulb holder ;and turn it clockwise.
X Press on housing cover :and turn it to the
right. Windscreen wipers
Switching the windscreen wipers on/
off
! Do not operate the windscreen wipers when
the windscreen is dry, as this could damage
the wiper blades. Moreover, dust that has col-
lected on the windscreen can scratch the
glass if wiping takes place when the wind-
screen is dry.
If it is necessary to switch on the windscreen wipers in dry weather conditions, always
operate them using washer fluid.
! If the windscreen wipers leave smears on
the windscreen after the vehicle has been
washed in an automatic car wash, this may be
due to wax or other residue. Clean the wind- screen with washer fluid after an automatic
car wash.
! Intermittent wiping with rain sensor: due to
optical influences and the windscreen becom-
ing dirty in dry weather conditions, the wind-
screen wipers may be activated inadvertently. This could damage the windscreen wiper
blades or scratch the windscreen.
For this reason, you should always switch off
the windscreen wipers in dry weather. Combination switch
1 $ Windscreen wipers off
2 Ä Intermittent wipe, low (rain sensor set
to low sensitivity)
3 Å Intermittent wipe, high (rain sensor
set to high sensitivity)
4 ° Continuous wipe, slow
5 ¯ Continuous wipe, fast
B í Single wipe
C î Wipes with washer fluid
X Turn the key to position 1or 2in the ignition
lock (Y page 148).
X Turn the combination switch to the corre-
sponding position.
In the ÄorÅ position, the appropriate
wiping frequency is set automatically according to the intensity of the rain. In the Åposition,
the rain sensor is more sensitive than in the
Ä position, causing the windscreen wiper to
wipe more frequently.
Vehicles with MAGIC VISION CONTROL: the
washer fluid is fed through the wiper blades and when wiping with washer fluid îthe washer
fluid is emitted directly from the blades.
If the wiper blades are worn, the windscreen will
no longer be wiped properly. This could mean
you are unable to observe the traffic conditions. 128
Windscreen wipersLights and windscreen wipers
Page 132 of 397

Switching the rear window wiper on/
off Combination switch
:
è Rear window wiper switch
2 b Wipes with washer fluid
3 ISwitches on intermittent wiping
4 0Switches off intermittent wiping
5 b Wipes with washer fluid
X Turn the key to position 1or 2in the ignition
lock (Y page 148).
X Turn switch :on the combination switch to
the corresponding position.
When the rear window wiper is switched on,
the icon appears in the instrument cluster. Replacing the wiper blades
Important safety notes G
WARNING
If the windscreen wipers begin to move while
you are changing the wiper blades, you can be trapped by the wiper arm. There is a risk of
injury.
Always switch off the windscreen wipers and
ignition before changing the wiper blades.
! To avoid damaging the windscreen wiper
blades, make sure that you touch only the
wiper arm of the windscreen wiper.
! Never open the bonnet/tailgate if a wiper
arm is folded away from the windscreen/rear
window.
Never fold a windscreen wiper arm without a
wiper blade back onto the windscreen/rear
window. Hold the windscreen wiper arm firmly when
you change the wiper blade. If you release the
wiper arm without a wiper blade and it falls
onto the windscreen/rear window, the wind-
screen/rear window may be damaged by the
force of the impact.
Mercedes-Benz recommends that you have
the wiper blades changed at a qualified spe-
cialist workshop.
Replacing the windscreen wiper blades Removing the wiper blades
X Remove the key from the ignition lock.
X Fold the wiper arm away from the windscreen. X
Firmly press release knob :and pull wiper
blade ;upwards from the wiper arm in the
direction of the arrow.
Fitting the wiper blades X
Position new wiper blade :in the retainer on
the wiper arm and slide it into place in the
direction of the arrow.
The wiper blade audibly engages.
X Make sure that the wiper blade sits correctly.
X Fold the wiper arm back onto the windscreen. Windscreen wipers
129Lights and windscreen wipers Z
Page 133 of 397
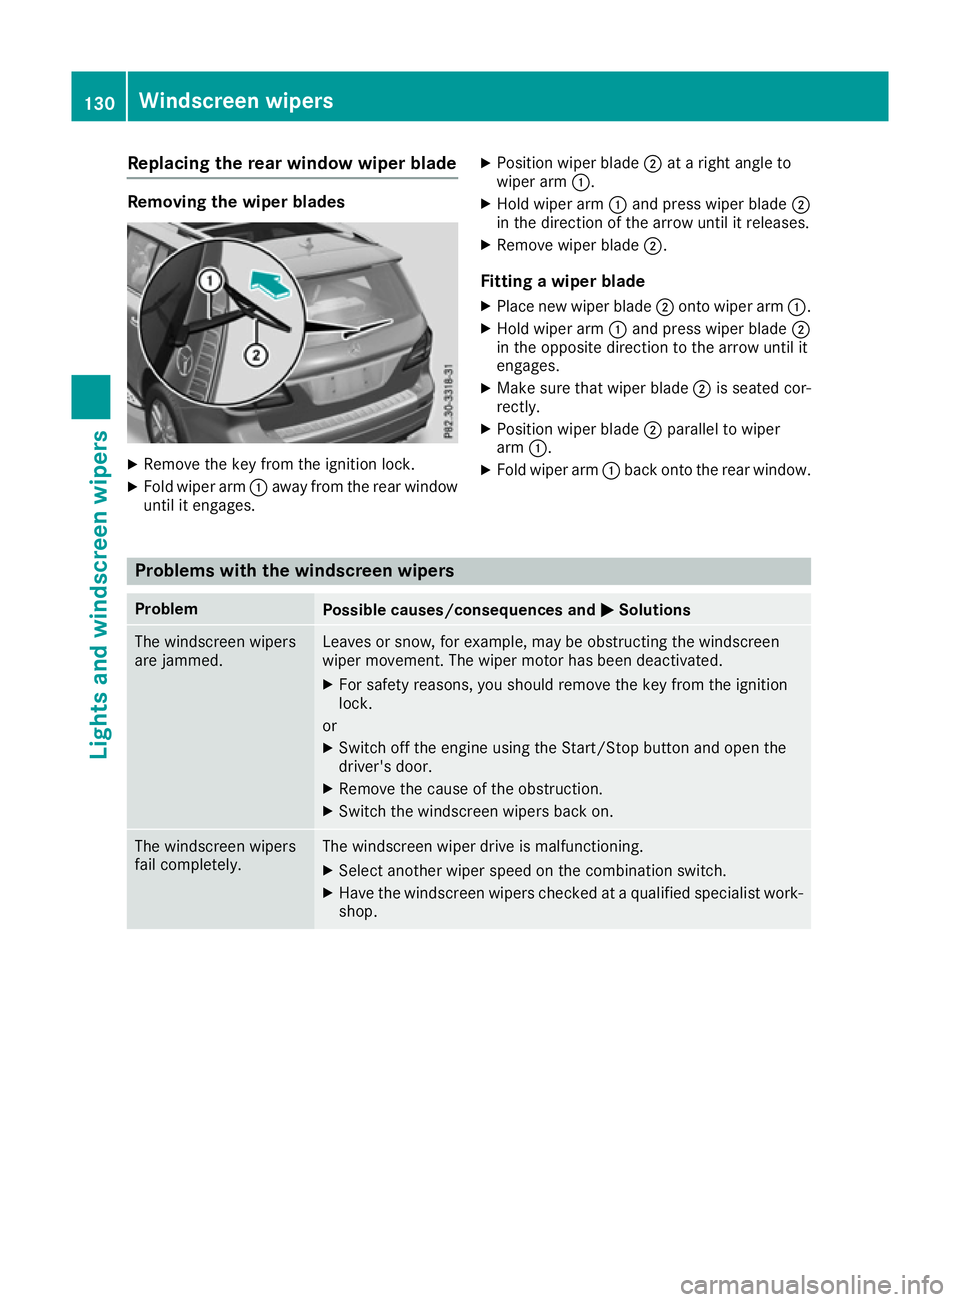
Replacing the rear window wiper blade
Removing the wiper blades
X
Remove the key from the ignition lock.
X Fold wiper arm :away from the rear window
until it engages. X
Position wiper blade ;at a right angle to
wiper arm :.
X Hold wiper arm :and press wiper blade ;
in the direction of the arrow until it releases.
X Remove wiper blade ;.
Fitting a wiper blade
X Place new wiper blade ;onto wiper arm :.
X Hold wiper arm :and press wiper blade ;
in the opposite direction to the arrow until it
engages.
X Make sure that wiper blade ;is seated cor-
rectly.
X Position wiper blade ;parallel to wiper
arm :.
X Fold wiper arm :back onto the rear window. Problems with the windscreen wipers
Problem
Possible causes/consequences and
M
MSolutions The windscreen wipers
are jammed. Leaves or snow, for example, may be obstructing the windscreen
wiper movement. The wiper motor has been deactivated.
X For safety reasons, you should remove the key from the ignition
lock.
or X Switch off the engine using the Start/Stop button and open the
driver's door.
X Remove the cause of the obstruction.
X Switch the windscreen wipers back on. The windscreen wipers
fail completely. The windscreen wiper drive is malfunctioning.
X Select another wiper speed on the combination switch.
X Have the windscreen wipers checked at a qualified specialist work-
shop. 130
Windscreen wipersLights and windscreen wipers
Page 134 of 397
Overview of climate control systems
General notes
Observe the settings recommended on the fol-
lowing pages. Otherwise, the windows could
mist up.
To prevent the windows from misting up:
R switch off climate control only briefly
R activate air-recirculation mode only briefly
R switch on "Cooling with air dehumidification"
R activate the "Windscreen demisting" function
briefly, if required
Climate control regulates the temperature and
the humidity in the vehicle interior and filters
undesirable substances out of the air.
the "Residual heat" function can be switched on
or off only with the ignition switched off
(Y page 140).
i Ventilate the vehicle for a brief period during
warm weather, e.g. using the convenience
opening feature (Y page 95).
This will speed up the cooling process and the desired interior temperature will be reached
more quickly. i
The integrated filter filters out most parti-
cles of dust and soot and completely filters
out pollen. It also reduces gaseous pollutants
and odours. A clogged filter reduces the
amount of air supplied to the vehicle interior.
For this reason, you should always observe
the interval for replacing the filter, which is
specified in the Service Booklet. As this
depends on environmental conditions, e.g.
heavy air pollution, the interval may be
shorter than stated in the Service Booklet.
i Vehicles with AIR-BALANCE package:
in
addition to ionisation, the vehicle has an air
filter with anti-allergenic properties that con-
tribute to improved air filtration.
i Under certain environmental conditions, the
residual heat function may be activated auto-
matically an hour after the key has been
removed in order to dry the automatic climate control. The vehicle is then ventilated for 30
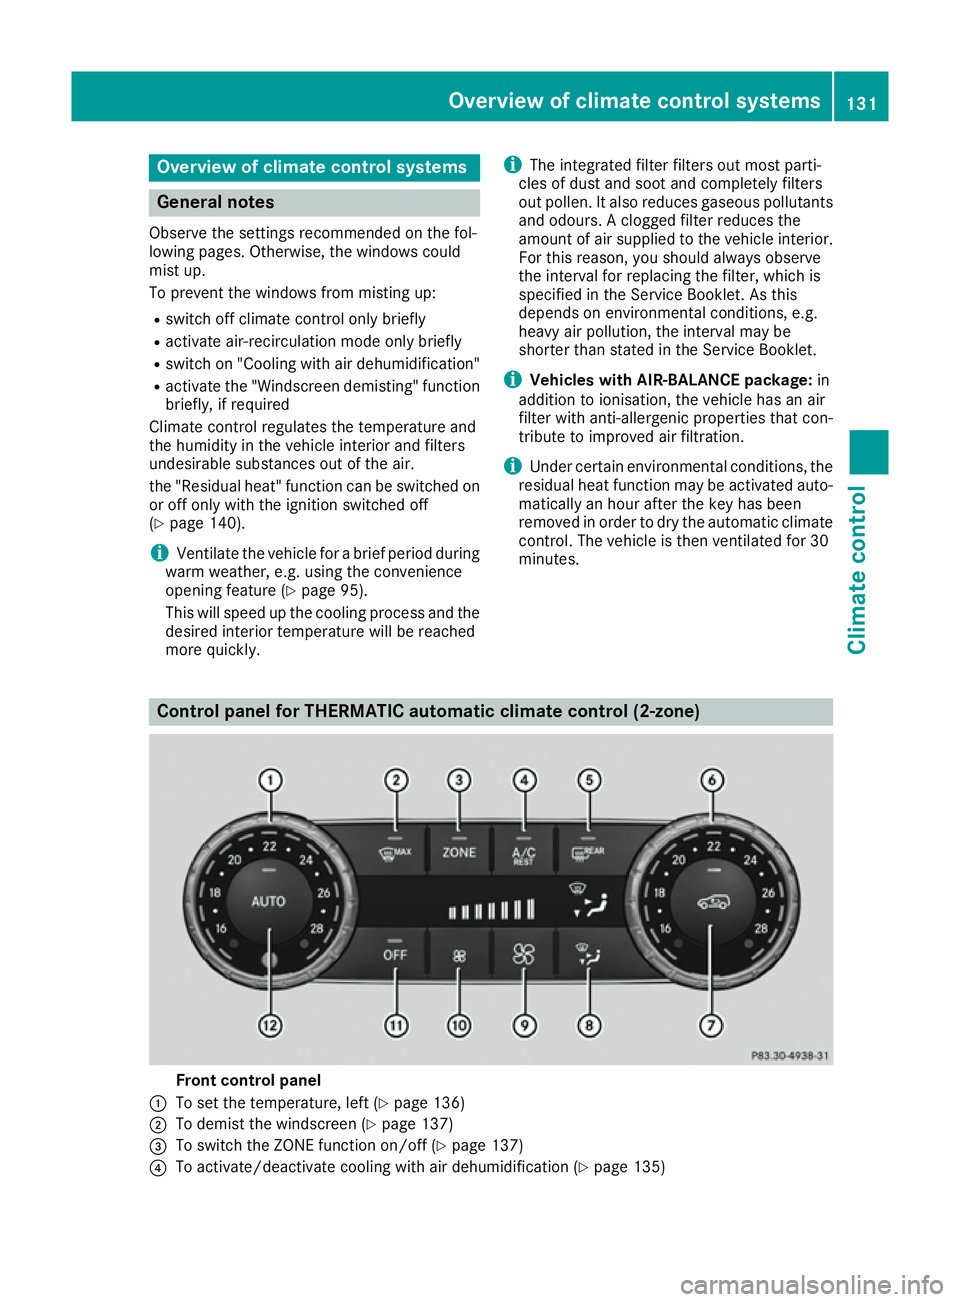
minutes. Control panel for THERMATIC automatic climate control (2-zone)
Front control panel
: To set the temperature, left (Y page 136)
; To demist the windscreen (Y page 137)
= To switch the ZONE function on/off (Y page 137)
? To activate/deactivate cooling with air dehumidification (Y page 135) Overview of climate control systems
131Climate control
Page 135 of 397
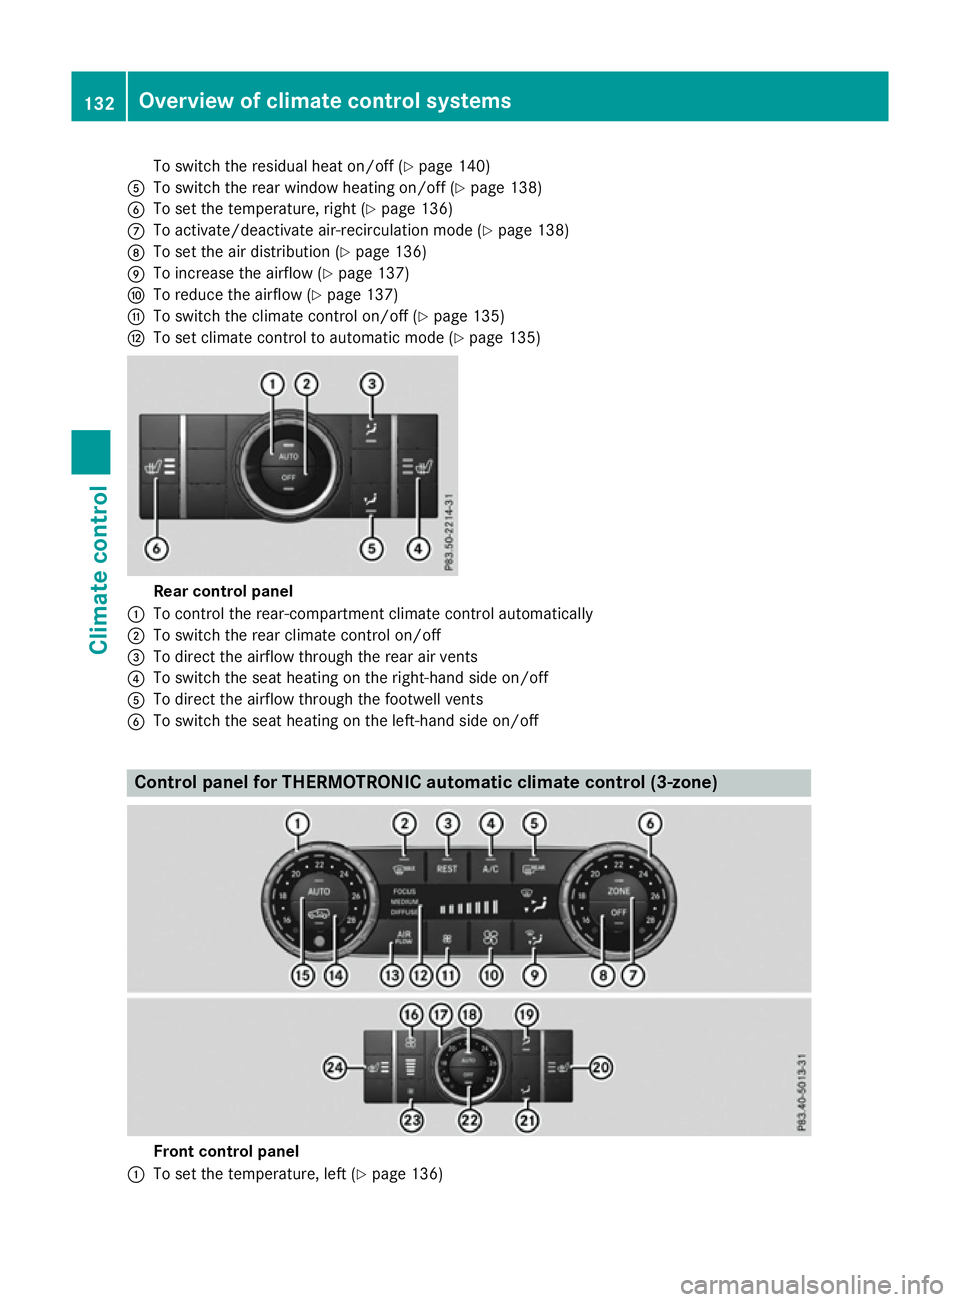
To switch the residual heat on/off (Y
page 140)
A To switch the rear window heating on/off (Y page 138)
B To set the temperature, right (Y page 136)
C To activate/deactivate air-recirculation mode (Y page 138)
D To set the air distribution (Y page 136)
E To increase the airflow (Y page 137)
F To reduce the airflow (Y page 137)
G To switch the climate control on/off (Y page 135)
H To set climate control to automatic mode (Y page 135)Rear control panel
: To control the rear-compartment climate control automatically
; To switch the rear climate control on/off
= To direct the airflow through the rear air vents
? To switch the seat heating on the right-hand side on/off
A To direct the airflow through the footwell vents
B To switch the seat heating on the left-hand side on/off Control panel for THERMOTRONIC automatic climate control (3-zone)
Front control panel
: To set the temperature, left (Y page 136)132
Overview of climate control systemsClimate control
Page 136 of 397
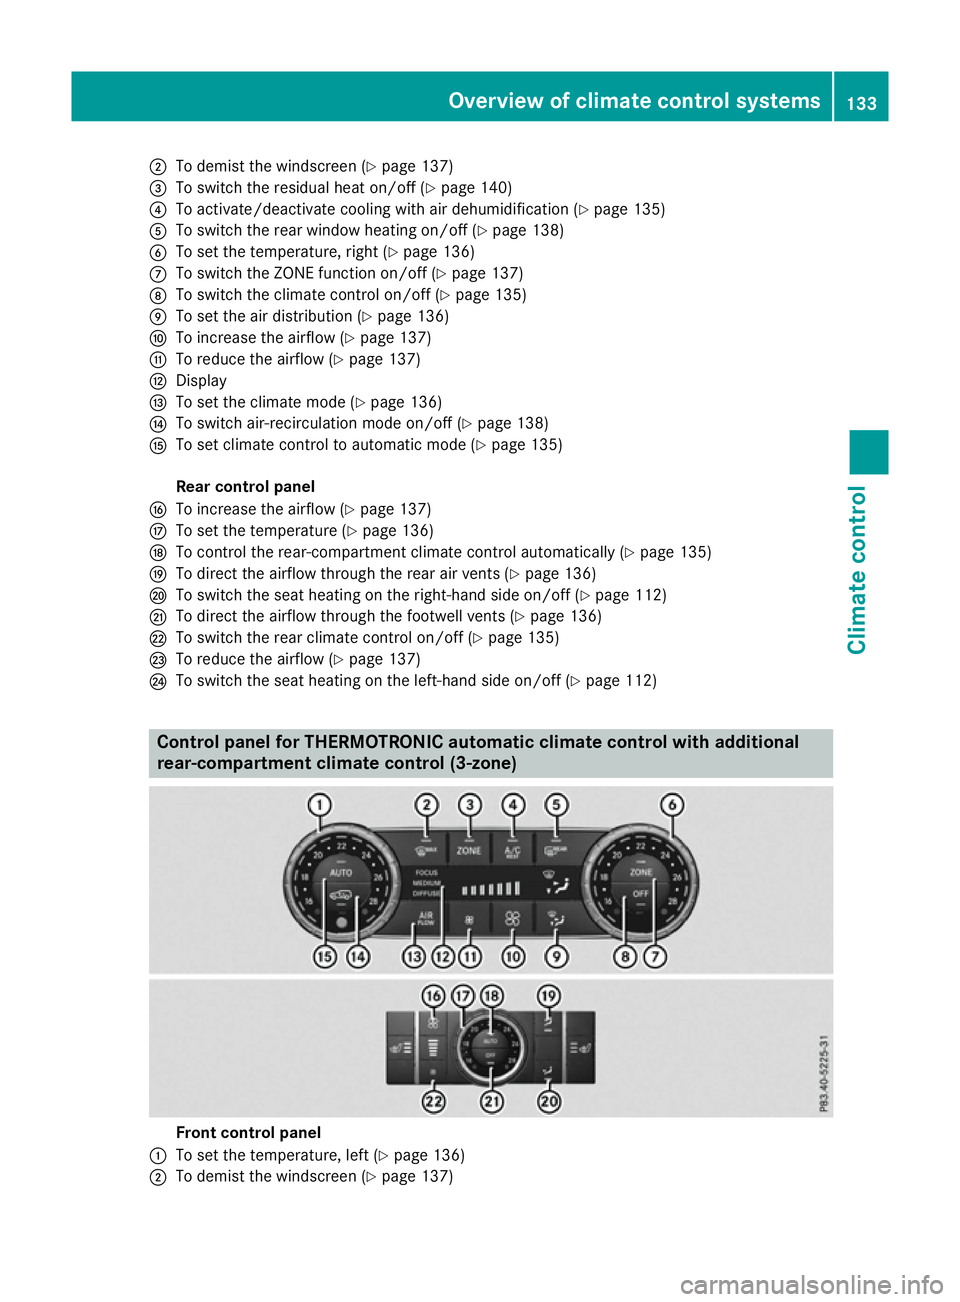
;
To demist the windscreen (Y page 137)
= To switch the residual heat on/off (Y page 140)
? To activate/deactivate cooling with air dehumidification (Y page 135)
A To switch the rear window heating on/off (Y page 138)
B To set the temperature, right (Y page 136)
C To switch the ZONE function on/off (Y page 137)
D To switch the climate control on/off (Y page 135)
E To set the air distribution (Y page 136)
F To increase the airflow (Y page 137)
G To reduce the airflow (Y page 137)
H Display
I To set the climate mode (Y page 136)
J To switch air-recirculation mode on/off (Y page 138)
K To set climate control to automatic mode (Y page 135)
Rear control panel
L To increase the airflow (Y page 137)
M To set the temperature (Y page 136)
N To control the rear-compartment climate control automatically (Y page 135)
O To direct the airflow through the rear air vents (Y page 136)
P To switch the seat heating on the right-hand side on/off (Y page 112)
Q To direct the airflow through the footwell vents (Y page 136)
R To switch the rear climate control on/off (Y page 135)
S To reduce the airflow (Y page 137)
T To switch the seat heating on the left-hand side on/off (Y page 112)Control panel for THERMOTRONIC automatic climate control with additional
rear-compartment climate control (3-zone) Front control panel
: To set the temperature, left (Y page 136)
; To demist the windscreen (Y page 137) Overview of climate control systems
133Climate control
Page 137 of 397
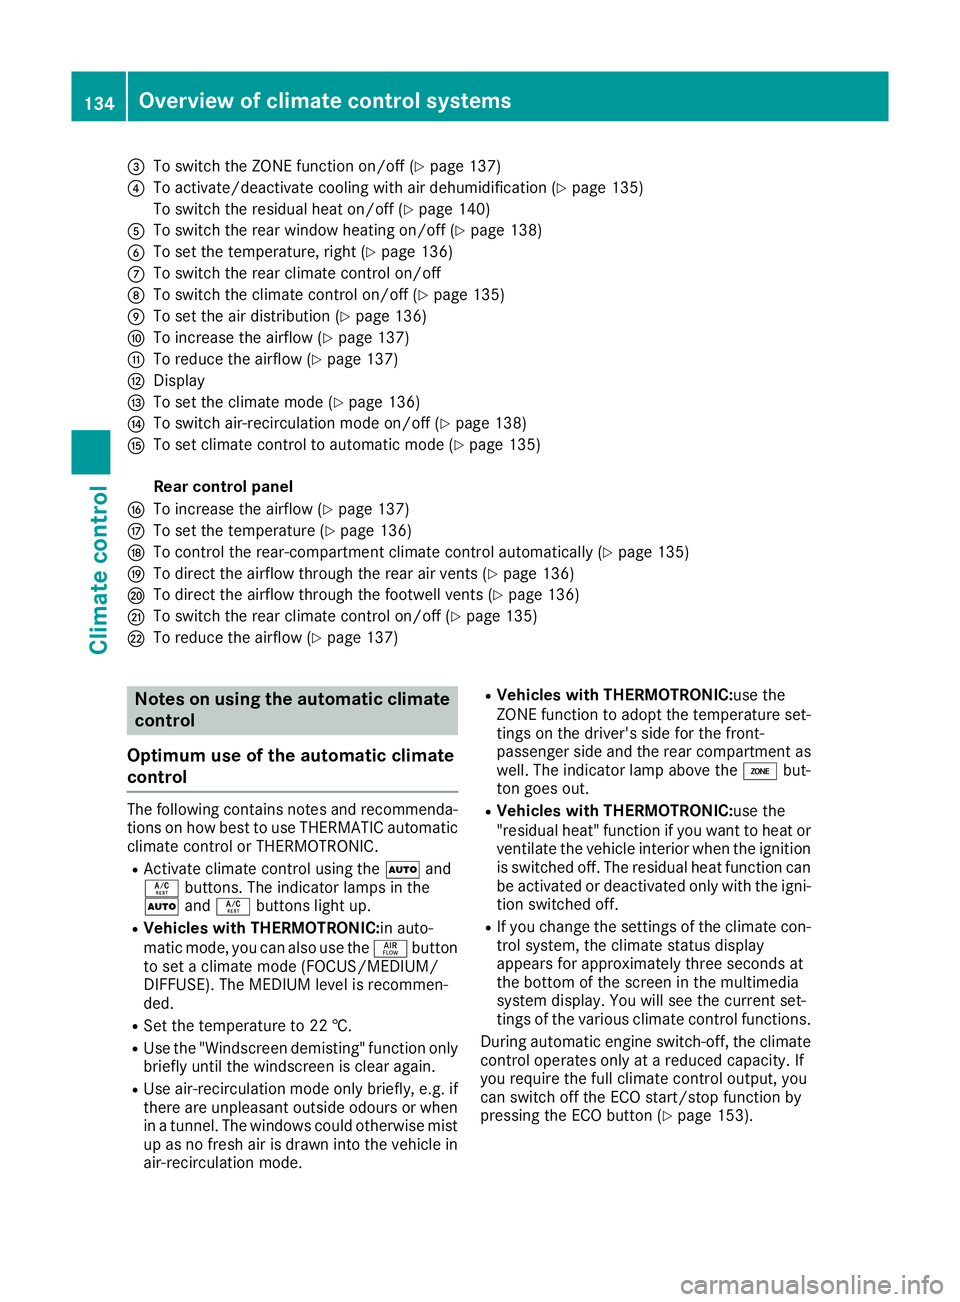
=
To switch the ZONE function on/off (Y page 137)
? To activate/deactivate cooling with air dehumidification (Y page 135)
To switch the residual heat on/off (Y page 140)
A To switch the rear window heating on/off (Y page 138)
B To set the temperature, right (Y page 136)
C To switch the rear climate control on/off
D To switch the climate control on/off (Y page 135)
E To set the air distribution (Y page 136)
F To increase the airflow (Y page 137)
G To reduce the airflow (Y page 137)
H Display
I To set the climate mode (Y page 136)
J To switch air-recirculation mode on/off (Y page 138)
K To set climate control to automatic mode (Y page 135)
Rear control panel
L To increase the airflow (Y page 137)
M To set the temperature (Y page 136)
N To control the rear-compartment climate control automatically (Y page 135)
O To direct the airflow through the rear air vents (Y page 136)
P To direct the airflow through the footwell vents (Y page 136)
Q To switch the rear climate control on/off (Y page 135)
R To reduce the airflow (Y page 137)Notes on using the automatic climate
control
Optimum use of the automatic climate
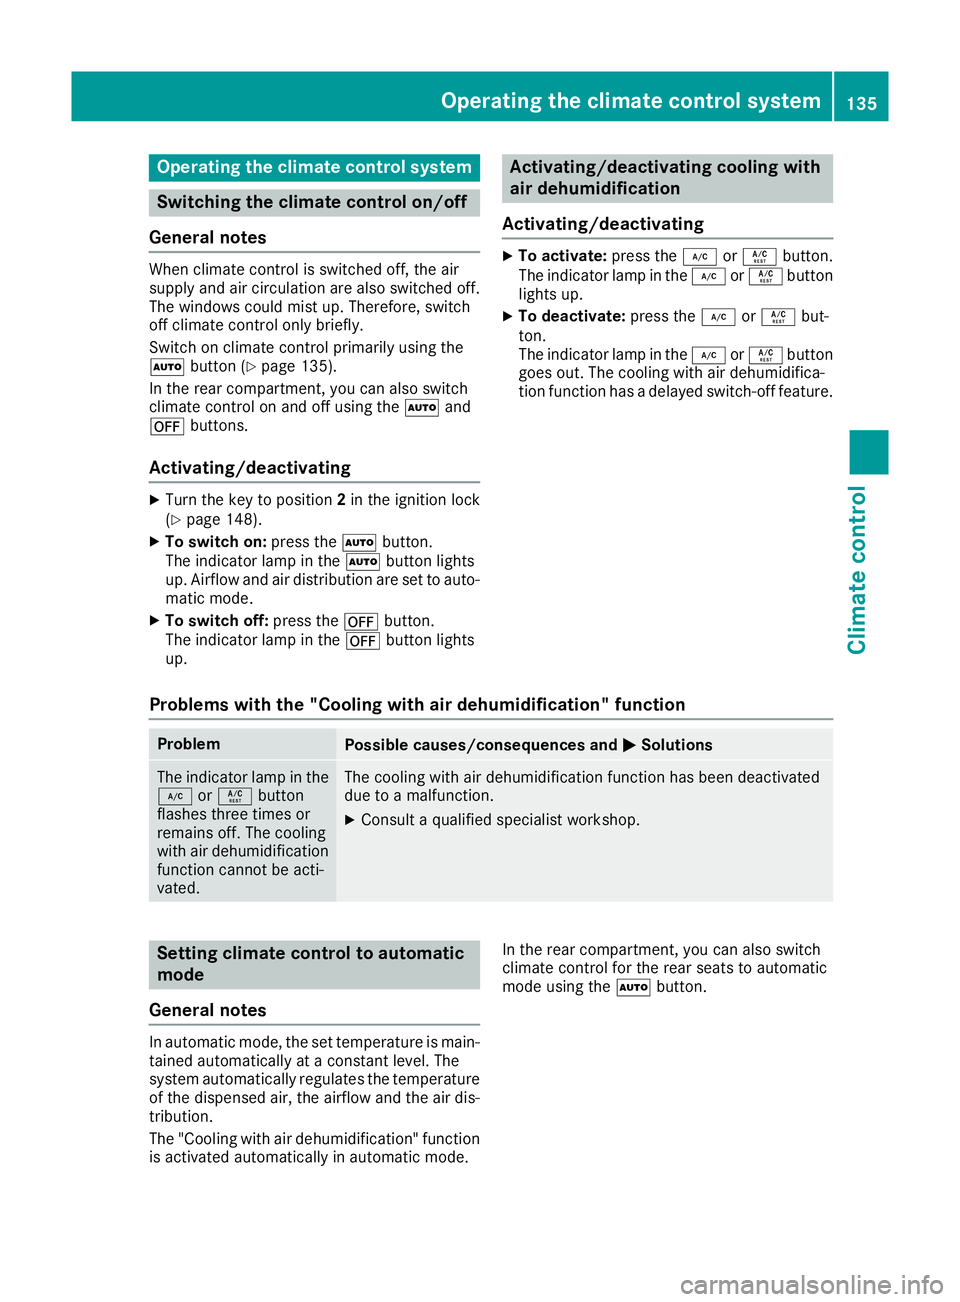
control The following contains notes and recommenda-
tions on how best to use THERMATIC automatic climate control or THERMOTRONIC.
R Activate climate control using the Ãand
Á buttons. The indicator lamps in the
à andÁ buttons light up.
R Vehicles with THERMOTRONIC:in auto-
matic mode, you can also use the ñbutton
to set a climate mode (FOCUS/MEDIUM/
DIFFUSE). The MEDIUM level is recommen-
ded.
R Set the temperature to 22 †.
R Use the "Windscreen demisting" function only
briefly until the windscreen is clear again.
R Use air-recirculation mode only briefly, e.g. if
there are unpleasant outside odours or when
in a tunnel. The windows could otherwise mist up as no fresh air is drawn into the vehicle in
air-recirculation mode. R
Vehicles with THERMOTRONIC:use the
ZONE function to adopt the temperature set-
tings on the driver's side for the front-
passenger side and the rear compartment as well. The indicator lamp above the ábut-
ton goes out.
R Vehicles with THERMOTRONIC:use the
"residual heat" function if you want to heat or
ventilate the vehicle interior when the ignitionis switched off. The residual heat function can
be activated or deactivated only with the igni- tion switched off.
R If you change the settings of the climate con-
trol system, the climate status display
appears for approximately three seconds at
the bottom of the screen in the multimedia
system display. You will see the current set-
tings of the various climate control functions.
During automatic engine switch-off, the climate
control operates only at a reduced capacity. If
you require the full climate control output, you
can switch off the ECO start/stop function by
pressing the ECO button (Y page 153).134
Overview of climate control systemsClimate control
Page 138 of 397
Operating the climate control system
Switching the climate control on/off
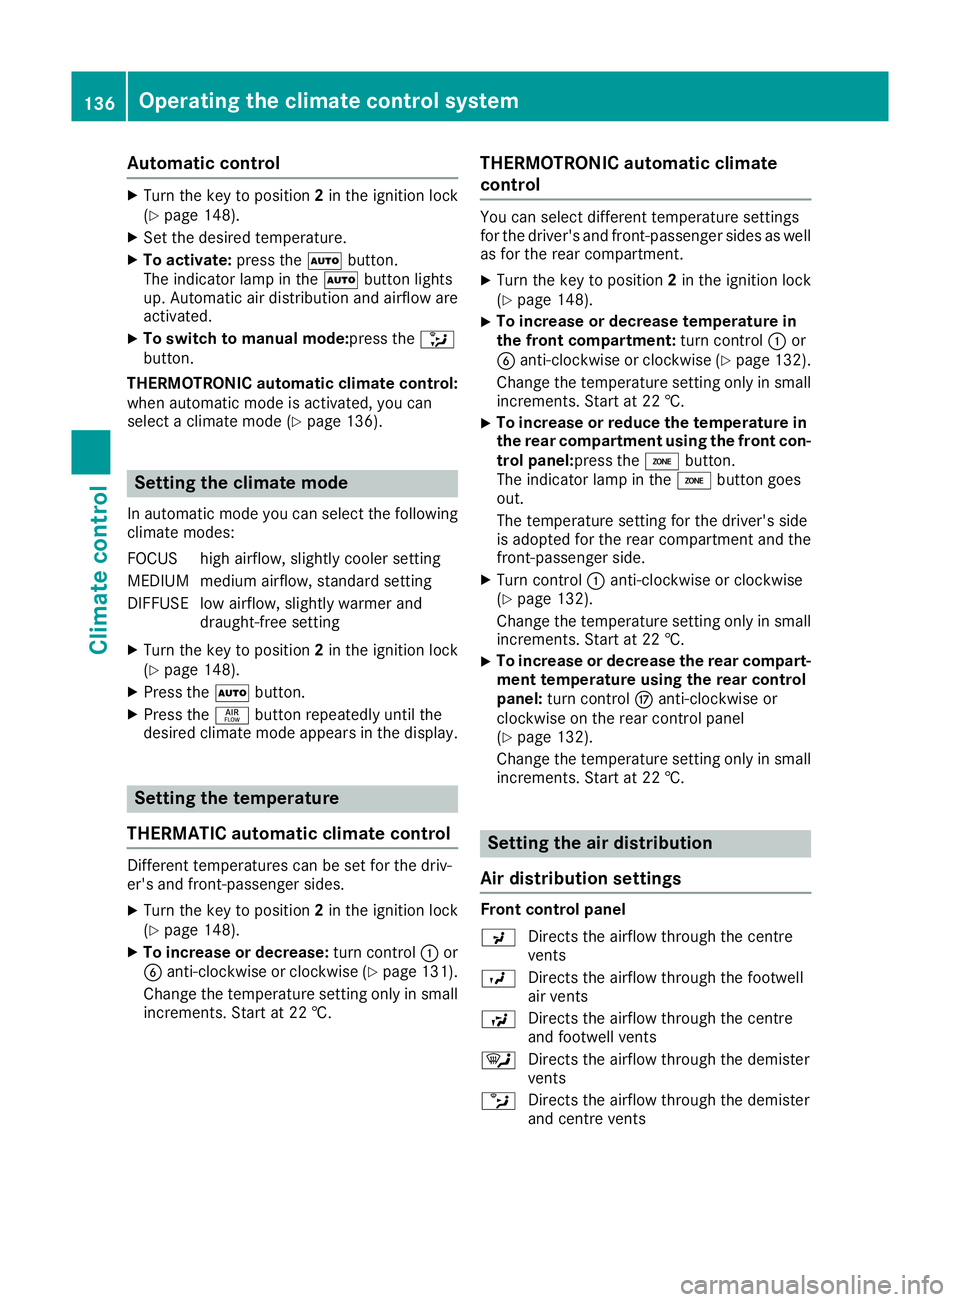
General notes When climate control is switched off, the air
supply and air circulation are also switched off.
The windows could mist up. Therefore, switch
off climate control only briefly.
Switch on climate control primarily using the
à button (Y page 135).
In the rear compartment, you can also switch
climate control on and off using the Ãand
^ buttons.
Activating/deactivating X
Turn the key to position 2in the ignition lock
(Y page 148).
X To switch on: press theÃbutton.
The indicator lamp in the Ãbutton lights
up. Airflow and air distribution are set to auto- matic mode.
X To switch off: press the^button.
The indicator lamp in the ^button lights
up. Activating/deactivating cooling with
air dehumidification
Activating/deactivating X
To activate: press the¿orÁ button.
The indicator lamp in the ¿orÁ button
lights up.
X To deactivate: press the¿orÁ but-
ton.
The indicator lamp in the ¿orÁ button
goes out. The cooling with air dehumidifica-
tion function has a delayed switch-off feature.
Problems with the "Cooling with air dehumidification" function Problem
Possible causes/consequences and
M MSolutions The indicator lamp in the
¿ orÁ button
flashes three times or
remains off. The cooling
with air dehumidification
function cannot be acti-
vated. The cooling with air dehumidification function has been deactivated
due to a malfunction.
X Consult a qualified specialist workshop. Setting climate control to automatic
mode
General notes In automatic mode, the set temperature is main-
tained automatically at a constant level. The
system automatically regulates the temperature of the dispensed air, the airflow and the air dis- tribution.
The "Cooling with air dehumidification" function
is activated automatically in automatic mode. In the rear compartment, you can also switch
climate control for the rear seats to automatic
mode using the
Ãbutton. Operating the climate control system
135Climate control
Page 139 of 397
Automatic control
X
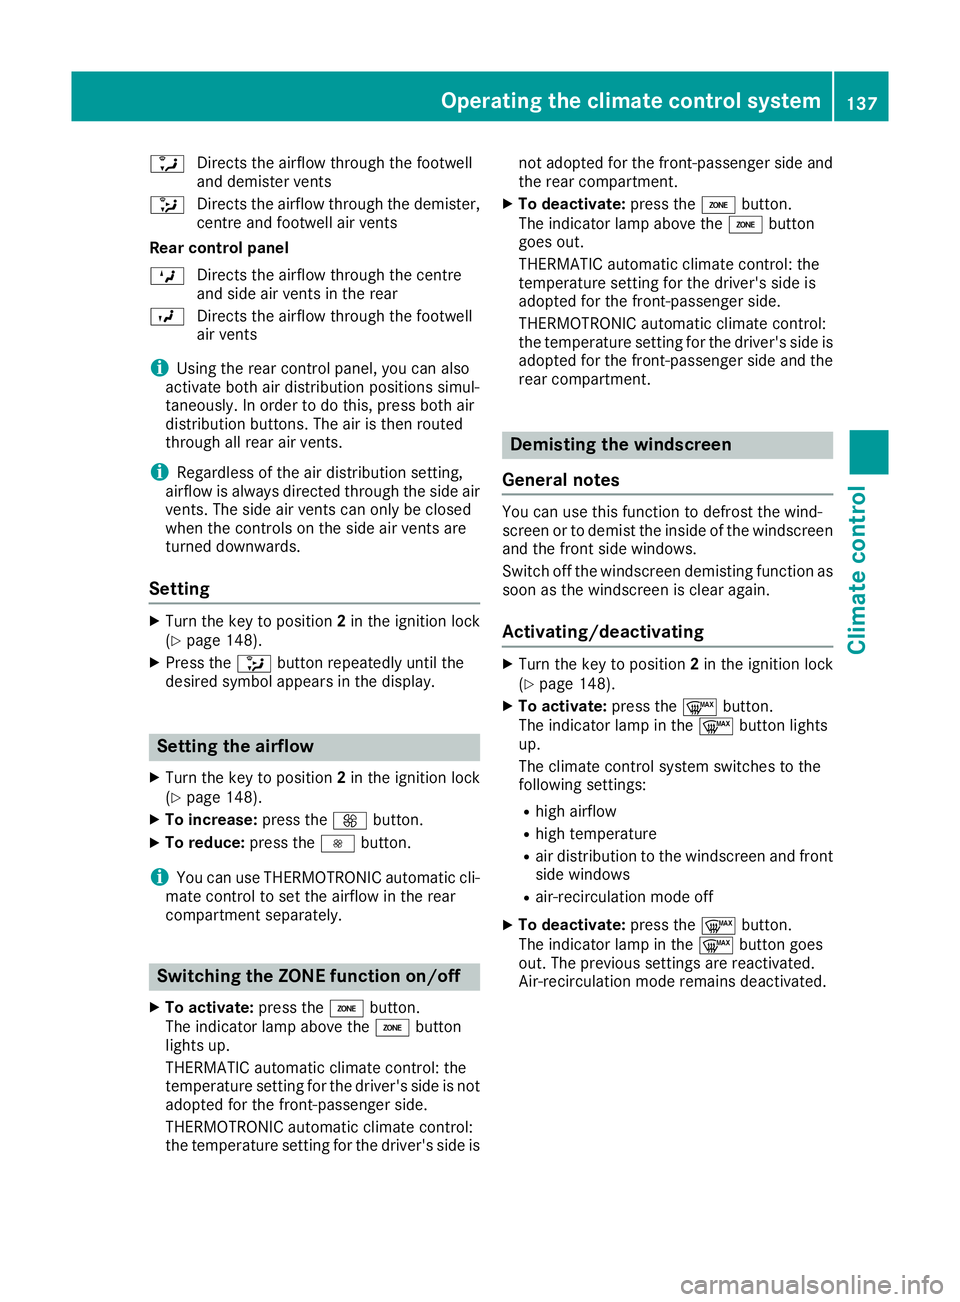
Turn the key to position 2in the ignition lock
(Y page 148).
X Set the desired temperature.
X To activate: press theÃbutton.
The indicator lamp in the Ãbutton lights
up. Automatic air distribution and airflow are
activated.
X To switch to manual mode:press the _
button.
THERMOTRONIC automatic climate control:
when automatic mode is activated, you can
select a climate mode (Y page 136).Setting the climate mode
In automatic mode you can select the following
climate modes:
FOCUS high airflow, slightly cooler setting
MEDIUM medium airflow, standard setting
DIFFUS Elow airflow, slightly warmer and
draught-free setting
X Turn the key to position 2in the ignition lock
(Y page 148).
X Press the Ãbutton.
X Press the ñbutton repeatedly until the
desired climate mode appears in the display. Setting the temperature
THERMATIC automatic climate control Different temperatures can be set for the driv-
er's and front-passenger sides.
X Turn the key to position 2in the ignition lock
(Y page 148).
X To increase or decrease: turn control:or
B anti-clockwise or clockwise (Y page 131).
Change the temperature setting only in small increments. Start at 22 †. THERMOTRONIC automatic climate
control You can select different temperature settings
for the driver's and front-passenger sides as well
as for the rear compartment.
X Turn the key to position 2in the ignition lock
(Y page 148).
X To increase or decrease temperature in
the front compartment: turn control:or
B anti-clockwise or clockwise (Y page 132).
Change the temperature setting only in small
increments. Start at 22 †.
X To increase or reduce the temperature in
the rear compartment using the front con-
trol panel:press the ábutton.
The indicator lamp in the ábutton goes
out.
The temperature setting for the driver's side
is adopted for the rear compartment and the
front-passenger side.
X Turn control :anti-clockwise or clockwise
(Y page 132).
Change the temperature setting only in small increments. Start at 22 †.
X To increase or decrease the rear compart-
ment temperature using the rear control
panel: turn control Manti-clockwise or
clockwise on the rear control panel
(Y page 132).
Change the temperature setting only in small
increments. Start at 22 †. Setting the air distribution
Air distribution settings Front control panel
P
Directs the airflow through the centre
vents
O Directs the airflow through the footwell
air vents
S Directs the airflow through the centre
and footwell vents
¯ Directs the airflow through the demister
vents
b Directs the airflow through the demister
and centre vents 136
Operating the climate control systemClimate control
Page 140 of 397
a
Directs the airflow through the footwell
and demister vents
_ Directs the airflow through the demister,
centre and footwell air vents
Rear control panel
M Directs the airflow through the centre
and side air vents in the rear
O Directs the airflow through the footwell
air vents
i Using the rear control panel, you can also
activate both air distribution positions simul-
taneously. In order to do this, press both air
distribution buttons. The air is then routed
through all rear air vents.
i Regardless of the air distribution setting,
airflow is always directed through the side air vents. The side air vents can only be closed
when the controls on the side air vents are
turned downwards.
Setting X
Turn the key to position 2in the ignition lock
(Y page 148).
X Press the _button repeatedly until the
desired symbol appears in the display. Setting the airflow
X Turn the key to position 2in the ignition lock
(Y page 148).
X To increase: press theKbutton.
X To reduce: press theIbutton.
i You can use THERMOTRONIC automatic cli-
mate control to set the airflow in the rear
compartment separately. Switching the ZONE function on/off
X To activate: press theábutton.
The indicator lamp above the ábutton
lights up.
THERMATIC automatic climate control: the
temperature setting for the driver's side is not
adopted for the front-passenger side.
THERMOTRONIC automatic climate control:
the temperature setting for the driver's side is not adopted for the front-passenger side and
the rear compartment.
X To deactivate: press theábutton.
The indicator lamp above the ábutton
goes out.
THERMATIC automatic climate control: the
temperature setting for the driver's side is
adopted for the front-passenger side.
THERMOTRONIC automatic climate control:
the temperature setting for the driver's side is adopted for the front-passenger side and therear compartment. Demisting the windscreen
General notes You can use this function to defrost the wind-
screen or to demist the inside of the windscreen
and the front side windows.
Switch off the windscreen demisting function as
soon as the windscreen is clear again.
Activating/deactivating X
Turn the key to position 2in the ignition lock
(Y page 148).
X To activate: press the¬button.
The indicator lamp in the ¬button lights
up.
The climate control system switches to the
following settings:
R high airflow
R high temperature
R air distribution to the windscreen and front
side windows
R air-recirculation mode off
X To deactivate: press the¬button.
The indicator lamp in the ¬button goes
out. The previous settings are reactivated.
Air-recirculation mode remains deactivated. Operating the climate control system
137Climate control