fuel cap MERCEDES-BENZ GLS SUV 2016 Owners Manual
[x] Cancel search | Manufacturer: MERCEDES-BENZ, Model Year: 2016, Model line: GLS SUV, Model: MERCEDES-BENZ GLS SUV 2016Pages: 397, PDF Size: 14.21 MB
Page 15 of 397
Folding in/out (automatically
)....... 117
Folding in/out (electrically) ........... 117
Out of position (troubleshooting) ... 117
Parking position ............................. 118
Resetting ....................................... 117
Storing settings (memory func-
tion) ............................................... 118 F
Fault message see Display messages
Favourites
Overview ........................................ 304
Filler cap
see Fuel filler flap
Fire extinguisher ............................... 345
First-aid kit ......................................... 345
Fitting a wheel
Fitting a wheel ............................... 372
Lowering the vehicle ...................... 373
Preparing the vehicle ..................... 370
Raising the vehicl e......................... 371
Removing a whee l.......................... 372
Securing the vehicle against roll-
ing away ........................................ 370
Flat tyre
MOExtended tyre s......................... 347
Preparing the vehicle ..................... 346
TIREFIT kit ...................................... 348
see Emergency spare wheel
Floormat ............................................. 331
Foglamps (extended range) .............. 123
Folding the rear bench seat for-
wards/back ....................................... 315
Fording
Off-road ......................................... 175
On flooded roads ........................... 175
Frequencies
Garage door opener ....................... 328
Mobile phone ................................. 379
Two-way radio ................................ 379
Front-passenger front airbag deac-
tivation
Display message ............................ 268
Front-passenger front airbag deac-
tivation system
Operation ......................................... 50 Problems ......................................... 54
System self-test ............................... 53
Fuel
Additives ........................................ 383
Consumption statistics .................. 244
Displaying the current consump-
tion ................................................ 245
Displaying the rang e...................... 245
Driving tips .................................... 172
Fuel gaug e....................................... 35
Grade (petrol) ................................ 382
Important safety notes .................. 382
Low outside temperature s............. 384
Notes for Mercedes‑AMG vehi-
cles ................................................ 383
Problem (malfunction) ................... 165
Quality (diesel )............................... 383
Refuelling ....................................... 163
Tank content/reserve fue l............. 382
Fuel filler flap
Opening ......................................... 164
Fuel filter (white display message) .. 274
Fuel level
Calling up the range (on-board
computer) ...................................... 245
Gaug e.............................................. 35
Fuel tank
Capacity ........................................ 382
Problem (malfunction) ................... 165
Fuses
Allocation chart ............................. 359
Before changing ............................. 359
Dashboard fuse box ....................... 359
Fuse box in the engine compart-
ment .............................................. 360
Fuse box under rear bench sea t.... 360
Important safety notes .................. 359 G
Garage door opener Clearing the memory ..................... 328
Frequencies ................................... 328
General notes ................................ 326
Important safety notes .................. 326
Opening/closing the garage doo r..3 27
Problems when programming ....... .327 12
Index
Page 24 of 397
Speedometer
Digital ............................................ 245
In the Instrument cluster ................. 35
Segments ...................................... 241
Selecting a display unit .................. 251
Start/Stop button
Starting the engine ........................ 150
Start/stop function
see ECO start/stop function
Starting (engine) ................................ 149
STEER CONTROL ..................................78
Steering
Display message ............................2 89
Steering Pilot
Activating/deactivating ................. 250
Display message ............................ 281
Steering wheel
Adjusting (electrically) ................... 114
Adjusting (manually) ...................... 113
Button overview ............................... 36
Buttons (on-board computer) ......... 242
Cleaning ......................................... 343
Important safety notes .................. 113
Steering wheel heating .................. 114
Storing settings (memory func-
tion) ............................................... 118
Steering wheel gearshift paddles .... 160
Steering wheel heating
Problem (malfunction) ................... 115
Switching on/of f........................... 114
Stopwatch (RACETIMER) ................... 256
Stowage areas ................................... 312
Stowage compartments
Armrest (under) ............................. 313
Centre console .............................. 314
Centre console (rear) ..................... 314
Cup holde r..................................... 320
Glove compartment ....................... 313
Important safety information ......... 312
Spectacles compartment ............... 314
Stowage net ....................................... 314
Stowage space
Stowage net ................................... 314
Summer tyres
In winter ........................................ 363
Sun blind
Rear side window s......................... 322 Sun visor
............................................ 322
Suspension settings
AMG RIDE CONTROL sports sus-
pension .......................................... 200
SETUP (on-board computer) .......... 256
Switching on media mode
Via the device list .......................... 310
Switching the auxiliary heating/
ventilation
On/off ........................................... 141 T
Tailgate Display message ............................ 286
Emergency unlocking ....................... 93
Important safety notes .................... 89
Limiting the opening angle ............... 92
Opening dimensions ...................... 387
Opening/closing (automatically
from inside) ...................................... 92
Opening/closing (automatically
from outside) ................................... 90
Opening/closing (from outside) ....... 90
Power closing .................................. 88
Tank
see Fuel tank
Technical data
Capacities ...................................... 381
Information .................................... 379
Trailer load s................................... 390
Tyres/wheels ................................. 374
Vehicle data ................................... 387
Telephone
Accepting a call (multifunction
steering wheel) .............................. 248
Authorising a mobile phone (con-
necting) ......................................... 307
Connecting a Mobile phone (gen-
eral information) ............................ 306
Display message ............................ 289
Menu (on-board computer) ............ 248
Number from the phone book ........ 248
Redialling ....................................... 249
Rejecting/ending a call ................. 248
See also Digital Owner's Manua l... 303
Switching between mobile
phones ........................................... 307 Index
21
Page 167 of 397
G
WARNING
Electrostatic charge can cause sparks and
thereby ignite fuel vapours. There is a risk of
fire and explosion.
Always touch the vehicle body before opening the fuel filler flap or touching the fuel pump
nozzle. This discharges any electrostatic
charge that may have built up. G
WARNING
Vehicles with a diesel engine:
If you mix diesel fuel with petrol, the flash
point of this fuel mixture is lower than that of pure diesel fuel. When the engine is running,
components in the exhaust system may over-
heat unnoticed. There is a risk of fire.
Never refuel with petrol. Never add petrol to
diesel fuel.
! Do not use petrol to refuel vehicles with a
diesel engine. Do not switch on the ignition if you accidentally refuel with the wrong fuel.
Otherwise, fuel can enter the fuel system.
Even small amounts of the wrong fuel could
result in damage to the fuel system and the
engine. The repair costs are high. Notify a
qualified specialist workshop and have the
fuel tank and fuel lines drained completely.
! Do not use diesel to refuel vehicles with a
petrol engine. Do not switch on the ignition if you accidentally refuel with the wrong fuel.
Otherwise, the fuel will enter the fuel system.
Even small amounts of the wrong fuel can
result in damage to the fuel system and the
engine. Notify a qualified specialist workshop
and have the fuel tank and fuel lines drained
completely.
! Overfilling the fuel tank could damage the
fuel system.
! Take care not to spill any fuel on painted
surfaces. You could otherwise damage the
paintwork.
! Use a filter when adding fuel from a fuel can.
The fuel lines and/or the fuel injection system could otherwise be blocked by particles fromthe fuel can. Do not get back into the vehicle during the refu-
elling process, Otherwise, electrostatic charge
could build up again.
If you overfill the fuel tank, some fuel may spray out when you remove the fuel pump nozzle.
Further information on fuel and fuel quality
(Y page 382). Refuelling
General information Pay attention to the important safety notes
(Y
page 163).
The fuel filler flap is unlocked or locked auto-
matically when you unlock or lock the vehicle
with the key or using KEYLESS-GO.
The position of the 8fuel filler cap is dis-
played in the instrument cluster. The arrow next
to the filling pump indicates the side of the vehi- cle.
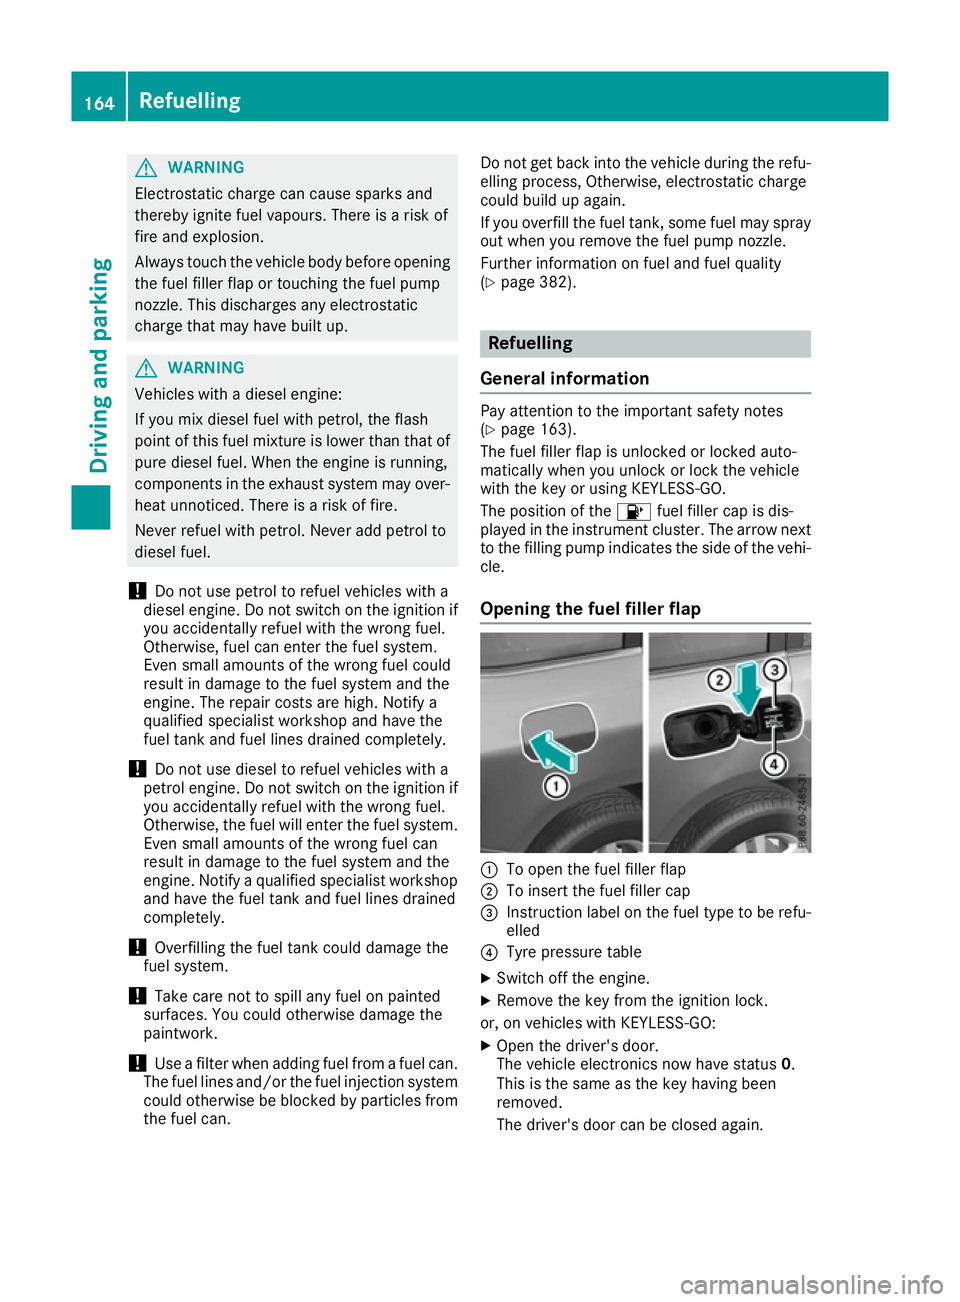
Opening the fuel filler flap :
To open the fuel filler flap
; To insert the fuel filler cap
= Instruction label on the fuel type to be refu-
elled
? Tyre pressure table
X Switch off the engine.
X Remove the key from the ignition lock.
or, on vehicles with KEYLESS‑ GO:
X Open the driver's door.
The vehicle electronics now have status 0.
This is the same as the key having been
removed.
The driver's door can be closed again. 164
RefuellingDriving and parking
Page 168 of 397
X
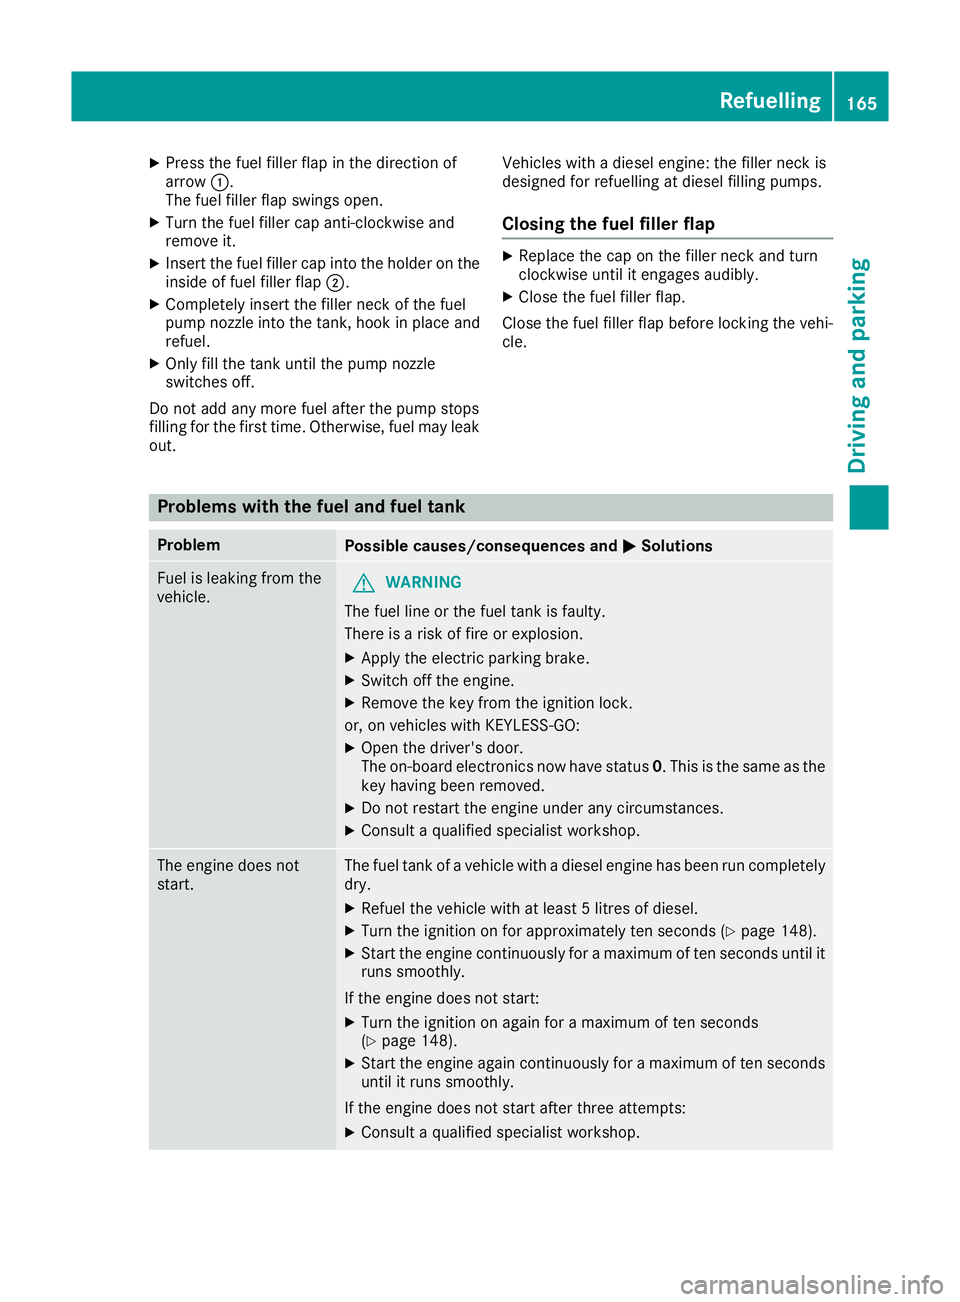
Press the fuel filler flap in the direction of
arrow :.
The fuel filler flap swings open.
X Turn the fuel filler cap anti-clockwise and
remove it.
X Insert the fuel filler cap into the holder on the
inside of fuel filler flap ;.
X Completely insert the filler neck of the fuel
pump nozzle into the tank, hook in place and refuel.
X Only fill the tank until the pump nozzle
switches off.
Do not add any more fuel after the pump stops
filling for the first time. Otherwise, fuel may leak out. Vehicles with a diesel engine: the filler neck is
designed for refuelling at diesel filling pumps.
Closing the fuel filler flap X
Replace the cap on the filler neck and turn
clockwise until it engages audibly.
X Close the fuel filler flap.
Close the fuel filler flap before locking the vehi-
cle. Problems with the fuel and fuel tank
Problem
Possible causes/consequences and
M MSolutions Fuel is leaking from the
vehicle.
G
WARNING
The fuel line or the fuel tank is faulty.
There is a risk of fire or explosion. X Apply the electric parking brake.
X Switch off the engine.
X Remove the key from the ignition lock.
or, on vehicles with KEYLESS‑GO: X Open the driver's door.
The on-board electronics now have status 0. This is the same as the
key having been removed.
X Do not restart the engine under any circumstances.
X Consult a qualified specialist workshop. The engine does not
start. The fuel tank of a vehicle with a diesel engine has been run completely
dry.
X Refuel the vehicle with at least 5 litres of diesel.
X Turn the ignition on for approximately ten seconds (Y page 148).
X Start the engine continuously for a maximum of ten seconds until it
runs smoothly.
If the engine does not start: X Turn the ignition on again for a maximum of ten seconds
(Y page 148).
X Start the engine again continuously for a maximum of ten seconds
until it runs smoothly.
If the engine does not start after three attempts:
X Consult a qualified specialist workshop. Refuelling
165Driving and parking Z
Page 169 of 397
Problem
Possible causes/consequences and
M
MSolutions The fuel filler flap cannot
be opened. The fuel filler flap is not unlocked.
X Unlock the vehicle (Y page 81). The key battery is weak or discharged.
X Unlock the vehicle using the emergency key element (Y page 83).The fuel filler flap is unlocked, but the opening mechanism is jammed.
X Consult a qualified specialist workshop. AdBlue
®
(BlueTEC vehicles only)
General notes To function properly, BlueTEC exhaust gas after-
treatment must be operated with the reducing
agent AdBlue ®
. Topping up AdBlue ®
is part of
the maintenance work. Under normal operating
conditions, a full tank of AdBlue ®
should last
until the next service due date.
When the supply of AdBlue ®
is down to approx-
imately 3.8 l, the Refill AdBlue See Own‐ Refill AdBlue See Own‐
er's Manual er's Manual message is shown in the multi-
function display.
X Add at least 3.8 lof AdBlue ®
.
X Switch on the ignition for at least 60 seconds.
X Start the engine.
i You can also have the AdBlue ®
tank refilled
at a qualified specialist workshop.
Before driving your vehicle outside Europe, have
the AdBlue ®
supply checked at a qualified spe-
cialist workshop.
Further information about BlueTEC exhaust gas
aftertreatment and about AdBlue ®
can
be obtained from any Mercedes-Benz Service
Centre.
Important safety notes AdBlue
®
is a water-soluble fluid for the exhaust
gas aftertreatment of diesel engines. It is:
R non-toxic
R colourless and odourless
R non-flammable
If you open the AdBlue ®
tank, small amounts of
ammonia vapour may be released. Ammonia vapours have a pungent odour and are
particularly irritating to the skin, mucous mem-
branes and eyes. You may experience a burning sensation in your eyes, nose and throat. You
may also experience coughing and watery eyes.
Do not inhale any ammonia vapours that may be
released. Only fill the AdBlue ®
tank in well-ven-
tilated areas.
Do not swallow AdBlue ®
or let it come into con-
tact with skin, eyes or clothing. Keep AdBlue ®
away from children.
If you or others come into contact with AdBlue ®
,
observe the following:
R immediately rinse AdBlue ®
off your skin with
soap and water.
R if AdBlue ®
comes into contact with your eyes,
immediately rinse them thoroughly with clean water. Seek medical attention immediately.
R if AdBlue ®
is swallowed, immediately rinse
your mouth out thoroughly. Drink plenty of
water. Seek medical attention immediately.
R change immediately out of clothing that has
come into contact with AdBlue ®
.
! Only use AdBlue ®
in accordance with
ISO 22241. Do not mix any additives with
AdBlue ®
, and do not dilute AdBlue ®
with
water. This may destroy the BlueTEC exhaust
gas aftertreatment system.
! In order to fill the AdBlue ®
tank, the vehicle
must be parked on a level surface. The
AdBlue ®
tank can only be filled as intended
with the vehicle parked on a level surface.
Fluctuations in capacity will thus be avoided.
Filling a vehicle standing on an uneven sur-
face is not permitted. There is a danger of
overfilling, which can cause damage to Blue-
TEC exhaust gas aftertreatment components. 166
RefuellingDriving and parking
Page 170 of 397
!
Surfaces which have come into contact with
AdBlue ®
while refilling should be rinsed
immediately with water, or remove AdBlue ®
with a moist cloth and cold water. If AdBlue ®
has already crystallised, use a sponge and
cold water to clean the area. AdBlue ®
residue
crystallises after a certain amount of time and soils the affected surfaces.
! AdBlue ®
is not a fuel additive and must not
be added to the fuel tank. If AdBlue ®
is added
to the fuel tank, this can lead to engine dam-
age.
Have the AdBlue ®
tank refilled at a qualified
specialist workshop. However, you can also top
up the AdBlue ®
tank:
R at a filling station with an AdBlue ®
filling pump
R with AdBlue ®
refill bottles
R with an AdBlue ®
refill canister
When the pump nozzle switches off automati-
cally during filling at a filling pump, the AdBlue ®
tank has been completely filled. Do not fill the
AdBlue ®
tank any further. AdBlue ®
may leak
out.
To avoid transporting already opened refill con-
tainers in the vehicle, completely empty refill
bottles or canisters when filling the AdBlue ®
tank, if possible.
Further information on AdBlue ®
(Y page 384).
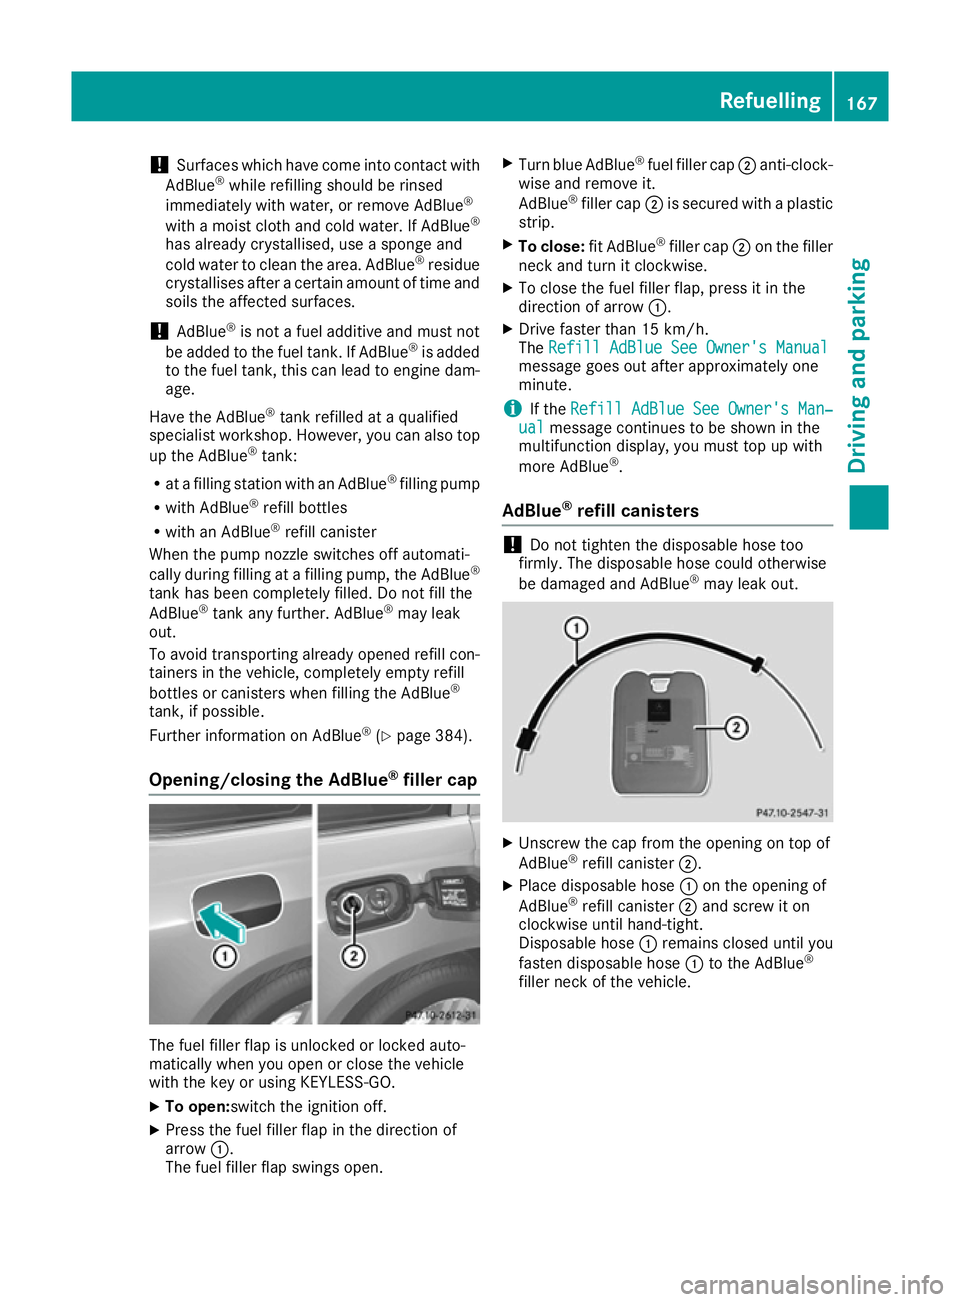
Opening/closing the AdBlue ®
filler cap The fuel filler flap is unlocked or locked auto-
matically when you open or close the vehicle
with the key or using KEYLESS-GO.
X To open:switch the ignition off.
X Press the fuel filler flap in the direction of
arrow :.
The fuel filler flap swings open. X
Turn blue AdBlue ®
fuel filler cap ;anti-clock-
wise and remove it.
AdBlue ®
filler cap ;is secured with a plastic
strip.
X To close: fit AdBlue®
filler cap ;on the filler
neck and turn it clockwise.
X To close the fuel filler flap, press it in the
direction of arrow :.
X Drive faster than 15 km/h.
The Refill AdBlue See Owner's Manual Refill AdBlue See Owner's Manual
message goes out after approximately one
minute.
i If the
Refill AdBlue See Owner's Man‐ Refill AdBlue See Owner's Man‐
ual
ual message continues to be shown in the
multifunction display, you must top up with
more AdBlue ®
.
AdBlue ®
refill canisters !
Do not tighten the disposable hose too
firmly. The disposable hose could otherwise
be damaged and AdBlue ®
may leak out. X
Unscrew the cap from the opening on top of
AdBlue ®
refill canister ;.
X Place disposable hose :on the opening of
AdBlue ®
refill canister ;and screw it on
clockwise until hand-tight.
Disposable hose :remains closed until you
fasten disposable hose :to the AdBlue ®
filler neck of the vehicle. Refuelling
167Driving and parking Z
Page 181 of 397

R
Do not stray from marked routes or paths.
R Observe the notes on off-road fording
(Y page 175).
i Information about retrofitting special all-ter-
rain tyres is available from any qualified spe-
cialist workshop.
i Do not use the HOLD function when driving
off-road, on steep uphill or downhill gradients or on slippery or loose surfaces. The HOLD
function cannot hold the vehicle on such sur- faces.
Checklist before off-road driving X
Engine oil level: check the engine oil and top
it up if necessary.
When driving on steep gradients, the oil level must be sufficiently high to ensure a correct
oil supply in the vehicle.
X AdBlue ®
tank (BlueTEC vehicles): check the
level and top up if necessary (Y page 166).
X Tyre-change tool kit: check that the jack is
working and make sure that the wheel
wrench, a robust tow cable and a folding
spade are in the vehicle.
X Wheels and tyres: check the tyre tread
depth and tyre pressure.
X Check for damage and remove any foreign
objects, e.g. small stones, from the wheels/
tyres.
X Replace any missing valve caps.
X Replace dented or damaged wheels.
X Wheels: dented or bent wheels can lead to a
loss of tyre pressure and damage to the tyre
bead. Before driving off-road, check the
wheels and replace them if necessary.
Checklist after off-road driving !
If you detect damage to the vehicle after
driving off-road, have the vehicle checked
immediately at a qualified specialist work-
shop.
Driving over rough terrain places greater
demands on your vehicle than driving on normal
roads. After driving off-road, check the vehicle.
This allows you to detect damage promptly and reduce the risk of an accident to yourself and
other road users.
X If the Off-road orOff-road Plus drive pro-
gram is selected: select the Individual,Sport,
Comfort orSlippery drive program
(Y page 155).
X Deactivate the LOW RANGE offroad gear
(Y page 230).
X Deactivate DSR (Y page 227).
X Lower the vehicle level again to a level suita-
ble to the road conditions, e.g. to the normal
level.
X Clean the headlamps and rear lights and
check for damage.
X Clean the front and rear licence plates.
X Clean the wheels and tyres with a water jet
and remove any foreign objects.
X Clean the wheels, wheel arches and the vehi-
cle underside with a water jet; check for any
foreign objects and damage.
X Check whether twigs or other parts of plants
have become trapped. These increase the risk
of fire and can damage fuel pipes, brake
hoses or the rubber bellows of the axle joints
and propeller shafts.
X After the trip, examine without fail the entire
undercarriage, wheels, tyres, brakes, body-
work structure, steering, chassis and exhaust
system for damage.
X After driving for extended periods across
sand, mud, gravel, water or in similarly dirty
conditions, have the brake discs, wheels,
brake pads/linings and axle joints checked
and cleaned.
X If you detect strong vibrations after driving
off-road, check for foreign objects in the
wheels and drive train and remove them if
necessary. Foreign objects can disturb the
balance and cause vibrations.
Driving on sand Observe the following rules when driving on
sand:
R Select the Offroaddrive program (vehicles
without Off-Road Engineering package)
(Y page 228).
R Select the Offroaddrive program (vehicles
with Off-Road Engineering package)
(Y page 229).
R Select a higher vehicle level.
R Avoid high engine speeds.
R Use the left-hand steering wheel gearshift
paddle to shift to a lower gear appropriate to
the terrain. 178
Driving
tipsDriving an d parking
Page 237 of 397
R
the permissible rear axle load of the towing
vehicle
R the maximum permissible gross vehicle
weight of both the towing vehicle and the
trailer
The applicable permissible values, which must
not be exceeded, can be found:
R in your vehicle documents
R on the identification plates of the trailer tow
hitch and the trailer
R on the vehicle identification plate
If the values differ, the lowest value applies.
You will find the values approved by the manu-
facturer on the vehicle identification plates and
those for the towing vehicle under "Technical
data" (Y page 390).
When towing a trailer, your vehicle's handling
characteristics will be different in comparison to
when driving without a trailer.
The vehicle/trailer combination:
R is heavier
R is restricted in its acceleration and gradient-
climbing capability
R has an increased braking distance
R is affected more by strong crosswinds
R demands more sensitive steering
R has a larger turning circle
This can impair the vehicle's handling charac-
teristics. Adapt your driving style accordingly.
Maintain a safe distance. Drive carefully.
When towing a trailer, always adjust your speed to the current road and weather conditions. Do
not exceed the maximum permissible speed for
your vehicle/trailer combination. Notes on towing a trailer
General notes !
If you have a trailer tow hitch retrofitted,
changes to the engine cooling system may be necessary, depending on the vehicle type.
If you have a trailer tow hitch retrofitted,
observe the anchorage points on the chassis.
Check the tyre pressures when towing a trailer.
You will find the values in the tyre pressure table in the vehicle fuel filler flap (Y page 364).Please note that when towing a trailer, the fol-
lowing driving systems have limited availability
or are not available at all.
R Parking Assist PARKTRONIC (Y page 201)
R Blind Spot Assist (Y page 219)
R Active Lane Keeping Assist (Y page 224)
R Parking Pilot (Y page 204)
On vehicles without level control, the height of
the ball coupling will alter according to the load
placed on the vehicle. If necessary, use a trailer
with a height-adjustable drawbar.
You will find permissible trailer loads under
"Technical data" (Y page 390).
Driving tips Observe the information on ESP
®
trailer stabili-
sation (Y page 74) and on pulling away with a
trailer (Y page 151).
Select the Comfortdrive program using the
DYNAMIC SELECT controller (Y page 155).
The maximum permissible speed for vehicle/
trailer combinations depends on the type of
trailer. Before beginning the journey, check the
trailer's documents to see what the maximum
permissible speed is for your trailer. Observe the legally prescribed maximum speed in the rele-
vant country.
For certain Mercedes-Benz vehicles, the maxi-
mum permissible rear axle load is increased
when towing a trailer. See the "Technical Data"
section to find out whether this applies to your
vehicle (Y page 390). If you utilise any of the
added maximum rear axle load when towing a
trailer, the vehicle/trailer combination may not
exceed a maximum speed of 100 km/h for rea-
sons concerning the operating permit. This also
applies in countries in which the permissible
maximum speed for vehicle/trailer combina-
tions is above 100 km/h.
When towing a trailer, your vehicle's handling
characteristics will be different to when driving
without a trailer and the vehicle will consume
more fuel.
Use the left-hand gearshift paddle to shift to a
lower gear on long and steep downhill gradients.
This also applies if you have activated cruise
control, the speed limiter or Distance Pilot
DISTRONIC.
This will use the braking effect of the engine, so
less braking will be required to maintain the
vehicle speed. This relieves the load on the 234
Towing a trailerDriving an
d parking
Page 357 of 397
Jump-starting
For the jump-starting procedure, use only the jump-starting connection point, consisting of a pos- itive terminal and an earth point, in the engine compartment. G
WARNING
Battery acid is caustic. There is a risk of injury.
Avoid contact with the skin, eyes or clothing. Do not breathe in any battery gases. Do not lean over the battery. Keep the batteries out of the reach of children. Immediately rinse off battery acid
thoroughly with plenty of clean water and seek medical attention at once. G
WARNING
During charging and jump-starting, explosive gases can escape from the battery. There is a risk of an explosion.
Particularly avoid fire, naked flames, creating sparks and smoking. Ensure there is sufficient
ventilation while charging and jump-starting. Do not lean over a battery. G
WARNING
During the charging process, a battery produces hydrogen gas. If a short circuit occurs or sparks
are created, the hydrogen gas can ignite. There is a risk of an explosion.
R Make sure that the positive terminal of a connected battery does not come into contact with
vehicle parts.
R Never place metal objects or tools on a battery.
R It is important that you observe the described order of the battery terminals when connecting
and disconnecting a battery.
R When jump-starting, make sure that the battery poles with identical polarity are connected.
R It is particularly important to observe the described order when connecting and disconnecting
the jump leads.
R Never connect or disconnect the battery terminals while the engine is running. G
WARNING
A discharged battery can freeze at temperatures below freezing point. When jump-starting the
vehicle or charging the battery, gases can escape from the battery. There is a risk of an explosion.
Allow the frozen battery to thaw out before charging it or jump-starting.
! Vehicles with a petrol engine:
avoid repeated and lengthy starting attempts. Otherwise, the
non-combusted fuel may damage the catalytic converter.
If the indicator/warning lamps do not light up at low temperatures, it is very likely that the dis-
charged battery has frozen. In this case you may neither jump-start the vehicle nor charge the
battery. The service life of a battery that has been thawed may be reduced. The starting charac-
teristics may be impaired, especially at low temperatures. Have the thawed battery checked at a
qualified specialist workshop. 354
Jump-startingBreakdown assistance
Page 368 of 397
sure monitors keep the tyre valve open. This
can also result in tyre pressure loss. There is a risk of accident.
Only screw standard valve caps or valve caps
specifically provided by Mercedes-Benz for
your vehicle onto the tyre valve. G
WARNING
If the tyre pressure drops repeatedly, the
wheel, valve or tyre may be damaged. Tyre
pressure that is too low may result in a tyre
blow-out. There is a risk of accident. R Check the tyre for foreign objects.
R Check whether the wheel is losing air or the
valve is leaking.
If you are unable to rectify the damage, con-
tact a qualified specialist workshop. H
Environmental note
Check the tyre pressure regularly, at least
every 14 days.
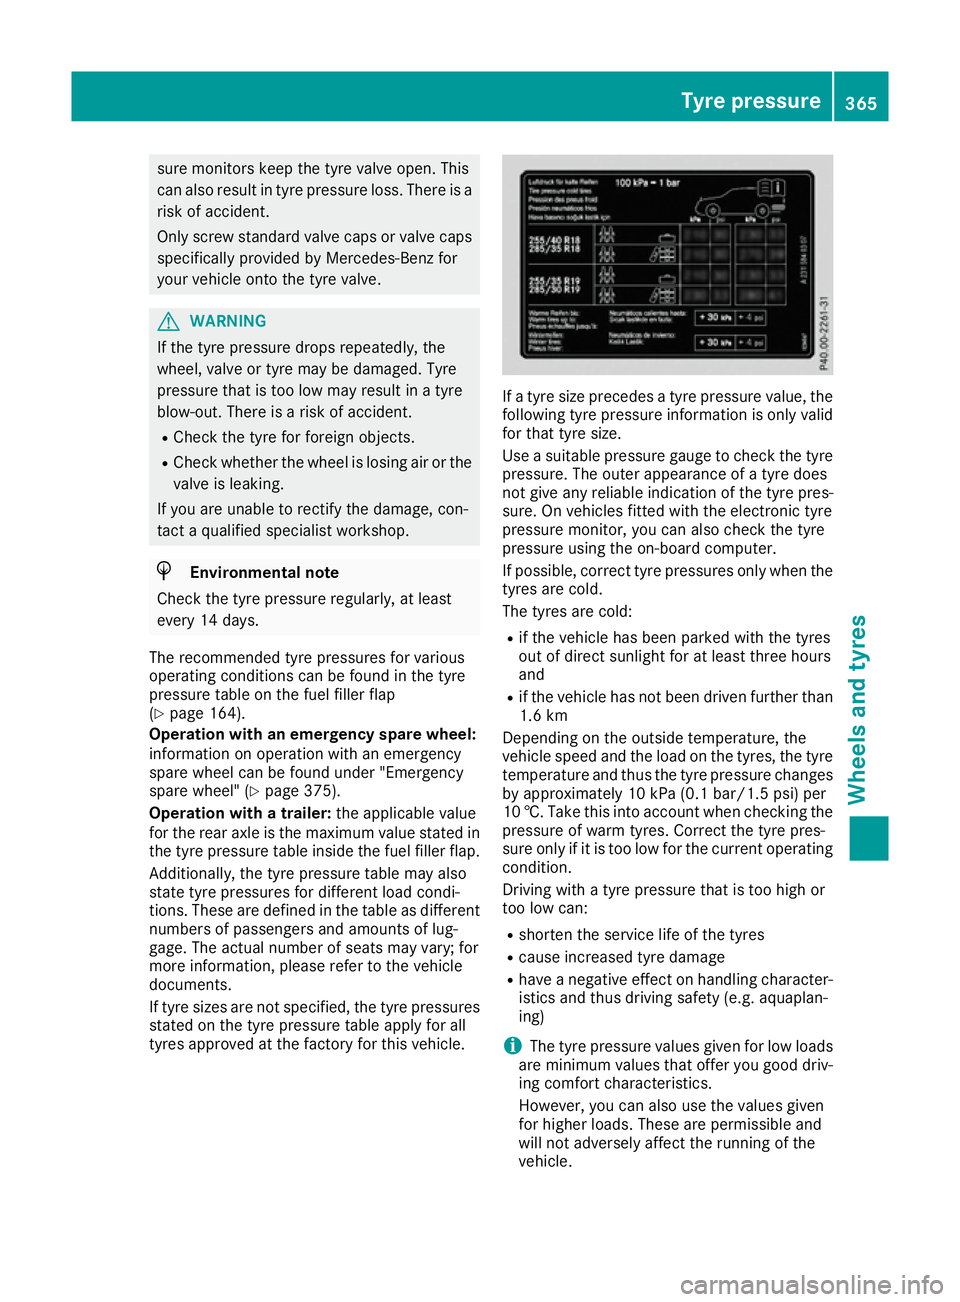
The recommended tyre pressures for various
operating conditions can be found in the tyre
pressure table on the fuel filler flap
(Y page 164).
Operation with an emergency spare wheel:
information on operation with an emergency
spare wheel can be found under "Emergency
spare wheel" (Y page 375).
Operation with a trailer: the applicable value
for the rear axle is the maximum value stated in the tyre pressure table inside the fuel filler flap.
Additionally, the tyre pressure table may also
state tyre pressures for different load condi-
tions. These are defined in the table as different numbers of passengers and amounts of lug-
gage. The actual number of seats may vary; for
more information, please refer to the vehicle
documents.
If tyre sizes are not specified, the tyre pressures
stated on the tyre pressure table apply for all
tyres approved at the factory for this vehicle. If a tyre size precedes a tyre pressure value, the
following tyre pressure information is only valid
for that tyre size.
Use a suitable pressure gauge to check the tyre
pressure. The outer appearance of a tyre does
not give any reliable indication of the tyre pres-
sure. On vehicles fitted with the electronic tyre
pressure monitor, you can also check the tyre
pressure using the on-board computer.
If possible, correct tyre pressures only when the
tyres are cold.
The tyres are cold:
R if the vehicle has been parked with the tyres
out of direct sunlight for at least three hours
and
R if the vehicle has not been driven further than
1.6 km
Depending on the outside temperature, the
vehicle speed and the load on the tyres, the tyre temperature and thus the tyre pressure changes by approximately 10 kPa (0.1 bar/1.5 psi) per
10 †. Take this into account when checking the
pressure of warm tyres. Correct the tyre pres-
sure only if it is too low for the current operating
condition.
Driving with a tyre pressure that is too high or
too low can:
R shorten the service life of the tyres
R cause increased tyre damage
R have a negative effect on handling character-
istics and thus driving safety (e.g. aquaplan-
ing)
i The tyre pressure values given for low loads
are minimum values that offer you good driv- ing comfort characteristics.
However, you can also use the values given
for higher loads. These are permissible and
will not adversely affect the running of the
vehicle. Tyre pressure
365Wheels and tyres Z