heating MERCEDES-BENZ GLS SUV 2019 Owners Manual
[x] Cancel search | Manufacturer: MERCEDES-BENZ, Model Year: 2019, Model line: GLS SUV, Model: MERCEDES-BENZ GLS SUV 2019Pages: 729, PDF Size: 12.03 MB
Page 20 of 729
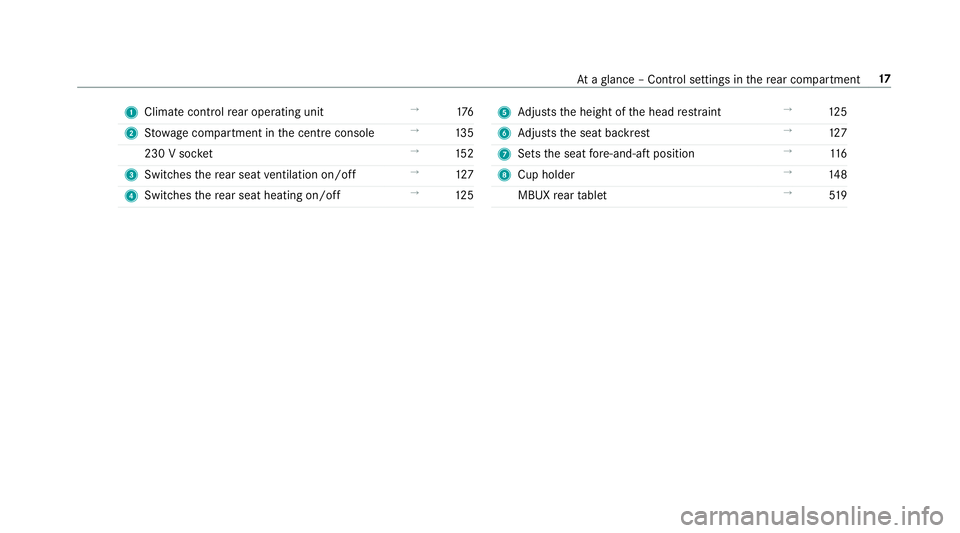
1
Climate cont rolre ar operating unit →
176
2 Stow age compartment in the cent reconsole →
13 5
230 V soc ket →
15 2
3 Switches there ar seat ventilation on/o ff→
127
4 Switches there ar seat heating on/off →
12 5 5
Adjusts the height of the head restra int →
12 5
6 Adjusts the seat backrest →
127
7 Sets the seat fore -and-aft position →
11 6
8 Cup holder →
14 8
MBUX rear tablet →
519 At
aglance – Control settings in there ar compartment 17
Page 118 of 729
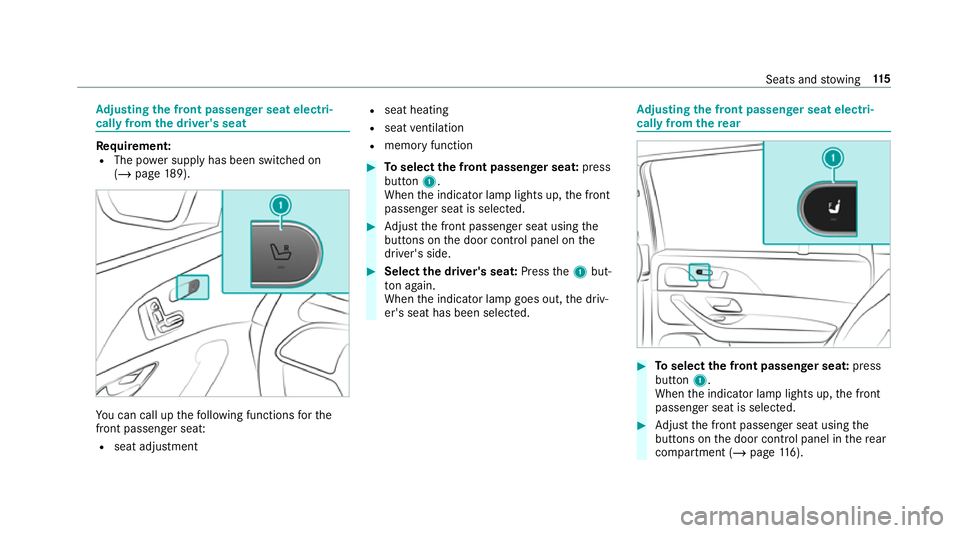
Ad
justing the front passen ger seat electri‐
cally from the driver's seat Re
quirement:
R The po wer supp lyhas been switched on
(/ page 189). Yo
u can call up thefo llowing functions forthe
front passenger sea t:
R seat adjustment R
seat heating
R seat ventilation
R memory function #
Toselect the front passenger seat: press
button 1.
When the indicator lamp lights up, the front
passenger seat is selected. #
Adjust the front passenger seat using the
buttons on the door control panel on the
driver's side. #
Select the driver's seat: Pressthe1 but‐
to n again.
When the indicator lamp goes out, the driv‐
er's seat has been selected. Ad
justing the front passen ger seat electri‐
cally from the rear #
Toselect the front passenger seat: press
button 1.
When the indicator lamp lights up, the front
passenger seat is selected. #
Adjust the front passenger seat using the
buttons on the door control panel in there ar
compartment (/ page116). Seats and
stowing 11 5
Page 125 of 729
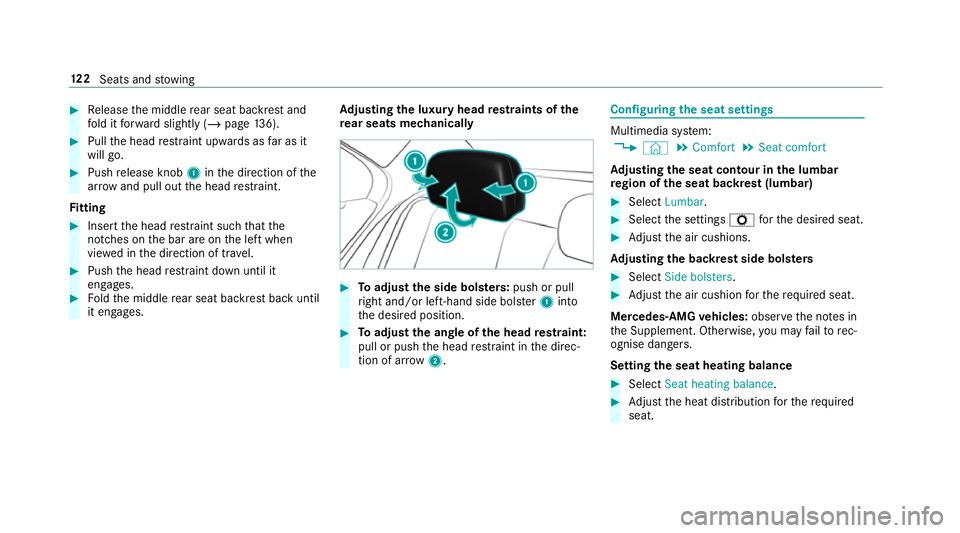
#
Release the middle rear seat backrest and
fo ld it forw ard slightly (/ page136). #
Pull the head restra int upwards as far as it
will go. #
Push release knob 1inthe direction of the
ar row and pull out the head restra int.
Fi tting #
Inse rtthe head restra int such that the
notches on the bar are on the left when
vie we d in the direction of tra vel. #
Push the head restra int down until it
engages. #
Foldthe middle rear seat backrest back until
it engages. Ad
justing the luxury head restra ints of the
re ar seats mechanically #
Toadjust the side bols ters: push or pull
ri ght and/or left-hand side bols ter1 into
th e desired position. #
Toadjust the angle of the head restra int:
pull or push the head restra int in the direc‐
tion of ar row2. Configuring
the seat settings Multimedia sy
stem:
4 © 5
Comfort 5
Seat comfort
Ad justing the seat contour in the lumbar
re gion of the seat backrest (lumbar) #
Select Lumbar . #
Select the settings Zforth e desired seat. #
Adjust the air cushions.
Ad justing the backrest side bols ters #
Select Side bolsters . #
Adjust the air cushion forth ere qu ired seat.
Mercedes-AMG vehicles: observeth e no tes in
th e Supplement. Otherwise, you may failto rec‐
ognise dangers.
Setting the seat heating balance #
Select Seat heating balance. #
Adjust the heat distribution forth ere qu ired
seat. 12 2
Seats and stowing
Page 129 of 729
To
protect against overheating, the seat heater
may be temp orarily deactivated af ter it is
switched on repeatedly.
* NO
TEDama getothe seats caused by
objects or documents when the seat
heater is switched on When
the seat heater is switched on, over‐
heating can occur due toobjects or docu‐
ments placed on the seats e.g. seat cushions
or child seats. This could cause damage to
th e seat sur face. #
Makesure that no objects or docu‐
ments are on the seats when the seat
heater is switched on. Re
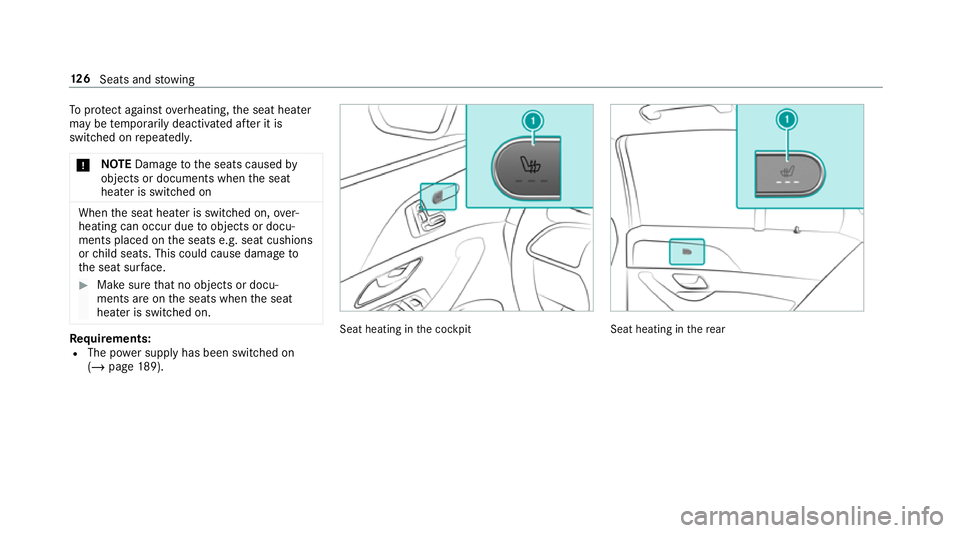
quirements:
R The po wer supply has been switched on
(/ page 189). Seat heating in
the cockpit Seat heating in
there ar 12 6
Seats and stowing
Page 130 of 729
Seat heating in
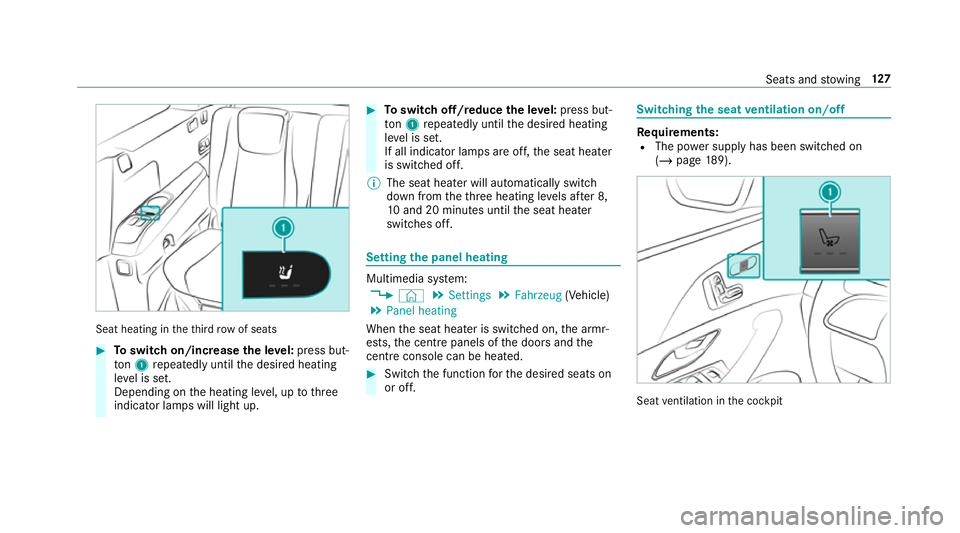
theth ird row of seats #
Toswitch on/increase the le vel:press but‐
to n1 repeatedly until the desired heating
le ve l is set.
Depending on the heating le vel, up tothree
indicator lamps will light up. #
Toswitch off/reduce the le vel:press but‐
to n1 repeatedly until the desired heating
le ve l is set.
If all indicator lamps are off, the seat heater
is switched off.
% The seat heater will automatically switch
down from theth re e heating le vels af ter 8,
10 and 20 minutes until the seat heater
switches off. Setting
the panel heating Multimedia sy
stem:
4 © 5
Settings 5
Fahrzeug (Vehicle)
5 Panel heating
When the seat heater is switched on, the armr‐
ests, the cent repanels of the doors and the
centre console can be hea ted. #
Switch the function forth e desired seats on
or off. Switching
the seat ventilation on/off Re
quirements:
R The po wer supply has been switched on
(/ page 189). Seat
ventilation in the cockpit Seats and
stowing 127
Page 152 of 729
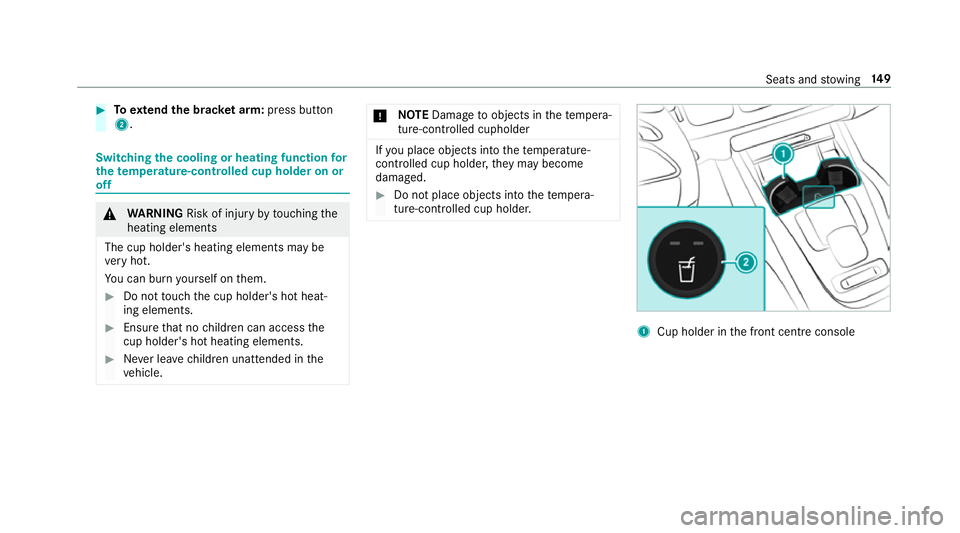
#
Toextend the brac ket arm: press button
2. Switching the cooling or heating function
for
th etemp erature-cont rolled cup holder on or
off &
WARNING Risk of inju ryby touching the
heating elements
The cup holder's heating elements may be
ve ry hot.
Yo u can burn yourself on them. #
Do not touch the cup holder's hot heat‐
ing elements. #
Ensure that no children can access the
cup holder's hot heating elements. #
Never lea vechildren unat tended in the
ve hicle. *
NO
TEDama getoobjects in thete mp era‐
ture-contro lled cupholder If
yo u place objects into thete mp erature-
controlled cup holder, they may become
dama ged. #
Do not place objects into thete mp era‐
ture-contro lled cup holder. 1
Cup holder in the front cent reconsole Seats and
stowing 14 9
Page 153 of 729
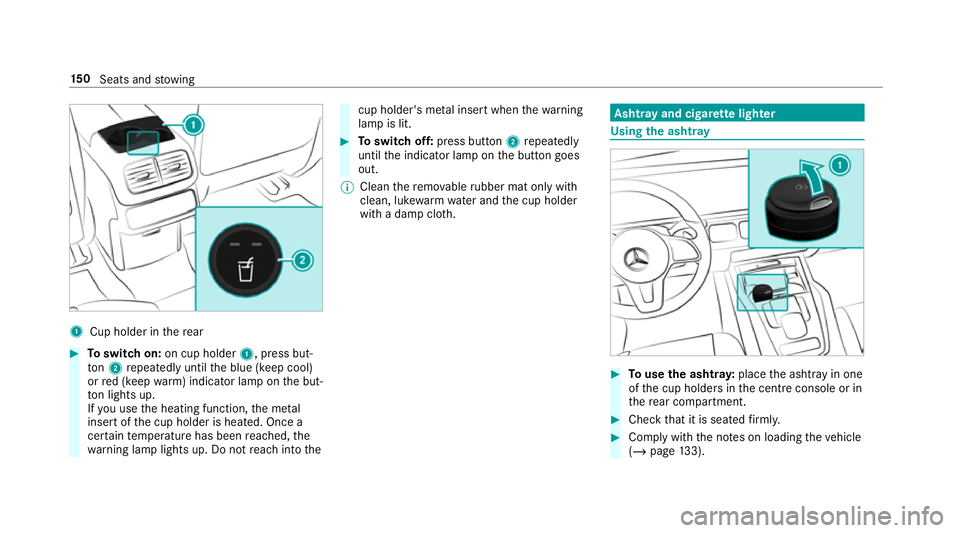
1
Cup holder in there ar #
Toswitch on: on cup holder 1, press but‐
to n2 repeatedly until the blue (keep cool)
or red (keep warm) indicator lamp on the but‐
to n lights up.
If yo u use the heating function, the me tal
inse rtof the cup holder is heated. Once a
cer tain temp erature has been reached, the
wa rning lamp lights up. Do not reach into the cup holder's me
tal inse rtwhen thewa rning
lamp is lit. #
Toswitch off: press button 2repeatedly
until the indicator lamp on the button goes
out.
% Clean there mo vable rubber mat only with
clean, luk ewarmwate r and the cup holder
with a damp clo th. Asht
ray and cigar ette lighter Using
the ashtr ay #
Touse the ashtr ay:place the ashtray in one
of the cup holders in the cent reconsole or in
th ere ar compartment. #
Check that it is seated firm ly. #
Comply with the no tes on loading theve hicle
(/ page 133). 15 0
Seats and stowing
Page 154 of 729
#
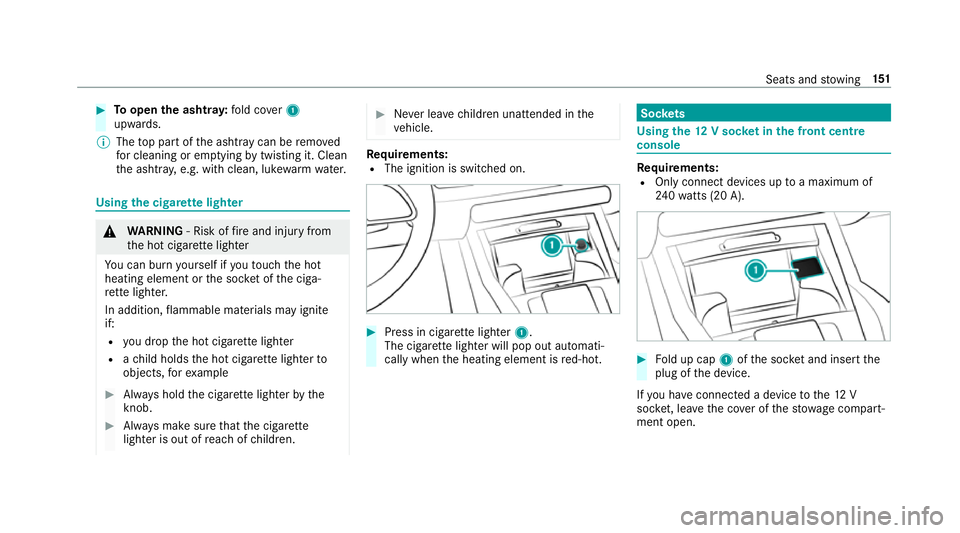
Toopen the ashtr ay:fold co ver1
upwards.
% The top part of the ashtr aycan be remo ved
fo r cleaning or em ptying bytwi sting it. Clean
th e ashtr ay, e.g. with clean, luk ewarmwate r. Using
the cigar ette lighter &
WARNING ‑ Risk of fire and injury from
th e hot cigar ette lighter
Yo u can burn yourself if youto uch the hot
heating element or the soc ket of the ciga‐
re tte lighter.
In addition, flammable materials may ignite
if:
R you drop the hot cigar ette lighter
R ach ild holds the hot cigar ette lighter to
objects, forex ample #
Alw ays hold the cigar ette lighter bythe
knob. #
Alw ays make sure that the cigar ette
lighter is out of reach of children. #
Never lea vechildren unat tended in the
ve hicle. Re
quirements:
R The ignition is switched on. #
Press in cigar ette lighter 1.
The cigar ette lighter will pop out automati‐
cally when the heating element is red-hot. Soc
kets Using the
12V so cket inthe front centre
console Re
quirements:
R Only connect devices up toa maximum of
24 0wa tts (20 A). #
Fold up cap 1ofthe soc ket and insert the
plug of the device.
If yo u ha veconnected a device tothe12 V
soc ket, le ave the co ver of thestow age compart‐
ment open. Seats and
stowing 151
Page 177 of 729
#
Vehicles with an additional sun visor: fold
additional sun visor 2down. Area permeable
to radiowav es on the
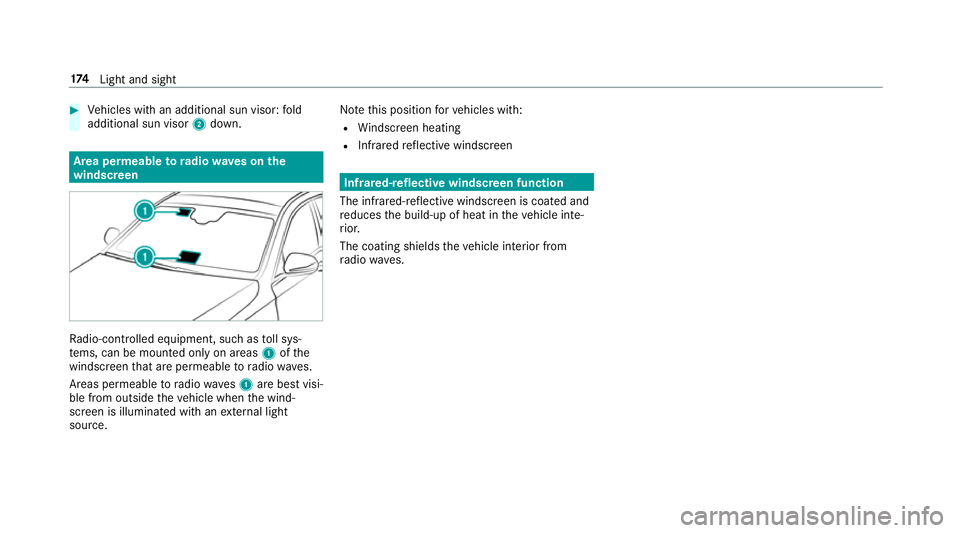
windscreen Ra
dio-contro lled equipment, such as toll sys‐
te ms, can be mounted only on areas 1ofthe
windscreen that are permeable toradio wav es.
Areas permeable toradio wav es1 are best visi‐
ble from outside theve hicle when the wind‐
screen is illuminated with an extern al light
source. No
tethis position forve hicles with:
R Windsc reen heating
R Infra redre flective windscreen Infrared-reflective windscreen function
The infrared-reflective windscreen is coated and
re duces the build-up of heat in theve hicle inte‐
ri or.
The coating shields theve hicle interior from
ra dio wav es. 174
Light and sight
Page 182 of 729
Deactivating
rear climate control #
Select REAR OFF.
Re ar climate control is deactivated. Ac
tivating/deactivating the climate control
syn chro nisation function via the control
panel Climate control can be set centrally using
the
synchronisation function. The temp erature and
air distribution setting forth e driver side is adop‐
te d automatically for all clima tecontrol zones. #
Press the 0 button.
The synchronisation function is deactivated if
th e settings for one of theot her climate zones
are changed. Ac
tivating/deactivating the climate control
syn chro nisation function using the multime‐
dia sy stem Climate control can be set centrally using
the
synchronisation function. The driver's settings fo
rte mp erature, air quantity and air distribution
are adop ted automatically for all clima tezones. #
Call up the air conditioning menu
(/ page 177). #
Select First row of seats. #
Select SYNC.
Depending on the pr evious status, the func‐
tion is activated or deactivated. Demisting
the windo ws Wi
ndo wsmis ted up on the inside #
Press theà button. #
Ifth e windo wscontinue tomist up: press the
¬ button.
Wi ndo wsmis ted up on the outside #
Switch on the windscreen wipers. #
Press theà button. Switching air-recirculation mode on/off
#
Press theg button.
The interior air will be recirculated. Air-reci
rculation mode automatically swit ches to
fresh air mode af ter some time.
% If air-recirculation mode is switched on, the
windo wsmay mist up more quickl y.Switch
on ai r-re circulation mode only brie fly. Switches
there sidual heat on/off Re
quirements:
R theve hicle is par ked.
It is possible tomake use of there sidual heat
from the engine tocontinue heating or ventilat‐
ing the front compartment of theve hicle for
appr oximately 30 minutes, depending on the
te mp erature set. #
Toactivate: press button Á.
Re sidual heat will be switched off automaticall y. Switching
there sidual heat in there ar
on/off Re
quirements:
R theve hicle is par ked. Climate control
17 9