clock MERCEDES-BENZ METRIS 2016 MY16 Operator’s Manual
[x] Cancel search | Manufacturer: MERCEDES-BENZ, Model Year: 2016, Model line: METRIS, Model: MERCEDES-BENZ METRIS 2016Pages: 310, PDF Size: 7.28 MB
Page 115 of 310
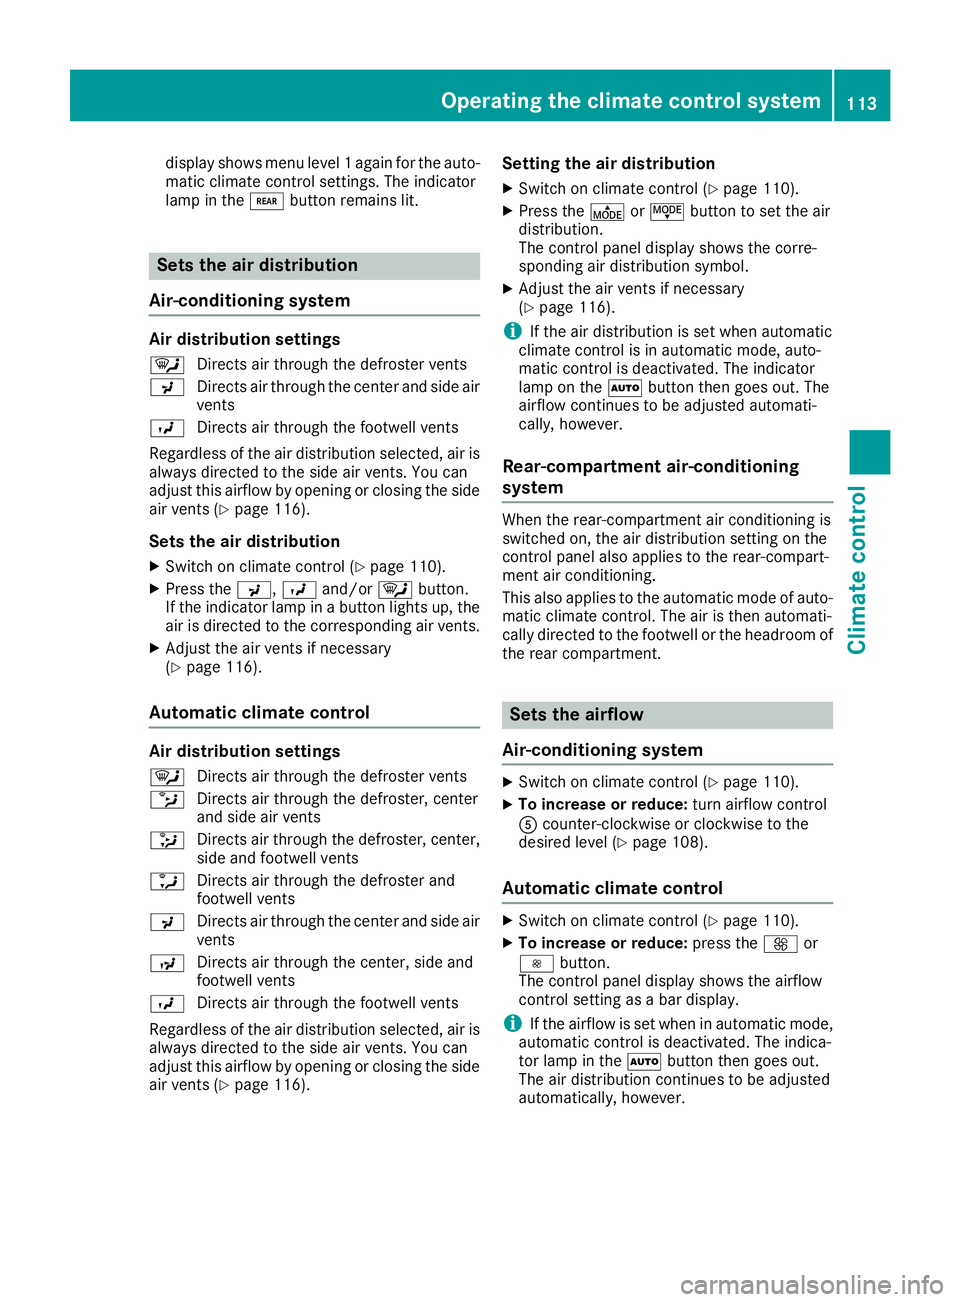
display shows menu level1again for the auto-
matic climate control settings. The indicator
lamp in the /buttonremains lit.
Sets the air distribution
Air-conditioning system
Air distribution settings
¯ Directs air through the defroster vents
P Directs air through the center and side air
vents
O Directs air through the footwell vents
Regardless of the air distribution selected, air is
always directed to the side air vents. You can
adjust this airflow by openin gorclosingthe side
air vent s(
Ypage 116).
Sets the air distribution
XSwitchonc limate control (Ypage 110).
XPress the P,Oand/or ¯button.
If the indicator lamp in abutto nlights up, the
air is directed to the correspondin gair vents.
XAdjust the air vent sifnecessary
(Ypage 116).
Automatic climat econtrol
Air distribution settings
¯
Directs air through the defroster vents
b Directs air through the defroster, center
and side air vents
_ Directs air through the defroster, center,
side and footwell vents
a Directs air through the defroster and
footwell vents
P Directs air through the center and side air
vents
N Directs air through the center, side and
footwell vents
O Directs air through the footwell vents
Regardless of the air distribution selected, air is
always directed to the side air vents. You can
adjust this airflow by openin gorclosingthe side
air vent s(
Ypage 116).
Setting the air distribution
XSwitchonc limate control (Ypage 110).
XPress the ÉorË buttontos et the air
distribution.
The control panel display shows the corre-
spondin gair distribution symbol.
XAdjust the air vent sifnecessary
(Ypage 116).
iIf the air distribution is set when automatic
climate control is in automatic mode, auto-
matic control is deactivated. The indicator
lamp on the Ãbuttonthen goes out. The
airflow continues to be adjusted automati-
cally, however.
Rear-compartment air-conditioning
system
When the rear-compartment air conditioning is
switched on, the air distribution setting on the
control panel also applies to the rear-compart-
ment air conditioning.
This also applies to the automatic mode of auto-
matic climate control. The air is then automati-
cally directed to the footwell or the headroom of
the rear compartment.
Sets the airflow
Air-conditioning system
XSwitc honc limate control (Ypage 110).
XTo increase or reduce: turn airflow control
A counter-clockwise or clockwise to the
desired level (
Ypage 108).
Automatic climat econtrol
XSwitc honc limate control (Ypage 110).
XTo increase or reduce: press theKor
I button.
The control panel display shows the airflow
control setting as abar display.
iIf the airflow is set when in automatic mode,
automatic control is deactivated. The indica-
tor lamp in the Ãbuttonthen goes out.
The air distribution continues to be adjusted
automatically, however.
Operating th eclimatec ontrol system113
Climatecontrol
Page 116 of 310
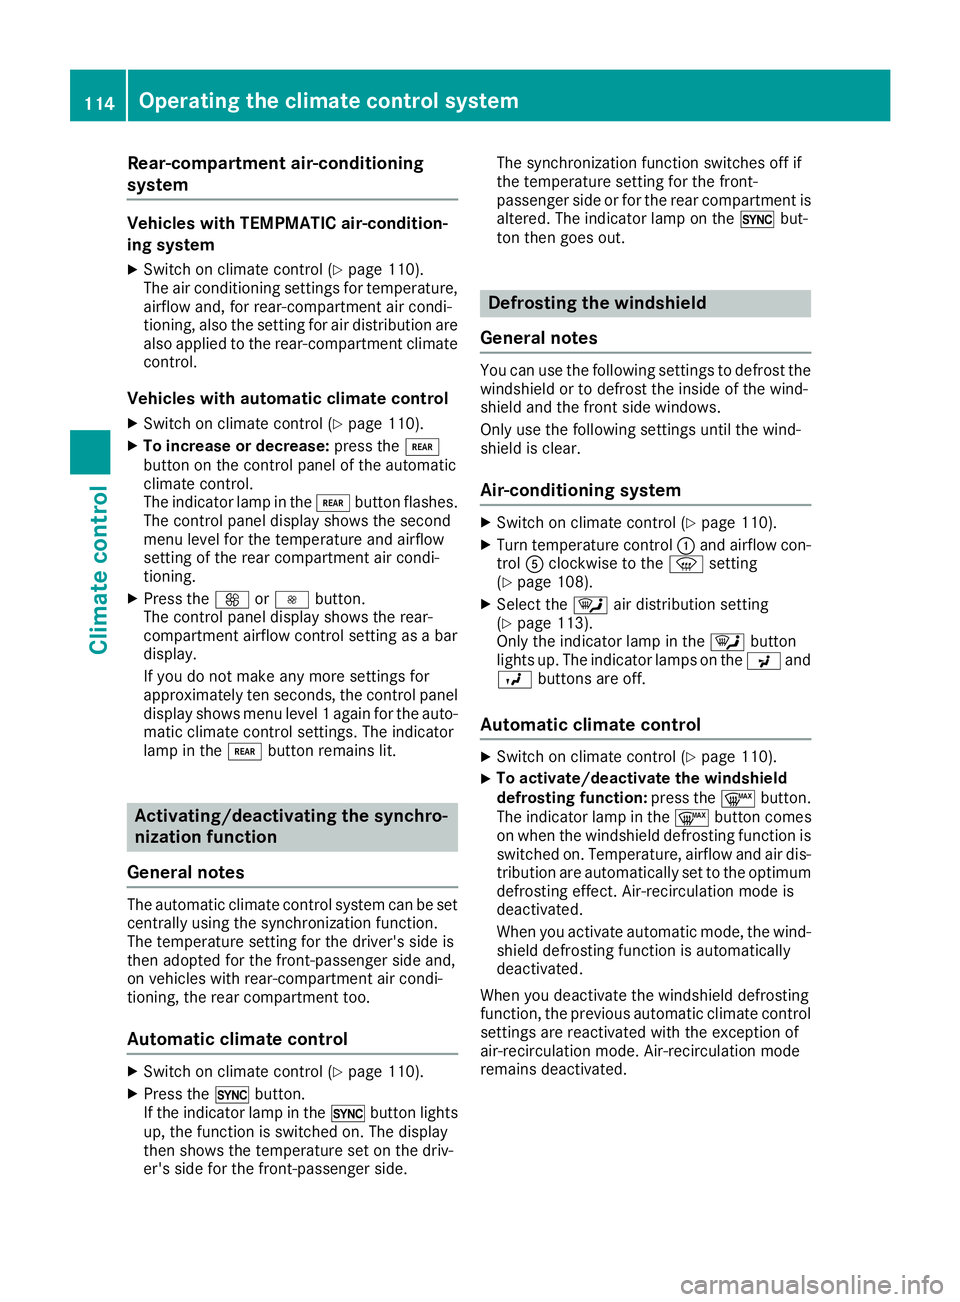
Rear-compartmentair-conditioning
system
Vehicles with TEMPMATI Cair-condition-
in gs ystem
XSwitch on climate control (Ypage 110).
The ai rconditioning settings for temperature,
airflo wand,for rear-compartment ai rcondi-
tioning, also the setting for ai rdistribution are
also applie dtothe rear-compartment climate
control.
Vehicles with automati cclimate control
XSwitch on climate control (Ypage 110).
XTo increase or decrease: press the/
button on the control panel of the automatic
climate control.
The indicator lamp in the /button flashes.
The control panel display shows the second
menu level for the temperature and airflow
setting of the rea rcompartment ai rcondi-
tioning.
XPress the KorI button.
The control panel display shows the rear-
compartment airflo wcontrol setting as abar
display.
If yo udon ot make any more settings for
approximately ten seconds, the control panel
display shows menu level 1again for the auto-
mati cclimate control settings. The indicator
lamp in the /button remains lit.
Activating/deactivatin gthe synchro-
nizatio nfunction
General notes
The automatic climate control system can be set
centrall yusing the synchronization function.
The temperature setting for the driver' ssidei s
then adopte dfor the front-passenger sid eand,
on vehicles with rear-compartment ai rcondi-
tioning, the rea rcompartment too.
Automatic climate control
XSwitch on climate control (Ypage 110).
XPress the 0button.
If the indicator lamp in the 0button lights
up ,the function is switched on. The display
then shows the temperature set on the driv-
er' ss idef or the front-passenger side. The synchronization function switches off if
the temperature setting for the front-
passenger sid
eorfor the rea rcompartment is
altered. The indicator lamp on the 0but-
ton then goe sout.
Defrosting the windshield
General notes
Yo uc an us ethe following settings to defrost the
windshield or to defrost the inside of the wind-
shielda nd the front sid ewindows.
Only us ethe following settings unti lthe wind-
shieldisc lear.
Air-conditioning system
XSwitch on climate control (Ypage 110).
XTurn temperature control :and airflo wcon-
trol Aclockwise to the zsetting
(
Ypage 108).
XSelect the ¯aird istribution setting
(Ypage 113).
Only the indicator lamp in the ¯button
lights up .The indicator lamps on the Pand
O buttons are off.
Automatic climate control
XSwitch on climate control (Ypage 110).
XTo activate/deactivate the windshield
defrostin gfunction: press the ¬button.
The indicator lamp in the ¬button comes
on when the windshield defrosting function is switched on. Temperature, airflo wand ai rdis-
tribution are automaticall yset to the optimum
defrosting effect. Air-recirculation mod eis
deactivated.
Whe nyou activate automatic mode, the wind-
shieldd efrosting function is automatically
deactivated.
Whe nyou deactivate the windshield defrosting
function, the previous automatic climate control
settings are reactivated with the exception of
air-recirculation mode. Air-recirculation mode
remains deactivated.
114Operating the climate control system
Climate control
Page 117 of 310
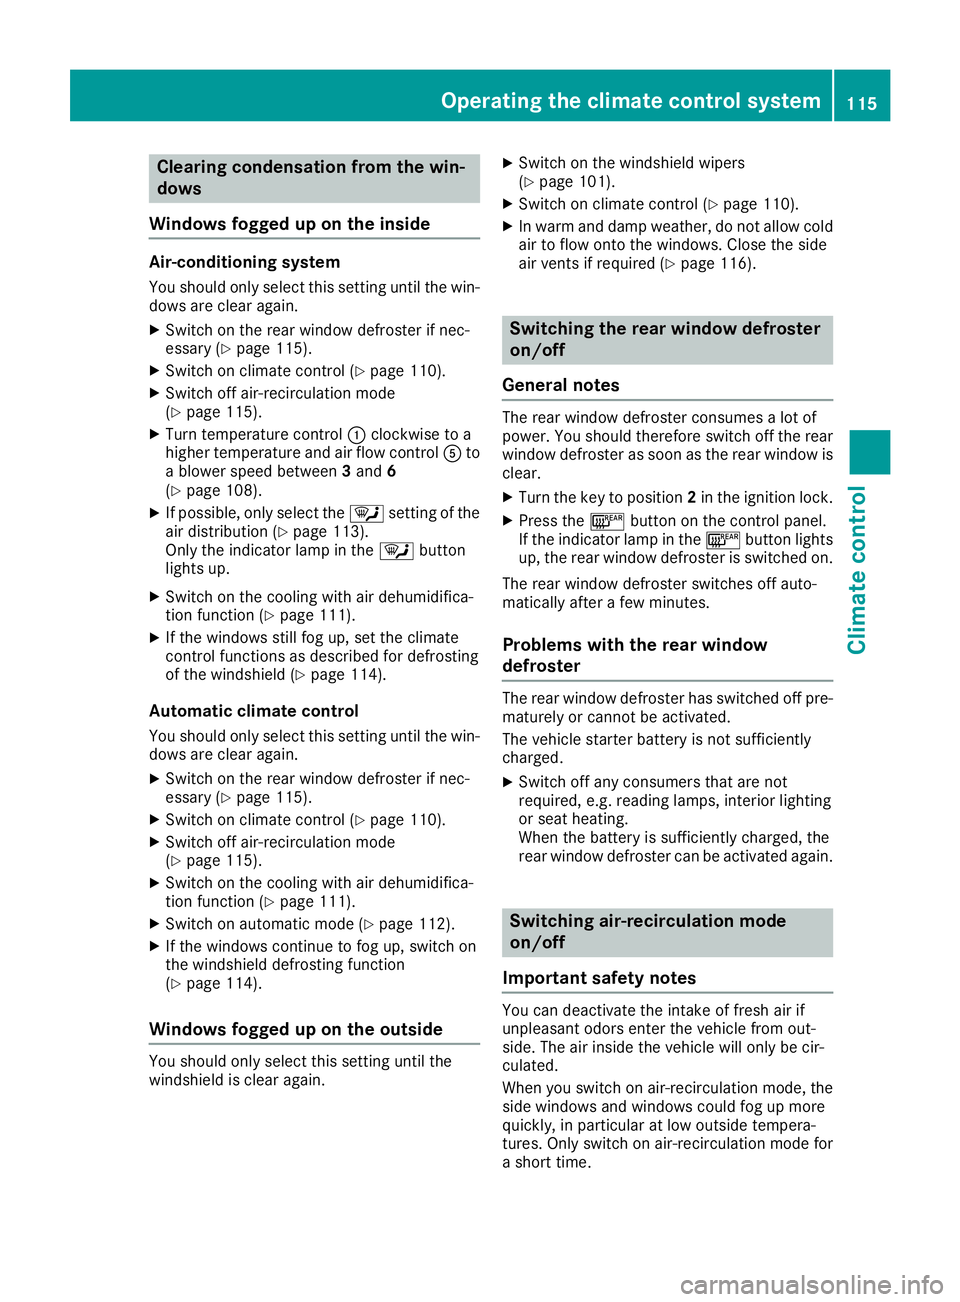
Clearing condensation from thewin-
dows
Windows fogged up on th einside
Air-conditioning system
You should only selectt hiss ettin guntil th ewin-
dows are clear again.
XSwitch on th erear window defroste rifnec-
essary (Ypage 115).
XSwitch on climate control (Ypage 110).
XSwitch off air-recirculation mode
(Ypage 115).
XTurn temperatur econtrol :clockwise to a
higher temperatur eand air flow control Ato
ab lower speedb etween3and 6
(
Ypage 108).
XIf possible, only selectt he¯ settingofthe
air distribution (Ypage 113).
Only th eindicator lamp in the ¯button
lightsu p.
XSwitch on th ecoolingw ithair dehumidifica-
tio nfunction (Ypage 111).
XIf th ewindows still fog up, set th eclimate
control functionsasd escribedfor defrosting
of th ewindshield (
Ypage 114).
Automatic climat econtrol
You should only selectt hiss ettin guntil th ewin-
dows are clear again.
XSwitch on th erear window defroste rifnec-
essary (Ypage 115).
XSwitch on climate control (Ypage 110).
XSwitch off air-recirculation mode
(Ypage 115).
XSwitch on th ecoolingw ithair dehumidifica-
tio nfunction (Ypage 111).
XSwitch on automatic mod e(Ypage 112).
XIf thewindows continue to fog up, switch on
th ew indshield defrostin gfunction
(
Ypage 114).
Windows fogged up on th eoutside
You should only selectt hiss ettin guntil the
windshield is clear again.
XSwitch on th ewindshield wipers
(Ypage 101).
XSwitch on climate control (Ypage 110).
XIn warm and damp weather,don otallow cold
air to flow onto th ewindows. Close th eside
air vents if required (
Ypage 116).
Switching th erearw indow defroster
on/off
General notes
The rear window defroste rconsume salot of
power.Y ou should therefor eswitch off th erear
window defroste rassoon as th erear window is
clear.
XTurn th ekeyto position 2in th eignition lock.
XPress the ¤buttonont hecontrol panel.
If th eindicator lamp in the ¤buttonlights
up, th erear window defroste risswitched on.
The rear window defroste rswitches off auto-
maticall yafter afew minutes.
Problemsw ith therearw indow
defroster
The rear window defroste rhas switched off pre-
maturely or canno tbeactivated.
The vehicle starter battery is no tsufficiently
charged.
XSwitch off any consumers that are not
required, e.g .reading lamps ,interiorl ighting
or seat heating.
When th ebattery is sufficiently charged, the
rear window defroste rcan be activated again.
Switching air-recirculation mode
on/off
Important safety notes
You can deactivate th eintake of fresh air if
unpleasanto dorsenterthev ehicle from out-
side. The air inside th evehicle will only be cir-
culated.
When you switch on air-recirculation mode, the
side windows and windows coul dfog up more
quickly, in particular at low outside tempera-
tures. Only switch on air-recirculation mod efor
as hort time.
Operatin gthe climatec ontrol system115
Climate control
Page 119 of 310
Make sure that all vehicle occupants always
maintainasufficient distance to the air out-
lets. If necessary, redirect the airflow to
another area of the vehicle interior.
The center and side air vents are adjustable.
The air vents can also be adjusted on vehicles
with rear-compartment air conditioning.
In order to ensure the direct flow of fresh air
through the air vents into the vehicle interior,
please observe the following notes:
Rkeep the air inlet between the windshield and
the hood free of blockages, such as ice, snow
or leaves.
Rnever cover the vents or the ventilation grilles
in the vehicle interior.
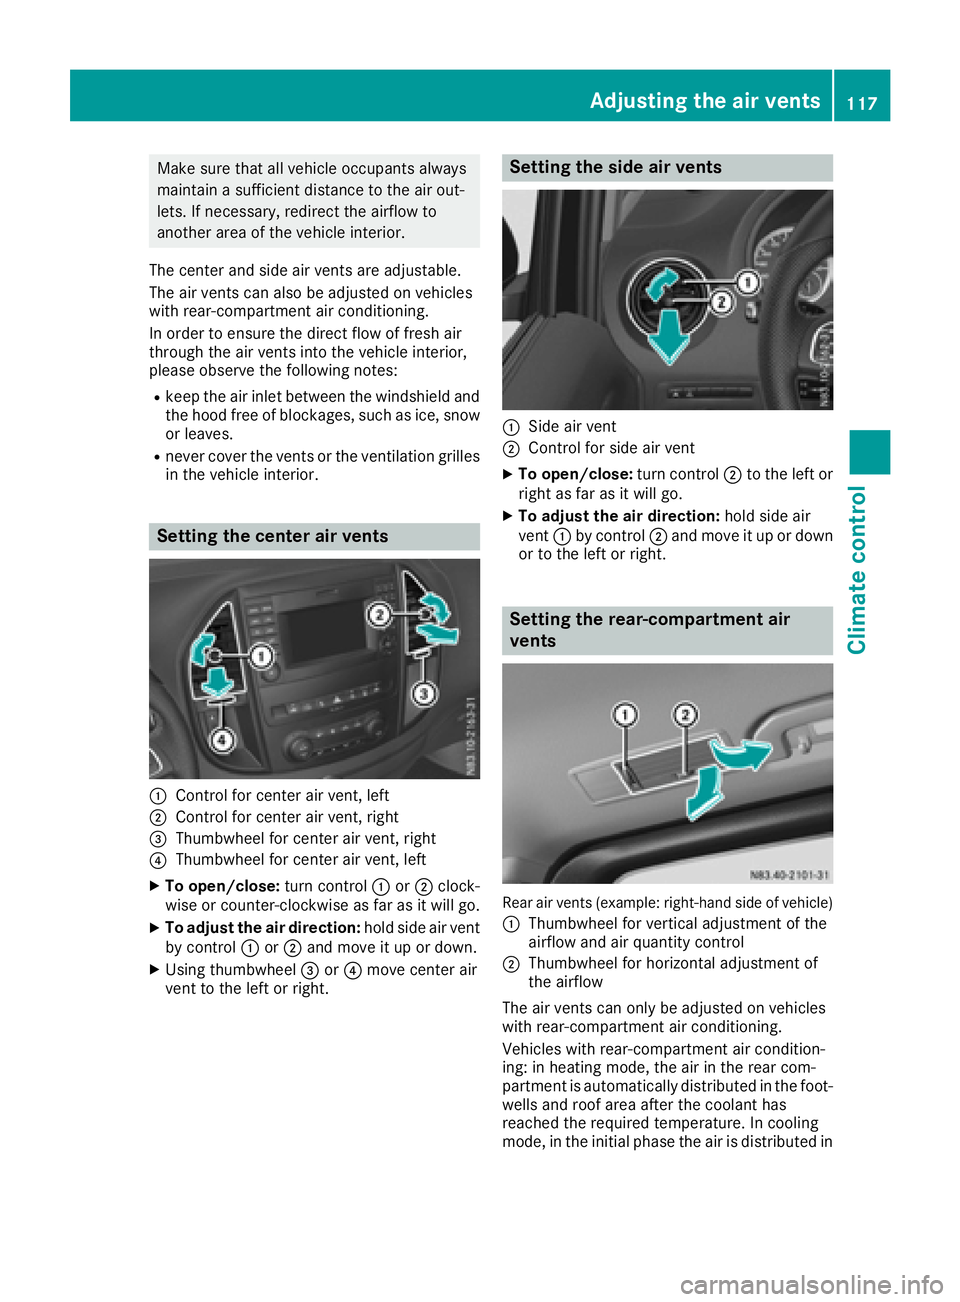
Setting the center air vents
:Control for center air vent, left
;Control for center air vent, right
=Thumbwheel for center air vent, right
?Thumbwheel for center air vent, left
XTo open/close: turn control:or; clock-
wise or counter-clockwise as far as it will go.
XTo adjust the air direction: hold side air vent
by control :or; and move it up or down.
XUsing thumbwheel =or? move center air
vent to the left or right.
Setting the side air vents
:Side air vent
;Control for side air vent
XTo open/close: turn control;to the left or
right as far as it will go.
XTo adjust the air direction: hold side air
vent :by control ;and move it up or down
or to the left or right.
Setting the rear-compartment air
vents
Rear air vents (example: right-hand side of vehicle)
:
Thumbwheel for vertical adjustment of the
airflow and air quantity control
;Thumbwheel for horizontal adjustment of
the airflow
The air vents can only be adjusted on vehicles
with rear-compartment air conditioning.
Vehicles with rear-compartment air condition-
ing: in heating mode, the air in the rear com-
partment is automatically distributed in the foot-
wells and roof area after the coolant has
reached the required temperature. In cooling
mode, in the initial phase the air is distributed in
Adjusting the air vents117
Climatec ontrol
Z
Page 134 of 310
Do not getinto the vehicl eagain durin gthe refu-
eling process. Otherwise, electrostatic charge
could buil dupagain.
HEnvironmental note
If fuel sarehandled improperly, theyp osea
dange rtopersons and the environment. Do
not allo wfuels to runi nto the sewag esystem,
the surface waters ,the ground water or into
the ground.
!Do not switch on the ignition if yo uacciden-
tally refue lwitht he wrong fuel .Otherwise, the
fuel will ente rthe fuel lines .Notify aquali fied
specialis tworkshop and have the fuel tank
and fuel lines draine dcompletely.
!Overfilling the fuel tank could damage the
fuel system.
!Take car enot to spil lany fuel on painted
surfaces .You could otherwis edamag ethe
paintwork.
!Use afilter when refueling fromaf uelcan.
Otherwise, the fuel lines and/or injectio nsys-
tem could be blocke dbyparticle sfromt he
fuel can.
Yo uw illf ind furthe rinformatio nabout fuel and
fuel grade sunder "Service products and capaci-
ties" (
Ypage 296).
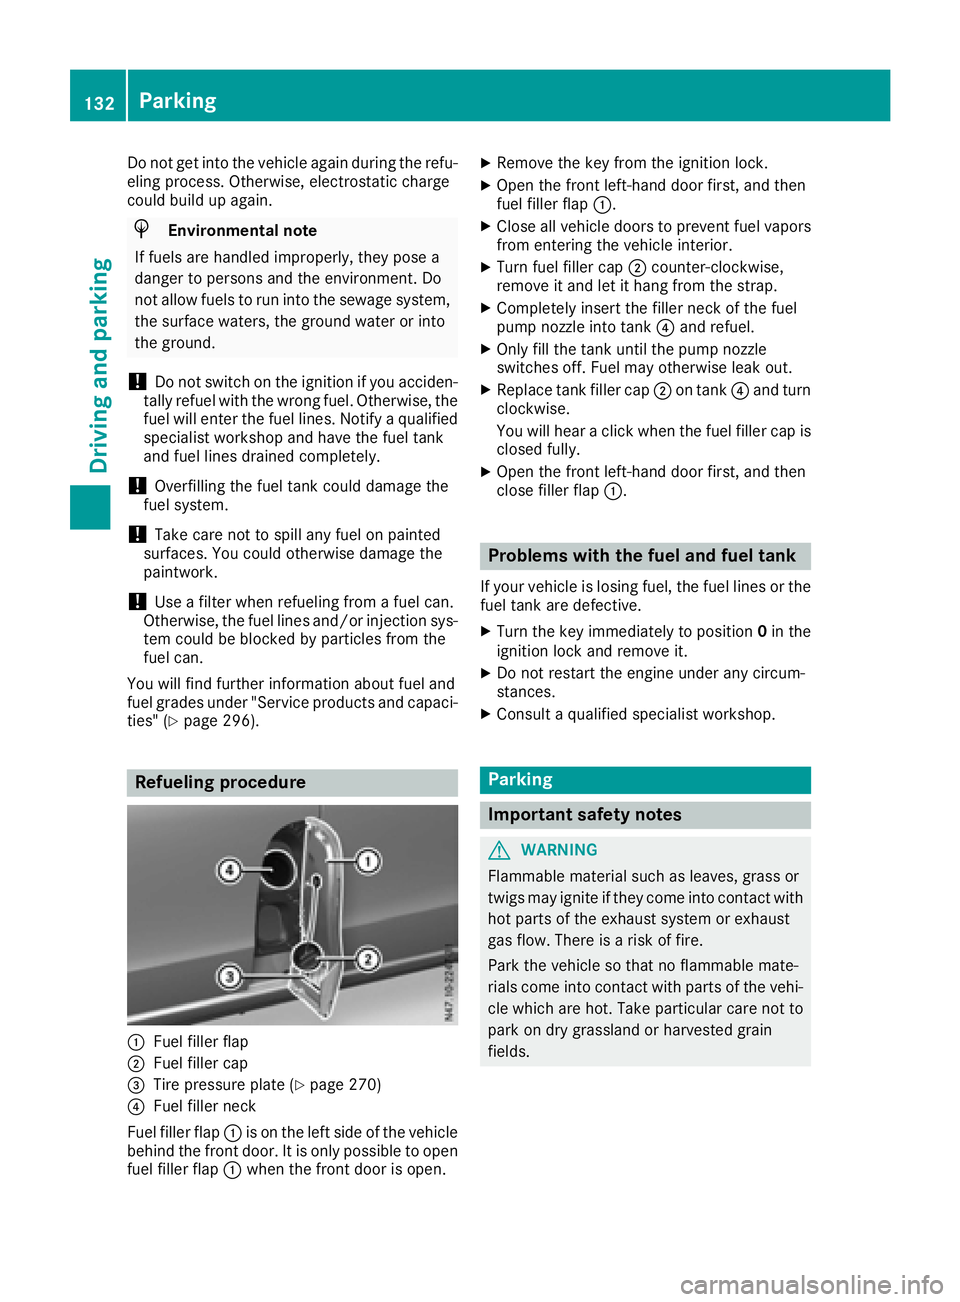
Refueling procedure
:Fue lfille rflap
;Fue lfille rcap
=Tire pressure plate (Ypage 270)
?Fue lfille rneck
Fue lfille rflap :is on the left side of the vehicle
behind the front door. It is onl ypossibl etoo pen
fuel fille rflap :when the front door is open.
XRemov ethe key fromt he ignition lock.
XOpen the front left-hand door first, and then
fuel fillerflap :.
XClose al lvehicl edoors to prevent fuel vapors
frome nteringthe vehicl einterior.
XTurn fuel fille rcap ; counter-clockwise,
remove it and le tithangf romt he strap.
XCompletely insert the fille rneck of the fuel
pump nozzl einto tank ?and refuel.
XOnlyf illt he tank unti lthe pump nozzle
switches off .Fuelm ayotherwis elea ko ut.
XReplace tank fille rcap ; on tank ?and turn
clockwise.
Yo uw illh ea rac lick when the fuel fille rcap is
closed fully.
XOpen the front left-hand door first, and then
close fille rflap :.
Problems with the fuela nd fueltank
If your vehicl eislosingfuel, the fuel lines or the
fuel tank ar edefective.
XTurn the key immediatel ytoposition0in the
ignition lock and remove it.
XDo not restar tthe engine under any circum-
stances.
XConsult aquali fied specialis tworkshop.
Parking
Important safety notes
GWARNING
Flammabl ematerial such as leaves, grass or
twigs mayi gnite if theyc ome into contact with
hot parts of the exhaust system or exhaust
gasf low. There is ariskoff ire.
Park the vehicl esothatnof lammabl emate-
rials come into contact with parts of the vehi-
cle which ar ehot. Take particular car enot to
park on dry grassland or harvested grain
fields.
132Parking
Driving an dparking
Page 172 of 310
On-boardcomputer (vehicles without
steering wheel buttons)
Operating the on-board computer
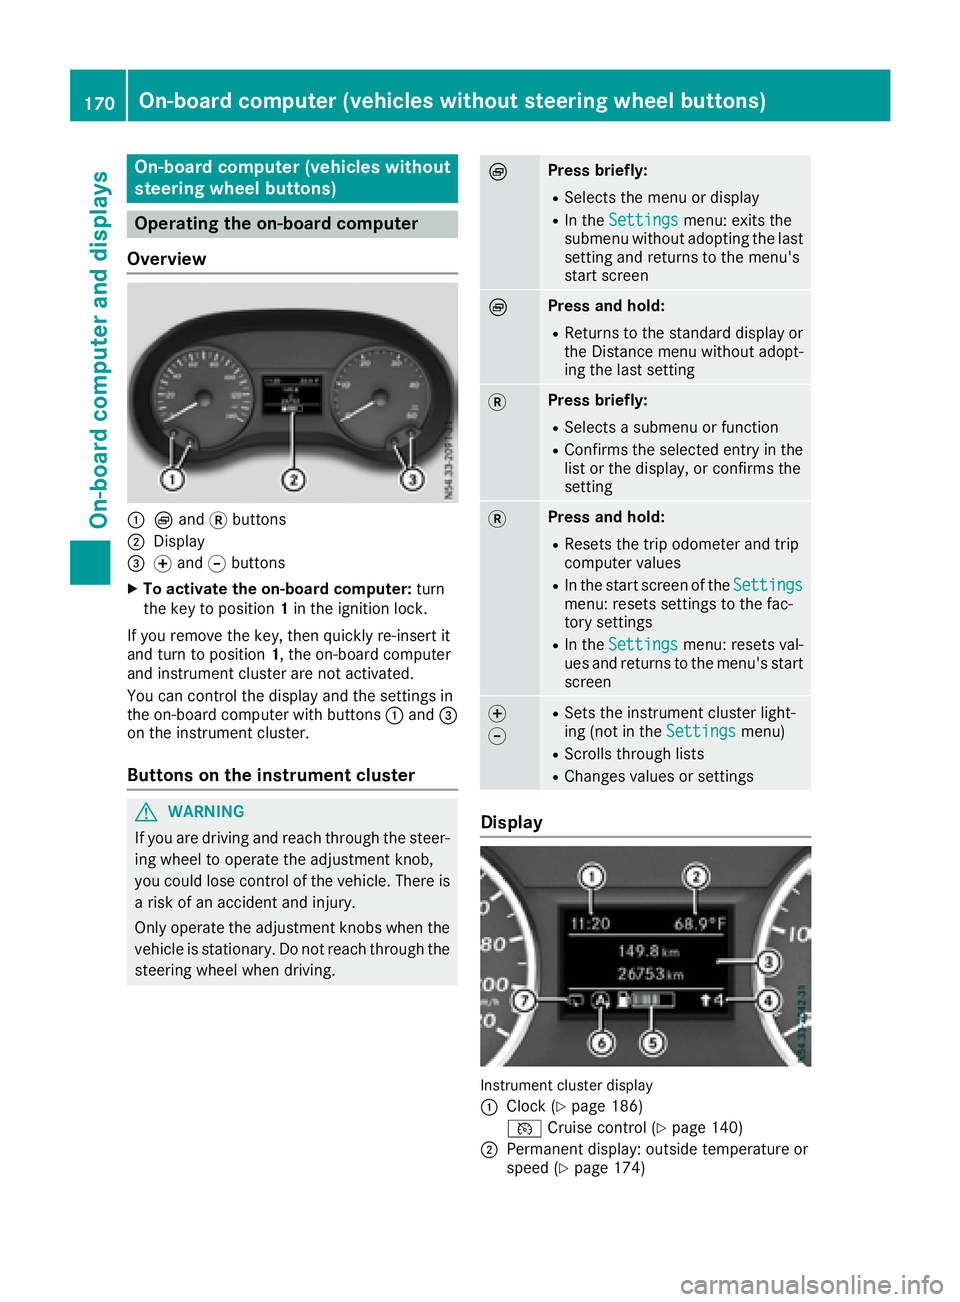
Overview
:È and 3buttons
;Display
=f and gbuttons
XTo activate the on-board computer: turn
the key to position 1in the ignition lock.
If you remove the key, then quickly re-insert it
and turn to position 1,the on-board computer
and instrument cluster are not activated.
You can control the display and the settings in
the on-board computer with buttons :and =
on the instrument cluster.
Buttons on the instrument cluster
GWARNING
If you are driving and reach through the steer- ing wheel to operate the adjustment knob,
you could lose control of the vehicle. There is
ar isk of an accidenta nd injury.
Only operate the adjustment knobs when the vehicle is stationary. Do not reach through the
steering wheel when driving.
ÈPress briefly:
RSelectst he menu or display
RIn theSettingsmenu: exits the
submenu without adopting the last
setting and return stothe menu's
start screen
ÈPress and hold:
RReturns to the standard display or the Distance menu without adopt-
ing the last setting
3Press briefly:
RSelectsas ubmenu or function
RConfirmsthe selected entry in the
list or the display, or confirms the
setting
3Press and hold:
RResets the trip odometer and trip
computer values
RIn the start screen of the Settingsmenu: resetssettings to the fac-
tory settings
RIn the Settingsmenu: resetsv al-
ues and return stothe menu's start
screen
f
gRSetst he instrument cluster light-
ing (not in the Settingsmenu)
RScrolls through lists
RChanges values or settings
Display
Instrument cluster display
:
Clock (Ypage 186)
V Cruise control (
Ypage 140)
;Permanen tdisplay: outside temperature or
speed (Ypage 174)
170On-boardc omputer (vehicles without steering wheel buttons)
On-boardcomputer and displays
Page 178 of 310
%Press briefly:
RBack
RIn theAudiomenu: exits the track
or station list
RHides display messages
RExitst he telephone book/redial
memory
RVehicles with anavigation system:
switches off voice-operated con-
trol of the navigation system; see
the separate operating instruc-
tions
%Press and hold:
RCallsupt he standard display in the
Tripmenu
Right control panel on the steering wheel
6RMakes or accepts acall
RSwitches to the redial memory
~RRejects or ends acall
RExitst he telephone book/redial
memory
W
XRAdjusts the volume
óRVehicles with anavigation system:
switches on voice-operated con-
trol of the navigation system; see
the separate operating instruc-
tions
8RMute
iThe audio devices, telephone and voice-
operated control using the steering wheel
buttons in the right control panel only func-
tion with aMercedes-Benza udio or naviga-
tion system. If you are using an audio or nav-
igation system from another manufacturer,
the described functions may be restricted or
not available at all.
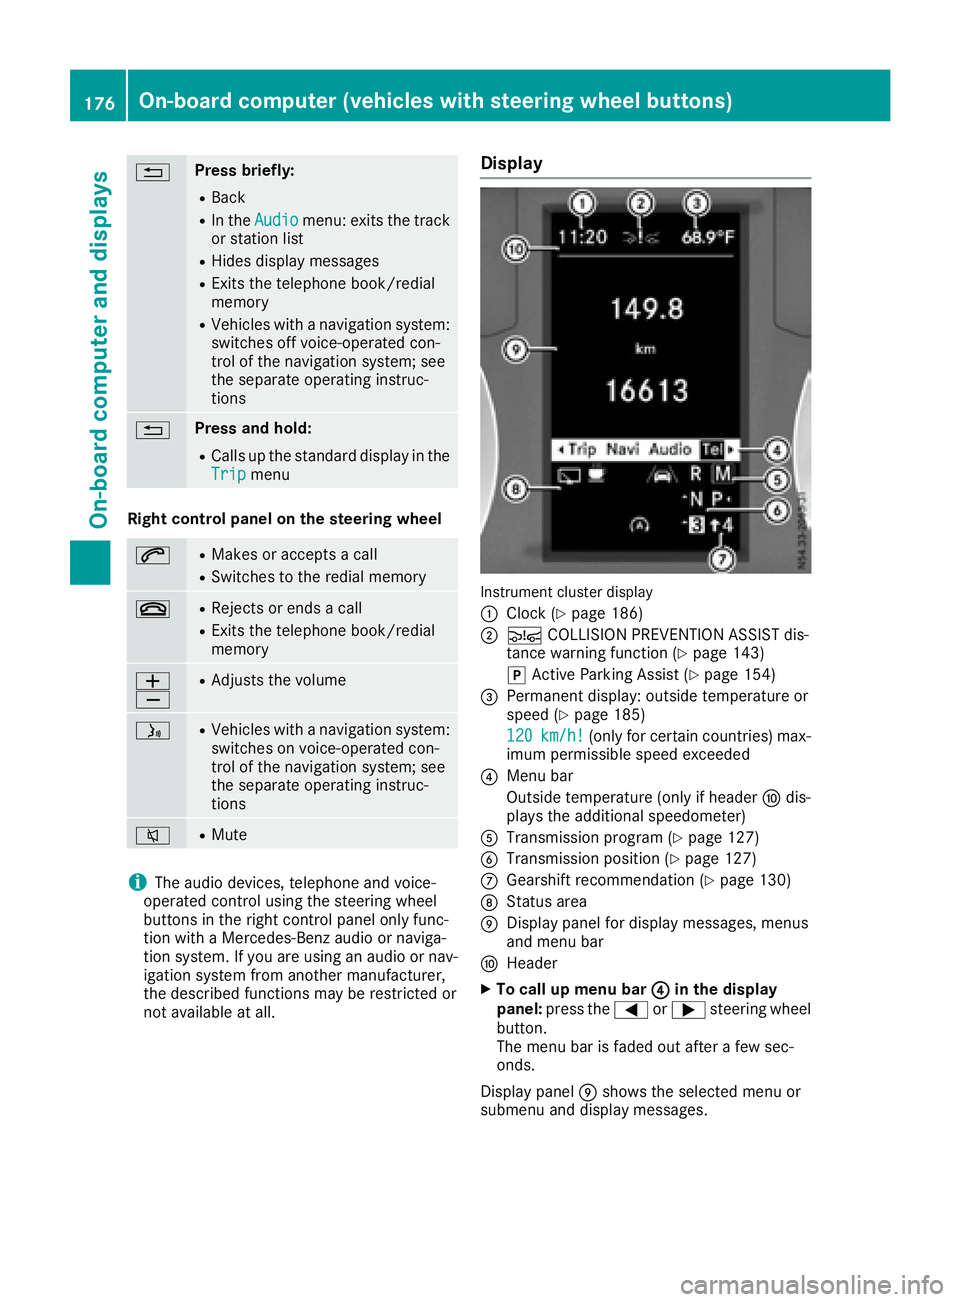
Display
Instrument cluster display
:
Clock (Ypage 186)
;Ä COLLISION PREVENTION ASSIST dis-
tance warning function (Ypage 143)
j Active Parking Assist (
Ypage 154)
=Permanent display:o utside temperature or
speed (Ypage 185)
120
km/h!(only for certain countries) max-
imum permissible speed exceeded
?Menu bar
Outside temperature (only if header Fdis-
playst he additional speedometer)
ATransmission program (Ypage 127)
BTransmission position (Ypage 127)
CGearshift recommendation (Ypage 130)
DStatus area
EDisplay panel for display messages, menus
and menu bar
FHeader
XTo call up menu bar ?in the display
panel: press the =or; steering wheel
button.
The menu bar is faded out after afew sec-
onds.
Display panel Eshows the selected menu or
submenu and display messages.
176On-board computer (vehicles with steering wheelb uttons)
On-board computer and displays
Page 188 of 310
Using the steering wheel buttons
XPress=or; to select the Settingsmenu.
XPress:or9 to select Inst. Clus‐ter.
XPressato confirm.
XPress :or9 to select PermanentDisplay:.
XPressato confirm.
The displays hows the current selection of
Outside Temp.
or Speedom..
XPress ato change the setting.
Clock/Date submenu
Setting the time
Using the steering wheel buttons
XPress =or; to select the Settingsmenu.
XPress:or9 to select Time/Date.
XPressato confirm.
XPress :or9 to select the Time:func-
tion.
The displays hows the current time.
XTo set the time: pressaagain.
XPress =or; to switch between hours
and minutes.
XPress :or9 to set the hours or
minutes.
XThen press ato confirm.
The displays hows the updated time.
Setting the date
Using the steering wheel buttons
XPress=or; to select the Settingsmenu.
XPress:or9 to select Time/Date.
XPressato confirm.
XPress :or9 to select the Date:func-
tion.
The displays hows the current date.
XTo set the date: pressaagain.
XPress =or; to switch between day,
month and year.
XPress :or9 to set the day, month or
year.
XThen press ato confirm.
The displays hows the updated date.
Lights submenu
Activating/deactivating the surround
lighting and exterior lighting delayed
switch-off
If you activate the Locator Lightingfunction
and the light switch is turned to the Ãposi-
tion, the following functions are activated when
it is dark:
RSurround lighting: the exterior lighting
remains on for 40 seconds after the doors are
unlocked. When you start the engine, the sur-
round lighting is deactivated and the auto-
matic headlamp feature is activated
(
Ypage 93).
RExterior lighting delayed switch-off: the
exterior lighting remains on for 60 seconds
after the engine is switched off. If you close all
the doors and the tailgate/rear doors, the
exterior lighting switches off after
15 seconds.
Using the steering wheel buttons
XPress =or; to select the Settingsmenu.
XPress:or9 to select Lights.
XPressato confirm.
XPress :or9 to select the LocatorLightingfunction.
The current status is shown.
XTo activate/deactivate: pressaagain.
If you change the setting, conversion does not
take place until the next time the vehicle is
stationary.
Temporarilyd eactivating the exterior lighting
delayed switch-off:
XBefore leaving the vehicle, turn the key to
position 0in the ignition lock.
XTurn the key to position 2in the ignition lock.
The exterior lighting delayed switch-off is
deactivated until the next time the engine is
started.
With surround lighting and exterior lighting
delayed switch-off, the following light up
depending on the vehicle's equipment:
RParking lamps
RFog lamps
RLow-beam headlamps
RDaytime running lamps
186On-board computer (vehicles with steering wheelb uttons)
On-board computer and displays
Page 189 of 310
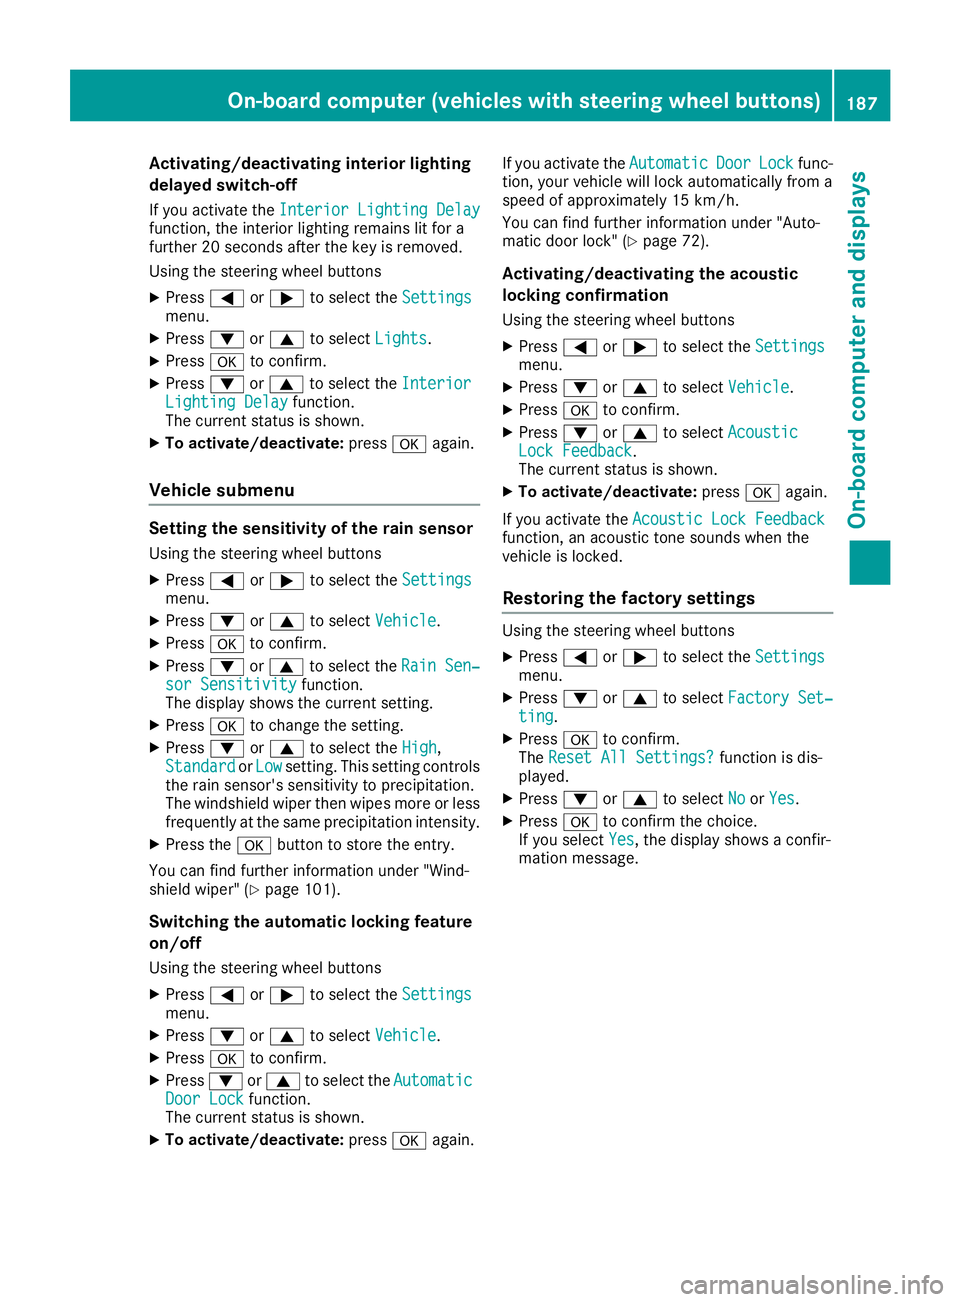
Activating/deactivatinginteri orlighting
delayed switch-off
If you activat ethe Interior Lighting Delayfunction ,the interio rlightin gremains lit for a
further 20 seconds after th ekeyis removed.
Usin gthe steering whee lbuttons
XPress =or; to select th eSettingsmenu.
XPress :or9 to select Lights.
XPressato confirm .
XPress:or9 to select th eInteriorLighting Delayfunction .
The curren tstatus is shown.
XTo act ivate/deact ivate:pressaagain.
Vehicle submenu
Settin gthe sensitivity of therains ensor
Usin gthe steering whee lbuttons
XPress =or; to select th eSettingsmenu.
XPress :or9 to select Vehicle.
XPressato confirm .
XPress:or9 to select th eRai nSen‐sor Sensitivityfunction .
The display shows th ecurren tsetting.
XPress ato chang ethe setting.
XPress :or9 to select th eHig h,
Standardor Lowsetting. This settin gcontrols
th er ain sensor's sensitivit ytop recipitation.
The windshield wiper then wipes mor eorless
frequently at th esame precipitatio nintensity.
XPress th ea buttontos tore th eentry.
You can fin dfurther information under "Wind-
shield wiper "(
Ypage 101).
Switchingthe autom atic lockin gfeature
on/off
Usin gthe steering whee lbuttons
XPress =or; to select th eSettingsmenu.
XPress :or9 to select Vehicle.
XPressato confirm .
XPress:or9 to select th eAutomaticDoo rLockfunction .
The curren tstatus is shown.
XTo act ivate/deact ivate:pressaagain.If you activat
ethe Automatic
Doo rLockfunc-
tion, your vehicl ewill loc kautomatically from a
spee dofa pproximately 15 km/h.
You can fin dfurther information under "Auto-
matic door lock" (
Ypage 72).
Activating/deactivatin gthe acoustic
lockin gconfirm ation
Usingthe steering whee lbuttons
XPress =or; to select th eSettingsmenu.
XPress :or9 to select Vehicle.
XPressato confirm .
XPress:or9 to select AcousticLockFeedback.
The curren tstatus is shown.
XTo act ivate/deact ivate:pressaagain.
If you activat ethe Acoustic Loc kFeedback
function ,anacoustic tone sounds when th e
vehicl eislocked.
Restoring th efactor ysettings
Usin gthe steering whee lbuttons
XPress =or; to select th eSettingsmenu.
XPress :or9 to select FactorySet‐tin g.
XPress ato confirm .
The Reset All Settings?function is dis-
played.
XPress :or9 to select NoorYes.
XPress ato confirm th echoice.
If you select Yes,the display shows aconfir -
mation message .
On-boardcomputer (vehicles with steering wheel buttons)187
On-boardcomputer and displays
Z
Page 247 of 310
!Take care not to spill any coolant on painted
surfaces. You could otherwise damage the
paintwork.
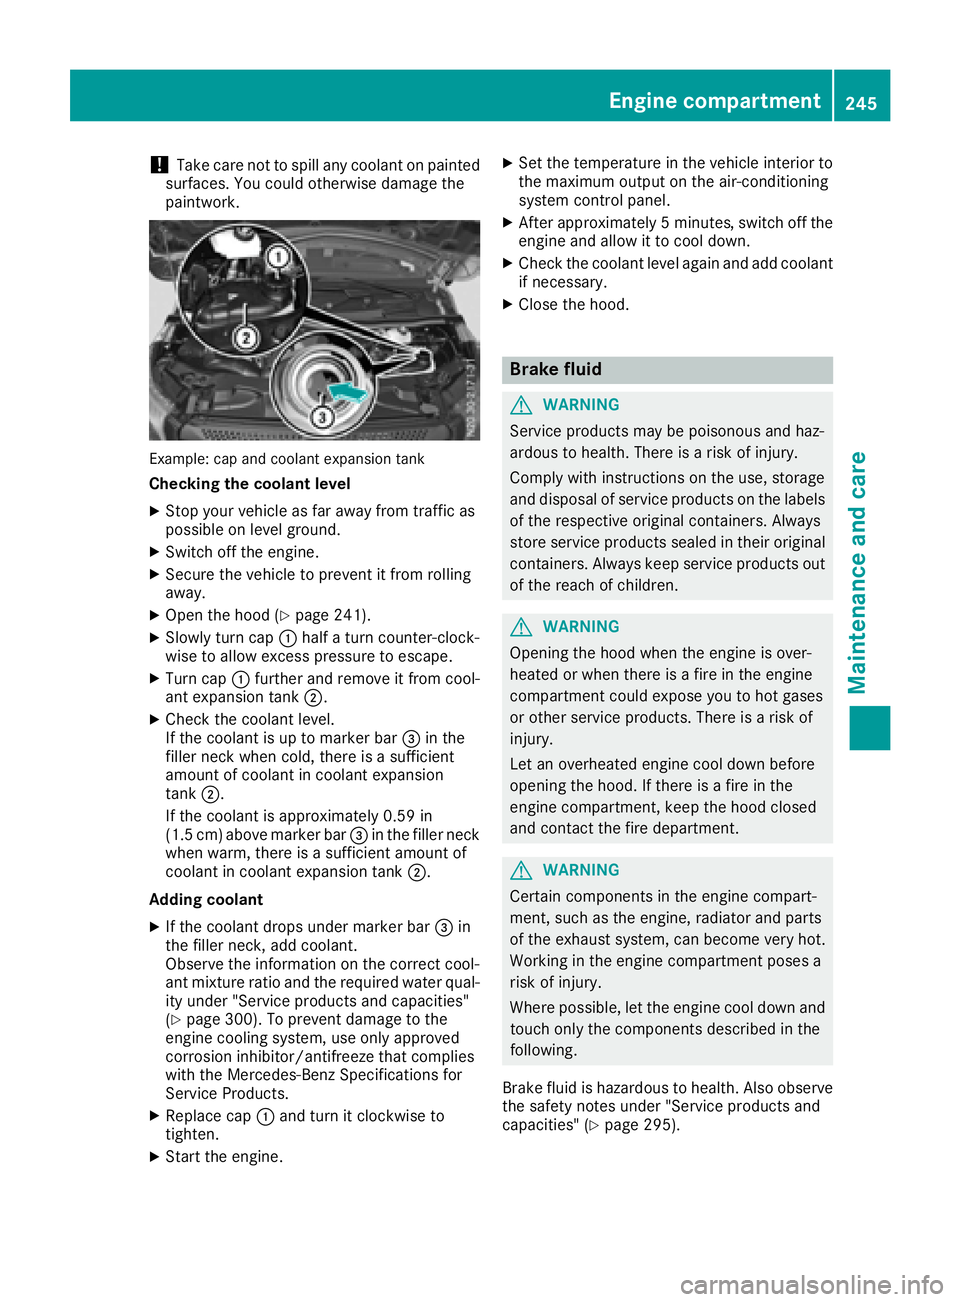
Example: cap and coolant expansion tank
Checkingt he coolant level
XStop your vehicle as far awayf rom traffic as
possible on level ground.
XSwitch off the engine.
XSecure the vehicle to prevent it from rolling
away.
XOpen the hood (Ypage 241).
XSlowly turn cap :half aturn counter-clock-
wise to allow excess pressure to escape.
XTurn cap :further and remove it from cool-
ant expansion tank ;.
XCheck the coolant level.
If the coolant is up to marker bar =in the
filler neck when cold, there is asufficient
amount of coolant in coolant expansion
tank ;.
If the coolant is approximately 0.59 in
(1.5 cm) above marker bar =in the filler neck
when warm, there is asufficient amount of
coolant in coolant expansion tank ;.
Adding coolant
XIf the coolant drops under marker bar =in
the filler neck, add coolant.
Observe the information on the correct cool-
ant mixture ratio and the required water qual-
ity under "Service products and capacities"
(
Ypage 300). To prevent damage to the
engine cooling system, use only approved
corrosion inhibitor/antifreeze that complies
with the Mercedes-Benz Specifications for
Service Products.
XReplace cap :and turn it clockwise to
tighten.
XStart the engine.
XSet the temperature in the vehicle interior to
the maximum output on the air-conditioning
system control panel.
XAfter approximately 5minutes ,switch off the
engine and allow it to cool down.
XCheck the coolant level againa nd add coolant
if necessary.
XClose the hood.
Brake fluid
GWARNING
Service products may be poisonous and haz-
ardous to health. There is arisk of injury.
Comply with instructionsont he use, storage
and disposalofs ervice products on the labels
of the respective original containers. Always
store service products sealed in their original
containers. Alwaysk eep service products out
of the reach of children.
GWARNING
Opening the hood when the engine is over-
heated or when there is afire in the engine
compartment could expose you to hot gases
or other service products. There is arisk of
injury.
Let an overheated engine cool down before
opening the hood. If there is afire in the
engine compartment,k eep the hood closed
and contact the fire department.
GWARNING
Certain componentsint he engine compart-
ment, such as the engine, radiator and parts
of the exhaust system, can become very hot.
Working in the engine compartment poses a
risk of injury.
Where possible,l et the engine cool down and
touch only the componentsd escribed in the
following.
Brake fluid is hazardous to health. Also observe the safety notes under "Service products and
capacities" (
Ypage 295).
Engine compartment245
Maintenance and care
Z