clock MERCEDES-BENZ METRIS 2016 MY16 Operator’s Manual
[x] Cancel search | Manufacturer: MERCEDES-BENZ, Model Year: 2016, Model line: METRIS, Model: MERCEDES-BENZ METRIS 2016Pages: 310, PDF Size: 7.28 MB
Page 263 of 310

XTo open:turn top rotary catch :clockwise
and bottom rotary catch :counter-clock-
wise.
XRemove cover ;.
XTo close:insert cover ;.
XTurn top rotary catch :counter-clockwise
and bottom rotary catch :clockwise.
XFoldd ownthe rea rseat.
Removing/stowin gvehicle too lkit and
jack
Depending on the equipment versio nofthe vehi-
cle ,the vehicl etool kit and the jack are stowed
either in astowag etray or in atool holde rwitha
cover.
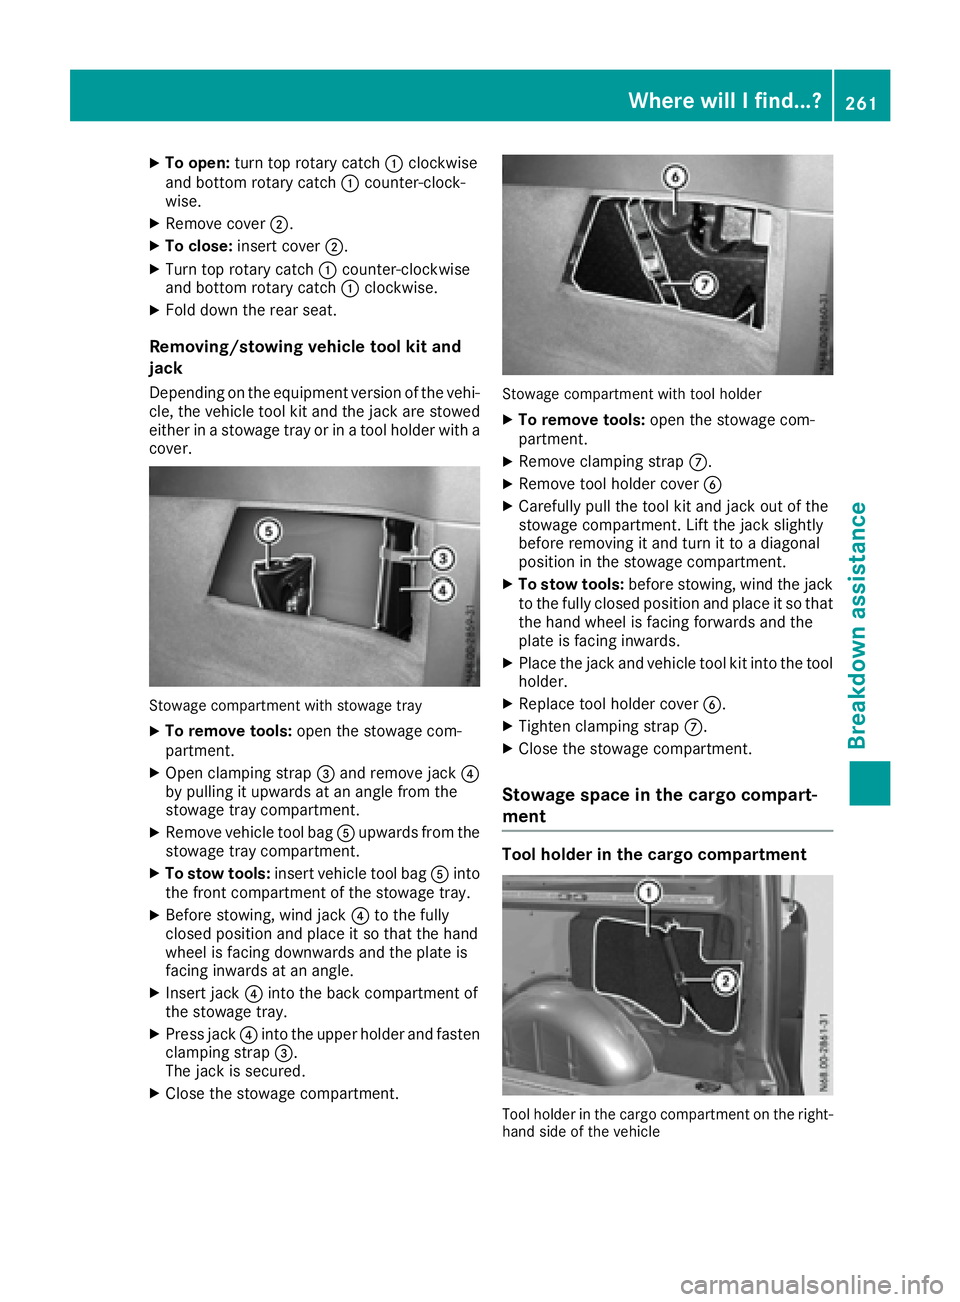
Stowag ecompartment with stowag etray
XTo remove tools: open the stowagecom-
partment.
XOpe nclamping strap =and remove jack ?
by pulling it upwards at an angle from the
stowag etray compartment.
XRemove vehicl etool bag Aupwards from the
stowag etray compartment.
XTo stowt ools:insert vehicl etool bag Ainto
the front compartment of the stowag etray.
XBefore stowing ,windj ack ?to the fully
closed positio nand place it so thatt he hand
whee lisfacing downward sand the plate is
facing inward satanangle.
XInsert jack ?into the back compartment of
the stowag etray.
XPress jack ?into the uppe rholde rand fasten
clamping strap =.
The jack is secured.
XClose the stowag ecompartment.
Stowag ecompartment with tool holder
XTo remove tools: open the stowagecom-
partment.
XRemove clamping strap C.
XRemove tool holdercover B
XCarefull ypullt he tool kit and jack outoft he
stowag ecompartment. Lif tthe jack slightly
before removing it and turn it to adiago nal
positio ninthe stowag ecompartment.
XTo stowt ools:before stowing ,windt he jack
to the fully closed positio nand place it so that
the hand whee lisfacing forward sand the
plate is facing inwards.
XPlace the jack and vehicl etool kit into the tool
holder.
XReplace tool holde rcover B.
XTighte nclamping strap C.
XClose the stowag ecompartment.
Stowage spac einthe carg ocom part-
ment
Too lholder in the carg ocom partment
Too lholde rint he cargo compartment on the right-
hand side of the vehicle
Where will Ifind...?261
Breakdo wn assis tance
Page 267 of 310

Have the vehicle transported onatransporter or
trailer if it has transmission damage.
Whent owing, the automati ctransmission must
be in position N.Ifthe automati ctransmission
cannot be shifted to position N,havet he vehicle
transported on atransporter or trailer.
The battery mus tbeconnected and charged.
Otherwise ,you :
Rcannot turn the key to position 2in the igni-
tion lock
Rcannot shift the transmission to position N
Before the vehicle is towed, switch off the auto-
mati clocking feature (
Ypage 72). You could
otherwise lock yourself out of the vehicle when
pushing or towing away the vehicle.
Installing/removin gthe towing eye
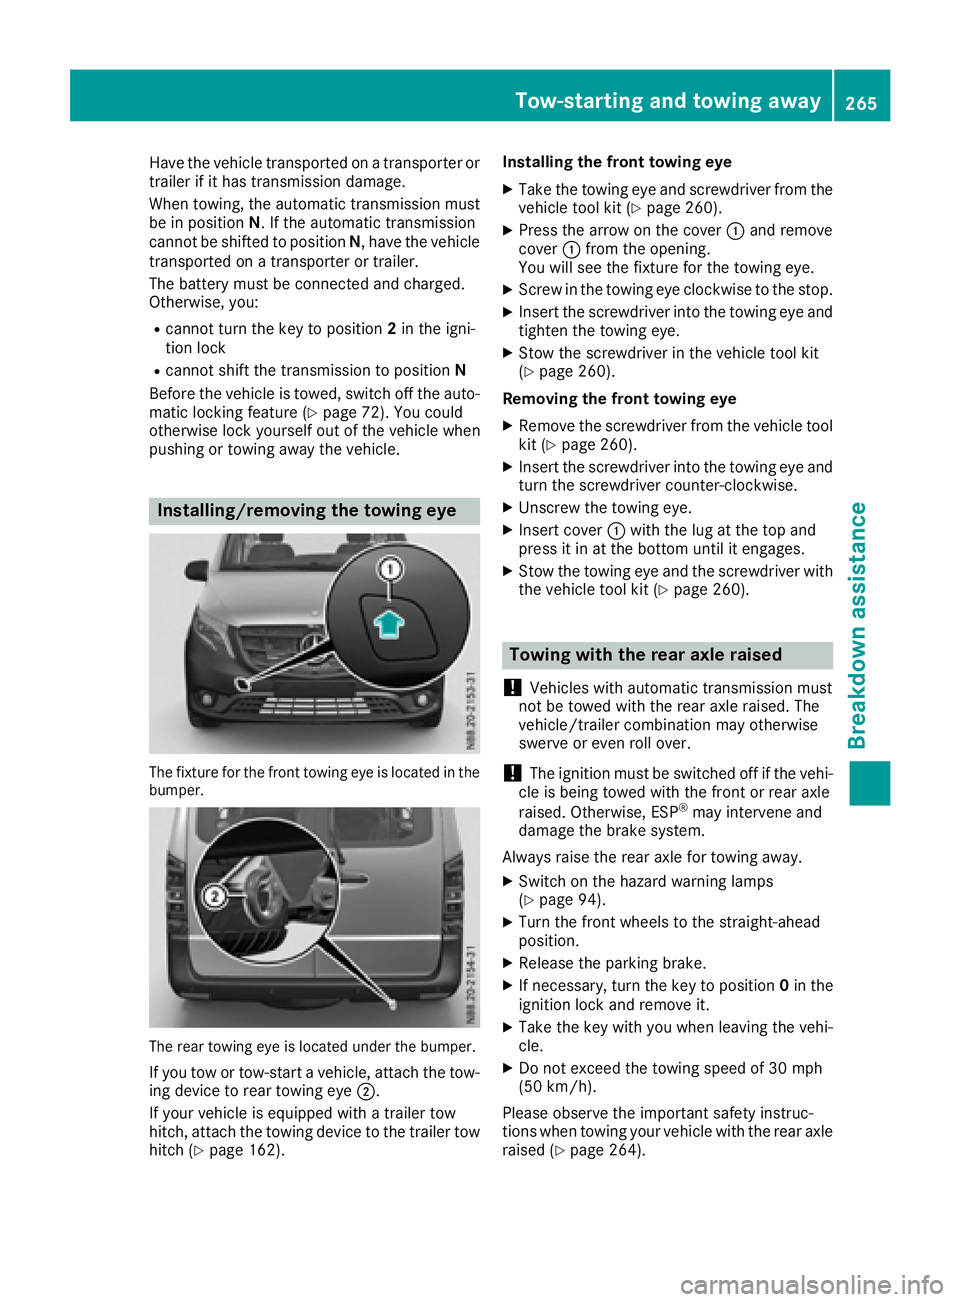
The fixtur efor the front towing eyeisl ocated in the
bumper.
The rea rtowing eyeisl ocated underthe bumper.
If yo utow or tow-start avehicle, attach the tow-
ing device to rea rtowing eye ;.
If your vehicle is equipped with atrailer tow
hitch, attach the towing device to the trailer tow
hitch (
Ypage 162). Installing the front towing eye
XTake the towing eyea
nd screwdriver from the
vehicle tool kit (Ypage 260).
XPres sthe arro wonthe cover :and remove
cover :from the opening.
You will see the fixtur efor the towing eye.
XScrew in the towing eyec lockwise to the stop.
XInsert the screwdriver into the towing eyea nd
tighte nthe towing eye.
XStow the screwdriver in the vehicle tool kit
(Ypage 260).
Removing the front towing eye
XRemove the screwdriver from the vehicle tool
kit (Ypage 260).
XInsert the screwdriver into the towing eyea nd
turn the screwdriver counter-clockwise.
XUnscrew the towing eye.
XInsert cover :with the lu gatthe top and
pres sitinatt he bottom until it engages.
XStow the towing eyea nd the screwdriver with
the vehicle tool kit (Ypage 260).
Towing with the rear axle raised
!
Vehicles with automati ctransmission must
not be towe dwitht he rea raxler aised.T he
vehicle/trailer combinatio nmay otherwise
swerve or even roll over.
!The ignition mus tbeswitched off if the vehi-
cle is being towe dwitht he front or rea raxle
raised.O therwise,ESP
®may intervene and
damag ethe brake system.
Always raise the rea raxlef or towing away.
XSwitch on the hazard warning lamps
(Ypage 94).
XTur nthe front wheels to the straight-ahead
position.
XRelease the parking brake.
XIf necessary ,turn the key to position 0in the
ignition lock and remov eit.
XTake the key with yo uwhenleaving the vehi-
cle.
XDo not excee dthe towing speed of 30 mph
(50 km/h).
Please observe the important safety instruc-
tions whe ntowing your vehicle with the rea raxle
raised (
Ypage 264).
Tow-starting and towing away265
Breakdow nassistance
Z
Page 289 of 310

Mountingawheel
Vehicle preparation
XStop the vehicleasf ar awayaspossible from
traffic and on alevel, firm and non-slip sur-
face.
XIf you rvehicl eposesar isk to approaching
traffic, switch on the hazar dwarning lamps.
XApply the parking brake.
XTurn the front wheels to the straight-ahead
position.
XShift the transmission to position P.
XSwitch off the engine.
XPassengers should leave the vehicle. Make
sure that the passengers are not endangered
as they do so.
XMake sure that no one is near the dange rarea
while the whee lisbeing changed .Anyone
who is not directly assisting in the wheel
change should, for example, stand behind the
barrier.
XPlace the warning triangl eorwarning lamp at
as uitable distance.
Observe the lega lrequirements on the cor-
rect use of the warning triangl eorwarning
lamp for the country in which you are cur-
rently driving
XSecure the vehicletop revent it from rolling
away.
Observe the safety notes on parking under
"Driving and parking" (
Ypag e132)
XOn level terrain: place chocks or other suit-
abl eo bjects under the front and rear of the
whee lthat is diagonally opposite the whee lto
be changed.
XOn slight inclines: place chocks or other
suitable objects under the wheels on the front and rear axle sopposite the whee ltobe
changed.
XIf included in the vehiclee quipment, take the
tire-changing tool kit out of the vehiclet ool kit
(
Ypag e260).
Apart from some country-specific variants,
vehicles are not equipped with tire-changing
tools. Some tools for changing awhee lare
specific to the vehicle. Consult aqualified
specialist worksho pfor more information on
which tools are required to perform awheel
change on you rv
ehi cle.
XIf included in the vehiclee quipment, remove
the spare whee lfrom the spare whee lbracket (
Ypag
e292) .Observe the safety notes listed
under "Spare wheel" (Ypag e291).
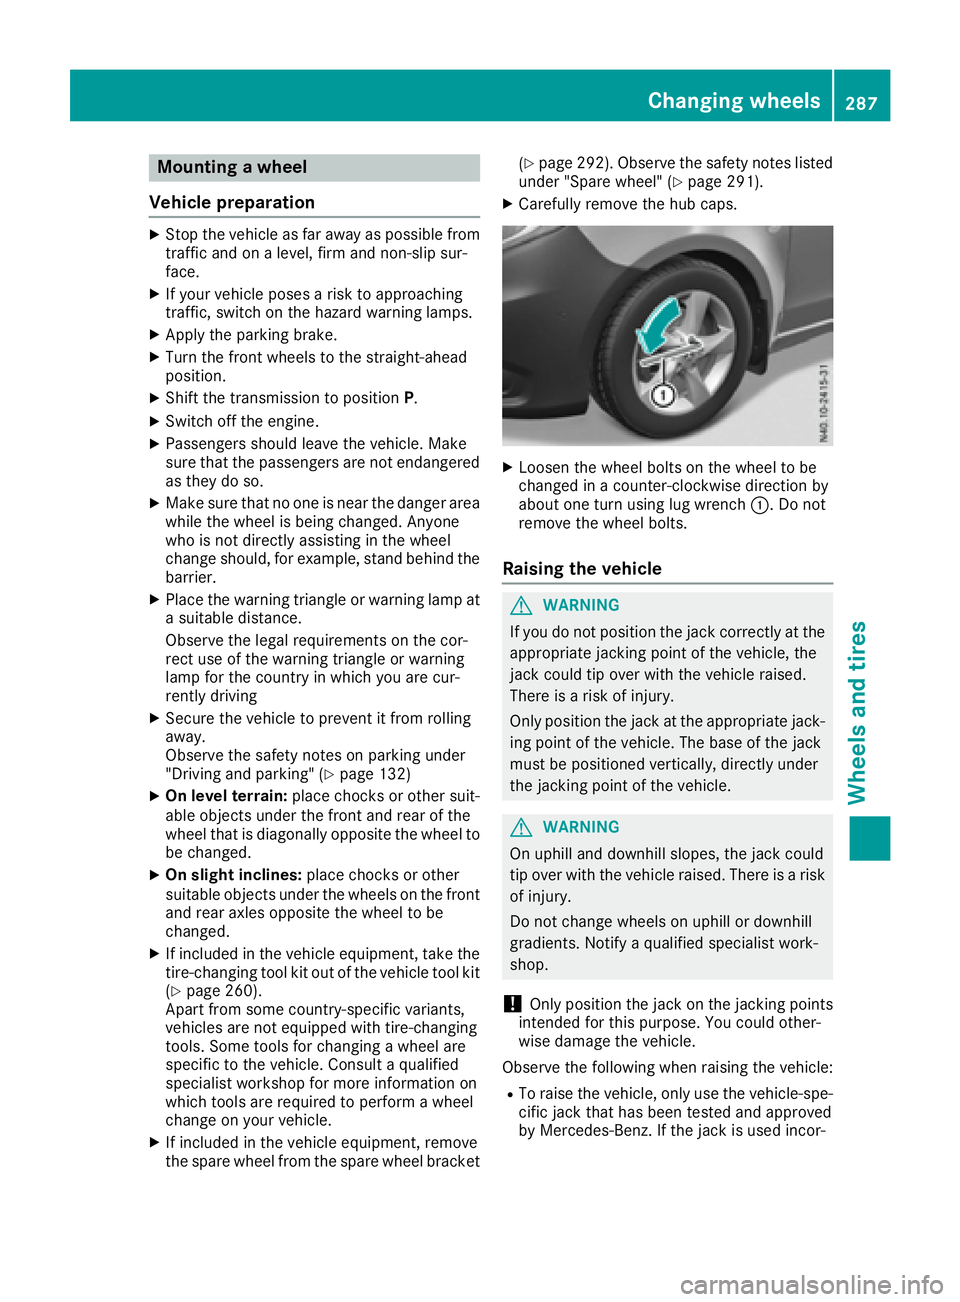
XCarefully remove the hub caps.
XLoosen the whee lbolts on the whee ltobe
changed in acounter-clockwise direction by
about one turn using lug wrench :.Donot
remove the whee lbolts.
Raisingt he vehicle
GWARNING
If you do not position the jack correctly at the
appropriate jacking point of the vehicle, the
jack coul dtip over with the vehicler aised.
There is arisk of injury.
Only position the jack at the appropriate jack-
ing point of the vehicle. The bas eofthe jack
must be positioned vertically,d irectly under
the jacking point of the vehicle.
GWARNING
On uphill and downhill slopes, the jack could
tip over with the vehicler aised. There isarisk
of injury.
Do not change wheels on uphill or downhill
gradients. Notify aqualified specialist work-
shop.
!Only position the jack on the jacking points
intended for this purpose. You coul dother-
wis edamage the vehicle.
Observe the following when raising the vehicle:
RTo rais ethe vehicle, only use the vehicle-spe-
cific jack that has been tested and approved
by Mercedes-Benz. If the jack is use dincor-
Changing wheels287
Wheels and tires
Z