service MERCEDES-BENZ METRIS 2016 MY16 Operator’s Manual
[x] Cancel search | Manufacturer: MERCEDES-BENZ, Model Year: 2016, Model line: METRIS, Model: MERCEDES-BENZ METRIS 2016Pages: 310, PDF Size: 7.28 MB
Page 137 of 310
Alwaysusethe hands-free system for telephon-
ing whil edriving .Onlyu sethe telephone if road
traffic conditions permit. If thisisn ot the case,
pull ove rtoasafel oc ation before using the tele-
phone.
Bea rinm ind thatata speed of just30mph
(approximately5 0km/h), your vehicl eiscov-
ering adistance of 44 fee t(approximately 14 m)
every second.
Drive sensibly –save fuel
In order to save fuel, observe the following tips:
XThe tires should alwaysbei nflated to the rec-
ommended tire pressure.
XRemove unnecessary loads.
XRemove roof carriers when they are not nee-
ded.
XWarm up the engine at low engine speeds.
XAvoid frequent acceleration or braking.
XHave all maintenanc ework carried out as
indicated by the servicei ntervals in the Main-
tenance Booklet or by the servicei nterval dis-
play.
Fuel consumption also increases when driving in cold weather, in stop-start traffic and in moun-
tainous terrain.
Overrun cutoff
If you are in overrun mode and take your foot off
the accelerator pedal, the fuel supply is cut off
when the engine speed is out of the idle speed
control range.
Drinking and driving
GWARNING
Drinking and driving and/or takin gdrugs and
driving are very dangerous combinations.
Even asmall amount of alcohol or drugs can
affect your reflexes ,perceptions and judg-
ment.
The possibility of aserious or even fatal acci-
dent is greatly increased when you drink or
take drugs and drive.
Do not drink or take drugs and drive or allow
anyone to drive who has been drinking or tak-
ing drugs.
Emission control
GWARNING
Combustion engines emit poisonous exhaust
gases such as carbon monoxide. Inhaling
these exhaust gases leads to poisoning. There
is ar isk of fatal injury. Thereforen ever leave
the engine running in enclosed spaces with-
out sufficien tventilation.
Certain engine systems are designed to keep
the level of poisonous substances in exhaust
fumes within legal limits.
These systems only work optimally if they are
maintained exactly in accordance with the man-
ufacturer's specifications. An ywork on the
engine should therefore be carried out by quali-
fied and authorized Mercedes-Benz technicians.
The engine settings must not be changed under
any circumstances. In addition, all specific
maintenanc ework must be carried out at regu-
lar intervals and in accordance with the service
requirement softhe dealer listed here on the
inside title page. Details can be found in the
Maintenance Booklet.
Speed limiter
GWARNING
Exceeding the stated tire load-bearing capa-
city and the approved maximum speed could
lead to tire damage or the tire bursting. There is ar isk of accident.
Therefore, only use tire types and sizes
approved for your vehicle model. Observe the
tire load ratin gand speed ratin grequired for
your vehicle.
As the driver, you must be aware of the maxi-
mum design speed of the vehicle and the maxi- mum permissible speed based on the tires (tire
and tire pressure). In particular, also observe the tire approval regulations for each country.
You must, under no circumstances, exceed the
speed limit for the tires specified by the speed
index. The speed ratin gisstated in the tire
tables (
Ypage 291).
You can permanently limit the maximum speed
of your vehicle, e.g. for driving on winter tires.
Driving tips135
Driving and parking
Z
Page 138 of 310
Mercedes-Benzrecommends that you have the
maximum permissible speed programed at a
Mercedes-BenzC ommercial Van Center.
Before overtaking, take into consideration that
the engine speed limiter prevents the speed
increasing beyond the programed maximum
speed.
Driving abroad
Service
An extensive network of authorized Mercedes-
Benz Centers is also at your disposal when you
are traveling abroad. Nevertheless, please bear
in mind that service facilities or replacement
parts may not always be immediately available.
The relevant workshop directories are available
from any Mercedes-BenzC ommercial Van Cen-
ter.
Fuel
In some countries, only fuels with ahigher sulfur
content are available.
Unsuitable fuel can cause engine damage. You
will find information about fuel under "Service
products and capacities" (
Ypage 296).
Low-beam headlamps
General notes
When driving in countries in which traffic drives
on the opposite side of the road to the country
where the vehicle is registered, you must switch
the headlamps to symmetrical low beam. This
prevents oncomingt raffic from being blinded.
Symmetrical low beam does not illuminate as
large an area of the edge of the road.
Vehicles with halogen headlamps
The headlamps do not need to be switched to
symmetrical low beam. The legal requirements
of countries in which traffic drives on the oppo- site side of the road to the countryw here the
vehicle is registered are met without the need to
convert the headlamps.
Transport by rail
Transporting your vehicle by rail may be subject to certain restrictions or require special meas- ures to be taken in some countries due to vary-
ing tunnel heights and loading standards.
You can obtain information on this from any
Mercedes-BenzC
ommercial Van Center.
Brakes
Important safety notes
GWARNING
If you shift down on aslippery road surface in
an attempt to increase the engine's braking
effect,t he drive wheels could lose their grip.
There is an increased danger of skidding and
accidents.
Do not shift down for additional engine brak-
ing on aslippery road surface.
Downhill gradients
!Depressing the brake pedal constantly
results in excessive and premature wear to
the brake pads.
This also applies to automatic braking if you
have activated cruise control.
On long and steep downhill gradients, you
should change down to shift range 2or1 in
good time (
Ypage 128).
This should be observed in particular when driv-
ing with aladen vehicle and when towing a
trailer.
You thereby make use of the braking effect of
the engine and do not have to brake as often to
maintain the speed. This relieves the load on the
service brake and prevents the brakes from
overheating and wearing too quickly.
Heavy and light loads
GWARNING
If you rest your foot on the brake pedal while
driving, the braking system can overheat. This increases the stopping distance and can even
cause the braking system to fail. There is a
risk of an accident.
Never use the brake pedal as afootrest.N ever
depress the brake pedal and the accelerator
pedal at the same time.
136Driving tips
Driving and parking
Page 139 of 310
!Depressing the brake pedal constantly
results in excessive and premature wear to
the brake pads.
If the brakes have been subjected to aheavy
load, do not stop the vehicle immediately.D rive
on for ashort while.T he brakes are cooled down
more quickly in the airflow.
Wet road surfaces
If you have been driving for along time in heavy
rain without braking, there may be adelayed
response when you first apply the brakes. This
may also occur after driving through acar wash
or deep water.
You must depress the brake pedal more firmly.
Maintain alonger distance to the vehicle in
front.
While paying attention to the traffic conditions,
you should brake the vehicle firmly after driving
on aw et road surface or through acar wash. This
heats the brake discs, so that they dry more
quickly, which protects them against corrosion.
Limited braking performance on salt-
treated roads
When driving on salted roads, salt may start to
buildupont he brake disks and brake pads. This
can increase braking distances considerably.
Maintain agreater distance to the vehicle in
front.
To remove any build-up of salt that may have
formed:
XApply the brakes at the start of the journey,
occasionally during journey and at the end of
the journey. Make sure that you do not endan-
ger other road users when doing so.
New brake discs and brake pads/
linings
New brake pads and brake discs only reach their
optimal braking effect after about60m iles
(100 kilometers). Until then, compensate for
this by applying greater force to the brake pedal. For safety reasons, Mercedes-Benz recom-
mends only installing the following brake discs
and brake pads/linings:
Rbrake discs that have been approved by
Mercedes-Benz
Rbrake pads/linings that have been approved
by Mercedes-Benz or are of an equivalent
standard of quality
Other brake discs or brake pads/linings can
compromise the safety of your vehicle.
Alwaysr eplace all brake discs or brake pads/
linings on an axle at the same time and only have
them replaced at aqualified specialist work-
shop. When replacing the brake discs, always
have the brake pads/linings replaced at the
same time.
Parking brake
GWARNING
If you must brake the vehicle with the parking brake, the braking distance is considerably
longer and the wheels could lock. There is an
increased danger of skidding and accidents.
Only use the parking brake to brake the vehi-
cle when the service brake is faulty. Do not
apply the parking brake too firmly. If the
wheels lock, release the parking brake until
the wheels begin turning again.
When driving on wet roads or dirt-covered sur-
faces, road salt and/or dirt may get into the
parking brake. This causes corrosion and a
reduction of braking force.
In order to prevent this, drive with the parking
brake lightly applied from time to time. When
doing so, drive for adistance of approximately
110 yds (100 m) at amaximum speed of 12 mph
(20 km/h).
The brake lamps are not illuminated when you
brake the vehicle using the parking brake.
Driving in wet conditions
Hydroplaning
GWARNING
There is adanger of hydroplaning occurring,
even if you are driving slowly and your tires
Driving tips137
Driving and parking
Z
Page 171 of 310
On vehicles with steering wheel buttons, the
light sensor in the instrument cluster automati-
cally controls the brightness of the displaylight-
ing.
While the lights are on, the brightness is depend-
ent upon the brightness of the ambient light.
You can also adjust the brightness of the instru-
ment lighting and the displayl ighting
Rby pressing thefand gbuttons on the
instrument cluster on vehicles without steer-
ing wheel buttons (not in the Settings
menu)
Rby turning control:on vehicles with steer-
ing wheel buttons.
Speedometer
If you change the wheel size on your vehicle,
make sure it is assigned to the correct wheel
size category (
Ypage 267). If you change wheel
size category without recoding the control unit,
the speedometer indication will be inaccurate.
The current vehicle speed may then be higher
than the speed displayed in the speedometer.
The speed can also be shown in the displayi n
the form of adigital speedometer:
Ron vehicles without steering wheel buttons
(Ypage 172)
Ron vehicles with steering wheel buttons
(Ypage 178)
iIn some countries, awarning sounds and/or
the displays howsamessage when the vehi-
cle reaches the maximum legally permissible
speed limit, e.g. at 75 mph (120 km/h).
Tachometer
!
Do not drive in the overrevving range, as this
could damage the engine.
HEnvironmental note
Avoid driving at high engine speeds. This
unnecessarily increases the fuel consumption
of your vehicle and harms the environment as
ar esult of increased emissions.
The red band in the tachometer indicates the
engine's overrevving range.
To protect the engine, the fuel supply is inter-
rupted when the red band is reached.
Outside temperatured isplay
You should pay special attention to road condi-
tions when temperatures are around freezing
point.
Please bear in mind that the outside tempera-
ture displayshows the air temperature meas-
ured and not the road temperature.
The displays hows the outside temperature in
the header:
Ron vehicles without steering-wheel buttons
(Ypage 170)
Ron vehicles with steering wheel buttons
(Ypage 176).
Changes in the outside temperature are dis-
played after ashort delay.
Coolant temperatureg auge
GWARNING
Opening the hood when the engine is over-
heated or when there is afire in the engine
compartment could expose you to hot gases
or other service products. There is arisk of
injury.
Let an overheated engine cool down before
opening the hood. If there is afire in the
engine compartment,k eep the hood closed
and contact the fire department.
On vehicles without steering wheel buttons, you
can have the coolant temperature shown in the
display(
Ypage 172).
On vehicles with steering wheel buttons, an ana-
log coolant temperature gage is located in the
tachometer in the instrument cluster
(
Ypage 37).
Under normal operating conditions and with the
specified coolant level, the gage may rise to
248 ‡(120† ).
Display and operation169
On-board computer and displays
Z
Page 173 of 310
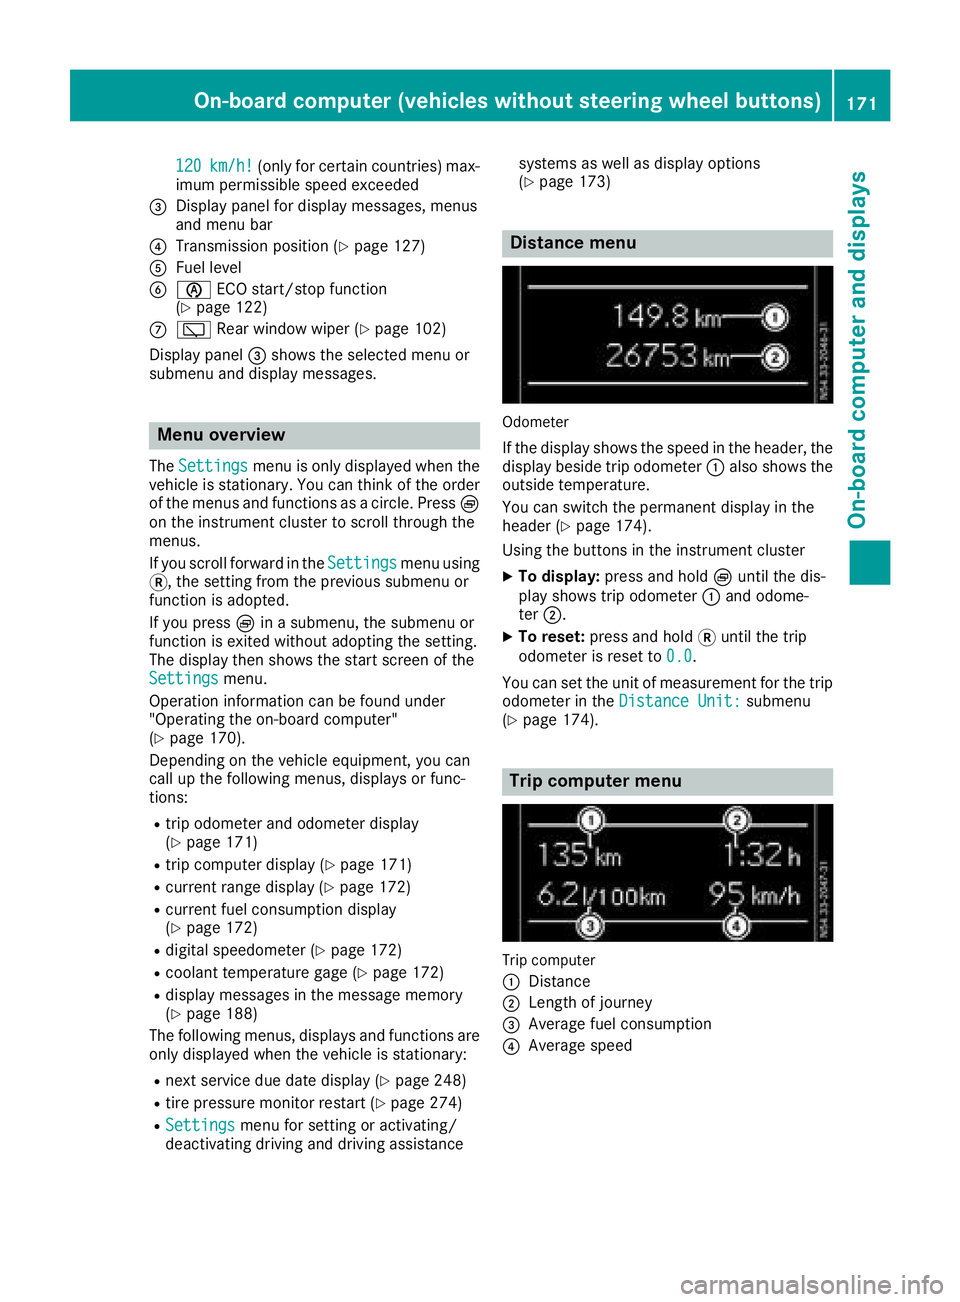
120km/h!(only for certain countries) max-
imum permissibles peed exceeded
=Display panel for displaym essages, menus
and menu bar
?Transmission position (Ypage 127)
AFuel level
Bè ECO start/stop function
(Ypage 122)
Cè Rear window wiper (Ypage 102)
Display panel =shows the selected menu or
submenu and displaym essages.
Menu overview
TheSettingsmenu is only displayed when the
vehicle is stationary. You can think of the order
of the menus and functions as acircle. Press È
on the instrument cluster to scroll through the
menus.
If you scroll forward in the Settings
menu using
3,t he setting from the previous submenu or
function is adopted.
If you press Èinas ubmenu, the submenu or
function is exited without adopting the setting.
The displayt hen shows the start screen of the
Settings
menu.
Operation information can be found under
"Operating the on-board computer"
(
Ypage 170).
Depending on the vehicle equipment, you can
call up the following menus, displays or func-
tions:
Rtrip odometer and odometer display
(Ypage 171)
Rtrip computer display(Ypage 171)
Rcurrent range display(Ypage 172)
Rcurrent fuel consumption display
(Ypage 172)
Rdigital speedometer (Ypage 172)
Rcoolant temperature gage (Ypage 172)
Rdisplaym essages in the message memory
(Ypage 188)
The following menus, displays and functions are only displayed when the vehicle is stationary:
Rnext service due date display(Ypage 248)
Rtire pressure monitor restart (Ypage 274)
RSettingsmenu for setting or activating/
deactivating driving and driving assistance systems as well as displayo
ptions
(
Ypage 173)
Distance menu
Odometer
If the displays hows the speed in the header, the
displayb eside trip odometer :also shows the
outside temperature.
You can switch the permanent displayint he
header (
Ypage 174).
Using the buttons in the instrument cluster
XTo display: press and hold Èuntil the dis-
play shows trip odometer :and odome-
ter ;.
XTo reset: press and hold 3until the trip
odometer is reset to 0.0
.
You can set the unit of measurement for the trip
odometer in the Distance Unit:
submenu
(Ypage 174).
Trip computer menu
Trip computer
:
Distance
;Length of journey
=Average fuel consumption
?Average speed
On-board computer (vehicles without steering wheelb uttons)171
On-board computer and displays
Z
Page 174 of 310
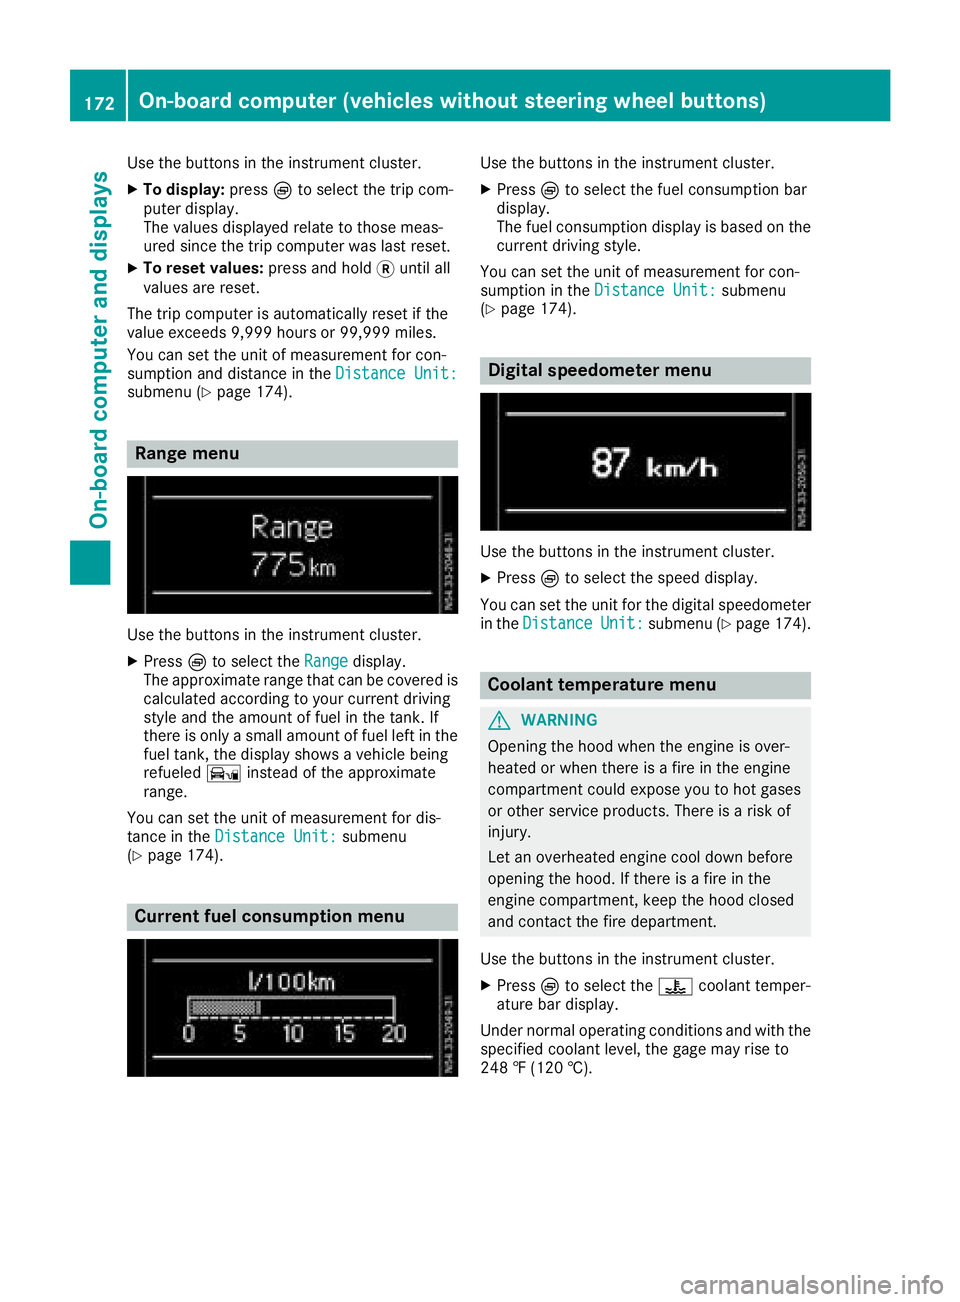
Use the buttons in the instrument cluster.
XTo display:pressÈto select the trip com-
puter display.
The valuesd isplayed relate to those meas-
ured since the trip computer was last reset.
XTo reset values: press and hold3until all
valuesa re reset.
The trip computer is automaticallyr eset if the
value exceeds 9,999 hours or 99,999 miles.
You can set the unit of measurement for con-
sumption and distance in the Distance Unit:
submenu (Ypage 174).
Range menu
Use the buttons in the instrument cluster.
XPressÈto select the Rangedisplay.
The approximate range that can be covered is calculated according to your current driving
style and the amount of fuel in the tank. If
there is only asmall amount of fuel left in the
fuel tank, the displays howsavehicle being
refueled Ïinstead of the approximate
range.
You can set the unit of measurement for dis-
tance in the Distance Unit:
submenu
(Ypage 174).
Current fuel consumption menu
Use the buttons in the instrument cluster.
XPress Èto select the fuel consumption bar
display.
The fuel consumption displayisb ased on the
current driving style.
You can set the unit of measurement for con-
sumption in the Distance Unit:
submenu
(Ypage 174).
Digital speedometer menu
Use the buttons in the instrument cluster.
XPress Èto select the speed display.
You can set the unit for the digital speedometer
in the Distance
Unit:submenu (Ypage 174).
Coolant temperaturem enu
GWARNING
Opening the hood when the engine is over-
heated or when there is afire in the engine
compartment could expose you to hot gases
or other service products. There is arisk of
injury.
Let an overheated engine cool down before
opening the hood. If there is afire in the
engine compartment,k eep the hood closed
and contact the fire department.
Use the buttons in the instrument cluster.
XPress Èto select the ?coolant temper-
ature bar display.
Under normal operating conditions and with the
specified coolant level, the gage may rise to
248 ‡(120 †).
172On-board computer (vehicles without steering wheelb uttons)
On-board computer and displays
Page 176 of 310
message with3,the display shows the next
submenu.
XPress forg to activate or deactivate ESP.
XPress 3to confirm.
The next submenu is shown in the display.
If the å warning lamp in the instrument
cluster lights up when the vehicleisr eadyto
drive, ESP
®is deactivated.
Observe the informatio nonwarning lamps
(
Ypage 221) and display messages
(Ypage 193).
Setting the sensitivity of the rain sensor
The vehiclem ust be stationary .Use the buttons
in the instrument cluster.
XPress Èto select the Settingsmenu.
XPress3to select the Rain Sensorsub-
menu.
The display shows the current sensitivity set-
ting.
XPress forg to select the Low,Standardor
Sensitivesetting. This setting controls the
rain sensor's sensitivity to precipitation. The
windshieldw iper willthen wip emore or less
frequently at the same precipitation intensity.
XPress 3to confirm.
The next submenu is shown in the display.
You can find further informatio nunder "Wind-
shiel dwiper" (
Ypage 101).
Activating/deactivatin gATTENTION
ASSIST
The vehiclem ust be stationary .Use the buttons
in the instrument cluster.
XPress Èto select the Settingsmenu.
XPress3to select the Attention Assistsubmenu.
The display shows the current status.
If theAttention Assist Inoperative
message is shown in the display ,ATTENTION
ASSIST is not available due to amalfunction
and is deactivated. If you confirm the mes-
sage with 3,the display shows the next sub-
menu.
XPress forg to activate or deactivate
ATTENTION ASSIST.
XPress 3to confirm.
The next submenu is shown in the display. Further informatio
ncan be found under "ATTEN-
TION ASSIST" (
Ypage 149).
Selecting the permanent display func-
tion
With the Permanent Display:function, you
can switch the display in the header between
outsid etemperature and speed.
If the display shows the speed in the header, the
outsid etemperature is shown with the odome-
ters (
Ypage 171).
The additional speedometer unit in the header is
alway sinverse to the speedometer unit.
The vehiclem ust be stationary .Use the buttons
in the instrument cluster.
XUsing Èselect the Settingsmenu.
XUsing3select the Permanent Display:submenu.
The display indicates the selected setting of
Outside Temp.
orSpeedometer.
XChange the setting by pressing forg.
XPress 3to confirm.
The next submenu is shown in the display.
Selecting the unit for the distance
In the Distance Unit:submenu, you can
select whether the display shows certain infor-
mation in kilometers or miles.
The vehiclem ust be stationary .Use the buttons
in the instrument cluster.
XPress Èto select the Settingsmenu.
XPress3to select the Distance Unit:sub-
menu.
The display indicates the selected setting of
km
or Miles.
XChange the setting by pressing forg.
XPress 3to confirm.
The display shows the next submenu or the
Settings
menu again.
The selected distance units are used for the dis- plays:
RDigital speedometer
ROdometer and trip odometer
RTrip computer
RRange
RCurrent consumption
RCruise control
RService intervals
174On-board computer (vehicles without steerin gwheel buttons)
On-board computer and displays
Page 179 of 310
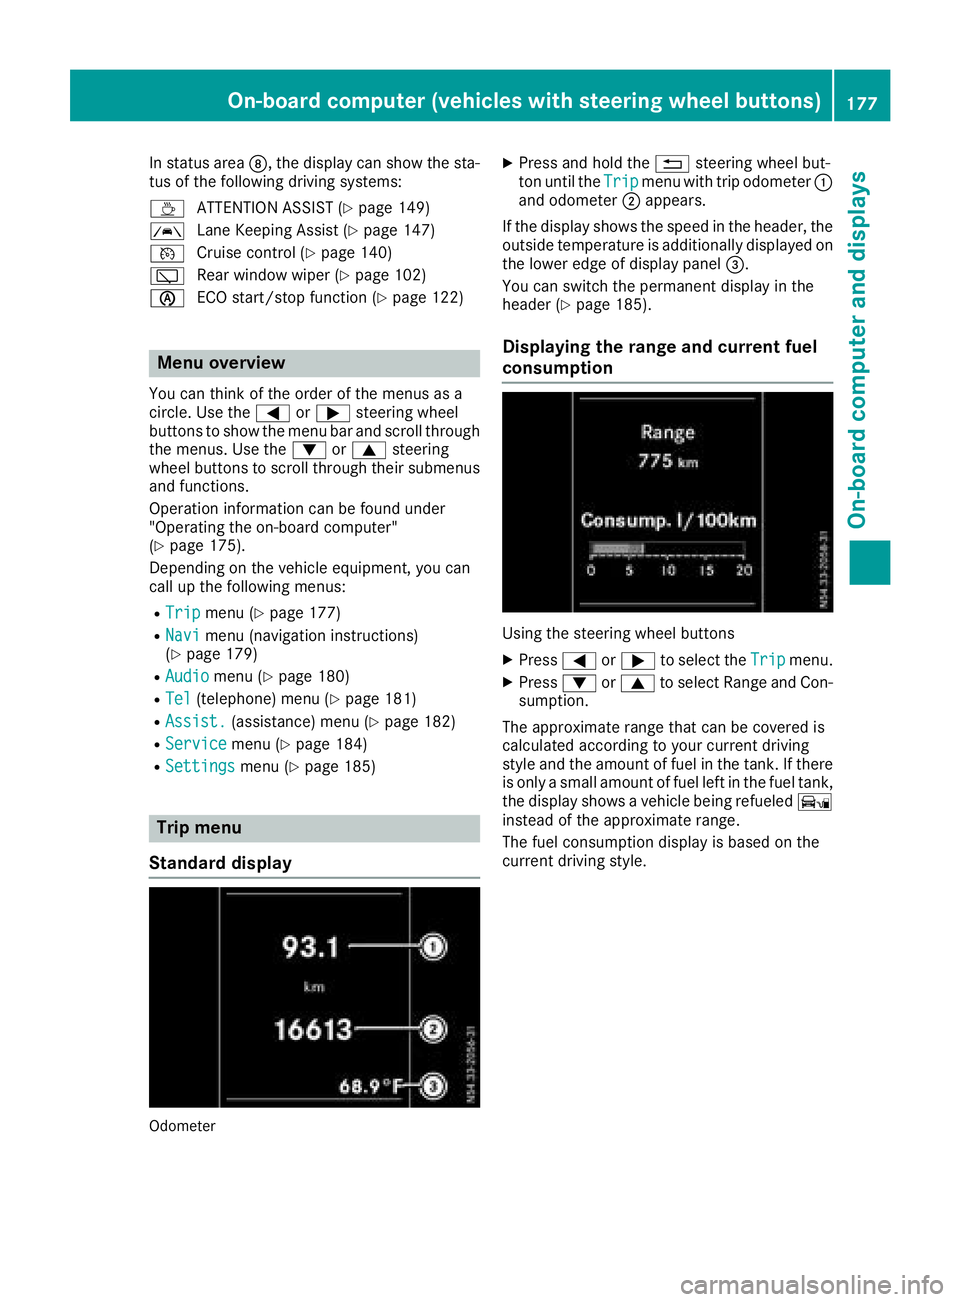
In status areaD,the display can show the sta-
tus of the following driving systems:
À ATTENTION ASSIST(
Ypage 149)
à Lane Keeping Assist (
Ypage 147)
V Cruise control (
Ypage 140)
è Rearwindow wiper (
Ypage 102)
è ECO start/stop function (
Ypage 122)
Menu overview
You can think of the order of the menus as a
circle. Use the =or; steering wheel
buttons to show the menu bar and scroll through
the menus. Use the :or9 steering
wheel buttons to scroll through their submenus and functions.
Operatio ninformation can be found under
"Operating the on-board computer"
(
Ypage 175).
Depending on the vehicle equipment, you can
call up the following menus:
RTripmenu (Ypage 177)
RNavimenu (navigation instructions)
(Ypage 179)
RAudiomenu (Ypage 180)
RTel(telephone) menu (Ypage 181)
RAssist.(assistance) menu (Ypage 182)
RServicemenu (Ypage 184)
RSettingsmenu (Ypage 185)
Trip menu
Standard display
Odometer
XPress and hold the %steering wheel but-
ton until the Tripmenu with trip odometer :
and odometer ;appears.
If the display shows the speed in the header, the
outsid etemperature is additionall ydisplaye don
the lowere dge of display panel =.
You can switch the permanent display in the
header (
Ypage 185).
Displaying the range and current fuel
consumption
Using the steering wheel buttons
XPress =or; to select the Tripmenu.
XPress:or9 to select Range and Con-
sumption.
The approximate range that can be covered is
calculated according to you rcurrent driving
style and the amount of fuel in the tank. If there
is only asmall amount of fuel left in the fuel tank,
the display shows avehicle being refueled Ï
instead of the approximate range.
The fuel consumption display is base donthe
current driving style.
On-board computer (vehicles with steeringw heel buttons)177
On-board computer and displays
Z
Page 183 of 310
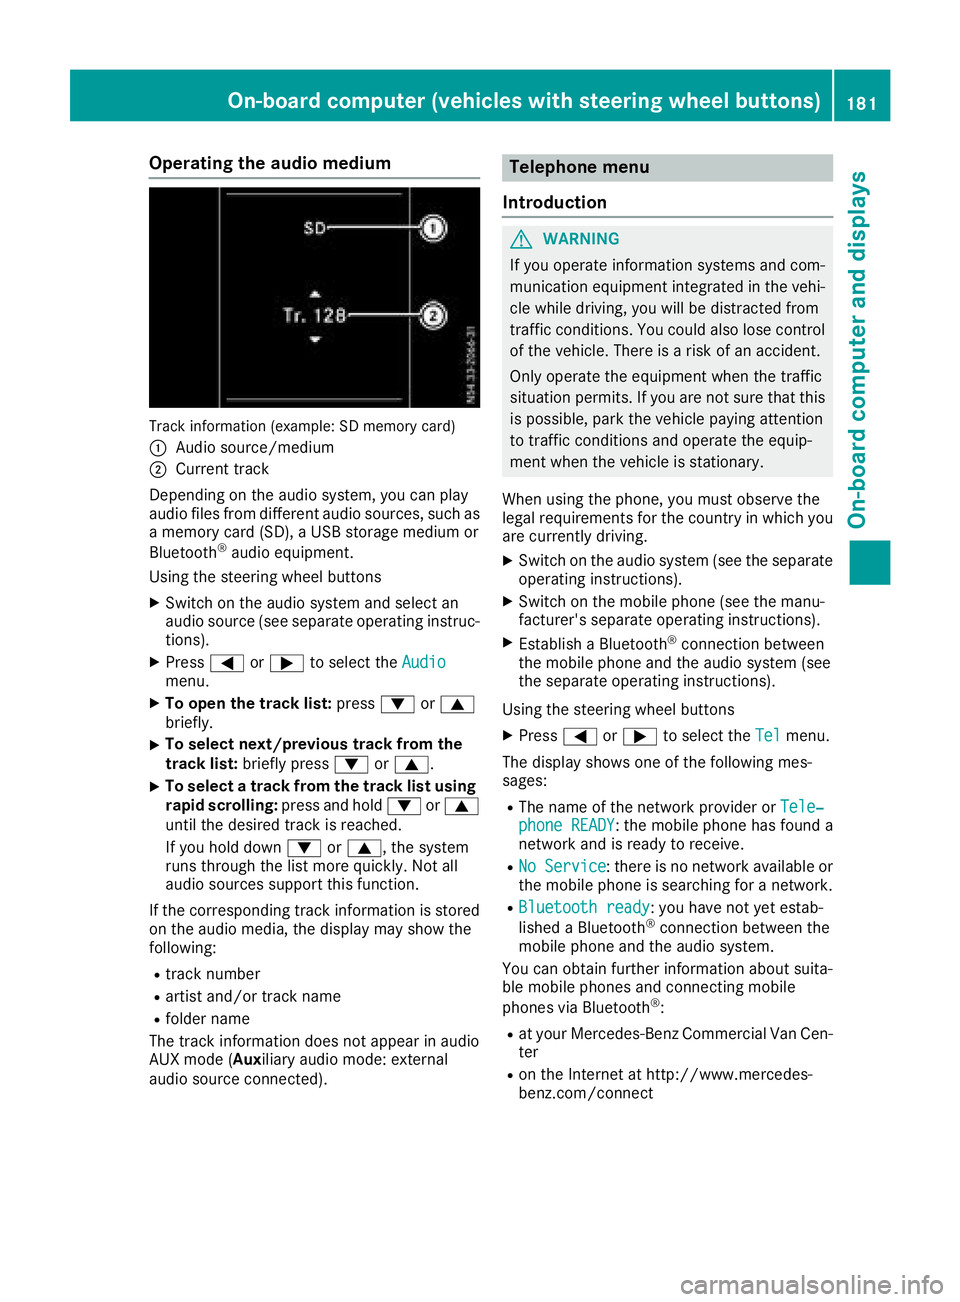
Operating the audio medium
Track information (example: SD memory card)
:
Audio source/medium
;Current track
Depending on the audio system, you can play
audio files from differenta udio sources, such as
am emory card (SD), aUSB storage medium or
Bluetooth
®audio equipment.
Using the steering wheel buttons
XSwitc hont he audio system and select an
audio source (see separate operatin ginstruc-
tions).
XPress =or; to select the Audiomenu.
XTo open the track list: press:or9
briefly.
XTo select next/previous track from the
track list: briefly press :or9.
XTo select atrack from the track list using
rapid scrolling: press and hold:or9
until the desired trac kisreached.
If you hold down :or9,t he system
runs through the list more quickly. Not all
audio sources support this function.
If the correspondin gtrac kinformation is stored
on the audio media, the display may show the
following:
Rtrac knumber
Rartist and/or trac kname
Rfolder name
The trac kinformation does not appear in audio
AUX mode (Aux iliary audio mode: external
audio source connected).
Telephone menu
Introduction
GWARNING
If you operate information systems and com-
munication equipment integrated in the vehi-
cle while driving, you will be distracted from
traffic conditions .You could also lose control
of the vehicle. There is arisk of an accident.
Only operate the equipment when the traffic
situation permits. If you are not sure that this
is possible, park the vehicle paying attention
to traffic conditions and operate the equip-
ment when the vehicle is stationary.
When using the phone, you must observe the
legal requirements for the country in which you
are currently driving.
XSwitc hont he audio system (see the separate
operatin ginstructions).
XSwitc hont he mobile phone (see the manu-
facturer's separate operatin ginstructions).
XEstablish aBluetooth®connection between
the mobile phone and the audio system (see
the separate operatin ginstructions).
Using the steering wheel buttons
XPress =or; to select the Telmenu.
The display shows one of the following mes-
sages:
RThe name of the network provider or Tele‐phone READY:the mobile phone has found a
network and is ready to receive.
RNo Service:t here is no network available or
the mobile phone is searchingf oran etwork.
RBluetooth ready:you have not yet estab-
lished aBluetooth®connection between the
mobile phone and the audio system.
You can obtain further information about suita-
ble mobile phones and connecting mobile
phones via Bluetooth
®:
Rat your Mercedes-Benz Commercial Van Cen-
ter
Ron the Internet at http://www.mercedes-
benz.com/connect
On-boardc omputer (vehicles with steering wheel buttons)181
On-boardcomputer and displays
Z
Page 186 of 310
XPressato confirm.
The currents tatus is shown.
XTo activate/deactivate: pressaagain.
If the å warning lamp in the instrument
cluster lights up when the vehicle is ready to
drive, ESP
®is deactivated.
If the ÷ warning lamp lights up continuously,
ESP
®is not availabled ue toamalfunction.
Observe the information on warning lamps
(
Ypage 221) and display messages
(Ypage 207).
Activating/deactivating the distance
warning function
Using the steerin gwheel buttons
XPress =or; to select the Assist.menu.
XPress9or: to select DistanceWarning.
XPressato confirm.
The currents tatus is shown.
XTo activate/deactivate: press theabut-
ton again.
If the distanc ewarning function of COLLISION
PREVENTION ASSIST is activated, the display
shows the Äsymbol in the header.
At speeds up to approx 20 mph (30 km/h),
the display in vehicles with Active Parking
Assist first shows the ístatus indicator.
Only from aspeed of about 20 mph (30 km/ h)
does the display show the Äsymbol
instead of the ístatus indicator.
Further information can be found under "COL-
LISION PREVENTION ASSIST" (
Ypage 143).
Setting ATTENTION ASSIST
Using the steering wheel buttons
XPress =or; to select the Assist.menu.
XPress:or9 to select AttentionAssist.
XPressato confirm.
The currents etting is displayed.
XTo change the setting: pressaagain.
XPress :or9 to set Deactivated,
Standardor Sensitive.
XPress ato confirm the choice.
If ATTENTION ASSISTisa ctivated, theÀ
symbol is shown in the status area of the dis- play. The selection
Standard
orSensitivesets the sensitivity with which the system
determines the attention level.
Further information can be found under "ATTEN-
TION ASSIST" (
Ypage 149).
Activating/deactivating Blind Spot
Assist
Using the steering wheel buttons
XPress =or; to select the Assist.menu.
XPress:or9 to select Blind SpotAssist.
XPressato confirm.
The currents tatus is shown.
XTo activate/deactivate: press theabut-
ton again.
Further information can be found under "Blind
Spot Assist "(
Ypage 145).
Setting Lane Keeping Assist
Using the steering wheel buttons
XPress=or; to select the Assist.menu.
XPress:or9 to select LaneKeepingAssist.
XPressato confirm.
The currents electionStandardorAdaptiveis displayed.
XTo change the setting: pressaagain.
Further information can be found under "Lane
Keeping Assist "(
Ypage 147).
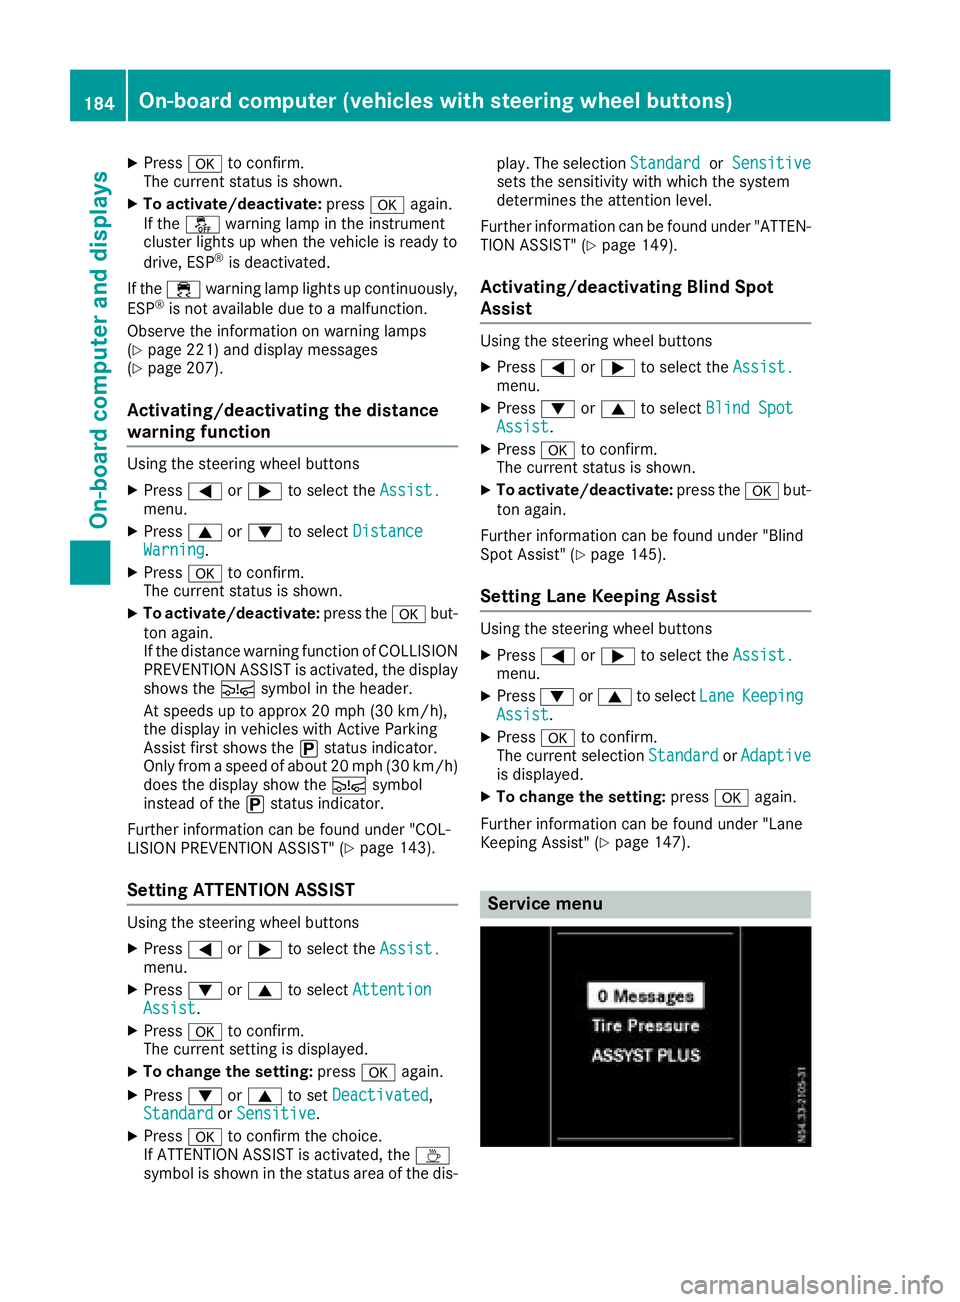
Service menu
184On-boardcomputer (vehicles with steering wheel buttons)
On-boardcomputer and displays