brake light MERCEDES-BENZ METRIS 2016 MY16 Operator’s Manual
[x] Cancel search | Manufacturer: MERCEDES-BENZ, Model Year: 2016, Model line: METRIS, Model: MERCEDES-BENZ METRIS 2016Pages: 310, PDF Size: 7.28 MB
Page 168 of 310
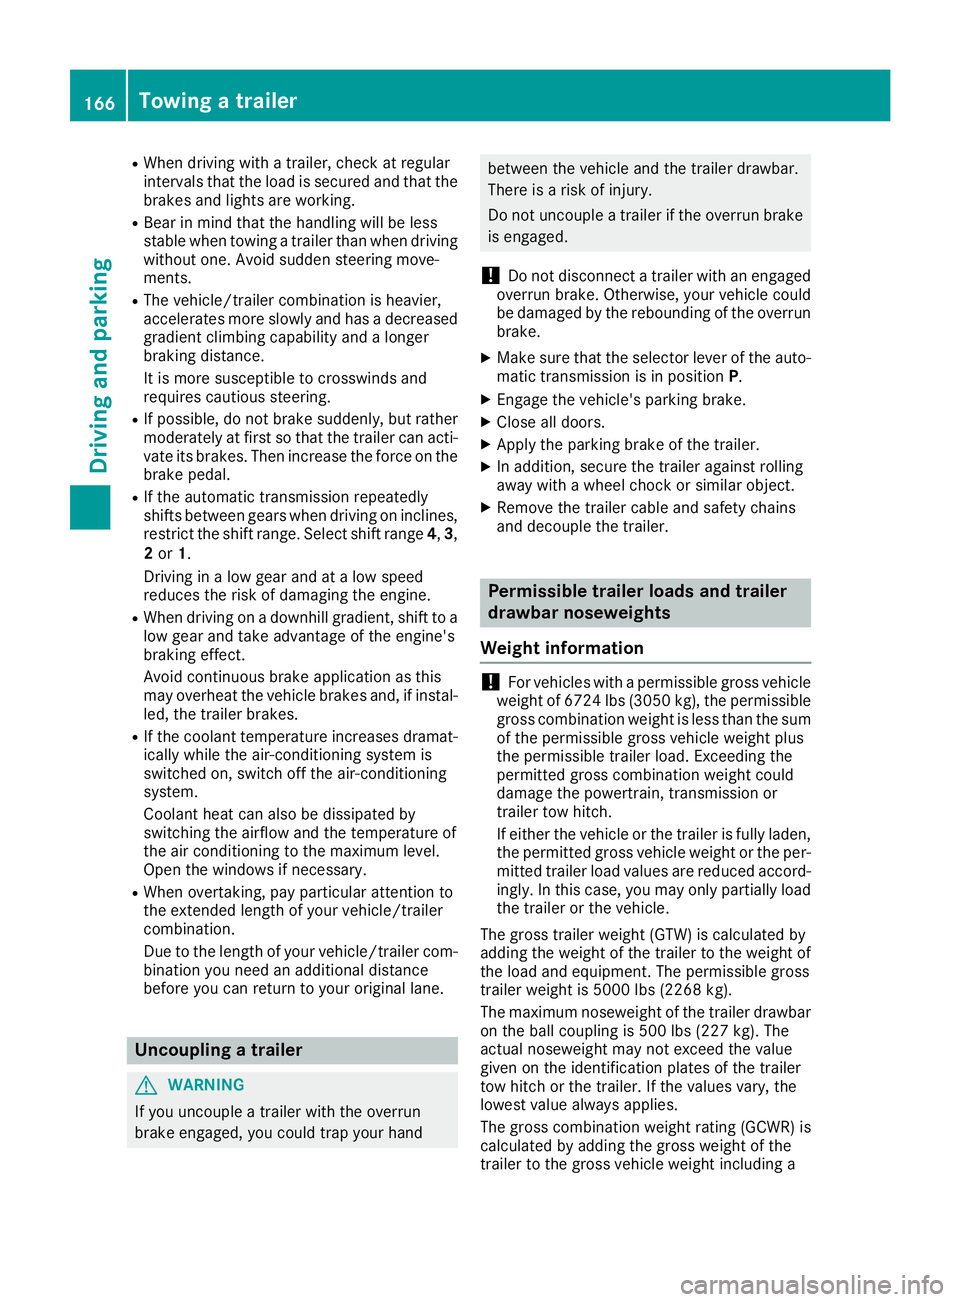
RWhen driving withatrailer, check at regular
intervals that the load is secured and that the
brakes and lights are working.
RBear in mind that the handling will be less
stable when towing atrailer than when driving
without one. Avoid sudden steerin gmove-
ments.
RThe vehicle/trailer combination is heavier,
accelerates more slowly and has adecreased
gradient climbing capability and alonger
braking distance.
It is more susceptible to crosswinds and
requires cautious steering.
RIf possible, do not brake suddenly, but rather
moderately at first so that the trailer can acti-
vate its brakes. Then increase the forceont he
brake pedal.
RIf the automatic transmission repeatedly
shifts between gears when driving on inclines,
restrict the shift range. Select shift range 4,3,
2 or 1.
Drivin ginal ow gear and at alow speed
reduces the risk of damaging the engine.
RWhen driving on adownhill gradient, shift to a
low gear and take advantage of the engine's
braking effect.
Avoid continuous brake application as this
may overheat the vehicle brakes and, if instal-
led, the trailer brakes.
RIf the coolant temperature increases dramat-
ically while the air-conditionin gsystem is
switched on, switch off the air-conditioning
system.
Coolant heat can also be dissipated by
switchin gthe airflow and the temperature of
the air conditioning to the maximum level.
Open the windows if necessary.
RWhen overtaking, pay particular attention to
the extended length of your vehicle/trailer
combination.
Due to the length of your vehicle/trailer com- bination you need an additional distance
before you can return to your original lane.
Uncoupling atrailer
GWARNING
If you uncouple atrailer with the overrun
brake engaged, you could trap your hand
between the vehicle and the trailer drawbar.
There is arisk of injury.
Do not uncouple atrailer if the overrun brake
is engaged.
!Do not disconnect atrailer with an engaged
overrun brake. Otherwise, your vehicle could
be damaged by the rebounding of the overrun
brake.
XMake sure that the selector lever of the auto-
matic transmission is in position P.
XEngage the vehicle's parking brake.
XClose all doors.
XApply the parking brake of the trailer.
XIn addition, secure the trailer against rolling
away withawheel chock or similar object.
XRemove the trailer cable and safety chains
and decouple the trailer.
Permissible trailer loads and trailer
drawbar noseweights
Weight information
!For vehicles with apermissible gross vehicle
weight of 6724 lbs (3050 kg), the permissible gross combination weight is less than the sum
of the permissible gross vehicle weight plus
the permissible trailer load. Exceeding the
permitted gross combination weight could
damage the powertrain ,transmission or
trailer tow hitch.
If either the vehicle or the trailer is fully laden,
the permitted gross vehicle weight or the per- mitted trailer load values are reduced accord-
ingly. In this case, you may only partially load
the trailer or the vehicle.
The gross trailer weight (GTW) is calculated by
adding the weight of the trailer to the weight of
the load and equipment. The permissible gross
trailer weight is 5000 lbs (2268 kg).
The maximum noseweight of the trailer drawbar
on the ball coupling is 500 lbs (227 kg). The
actual noseweight may not exceed the value
given on the identification plates of the trailer
tow hitch or the trailer. If the values vary, the
lowest value alwaysa pplies.
The gross combination weight rating (GCWR) is
calculated by adding the gross weight of the
trailer to the gross vehicle weight including a
166Towing atrailer
Driving and parking
Page 191 of 310
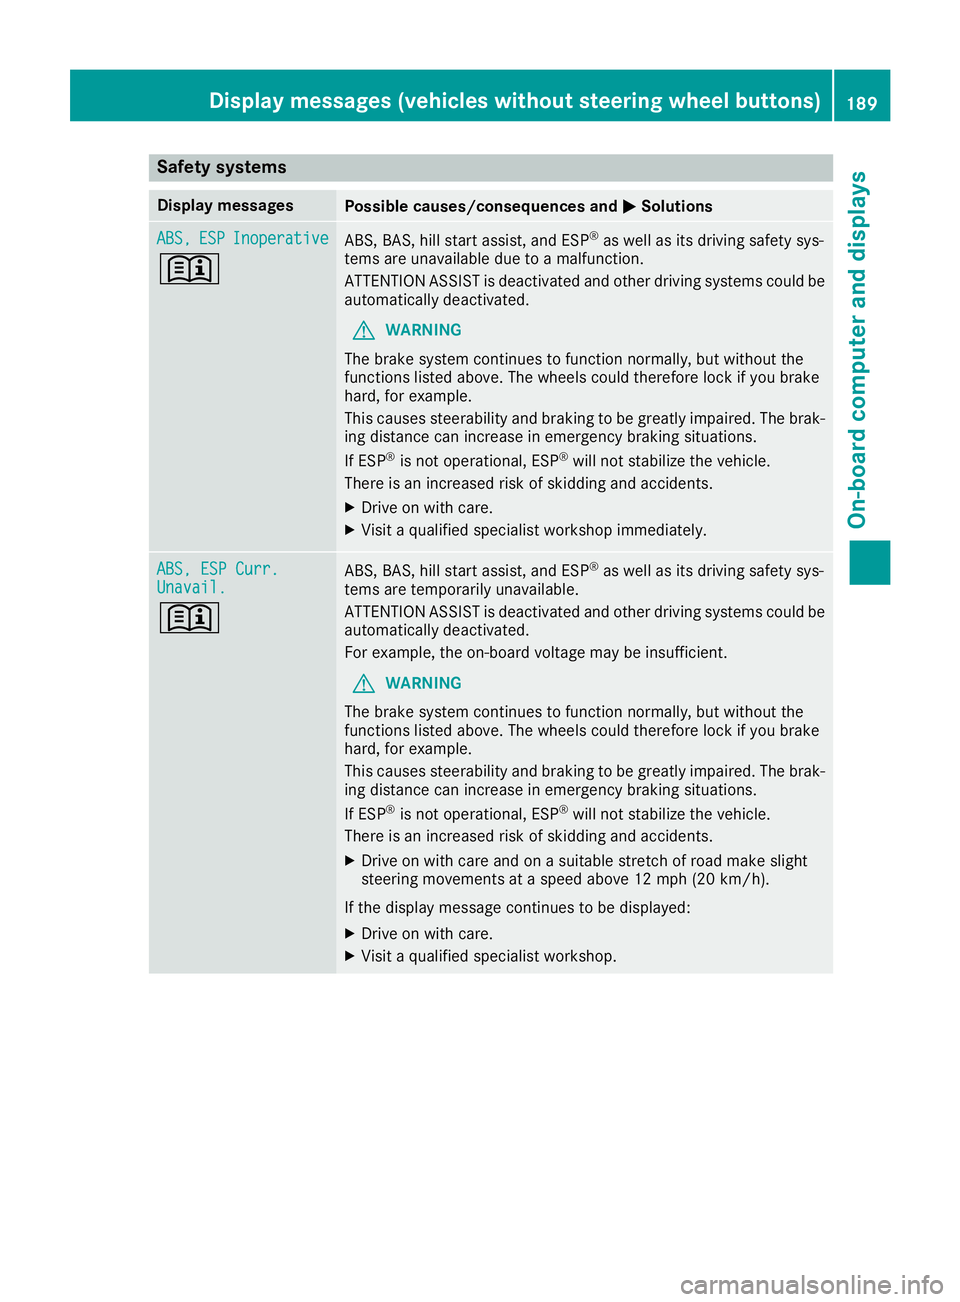
Safety systems
Display messagesPossible causes/consequences andMSolutions
ABS,ESPInoperative
+
ABS,BAS,hill start assist, and ESP®as well as its driving safety sys-
tems are unavailable due to amalfunction.
ATTENTION ASSIST is deactivated and other driving systems could be
automatically deactivated.
GWARNING
The brake system continues to function normally, but without the
functions listed above. The wheels could therefore lock if you brake
hard, for example.
This causes steerability and braking to be greatly impaired. The brak-
ing distance can increase in emergency braking situations.
If ESP
®is not operational, ESP®will not stabilize the vehicle.
There is an increased risk of skidding and accidents.
XDrive on with care.
XVisit aqualified specialist workshop immediately.
ABS, ESP Curr.Unavail.
+
ABS,B AS,hill start assist, and ESP®as well as its driving safety sys-
tems are temporarily unavailable.
ATTENTION ASSIST is deactivated and other driving systems could be
automatically deactivated.
For example, the on-board voltage may be insufficient.
GWARNING
The brake system continues to function normally, but without the
functions listed above. The wheels could therefore lock if you brake
hard, for example.
This causes steerability and braking to be greatly impaired. The brak-
ing distance can increase in emergency braking situations.
If ESP
®is not operational, ESP®will not stabilize the vehicle.
There is an increased risk of skidding and accidents.
XDrive on with care and on asuitable stretch of road make slight
steering movementsatas peed above 12 mph (20 km/h).
If the display message continues to be displayed:
XDrive on with care.
XVisit aqualified specialist workshop.
Display messages (vehicles without steering wheel buttons)189
On-board computer and displays
Z
Page 195 of 310
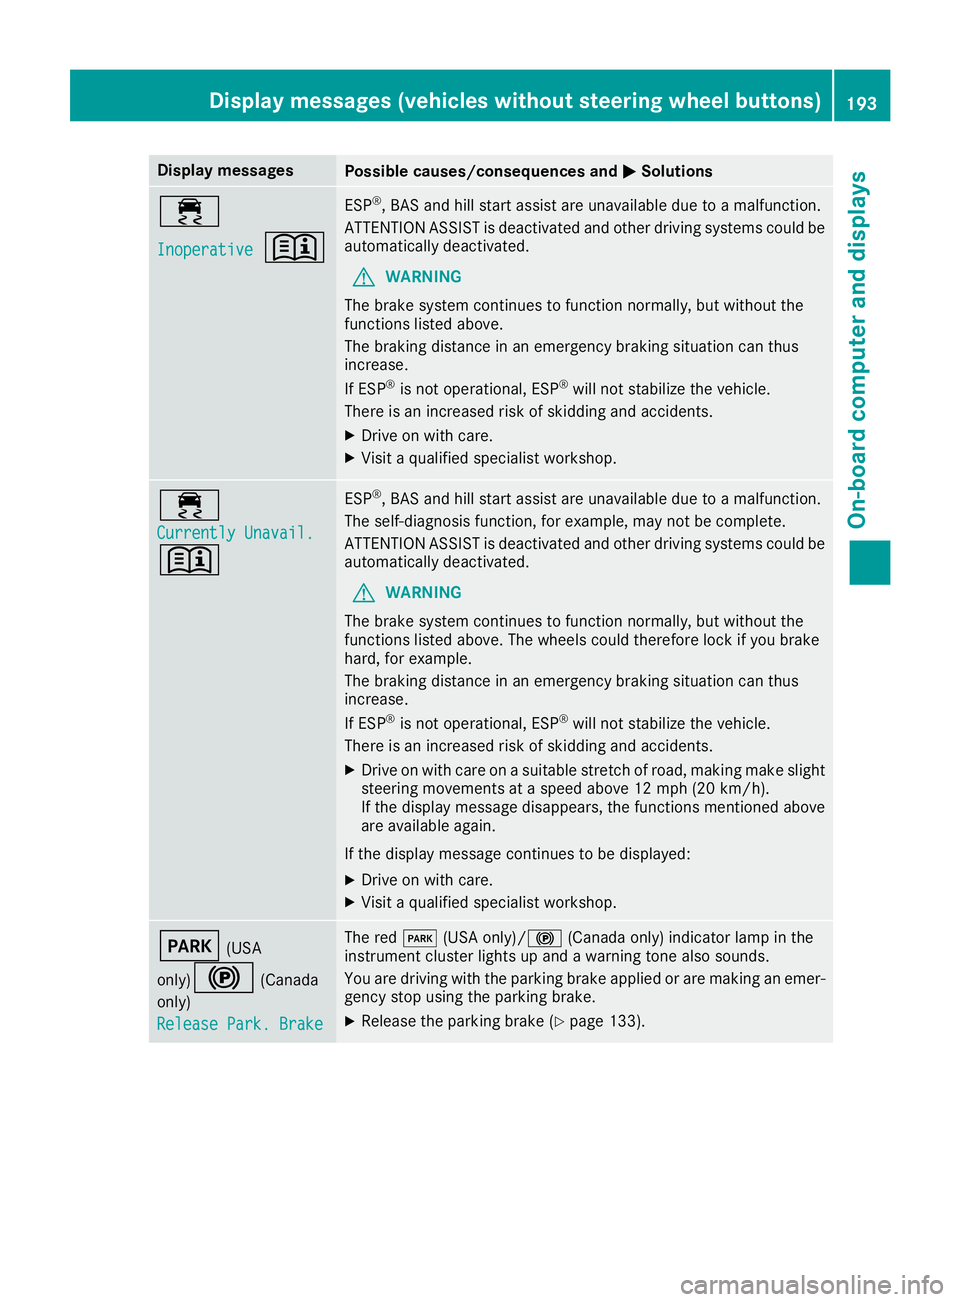
Display messagesPossible causes/consequences andMSolutions
÷
Inoperative+
ESP®,BAS and hill start assist are unavailable due to amalfunction .
ATTENTION ASSIST is deactivated and other drivin gsystems could be
automatically deactivated.
GWARNIN G
The brak esystem continues to function normally, but without th e
function slisted above.
The braking distanc einanemergenc ybraking situation can thus
increase.
If ES P
®is no toperational, ES P®will notstabiliz ethe vehicle.
There is an increased ris kofskiddin gand accidents .
XDrive on withcare.
XVisit aqualified specialist workshop .
÷
Currently Unavail.
+
ESP®,BAS and hill start assist are unavailable due to amalfunction .
The self-diagnosis function ,for example, may no tbecomplete.
ATTENTION ASSIST is deactivated and other drivin gsystems could be
automatically deactivated.
GWARNIN G
The brak esystem continues to function normally, but without th e
function slisted above. The wheels could therefor eloc kify ou brak e
hard, for example.
The braking distanc einanemergenc ybraking situation can thus
increase.
If ES P
®is no toperational, ES P®will notstabiliz ethe vehicle.
There is an increased ris kofskiddin gand accidents .
XDrive on withcareonas uitable stretch of road, making mak eslight
steering movement sataspeed abov e12mph(20 km/ h).
If the display messag edisappears, the functions mentioned above
are available again.
If the display message continues to be displayed:
XDrive on with care.
XVisit aqualifieds pecialist workshop.
F(USA
only)
!(Canada
only)
Release Park. Brake
The red F(USA only)/! (Canada only) indicator lamp in the
instrument cluster lights up and awarning tone also sounds.
You are driving with the parking brake applied or are making an emer-
gency stop using the parking brake.
XRelease the parking brake (Ypage 133).
Display messages( vehicles without steeringw heel buttons)193
On-board computer and displays
Z
Page 197 of 310
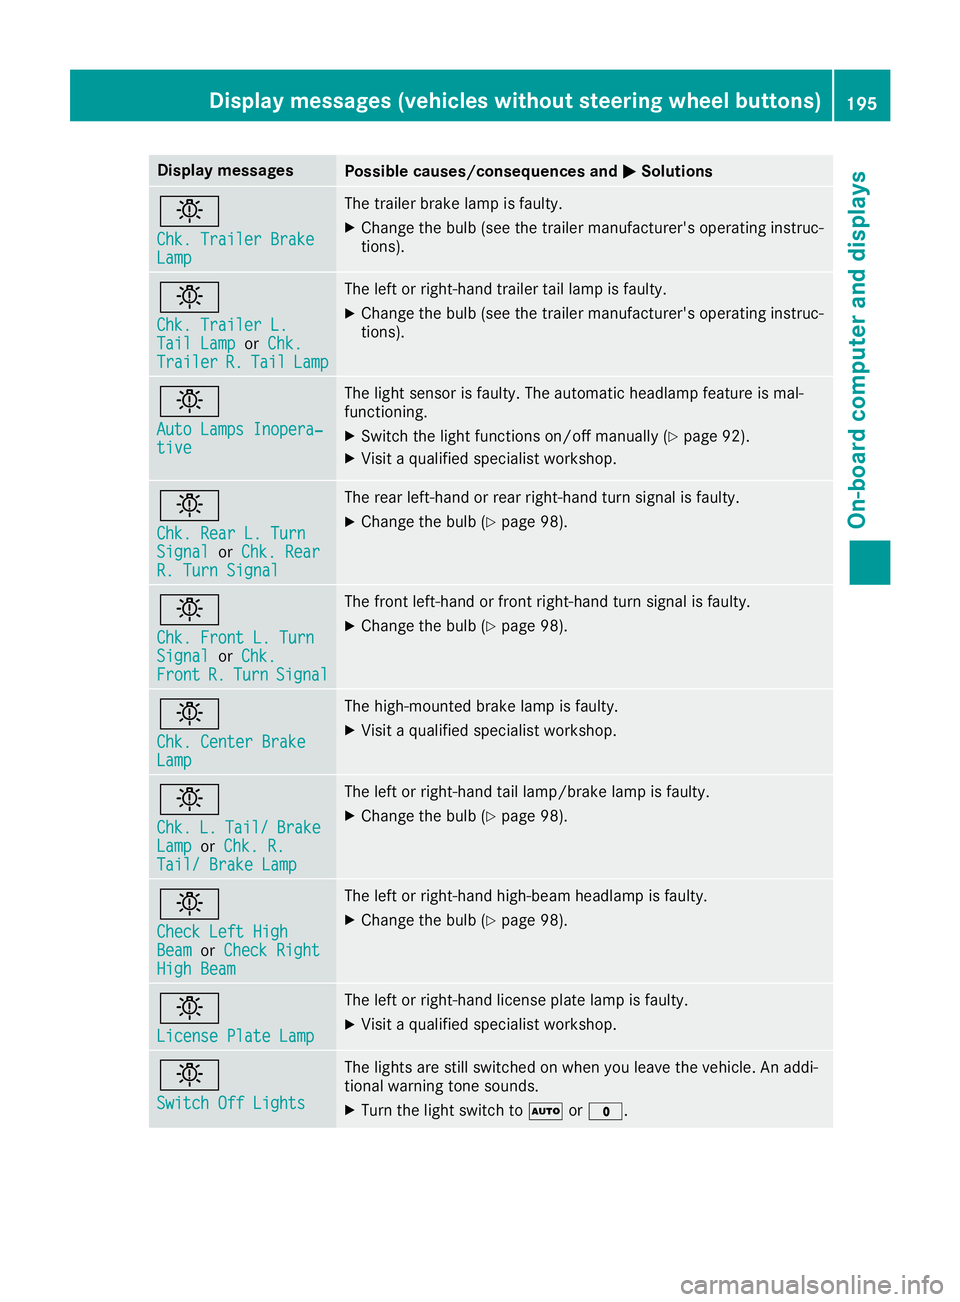
Display messagesPossible causes/consequences andMSolutions
b
Chk.Traile rBrakeLamp
The trailer brak elamp is faulty.
XChange th ebulb (see th etrailer manufacturer' soperating instruc-
tions).
b
Chk .Traile rL.TailLampor Chk .Traile rR.TailLamp
The lef torright-hand trailer tai llamp is faulty.
XChange th ebulb (see th etrailer manufacturer' soperating instruc-
tions).
b
Aut oLamps Inopera‐tive
The ligh tsensor is faulty. The automatic headlamp feature is mal-
functioning .
XSwitchthe ligh tfunction son/of fmanually (Ypage 92).
XVisitaqualified specialist workshop .
b
Chk.RearL.T urnSignalor Chk .RearR. Tur nSignal
The rear left-han dorrear right-hand tur nsignal is faulty.
XChange th ebulb (Ypage 98).
b
Chk .Front L. Tur nSignalorChk .FrontR.TurnSignal
The fron tleft-han dorfrontright-hand tur nsignal is faulty.
XChange th ebulb (Ypage 98).
b
Chk .Center BrakeLamp
The high-mounte dbrak elamp is faulty.
XVisit aqualified specialist workshop .
b
Chk.L.Tail/BrakeLamporChk .R.Tail/ Brake Lam p
The leftorright-hand tai llamp/brake lamp is faulty.
XChange th ebulb (Ypage 98).
b
Check Lef tHighBea morCheck RightHig hBeam
The lef torright-hand high-beam headlamp is faulty.
XChange th ebulb (Ypage 98).
b
Licens ePlate Lam p
The leftorright-hand license plat elamp is faulty.
XVisit aqualified specialist workshop .
b
Switch Off Lights
The lights are still switched on when you leav ethe vehicle. An addi-
tional warning tone sounds.
XTurn th eligh tswitch to Ãor$.
Display message s(vehicles withou tsteering wheelbuttons)19 5
On-board computera nd displays
Z
Page 205 of 310
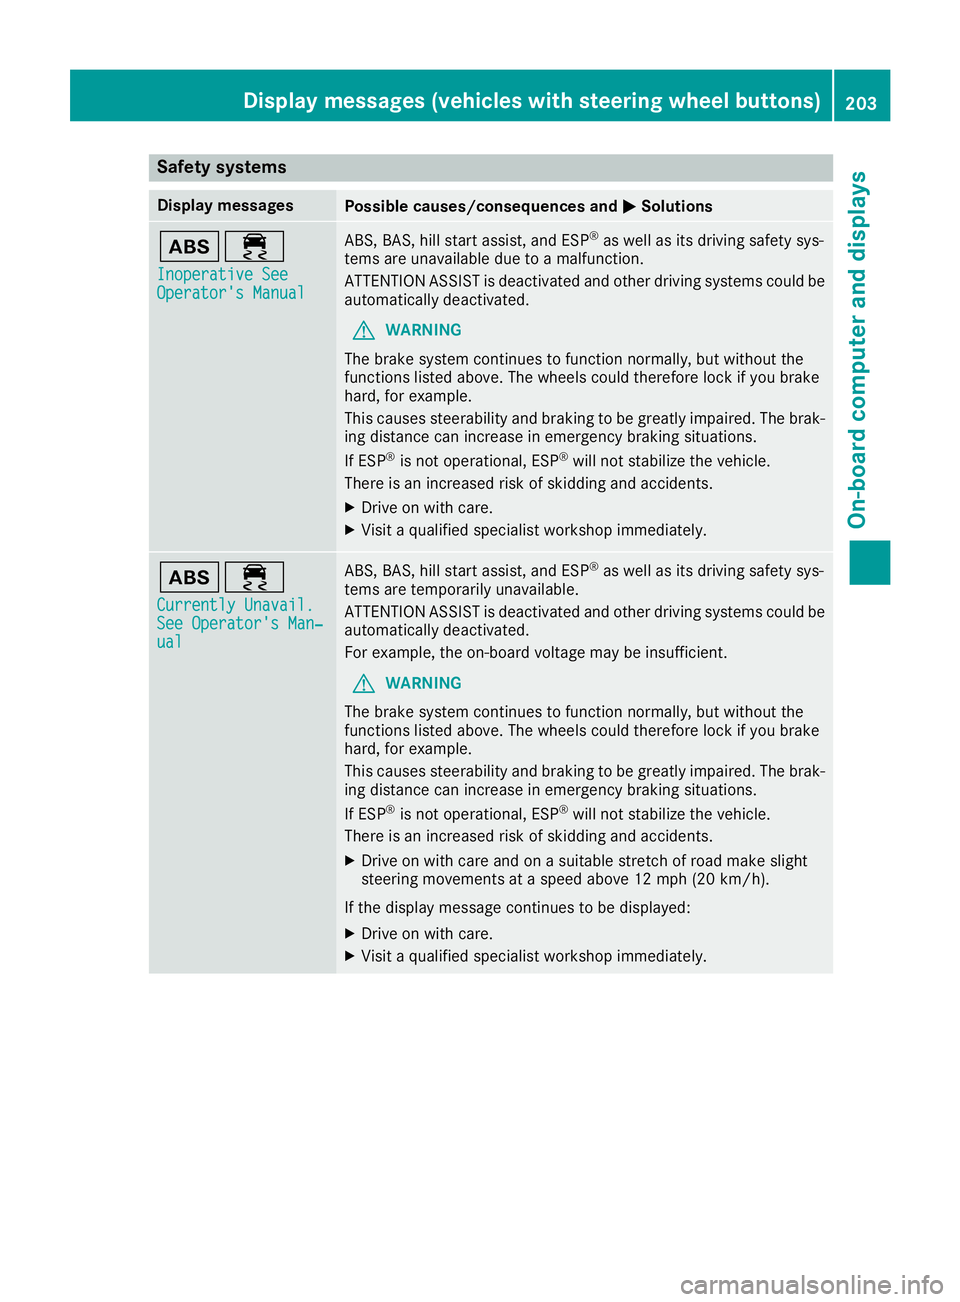
Safety systems
Display messagesPossible causes/consequences andMSolutions
ò÷
Inoperative SeeOperator's Manual
ABS,BAS,hill start assist, and ESP®as well as its driving safety sys-
tems are unavailable due to amalfunction.
ATTENTION ASSIST is deactivated and other driving systems could be
automatically deactivated.
GWARNING
The brake system continues to function normally, but without the
functions listed above. The wheels could therefore lock if you brake
hard, for example.
This causes steerability and braking to be greatly impaired. The brak-
ing distance can increase in emergency braking situations.
If ESP
®is not operational, ESP®will not stabilize the vehicle.
There is an increased risk of skidding and accidents.
XDrive on with care.
XVisit aqualified specialist workshop immediately.
ò÷
Currently Unavail.See Operator's Man‐ual
ABS,B AS,hill start assist, and ESP®as well as its driving safety sys-
tems are temporarily unavailable.
ATTENTION ASSIST is deactivated and other driving systems could be
automatically deactivated.
For example, the on-board voltage may be insufficient.
GWARNING
The brake system continues to function normally, but without the
functions listed above. The wheels could therefore lock if you brake
hard, for example.
This causes steerability and braking to be greatly impaired. The brak-
ing distance can increase in emergency braking situations.
If ESP
®is not operational, ESP®will not stabilize the vehicle.
There is an increased risk of skidding and accidents.
XDrive on with care and on asuitable stretch of road make slight
steering movementsatas peed above 12 mph (20 km/h).
If the display message continues to be displayed:
XDrive on with care.
XVisit aqualified specialist workshop immediately.
Display messages (vehicles with steering wheel buttons)203
On-board computer and displays
Z
Page 209 of 310

Display messagesPossible causes/consequences andMSolutions
÷
Inoperative SeeOperator'sManual
ESP®,BAS and hill start assist are unavailable due to amalfunction .
ATTENTION ASSIST is deactivated and other drivin gsystems could be
automatically deactivated.
GWARNIN G
The brak esystem continues to function normally, but without th e
function slisted above.
The braking distanc einanemergenc ybraking situation can thus
increase.
If ES P
®is no toperational, ES P®will notstabiliz ethe vehicle.
There is an increased ris kofskiddin gand accidents .
XDrive on withcare.
XVisit aqualified specialist workshop immediately.
÷
Currently Unavail.See Operator' sMan‐ual
ES P®,BAS and hill start assist are unavailable due to amalfunction .
The self-diagnosis function ,for example, may no tbecomplete.
ATTENTION ASSIST is deactivated and other drivin gsystems could be
automatically deactivated.
GWARNIN G
The brak esystem continues to function normally, but without th e
function slisted above. The wheels could therefor eloc kify ou brak e
hard, for example.
The braking distanc einanemergenc ybraking situation can thus
increase.
If ES P
®is no toperational, ES P®will notstabiliz ethe vehicle.
There is an increased ris kofskiddin gand accidents .
XDrive on withcareonas uitable stretch of road, making slight
steering movement sataspeed abov e12mph (20 km/h).
If th edisplay message disappears, th efunction smentioned abov e
are available again .
If th edisplay message continues to be displayed:
XDrive on wit hcare.
XVisit aqualified specialist workshop immediately.
F(US A
only)
!(Canada
only)
Releas eParkin g
Brake
The red F(USAonly)/! (Canada only) indicator lamp in th e
instrumen tcluste rlights up and awarning tone also sounds.
You are drivin gwitht he parking brak eapplie dora re making an emer-
gency stop usin gthe parking brake.
XReleas ethe parking brak e(Ypage 133).
Display message s(vehicles wit hsteering whee lbuttons)20 7
On-board computera nd displays
Z
Page 227 of 310
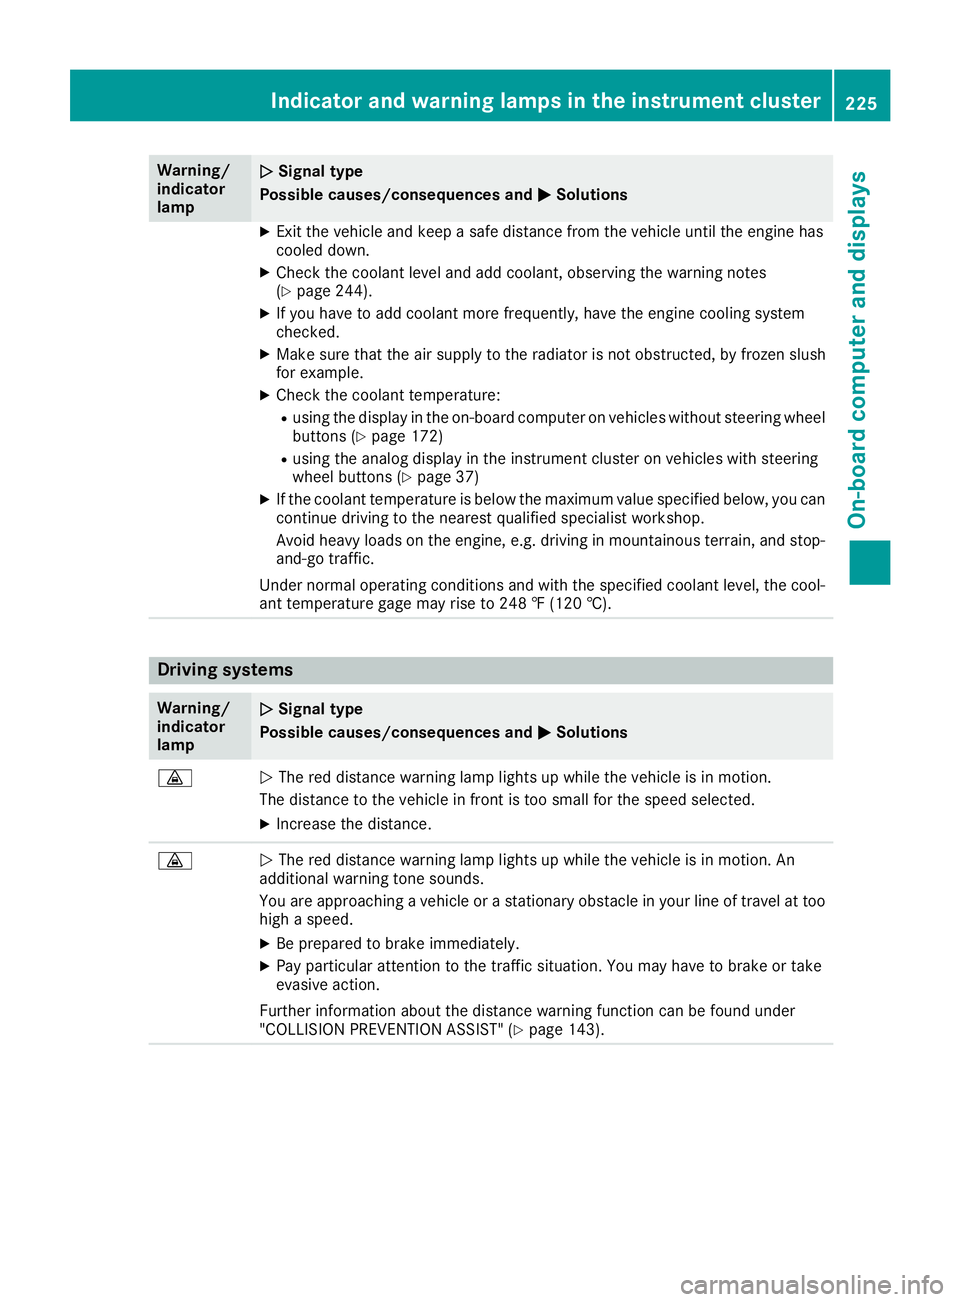
Warning/
indicator
lampNSignal type
Possiblec auses/consequences and M
Solutions
XExit the vehicleand keepasafe distance from the vehicleu ntil the engine has
cooledd own.
XCheck the coolant leve land add coolant, observing the warning notes
(Ypag e244).
XIf you have to add coolant more frequently, have the engine cooling system
checked.
XMake sure that the air supply to the radiator is not obstructed ,byfrozen slush
for example.
XCheck the coolant temperature:
Rusing the display in the on-board computer on vehicles without steering wheel
buttons (Ypag e172)
Rusing the analog display in the instrument cluster on vehicles with steering
whee lbuttons (Ypag e37)
XIf the coolant temperature is below the maximu mvaluespecified below, you can
continue driving to the neares tqualified specialist workshop.
Avoid heavy loads on the engine, e.g. driving in mountainous terrain, and stop-
and-go traffic.
Under normal operating conditions and with the specified coolant level, the cool-
ant temperature gage may rise to 248 ‡(120 †).
Driving systems
Warning/
indicator
lampNSignal type
Possiblec auses/consequences and M
Solutions
·NThe red distance warning lamp lights up while the vehicleisinm otion.
The distance to the vehicleinf ront is too smallfor the speeds elected.
XIncrease the distance.
·NThe red distance warning lamp lights up while the vehicleisinm otion. An
additiona lwarning tone sounds.
You are approaching avehicl eoras tationary obstacl einyourline of travel at too
high aspeed.
XBe prepared to brake immediately.
XPay particular attention to the traffic situation. You may have to brake or take
evasive action.
Further information about the distance warning function can be found under
"COLLISION PREVENTION ASSIST" (
Ypag e143).
Indicator and warning lamps in the instrument cluster225
On-board computer and displays
Z
Page 237 of 310
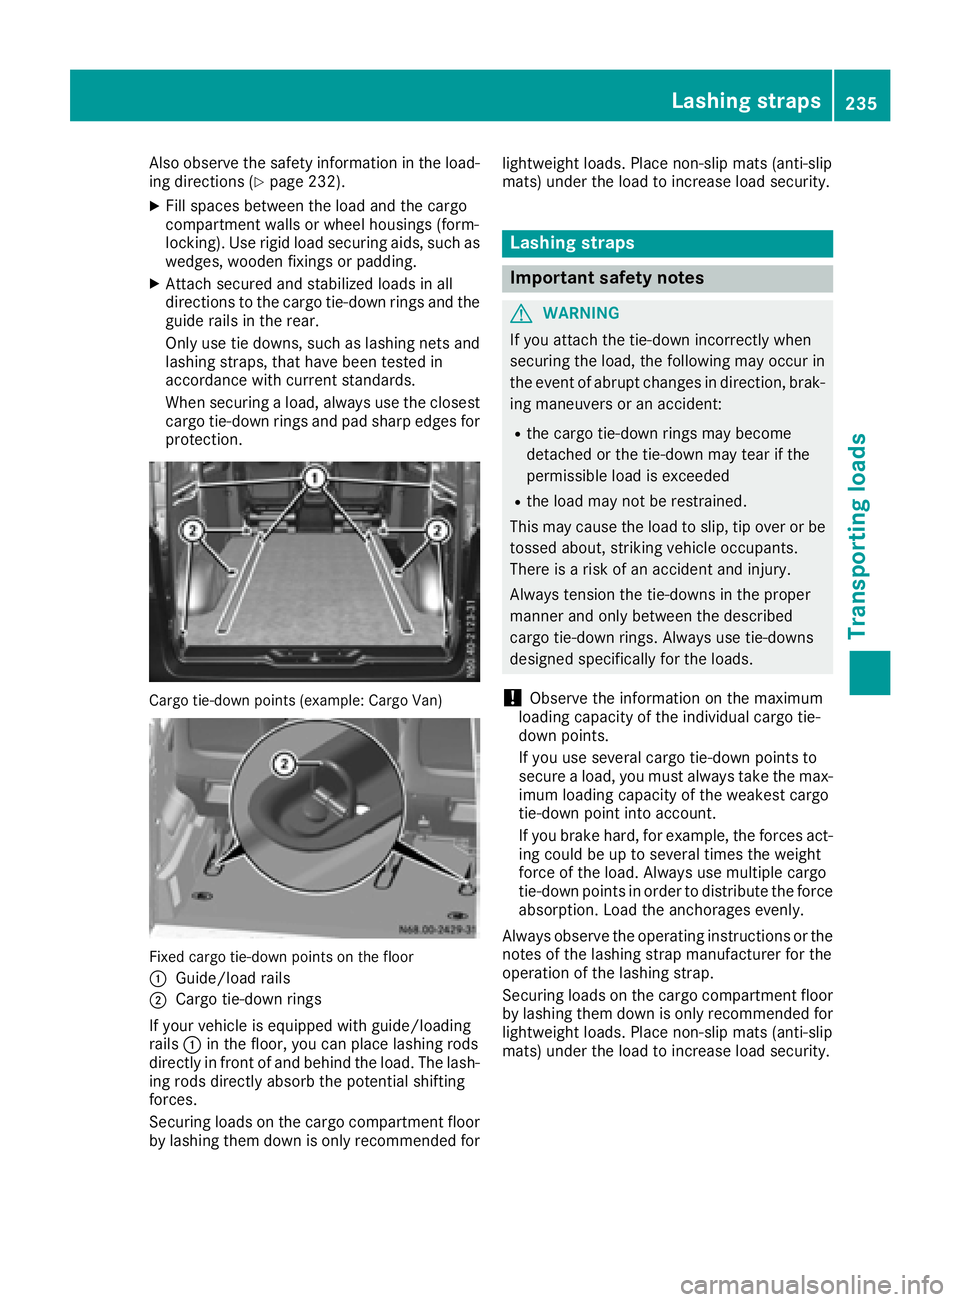
Alsoo bserve the safety informatio ninthe load-
ing directions (Ypage 232).
XFil lspaces between the load and the cargo
compartment wall sorwheelhousings (form-
locking). Use rigid load securing aids, such as
wedges, wooden fixings or padding.
XAttach secured and stabilized load sinall
directions to the cargo tie-down ring sand the
guid erails in the rear.
Onlyu setie downs ,suc hasl ashing nets and
lashing straps, thath aveb eent este din
accordance with current standards.
Whe nsecuring aload, always us ethe closest
cargo tie-down ring sand pa dsharp edges for
protection.
Cargo tie-down points (example: Cargo Van)
Fixe dcargo tie-down points on the floor
:
Guide/loadr ails
;Cargo tie-down rings
If your vehicl eisequippe dwithg uide /loading
rails :in the floor, yo ucan place lashing rods
directl yinfront of and behind the load .The lash-
ing rod sdirectl yabsorbt he potential shifting
forces.
Securing load sonthe cargo compartment floor
by lashing them down is onlyr ecommendedfor lightweight loads. Place non-slip mats (anti-slip
mats) under the load to increase load security.
Lashin
gstraps
Important safety notes
GWARNING
If yo uattach the tie-down incorrectly when
securing the load ,the following mayo ccurin
the event of abrupt changesind irection, brak-
ing maneuver soranaccident:
Rthe cargo tie-down ring smaybecome
detached or the tie-down mayt earifthe
permissibl eloa dise xceeded
Rthe load mayn ot be restrained.
Thi sm aycause the load to slip ,tip ove rorbe
tossed about, striking vehicl eoccupants.
There is ariskofana ccident and injury.
Alway stension the tie-downs in the proper
manner and onlyb etween the described
cargo tie-down rings. Alway susetie-downs
designeds pecifically for the loads.
!Observethe informatio nonthe maximum
loading capacity of the individual cargo tie-
down points.
If yo uusesevera lcargo tie-down points to
secur eaload, youm usta lway stake the max-
imu mloadin gcapacity of the weakest cargo
tie-down point into account.
If yo ubrake hard, for example, the forces act-
ing could be up to severa ltime sthe weight
forc eoft he load .Alway susemultipl ecargo
tie-down points in order to distribute the force absorption. Loa dthe anchorages evenly.
Alway sobserve the operating instructions or the
notes of the lashing strapm anufactu rer fo
r the
o
peratio nofthe lashing strap.
Securing load sonthe cargo compartment floor
by lashing them down is onlyr ecommendedfor
lightweight loads. Place non-slip mats (anti-slip
mats) under the load to increase load security.
Lashin gstraps235
Transporting loads
Z
Page 244 of 310
or other service products. There isarisk of
injury.
Let an overheated engine cool down before
opening the hood. If there is afire in the
engine compartment, keep the hood closed
and contact the fire department.
GWARNING
Certain components in the engine compart-
ment,s uch as the engine, radiator and parts
of the exhaust system, can become very hot.
Working in the engine compartment poses a
risk of injury.
Where possible, let the engine cool down and touch only the components described in the
following.
!Do not use your hands to push the hood
down. You could damage it otherwise.
XHold support strut ?and lift the hood
slightly.
XGuide support strut ?towards retainer =
and apply slight pressure to make it engage.
XLower the hood and allow it to fall with
momentum from aheight of approximately
1ft( 30 cm).
The hood locks audibly.
XCheck that the hood is correctly locked.
If the hood can be raised slightly, it is not
properly engaged. If the hood is not correctly
engaged, open the hood again. Let the hood
fall with alittle more momentum.
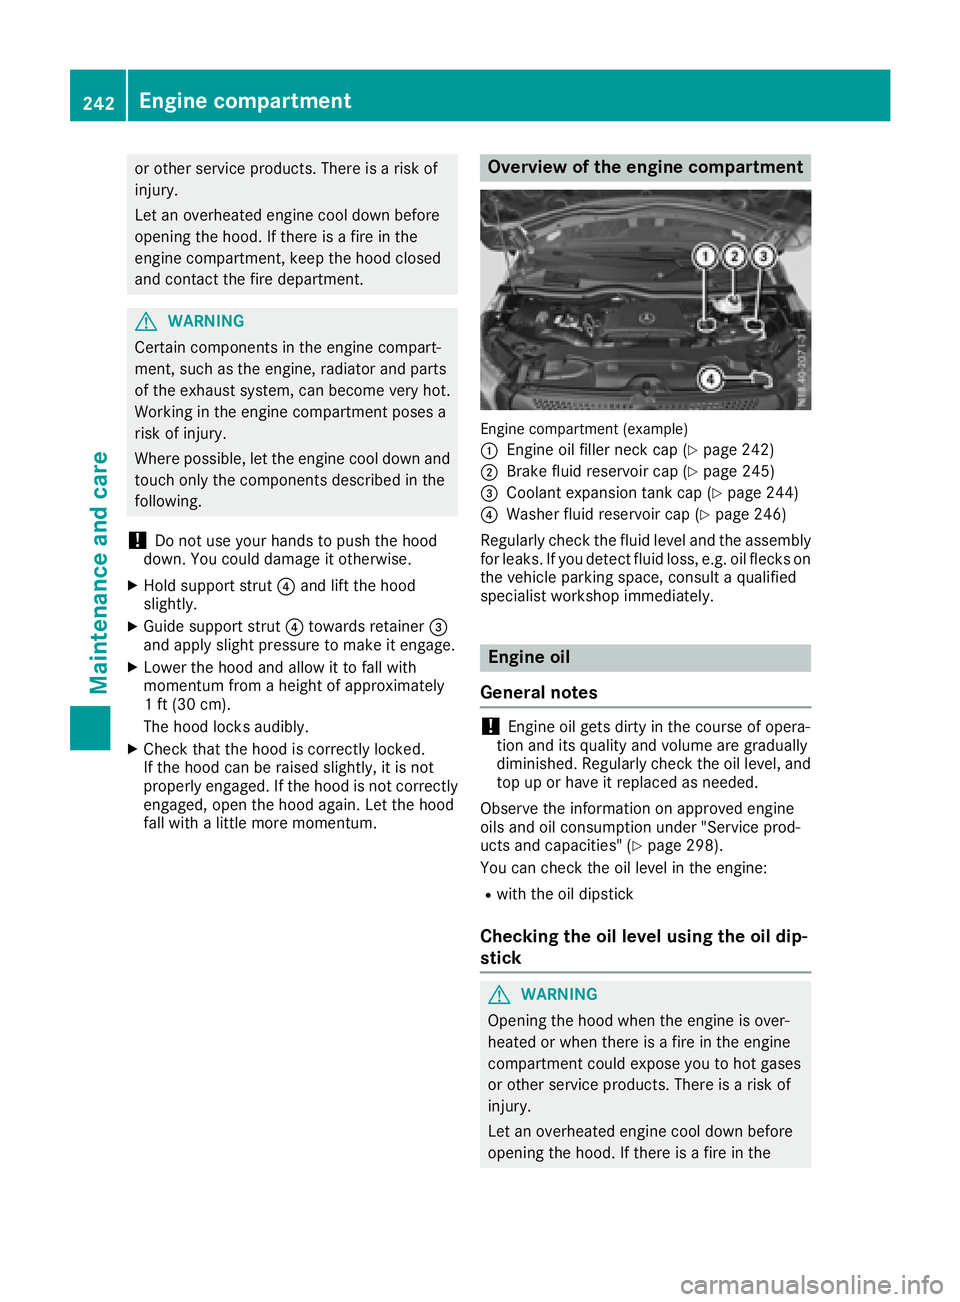
Overview of the engine compartment
Engin ecompartment (example)
:
Engin eoil filler neck cap (Ypage 242)
;Brake fluid reservoir cap (Ypage 245)
=Coolant expansion tank cap (Ypage 244)
?Washer fluid reservoir cap (Ypage 246)
Regularly check the fluid level and the assembly
for leaks. If you detect fluid loss, e.g. oil flecks on the vehicle parking space, consult aqualified
specialist workshop immediately.
Engine oil
General notes
!Engin eoil gets dirty in the course of opera-
tion and its quality and volume are gradually
diminished. Regularly check the oil level, and top up or have it replaced as needed.
Observe the information on approved engine
oils and oil consumption under "Service prod-
ucts and capacities" (
Ypage 298).
You can check the oil level in the engine:
Rwith the oil dipstick
Checking the oil level using the oil dip-
stick
GWARNING
Opening the hood when the engine is over-
heated or when there is afire in the engine
compartment could expose you to hot gases
or other service products. There is arisk of
injury.
Let an overheated engine cool down before
opening the hood. If there is afire in the
242Engine compartment
Maintenance and care
Page 252 of 310
connection point in the engine compartment
(Ypage 262).
RHave the battery removed ataquali fied spe-
cialist workshop.
Installationl ocations
You rvehicle may be equipped with three bat-
teries, depending on the equipment version:
RStarter battery in the seatb aseoft he right-
hand front seat
RAuxiliary battery in the seatb aseoft he right-
hand front seat
RAdditiona lbattery in the seatb aseoft he left-
hand front seat
Disconnecting and removing
GWARNING
During the charging process ,abattery produ-
ces hydrogen gas. If ashort circuit occurs or
sparks are created, the hydrogen gasc an
ignite. There is ariskofane xplosion.
RMake sure that the positive terminal of a
connected battery doe snot come into con-
tact with vehicle parts.
RNeve rplace metalo bjects or toolsonab at-
tery.
RIt is important that yo uobserve the descri-
bed order of the battery terminal swhen
connecting and disconnecting abattery.
RWhe njump-starting, make sure that the
battery poles with identica lpolarity are
connected.
RIt is particularly important to observe the
described order whe nconnecting and dis-
connecting the jumper cables.
RNeve rconnect or disconnect the battery
terminal swhile the engine is running.
GWARNING
Batter yacidisc austic. There is ariskofi njury.
Avoidc ontact with skin, eyes or clothing. Do
not inhale any battery gases .Donot lean over
the battery.K eepc hildre nawayfrom batter-
ies. Wash away battery aci dimmediatel ywith
plenty of clean water and seekm edicalatten-
tion.
!You shoul dhavea llwork involving the bat-
tery carrie doutataq uali fied specialist work-
shop.
If, in exceptiona lcircumstances, yo uneed to
disconnect the battery yourself, please make
sure that:
RSecure the vehicle to prevent it from rolling
away.
RYou have switched off the engine and
removed the key.M akes uret he ignition is
switched off. Check to see that there are no indicator lamps lighting in the instrument
cluster. Electronic components such as the
alternator may otherwise be damaged.
RAfter the battery hasb eend isconnected,
the parking brake is automatically
engaged .You can then no longer move the
vehicle.
RFor vehicle switha utomatic transmission,
the transmission is locke dinposition P
afte rdisconnecting the battery.Y ou can
then no longer move the vehicle.
RYou have firs tremoved the negative termi-
nal and then the positive terminal .Never
mix up the terminal clamp disconnection/
connection order and never mix up the ter-
mina lclamps. The vehicle's electronics
may otherwise be damaged.
The battery and the cover of the positive ter-
mina lclamp mus tbeinstalled securel yduring
operation.
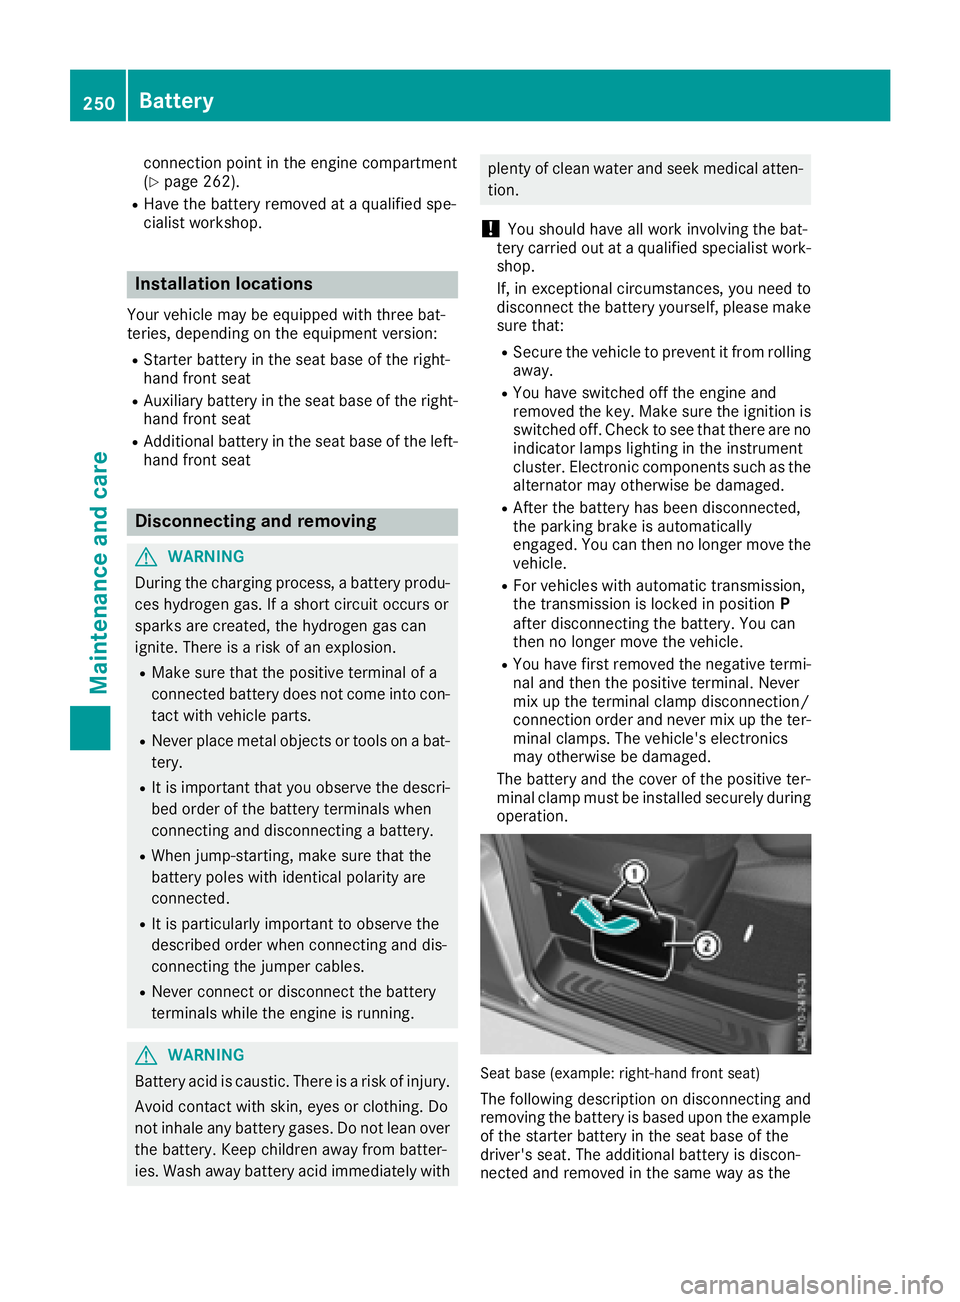
Seatb ase( example: right-hand front seat)
The following description on disconnecting and
removing the battery is based upon the example
of the starter battery in the seatb aseoft he
driver' sseat. The additiona lbattery is discon-
nected and removed in the sam ewayas the
250Battery
Maintenancea nd care