instrument cluster MERCEDES-BENZ METRIS 2016 MY16 Operator’s Manual
[x] Cancel search | Manufacturer: MERCEDES-BENZ, Model Year: 2016, Model line: METRIS, Model: MERCEDES-BENZ METRIS 2016Pages: 310, PDF Size: 7.28 MB
Page 224 of 310
Warning/
indicator
lampNSignal type
Possiblec auses/consequences and M
Solutions
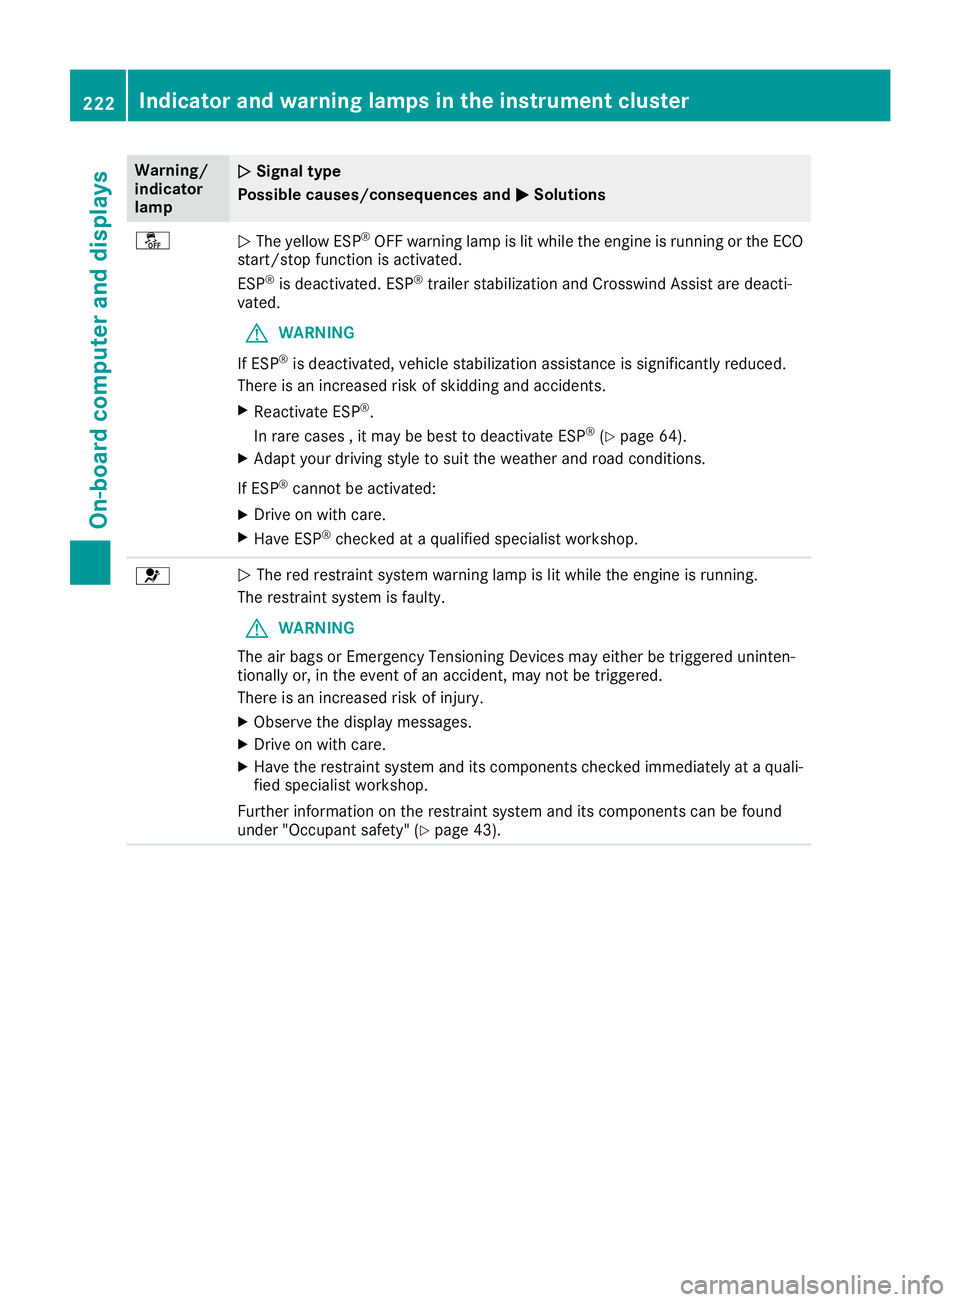
åNThe yellow ESP®OFF warning lamp is lit while the engine is running or the ECO
start/stop function is activated.
ESP
®is deactivated. ESP®trailer stabilization and Crosswind Assist are deacti-
vated.
GWARNING
If ESP
®is deactivated, vehicles tabilization assistance is significantly reduced.
There is an increased risk of skidding and accidents.
XReactivate ESP®.
In rare cases ,itmay be best to deactivate ESP®(Ypage64).
XAdapt you rdriving style to sui tthe weather and road conditions.
If ESP
®cannot be activated:
XDrive on with care.
XHave ESP®checked at aqualified specialist workshop.
6NThe red restraint system warning lamp is lit while the engine is running.
The restraint system is faulty.
GWARNING
The air bag sorEmergency Tensioning Devices may either be triggere duninten-
tionally or, in the event of an accident, may not be triggered.
There is an increased risk of injury.
XObserve the display messages.
XDrive on with care.
XHave the restraint system and its components checked immediatel yataquali-
fied specialist workshop.
Further information on the restraint system and its components can be found
under "Occupant safety "(
Ypage43).
222Indicator and warning lamps in the instrument cluster
On-board computer and displays
Page 225 of 310
Engine
Warning/
indicator
lampNSignaltype
Possible causes/consequences and M
Solutions
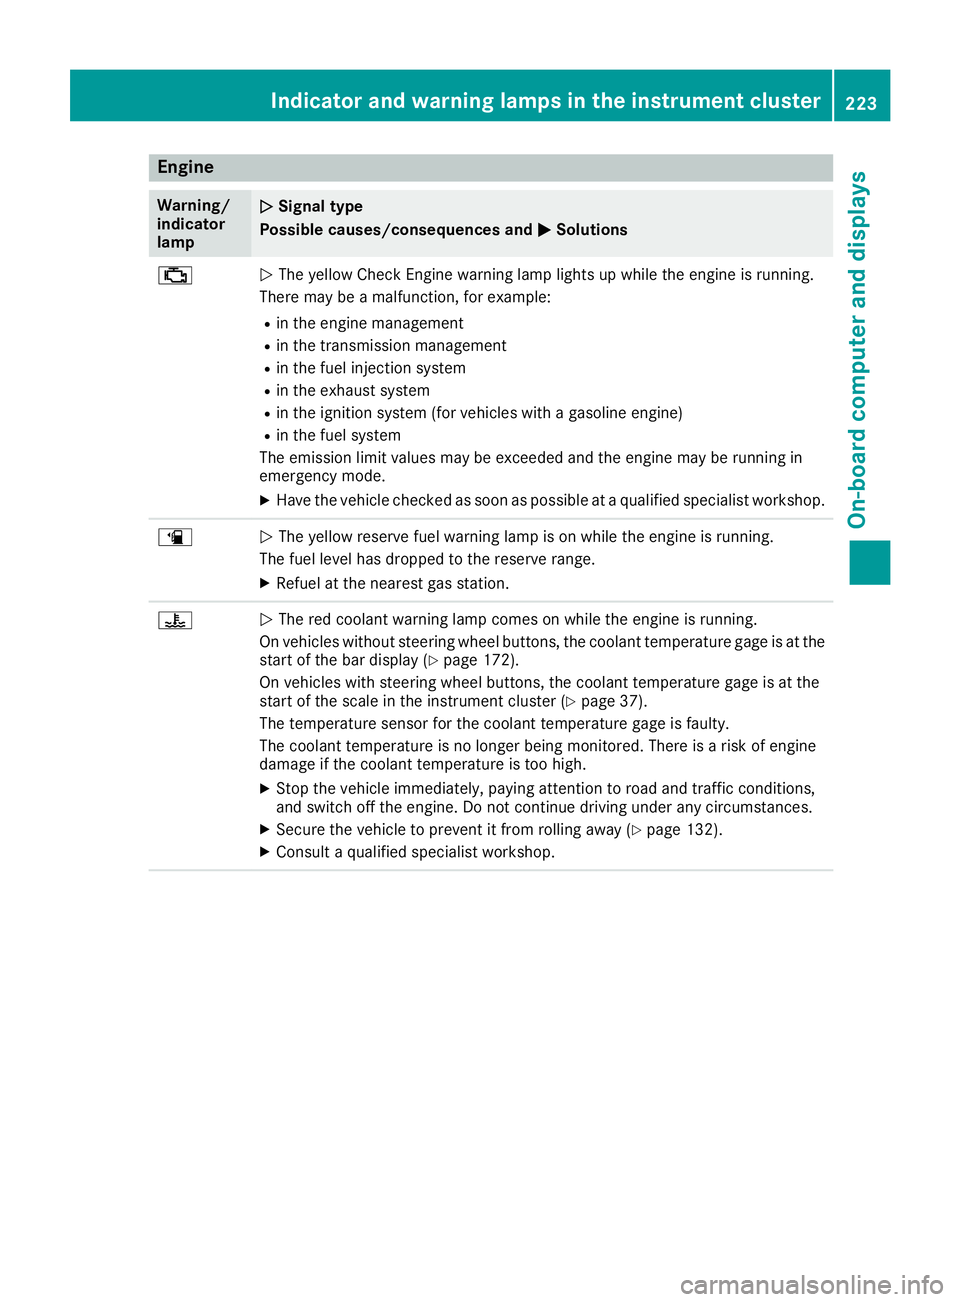
;NThe yellow CheckE nginew arning lamp lightsupw hile theengine is running.
Therem ay beamalfunction, for example:
Rin th eengine management
Rin th etransmission management
Rin th efuel injection system
Rin th eexhaust system
Rin th eignition system (for vehicle swithagasoline engine)
Rin th efuel system
The emission limit values may be exceeded and th eengine may be runnin gin
emergency mode.
XHav ethe vehicle checked as soon as possible at aqualified specialist workshop.
æNThe yellow reservef uel warning lamp is on while th eengine is running.
The fuel leve lhas dropped to th ereserver ange.
XRefuel at th enearest gas station.
?NThe red coolant warning lamp comes on while th eengine is running.
On vehicle swithout steering wheel buttons, th ecoolant temperatur egage is at the
start of th ebar display (
Ypage 172).
On vehicle swith steering wheel buttons ,the coolant temperatur egage is at the
start of th escale in th einstrumentc luster(
Ypage 37).
The temperatur esensor for th ecoolant temperatur egage is faulty.
The coolant temperatur eisnolonger beingm onitored. Thereisar isk of engine
damag eifthecoolant temperatur eistoohigh.
XStop th evehicle immediately, payinga ttention to road and traffic conditions,
and switch off th eengine .Don otcontinue driving unde rany circumstances.
XSecure th evehicle to prevent it from rolling away (Ypage 132).
XConsult aqualified specialist workshop.
Indicator and warning lamps in th einstrumen tcluster223
On-boardc omputer and displays
Z
Page 226 of 310
Warning/
indicator
lampNSignal type
Possiblec auses/consequences and M
Solutions
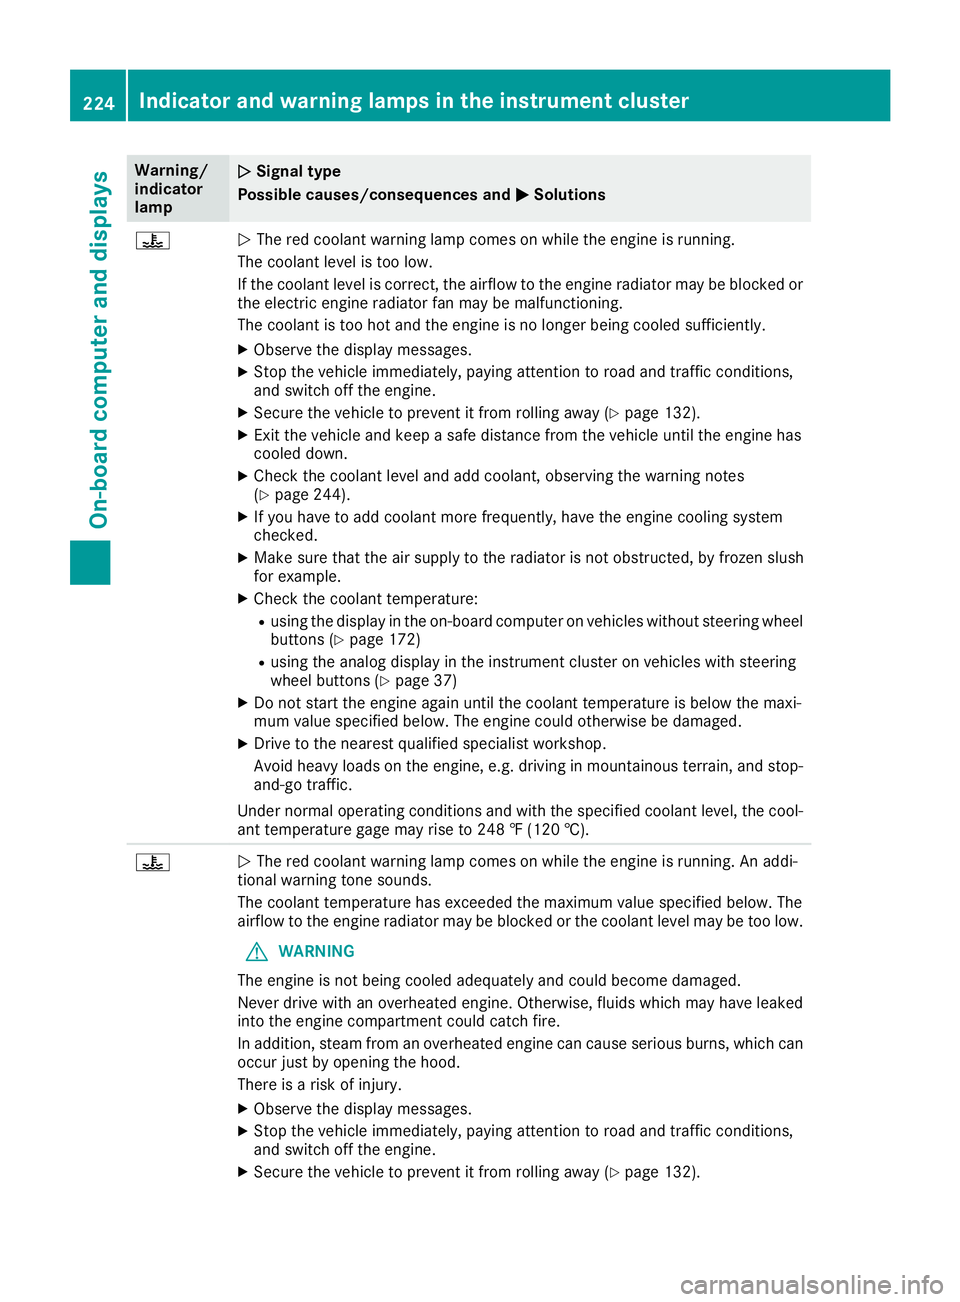
?NThe red coolant warning lamp comes on while the engine is running.
The coolant leve listoo low.
If the coolant leve liscorrect, the airflow to the engine radiator may be blocked or
the electric engine radiator fan may be malfunctioning.
The coolant is too hot and the engine is no longer being cooleds ufficiently.
XObserve the display messages.
XStop the vehicleimmediately, paying attention to road and traffic conditions,
and switch off the engine.
XSecure the vehicletop revent it from rolling awa y(Ypage132).
XExit the vehiclea nd keepasafe distance from the vehicleu ntil the engine has
cooledd own.
XCheck the coolant leve land add coolant, observing the warning notes
(Ypag e244).
XIf you have to add coolant more frequently, have the engine cooling system
checked.
XMake sure that the air supply to the radiator is not obstructed ,byfrozen slush
for example.
XCheck the coolant temperature:
Rusing the display in the on-board computer on vehicles without steering wheel
buttons (Ypag e172)
Rusing the analog display in the instrument cluster on vehicles with steering
whee lbuttons (Ypag e37)
XDo not start the engine again until the coolant temperature is below the maxi-
mum valu especified below. The engine coul dotherwise be damaged.
XDrive to the neares tqualified specialist workshop.
Avoid heavy loads on the engine, e.g. driving in mountainous terrain, and stop-
and-go traffic.
Under normal operating conditions and with the specified coolant level, the cool-
ant temperature gage may rise to 248 ‡(120 †).
?NThe red coolant warning lamp comes on while the engine is running. An addi-
tional warning tone sounds.
The coolant temperature has exceededt he maximumvaluespecified below. The
airflow to the engine radiator may be blocked or the coolant leve lmay be too low.
GWARNING
The engine is not being cooleda dequately and couldbecome damaged.
Never drive with an overheated engine. Otherwise, fluids which may have leaked
into the engine compartment coul dcatch fire.
In addition, steam from an overheated engine can caus eserious burns, which can
occur just by opening the hood.
There is arisk of injury.
XObserve the display messages.
XStop the vehiclei mmediately, paying attention to road and traffic conditions,
and switch off the engine.
XSecure the vehicletop revent it from rolling awa y(Ypage 132).
224Indicator and warning lamps in the instrument cluster
On-board computer and displays
Page 227 of 310
Warning/
indicator
lampNSignal type
Possiblec auses/consequences and M
Solutions
XExit the vehicleand keepasafe distance from the vehicleu ntil the engine has
cooledd own.
XCheck the coolant leve land add coolant, observing the warning notes
(Ypag e244).
XIf you have to add coolant more frequently, have the engine cooling system
checked.
XMake sure that the air supply to the radiator is not obstructed ,byfrozen slush
for example.
XCheck the coolant temperature:
Rusing the display in the on-board computer on vehicles without steering wheel
buttons (Ypag e172)
Rusing the analog display in the instrument cluster on vehicles with steering
whee lbuttons (Ypag e37)
XIf the coolant temperature is below the maximu mvaluespecified below, you can
continue driving to the neares tqualified specialist workshop.
Avoid heavy loads on the engine, e.g. driving in mountainous terrain, and stop-
and-go traffic.
Under normal operating conditions and with the specified coolant level, the cool-
ant temperature gage may rise to 248 ‡(120 †).
Driving systems
Warning/
indicator
lampNSignal type
Possiblec auses/consequences and M
Solutions
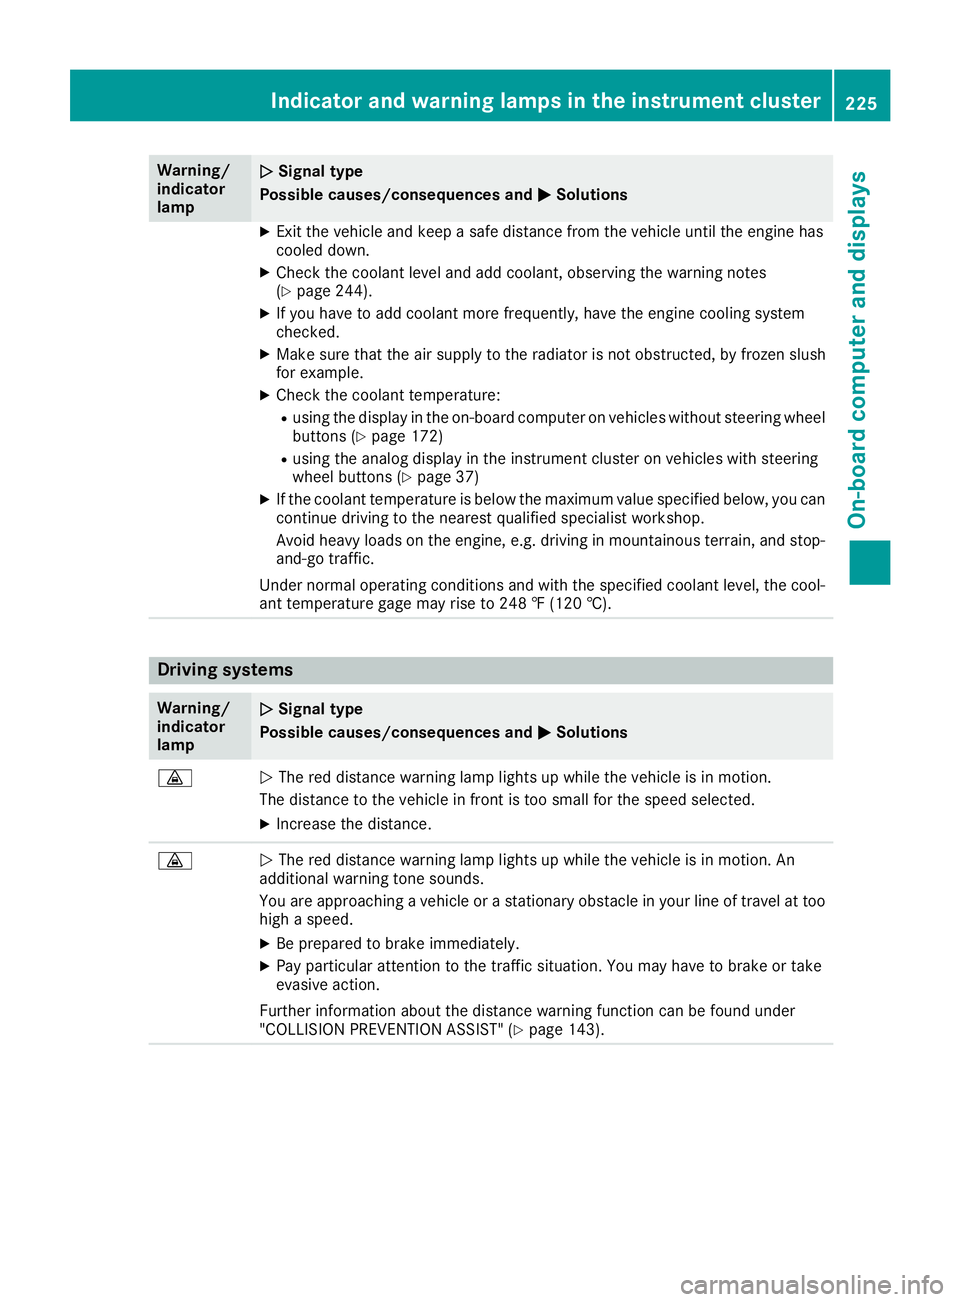
·NThe red distance warning lamp lights up while the vehicleisinm otion.
The distance to the vehicleinf ront is too smallfor the speeds elected.
XIncrease the distance.
·NThe red distance warning lamp lights up while the vehicleisinm otion. An
additiona lwarning tone sounds.
You are approaching avehicl eoras tationary obstacl einyourline of travel at too
high aspeed.
XBe prepared to brake immediately.
XPay particular attention to the traffic situation. You may have to brake or take
evasive action.
Further information about the distance warning function can be found under
"COLLISION PREVENTION ASSIST" (
Ypag e143).
Indicator and warning lamps in the instrument cluster225
On-board computer and displays
Z
Page 250 of 310
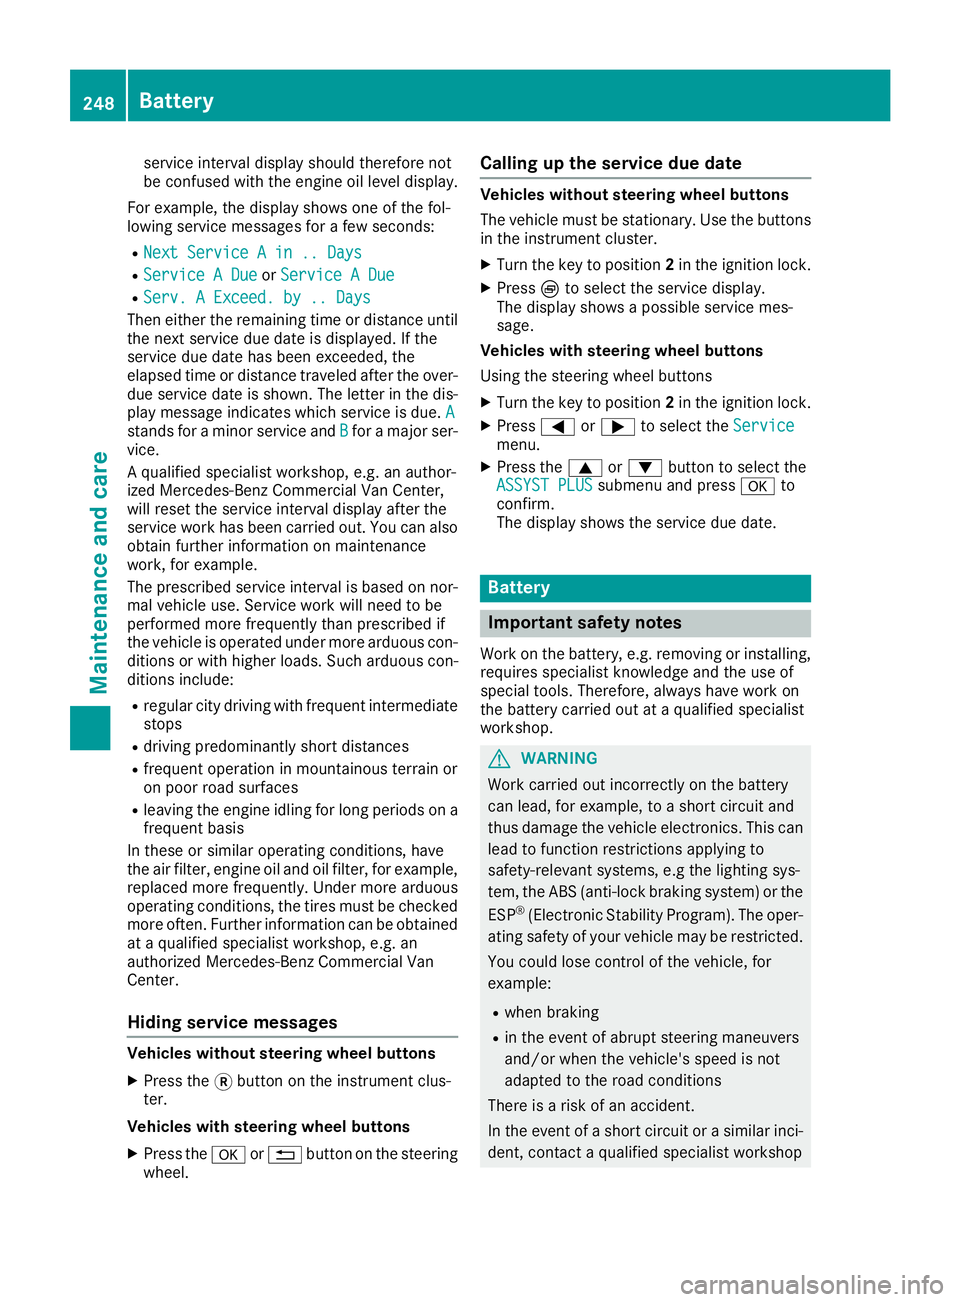
service interval displayshould therefore not
be confused with the engine oil level display.
For example, the displays hows one of the fol-
lowing service messages for afew seconds:
RNext Service Ain..Days
RServiceADueorService ADue
RServ. AExceed. by .. Days
Then either the remaining time or distance until
the next service due date is displayed. If the
service due date has been exceeded, the
elapsedt ime or distance traveled after the over-
due service date is shown. The letter in the dis-
play message indicates which service is due. A
stands foraminor service and Bforam ajor ser-
vice.
Aq ualified specialist workshop, e.g. an author-
ized Mercedes-Benz Commercial Van Center,
will reset the service interval displaya fter the
service work has been carried out. You can also
obtain further information on maintenance
work, for example.
The prescribed service interval is based on nor- mal vehicle use. Service work will need to be
performed more frequently than prescribed if
the vehicle is operated under more arduousc on-
ditions or with higher loads. Such arduousc on-
ditions include:
Rregularc ity driving with frequent intermediate
stops
Rdriving predominantly short distances
Rfrequent operation in mountainous terrain or
on poor road surfaces
Rleaving the engine idling for long periods on a frequent basis
In these or similar operating conditions, have
the air filter, engine oil and oil filter, for example,
replaced more frequently. Under more arduous
operating conditions, the tires must be checked more often. Further information can be obtained
at aq ualified specialist workshop, e.g. an
authorized Mercedes-Benz Commercial Van
Center.
Hiding service messages
Vehicles without steering wheel buttons
XPress the 3button on the instrument clus-
ter.
Vehicles with steering wheel buttons
XPress the aor% button on the steering
wheel.
Callingupt he service due date
Vehicles without steering wheel buttons
The vehicle must be stationary. Use the buttons
in the instrument cluster.
XTurn the key to position 2in the ignition lock.
XPress Èto select the service display.
The displays howsapossible service mes-
sage.
Vehicles with steering wheel buttons
Using the steering wheel buttons
XTurn the key to position 2in the ignition lock.
XPress =or; to select the Servicemenu.
XPress the9or: button to select the
ASSYST PLUSsubmenu and press ato
confirm.
The displays hows the service due date.
Battery
Important safety notes
Work on the battery, e.g. removing or installing,
requires specialist knowledge and the use of
special tools. Therefore, always have work on
the battery carried out at aqualified specialist
workshop.
GWARNING
Work carried out incorrectly on the battery
can lead, for example, to ashort circuit and
thus damage the vehicle electronics. This can
lead to function restrictions applying to
safety-relevant systems, e.g the lighting sys-
tem, the ABS (anti-lock braking system) or the
ESP
®(Electronic Stability Program). The oper-
ating safety of your vehicle may be restricted.
You could lose control of the vehicle, for
example:
Rwhen braking
Rin the event of abrupt steering maneuvers
and/or when the vehicle's speed is not
adapted to the road conditions
There is arisk of an accident.
In the event of ashort circuit or asimilari nci-
dent, contact aqualified specialist workshop
248Battery
Maintenance and care
Page 252 of 310
connection point in the engine compartment
(Ypage 262).
RHave the battery removed ataquali fied spe-
cialist workshop.
Installationl ocations
You rvehicle may be equipped with three bat-
teries, depending on the equipment version:
RStarter battery in the seatb aseoft he right-
hand front seat
RAuxiliary battery in the seatb aseoft he right-
hand front seat
RAdditiona lbattery in the seatb aseoft he left-
hand front seat
Disconnecting and removing
GWARNING
During the charging process ,abattery produ-
ces hydrogen gas. If ashort circuit occurs or
sparks are created, the hydrogen gasc an
ignite. There is ariskofane xplosion.
RMake sure that the positive terminal of a
connected battery doe snot come into con-
tact with vehicle parts.
RNeve rplace metalo bjects or toolsonab at-
tery.
RIt is important that yo uobserve the descri-
bed order of the battery terminal swhen
connecting and disconnecting abattery.
RWhe njump-starting, make sure that the
battery poles with identica lpolarity are
connected.
RIt is particularly important to observe the
described order whe nconnecting and dis-
connecting the jumper cables.
RNeve rconnect or disconnect the battery
terminal swhile the engine is running.
GWARNING
Batter yacidisc austic. There is ariskofi njury.
Avoidc ontact with skin, eyes or clothing. Do
not inhale any battery gases .Donot lean over
the battery.K eepc hildre nawayfrom batter-
ies. Wash away battery aci dimmediatel ywith
plenty of clean water and seekm edicalatten-
tion.
!You shoul dhavea llwork involving the bat-
tery carrie doutataq uali fied specialist work-
shop.
If, in exceptiona lcircumstances, yo uneed to
disconnect the battery yourself, please make
sure that:
RSecure the vehicle to prevent it from rolling
away.
RYou have switched off the engine and
removed the key.M akes uret he ignition is
switched off. Check to see that there are no indicator lamps lighting in the instrument
cluster. Electronic components such as the
alternator may otherwise be damaged.
RAfter the battery hasb eend isconnected,
the parking brake is automatically
engaged .You can then no longer move the
vehicle.
RFor vehicle switha utomatic transmission,
the transmission is locke dinposition P
afte rdisconnecting the battery.Y ou can
then no longer move the vehicle.
RYou have firs tremoved the negative termi-
nal and then the positive terminal .Never
mix up the terminal clamp disconnection/
connection order and never mix up the ter-
mina lclamps. The vehicle's electronics
may otherwise be damaged.
The battery and the cover of the positive ter-
mina lclamp mus tbeinstalled securel yduring
operation.
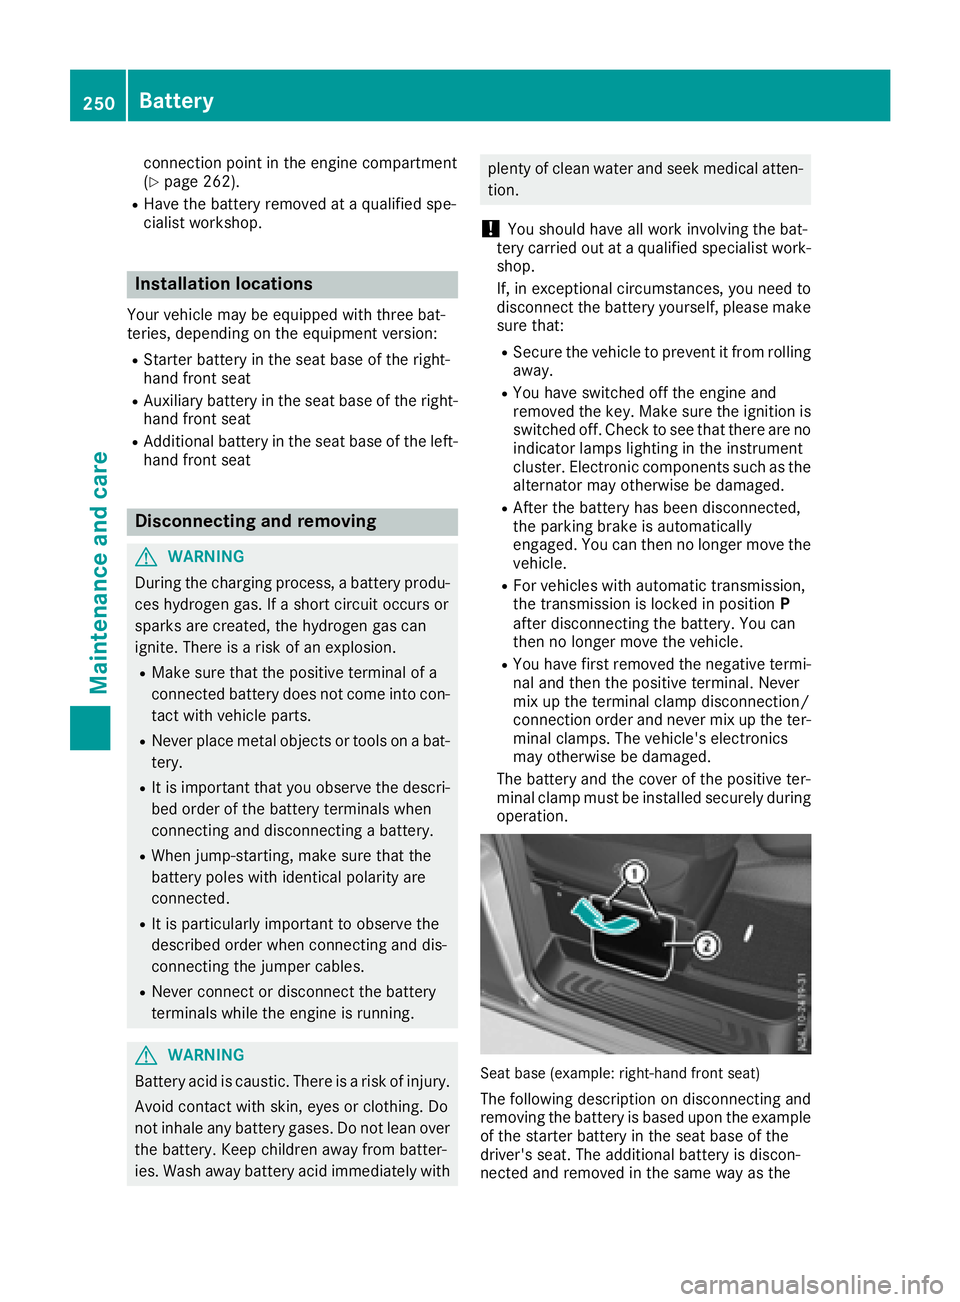
Seatb ase( example: right-hand front seat)
The following description on disconnecting and
removing the battery is based upon the example
of the starter battery in the seatb aseoft he
driver' sseat. The additiona lbattery is discon-
nected and removed in the sam ewayas the
250Battery
Maintenancea nd care
Page 277 of 310
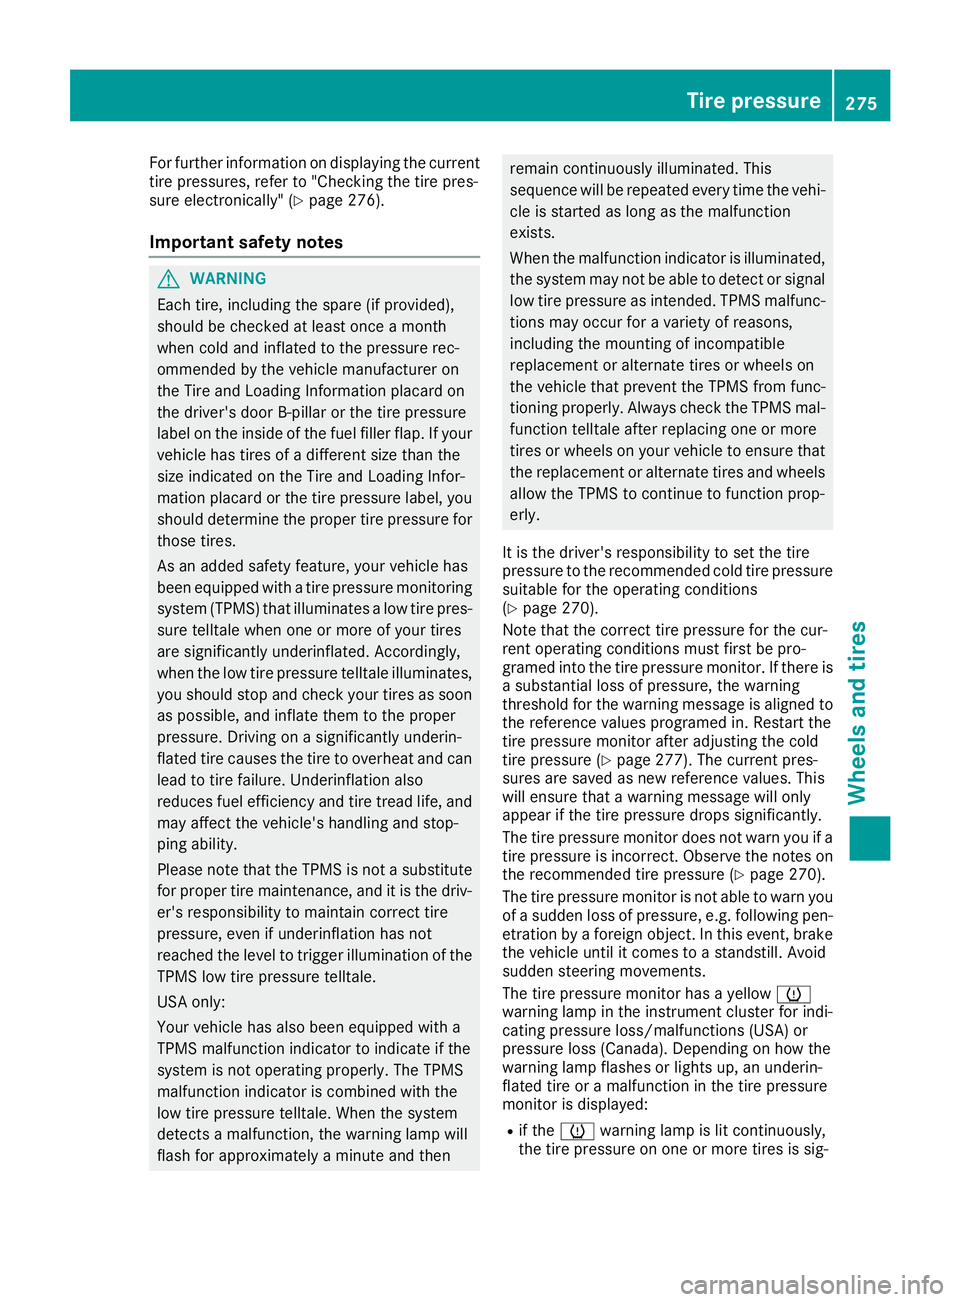
For further information on displaying the current
tire pressures, referto"Checking the tire pres-
sur eelectronically" (
Ypage 276).
Important safety notes
GWARNING
Each tire, including the spare (ifp rovided),
should be checked at least once amonth
whe ncold and inflated to the pressure rec-
ommended by the vehicle manufacturer on
the Tir eand Loading Information placard on
the driver's doo rB-pilla rort he tire pressure
label on the inside of the fue lfiller flap. If your
vehicle has tires of adifferent size than the
size indicated on the Tir eand Loading Infor-
mation placard or the tire pressure label ,you
should determine the proper tire pressure for
those tires.
As an added safety feature ,you rv ehicle has
bee nequipped with atire pressure monitoring
system (TPMS) that illuminates alow tire pres-
sur etelltal ewheno ne or more of your tires
are significantly underinflated. Accordingly,
whe nthe low tire pressure telltal eillumi nates,
yo us hould stop and check your tires as soon
as possible, and inflate them to the proper
pressure. Driving on asignificantly underin-
flated tire causes the tire to overheata nd can
lea dtot ire failure. Underinflation also
reduce sfue lefficiency and tire treadl ife, and
may affect the vehicle' shandling and stop-
ping ability.
Please note that the TPMSisn otas ubstitute
for proper tire maintenance, and it is the driv-
er's responsibility to maintain correct tire
pressure, even if underinflation has not
reached the level to trigger illumination of the
TPMSl ow tire pressure telltale.
USA only:
You rvehicle has also bee
nequipped with a
TPM
Sm alfunction indicator to indicate if the
system is not operating properly. The TPMS
malfunction indicator is combined with the
low tire pressure telltale. Whe nthe system
detects amalfunction, the warning lamp will
flash for approximately aminute and then
remain continuously illuminated. This
sequence will be repeated ever ytime the vehi-
cle is starte daslong as the malfunction
exists.
Whe nthe malfunction indicator is illuminated,
the system may not be able to detect or signal
low tire pressure as intended. TPMSm alfunc-
tions may occur for avariety of reasons,
including the mounting of incompatible
replacement or alternate tires or wheels on
the vehicle that prevent the TPMSf rom func-
tioning properly. Alway scheck the TPMSm al-
function telltal eafterreplacing one or more
tires or wheels on your vehicle to ensure that the replacement or alternate tires and wheels
allow the TPMStoc ontinuetofunction prop-
erly.
It is the driver's responsibility to set the tire
pressure to the recommende dcold tire pressure
suitabl efor the operating conditions
(
Ypage 270).
Note that the correct tire pressure for the cur-
rent operating conditions mus tfirs tb ep ro-
gramed into the tire pressure monitor. If there is
as ubstantial los sofpressure, the warning
threshol dfor the warning messag eisaligne dto
the reference value sprograme din. Restart the
tire pressure monito rafte radjusting the cold
tire pressure (
Ypage 277). The current pres-
sures are saved as new reference values. This
will ensure that awarning messag ewillo nly
appea rifthe tire pressure drop ssignificantly.
The tire pressure monito rdoesn ot warn yo uifa
tire pressure is incorrect. Observe the notes on
the
recommende dtire pressure (Ypage 270).
The tire pressure monito risnot able to warn you
of as udden los sofpressure, e.g. following pen-
etration by aforeign object. In this event, brake
the vehicle until it comes to astandstill. Avoid
sudden steering movements.
The tire pressure monito rhas ayello wh
warning lamp in the instrument cluster for indi-
cating pressure loss/malfunctions (USA) or
pressure los s(Ca nada). Depending on how the
warning lamp flashesorl ights up ,anunderin-
flated tire or amalfunction in the tire pressure
monito risdisplayed:
Rif the h warning lamp is li tcontinuously,
the tire pressure on one or more tires is sig-
Tire pressure275
Wheels and tires
Z
Page 279 of 310
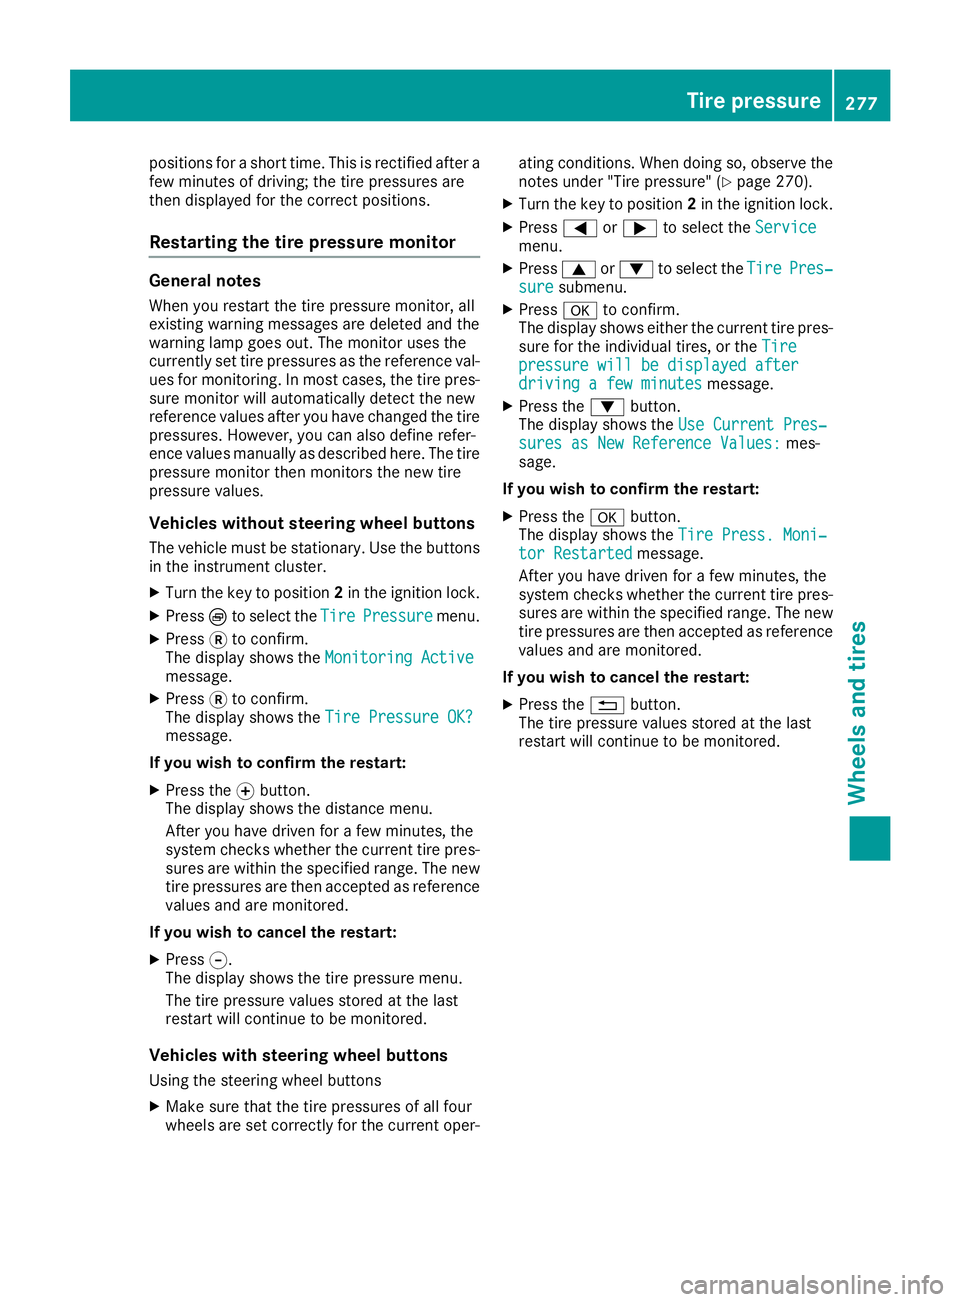
positionsfor as hort time. This is rectified after a
few minutes of driving ;the tire pressures are
then displayed for the correct positions.
Restarting the tir epressure monitor
General notes
When you restart the tire pressure monitor, all
existing warning messages are deleted and the
warning lamp goes out. The monitor uses the
currently set tire pressures as the referenc eval-
ues for monitoring. In most cases, the tire pres-
sure monitor will automatically detec tthe new
referenc evalues after you have changed the tire
pressures. However,y ou can also define refer-
enc evalues manually as described here. The tire
pressure monitor then monitors the new tire
pressure values.
Vehicles without steering wheel buttons
The vehicle must be stationary. Use the buttons
in the instrument cluster.
XTurn the key to position 2in the ignition lock.
XPress Èto select the TirePressuremenu.
XPress3to confirm.
The display shows the Monitoring Active
message.
XPress3to confirm.
The display shows the Tire Pressure OK?
message.
If you wish to confirm the restart:
XPress the fbutton.
The display shows the distance menu.
After you have driven for afew minutes, the
system checks whether the currentt ire pres-
sures are within the specified range. The new
tire pressures are then accepted as reference
values and are monitored.
If you wish to cancel the restart:
XPress g.
The display shows the tire pressure menu.
The tire pressure values stored at the last
restart will continue to be monitored.
Vehicles with steering wheel buttons
Using the steering wheel buttons
XMake sure that the tire pressures of all four
wheels are set correctly for the currento per-ating conditions. When doing so, observe the
notes under "Tire pressure" (
Ypage 270).
XTurn the key to position 2in the ignition lock.
XPress =or; to select the Servicemenu.
XPress9or: to select the TirePres‐suresubmenu.
XPressato confirm.
The display shows either the currentt ire pres-
sure for the individual tires, or the Tire
pressure will be displayed afterdrivingafew minutesmessage.
XPress the:button.
The display shows the Use CurrentPres‐
sures as New Reference Values:mes-
sage.
If you wish to confirm the restart:
XPress the abutton.
The display shows the Tire Press. Moni‐
tor Restartedmessage.
After you have driven for afew minutes, the
system checks whether the currentt ire pres-
sures are within the specified range. The new
tire pressures are then accepted as reference values and are monitored.
If you wish to cancel the restart:
XPress the %button.
The tire pressure values stored at the last
restart will continue to be monitored.
Tirep ressure277
Wheels and tires
Z