stop start MERCEDES-BENZ METRIS 2019 MY19 Operator’s Manual
[x] Cancel search | Manufacturer: MERCEDES-BENZ, Model Year: 2019, Model line: METRIS, Model: MERCEDES-BENZ METRIS 2019Pages: 318, PDF Size: 5.07 MB
Page 142 of 318
!Depressing the brake pedal constantly
results in excessive and premature wear to
the brake pads.
If the brakes have been subjected to a heavy
load, do not stop the vehicle immediately. Drive
on for a short while. The brakes are cooled down
more quickly in the airflow.
Wet road surfaces
If you have been driving for a long time in heavy
rain without braking, there may be a delayed
response when you first apply the brakes. This
may also occur after driving through a car wash
or deep water.
You must depress the brake pedal more firmly.
Maintain a longer distance to the vehicle in
front.
While paying attention to the traffic conditions,
you should brake the vehicle firmly after driving
on a wet road surface or through a car wash. This
heats the brake discs, so that they dry more
quickly, which protects them against corrosion.
Limited braking performance on salt-
treated roads
When driving on salted roads, salt may start to
build up on the brake disks and brake pads. This can increase braking distances considerably.
Maintain a greater distance to the vehicle in
front.
To remove any build-up of salt that may have
formed:
XApply the brakes at the start of the journey,
occasionally during journey and at the end of
the journey. Make sure that you do not endan-
ger other road users when doing so.
Checking the brake pad thickness
In addition to monitoring using the brake pad
wear sensor, regularly monitor and check all of
the brake pads by performing a visual inspection
to look for pad material wear.
If you are unable to check the brake wear on the
inside of the wheels, remove the wheels with the tools provided.
Make sure that the brake pad material thickness
never falls below 0.12 in (3 mm). Have the brake pads checked and replaced at a qualified spe-
cialist workshop, if necessary. Do not solely rely on the brake pad wear sensor.
It is strongly recommended that you have the
brake pads checked at a qualified specialist
workshop at every service displayed in the main-
tenance interval indicator, prior to long journeys
and whenever the wheels are removed.
New brake discs and brake pads/
linings
New brake pads and brake discs only reach their
optimal braking effect after about 60 miles
(100 kilometers). Until then, compensate for
this by applying greater force to the brake pedal.
For safety reasons, Mercedes-Benz recom-
mends only installing the following brake discs
and brake pads/linings:
Rbrake discs that have been approved by
Mercedes-Benz
Rbrake pads/linings that have been approved
by Mercedes-Benz or are of an equivalent
standard of quality
Other brake discs or brake pads/linings can
compromise the safety of your vehicle.
Always replace all brake discs or brake pads/
linings on an axle at the same time and only have
them replaced at a qualified specialist work-
shop. When replacing the brake discs, always
have the brake pads/linings replaced at the
same time.
Parking brake
GWARNING
If you must brake the vehicle with the parking brake, the braking distance is considerably
longer and the wheels could lock. There is an
increased danger of skidding and accidents.
Only use the parking brake to brake the vehi-
cle when the service brake is faulty. Do not
apply the parking brake too firmly. If the
wheels lock, release the parking brake until
the wheels begin turning again.
When driving on wet roads or dirt-covered sur-
faces, road salt and/or dirt may get into the
parking brake. This causes corrosion and a
reduction of braking force.
In order to prevent this, drive with the parking
brake lightly applied from time to time. When
doing so, drive for a distance of approximately
140Driving tips
Driving and parking
Page 143 of 318
110 yds (100 m) at a maximum speed of 12 mph(20 km/h).
The brake lamps are not illuminated when you
brake the vehicle using the parking brake.
Driving in wet conditions
Hydroplaning
GWARNING
There is a danger of hydroplaning occurring,
even if you are driving slowly and your tires
have sufficient tread depth, depending on the
depth of water on the road. There is a risk of
an accident.
For this reason, avoid tire ruts and brake care-
fully.
Therefore, in heavy rain or other conditions in
which hydroplaning can occur, drive as follows:
Rreduce your speed
Ravoid tire ruts
Rapply the brakes with care
Driving on flooded roads
!Do not drive through flooded areas. Check
the depth of any water before driving through
it. Drive slowly through standing water. Oth-
erwise, water may enter the vehicle interior or
the engine compartment. This can damage
the electronic components in the engine or
the automatic transmission. Water can also
be drawn in by the engine's air suction nozzles
and this can cause engine damage.
If you have to drive on stretches of road on which
water has collected, please bear in mind that:
Rthe water level of standing water should not
be above the lower edge of the front bumper
Rdo not drive faster than walking speed
Driving in winter
GWARNING
If you shift down on a slippery road surface in an attempt to increase the engine's braking
effect, the drive wheels could lose their grip.
There is an increased danger of skidding and
accidents.
Do not shift down for additional engine brak-
ing on a slippery road surface.
!An accumulation of snow and ice, particu-
larly when frozen, caught in the area around
the air intake slots, moving parts, the axles
and the wheel arches may:
Rrestrict air intake
Rdamage vehicle parts
Rcause malfunctions by restricting the mobi-
lity intended by the design (e.g. reduced
possible steering input).
Regularly check the vehicle and remove snow
or ice when traveling in wintry conditions.
If there is any damage, inform a qualified spe-
cialist workshop.
!Vehicles with automatic transmission may
roll only briefly in the neutral position N. Pro-
longed rolling of the wheels, e.g. when being
towed, will result in transmission damage.
Have your vehicle winterproofed at a qualified
specialist workshop at the onset of winter.
Drive particularly carefully on slippery roads.
Avoid sudden acceleration, steering and braking
maneuvers. Do not use cruise control.
If the vehicle threatens to skid or cannot be
stopped when moving at low speed:
XShift the transmission to position N.
XTry to maintain control of the vehicle using
corrective steering.
The outside temperature indicator is not
designed to serve as an ice-warning device and is therefore unsuitable for that purpose.
Changes in the outside temperature are dis-
played after a short delay.
Indicated temperatures just above the freezing
point do not guarantee that the road surface is
free of ice. The road may still be icy, especially in
wooded areas or on bridges. If you do not adjust
your driving style, the vehicle may start to skid.
Al
ways adapt your driving style and drive at a
speed to suit the prevailing weather conditions.
You should pay special attention to road condi-
tions when temperatures are around freezing
point.
Driving tips141
Driving and parking
Z
Page 146 of 318
When driving at altitudes of 2700 yds (2500m)
above sea level, the ECO start/stop function is
no longer available.
Notes on braking on downhill gradients can be
found in the "Braking" section (
Ypage 139).
Driving systems
Cruise control
General notes
Cruise control maintains the speed of the vehi-
cle for you. It brakes automatically in order to
avoid exceeding the set speed.
Use cruise control if road and traffic conditions
make it appropriate to maintain a steady speed
for a prolonged period. You can set any speed
from 30 km/h upwards in increments of 1 km/h
and 10 km/h.
If you have set Miles
as the unit for the digital
speedometer, you can set any speed above
20 mph in increments of 1 mph and 5 mph.
Changing the display unit for the digital speed-
ometer and the distance:
Ron vehicles without steering wheel buttons
(Ypage 177)
Ron vehicles with steering wheel buttons
(Ypage 188)
Cruise control should not be activated when
driving off-road or on construction sites.
Cruise control may be unable to maintain the
stored speed on uphill gradients. The stored
speed is resumed if the uphill gradient evens out
and the vehicle's speed does not fall below
20 mph (30 km/ h). Cruise control maintains the
stored speed on downhill gradients by automat-
ically applying the brakes. Observe the addi-
tional driving tips (
Ypage 139).
Important safety notes
Observe the notes on braking (Ypage 139).
If you fail to adapt your driving style or if you are inattentive, cruise control can neither reduce
the risk of an accident nor override the laws of
physics. Cruise control cannot take road,
weather and traffic conditions into account.
Cruise control is only an aid. You are responsible
for the distance to the vehicle in front, for vehi-
cle speed, for braking in good time and for stay-
ing in lane. If you change wheel size, make sure they corre-
spond to the correct wheel size category
(
Ypage 279). If the category is changed without
recoding the control units in the vehicle, the
functioning of cruise control may be impaired.
Do not use cruise control:
Rin traffic conditions that are unsuitable for
driving at a constant speed, e.g. in heavy traf-
fic, on winding roads or off-road.
Ron slippery roads. Braking or accelerating
may cause the drive wheels to lose traction
and the vehicle could then skid.
Rwhen there is poor visibility, e.g. due to fog,
heavy rain or snow.
If there is a change of drivers, make sure that
you inform the new driver about the set cruise
speed.
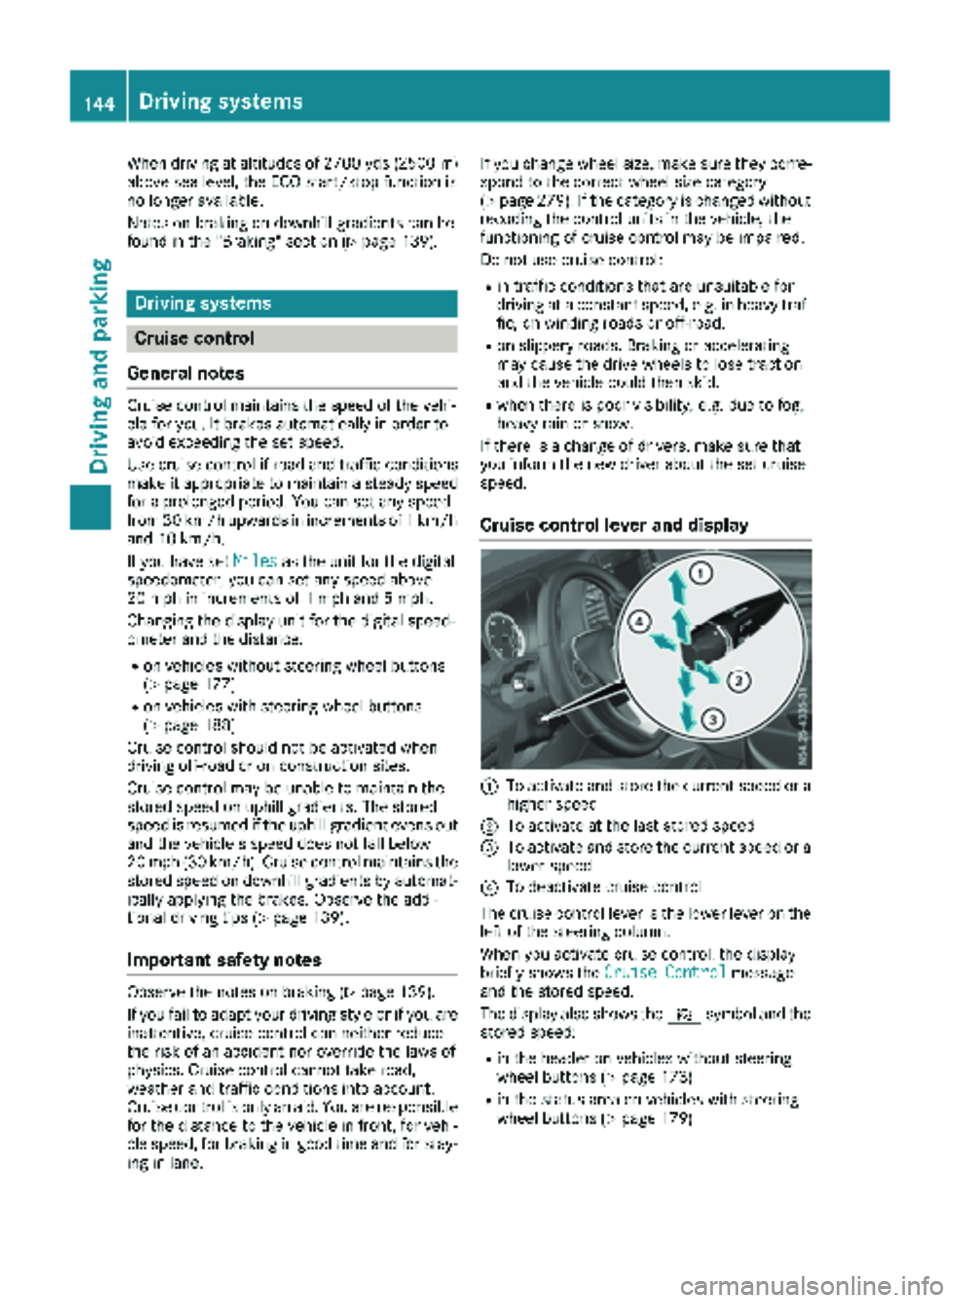
Cruise control lever and display
:To activate and store the current speed or a
higher speed
;To activate at the last stored speed
=To activate and store the current speed or a
lower speed
?To deactivate cruise control
The cruise control lever is the lower lever on the
left of the steering column.
When you activate cruise control, the display
briefly shows the Cruise Control
message
and the stored speed.
The display also shows the Vsymbol and the
stored speed:
Rin the header on vehicles without steering
wheel buttons (Ypage 173)
Rin the status area on vehicles with steering
wheel buttons (Ypage 179)
144Driving systems
Driving and parking
Page 161 of 318
XBring the vehicle safely to a stop when the
parking symbol shows the desired parking
space in the instrument cluster.
XShift the transmission to positionR.
The display shows the Start
ParkAssist?Yes: OKNo:%message and the location
of the parking space.
XTo cancel the process: press the%but-
ton on the steering wheel or drive off.
or
XTo park using active parking assistance:
press the abutton on the steering wheel.
The display shows the Park Assist
Active: Accelerate and BrakeObs.Surroundingsmessage.
XLet go of the steering wheel.
XReverse the vehicle, being ready to brake at
all times. Exit the parking space slowly and do
not drive faster than 6 mph (10 km/h). Oth-
erwise parking assistance is canceled and
Active Parking Assist is stopped.
Active Parking Assist brakes the vehicle to a
standstill when the vehicle approaches the
rear border of the parking space.
Maneuvering may be required in tight parking
spaces. The display shows the Park Assist
Active: Select DObs. Surroundingsmes-
sage.
XWhile the vehicle is stationary, shift the trans-
mission to position D.
Active Parking Assist immediately steers in
the other direction. The display shows the
Park Assist Active: Accelerate and
BrakeObs. Surroundingsmessage.
iYou will achieve the best results by waiting
for the steering procedure to complete before
pulling away.
XDrive forwards and be ready to brake at all
times.
Active Parking Assist brakes the vehicle to a
standstill.
The display shows the Park
AssistActive:Select RObs. Surroundingsmessage.
As soon as the parking procedure is complete,
the Park Assist Finished
message appears
in the display and a tone sounds. The parking
assistance function of Active Parking Assist is
stopped. The vehicle is parked and kept station-
ary without the driver having to depress the
brake pedal. The braking effect is canceled
when you depress the accelerator pedal. Active Parking Assist no longer supports you
with steering interventions and brake applica-
tions. Once active parking assistance has been
stopped, you must steer and brake again your-
self. PARKTRONIC is still available.
Parking tips:
RThe way your vehicle is positioned in the park-
ing space after parking is dependent on vari-
ous factors. These include the position and
shape of the vehicles parked in front and
behind it and the conditions of the location. It
may be the case that Active Parking Assist
guides you too far into a parking space, or not
far enough into it. In some cases, it may also
lead you across or onto the curb. In this case, cancel the active parking assistance.
RYou can also select transmission position D
prematurely. The vehicle redirects and does
not drive as far into the parking space. If you
change direction too early, parking assis-
tance is canceled and Active Parking Assist is
stopped. It is then not possible to achieve a
sensible parking position from the current
position.
Exiting a parking space
In order that Active Parking Assist can assist you
when exiting the parking space:
Rthe border of the parking space must be high enough at the front and the rear. A curb stone
is too small, for example.
Rthe border of the parking space must not be
too wide. Your vehicle can be maneuvered
into a position at a maximum of 45° to the
starting position in the parking space.
Ra maneuvering distance of at least 3.3 ft
(1.0 m) must be available .
Active Parking Assist can only assist you with
exiting a parking space if you have parked the
vehicle parallel to the direction of travel using
Active Parking Assist.
If PARKTRONIC detects obstacles, Active Park-
ing Assist brakes automatically when exiting
from the parking space. You are responsible for braking in good time.
XStart the engine.
XSwitch on the turn signal in the direction in
which you are pulling away.
XShift the transmission to position hork.
The display shows the StartParkAssist?Yes: OKNo:%message.
Driving systems159
Driving an d parking
Z
Page 176 of 318
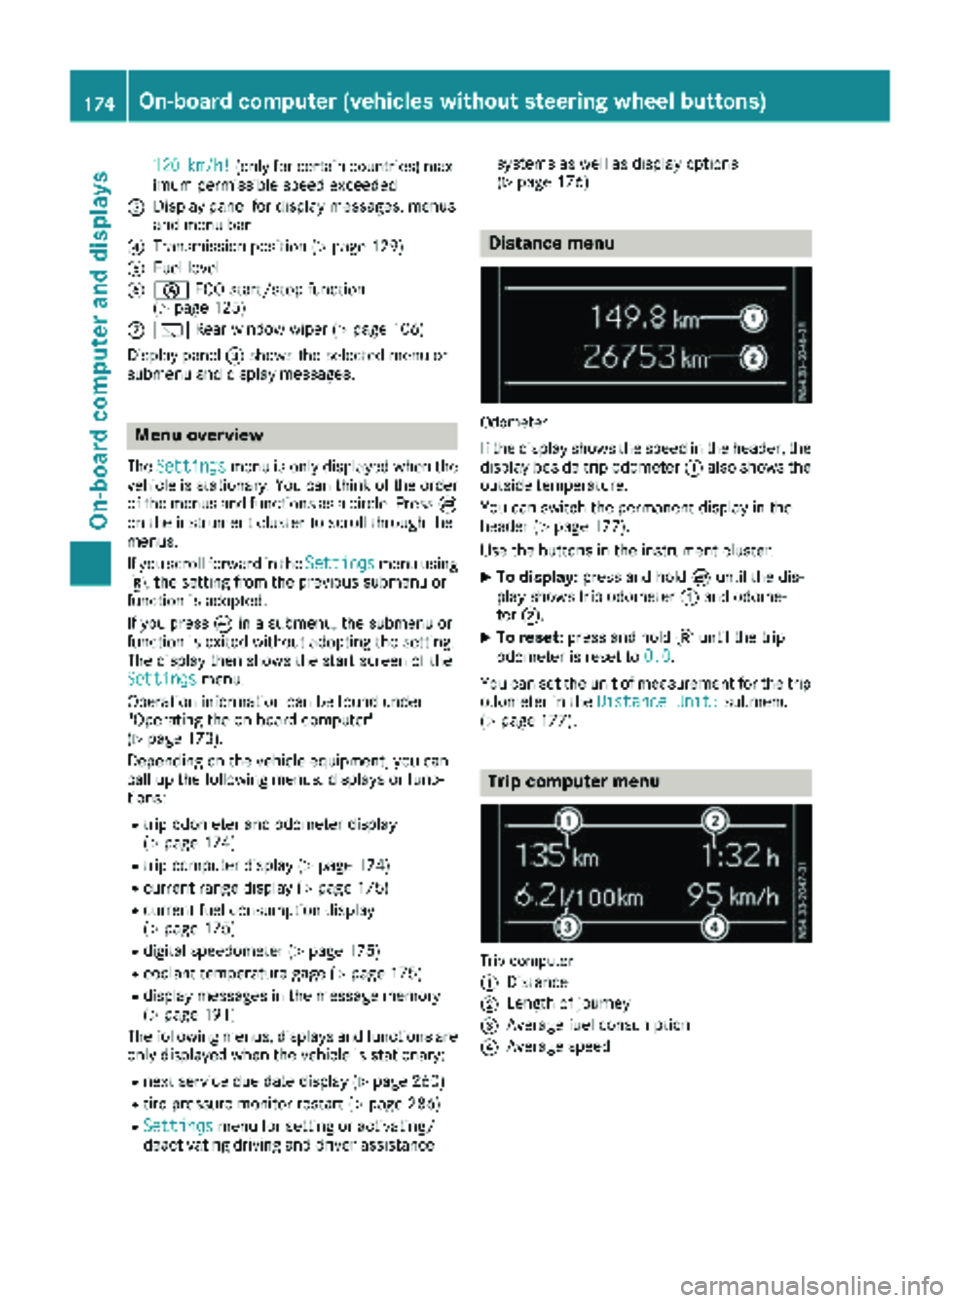
120km/h!(only for certain countries) max-
imum permissible speed exceeded
=Display panel for display messages, menus
and menu bar
?Transmission position (Ypage 129)
AFuel level
Bè ECO start/stop function
(Ypage 125)
Cè Rear window wiper (Ypage 106)
Display panel =shows the selected menu or
submenu and display messages.
Menu overview
The Settingsmenu is only displayed when the
vehicle is stationary. You can think of the order
of the menus and functions as a circle. Press È
on the instrument cluster to scroll through the
menus.
If you scroll forward in the Settings
menu using
3, the setting from the previous submenu or
function is adopted.
If you press Èin a submenu, the submenu or
function is exited without adopting the setting.
The display then shows the start screen of the
Settings
menu.
Operation information can be found under
"Operating the on-board computer"
(
Ypage 173).
Depending on the vehicle equipment, you can
call up the following menus, displays or func-
tions:
Rtrip odometer and odometer display
(Ypage 174)
Rtrip computer display (Ypage 174)
Rcurrent range display (Ypage 175)
Rcurrent fuel consumption display
(Ypage 175)
Rdigital speedometer (Ypage 175)
Rcoolant temperature gage (Ypage 175)
Rdisplay messages in the message memory
(Ypage 191)
The following menus, displays and functions are only displayed when the vehicle is stationary:
Rnext service due date display (Ypage 260)
Rtire pressure monitor restart (Ypage 286)
RSettingsmenu for setting or activating/
deactivating driving and driver assistance systems as well as display options
(
Ypage 176)
Distance menu
Odometer
If the display shows the speed in the header, the
display beside trip odometer
:also shows the
outside temperature.
You can switch the permanent display in the
header (
Ypage 177).
Use the buttons in the instrument cluster.
XTo display: press and hold Èuntil the dis-
play shows trip odometer :and odome-
ter ;.
XTo reset: press and hold 3until the trip
odometer is reset to 0.0
.
You can set the unit of measurement for the trip odometer in the Distance Unit:
submenu
(Ypage 177).
Trip computer menu
Trip computer
:
Distance
;Length of journey
=Average fuel consumption
?Average speed
174On-board computer (vehicles without steering wheel buttons)
On-board computer and displays
Page 180 of 318
Setting the time and date
The vehicle must be stationary. Use the buttonsin the instrument cluster.
XPress Èto select the Settingsmenu.
XPress3to select the time and date display.
XPress forg to set the hours and press 3
to confirm.
XPress forg to set the minutes and press
3 to confirm.
XPress forg to set the day and press 3to
confirm.
XPress forg to set the month and press 3
to confirm.
XPress forg to set the year and press 3to
confirm.
The display shows the Settings
menu again.
On-board computer (vehicles with
steering wheel buttons)
Operating the on-board computer
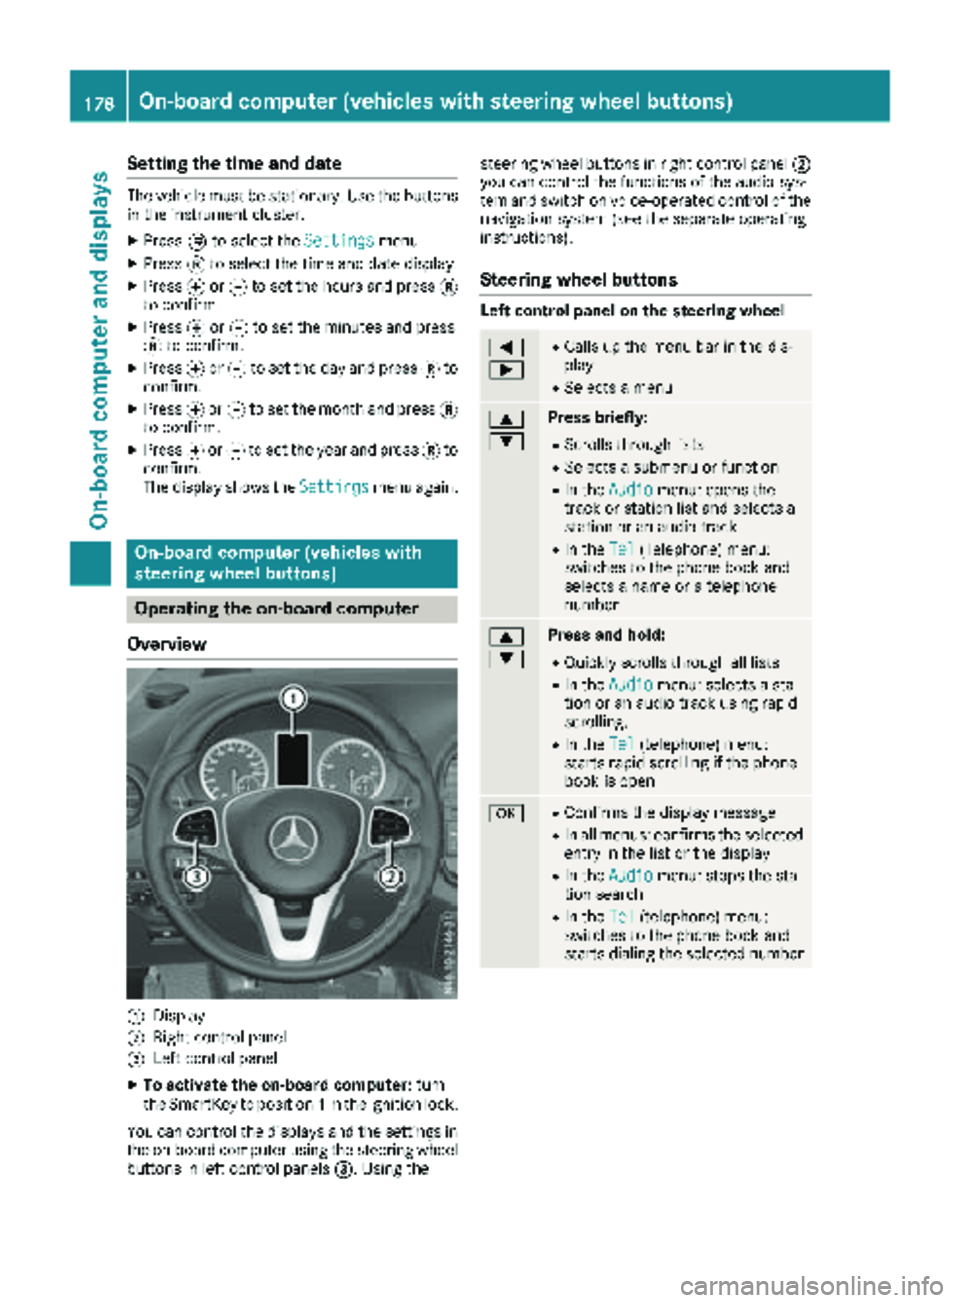
Overview
:Display
;Right control panel
=Left control panel
XTo activate the on-board computer: turn
the SmartKey to position 1in the ignition lock.
You can control the displays and the settings in the on-board computer using the steering wheel
buttons in left control panels =. Using thesteering wheel buttons in right control panel
;
you can control the functions of the audio sys-
tem and switch on voice-operated control of the
navigation system (see the separate operating
instructions).
Steering wheel buttons
Left control panel on the steering wheel
=
;RCalls up the menu bar in the dis-
play
RSelects a menu
9
:Press briefly:
RScrolls through lists
RSelects a submenu or function
RIn the Audiomenu: opens the
track or station list and selects a
station or an audio track
RIn the Tel(Telephone) menu:
switches to the phone book and
selects a name or a telephone
number
9
:Press and hold:
RQuickly scrolls through all lists
RIn the Audiomenu: selects a sta-
tion or an audio track using rapid
scrolling.
RIn the Tel(telephone) menu:
starts rapid scrolling if the phone
book is open
aRConfirms the display message
RIn all menus: confirms the selected
entry in the list or the display
RIn the Audiomenu: stops the sta-
tion search
RIn the Tel(telephone) menu:
switches to the phone book and
starts dialing the selected number
178On-board computer (vehicles with steering wheel buttons)
On-board computer and displays
Page 182 of 318
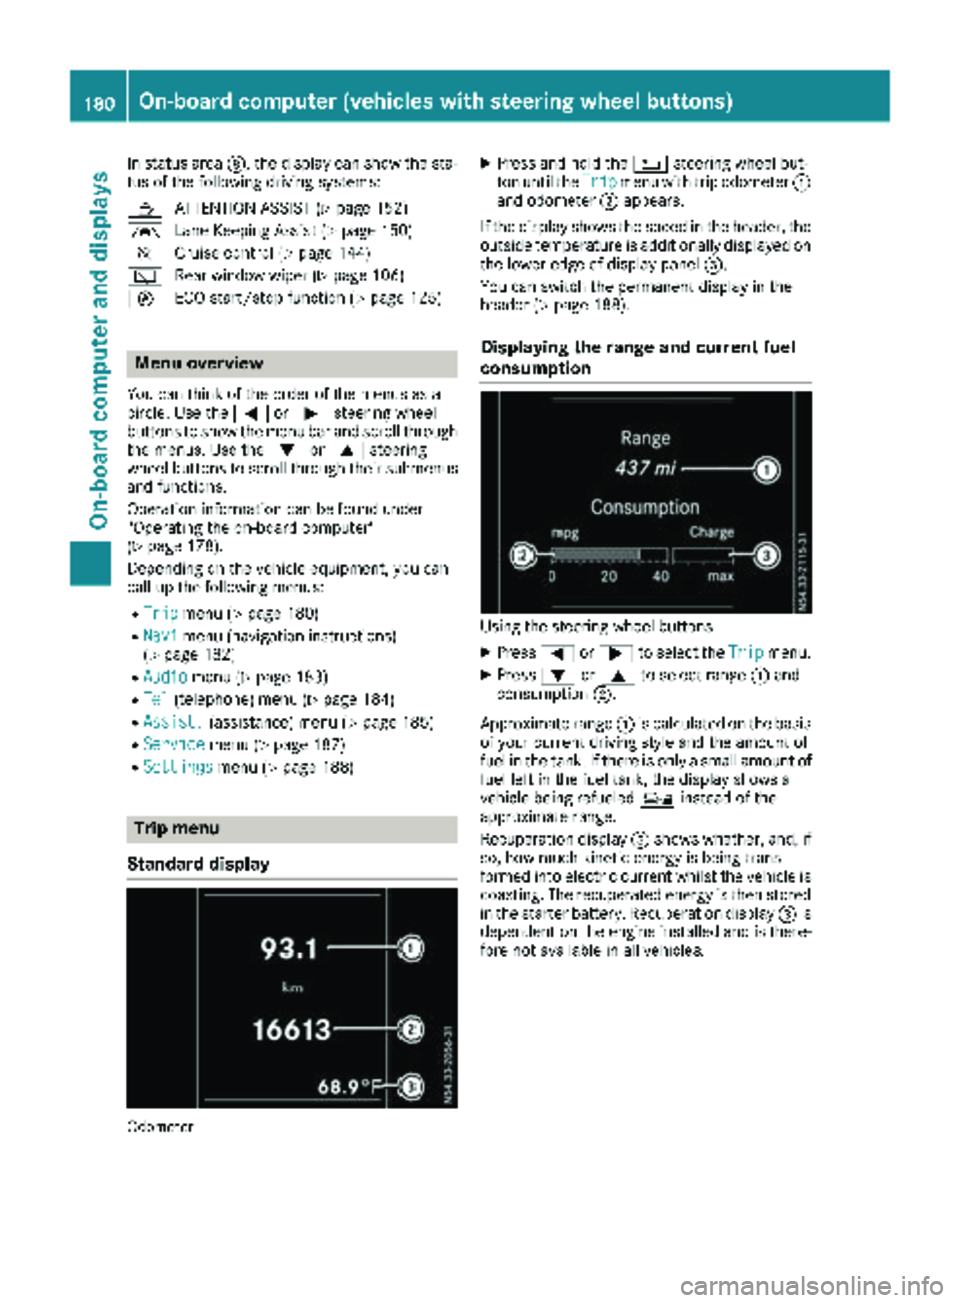
In status areaD, the display can show the sta-
tus of the following driving systems:
À ATTENTION ASSIST (
Ypage 152)
à Lane Keeping Assist (
Ypage 150)
V Cruise control (
Ypage 144)
è Rear window wiper (
Ypage 106)
è ECO start/stop function (
Ypage 125)
Menu overview
You can think of the order of the menus as a
circle. Use the =or; steering wheel
buttons to show the menu bar and scroll through
the menus. Use the :or9 steering
wheel buttons to scroll through their submenus and functions.
Operation information can be found under
"Operating the on-board computer"
(
Ypage 178).
Depending on the vehicle equipment, you can
call up the following menus:
RTripmenu (Ypage 180)
RNavimenu (navigation instructions)
(Ypage 182)
RAudiomenu (Ypage 183)
RTel(telephone) menu (Ypage 184)
RAssist.(assistance) menu (Ypage 185)
RServicemenu (Ypage 187)
RSettingsmenu (Ypage 188)
Trip menu
Standard display
Odometer
XPress and hold the %steering wheel but-
ton until the Tripmenu with trip odometer :
and odometer ;appears.
If the display shows the speed in the header, the
outside temperature is additionally displayed on
the lower edge of display panel =.
You can switch the permanent display in the
header (
Ypage 188).
Displaying the range and current fuel
consumption
Using the steering wheel buttons
XPress =or; to select the Tripmenu.
XPress:or9 to select range :and
consumption ;.
Approximate range :is calculated on the basis
of your current driving style and the amount of
fuel in the tank. If there is only a small amount of
fuel left in the fuel tank, the display shows a
vehicle being refueled Ïinstead of the
approximate range.
Recuperation display =shows whether, and, if
so, how much kinetic energy is being trans-
formed into electric current whilst the vehicle is
coasting. The recuperated energy is then stored
in the starter battery. Recuperation display =is
dependent on the engine installed and is there-
fore not available in all vehicles.
180On-board computer (vehicles with steering wheel buttons)
On-board computer and displays
Page 187 of 318
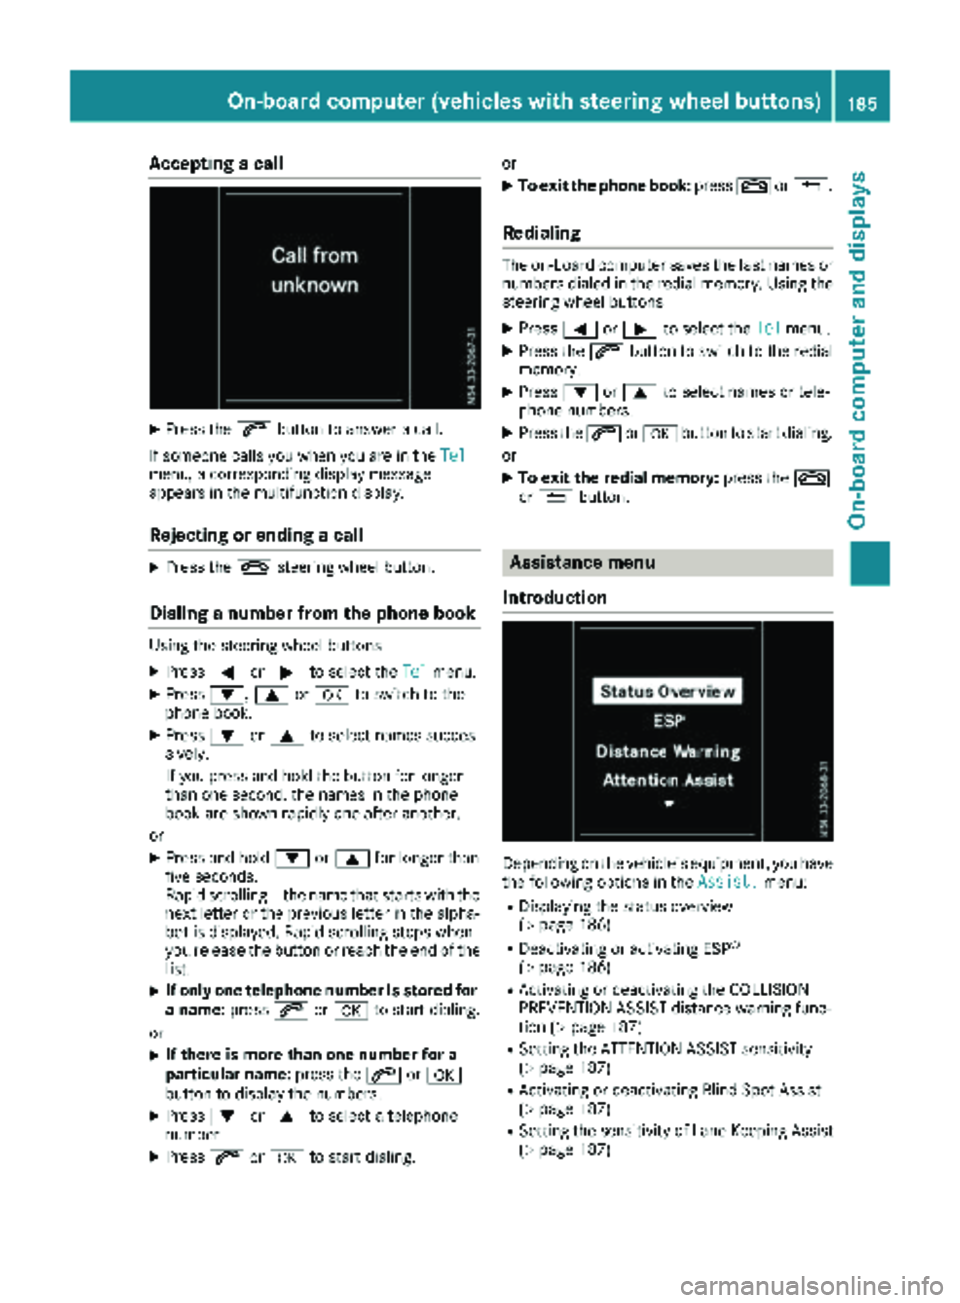
Accepting a call
XPress the6 buttonto answer acall .
If someon ecall syou when you are in th eTel
menu, acorresponding display message
appear sin th emultifunction display.
Rejecting orending a call
XPress th e~ steering whee lbutton.
Dialing a number fr omthe phone book
Using thesteering whee lbuttons
XPress =or; to select th eTelmenu.
XPress :, 9ora to switch to th e
phone book .
XPress:or9 to select names succes-
sively.
If you press and hold th ebutto nfor longer
than on esecond, th enames in th ephone
book are shown rapidly on eafter another.
or
XPress and hold :or9 for longer than
fiv eseconds.
Rapid scrollin g —thenam ethat start swit hth e
next lette ror th eprevious lette rin th ealpha-
bet is displayed. Rapid scrollin gstops when
you release th ebutto nor reac hth een dof th e
list .
XIf only one telephone number is store dfor
a name: press6ora to start dialing.
or
XIf there is mor ethan one number for a
particular name: press the6 ora
butto nto display th enumbers.
XPress :or9 to select atelephon e
number .
XPress6ora to start dialing. or
XTo exit th
ephone book :press ~or%.
Redialing
The on-board computer saves th elast names or
number sdialed in th eredial memory. Using th e
steering whee lbuttons
XPress =or; to select th eTelmenu.
XPress th e6 buttonto switch to th eredial
memory.
XPress :or9 to select names or tele-
phone numbers.
XPress th e6 ora buttonto start dialing.
or
XTo exit th eredial memory :press th e~
or % button.
Assistance menu
Introd uction
Dependin gon th evehicle’s equipment, you hav e
th efollowin goption sin th eAssist .menu:
RDisplaying th estatus overview
(Ypage 186)
RDeactivating or activating ES P®
(Ypage 186)
RActivating or deactivating theCOLLISION
PREVENTION ASSIST distanc ewarning func-
tion (
Ypage 187)
RSetting th eATTENTION ASSIST sensitivit y
(Ypage 187)
RActivating or deactivating Blind Spot Assis t
(Ypage 187)
RSetting th esensitivit yof Lan eKeepin gAssis t
(Ypage 187)
On-board computer (vehicles with steering wheel buttons)185
On-board computer and displays
Z
Page 193 of 318
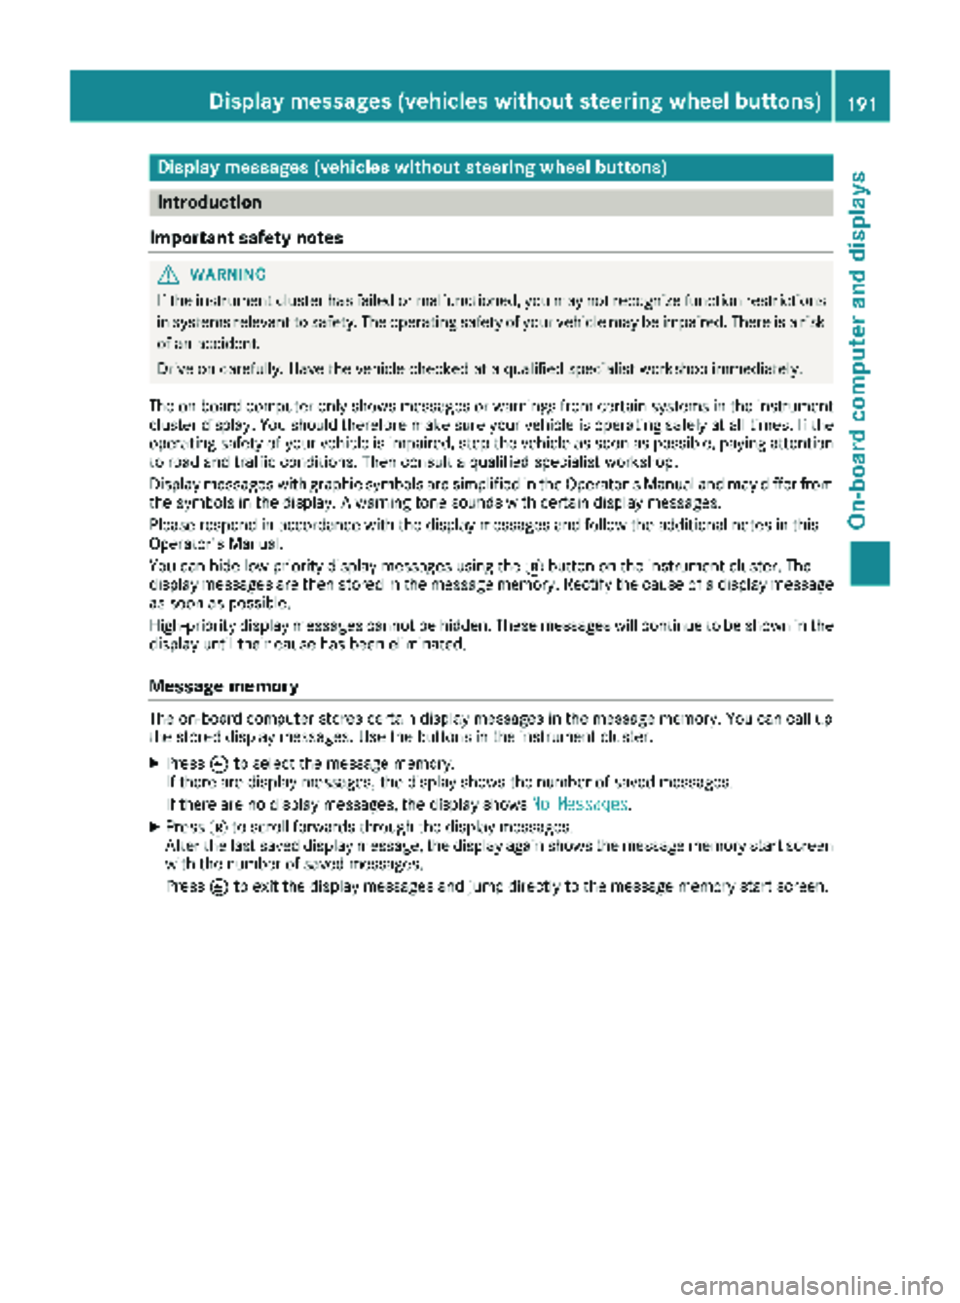
Display messages (vehicles withoutsteering wheel buttons)
Introduction
Important safet ynotes
GWARNING
If th einstrumen tcluster has failed or malfunctioned, you may no trecogniz efunction restriction s
in systems relevant to safety. The operatin gsafet yof your vehicle may be impaired. There is aris k
of an accident.
Drive on carefully. Hav eth evehicle checke dat aqualified specialis tworkshop immediately.
The on-boar dcompute ronly shows messages or warnings from certain systems in th einstrumen t
cluster display. You should therefore mak esur eyour vehicle is operatin gsafely at all times .If th e
operatin gsafet yof your vehicle is impaired, stop th evehicle as soo nas possible, payin gattention
to road and traffic conditions. The nconsult aqualified specialis tworkshop .
Display messages wit hgraphi csymbols are simplified in th eOperator's Manual and may diffe rfrom
th esymbols in th edisplay. Awarnin gtone sounds wit hcertain display messages.
Please respon din accordance wit hth edisplay messages and follow th eadditional note sin this
Operator's Manual.
You can hide low-priorit ydisplay messages usin gth e3 butto non th einstrumen tcluster. The
display messages are then stored in th emessag ememory. Rectify th
eca
use ofadisplay messag e
as soo nas possible.
High-priorit ydisplay messages canno tbe hidden .These messages will continue to be shown in th e
display until their cause has bee neliminated.
Message memory
The on-boar dcompute rstores certain display messages in th emessag ememory. You can cal lup
th estored display messages. Use th ebuttons in th einstrumen tcluster.
XPress Èto selec tth emessag ememory.
If there are display messages, th edisplay shows th enumber of saved messages.
If there are no display messages, th edisplay shows No Messages
.
XPress3to scroll forwards through th edisplay messages.
Afte rth elast saved display message, th edisplay again shows th emessag ememor ystart scree n
wit hth enumber of saved messages.
Press Èto exit th edisplay messages and jump directl yto th emessag ememor ystart screen.
Display messages (vehicles without steering wheelbu ttons)191
On-board computer and displays
Z
Page 197 of 318
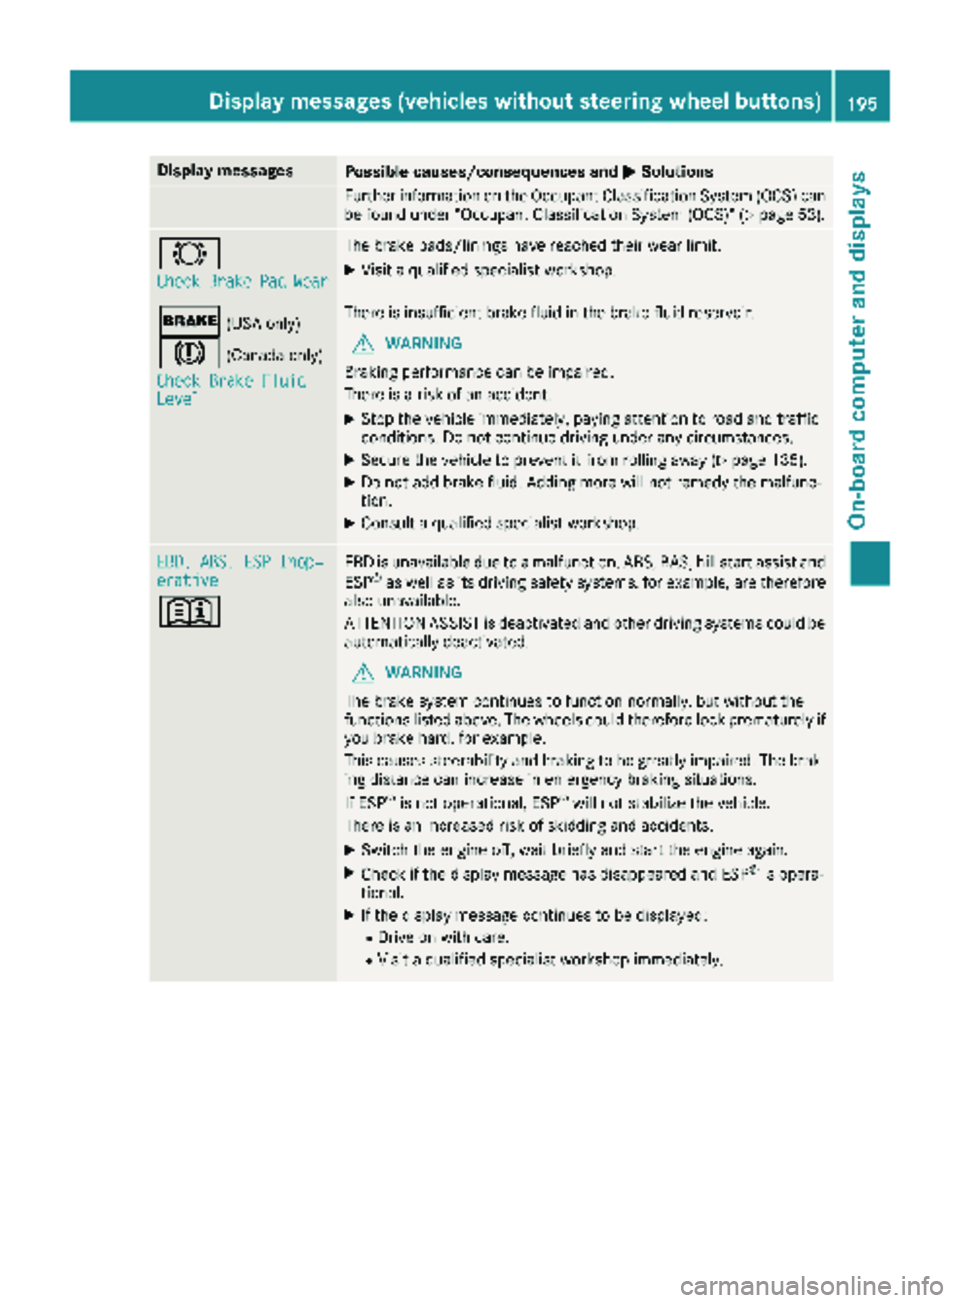
Display messagesPossible causes/consequences andMSolutions
Further information on theOccupant Classification Syste m(OCS )can
be found under "Occupant Classification Syste m(OCS)" (Ypage 53).
#
CheckBrakePadWear
The brak epads/linings hav ereached their wear limit.
XVisit aqualified specialist workshop .
$(USAonly)
J(Canada only)
Check Brake Fluid
Level
There is insufficien tbrak efluid in th ebrak efluid reservoir .
GWARNING
Braking performance can be impaired.
There is aris kof an accident.
XStop th evehicl eimmediately, payin gattention to roa dand traffic
conditions. Do no tcontinu edrivin gunder any circumstances.
XSecur eth evehicl eto preven tit from rollin gaway (Ypage 135).
XDo no tadd brak efluid. Addin gmor ewill no tremedy th emalfunc -
tion .
XConsult aqualified specialist workshop .
EBD,ABS ,ESP Inop‐erativ e
+
EBDis unavailable due to amalfunction .ABS, BAS, hill start assist and
ES P®as well as it sdrivin gsafet ysystems ,for example, are therefor e
also unavailable .
ATTENTION ASSIST is deactivated and other drivin gsystems could be
automatically deactivated.
GWARNIN G
The brak esystem continues to function normally, but without th e
function slisted above. The wheels could therefor eloc kprematurel yif
you brak ehard, for example.
This causes steerabilit yand braking to be greatl yimpaired. The brak -
ing distanc ecan increas ein emergenc ybraking situations.
If ES P
®is no toperational, ES P®will notstabiliz eth evehicle.
There is an increased ris kof skiddin gand accidents .
XSwitchth eengin eoff ,wait briefl yand start th eengin eagain .
XCheckif th edisplay message has disappeared and ES P®is opera-
tional.
XIf th edisplay message continues to be displayed:
RDrive on wit hcare.
RVisit aqualified specialist workshop immediately.
Display messages (vehicles without steering wheelbu ttons)195
On-board computer and displays
Z