bulb MERCEDES-BENZ ML SUV 2008 Owners Manual
[x] Cancel search | Manufacturer: MERCEDES-BENZ, Model Year: 2008, Model line: ML SUV, Model: MERCEDES-BENZ ML SUV 2008Pages: 381, PDF Size: 7.18 MB
Page 7 of 381
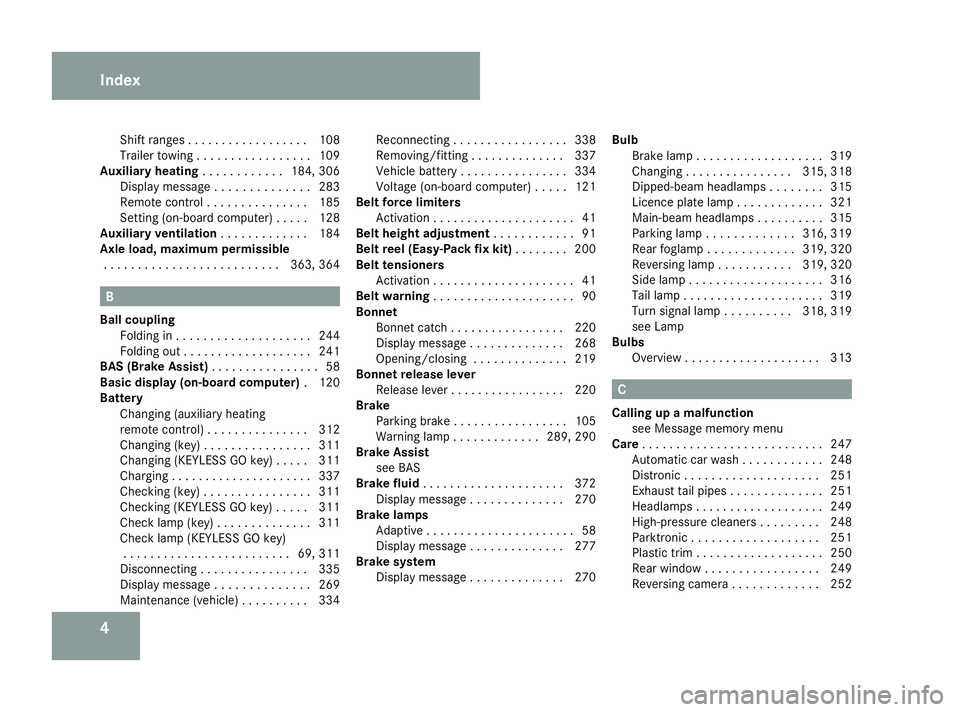
4Shift ranges . . . . . . . . . . . . . . . . .
.108
Trailer towing . . . . . . . . . . . . . . . . .109
Auxiliary heating . . . . . . . . . . ..184, 306
Display message . . . . . . . . . . . . . .283
Remote control . . . . . . . . . . . . . . .185
Setting (on-board computer) . . . . .128
Auxiliary ventilation . . . . . . . . . . . ..184
Axle load, maximum permissible
. . . . . . . . . . . . . . . . . . . . . . . . . .363, 364 B
Ball coupling Folding in . . . . . . . . . . . . . . . . . . . .244
Folding out . . . . . . . . . . . . . . . . . . .241
BAS (Brake Assist) . . . . . . . . . . . . . . ..58
Basic display (on-board computer) .120
Battery Changing (auxiliary heating
remote control) . . . . . . . . . . . . . . .312
Changing (key ).. . . . . . . . . . . . . . .311
Changing (KEYLESS GO key) . . . . .311
Charging . . . . . . . . . . . . . . . . . . . . .337
Checking (key ).. . . . . . . . . . . . . . .311
Checking (KEYLESS GO key) . . . . .311
Check lamp (key ).. . . . . . . . . . . . .311
Check lamp (KEYLESS GO key) . . . . . . . . . . . . . . . . . . . . . . . . .69, 311
Disconnecting . . . . . . . . . . . . . . . .335
Display message . . . . . . . . . . . . . .269
Maintenance (vehicle ).. . . . . . . ..334 Reconnecting . . . . . . . . . . . . . . . .
.338
Removing/fitting . . . . . . . . . . . . . .337
Vehicle battery . . . . . . . . . . . . . . . .334
Voltage (on-board computer) . . . . .121
Belt force limiters
Activatio n.. . . . . . . . . . . . . . . . . . . .41
Belt height adjustment . . . . . . . . . . ..91
Belt reel (Easy-Pack fix kit) . . . . . . ..200
Belt tensioners Activatio n.. . . . . . . . . . . . . . . . . . . .41
Belt warning . . . . . . . . . . . . . . . . . . . . .90
Bonnet Bonnet catch . . . . . . . . . . . . . . . . .220
Display message . . . . . . . . . . . . . .268
Opening/closing . . . . . . . . . . . . . .219
Bonnet release lever
Release lever . . . . . . . . . . . . . . . . .220
Brake
Parking brake . . . . . . . . . . . . . . . . .105
Warning lamp . . . . . . . . . . . . .289, 290
Brake Assist
see BAS
Brake fluid . . . . . . . . . . . . . . . . . . . . .372
Display message . . . . . . . . . . . . . .270
Brake lamps
Adaptive . . . . . . . . . . . . . . . . . . . . . .58
Display message . . . . . . . . . . . . . .277
Brake system
Display message . . . . . . . . . . . . . .270 Bulb
Brake lamp . . . . . . . . . . . . . . . . . . .319
Changing . . . . . . . . . . . . . . . .315, 318
Dipped-beam headlamps . . . . . . . .315
Licence plate lamp . . . . . . . . . . . . .321
Main-beam headlamps . . . . . . . . . .315
Parking lamp . . . . . . . . . . . . .316, 319
Rear foglamp . . . . . . . . . . . . .319, 320
Reversing lamp . . . . . . . . . . .319, 320
Side lamp . . . . . . . . . . . . . . . . . . . .316
Tail lamp . . . . . . . . . . . . . . . . . . . . .319
Turn signal lamp . . . . . . . . . .318, 319
see Lamp
Bulbs
Overview . . . . . . . . . . . . . . . . . . . .313 C
Calling up a malfunction see Message memory menu
Care . . . . . . . . . . . . . . . . . . . . . . . . . . .247
Automatic car wash . . . . . . . . . . . .248
Distronic . . . . . . . . . . . . . . . . . . . .251
Exhaust tail pipes . . . . . . . . . . . . . .251
Headlamps . . . . . . . . . . . . . . . . . . .249
High-pressure cleaners . . . . . . . . .248
Parktroni c.. . . . . . . . . . . . . . . . . .251
Plastic trim . . . . . . . . . . . . . . . . . . .250
Rear window . . . . . . . . . . . . . . . . .249
Reversing camera . . . . . . . . . . . . .252 Index
164_AKB; 5; 5, en-GB
wobuchh,
Version: 2.10.6 2008-05-11T11:55:12+02:00 - Seite 4Dateiname: 6515_4293_02_buchblock.pdf; preflight
Page 256 of 381
253
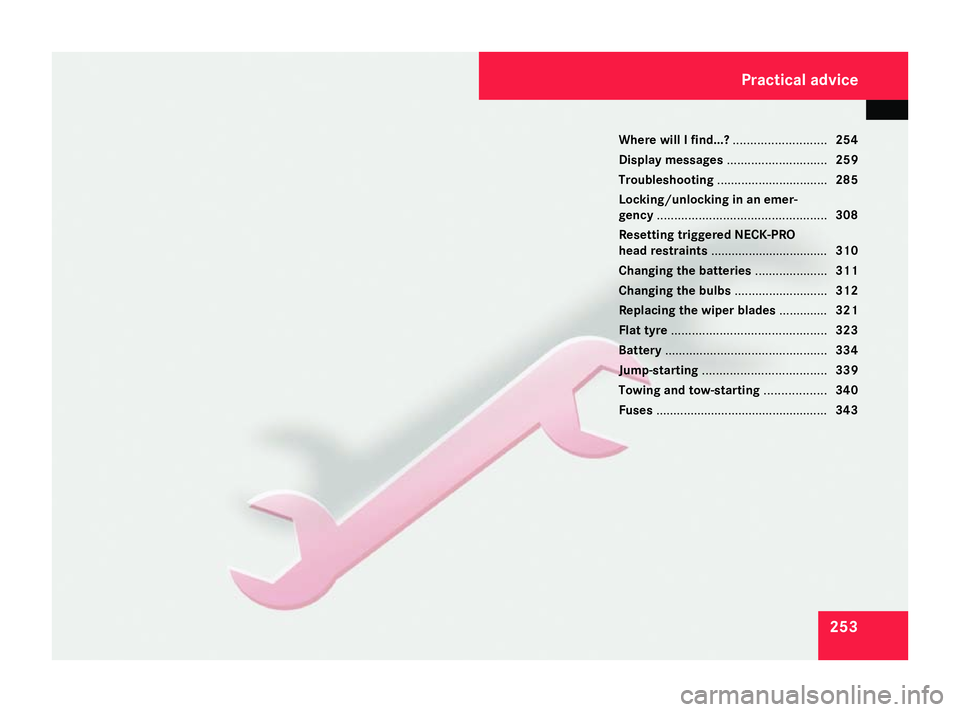
Where will I find...?
...........................254
Display messages ............................. 259
Troubleshooting ................................ 285
Locking/unlocking in an emer-
gency ................................................. 308
Resetting triggered NECK-PRO
head restraints .................................. 310
Changing the batteries .....................311
Changing the bulbs ...........................312
Replacing the wiper blades ..............321
Flat tyre ............................................. 323
Battery ............................................... 334
Jump-starting .................................... 339
Towing and tow-starting ..................340
Fuses .................................................. 343 Practical advice
164_AKB; 5; 5, en-GB
wobuchh,
Version: 2.10.6
2008-05-11T11:55:12+02:00 - Seite 253 Dateiname: 6515_4293_02_buchblock.pdf; preflight
Page 278 of 381
Display
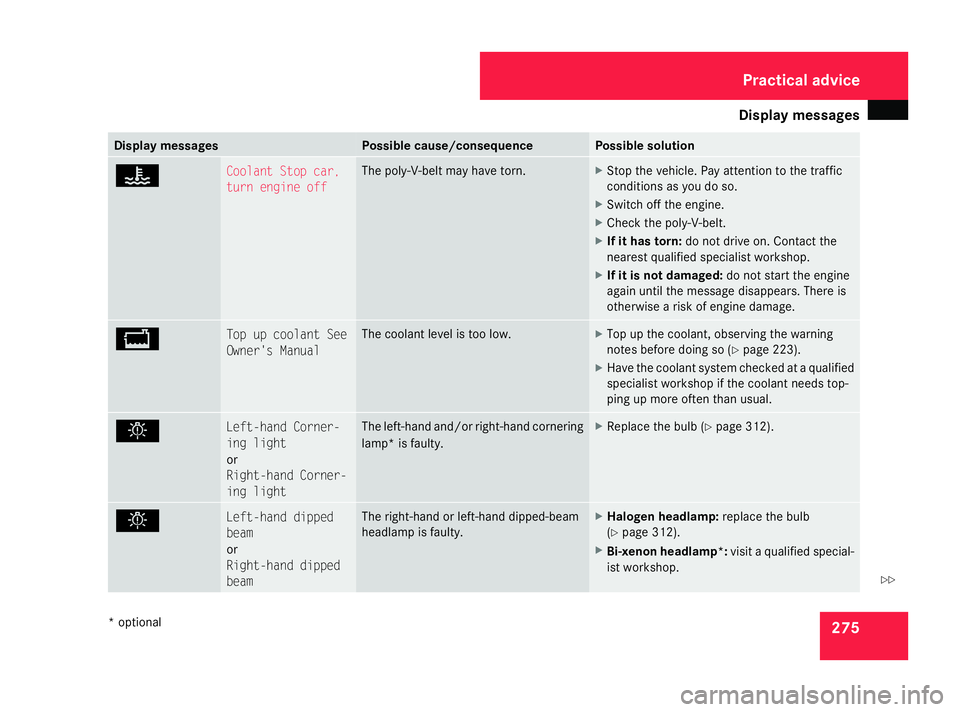
messages 275Display messages Possible cause/consequence Possible solution
D Coolant Stop car,
turn engine off The poly-V-belt may have torn. X
Stop the vehicle. Pay attention to the traffic
conditions as you do so.
X Switch off the engine.
X Check the poly-V-belt.
X If it has torn: do not drive on. Contact the
nearest qualified specialist workshop.
X If it is not damaged: do not start the engine
again until the message disappears. There is
otherwise a risk of engine damage. B Top up coolant See
Owner's Manual The coolant level is too low. X
Top up the coolant, observing the warning
notes before doing so (Y page 223).
X Have the coolant system checked at a qualified
specialist workshop if the coolant needs top-
ping up more often than usual. . Left-hand Corner-
ing light
or
Right-hand Corner-
ing light The left-hand and/or right-hand cornering
lamp* is faulty. X
Replace the bulb (Y page 312). . Left-hand dipped
beam
or
Right-hand dipped
beam The right-hand or left-hand dipped-beam
headlamp is faulty. X
Halogen headlamp: replace the bulb
(Y page 312).
X Bi-xenon headlamp*: visit a qualified special-
ist workshop. Practical advi
ce
* optional
164_AKB; 5; 5, en-GB
wobuchh,
Version: 2.10.6 2008-05-11T11:55:12+02:00 - Seite 275 ZDateiname: 6515_4293_02_buchblock.pdf; preflight
Page 279 of 381
Display
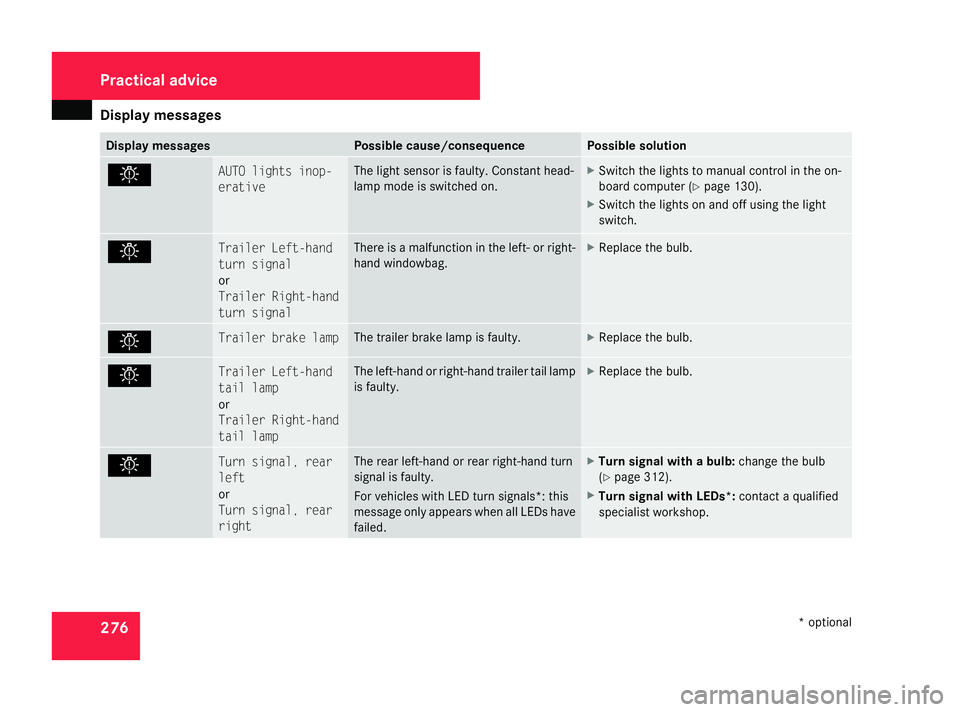
messages 276 Display messages Possible cause/consequence Possible solution
. AUTO lights inop-
erative The light sensor is faulty. Constant head-
lamp mode is switched on. X
Switch the lights to manual control in the on-
board computer (Y page 130).
X Switch the lights on and off using the light
switch. . Trailer Left-hand
turn signal
or
Trailer Right-hand
turn signal There is a malfunction in the left- or right-
hand windowbag. X
Replace the bulb. . Trailer brake lamp The trailer brake lamp is faulty. X
Replace the bulb. . Trailer Left-hand
tail lamp
or
Trailer Right-hand
tail lamp The left-hand or right-hand trailer tail lamp
is faulty. X
Replace the bulb. . Turn signal, rear
left
or
Turn signal, rear
right The rear left-hand or rear right-hand turn
signal is faulty.
For vehicles with LED turn signals*: this
message only appears when all LEDs have
failed. X
Turn signal with a bulb: change the bulb
(Y page 312).
X Turn signal with LEDs*: contact a qualified
specialist workshop. Practical advi
ce
* optional
164_AKB; 5; 5, en-GB
wobuchh,
Version: 2.10.6 2008-05-11T11:55:12+02:00 - Seite 276Dateiname: 6515_4293_02_buchblock.pdf; preflight
Page 280 of 381
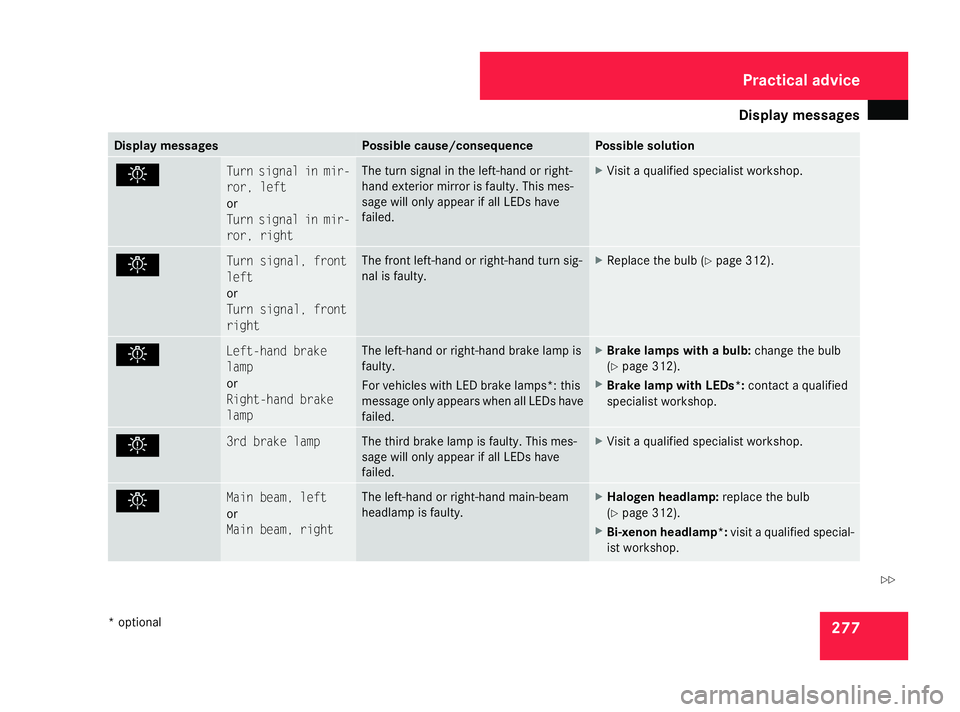
Display
messages 277Display messages Possible cause/consequence Possible solution
. Turn signal in mir-
ror, left
or
Turn signal in mir-
ror, right The turn signal in the left-hand or right-
hand exterior mirror is faulty. This mes-
sage will only appear if all LEDs have
failed. X
Visit a qualified specialist workshop. . Turn signal, front
left
or
Turn signal, front
right The front left-hand or right-hand turn sig-
nal is faulty. X
Replace the bulb (Y page 312). . Left-hand brake
lamp
or
Right-hand brake
lamp The left-hand or right-hand brake lamp is
faulty.
For vehicles with LED brake lamps*: this
message only appears when all LEDs have
failed. X
Brake lamps with a bulb: change the bulb
(Y page 312).
X Brake lamp with LEDs*: contact a qualified
specialist workshop. . 3rd brake lamp The third brake lamp is faulty. This mes-
sage will only appear if all LEDs have
failed. X
Visit a qualified specialist workshop. . Main beam, left
or
Main beam, right The left-hand or right-hand main-beam
headlamp is faulty. X
Halogen headlamp: replace the bulb
(Y page 312).
X Bi-xenon headlamp*: visit a qualified special-
ist workshop. Practical advi
ce
* optional
164_AKB; 5; 5, en-GB
wobuchh,
Version: 2.10.6 2008-05-11T11:55:12+02:00 - Seite 277 ZDateiname: 6515_4293_02_buchblock.pdf; preflight
Page 281 of 381
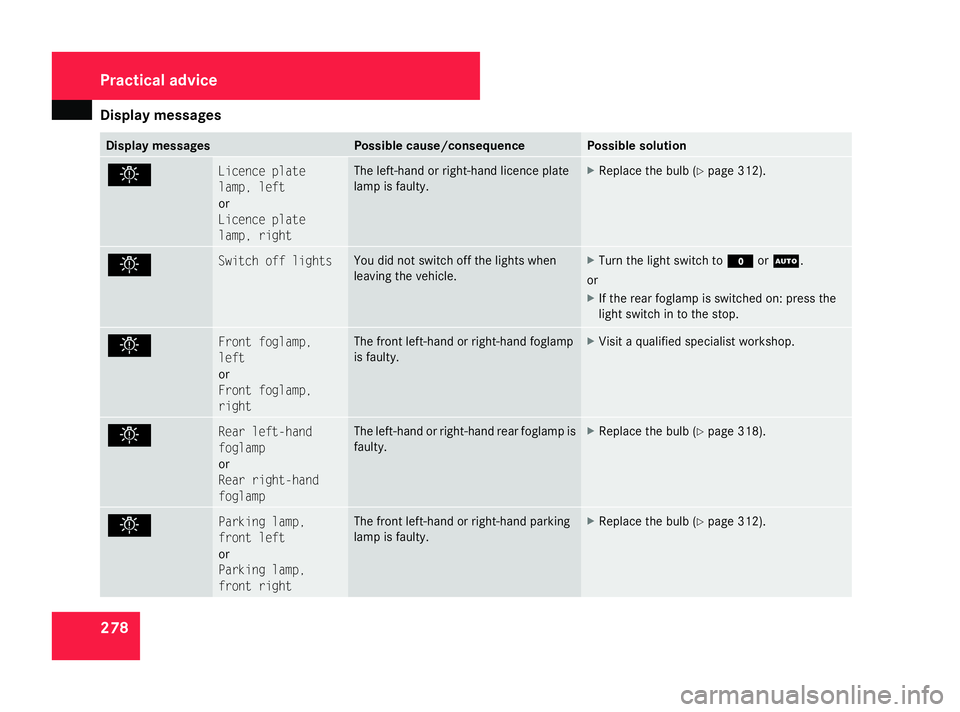
Display
messages 278 Display messages Possible cause/consequence Possible solution
. Licence plate
lamp, left
or
Licence plate
lamp, right The left-hand or right-hand licence plate
lamp is faulty. X
Replace the bulb (Y page 312).. Switch off lights You did not switch off the lights when
leaving the vehicle. X
Turn the light switch to MorU.
or
X If the rear foglamp is switched on: press the
light switch in to the stop. . Front foglamp,
left
or
Front foglamp,
right The front left-hand or right-hand foglamp
is faulty. X
Visit a qualified specialist workshop. . Rear left-hand
foglamp
or
Rear right-hand
foglamp The left-hand or right-hand rear foglamp is
faulty. X
Replace the bulb (Y page 318).. Parking lamp,
front left
or
Parking lamp,
front right The front left-hand or right-hand parking
lamp is faulty. X
Replace the bulb (Y page 312).Practical advi
ce
164_AKB; 5; 5, en-GB
wobuchh,
Version: 2.10.6 2008-05-11T11:55:12+02:00 - Seite 278Dateiname: 6515_4293_02_buchblock.pdf; preflight
Page 282 of 381
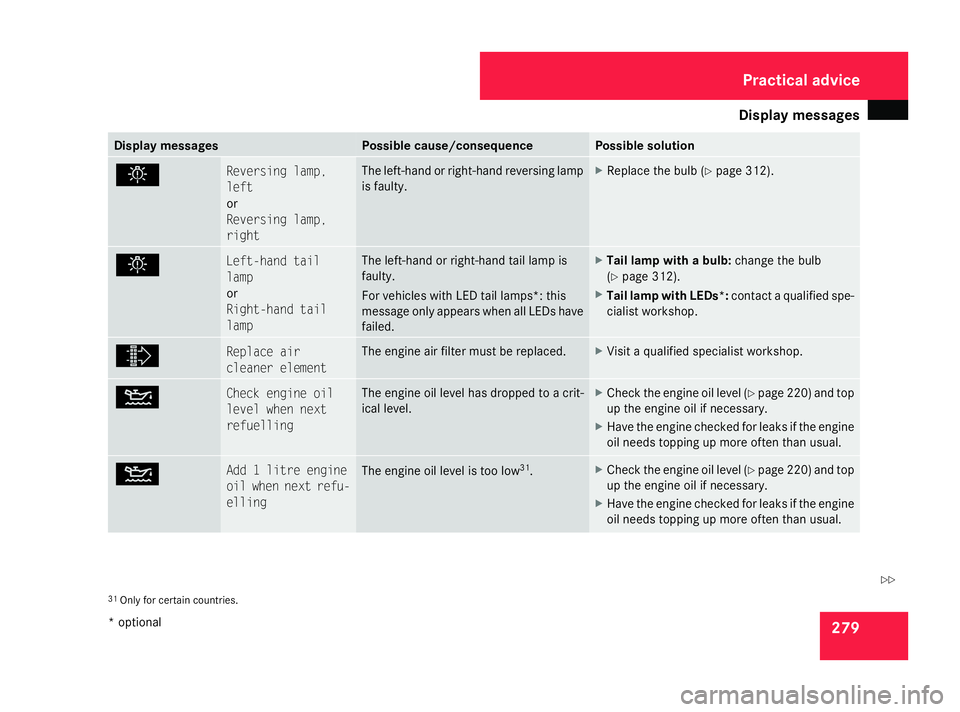
Display
messages 279Display messages Possible cause/consequence Possible solution
. Reversing lamp,
left
or
Reversing lamp,
right The left-hand or right-hand reversing lamp
is faulty. X
Replace the bulb (Y page 312). . Left-hand tail
lamp
or
Right-hand tail
lamp The left-hand or right-hand tail lamp is
faulty.
For vehicles with LED tail lamps*: this
message only appears when all LEDs have
failed. X
Tail lamp with a bulb: change the bulb
(Y page 312).
X Tail lamp with LEDs*: contact a qualified spe-
cialist workshop. ò Replace air
cleaner element The engine air filter must be replaced. X
Visit a qualified specialist workshop. N Check engine oil
level when next
refuelling The engine oil level has dropped to a crit-
ical level. X
Check the engine oil level (Y page 220) and top
up the engine oil if necessary.
X Have the engine checked for leaks if the engine
oil needs topping up more often than usual. N Add 1 litre engine
oil when next refu-
elling The engine oil level is too low
31
. X
Check the engine oil level (Y page 220) and top
up the engine oil if necessary.
X Have the engine checked for leaks if the engine
oil needs topping up more often than usual. 31
Only for certain countries. Practical advi
ce
* optional
164_AKB; 5; 5, en-GB
wobuchh,
Version: 2.10.6 2008-05-11T11:55:12+02:00 - Seite 279 ZDateiname: 6515_4293_02_buchblock.pdf; preflight
Page 315 of 381
Changing the bulbs
312
X
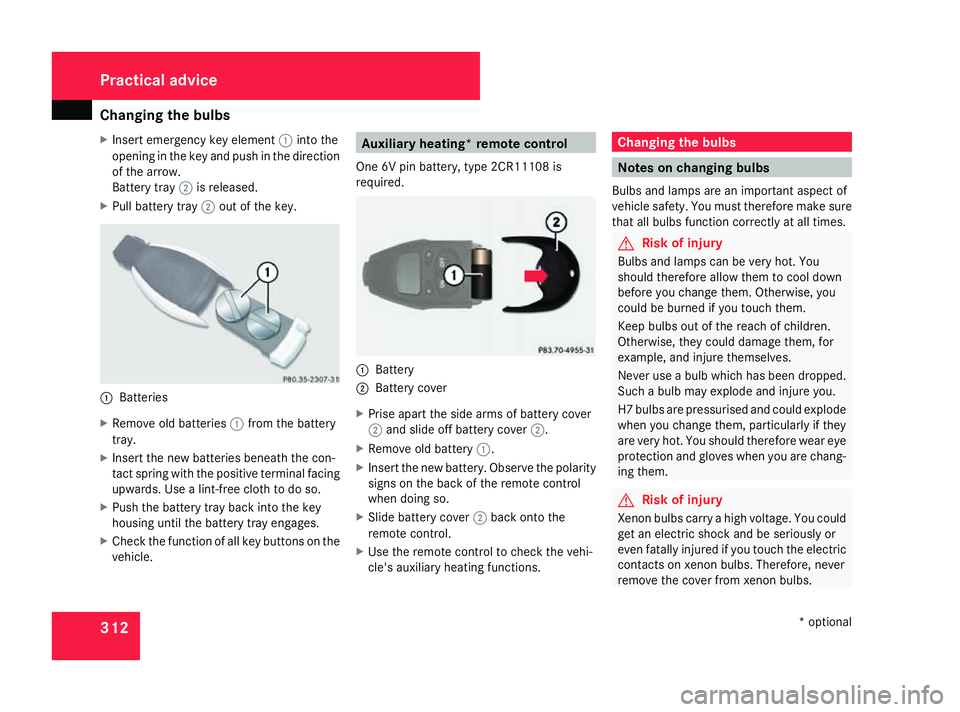
Insert emergency key element 1into the
opening in the key and push in the direction
of the arrow.
Battery tray 2is released.
X Pull battery tray 2out of the key. 1
Batteries
X Remove old batteries 1from the battery
tray.
X Insert the new batteries beneath the con-
tact spring with the positive terminal facing
upwards. Use a lint-free cloth to do so.
X Push the battery tray back into the key
housing until the battery tray engages.
X Check the function of all key buttons on the
vehicle. Auxiliary heating* remote control
One 6V pin battery, type 2CR11108 is
required. 1
Battery
2 Battery cover
X Prise apart the side arms of battery cover
2 and slide off battery cover 2.
X Remove old battery 1.
X Insert the new battery. Observe the polarity
signs on the back of the remote control
when doing so.
X Slide battery cover 2back onto the
remote control.
X Use the remote control to check the vehi-
cle's auxiliary heating functions. Changing the bulbs
Notes on changing bulbs
Bulbs and lamps are an important aspect of
vehicle safety. You must therefore make sure
that all bulbs function correctly at all times. G
Risk of injury
Bulbs and lamps can be very hot. You
should therefore allow them to cool down
before you change them. Otherwise, you
could be burned if you touch them.
Keep bulbs out of the reach of children.
Otherwise, they could damage them, for
example, and injure themselves.
Never use a bulb which has been dropped.
Such a bulb may explode and injure you.
H7 bulbs are pressurised and could explode
when you change them, particularly if they
are very hot. You should therefore wear eye
protection and gloves when you are chang-
ing them. G
Risk of injury
Xenon bulbs carry a high voltage. You could
get an electric shock and be seriously or
even fatally injured if you touch the electric
contacts on xenon bulbs. Therefore, never
remove the cover from xenon bulbs. Practical advice
* optional
164_AKB; 5; 5, en-GB
wobuchh,
Version: 2.10.6
2008-05-11T11:55:12+02:00 - Seite 312 Dateiname: 6515_4293_02_buchblock.pdf; preflight
Page 316 of 381
Changing the bulbs
313Do not change xenon bulbs yourself, but
have them replaced at a qualified specialist
workshop which has the necessary special-
ist knowledge and tools to carry out the
work required.
Mercedes-Benz recommends that you use
a Mercedes-Benz Service Centre for this
purpose. In particular, work relevant to
safety or on safety-related systems must be
carried out at a qualified specialist work-
shop.
! Do not change the LEDs yourself. You
could otherwise damage the LEDs or parts
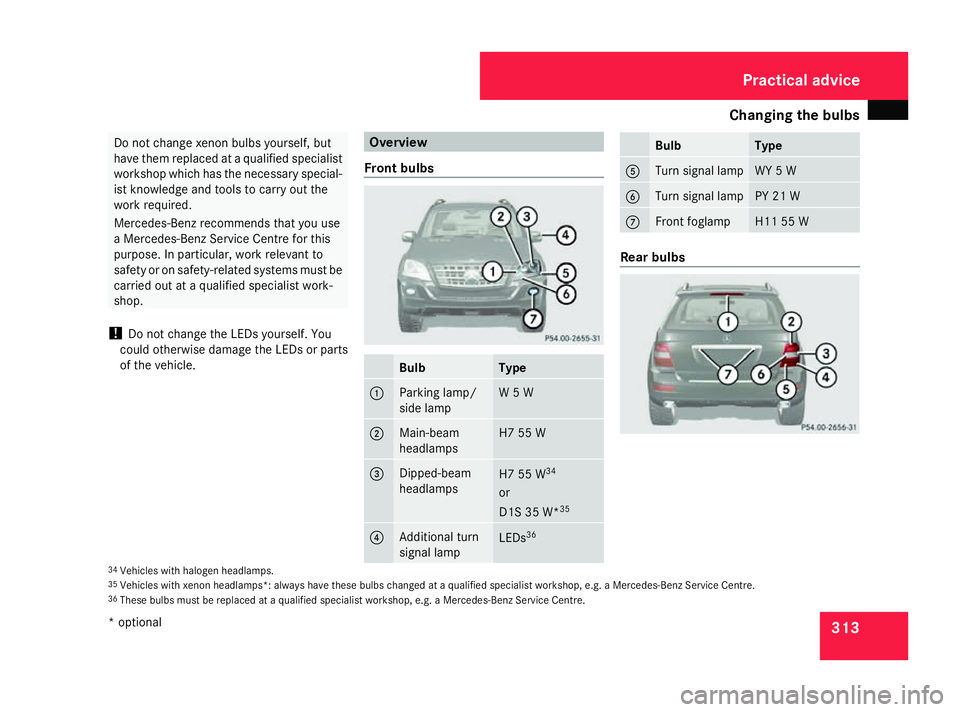
of the vehicle. Overview
Front bulbs Bulb Type
1 Parking lamp/
side lamp W 5 W
2 Main-beam
headlamps H7 55 W
3 Dipped-beam
headlamps
H7 55 W
34
or
D1S 35 W* 35 4 Additional turn
signal lamp
LEDs
36 Bulb Type
5 Turn signal lamp WY 5 W
6 Turn signal lamp PY 21 W
7 Front foglamp H11 55 W
Rear bulbs
34
Vehicles with halogen headlamps.
35 Vehicles with xenon headlamps*: always have these bulbs changed at a qualified specialist workshop, e.g. a Mercedes-Benz Service Centre.
36 These bulbs must be replaced at a qualified specialist workshop, e.g. a Mercedes-Benz Service Centre. Practical advice
* optional
164_AKB; 5; 5, en-GB
wobuchh,
Version: 2.10.6 2008-05-11T11:55:12+02:00 - Seite 313 ZDateiname: 6515_4293_02_buchblock.pdf; preflight
Page 317 of 381
Changing the bulbs
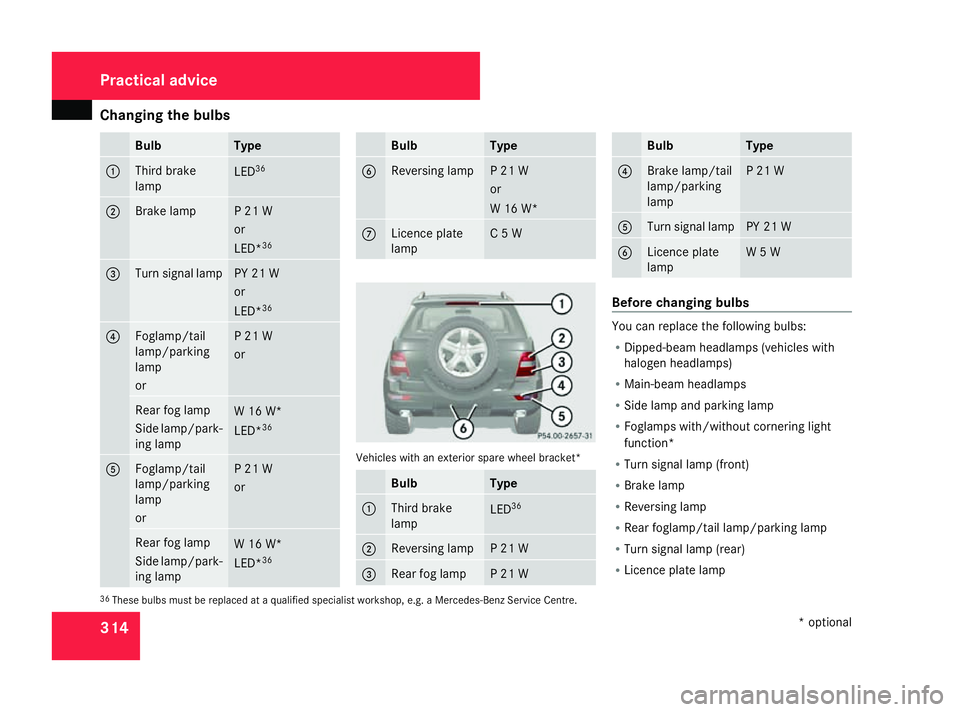
314 Bulb Type
1 Third brake
lamp LED
36 2 Brake lamp P 21 W
or
LED*
36 3 Turn signal lamp PY 21 W
or
LED*
36 4 Foglamp/tail
lamp/parking
lamp
or P 21 W
or
Rear fog lamp
Side lamp/park-
ing lamp
W 16 W*
LED*
36 5 Foglamp/tail
lamp/parking
lamp
or P 21 W
or
Rear fog lamp
Side lamp/park-
ing lamp
W 16 W*
LED*
36 Bulb Type
6 Reversing lamp P 21 W
or
W 16 W*
7 Licence plate
lamp C 5 W
Vehicles with an exterior spare wheel bracket*
Bulb Type
1 Third brake
lamp
LED
36 2 Reversing lamp P 21 W
3 Rear fog lamp P 21 W Bulb Type
4 Brake lamp/tail
lamp/parking
lamp P 21 W
5 Turn signal lamp PY 21 W
6 Licence plate
lamp W 5 W
Before changing bulbs
You can replace the following bulbs:
R
Dipped-beam headlamps (vehicles with
halogen headlamps)
R Main-beam headlamps
R Side lamp and parking lamp
R Foglamps with/without cornering light
function*
R Turn signal lamp (front)
R Brake lamp
R Reversing lamp
R Rear foglamp/tail lamp/parking lamp
R Turn signal lamp (rear)
R Licence plate lamp
36 These bulbs must be replaced at a qualified specialist workshop, e.g. a Mercedes-Benz Service Centre. Practical advice
* optional
164_AKB; 5; 5, en-GB
wobuchh,
Version: 2.10.6 2008-05-11T11:55:12+02:00 - Seite 314Dateiname: 6515_4293_02_buchblock.pdf; preflight