washer fluid MERCEDES-BENZ ML320 1997 Complete Owner's Guide
[x] Cancel search | Manufacturer: MERCEDES-BENZ, Model Year: 1997, Model line: ML320, Model: MERCEDES-BENZ ML320 1997Pages: 4133, PDF Size: 88.89 MB
Page 1141 of 4133

337 Index
Sun visor 132
Supplemental Restraint System
(SRS) 314
Switching off
Automatic climate control 137
ESP 81
Hazard warning flasher 112
Headlamps 54
Rapid seat heating 99
Transmission control – LOW RANGE
mode 125
Switching on
Automatic climate control 137
ESP 82
Front fog lamps 111
Front fog lamps, rear fog lamp 111
Hazard warning flasher 112
Headlamps 48
High beams 110
Rapid seat heating* 98
Seat heating* 98
Transmission control – LOW RANGE
mode 125
Trip computer* 186
Windshield wipers 49Synchronizing
ESP 246
Power windows 146
Remote control 263
Sliding/pop-up roof* 149
T
Tachometer 26, 118
Displaying gear range 121
Tail lamps 270
Cleaning 236
Replacing bulbs 267Tar stains 235
Technical data 302
Brake fluid 302
Coolants 304
Electrical system 297
Engine 294
Engine oil 302
Engine oil additives 302
Fuel requirements 303
Gasoline additives 303
Main dimensions 298
Premium unleaded gasoline 303
Rims and tires 295
Weights 299
Windshield and headlamp washer
system 307
Tele Aid System* 315
Page 1144 of 4133

340 IndexUseful features 164
Ashtrays and cigarette lighter 168
Cup holder 166
Electrical outlet 170
Garage door opener 180
Interior storage spaces 164
Programming or reprogramming the in-
tegrated remote control 182
Tele Aid* 171
Telephone* 170
Trip computer* 186
V
Vehicle
Locking 28
Locking in an emergency 262
Lowering 276
Proper use of 17
Service battery 278
Towing 283
Unlocking 28
Unlocking in an emergency 261
Vehicle and trailer weights and
ratings 207
Vehicle battery 278Vehicle care
Cup holder 238
Engine cleaning 236
Gear selector lever 238
Hard plastic trim items 238
Headlamps 236
Instrument cluster 238
Leather upholstery 239
Light alloy wheels 238
MB Tex upholstery 239
Ornamental moldings 236
Paintwork 235
Parktronic* system sensor 237
Plastic and rubber parts 239
Power washer 235
Seat belts 238
Steering wheel 238
Tail lamps 236
Tar stains 235
Turn signals 236
Upholstery 239
Vehicle washing 236
Window cleaning 237
Wiper blades 237Vehicle identification number (VIN) 292
Vehicle jack 258
Vehicle lighting
Checking 216
Vehicle tool kit 257
Vehicle with CD-changer* 258
Vehicle washing 236
VIN (Vehicle Identification Number) 292,
315
Voice control system* 315
W
Warning indicators
Parktronic* 155
Warning sounds
Drivers seat belts 64
Parking brake 48
Warranty coverage 291
Washer fluid see Windshield washer fluid
Washing the vehicle 234
Page 1145 of 4133

341 Index
Wear pattern (tires) 228
Weights 299
Wheel bolt wrench 258
Wheel change
Tightening torque 277
Wheels
Rotating 228
Window curtain airbags 64
Windows see Side windows
Windshield
Defogging 138
Refilling washer fluid 224
Replacing wiper blades 273
Washer fluid 224, 307
Washer system 307
Windshield washer fluid 307
Filler neck 224
Mixing ratio 307
Refilling 224
Wiping with 50Windshield washer system 307
Windshield wipers 49, 129
Intermittent 49
Interval wiping 130
Normal wiper speed 49
Rain sensor* 130
Rear window wiper/washer 51
Replacing wiper blades 273
Simultaneous wiping and washing 51
Single wipe 50
Switching on 49
Wiping with windshield washer
fluid 50
Winter driving
Snow chains 231
Tires 230
Winter driving instructions 198
Winter tires 230Wiper blades
Cleaning 237
Installing 273
Removing 273
Replacing 273
Wiper switch 49
Wiper/washer
Rear window 51
Wiping
And washing simultaneously 50
Intermittent 49, 130
With windshield washer fluid 50
Wiping and washing simultaneously 51
X
Xenon headlamps*
Bi-Xenon* 311
Page 1151 of 4133
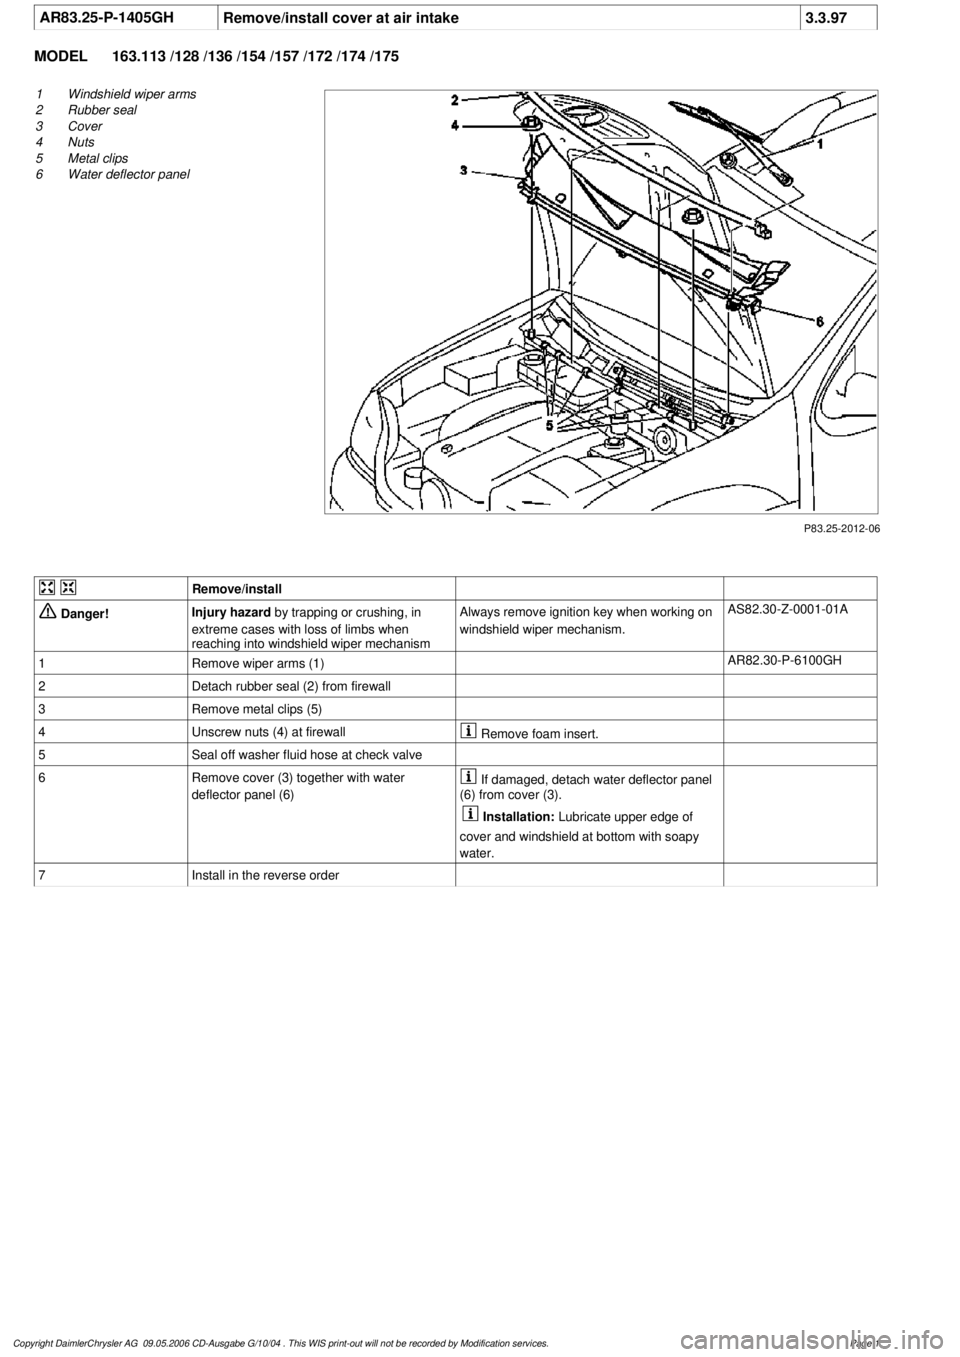
AR83.25-P-1405GH
Remove/install cover at air intake
3.3.97
MODEL
163.113 /128 /136 /154 /157 /172 /174 /175
P83.25-2012-06
1
Windshield wiper arms
2
Rubber seal
3
Cover
4
Nuts
5
Metal clips
6
Water deflector panel
Remove/install
Danger!
Injury hazard
by trapping or crushing, in
extreme cases with loss of limbs when
reaching into windshield wiper mechanism
Always remove ignition key when working on
windshield wiper mechanism.
AS82.30-Z-0001-01A
1
Remove wiper arms (1)
AR82.30-P-6100GH
2
Detach rubber seal (2) from firewall
3
Remove metal clips (5)
4
Unscrew nuts (4) at firewall
Remove foam insert.
5
Seal off washer fluid hose at check valve
6
Remove cover (3) together with water
deflector panel (6)
If damaged, detach water deflector panel
(6) from cover (3).
Installation:
Lubricate upper edge of
cover and windshield at bottom with soapy
water.
7
Install in the reverse order
Copyright DaimlerChrysler AG 09.05.2006 CD-Ausgabe G/10/04 . This WIS print-out will not be recorde
d by Modification services.
Page 1
Page 1549 of 4133
REAR WASH - FUNCTION - GF82.35-P-3001GH
MODEL 163
The rear wash function is activated by placing the rear wiper/ washer switch (S78) in the down position. The
switch contact connects the tailgate washer pump (M5/3) to terminal 15. The All Activity Module (AAM)
(N10) detects the activation of the switch via the second switch contact and actuates the tailgate washer motor
(M6/4) and the tailgate washer fluid pump (M5/3) for as long as the switch is on.
The activation time for the tailgate washer fluid pump (M5/3)is limited to 15 sec. To reactivate the pump, the
button must be pressed again.
To wipe window dry, the tailgate wiper motor (M6/4) remains activated for five seconds after the switch is
released.
As described for the rear wiper function, a relay circuit in the wiper motor stops the wiper in the park position .
WINDSHIELD WASH - FUNCTION - GF82.35-P-3002GH
MODEL 163
The windshield wash function is activated by pulling the combination switch, washer switch (S4s4) towards
the steering column. The switch contact connects the washer pump (M5/1) to terminal 15R. The All Activity
Module (AAM) (N10) detects switch activation via an input that measures power supply to the washer pump
(M5/1).
If the combination switch (S4) is in the Wiper Off or Intermittent position, the AAM activates the wiper
motor (M6/1) via rela
y F1k17 . To wipe windshield dry, the motor continues to operate after the switch has
Rear window washer
pump, location /
purpose / design /
function GF82.35-P-4103GH
Table of contents,
function description,
wiper system (WS) GF82.30-P-0998GH
Rear Wipe GF82.30-P-3004GH
Rear Wiper/Washer
Switch GF82.30-P-4105GH
Tailgate Wiper Motor GF82.30-P-4106GH
Tailgate Washer Pump GF82.35-P-4103GH
All Activity ModuleTo 30.11.99GF54.21-P-4100GH
As of 1.12.99GF54.21-P-4100GK
2001 Mercedes-Benz ML320
1998-2005 ACCESSORIES & BODY, CAB Electrical System - Body - 163 Chassis
me
Saturday, October 02, 2010 3:30:05 PMPage 54 © 2006 Mitchell Repair Information Company, LLC.
Page 1746 of 4133
rain sensorwith CODE (345a) Rain sensor7700GH
Removing and
installing washer
fluid reservoir of
windshield
washer systemMODEL
163.113/128 /136 /154 /157 /172 /174 /175 with
7.6 L reservoirAR82.35-P-
6000GH
Remove/install
radioMODEL 129, 163, 168, 170, 202, 208, 210,
414,463...AR82.60-P-
7502EA
Removing and
installing CAN
bus adapterMODEL 163 with CODE (353) Audio 30 APSAR82.61-P-
7413G
Remove/install
antenna for
global positioning
system (GPS) on
vehicles with
APSMODEL 163...AR82.61-P-
7474GI
Check
microphone for
sound amplifierMODELS 163.113/154 /174 #A as of 289565,
163.128 /157 /175 with CODE (810) Sound
systemAR82.62-P-
1110GH
Removing and
installing
microphoneMODEL 163...AR82.62-P-
7700GH
Remove/install
loudspeaker
amplifier control
moduleMODELS 163.113/128 /136 /154 /157 /172 /175
with CODE (810) Sound system MODEL
163.174AR82.62-P-
7720GH
Remove/install
speaker in the
side paneling
(rear)MODEL 163...AR82.62-P-
7837GH
Remove/install
wooferMODELS 163.113/128 /136 /154 /157 /172 /175
with CODE (810) Sound system MODEL
163.174AR82.62-P-
7839GH
Removing and
installing
loudspeakers in
front doorsMODEL 163AR82.62-P-
7845GH
Remove/install
front door
speakers in
mirror triangleMODEL 163...AR82.62-P-
7850GH
Removing and
installing
loudspeakers in MODEL 163AR82.62-P-
7874GH
2001 Mercedes-Benz ML320
1998-2005 ACCESSORIES & BODY, CAB Electrical System - Body - 163 Chassis
me
Saturday, October 02, 2010 3:30:08 PMPage 251 © 2006 Mitchell Repair Information Company, LLC.
Page 1779 of 4133
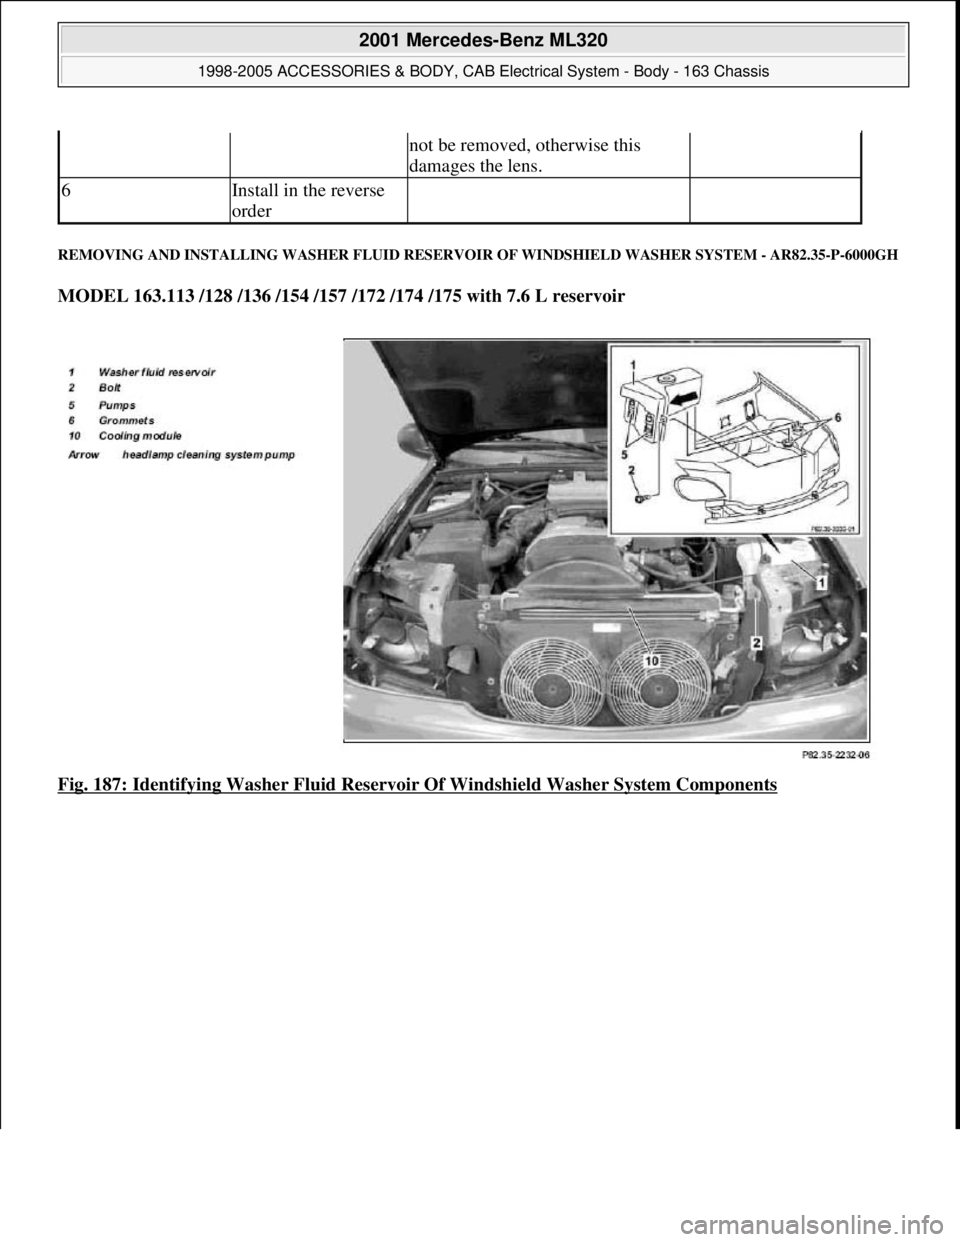
REMOVING AND INSTALLING WASHER FLUID RESERVOIR OF WINDSHIELD WASHER SYSTEM - AR82.35-P-6000GH
MODEL 163.113 /128 /136 /154 /157 /172 /174 /175 with 7.6 L reservoir
Fig. 187: Identifying Washer Fluid Reservoir Of Windshield Washer System Components
not be removed, otherwise this
damages the lens.
6Install in the reverse
order
2001 Mercedes-Benz ML320
1998-2005 ACCESSORIES & BODY, CAB Electrical System - Body - 163 Chassis
me
Saturday, October 02, 2010 3:30:09 PMPage 284 © 2006 Mitchell Repair Information Company, LLC.
Page 1780 of 4133
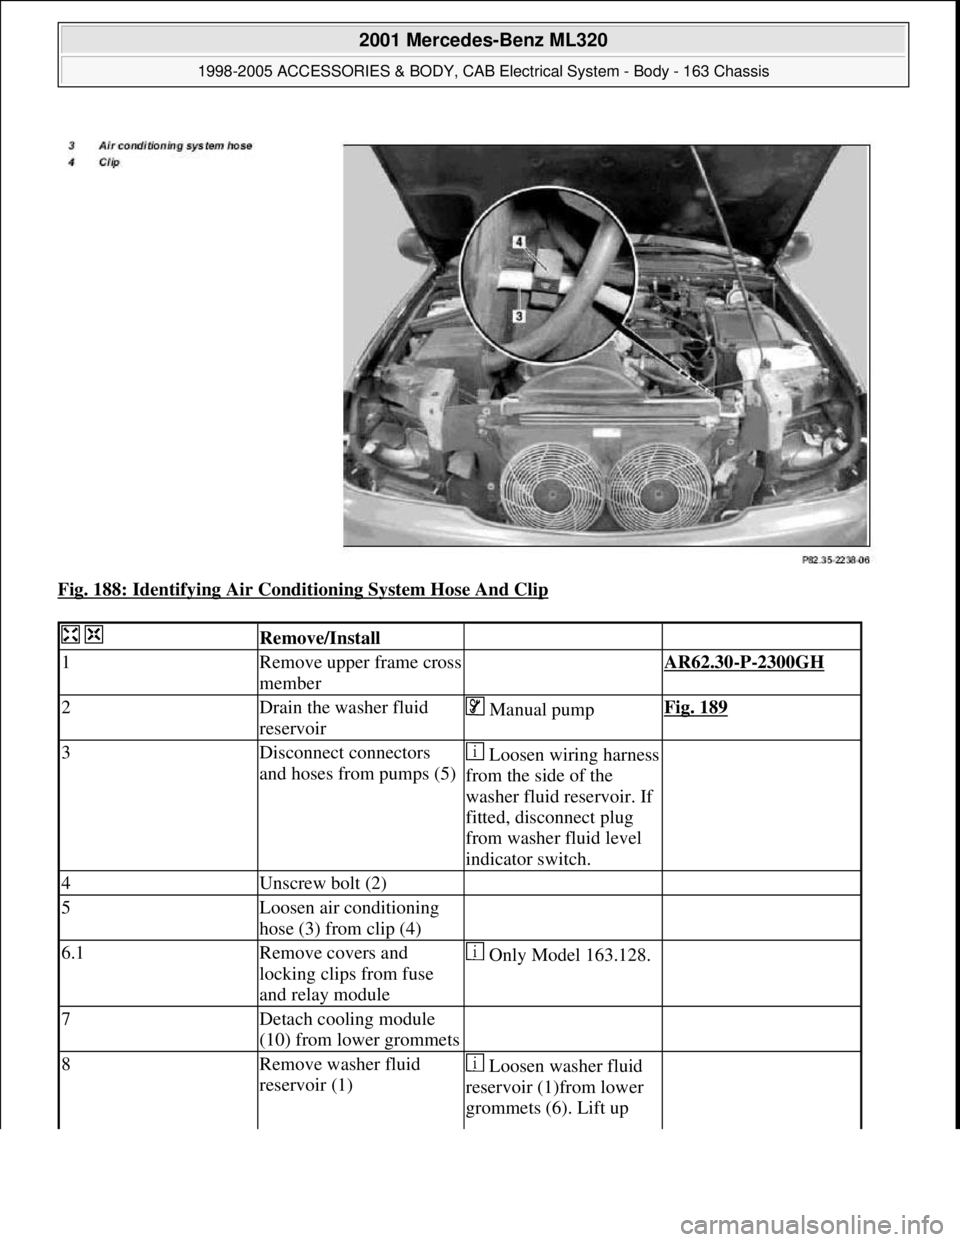
Fig. 188: Identifying Air Conditioning System Hose And Clip
Remove/Install
1Remove upper frame cross
member AR62.30-P-2300GH
2Drain the washer fluid
reservoir Manual pumpFig. 189
3Disconnect connectors
and hoses from pumps (5)Loosen wiring harness
from the side of the
washer fluid reservoir. If
fitted, disconnect plug
from washer fluid level
indicator switch.
4Unscrew bolt (2)
5Loosen air conditioning
hose (3) from clip (4)
6.1Remove covers and
locking clips from fuse
and relay module Only Model 163.128.
7Detach cooling module
(10) from lower grommets
8Remove washer fluid
reservoir (1) Loosen washer fluid
reservoir (1)from lower
grommets (6). Lift up
2001 Mercedes-Benz ML320
1998-2005 ACCESSORIES & BODY, CAB Electrical System - Body - 163 Chassis
me
Saturday, October 02, 2010 3:30:09 PMPage 285 © 2006 Mitchell Repair Information Company, LLC.
Page 1781 of 4133
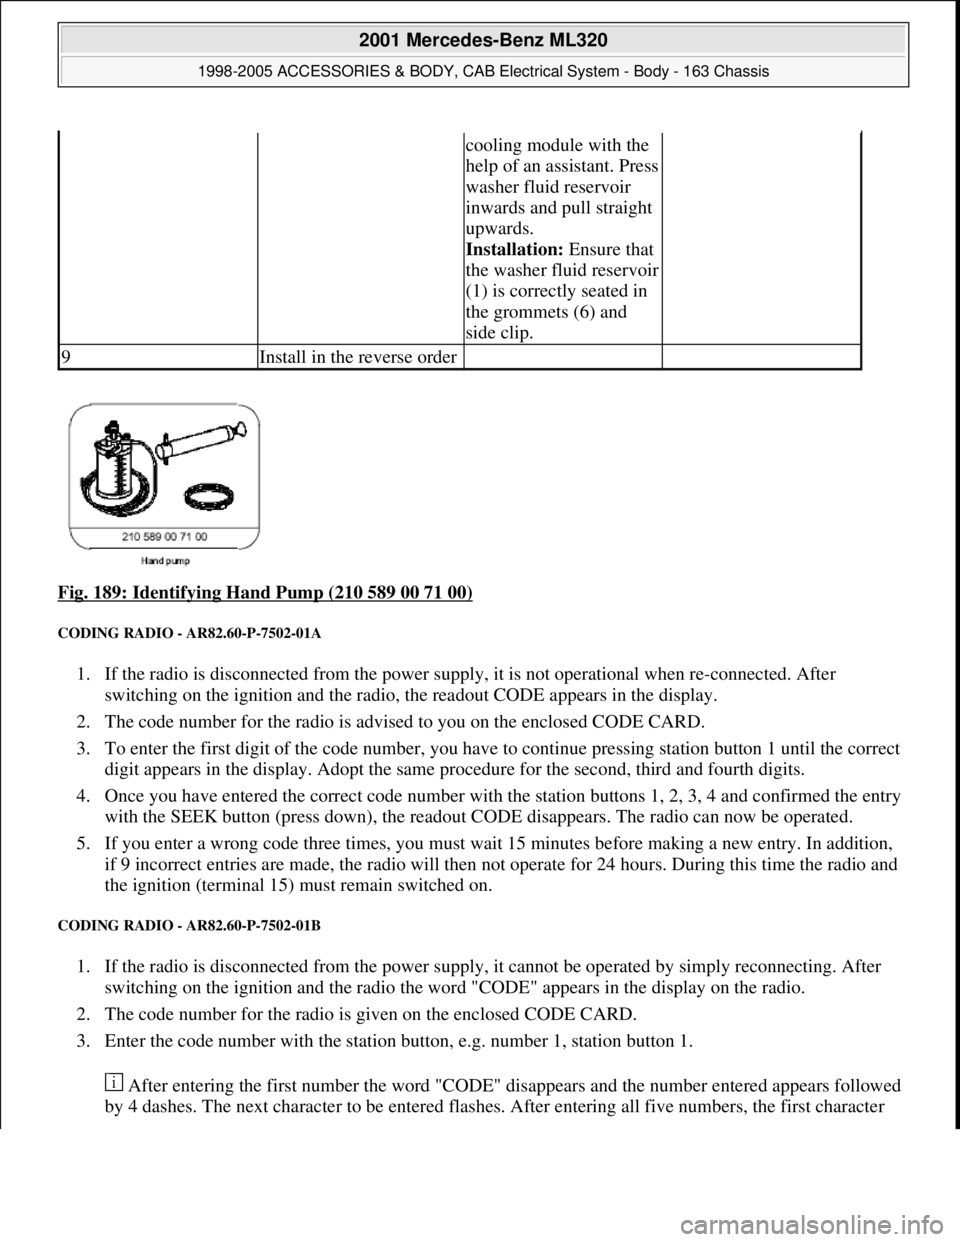
Fig. 189: Identifying Hand Pump (210 589 00 71 00)
CODING RADIO - AR82.60-P-7502-01A
1. If the radio is disconnected from the power supply, it is not operational when re-connected. After
switching on the ignition and the radio, the readout CODE appears in the display.
2. The code number for the radio is advised to you on the enclosed CODE CARD.
3. To enter the first digit of the code number, you have to continue pressing station button 1 until the correct
digit appears in the display. Adopt the same procedure for the second, third and fourth digits.
4. Once you have entered the correct code number with the station buttons 1, 2, 3, 4 and confirmed the entry
with the SEEK button (press down), the readout CODE disappears. The radio can now be operated.
5. If you enter a wrong code three times, you must wait 15 minutes before making a new entry. In addition,
if 9 incorrect entries are made, the radio will then not operate for 24 hours. During this time the radio and
the ignition (terminal 15) must remain switched on.
CODING RADIO - AR82.60-P-7502-01B
1. If the radio is disconnected from the power supply, it cannot be operated by simply reconnecting. After
switching on the ignition and the radio the word "CODE" appears in the display on the radio.
2. The code number for the radio is given on the enclosed CODE CARD.
3. Enter the code number with the station button, e.g. number 1, station button 1.
After entering the first number the word "CODE" disappears and the number entered appears followed
by 4 dashes. The next character to be entered flashes. After entering all five numbers, the first character
cooling module with the
help of an assistant. Press
washer fluid reservoir
inwards and pull straight
upwards.
Installation: Ensure that
the washer fluid reservoir
(1) is correctly seated in
the grommets (6) and
side clip.
9Install in the reverse order
2001 Mercedes-Benz ML320
1998-2005 ACCESSORIES & BODY, CAB Electrical System - Body - 163 Chassis
me
Saturday, October 02, 2010 3:30:09 PMPage 286 © 2006 Mitchell Repair Information Company, LLC.
Page 1820 of 4133
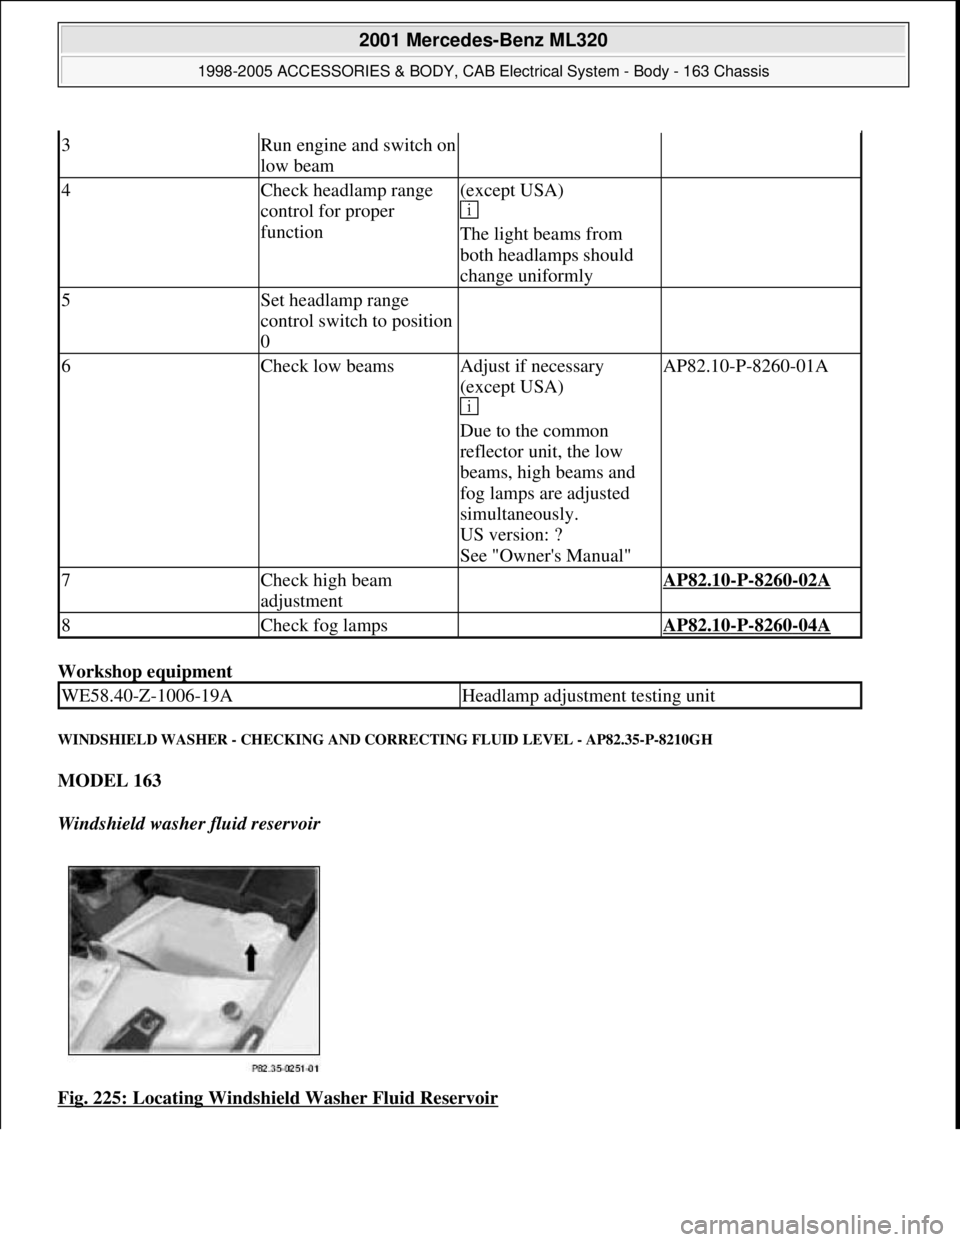
Workshop equipment
WINDSHIELD WASHER - CHECKING AND CORRECTING FLUID LEVEL - AP82.35-P-8210GH
MODEL 163
Windshield washer fluid reservoir
Fig. 225: Locating Windshield Washer Fluid Reservoir
3Run engine and switch on
low beam
4Check headlamp range
control for proper
function(except USA)
The light beams from
both headlamps should
change uniformly
5Set headlamp range
control switch to position
0
6Check low beamsAdjust if necessary
(except USA)
Due to the common
reflector unit, the low
beams, high beams and
fog lamps are adjusted
simultaneously.
US version: ?
See "Owner's Manual"AP82.10-P-8260-01A
7Check high beam
adjustment AP82.10-P-8260-02A
8Check fog lamps AP82.10-P-8260-04A
WE58.40-Z-1006-19AHeadlamp adjustment testing unit
2001 Mercedes-Benz ML320
1998-2005 ACCESSORIES & BODY, CAB Electrical System - Body - 163 Chassis
me
Saturday, October 02, 2010 3:30:10 PMPage 325 © 2006 Mitchell Repair Information Company, LLC.