tow MERCEDES-BENZ ML430 2002 W163 User Guide
[x] Cancel search | Manufacturer: MERCEDES-BENZ, Model Year: 2002, Model line: ML430, Model: MERCEDES-BENZ ML430 2002 W163Pages: 342, PDF Size: 13.75 MB
Page 135 of 342

132 Interior equipment
Te ch n i c a l
data Instruments
and controlsOperationDrivingInstrument
cluster displayPractical hints Car care Index
Interior Storage compartments, armrest and cup holder
Wa r n i n g !
To help avoid personal injury during a collision or
sudden maneuver, exercise care when stowing
things. Put luggage or cargo in the rear cargo area
and secure. Do not pile luggage or cargo higher
than the seat backs. Luggage nets cannot secure hard or heavy objects.
Wa r n i n g !
Keep compartment lids closed. This will help to
prevent stored objects from being thrown about
and injuring vehicle occupants during an accident
and sudden maneuvers.
Page 157 of 342

154 Interior equipment
Te ch n i c a l
data Instruments
and controlsOperationDrivingInstrument
cluster displayPractical hints Car care Index
Loading instructions
The total load weight including vehicle occupants and
luggage / cargo should not exceed the vehicle capacity
weight indicated on the certification label which can be
found on the left door pillar.
The handling characteristics of a fully loaded vehicle
depend greatly on the load distribution. It is therefore
recommended to load the vehicle according to the
illustrations shown, with the heaviest items being
placed towards the front of the vehicle.Always place items being carried against front or rear
seat backrests, and fasten them as securely as possible.
The heaviest portion of the cargo should always be kept
as low as possible against front or rear seat backrest
since it influences the handling characteristics of the
vehicle.
For additional safety when transporting cargo while the
rear seats are unoccupied, fasten the outer seat belts
crosswise into the opposite side buckles.
Page 159 of 342

156 Interior equipment
Te ch n i c a l
data Instruments
and controlsOperationDrivingInstrument
cluster displayPractical hints Car care Index
Removing blind:
Pull right side mounting sleeve toward vehicle center
(arrow) until button (2) engages, and remove blind from
holders.Installing blind:
Place left side of blind in left mount. Position right side
of blind over right mount. Push button (2), releasing
mounting sleeve to slide into mount.
Notes:
A removable cap is fitted into the mount openings on
vehicles fitted with third row seats.
Passenger use of third row seats with cargo area cover
blind installed is restricted.
2
Page 166 of 342
163 Contents - Driving
Te ch n i c a l
data Instruments
and controlsOperationDrivingInstrument
cluster displayPractical hints Car care Index
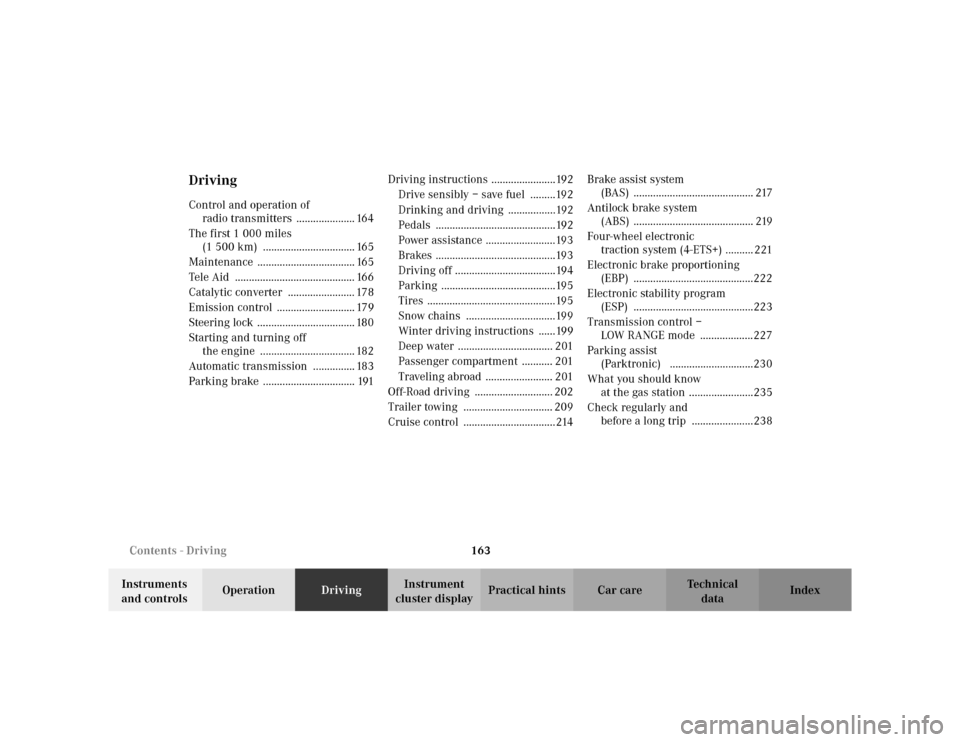
DrivingControl and operation of
radio transmitters ..................... 164
The first 1 000 miles
(1 500 km) ................................. 165
Maintenance ................................... 165
Tele Aid ........................................... 166
Catalytic converter ........................ 178
Emission control ............................ 179
Steering lock ................................... 180
Starting and turning off
the engine .................................. 182
Automatic transmission ............... 183
Parking brake ................................. 191Driving instructions .......................192
Drive sensibly – save fuel .........192
Drinking and driving .................192
Pedals ...........................................192
Power assistance .........................193
Brakes ...........................................193
Driving off ....................................194
Parking .........................................195
Tires ..............................................195
Snow chains ................................199
Winter driving instructions ......199
Deep water .................................. 201
Passenger compartment ........... 201
Traveling abroad ........................ 201
Off-Road driving ............................ 202
Trailer towing ................................ 209
Cruise control .................................214Brake assi st system
(BAS) ........................................... 217
Antilock brake system
(ABS) ........................................... 219
Four-wheel electronic
traction system (4-ETS+) .......... 221
Electronic brake proportioning
(EBP) ...........................................222
Electronic stability program
(ESP) ...........................................223
Transmission control –
LOW RANGE mode ...................227
Parking assist
(Parktronic) ..............................230
What you should know
at the gas station .......................235
Check regularly and
before a long trip ......................238
Page 170 of 342
167 Tele Aid
Te ch n i c a l
data Instruments
and controlsOperationDrivingInstrument
cluster displayPractical hints Car care Index Important!
Always make sure that the indicator lamps in the
“SOS” button, the Roadside Assistance button• and
the Information button¡do not remain illuminated
constantly in red and the message “TELE AID – VISIT
WORKSHOP” is not displayed in the MCS display after
the system self check.
If a malfunction is indicated as outlined above, have the
system checked at the nearest Mercedes-Benz Light
Truck Center as soon as possible.
Emergency calls
An emergency call is initiated automatically:
•following an accident in which the Emergency
Tensioning Retractors (ETR’s) or airbags deploy,
•if the antitheft alarm or the tow away alarm stays on
for more than 20 seconds, see pages 36 and 37.
An emergency call can also be initiated manually by
opening the cover next to the inside rear view mirror
labeled “SOS”, then briefly pressing the button located
under the cover. See below for instructions on initiating
an emergency call manually.Once the emergency call is in progress, the indicator
lamp in the “SOS” button will begin to flash. The
message “EMERGENCY CALL – CONNECTING CALL”
appears in the MCS display. When the connection is
established, the message “EMERGENCY CALL – CALL
CONNECTED” appears in the MCS display. All
information relevant to the emergency, such as the
location of the vehicle (determined by the GPS satellite
location system), vehicle model, identification number
and color are generated.
A voice connection between the Response Center and
the occupants of the vehicle will be established
automatically soon after the emergency call has been
initiated. When a voice connection is established the
audio system mutes and the message “TELE AID –
EMERGENCY CALL ACTIVE” appears in the MCS
display. The Response Center will attempt to determine
more precisely the nature of the accident provided they
can speak to an occupant of the vehicle.
Page 174 of 342

171 Tele Aid
Te ch n i c a l
data Instruments
and controlsOperationDrivingInstrument
cluster displayPractical hints Car care Index When the connection is established, the message
“ROADSIDE ASSISTANCE – CALL CONNECTED”
appears in the MCS display. The Tele Aid system will
transmit data generating the vehicle identification
number, model, color and location (subject to
availability of cellular and GPS signals).
While the call is connected, you can change to
navigation menu by pressing NAVI button on the MCS.
A voice connection between the Roadside Assistance
dispatcher and the occupants of the vehicle will be
established. When a voice connection is established the
audio system mutes and the message “TELE AID –
ROADSIDE ASSISTANCE CALL ACTIVE” appears in the
MCS display. The nature of the need for assistance can
then be described. The Mercedes-Benz Roadside
assistance dispatcher will either dispatch a qualified
Mercedes-Benz technician or arrange to tow your
vehicle to the nearest Mercedes-Benz Center. For
services such as labor and/or towing charges may apply.
Refer to the Roadside Assistance manual for more
information.These programs are only available in the USA:
•Sign and Drive services: Services such as jump start,
a few gallons of fuel or the replacement of a flat tire
with the vehicle spare tire are obtainable,
•Remote Vehicle Diagnostics: This function permits
the Mercedes-Benz Roadside Assistance dispatcher
to download malfunction codes and actual vehicle
data.
Notes:
The indicator lamp in the Roadside Assistance
button• remains illuminated in red for
approximately 10 seconds during the system self-check
after turning key in steering lock to position 2 (together
with the “SOS” button and the Information
button¡).
See system self-check on page 166 when the indicator
lamp does not light up in red or stay on longer than
approximately 10 seconds.
Page 188 of 342
185 Automatic transmission
Te ch n i c a l
data Instruments
and controlsOperationDrivingInstrument
cluster displayPractical hints Car care Index Maneuvering
To maneuver in tight areas, e.g. when pulling into a
parking space, control the vehicle speed by gradually
releasing the brakes. Accelerate gently and never
abruptly step on the accelerator.
To rock a vehicle out of soft ground (mud or snow),
alternately shift from forward to reverse, while applying
slight partial throttle.
Rocking a vehicle free in this manner may cause the
ABS or traction system malfunction indicator lamp to
come on. Turn off and restart the engine to clear the
malfunction indication.Towing a trailer
If the transmission hunts between gears on inclines,
manually shift to a lower gear (select “4”, “3”, “2”
or “1”). A lower gear and reduction of speed reduces the
chance of engine overloading and / or overheating.
At very steep inclines, not manageable with selector
lever in position “1”, switch transfer case to LOW
RANGE, see page 227 for instructions on how to engage
LOW RANGE.
For instructions on trailer towing refer to page 209.
Wa r n i n g !
Getting out of your vehicle with the selector lever
not fully engaged in position “P” is dangerous.
Also, when parked on an incline, position “P” alone
may not prevent your vehicle from moving,
possibly hitting people or objects.Always set the parking brake in addition to shifting
to position “P”, see page 191 for parking brake. When parked on an incline, also turn front wheel
against curb.
Wa r n i n g !
When leaving the vehicle always remove the key
from the steering lock, and lock the vehicle. Do not
leave children unattended in the vehicle, or with
access to an unlocked vehicle. Children could move
the gear selector lever from position “P”, which
could result in an accident or serious injury.
Page 190 of 342
187 Automatic transmission
Te ch n i c a l
data Instruments
and controlsOperationDrivingInstrument
cluster displayPractical hints Car care Index Neutral
No power is transmitted from the engine to the
drive axle. When the brakes are released, the
vehicle can be moved freely (pushed or towed). Do
not engage “N” while driving except to coast
when the vehicle is in danger of skidding (e.g. on
icy roads, see winter driving instructions on
page 199).
Important!
Coasting the vehicle, or driving for any other
reason with selector lever in “N” can result in
transmission damage that is not covered by the
Mercedes-Benz Limited Warranty.
The transmission automatically upshifts through
5th gear. Position “D” provides optimum driving
characteristics under all normal operating
conditions.Gear selection for special circumstances
The transmission gear ranges for special circumstances
can be selected by pressing the selector lever to the
right or the left with the selector lever in position “D”.
The gear range currently selected is indicated in the
instrument cluster display.
Briefly press selector lever in the “D –” direction:
The transmission will shift from the current gear range
to the next lower gear range.
Press and hold selector lever in the “D –” direction:
The selector lever position display will switch to the
gear range currently selected by the automatic
transmission.
Shifting into another gear range that allows for quicker
acceleration or to slow the vehicle down is possible.
Downshifts can also be performed.
Note:
To avoid overrevving the engine when the selector lever
is moved in “D –” direction, the transmission will not
shift to a lower gear range if the engine’s revolutions
per minute limit would be exceeded.
Page 198 of 342
195 Driving instructions
Te ch n i c a l
data Instruments
and controlsOperationDrivingInstrument
cluster displayPractical hints Car care Index Parking
Important!
It is advisable to set the parking brake whenever
parking or leaving the vehicle. In addition, move
selector lever to position “P”.
When parking on hills, always set the parking brake.Tires
Tread wear indicators (TWI) are required by law. These
indicators are located in six places on the tread
circumference and become visible at a tread depth of
approximately
1/16in (1.5 mm), at which point the tire is
considered worn and should be replaced.
The tread wear indicator appears as a solid band across
the tread.
Wa r n i n g !
To reduce the risk of personal injury as a result of
vehicle movement, before
turning off the engine
and leaving the vehicle, always:
1. Keep right foot on the service brake pedal.
2. Firmly depress parking brake pedal.
3. Move the selector lever to position “P”.
4. Slowly release the service brake pedal.
5. Turn front wheels towards the road curb.
6. Turn the key to steering lock position 0 and
remove.
7. Take the key and lock vehicle when leaving.
Wa r n i n g !
If you feel a sudden significant vibration or ride
disturbance, or you suspect that possible damage to
your vehicle has occurred, you should turn on the
hazard warning flashers, carefully slow down, and
drive with caution to an area which is a safe
distance from the roadway.Inspect the tires and under the vehicle for possible
damage. If the vehicle or tires appear unsafe, have
it towed to the nearest Mercedes-Benz Light Truck
Center or tire dealer for repairs.
Page 206 of 342
203 Driving instructions
Te ch n i c a l
data Instruments
and controlsOperationDrivingInstrument
cluster displayPractical hints Car care Index Checklist before off-road driving
• Tires: Check the tread depth and maintain specified
tire pressure (see tire pressure label inside the fuel
filler flap). Check tires for possible damage and
remove foreign objects. The valve caps must be
mounted.
•Rims: Dented or bent rims can cause tire pressure
loss and damage the tire beads. For this reason,
check and, if neccesary, change rims before driving
off-road.
• Vehicle tool kit: Check if the vehicle jack is
functional. In all cases take the vehicle tool kit, a
strong tow rope, a shovel and a small plank (to put
under the vehicle jack on sandy soil) with you.Driving in steep terrain
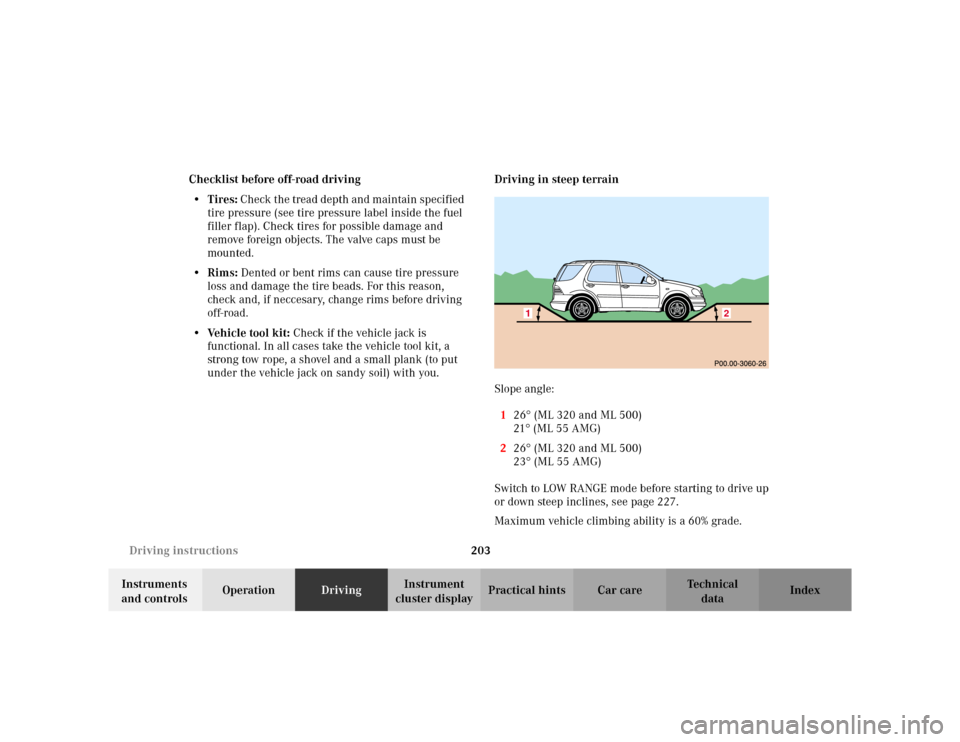
Slope angle:
126
° (ML 320 and ML 500)
21° (ML 55 AMG)
226° (ML 320 and ML 500)
23° (ML 55 AMG)
Switch to LOW RANGE mode before starting to drive up
or down steep inclines, see page 227.
Maximum vehicle climbing ability is a 60% grade.1
2