tow MERCEDES-BENZ R-Class 2012 W251 Comand Manual
[x] Cancel search | Manufacturer: MERCEDES-BENZ, Model Year: 2012, Model line: R-Class, Model: MERCEDES-BENZ R-Class 2012 W251Pages: 210, PDF Size: 5.11 MB
Page 11 of 210
Regis
terin g.<0023002300230023002300230023002300230023002300230023002300230023
0023002300230023002300230023002300230023002300230023002300230023
002300230023> 122
Sele cting acate gor y.<0023002300230023002300230023002300230023002300230023002300230023
00230023002300230023> 123
Scre en
Sele cting forremote operatio n........ 31
SD memory card
Ejecting .......................................... 129
Inserting <0023002300230023002300230023002300230023002300230023002300230023
0023002300230023002300230023002300230023002300230023002300230023
00230023002300230023002300230023> 129
Searc h&Send.................... ................ .. 59
Sear ching (SeealsoPredict ive
spell er)
addres sbook <0023002300230023002300230023002300230023002300230023002300230023
0023002300230023002300230023002300230023002300230023002300230023
0023> 194
Sel ecting audio track
voice command sfor <0023002300230023002300230023002300230023002300230023002300230023
002300230023002300230023> 198
Skippin gback
CD/DVD mode<0023002300230023002300230023002300230023002300230023002300230023
00230023002300230023002300230023002300230023002300230023> 133
Skippin gforw ards
CD/DVD mode<0023002300230023002300230023002300230023002300230023002300230023
00230023002300230023002300230023002300230023002300230023> 133
Soun d
Switchi ngon/off ..............................27
Soun dsettings <0023002300230023002300230023002300230023002300230023002300230023
002300230023002300230023002300230023002300230023> 27,150
Spel lingwi th voi cecommand ..........180
State/pro vince
Sele cting .... ................ .................. .. .. 49
State ofdestin ation,selectin g......... 185
Station Sele cting ........................................ 117
Storing <0023002300230023002300230023002300230023002300230023002300230023
0023002300230023002300230023002300230023002300230023002300230023
00230023002300230023002300230023002300230023> 118
Station search<0023002300230023002300230023002300230023002300230023002300230023
0023002300230023002300230023002300230023002300230023002300230023
002300230023> 117
Station selection (radio )
voice command sfor <0023002300230023002300230023002300230023002300230023002300230023
002300230023002300230023> 196
Stee ring wheel....... ..................... ....... 179
Storage options
Sele cting .................... .................. .. .. 79
Street ofdestin ation,selectin g....... 187
Summer andstandard time
Switchi ng<0023002300230023002300230023002300230023002300230023002300230023
0023002300230023002300230023002300230023002300230023002300230023
002300230023002300230023002300230023> 37
Surround sound<0023002300230023002300230023002300230023002300230023002300230023
0023002300230023002300230023002300230023002300230023002300230023
002300230023> 28
Syste mlanguag e
Setting <0023002300230023002300230023002300230023002300230023002300230023
0023002300230023002300230023002300230023002300230023002300230023
0023002300230023002300230023002300230023002300230023> 43T
Tele phone
Ending anactive call<0023002300230023002300230023002300230023002300230023002300230023
002300230023002300230023> 101
Entering phonenumbe rs....... .........100
Incoming call<0023002300230023002300230023002300230023002300230023002300230023
0023002300230023002300230023002300230023002300230023002300230023
0023> 100
Outgo ingcall <0023002300230023002300230023002300230023002300230023002300230023
0023002300230023002300230023002300230023002300230023002300230023
0023> 100
Red ialing <0023002300230023002300230023002300230023002300230023002300230023
0023002300230023002300230023002300230023002300230023002300230023
00230023002300230023002300230023> 100Sending
DTMFtones..................... .101
Single call<0023002300230023002300230023002300230023002300230023002300230023
0023002300230023002300230023002300230023002300230023002300230023
002300230023002300230023> 101
Switchi nghands -freemicrop hone
on/off <0023002300230023002300230023002300230023002300230023002300230023
0023002300230023002300230023002300230023002300230023002300230023
002300230023002300230023002300230023002300230023> 101
Tele phone (Seealso Calling)
voice control with <0023002300230023002300230023002300230023002300230023002300230023
00230023> 181,200
Tele phone basicmenu
Blue tooth ®
interfa ce<0023002300230023002300230023002300230023002300230023002300230023
00230023002300230023002300230023> 99
Tele phone number
Entering <0023002300230023002300230023002300230023002300230023002300230023
0023002300230023002300230023002300230023002300230023002300230023
002300230023002300230023002300230023> 100
Time
Setting <0023002300230023002300230023002300230023002300230023002300230023
0023002300230023002300230023002300230023002300230023002300230023
0023002300230023002300230023002300230023002300230023> 37
Time format
Setting <0023002300230023002300230023002300230023002300230023002300230023
0023002300230023002300230023002300230023002300230023002300230023
0023002300230023002300230023002300230023002300230023> 37
Time zone
Setting <0023002300230023002300230023002300230023002300230023002300230023
0023002300230023002300230023002300230023002300230023002300230023
0023002300230023002300230023002300230023002300230023> 37
Tone settin gs
Bala nceand fade r.<0023002300230023002300230023002300230023002300230023002300230023
00230023002300230023002300230023002300230023> 28
Treb leand bass.<0023002300230023002300230023002300230023002300230023002300230023
00230023002300230023002300230023002300230023002300230023> 28
Town ,selectin gas dest ination........ 186
Track information ..................... .........168
Track selection (audio )
voice command sfor <0023002300230023002300230023002300230023002300230023002300230023
002300230023002300230023> 198
Track selection (video)
voice command sfor <0023002300230023002300230023002300230023002300230023002300230023
002300230023002300230023> 198
Traffic jamfunc tion ..................... ........70
Traffi cPro gram
Swi tchi ngoff <0023002300230023002300230023002300230023002300230023002300230023
0023002300230023002300230023002300230023002300230023002300230023
0023002300230023> 27
Traffic report
Rea l-time traffic report<0023002300230023002300230023002300230023002300230023002300230023
0023002300230023> 76
Traffic reportread-alo udfunc tion ..... 73
Traffic reports ................ .................. .... 73
Trouble shooting
voice control <0023002300230023002300230023002300230023002300230023002300230023
0023002300230023002300230023002300230023002300230023002300230023
00230023> 206 U
Usi ngthe telephone <0023002300230023002300230023002300230023002300230023002300230023
0023002300230023002300230023002300230023> 100 V
Video voice control with <0023002300230023002300230023002300230023002300230023002300230023
0023002300230023002300230023002300230023> 205
Video DVD
Fast forwa rd/rew ind....... .............. .153
Opera tion.............. .............. ...........150
Pau sefunction <0023002300230023002300230023002300230023002300230023002300230023
002300230023002300230023002300230023002300230023002300230023> 153
Sele cting afilm /title ..................... .154 In
dex
9
Page 38 of 210
COMAN
Dfea tures
Thes eOper atingIn st ruc tions desc ribeall
st andar dand optionalequipm enta vail able
for you rCOMAND systematthe time of
purcha se.Cou ntry-specifi cdeviation sare
possible. Pleasenotethat your COMAND
system maynotbeequipped withallthe
features described. Display
settings Sett
ingthe bright ness
The brightn essdetec tedbythe COMAND
light sensor affectsthe sett ingoption sfor this
func tion.
X Press theW button .
X Select Setting s using
the :=; buttonsand press the
9 button tocon firm.
X Select Display and
press the9button to
con firm.
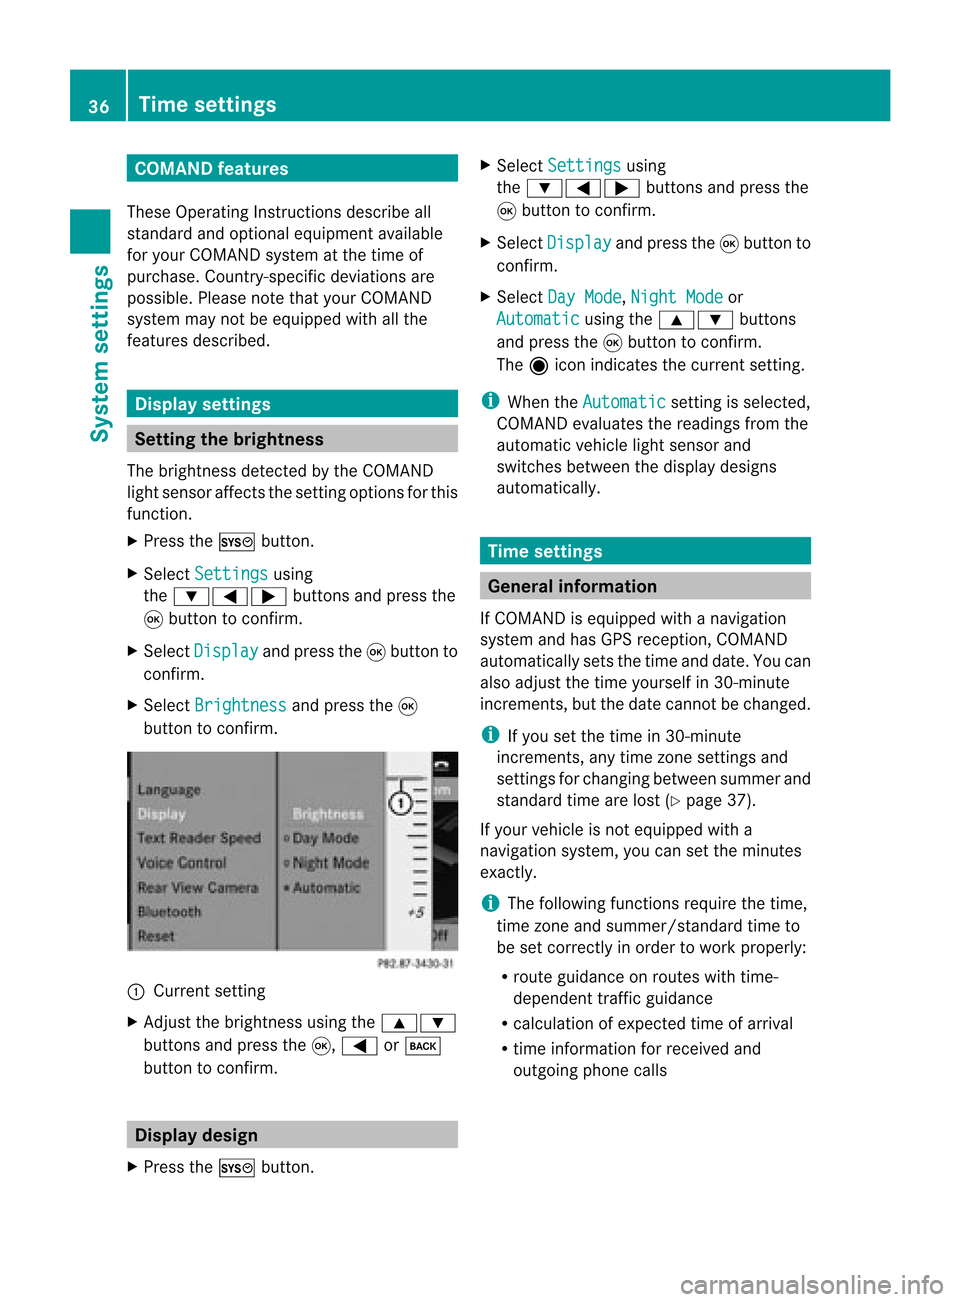
X Select Brightn ess and
press the9
button tocon firm. :
Current setting
X Adj ust the brightn essusing the9:
button sand press the9, = ork
button tocon firm. Display
design
X Press theW button . X
Select Setting s using
the :=; buttonsand press the
9 button tocon firm.
X Select Display and
press the9button to
con firm.
X Select DayMode ,
Night Mode or
Automat ic using
the9: buttons
and press the9button tocon firm.
The äicon indicat esthe curren tsett ing.
i When theAutomat ic sett
ingisselect ed,
COMAND evaluatesthereadings fromthe
automatic vehiclelightsensor and
switch esbetween thedisplay designs
automatic ally. Tim
esettings General
information
If COMAND isequipped withanavigation
system andhasGPS recept ion,COMAND
automatic allysets thetime anddate. Youcan
also adjust thetime yourself in30- minut e
incr ement s,but thedate cannotbe changed.
i Ifyou setthe time in30- minut e
incr ement s,any time zonesett ings and
sett ings forchangin gbetween summerand
stan dard timearelost (Ypage 37).
If your vehicle isnot equipped witha
navigation system,youcan setthe minut es
exact ly.
i The following functionsrequire thetime,
time zoneand summer/ standard timeto
be set corr ectlyin order towork properly:
R route guidance onroutes withtime-
dependen ttraffic guidance
R calcu lation ofexpected timeofarriva l
R time informati onfor receive dand
outgoi ngphone calls 36
Time
setting sSystem settings
Page 71 of 210
direct
ionsmay cause youtodivert your
atte ntion from driving andincrease yourrisk
of an acciden t.
Repea tingnavigat ionannouncement s i
Audible navigationannoun cementsare
muted duringatelephon ecall.
If you have missed anannoun cement,you can
call upthe curren tannoun cementat any
time.
X To show themenu: presstheØ
func tion butto n.
X Select +inthe navigat ionmenu barusing
the :=; buttonsand press the
9 butto nto con firm.
Switching navigationannouncement s
on/off X
To switch off:press the8 button
during anannoun cement.
You willbriefly seethemessage: The guidan
ceinstru ctions havebeen muted .
X To switch on:press theØ function
butto n.
X Select +inthe navigat ionmenu barusing
the :=; buttonsand press the
9 butto nto con firm.
i COMAND automaticallyswitch esthe
navigat ionannoun cementsback onwhen:
R itreceiv esRDS- TMC trafficreport s
during traffic-dependen troute guidance
and recalculates theroute (Ypage 51).
R you have anew route calculated.
R you switch COMAND backonagain or
start theengine. Reducing
volumeduring anavig ation
anno uncemen t The
volu meofan active audio orvide osou rce
can beautomatica llyredu cedduring a
navig ationannou ncement.
X Sele ctNavi in
the mainmenu barusing the
9=; buttonsand press the9
button tocon firm.
X Select Audio fadeout and
press the9
button tocon firm.
Depen dingonthe previous status,the
func tion isswitch edon O oroff ª.
Sett ingthe volume manually X
Adj ust the volume usingtheqcon trol
kn ob during anavigation announcement.
or
X Select +inthe map view withthemenu
shown andadjust thevolume usingthe
q con trol knob. Nav
igation system displaysinthe
mult ifunction display
Calling upthe navigat ionsystem menu X
Press theV orU button repeatedly
until Navi appears
inthe display.
The view inthe multifunc tiondisplay depends
on whether routeguidance isactive ornot .
Rout eguida nceisinactive: thedirect ionof
travel and,ifkn own, thename ofthe road you
are curren tlytravelin galong areshown inthe
multifunc tiondisplay.
Rout eguida nceisactive: thedisplay inthe
multifunc tiondisplay depends onwhether a
change ofdirect ionisannoun cedornot .
When achange ofdirect ionisannoun ced,you
will see asymbol forthe change ofdirect ion
and adistanc egraphic. Thedistanc e
indicat orshort enstowards thetop ofthe
display asyou approach thepoint ofthe
announ cedchange ofdirect ion. Rout
eguida nce
69Navigation Z
Page 93 of 210

Problems
withthenavigation system Problem Possible
causes/co nsequences andM Solutions
COMAND
isunable to
cont inue route
guida nceafter the
journey hasbeen
interr upted. Route
guidanceiscanceled ifyou interr uptthejourney formore
than twohours.
"Interr upting thejourney" referstostopping thevehicle and
switching offCOMAND. "Continuing routeguidance"refers to
switching COMAND backonand driving on.
X Continue routeguidance(Ypage 68).
COMAND determines thevehicle's position.Depending onthe
driving situation, thismay take some time.
Route guidancemay berestric tedduring thedeterminat ionof
the vehicle's position.
When positioning iscomplete, routeguidanceisresumed with
navigation announcementsandroute guidancedisplay s. Problem Possible
causes/co nsequences andM Solutions
COMAND
isunable to
determine thevehicle's
position. COMAND
hastoredetermine theposition ofthe vehicle ifthe
vehicle hasbeen transport ed(e.g. byferry, bymotorail orafter
towing).
X Start thevehicle andpullaway .
COMAND determines thevehicle's position.Depending onthe
driving situation, thismay take some time.
Route guidancemay berestric tedduring thedeterminat ionof
the vehicle's position.
When positioning iscomplete, routeguidanceisresumed with
navigation announcementsandroute guidancedisplay s. Problems
withthenavigation system
91Navigation Z
Page 131 of 210

Eject
ingallCDs/DVDs X
Pres sth eV load/eject butt on.
The magaz inemen uappear s.
X Sele ctEje ct all .
The DVDc hanger ejectsthe last disc
selected. YouseetheEjecting disc
X Take thedisc outofthe disc slotwhen you
see thePlease removedisc
The DVD changer switches tothe next
loaded magazine trayandeject sthe disc.
X Repea tthe last step until themagazine is
empty.
X To cancel ejecting: presstheV eject/
load button againorpress thek button. Inserting
andejecting anSD memory
card
General informat ion COMAND
supports16-bitfull-size typeIand
II SD mem orycards.
Me rced es-Benzreco mme ndsusing SD
mem orycardswith astor agecap acityof up
to 4GB.
SD mem orycardsfea turethe following logo: This
logo isaregistered trademark ofSanDisk
Corporation.
i COMAND doesnotsupport the"SD-H C
2.0 Standard" SDcard format. NotallSD
memory cardsandstorage mediaare
designed forthe temperatures whichmay
be reached inthe vehicle.
Due tothe wide range ofSD memory cards
availa bleonthe market, playback cannot
be guaranteed forallbrands ofSD memory
card.
Inserting anSD memory card X
Insert theSDmemory cardintotheslot.
The side with thecont acts must face
downwards andpoint towards theslot.
COMAND loadsthememory cardand
shows amessage tothis effect .Ifn oMP3
track scan befound, youwillsee amessage
to this effect .
Ejecting anSD memor ycard X
Press theSDmemory card.
The SDmemory cardiseject ed.
X Remove theSDmemory cardfrom theslot. Activating
audioCD/DVDorMP3
mode
Option 1 X
Insert aCD/D VD(Ypage 126)oran SD
memory card(Ypage 129).
COMAND loadsthemedium insertedand
start sto play it. Audio
CD/DVD andMP3 mode
129Audio Z
Page 143 of 210

:
Fold ersel ectio nsymbo l
; Icon formus icfile
= Curr entfolder
X To select onefolder higher: selectthe
U symbol.
The display changes tothe next folder up.
Changing thefolder/tr ackname X
Select Folder using
the:=;
button sand press the9button toconf irm.
X Select afolder/t rackusing the:9
button sand press the9button toconf irm.
X Select Options and
press the9button to
conf irm.
X Select Change and
press the9button to
conf irm.
X En ter aname forthe folder/t rack.
X To save thechanges: select¬and
press the9button toconf irm.
Dele ting folders/tr acks X
Select Folder using
the:=;
button sand press the9button toconf irm.
X Select afolder/t rackusing the:9
button sand press the9button toconf irm.
X Select Options and
press the9button to
conf irm.
X Select Delete and
press 9toconf irm.
Aq uery appear s.No is
high light ed.
If you selectYes ,
th efol der s/track sare
delet ed.You seethePle ase Wait... mes
sage .Then, youseetheDeletion Procedure
Successful message.
If you select No ,
the process willbeaborted. Playback
options
The following optionsareavaila bletoyou:
R Normal TrackSequence The
track sare play edinthe normal order
(e.g. track 1,2,3, etc. ).
R Random Tracks All
the track son the medium areplay edin
random order.
R Random Folder (only
inMP3 mode)
The track sin the current lyactive folderare
play edinrandom order.
X To selec toptio ns:switch onthe MUSIC
REG ISTER (Ypage 138).
X Sel ect Musi cRegi ster .
The options list appea rs.The #dot
ind icates the optionselected .
X Sel ect anopti on.
The optionisswi tched on.For allopti ons
excep tNorm alTrac kSequ ence ,
yo uwi ll
see acorre spondingdispl ayinthe displ ay/
sel ectio nwindow.
i The Norm alTrac kSequ ence opt
ion is
autom atically selec tedwhen youchan ge
the disc youarecurr entlylist enin gto or
when youselec tadifferent medium.Ifan
option isselect ed,itremains selectedafter
COMAND isswitc hedonoroff. Media
Interfacemode Connection
options
Overview The
connection jacksare located:
R in the centercon sole stowage
compart ment(SL)
R in the glove box Media
Interfacemod e
141Audio Z
Page 144 of 210
To
conn ectexter naldevices tothe Media
Int erface, yourequire device-spec ificadapter
cables whichareincluded inthe Media
Int erface scopeofdelivery.
i Stow the individual partsinasecure
location.
Use only genuine Mercedes- Benz
conn ectin gcables.
You canconn ectthe following datacarriers
to COMAND viathe Media Interface:
R iPod ®
R USB devices (USBsticks,USB hard drives)
i iPod ®
is aregistered trademark ofApple
Inc .,Cupertino, California,USA.
Supp orted iPod®
varia nts The
following areexamples ofsupported
iPod ®
variants:
R iPod ®
mini
R iPod ®
nano
R iPod ®
classic
R iPod ®
touch
Supp orted USBdevices The
following USBdevices aresupported:
R USB sticks(flash memory)
R USB hard drives requiring astart up/
permanen tcurren tof max. 800mA(itmay
be necess arytoconn ectaseparate power
supply)
R cert ainMP3 players
i The Media Interface supports USB
storage mediaof"USB Device Subclass 6".
Infor mation concernin gUSB Device
Subclass 6isavail able from theequip ment
manufacturer.
For further detailsandalist ofsupported
devices, pleasecontactanauthorized
Mercedes-Benz Centerorvisit http://
www .mercedes-be nz.com/conne ctand proceed
asdescribed under"Media
Interf ace". Conne
ctinganexternal device
i Donot leave extern aldevices inthe
vehicle, asatextreme temperatures (e.g.in
direct sunlight orextremely lowoutside
temperatures) theycannot beguara nteed
to function correctly(see theoperating
instruct ionsforthe respective device).
Mercedes-Benz doesnottake
responsibili tyfor any damage toextern al
devices.
Never connectmore thanonedevice ata
time. Youwillotherwise notbeable toplay
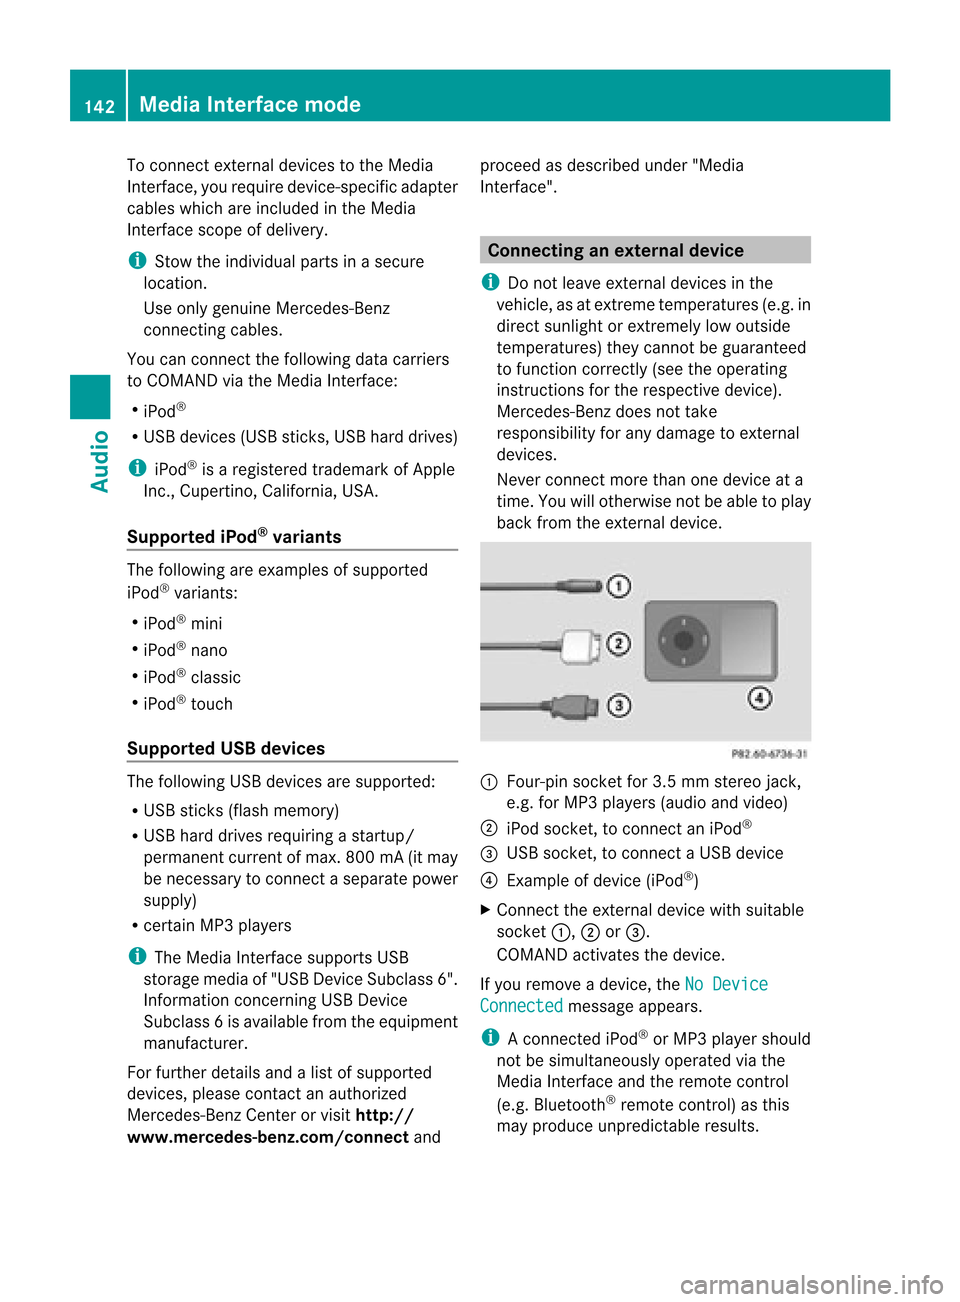
back fromtheextern aldevice. :
Four-pin socketfor3.5 mm stereo jack,
e.g. forMP3 players(audio and video)
; iPod socket ,to conn ectaniPod ®
= USB socket ,to conn ectaUSBdevice
? Examp leof device (iPod ®
)
X Co nnect theexter naldevice with suita ble
socke t:, ;or=.
CO MAND activate sthe device .
If yo uremo veade vice ,the No Device Connected message
appears.
i Aconn ected iPod®
or MP3 playershould
not besimultaneously operatedviathe
Media Interface andtheremote control
(e.g. Bluetooth ®
remote control)asthis
may produce unpredictable results.142
Media
Interface modeAudio
Page 158 of 210
X
Sel ect Menulan guage or
Aud io lan
guage and
pressthe 9button to
confi rm.
In both cases, amenu appe ars afte rafew
seconds. The#dot infront ofan entry
indi cates thecurrently selected langua ge.
X Select asetting using the 9:
buttons andpress the9button toconfirm.
X To exitthe menu: pressthe=
or ; button. Subtitle
sand camera angle
These functions arenot available onallDVDs.
The numbe rofsubt itle lang uages andcam era
ang lesavailab ledepe ndson theco nten to f
the DVD. Itis po ssi ble tha tthe settin gsmay
also beaccessed inthe DVD menu
(Y page 154).
X Show themenu (Ypage 152).
X Select DVD-Video in
the menu using
the :=; buttonsandpress the
9 button toconfirm .
X Select DVDFunctions and
press the9
button toconfirm .
X Select Subtitles or
Camera Angle and
press the9button toconfirm .
In both cases, amenu appears.The #dot
in front ofan entr yindicates thecurrent
settin g.
X Select asettin gusing the9:
buttons andpress the9button toconfirm .
X To exit themenu: pressthe=
or ; button. Interactive
content
DVD scan cont aininteract ivecont ent(e.g. a
video game). Inavideo game, forexample,
you may beable toinfluence eventsby
selecting andtriggering actions.Thetype and
number ofactions depend onthe DVD . X
Select anaction usingthe
9:=; buttonsandpress
the 9button toexecute it.
A menu appearsand thefirst entry,
Select ,
is highlighted.
X Press the9button.
or
X Show thecont rolmenu whileinvideo DVD
mode, ifnecessary.
X Select Menu using
the=;
9: buttonsandpress the9button
to confirm .
X Select DVD-V in
the menu usingthe
=;9: buttonsandpress
the 9button toconfirm .
X Select DVDFunctions and
press the9
button toconfirm .
X Select orexecute anaction usingthearrow
keys. Video
AUXmode Conne
ctingexternal videosources
If your vehicle isequipp edwith aMedia
Int erface, youcan conn ectanextern alvideo
source.
You require anadditional audio/video cable
set toconn ectanextern alvideo source to
Media Interface.
For details, pleaseconsult anauthorized
Mercedes-Ben zCenter orvisit http://
www .mer<00030005000400050013002500020005000E001D00210003000F000D00220003
000FB nnect.and
proceed asdescribed under"Media
Int erface".
The conn ection jacksarelocated:
R in the cent erconsole stowage
compartmen t(SL)
R in the glove box 156
Video
AUXmodeVideo
Page 176 of 210
X
Sel ect Source from
theAUX menu and
pre ssthe 9button toconfi rm.
X Sel ect DiscDri veAux and
pressthe 9
bu tton toconfi rm.
Yo uwi llhea rand see theconte ntofthe
exte rnalvid eo sou rce ifit is conne ctedto
the CD/DV Ddri ve and switch edto
pl ay ba ck. Ifno video ima geisavailabl e
from theAUX source conne cted,yo uwi ll
see anaudio menu .
Di spl aying AUX X
Sel ect the scre entowh ich anexte rnal
vid eo sou rce isconne ctedandwhich you
wo uld like toopera tewith the rem ote
contro l(Y pa ge 31) .
X Sel ect Aux in
the menu using the
9=; buttons onthe rem ote
contro land pressthe 9button toconfi rm.
X Sel ect Source from
theAUX menu and
pre ssthe 9button toconfi rm.
X Sel ect DisplayAux and
pressthe 9
bu tton toconfi rm.
Yo uwi llsee and hearthe cont entofthe
video source ifit is switched toplay back. If
no video image isavaila blefrom theAUX
source connected, youwillsee anaudi o
menu.
Selec tingtheactive COMAND source X
Select Aux in
the menu usingthe
9=; buttonsonthe remote
cont roland press the9button toconfirm .
X Select COMAND from
theAUX menu and
press the9button toconfirm .
X Select COMAND Audio or
COMAND Video and
press the9button toconfirm .
COMAND audio:theaudi omode selected
for COMAND isalso selected forthe Rear
Seat Entertainment System.
COMAND video:COMAND transmitsthe
video image tothe Rear SeatEntertainment
System. Operat
ionwith anactive COMAND
source
You cantransf eran audi oorvideo mode
selec tedinCOMA NDtothe Rear Seat
En ter tain men tSyst em.
i Ifyou thenswitc hmode sin COMA ND,th e
new sourc ewill notbetransm itted tothe
Rear SeatEnter tain men tSyst em.
X To switch onthefun ction inCOMAN D:
swit chtothedesir edaudio mode in
COMA NDorshow themen uwhen invideo
mode.
X Select themenu itematthe bottom left,
e.g. CD ,
using the:=; buttons
on the remote controlwhile CDmode is
switched on.
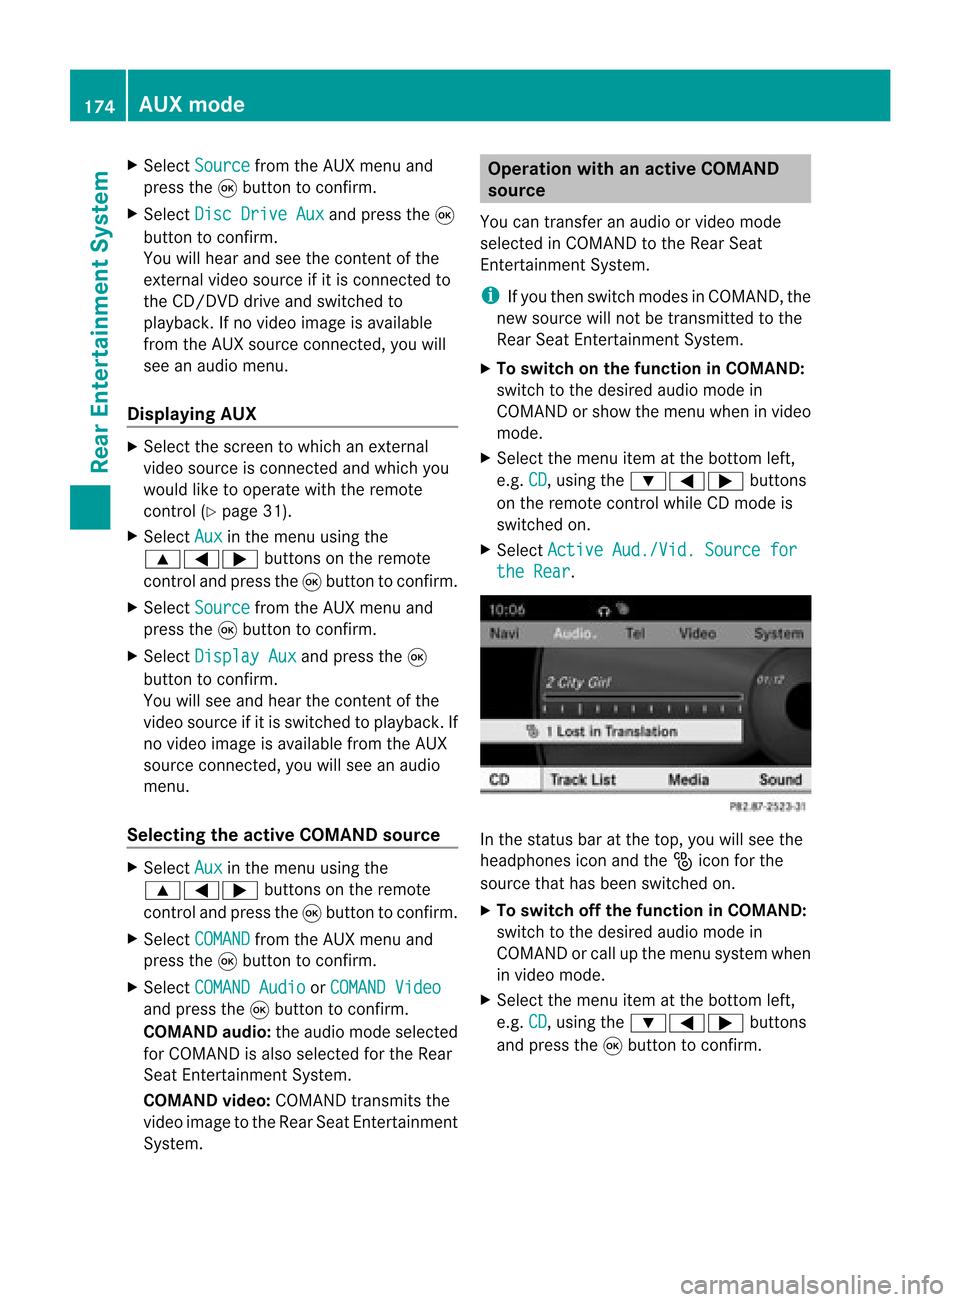
X Select Active Aud./Vid. Sourcefor the
Rear .
In
the status baratthe top, youwillsee the
headphones iconandthe_icon forthe
source thathasbeen switched on.
X To switch offthe function inCOMAND:
switch tothe desired audiomode in
COMAND orcall upthe menu system when
in video mode.
X Select themenu itematthe bottom left,
e.g. CD ,
using the:=; buttons
and press the9button toconfirm . 174
AUX
modeRear Enterta inment System
Page 182 of 210
Star
ting theDialog X
Switch onthe ignition (seethevehicle
Owner's Manual).
X Vehicles withVoice Control buttonson
the Multi-fu nctionSteering Wheel:Press
the ? button.
or
X Vehicles withLever forVoice Control:
Pull thelever toward you
An acoustic signalconfirms thatthedialog
has been started.
X Give acommand.
Interru ptingtheDialog If
alist appears onthe display ,you can use
the “Pause” command tointerr uptthedialog.
You canthen select anentr yusing the
COMAND controlpanel.
To resume thedialog withvoice control,press
the ? button onthe multifunct ionsteering
wheel.
Cancel ingthe Dialog X
Vehicles withVoice Control buttonson
the Multi-fu nctionSteering Wheel:Press
the A button.
or
X Vehicles withLever forVoice Control:
Push thelever away fromyou.
An acoustic signalconfirms thatthedialog
has been canceled.
or
X Say thecommand “Cancel”(exceptwhen
creating andstoring voicetags,navigation
entr iesorduring individual ization).
or
X Press anybutton onCOMAND.
Adjust ingthe Volume X
Start thedialog.
X Give acommand, e.g.“Help”. X
Press theW orX button.
The volume increases ordecreases during
voice output.
or
X Set thevolume forthe voice output onthe
volume controlfor COMAND.
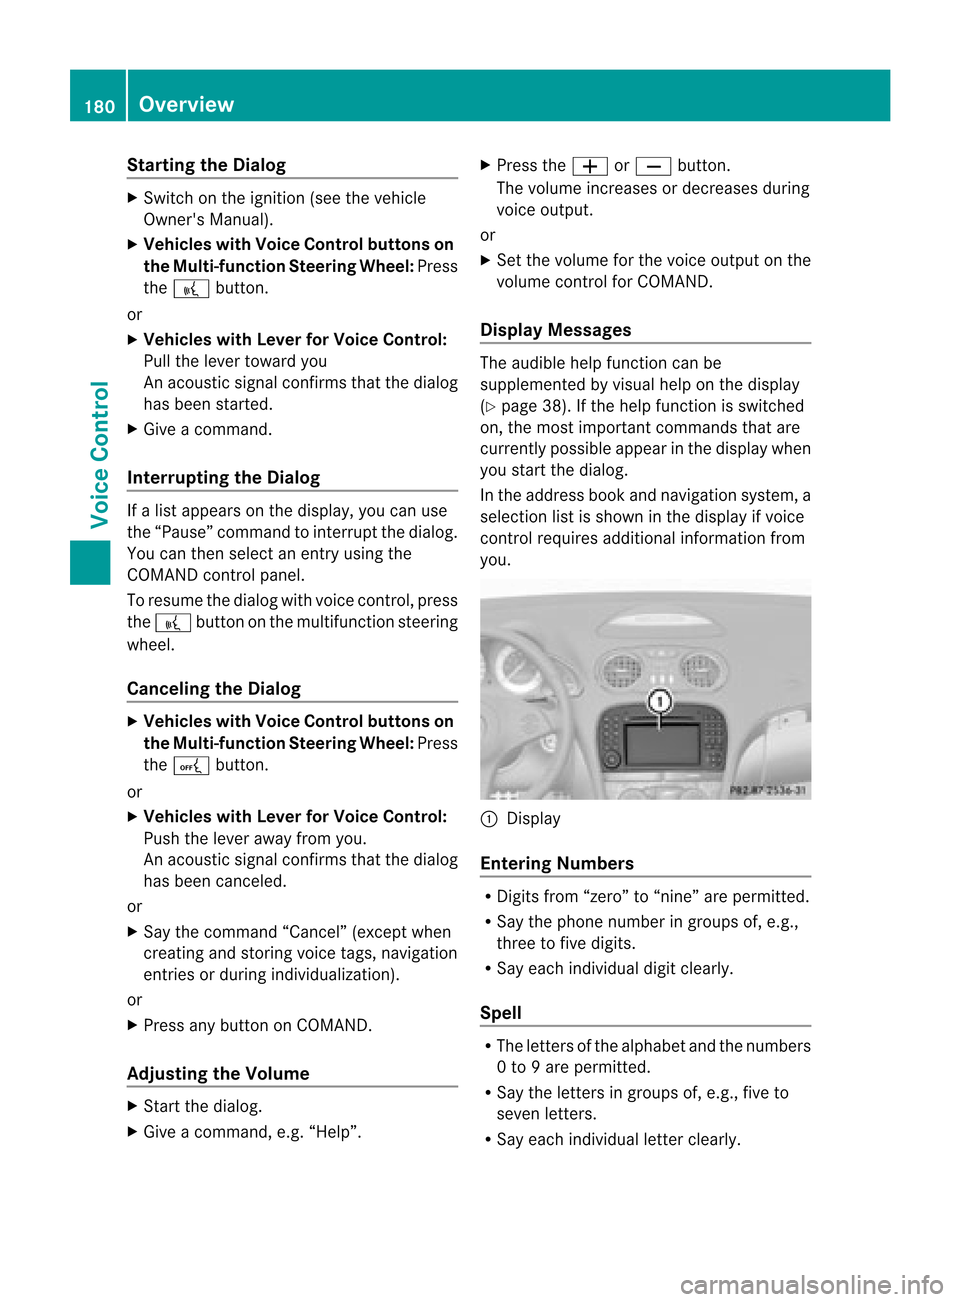
Display Messages The
audi blehelp funct ioncan be
supplemented byvisual helponthe display
(Y page 38).Ifthe help funct ionisswitched
on, the most important commands thatare
current lypossible appearint he displa ywhen
you start thedialog .
In the address bookandnavigation system,a
selection listisshown inthe displa yif voice
cont rolrequires additional information from
you. 1
Display
Entering Numbers R
Digits from“zero” to“nine” arepermitted.
R Say thephone number ingroups of,e.g.,
three tofive digits.
R Say each individua ldigit clearly.
Spell R
The letters ofthe alpha betand thenumbers
0 to 9are permitted.
R Say theletters ingroups of,e.g., fiveto
seven letters.
R Say each individua lletter clearly. 180
OverviewVoice
Control