low oil pressure MERCEDES-BENZ R-CLASS FAMILY TOURER 2012 Owners Manual
[x] Cancel search | Manufacturer: MERCEDES-BENZ, Model Year: 2012, Model line: R-CLASS FAMILY TOURER, Model: MERCEDES-BENZ R-CLASS FAMILY TOURER 2012Pages: 368, PDF Size: 29.05 MB
Page 158 of 368
Problems with the transmissionProblemPossible causes/consequences and M SolutionsThe transmission has
problems shifting gear.The transmission is losing oil.XHave the transmission checked at a qualified specialist
workshop, e.g. an authorized Mercedes-Benz Center,
immediately.The acceleration ability
is deteriorating.
The transmission no
longer changes gear.The transmission is in emergency mode.
It is only possible to shift into second gear and reverse gear.XStop the vehicle.XShift the transmission to position P.XSwitch off the engine.XWait at least 10 seconds before restarting the engine.XShift the transmission to position D or R.
If D is selected, the transmission shifts into second gear; if R is
selected, the transmission shifts into reverse gear.XHave the transmission checked at a qualified specialist
workshop, e.g. an authorized Mercedes-Benz Center,
immediately.Transfer case
The vehicle has permanent 4-wheel drive
(4MATIC). Power is always transmitted to
both axles.
! Performance tests may only be carried
out on a 2-axle dynamometer. The brake
system or transfer case could otherwise be
damaged. Contact a qualified specialist
workshop for a performance test.
Mercedes-Benz recommends that you use
an authorized Mercedes-Benz Center for
this purpose.
! If the parking brake is being tested on a
brake dynamometer, the ignition must be
switched off (SmartKey or Start/Stop
button in position 0 or 1), as ESP ®
will
otherwise automatically intervene. The test
must last a maximum of 10 seconds. The
brake system could otherwise be damaged.Refueling
Important safety notes
GWARNING
Gasoline and diesel fuels are highly flammable
and poisonous. They burn violently and can
cause serious injury.
Never allow sparks, flames or smoking
materials near gasoline or diesel fuel!
Turn off the engine before refueling.
Whenever you are around gasoline or diesel
fuel, avoid inhaling fumes and any skin or
clothing contact. Extinguish all smoking
materials.
Direct skin contact with fuels and the
inhalation of fuel vapors are damaging your
health.
GWARNING
Overfilling of the fuel tank may create
pressure in the system which could cause a
gas discharge. This could cause the gasoline
156RefuelingDriving and parking
Page 287 of 368
damage to the engine or the catalytic
converter. Have excess oil siphoned off.
For further information on engine oil, see
( Y page 358).XReplace cap : on the filler neck and
tighten clockwise.
Ensure that the cap locks into place
securely.
Checking and adding other service
products
Checking the coolant level
Only check the coolant level when the vehicle
is on a level surface and the engine has cooled
down.
XTurn the SmartKey to position
2 (Y page 145) in the ignition lock.
On vehicles with KEYLESS-GO, press the
Start/Stop button twice ( Y page 145).XCheck the coolant temperature gauge in
the multifunction display.
The coolant temperature must be below
158 ‡ (70 †).GWARNING
In order to avoid any potentially serious burns:
R use extreme caution when opening the
hood if there are any signs of steam or
coolant leaking from the cooling system, or
if the coolant temperature display indicates
that the coolant is overheated.
R do not remove the pressure cap on the
coolant reservoir if the coolant temperature
is above 158 ‡ (70 †). Allow the engine to
cool down before removing the cap. The
coolant reservoir contains hot fluid and is
under pressure.
R using a rag, slowly turn the cap
approximately 1
/ 2 turn to relieve excess
pressure. If opened immediately, scalding
hot fluid and steam will be blown out under
pressure.
R do not spill antifreeze on hot engine parts.
Antifreeze contains ethylene glycol which
may burn if it comes into contact with hot
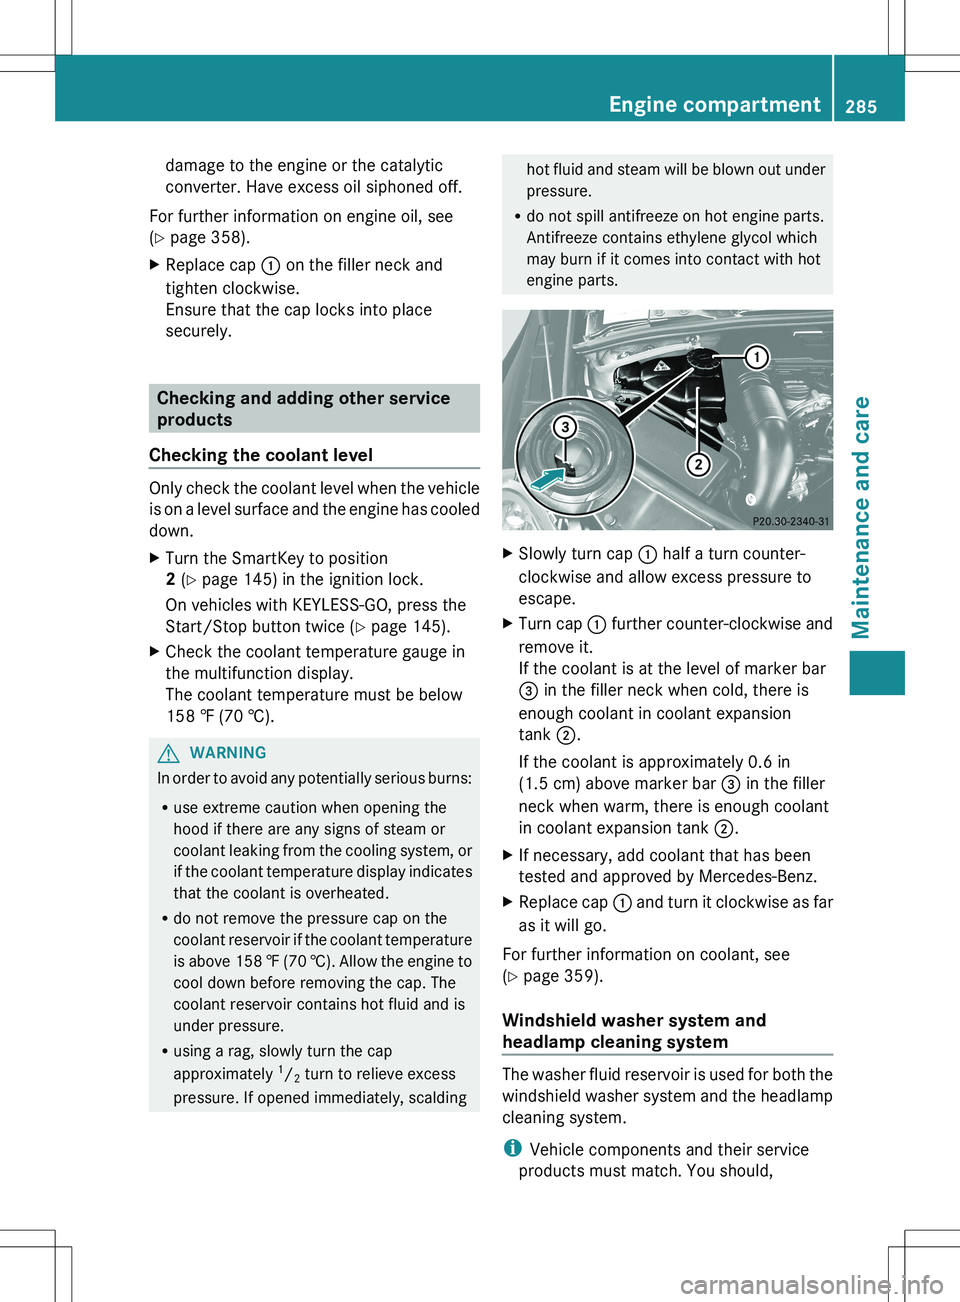
engine parts.XSlowly turn cap : half a turn counter-
clockwise and allow excess pressure to
escape.XTurn cap : further counter-clockwise and
remove it.
If the coolant is at the level of marker bar
= in the filler neck when cold, there is
enough coolant in coolant expansion
tank ;.
If the coolant is approximately 0.6 in
(1.5 cm) above marker bar = in the filler
neck when warm, there is enough coolant
in coolant expansion tank ;.XIf necessary, add coolant that has been
tested and approved by Mercedes-Benz.XReplace cap : and turn it clockwise as far
as it will go.
For further information on coolant, see
( Y page 359).
Windshield washer system and
headlamp cleaning system
The washer fluid reservoir is used for both the
windshield washer system and the headlamp
cleaning system.
i Vehicle components and their service
products must match. You should,
Engine compartment285Maintenance and careZ
Page 294 of 368
! When cleaning the sensors with a power
washer, maintain a distance between the
vehicle and the nozzle of the power washer
of at least 11.8 in (30 cm). Information
about the correct distance is available from
the equipment manufacturer.
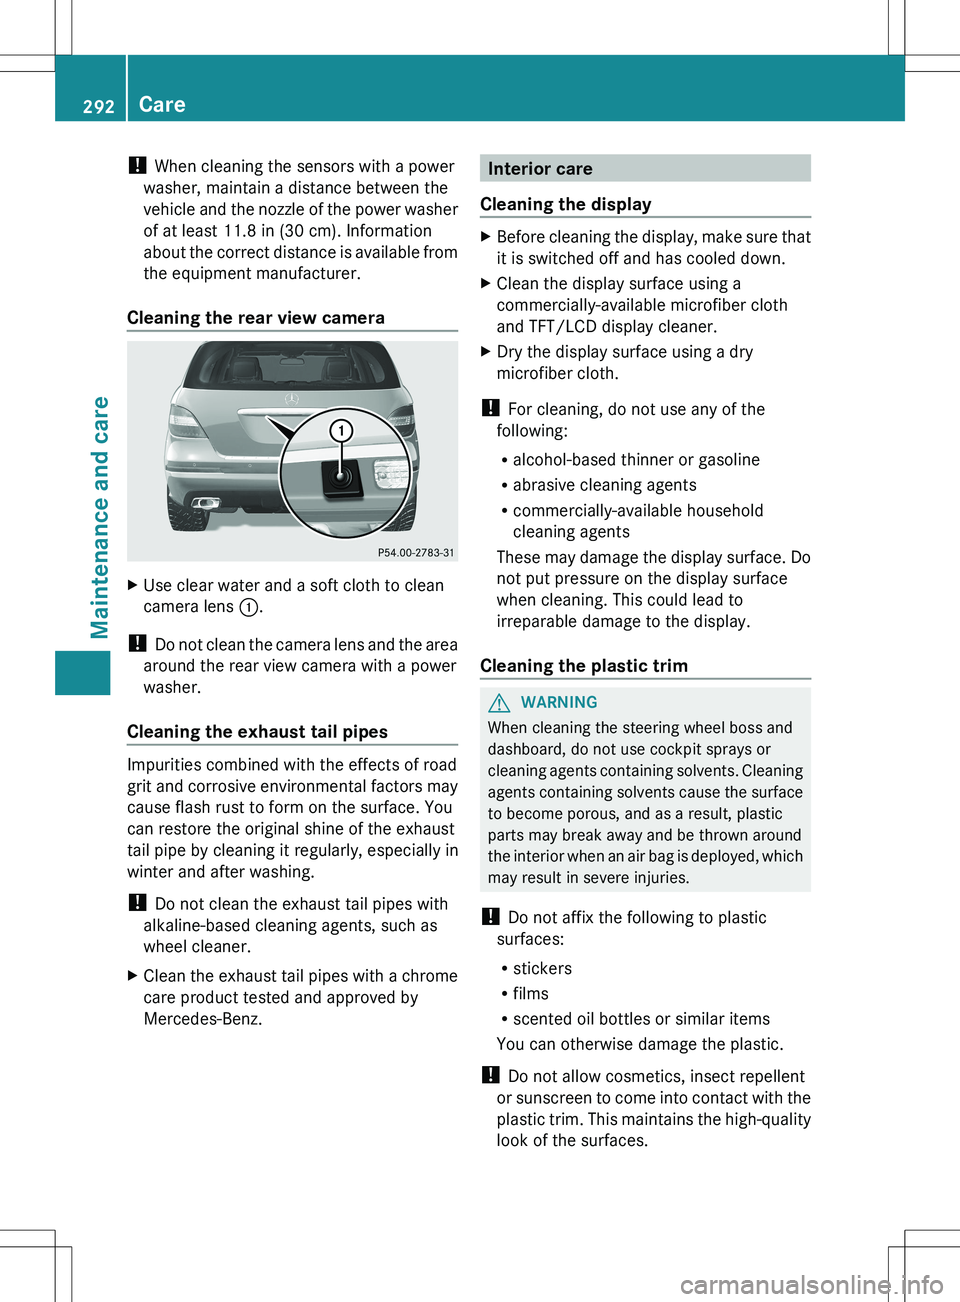
Cleaning the rear view cameraXUse clear water and a soft cloth to clean
camera lens :.
!
Do not clean the camera lens and the area
around the rear view camera with a power
washer.
Cleaning the exhaust tail pipes
Impurities combined with the effects of road
grit and corrosive environmental factors may
cause flash rust to form on the surface. You
can restore the original shine of the exhaust
tail pipe by cleaning it regularly, especially in
winter and after washing.
! Do not clean the exhaust tail pipes with
alkaline-based cleaning agents, such as
wheel cleaner.
XClean the exhaust tail pipes with a chrome
care product tested and approved by
Mercedes-Benz.Interior care
Cleaning the displayXBefore cleaning the display, make sure that
it is switched off and has cooled down.XClean the display surface using a
commercially-available microfiber cloth
and TFT/LCD display cleaner.XDry the display surface using a dry
microfiber cloth.
! For cleaning, do not use any of the
following:
R alcohol-based thinner or gasoline
R abrasive cleaning agents
R commercially-available household
cleaning agents
These may damage the display surface. Do
not put pressure on the display surface
when cleaning. This could lead to
irreparable damage to the display.
Cleaning the plastic trim
GWARNING
When cleaning the steering wheel boss and
dashboard, do not use cockpit sprays or
cleaning agents containing solvents. Cleaning
agents containing solvents cause the surface
to become porous, and as a result, plastic
parts may break away and be thrown around
the interior when an air bag is deployed, which
may result in severe injuries.
! Do not affix the following to plastic
surfaces:
R stickers
R films
R scented oil bottles or similar items
You can otherwise damage the plastic.
! Do not allow cosmetics, insect repellent
or sunscreen to come into contact with the
plastic trim. This maintains the high-quality
look of the surfaces.
292CareMaintenance and care
Page 309 of 368
Mounting a new wheelGWARNING
Always replace wheel bolts that are damaged
or rusted.
Never apply oil or grease to wheel bolts.
Damaged wheel hub threads should be
repaired immediately. Do not continue to
drive under these circumstances! Contact an
authorized Mercedes-Benz Center or call
Roadside Assistance.
Incorrect wheel bolts or improperly tightened
wheel bolts can cause the wheel to come off.
This could cause an accident. Make sure to
use the correct wheel bolts.
GWARNING
Only use genuine Mercedes-Benz wheel bolts.
Other wheel bolts may come loose.
Do not tighten the wheel bolts when the
vehicle is raised. Otherwise, the vehicle could
fall off the jack.
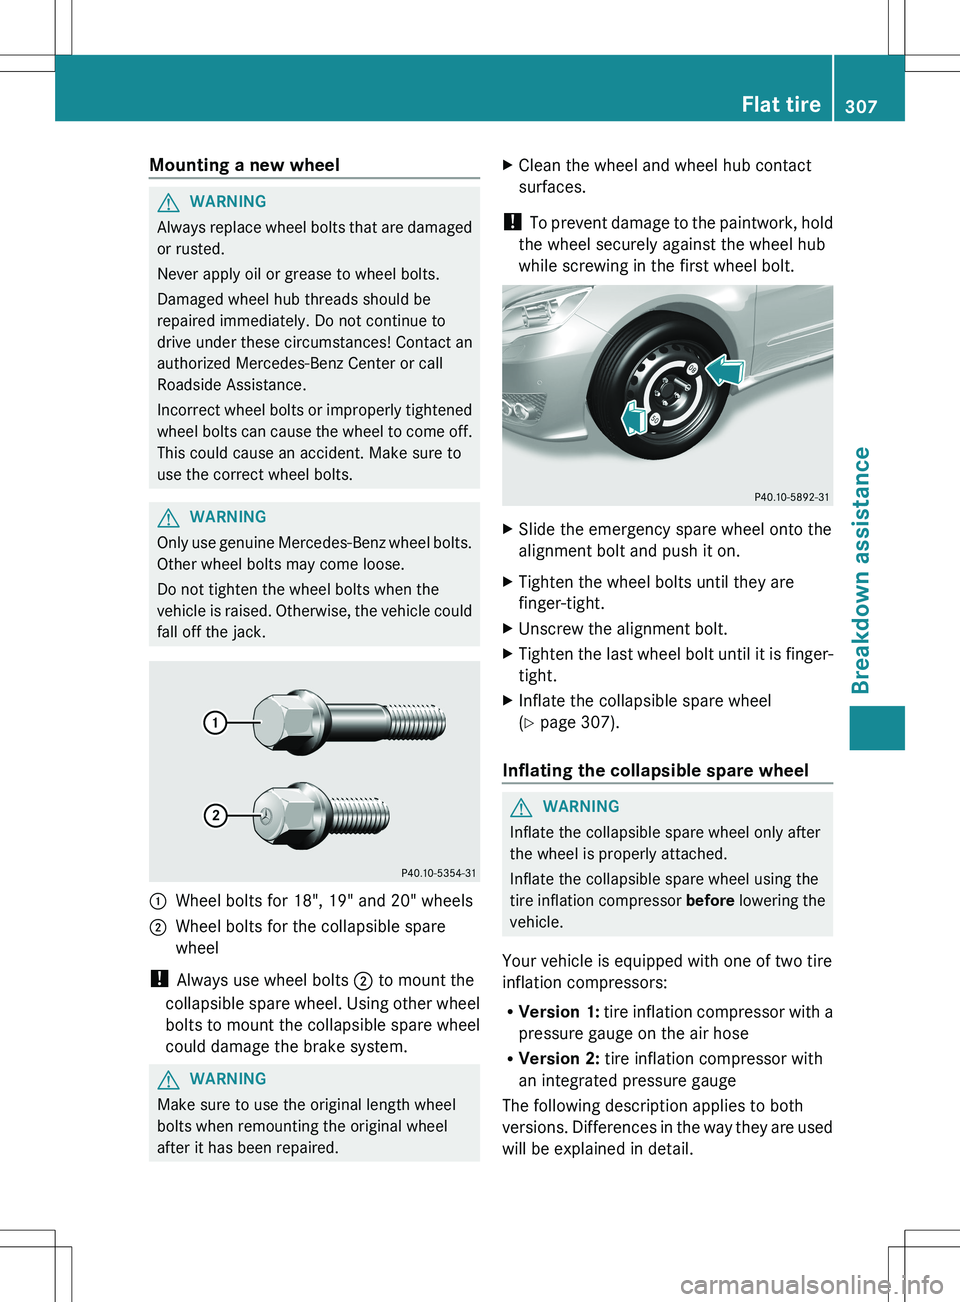
:Wheel bolts for 18", 19" and 20" wheels2Wheel bolts for the collapsible spare
wheel
! Always use wheel bolts ; to mount the
collapsible spare wheel. Using other wheel
bolts to mount the collapsible spare wheel
could damage the brake system.
GWARNING
Make sure to use the original length wheel
bolts when remounting the original wheel
after it has been repaired.
XClean the wheel and wheel hub contact
surfaces.
! To prevent damage to the paintwork, hold
the wheel securely against the wheel hub
while screwing in the first wheel bolt.
XSlide the emergency spare wheel onto the
alignment bolt and push it on.XTighten the wheel bolts until they are
finger-tight.XUnscrew the alignment bolt.XTighten the last wheel bolt until it is finger-
tight.XInflate the collapsible spare wheel
( Y page 307).
Inflating the collapsible spare wheel
GWARNING
Inflate the collapsible spare wheel only after
the wheel is properly attached.
Inflate the collapsible spare wheel using the
tire inflation compressor before lowering the
vehicle.
Your vehicle is equipped with one of two tire
inflation compressors:
R Version 1: tire inflation compressor with a
pressure gauge on the air hose
R Version 2: tire inflation compressor with
an integrated pressure gauge
The following description applies to both
versions. Differences in the way they are used
will be explained in detail.
Flat tire307Breakdown assistanceZ
Page 349 of 368
Storing wheels
Store wheels that are not being used in a cool,
dry and preferably dark place. Protect the
tires from oil, grease, gasoline and diesel.
Cleaning the wheels
GWARNING
Do not use power washers with circular-jet
nozzles (dirt grinders) to clean your vehicle, in
particular the tires. You could otherwise
damage the tires and cause an accident.
Wheel and tire combinations
Please bear the following in mind
! For safety reasons, Mercedes-Benz
recommends that you only use Tires and
wheels which have been approved by
Mercedes-Benz specifically for your
vehicle.
These tires have been specially adapted for
use with the control systems, such as ABS
or ESP ®
, and are marked as follows:
R MO = Mercedes-Benz Original
R MOE = Mercedes-Benz Original Extended
(tires featuring run-flat characteristics)
R MO1 = Mercedes-Benz Original (only
certain AMG tires)
Mercedes-Benz Original Extended tires
may only be used on wheels that have been
specifically approved by Mercedes-Benz.
Only use tires, wheels or accessories
tested and approved by Mercedes-Benz.
Certain characteristics, e.g. handling,
vehicle noise emissions or fuel
consumption, may otherwise be adversely
affected. In addition, when driving with a
load, tire dimension variations could cause
the tires to come into contact with the
bodywork and axle components. This could
result in damage to the tires or the vehicle.
Mercedes-Benz accepts no liability for
damage resulting from the use of tires,
wheels or accessories other than those
tested and approved.
Further information about tires, wheels and
approved combinations can be obtained
from any authorized Mercedes-Benz
Center.
i The Tire and Load Information placard
with the recommended tire pressures is
attached to the B-pillar on the driver's side.
Further information about driving at high
speeds or driving with vehicle loads that are
lighter than the maximum vehicle load can
be found in the tire pressure table on the
inside of the fuel filler flap. Check tire
pressures regularly, and only when the tires
are cold. Comply with the maintenance
recommendations of the tire manufacturer
in the vehicle document wallet.
For further information on the recommended
tire inflation pressure and on tire pressures
for specific driving conditions, see
( Y page 325).
i Notes on the vehicle equipment – always
equip the vehicle:
R with tires of the same size on a given axle
(left/right)
R with the same type of tires at a given time
(summer tires, winter tires, MOExtended
tires)
i Vehicles equipped with MOExtended tires
are not equipped with a TIREFIT kit at the
factory. It is therefore recommended that
you additionally equip your vehicle with a
TIREFIT kit if you mount tires that do not
feature run-flat properties, e.g. winter tires.
A TIREFIT kit can be obtained from an
authorized Mercedes-Benz Center.
i On the following pages, you can find
information on approved wheel rims and
tire sizes for equipping your vehicle with
winter tires. Winter tires are not available
from the factory as standard equipment or
optional extras.Wheel and tire combinations347Wheels and tiresZ
Page 358 of 368
Fuel
Important safety notesGWARNING
Gasoline and diesel fuels are highly flammable
and poisonous. They burn violently and can
cause serious injury.
Never allow sparks, flames or smoking
materials near gasoline or diesel fuel!
Turn off the engine before refueling.
Whenever you are around gasoline or diesel
fuel, avoid inhaling fumes and any skin or
clothing contact. Extinguish all smoking
materials.
Direct skin contact with fuels and the
inhalation of fuel vapors are damaging your
health.
Premium-grade unleaded gasoline
! To ensure the longevity and full
performance of the engine, only premium-
grade unleaded gasoline must be used.
If no premium-grade unleaded gasoline is
available and regular unleaded gasoline
must be used, observe the following
precautions:
R only fill the fuel tank to half full with
regular unleaded gasoline and fill the rest
with premium-grade unleaded gasoline
as soon as possible.
R do not drive at the maximum speed.
R avoid sudden acceleration.
R when the vehicle is carrying a light load,
e.g. two passengers without luggage, do
not allow the engine to rev above
3000 rpm.
R when the vehicle is fully loaded or in
mountainous terrain, do not depress the
accelerator pedal further than ⅔ of the
pedal travel.
Fuel requirements
Gasoline engines
Use only premium-grade unleaded gasoline.
The octane number should be at least 91.
Details can be found on the gas pump. The
octane number is the average value of the
Research Octane Number (RON) and the
Motor Octane Number (MON): (RON +
MON) / 2, also known as knock resistance.
Reformulated Gasoline (RFG) and/or
unleaded gasoline with additives can be used
if the concentration of the additives in the fuel
does not exceed 10%, e.g.:
R Ethanol
R TAME
R ETBE
R IPA
R TBA
For MTBE, the concentration should not
exceed 15%.
The concentration of methanol in gasoline
including other additives must not exceed 3%.
Using mixtures of methanol and ethanol is not
permitted. Gasohol, a mixture of 10% ethanol
and 90% unleaded gasoline, can be used.
All of these mix fuels must fulfill the fuel
requirements, e.g.:
R knock resistance
R boiling point
R vapor pressure
Diesel engines – Important safety notes
! Only use commercially available ULTRA-
LOW SULFUR DIESEL FUEL (ULSD, 15 ppm
MAXIMUM SULFUR) that meets the
ASTM D975 standard. Failure to use
ULTRA-LOW SULFUR DIESEL FUEL (ULSD)
can severely damage the vehicle's exhaust
gas aftertreatment system.
! Do not fill the tank with gasoline. Do not
blend diesel fuel with gasoline or kerosene.
Otherwise, the fuel system and the engine
could be damaged.
356Service products and capacitiesTechnical data