oil level MERCEDES-BENZ R-CLASS FAMILY TOURER 2013 Owners Manual
[x] Cancel search | Manufacturer: MERCEDES-BENZ, Model Year: 2013, Model line: R-CLASS FAMILY TOURER, Model: MERCEDES-BENZ R-CLASS FAMILY TOURER 2013Pages: 364, PDF Size: 28.68 MB
Page 7 of 364
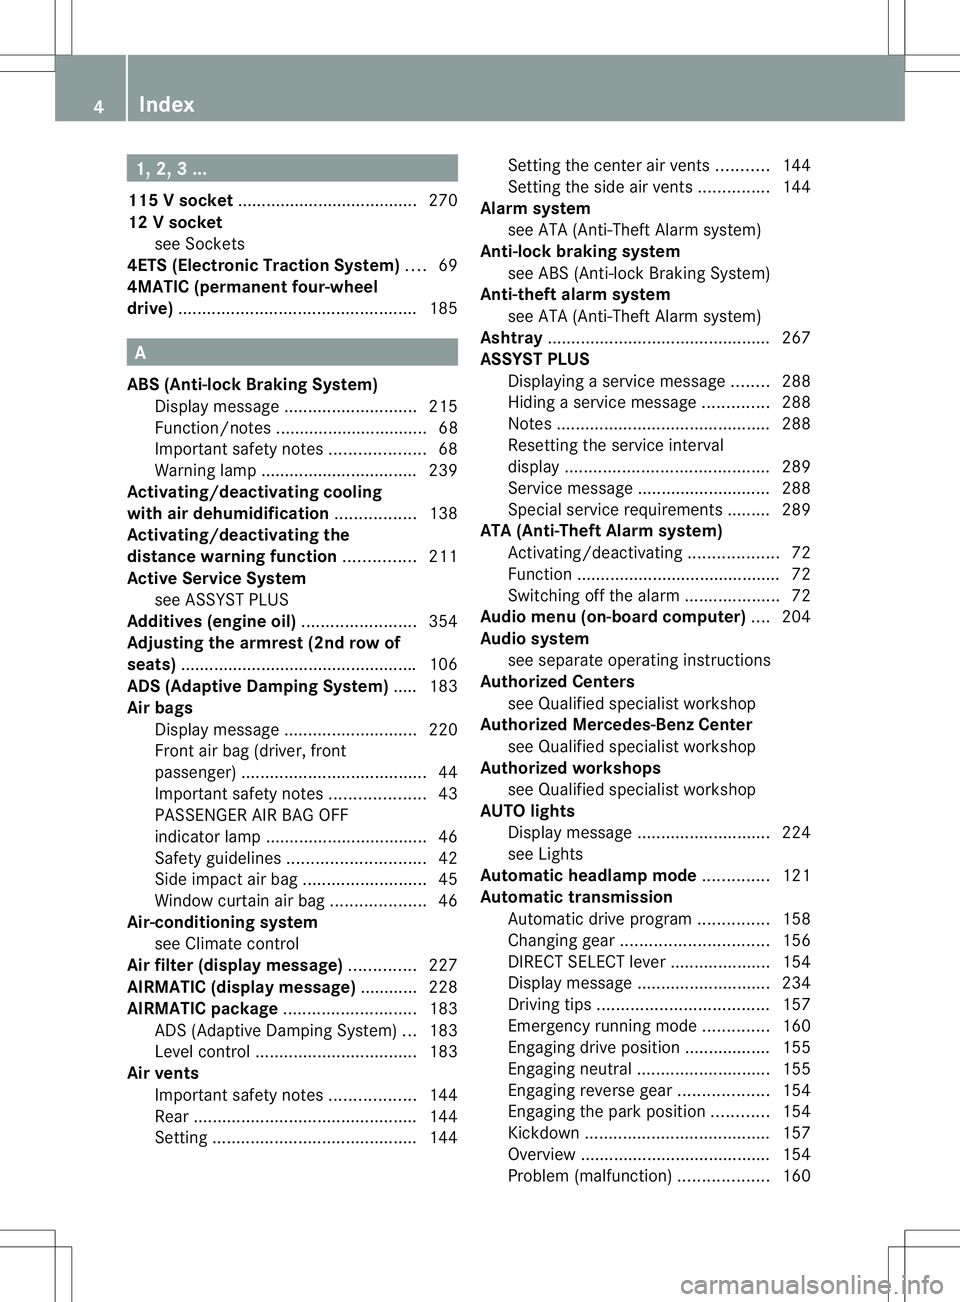
1, 2, 3 ...
115 Vsocket ...................................... 270
12 Vsocket
see Sockets
4ETS (Electronic Traction System) ....69
4MATIC (permanent four-wheel
drive) .................................................. 185A
ABS (Anti-lock Braking System) Display message ............................ 215
Function/notes ................................ 68
Important safety notes ....................68
Warning lamp ................................. 239
Activating/deactivating cooling
with air dehumidification .................138
Activating/deactivating the
distance warning function ...............211
Active Service System see ASSYST PLUS
Additives (engine oil) ........................354
Adjusting the armrest (2nd row of
seats) ................................................. .106
ADS (Adaptive Damping System) ..... 183
Airb ags
Display message ............................ 220
Front air bag (driver, front
passenger )....................................... 44
Important safety notes ....................43
PASSENGER AIR BAG OFF
indicator lamp .................................. 46
Safety guidelines ............................. 42
Side impact airb ag.......................... 45
Windo wcurtain air bag .................... 46
Air-conditioning system
see Climate control
Airf ilter (display message) ..............227
AIRMATIC (display message) ............ 228
AIRMATIC package ............................183
ADS (Adaptive Damping System) ...183
Level control .................................. 183
Airv ents
Important safet ynotes .................. 144
Rea r............................................... 144
Setting ........................................... 144Setting the center air vents
...........144
Setting the side air vents ...............144
Alarm system
see ATA (Anti-Theft Alarm system)
Anti-loc kbraking system
see ABS (Anti-lock Braking System)
Anti-theft alarm system
see ATA (Anti-Theft Alarm system)
Ashtray ............................................... 267
ASSYST PLUS Displaying a service message ........288
Hiding a service message ..............288
Notes ............................................. 288
Resetting the service interval
display. .......................................... 289
Service message ............................ 288
Special service requirements ......... 289
ATA (Anti-Theft Alarm system)
Activating/deactivating ...................72
Function .......................................... .72
Switching off the alarm ....................72
Audio menu (on-board computer) ....204
Audio system see separate operating instructions
Authorized Centers
see Qualified specialist workshop
Authorized Mercedes-Benz Center
see Qualified specialist workshop
Authorized workshops
see Qualified specialist workshop
AUTO lights
Display message ............................ 224
see Lights
Automatic headlamp mode ..............121
Automatic transmission Automatic drive program ...............158
Changing gear. .............................. 156
DIRECT SELECT leve r..................... 154
Display message ............................ 234
Driving tips .................................... 157
Emergency running mode ..............160
Engaging drive position .................. 155
Engaging neutra l............................ 155
Engaging revers egear ................... 154
Engaging the par kposition ............ 154
Kickdow n....................................... 157
Overview ........................................ 154
Problem (malfunction) ...................1604
Index
Page 12 of 364
EBD (electronic brake force
distribution)
Display message ............................ 217
Function/notes ................................ 70
Electronic Stability Program
see ESP ®
(Electroni cStability Program)
Emergenc yrelease
Driver's door .................................... 84
Fuel filler fla p................................. 162
Vehicle ............................................. 84
Emergency spare wheel
Important safety notes ..................342
Points to remember .......................342
Storage location ............................ 342
Stowing .......................................... 344
Technical data ............................... 346
Emergency Tensioning Devices
Function .......................................... .59
Safety guidelines. ............................ 42
Emissions control
Service and warranty information ....21
Engine
Check Engine warning lamp ........... 245
Display message ............................ 224
Engine number ............................... 350
Irregularr unning............................ 153
Jump-starting ................................. 304
Starting problems ..........................153
Starting the engine with the
SmartKey ....................................... 151
Starting with KEYLESS-GO .............151
Switching off .................................. 167
Tow-starting (vehicle) ..................... 308
Engine electronics
Problem (malfunction) ...................153
Engine emergency stop ....................310
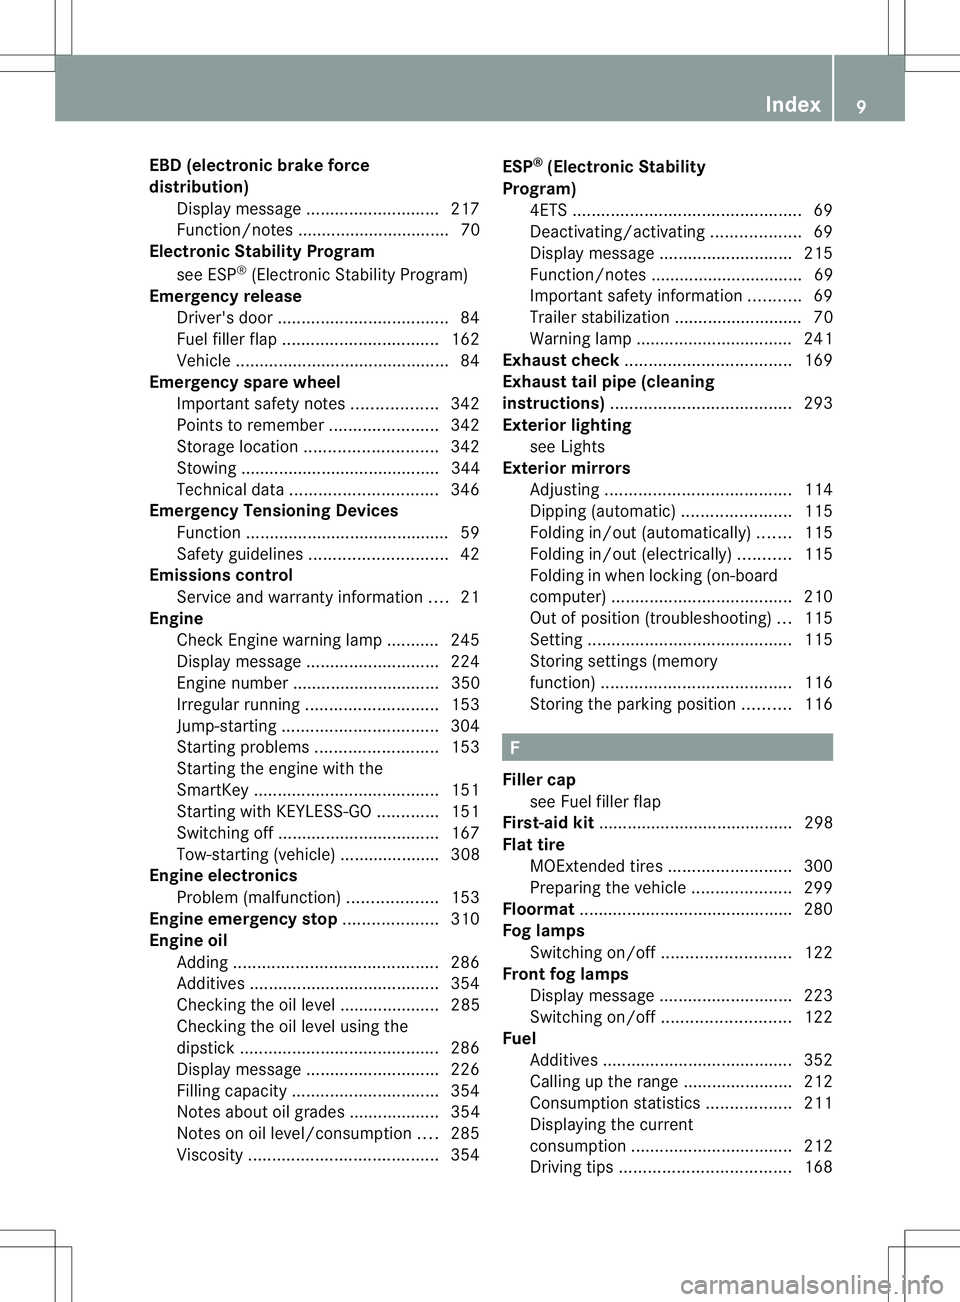
Engine oil Adding ........................................... 286
Additives ........................................ 354
Checking the oil level ..................... 285
Checking the oil level using the
dipstick .......................................... 286
Display message ............................ 226
Filling capacity ............................... 354
Notes about oil grades ................... 354
Notes on oil level/consumption ....285
Viscosity ........................................ 354ESP
®
(Electronic Stability
Program) 4ETS ................................................ 69
Deactivating/activating ...................69
Display message ............................ 215
Function/notes ................................ 69
Important safety information ...........69
Trailer stabilization ........................... 70
Warning lamp ................................. 241
Exhaus tcheck ................................... 169
Exhaus ttail pipe (cleaning
instructions) ...................................... 293
Exterior lighting see Lights
Exterior mirrors
Adjusting ....................................... 114
Dipping (automatic) .......................115
Folding in/out( automatically).......115
Folding in/out( electrically)...........115
Folding in whenl ocking (on-board
computer) ...................................... 210
Out of position (troubleshooting) ...115
Setting ........................................... 115
Storing settings (memory
function) ........................................ 116
Storing the parking position ..........116 F
Fille rcap
see Fuel filler flap
First-aid kit ......................................... 298
Flat tire MOExtended tires ..........................300
Preparing the vehicle .....................299
Floormat ............................................ .280
Fog lamps Switching on/off ........................... 122
Front fog lamps
Display message ............................ 223
Switching on/off ........................... 122
Fuel
Additives ........................................ 352
Calling up the range .......................212
Consumption statistics ..................211
Displaying the current
consumption .................................. 212
Driving tips .................................... 168 Index
9
Page 172 of 364
Drinking an
ddriving G
WARNING
Drinking and driving and/or taking drugs and
driving are very dangerous combinations.
Even a small amount of alcohol or drugs can
affec tyour reflexes, perceptions and
judgment.
The possibility of a serious or even fatal
accident are greatly increased when you drink
or take drugs and drive.
Do not drink or take drugs and drive or allow
anyone to drive who has been drinking or
taking drugs.
Exhaust check G
WARNING
Combustion engines emit poisonous exhaust
gases such as carbon monoxide. Inhaling
these exhaust gases leads to poisoning. There
is a risk of fatal injury. Therefore never leave
the engine running in enclosed spaces
without sufficient ventilation.
Certain engine systems are designed to keep
the level of poisonous components in exhaust
fumes within legal limits.
These systems only work at peak efficiency if
they are serviced exactly in accordance with
the manufacturer's specifications. For this
reason, all work on the engine must be carried
out by qualified and authorized Mercedes-
Benz technicians.
The engine settings must not be changed
under any circumstances. Furthermore, all
specific service work must be carried out at
regular intervals and in accordance with the
Mercedes-Benz service requirements. Details
can be found in the Maintenance Booklet. Engine oil
! Vehicles with adiesel particle filter: if
the vehicle is predominantly used to travel
short distances, this can lead to
malfunctions in the automatic cleaning of the diesel particle filter. This can result in
fuel collecting in the engine oil and causing
engine failure. Therefore, if you frequently
drive short distances, make sure to drive
on highways or country roads for 20
minutes at least every 310 miles (500km).
Braking
Important safety notes G
WARNING
If you shift down on a slippery road surface in
an attempt to increase the engine's braking
effect, the drive wheels could lose their grip.
There is an increased danger of skidding and
accidents.
Do not shift down for additional engine
braking on a slippery road surface.
Downhill gradients !
On long and steep gradients, you must
reduce the load on the brakes by shifting
early to a lower gear. This allows you to take
advantage of the engine braking effect and
helps avoid overheating and excessive
wear of the brakes.
When you take advantage of the engine
braking effect, a drive wheel may not turn
for some time, e.g. on a slippery road
surface. This could cause damage to the
drive train. This type of damage is not
covered by the Mercedes-Benzw arranty.
Do no tdepress the brake pedal continuously
while the vehicle is in motion, e.g. never
cause the brakes to rub by applying constant
slight pedal pressure. This results in
excessive and premature wear to the brake
pads.
Heavy and light loads G
WARNING
If you rest your foot on the brake pedal while
driving, the braking system can overheat .This Driving tips
169Driving and parking
Z
Page 206 of 364
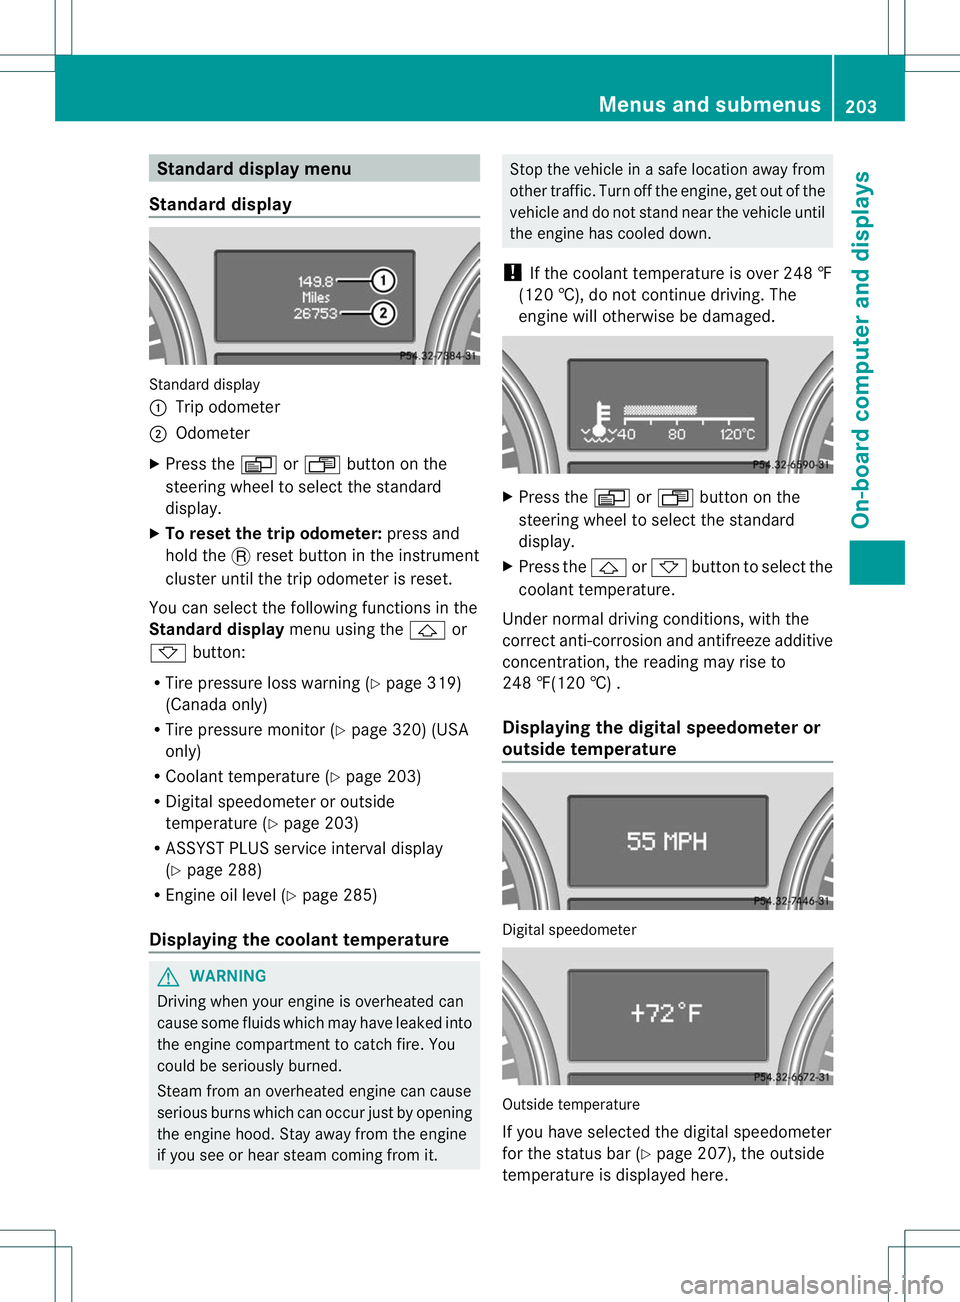
Standard display menu
Standard display Standard display
:
Trip odometer
; Odometer
X Press the VorU button on the
steering wheel to select the standard
display.
X To reset the trip odometer: press and
hold the .reset button in the instrument
cluster until the trip odometer is reset.
You can select the following functions in the
Standard display menu using the&or
* button:
R Tire pressure loss warning (Y page 319)
(Canada only)
R Tire pressure monitor (Y page 320) (USA
only)
R Coolant temperature (Y page 203)
R Digital speedometer or outside
temperature (Y page 203)
R ASSYST PLUS service interval display
(Y page 288)
R Engine oil level (Y page 285)
Displaying the coolant temperature G
WARNING
Driving when your engine is overheated can
cause some fluids which may have leaked into
the engine compartment to catch fire. You
could be seriously burned.
Steam from an overheated engine can cause
serious burns which can occur just by opening
the engine hood. Stay away from the engine
if you see or hear steam coming from it. Stop the vehicle in a safe location away from
other traffic. Turn off the engine, get out of the
vehicle and do not stand near the vehicle until
the engine has cooled down.
! If the coolant temperature is over 248 ‡
(120 †), do not continue driving. The
engine will otherwise be damaged. X
Press the VorU button on the
steering wheel to select the standard
display.
X Press the &or* button to select the
coolant temperature.
Under normal driving conditions, with the
correcta nti-corrosiona nd antifreeze additive
concentration, the reading may rise to
248 ‡(120 †) .
Displaying the digital speedomete ror
outside temperature Digital speedometer
Outside temperature
If you have selected the digital speedometer
for the status bar (Y
page 207), the outside
temperature is displayed here. Menus and submenus
203On-board computer and displays Z
Page 229 of 364
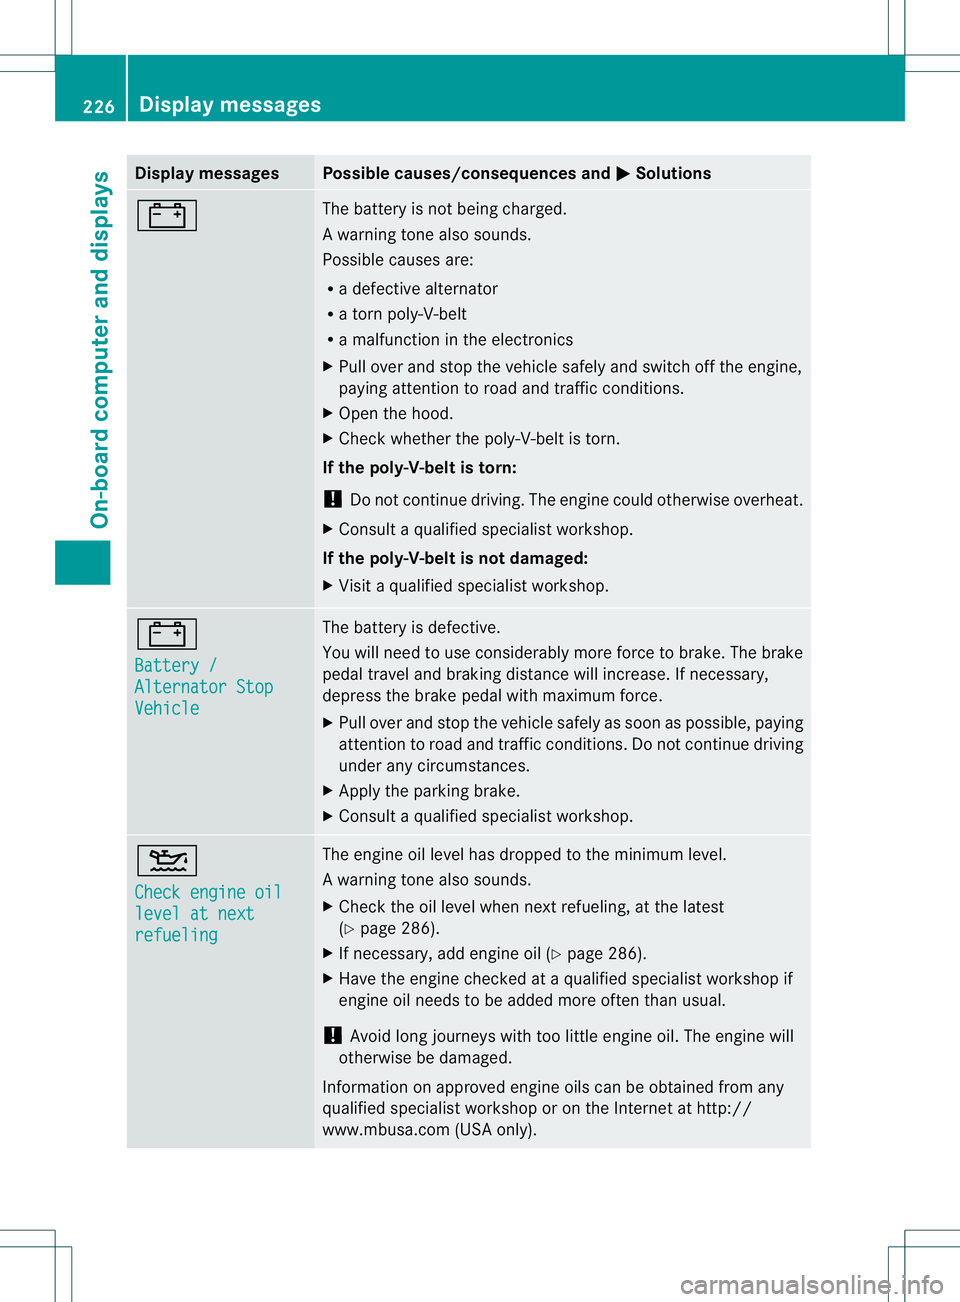
Display messages Possible causes/consequences and
M Solutions
# The battery is no
tbeing charged.
Aw arning tone also sounds.
Possible causes are:
R a defective alternator
R a torn poly-V-belt
R a malfunction in the electronics
X Pull ove rand stop the vehicle safely and switch off the engine,
paying attention to road and traffic conditions.
X Ope nthe hood.
X Check whether the poly-V-belt is torn.
If the poly-V-belt is torn:
! Do not continue driving. The engine could otherwise overheat.
X Consult a qualified specialist workshop.
If the poly-V-belt is not damaged:
X Visit a qualified specialist workshop. #
Battery /
Alternator Stop
Vehicle The battery is defective.
You will need to use considerably more force to brake. The brake
pedal travel and braking distance will increase. If necessary,
depress the brake pedal with maximum force.
X
Pull over and stop the vehicle safely as soon as possible, paying
attention to road and traffic conditions. Do not continue driving
under any circumstances.
X Apply the parking brake.
X Consult a qualified specialist workshop. 4
Check engine oil
level at next
refueling The engine oil level has dropped to the minimum level.
Aw
arning tone also sounds.
X Chec kthe oil level when next refueling, at the latest
(Y page 286).
X If necessary, add engine oil (Y page 286).
X Have the engine checked at a qualified specialist workshop if
engine oil needs to be added more often than usual.
! Avoid long journeys with too little engine oil. The engine will
otherwise be damaged.
Information on approved engine oils can be obtained from any
qualified specialist workshop or on the Internet at http://
www.mbusa.com (USA only). 226
Display messagesOn-board computer and displays
Page 288 of 364
!
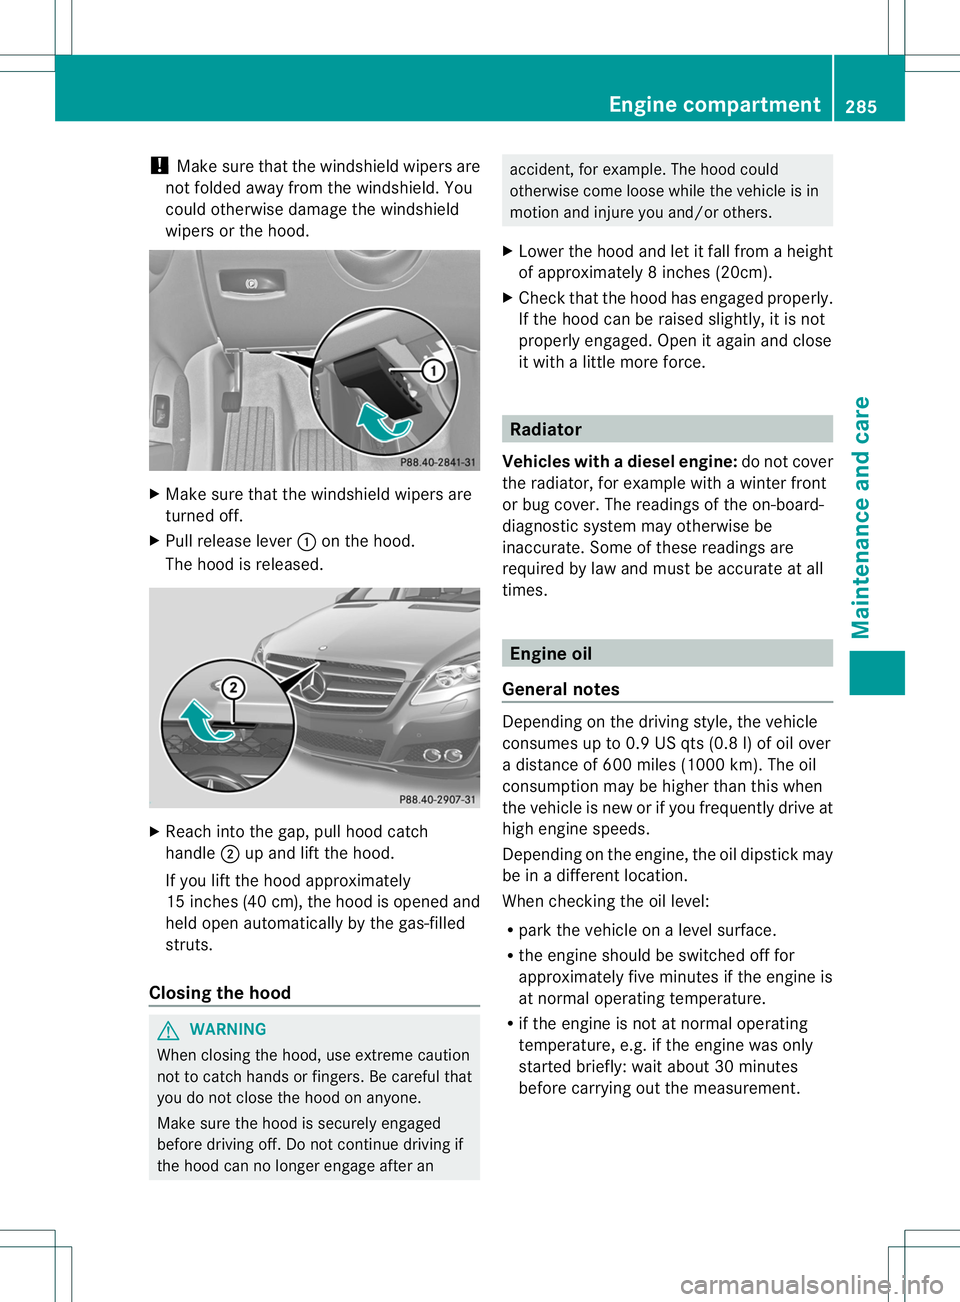
Make sure that the windshieldw ipers are
not folded away fro mthe windshield. You
could otherwise damage the windshield
wipers or the hood. X
Make sure that the windshield wipers are
turned off.
X Pull release lever :on the hood.
The hood is released. X
Reach into the gap, pull hood catch
handle ;up and lift the hood.
If you lift the hood approximately
15 inches (40c m), the hood is opened and
held open automatically by the gas-filled
struts.
Closing the hood G
WARNING
When closing the hood, use extreme caution
not to catch hands or fingers. Be careful that
you do not close the hood on anyone.
Make sure the hood is securely engaged
before driving off. Do not continue driving if
the hood can no longer engage after an accident, for example. The hood could
otherwise come loose while the vehicle is in
motion and injure you and/oro
thers.
X Lower the hood and le titfall from a height
of approximately 8inche s(20cm).
X Check that the hood has engaged properly.
If the hood can be raised slightly, it is not
properly engaged. Open it again and close
it with a little more force. Radiator
Vehicles with adiesel engine: do not cover
the radiator, for example with a winter front
or bug cover. The reading softhe on-board-
diagnostic system may otherwise be
inaccurate. Some of these readings are
required by law and must be accurate at all
times. Engine oil
General notes Depending on the driving style, the vehicle
consumes up to 0.9 US qts (0.8 l) of oil over
a distance of 600 miles (1000 km). The oil
consumption may be higher than this when
the vehicle is new or if you frequently drive at
high engine speeds.
Depending on the engine, the oil dipstick may
be in a different location.
When checking the oil level:
R
park the vehicle on a level surface.
R the engine should be switched off for
approximately five minutes if the engine is
at normal operating temperature.
R if the engine is not at normal operating
temperature, e.g. if the engine was only
started briefly: wait about 30 minutes
before carrying out the measurement. Engine compartment
285Maintenance and care Z
Page 289 of 364
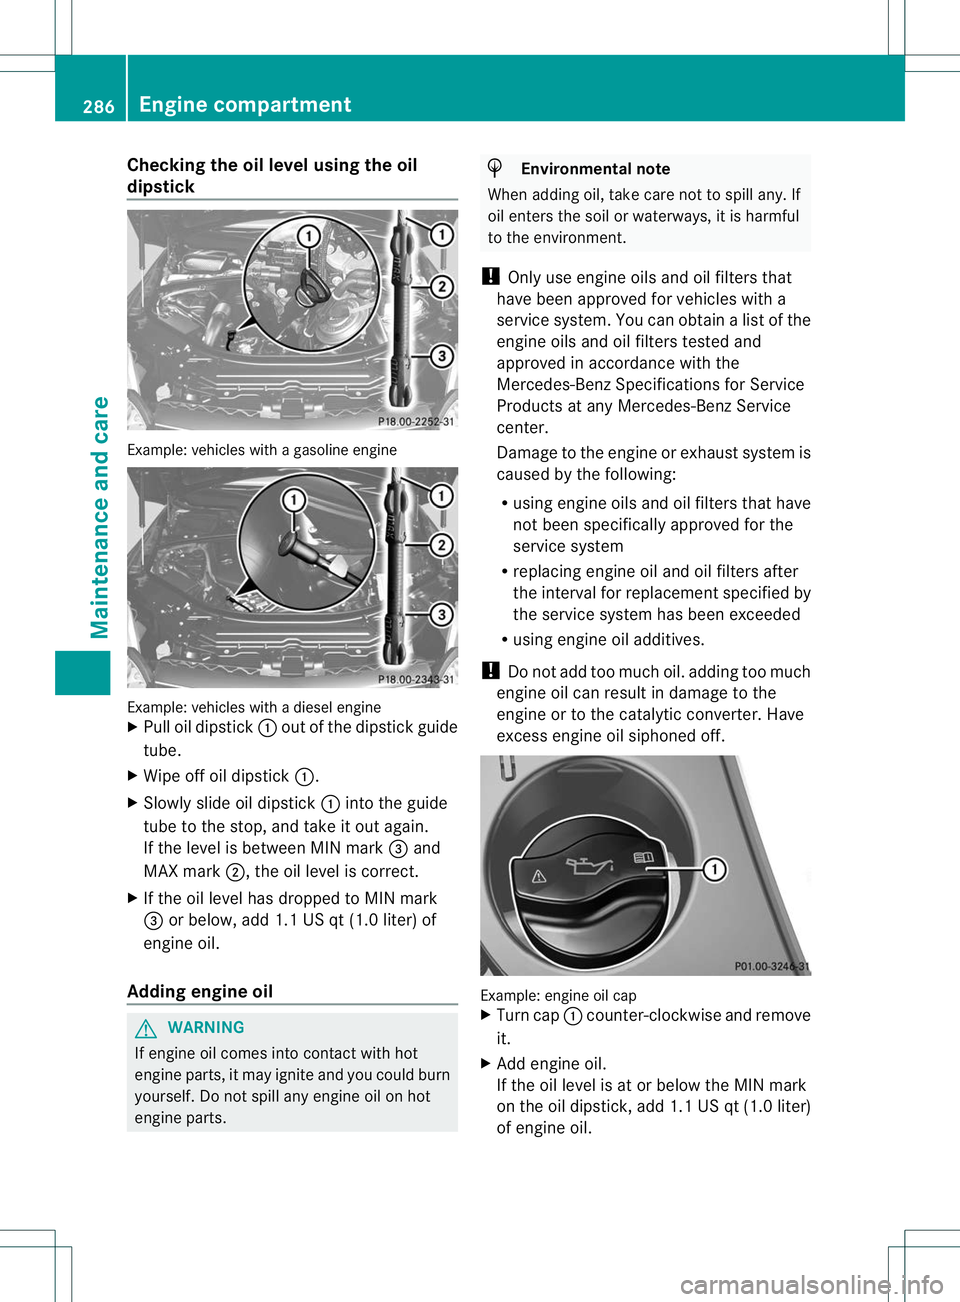
Checking the oil level using the oil
dipstick
Example
:vehicles with a gasoline engine Example: vehicles with a diesel engine
X
Pull oil dipstick :out of the dipstick guide
tube.
X Wipe off oil dipstick :.
X Slowly slide oil dipstick :into the guide
tube to the stop, and take it out again.
If the level is between MIN mark =and
MAX mark ;, the oil level is correct.
X If the oil level has dropped to MIN mark
= or below, add 1.1 US qt (1.0 liter) of
engine oil.
Adding engine oil G
WARNING
If engine oil comes into contact with hot
engine parts, it may ignite and you could burn
yourself. Do not spill any engine oil on hot
engine parts. H
Environmental note
When adding oil, take care not to spill any. If
oil enters the soil or waterways, it is harmful
to the environment.
! Only use engine oils and oil filters that
have been approved for vehicles with a
service system. You can obtain a list of the
engine oils and oil filters tested and
approved in accordance with the
Mercedes-Benz Specifications for Service
Products at any Mercedes-Benz Service
center.
Damage to the engine or exhaust system is
caused by the following:
R using engine oils and oil filters that have
not been specifically approved for the
service system
R replacing engine oil and oil filters after
the interval for replacemen tspecified by
the service system has been exceeded
R using engine oil additives.
! Do not add too much oil. adding too much
engine oil can result in damage to the
engine or to the catalytic converter. Have
excess engine oil siphoned off. Example: engine oil cap
X
Turn cap :counter-clockwise and remove
it.
X Add engine oil.
If the oil level is at or below the MIN mark
on the oil dipstick, add 1.1 US qt (1.0 liter)
of engine oil. 286
Engine compartmentMaintenance and care
Page 290 of 364
X
Replace cap :on the filler neck and turn
clockwise.
Ensure that the cap locks into place
securely.
X Chec kthe oil level again with the oil
dipstick (Y page 286).
For further information on engine oil, see
(Y page 354). Additional service products
Checking the coolant level G
WARNING
In order to avoid potentially serious burns:
R use extreme caution when opening the
hood if there are any signs of vapor or
coolant leaking from the cooling system, or
if the coolant temperature display indicates
that the coolant is overheated.
R do not remove the pressure cap on the
coolant tank if the coolant temperature is
above 158 ‡ (70 †). Allow the engine to
cool down before removing the cap. The
coolant tank contains hot fluid and is under
pressure.
R using a cloth, slowly turn the cap
approximately Öturn to relieve excess
pressure. If you open the cap immediately,
pressurized scalding hot fluid and vapor will
be blown out.
R do not spill antifreeze on hot engine parts.
Antifreeze contains ethylene glycol which
may burn if it comes into contact with hot
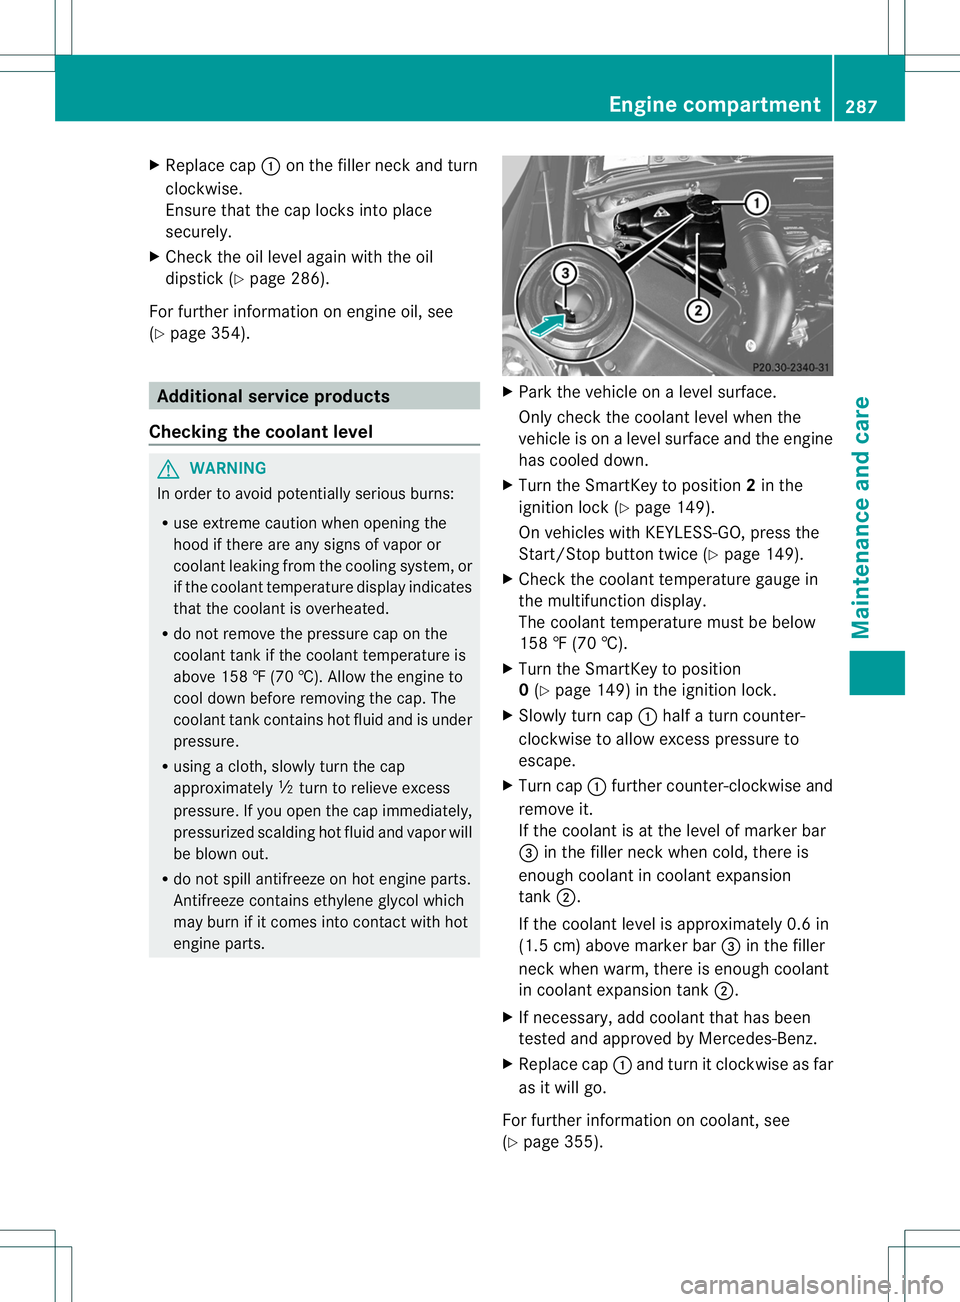
engine parts. X
Park the vehicle on a level surface.
Only check the coolant level when the
vehicle is on a level surface and the engine
has cooled down.
X Turn the SmartKey to position 2in the
ignition lock (Y page 149).
On vehicles with KEYLESS-GO, press the
Start/Stop button twice (Y page 149).
X Check the coolant temperature gauge in
the multifunction display.
The coolant temperature must be below
158 ‡ (70 †).
X Turn the SmartKey to position
0(Y page 149) in the ignition lock.
X Slowly turn cap :half a turn counter-
clockwise to allow excess pressure to
escape.
X Turn cap :further counter-clockwise and
remove it.
If the coolant is at the level of marker bar
= in the filler neck when cold, there is
enough coolant in coolant expansion
tank ;.
If the coolant level is approximately 0.6 in
(1.5 cm) above marker bar =in the filler
neck when warm, there is enough coolant
in coolant expansion tank ;.
X If necessary, add coolant that has been
tested and approved by Mercedes-Benz.
X Replace cap :and turn it clockwise as far
as it will go.
For further information on coolant, see
(Y page 355). Engine compartment
287Maintenance and care Z
Page 291 of 364
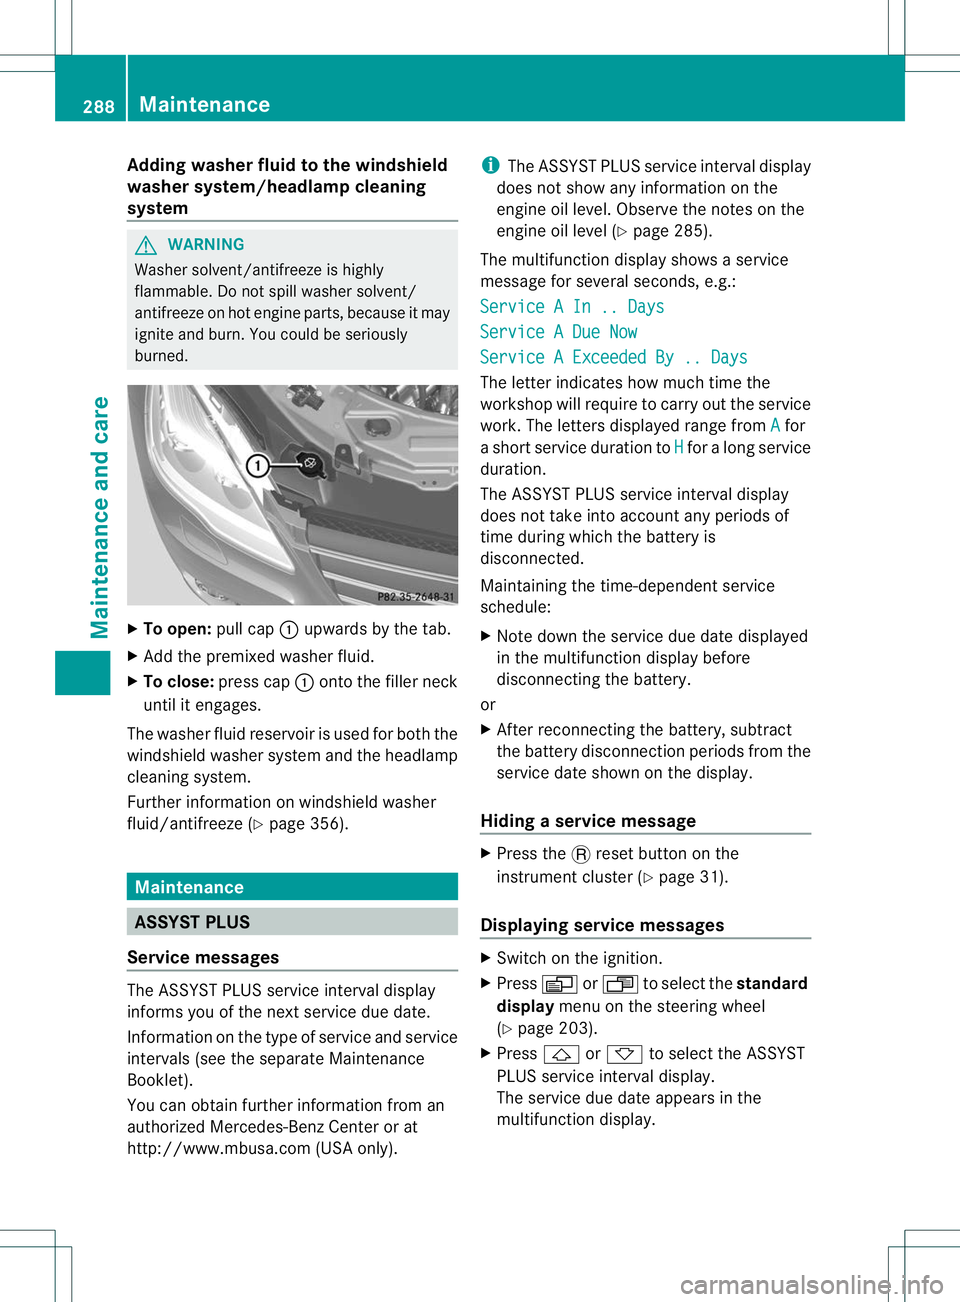
Adding washer fluid to the windshield
washer system/headlamp cleaning
system
G
WARNING
Washer solvent/antifreeze is highly
flammable. Do no tspill washer solvent/
antifreeze on hot engin eparts, because it may
ignite and burn .You could be seriously
burned. X
To open: pull cap:upwards by the tab.
X Add the premixed washer fluid.
X To close: press cap :onto the filler neck
until it engages.
The washer fluid reservoir is used for both the
windshield washer system and the headlamp
cleaning system.
Further information on windshield washer
fluid/antifreeze (Y page 356).Maintenance
ASSYST PLUS
Service messages The ASSYST PLUS service interval display
informs you of the next service due date.
Information on the type of service and service
intervals (see the separate Maintenance
Booklet).
You can obtain further information from an
authorized Mercedes-Benz Center or at
http://www.mbusa.com (USA only). i
The ASSYST PLUS service interval display
does not show any information on the
engine oil level. Observe the notes on the
engine oil level (Y page 285).
The multifunction display shows a service
message for several seconds, e.g.:
Service A In .. Days Service A Due Now
Service A Exceeded By .. Days
The letter indicates how much time the
workshop will require to carry out the service
work. The letters displayed range from
A for
a short service duration to H for a long service
duration.
The ASSYST PLUS service interval display
does not take into account any periods of
time during which the battery is
disconnected.
Maintaining the time-dependent service
schedule:
X Note down the service due date displayed
in the multifunction display before
disconnecting the battery.
or
X After reconnecting the battery, subtract
the battery disconnection periods from the
service date shown on the display.
Hiding aservice message X
Press the .reset button on the
instrument cluster (Y page 31).
Displaying service messages X
Switch on the ignition.
X Press VorU to selec tthe standard
display menu on the steering wheel
(Y page 203).
X Press &or* to select the ASSYST
PLUS service interval display.
The service due date appears in the
multifunction display. 288
MaintenanceMaintenance and care
Page 336 of 364
Load index
In addition to the load-bearing index, the load
inde
xmay also be imprinted on the sidewall
of the tire. This specifie sthe load-bearing
capacity more precisely.
Curb weight
The weight of a vehicle with standard
equipment including the maximum capacity
of fuel, oil and coolant. It also includes the air-
conditioning system and optional equipment
if these are installed in the vehicle, but does
not include passengers or luggage.
Maximum load rating
The maximum tire load is the maximum
permissible weight in kilograms or lbs for
which a tire is approved.
Maximum permissible tire pressure
Maximum permissible tire pressure for one
tire.
Maximum load on one tire
Maximum load on one tire. This is calculated
by dividing the maximum axle load of one axle
by two.
PSI (pounds per square inch)
As tandard uni tofmeasure for tire pressure.
Aspect ratio
Relationship between tire height and tire
width in percent.
Tire pressure
This is pressure inside the tire applying an
outward force to each square inch of the tire's
surface. The tire pressure is specified in
pounds per square inch (psi), in kilopascal
(kPa) or in bar. The tire pressure should only
be corrected when the tires are cold. Cold tire pressure
The tires are cold:
R
if the vehicle has been parked without
direct sunlight on the tires for at least three
hours and
R if the vehicle has been driven for less than
1 mile (1.6 km).
Tread
The part of the tire that comes into contact
with the road.
Bead
The tire bead ensures that the tire sits
securely on the wheel. There are several steel
wires in the bead to prevent the tire from
coming loose from the wheel rim.
Sidewall
The part of the tire between the tread and the
bead.
Weight of optional extras
The combined weight of those optional extras
that weigh more than the replaced standard
parts and more than 2.3 kilograms (5 lbs).
These optional extras, such as high-
performance brakes, level control, a roof rack
or a high-performance battery, are not
included in the curb weight and the weight of
the accessories.
TIN (Tire Identification Number)
This is a unique identifier which can be used
by a tire manufacturer to identify tires, for
example for a product recall, and thus identify
the purchasers. The TIN is made up of the
manufacturer's identity code, tire size, tire
type code and the manufacturing date.
Load bearing index
The load bearing index (also load index) is a
code that contains the maximum load bearing
capacity of a tire. All about wheels and tires
333Wheels and tires Z