display MERCEDES-BENZ R-CLASS MPV 2008 Owner's Guide
[x] Cancel search | Manufacturer: MERCEDES-BENZ, Model Year: 2008, Model line: R-CLASS MPV, Model: MERCEDES-BENZ R-CLASS MPV 2008Pages: 373, PDF Size: 6.75 MB
Page 125 of 373
On-board computer
122 Multi-function display
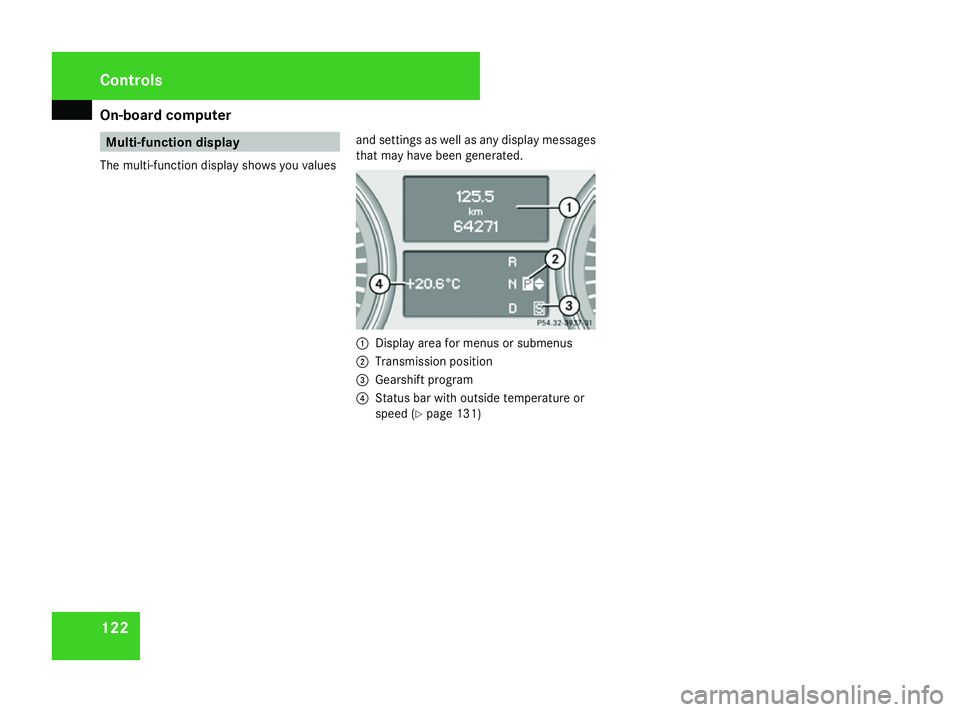
The multi-function display shows you values and settings as well as any display messages
that may have been generated. 1
Display area for menus or submenus
2 Transmission position
3 Gearshift program
4 Status bar with outside temperature or
speed (Y page 131) Controls
251_AKB; 5; 7, en-GB
wobuchh,
Version: 2.10.6
2008-05-11T14:51:51+02:00 - Seite 122 Dateiname: 6515_1825_02_buchblock.pdf; preflight
Page 127 of 373
On-board computer
124 Function
1 Basic display
menu (Ypage 125)
R Tyre pressure loss warning system
(Y page 227) or tyre pressure mon-
itor* (Y page 228)
R Coolant temperature (Y page 125)
R Digital speedometer 19
or outside
temperature (Y page 125).
R ASSYST PLUS service interval dis-
play (Y page 242) 2
Audio/TV*/DVD*
menu
(Y page 126)
R Radio station ( Ypage 126)
R Audio drive or media*
(Y page 126)
R TV* (Y page 127)
R DVD video* (Y page 127) 3
Navigation*
menu (Ypage 127) Function
4
AIRMATIC*/compass*
menu
(Y page 128)
R Level control* (Y page 152)
R Compass display *(Y page 212) 5
Distronic
* menu (distance display)
(Y page 128) 6
Message memory
menu20
(fault and
warning messages) (Y page 128) 7 Settings
menu (Ypage 129)
R Resetting to factory settings
(Y page 129)
R Selecting a submenu (Y page 129) 8
Additional functions*
menu
(Y page 136)
R Distance warning sys-
tem* (Y page 136)
R Tow-away protec-
tion* (Y page 136)
R Interior motion sen-
sor* (Y page 137) Function
9 Trip computer
menu (Ypage 137)
R Consumption statistics
(Y page 137)
R Range (Y page 138) a Telephone
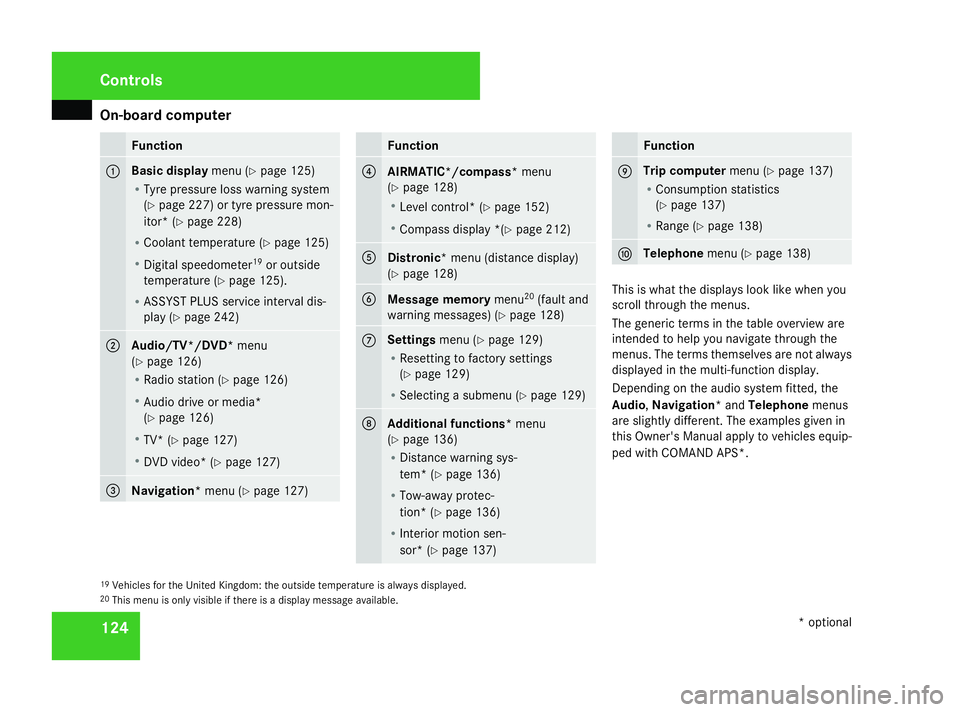
menu (Ypage 138) This is what the displays look like when you
scroll through the menus.
The generic terms in the table overview are
intended to help you navigate through the
menus. The terms themselves are not always
displayed in the multi-function display.
Depending on the audio system fitted, the
Audio,
Navigation* and Telephonemenus
are slightly different. The examples given in
this Owner's Manual apply to vehicles equip-
ped with COMAND APS*.
19 Vehicles for the United Kingdom: the outside temperature is always displayed.
20 This menu is only visible if there is a display message available. Controls
* optional
251_AKB; 5; 7, en-GB
wobuchh,
Version: 2.10.6 2008-05-11T14:51:51+02:00 - Seite 124Dateiname: 6515_1825_02_buchblock.pdf; preflight
Page 128 of 373
On-board computer
125Standard display menu
i Menu overview: (Y page 123).
Use the buttons on the multi-function steer-
ing wheel.
X Press the èor· button to select the
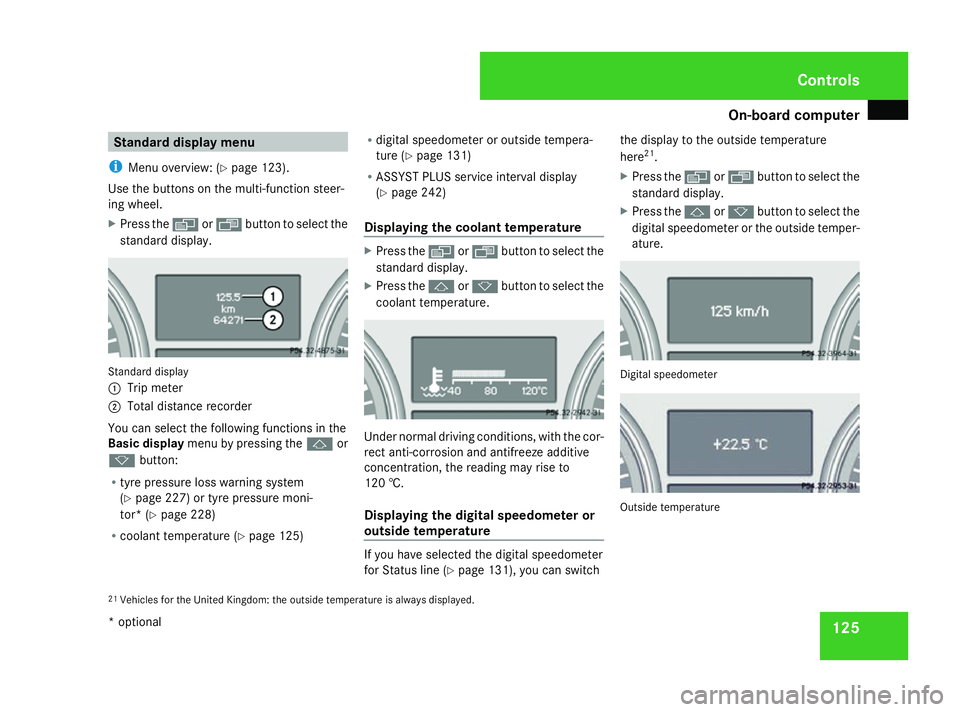
standard display. Standard display
1
Trip meter
2 Total distance recorder
You can select the following functions in the
Basic display menu by pressing the jor
k button:
R tyre pressure loss warning system
(Y page 227) or tyre pressure moni-
tor* (Y page 228)
R coolant temperature (Y page 125)R
digital speedometer or outside tempera-
ture (Y page 131)
R ASSYST PLUS service interval display
(Y page 242)
Displaying the coolant temperature X
Press the èor· button to select the
standard display.
X Press the jork button to select the
coolant temperature. Under normal driving conditions, with the cor-
rect anti-corrosion and antifreeze additive
concentration, the reading may rise to
120 †.
Displaying the digital speedometer or
outside temperature
If you have selected the digital speedometer
for Status line (Y
page 131), you can switch the display to the outside temperature
here
21
.
X Press the èor· button to select the
standard display.
X Press the jork button to select the
digital speedometer or the outside temper-
ature. Digital speedometer
Outside temperature
21 Vehicles for the United Kingdom: the outside temperature is always displayed. Controls
* optional
251_AKB; 5; 7, en-GB
wobuchh, Version: 2.10.6 2008-05-11T14:51:51+02:00 - Seite 125 ZDateiname: 6515_1825_02_buchblock.pdf; preflight
Page 129 of 373
On-board computer
126 Audio/TV*/DVD* menu
Use the functions in the Audio/TV/DVD
menu to operate the audio equipment or
COMAND APS*. If the audio equipment or
COMAND APS* is switched off, the multi-
function display shows the message AUDIO
off.
i Menu overview: (Y page 123).
Use the buttons on the multi-function steer-
ing wheel.
Selecting a radio station You can only store new stations using the
audio systemor COMAND APS
*.Please refer
to the separate operating instructions for
notes on how to do this.
X Switch on the audio equipment or
COMAND APS* and select Radio (see the
separate operating instructions).
X Use the èor· button to select the
Audio/TV/DVD menu. X
To select a stored station: briefly press
the j ork button.
X To select a channel from the channel
list: press and hold the jork but-
ton.
X To select a station using the station
search (only if no station list is being
received): press and hold the jor
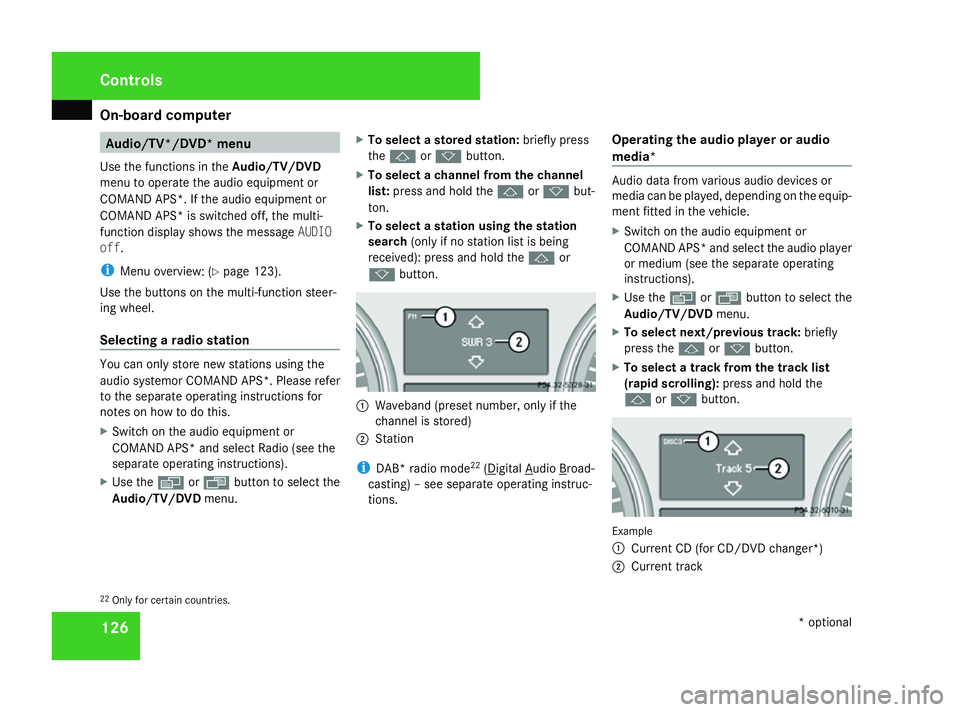
k button. 1
Waveband (preset number, only if the
channel is stored)
2 Station
i DAB* radio mode 22
( Digital Audio Broad-
casting) – see separate operating instruc-
tions. Operating the audio player or audio
media* Audio data from various audio devices or
media can be played, depending on the equip-
ment fitted in the vehicle.
X
Switch on the audio equipment or
COMAND APS* and select the audio player
or medium (see the separate operating
instructions).
X Use the èor· button to select the
Audio/TV/DVD menu.
X To select next/previous track: briefly
press the jork button.
X To select a track from the track list
(rapid scrolling): press and hold the
j ork button. Example
1
Current CD (for CD/DVD changer*)
2 Current track
22 Only for certain countries. Controls
* optional
251_AKB; 5; 7, en-GB
wobuchh,
Version: 2.10.6 2008-05-11T14:51:51+02:00 - Seite 126Dateiname: 6515_1825_02_buchblock.pdf; preflight
Page 130 of 373
On-board computer
127
In audio AUX mode, the current track is not
displayed.
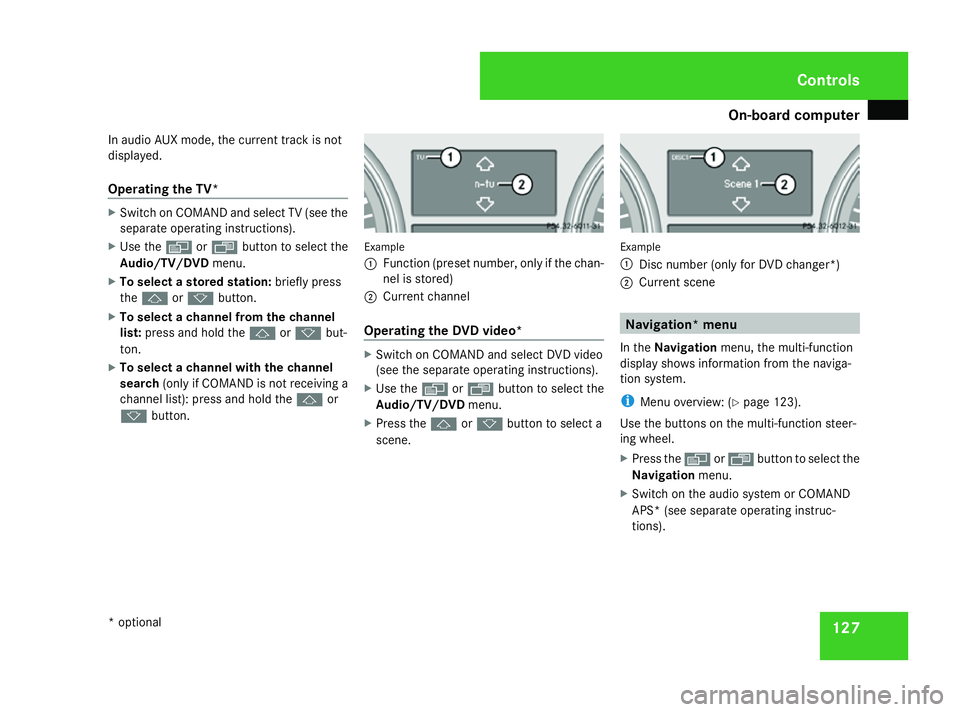
Operating the TV* X
Switch on COMAND and select TV (see the
separate operating instructions).
X Use the èor· button to select the
Audio/TV/DVD menu.
X To select a stored station: briefly press
the j ork button.
X To select a channel from the channel
list: press and hold the jork but-
ton.
X To select a channel with the channel
search (only if COMAND is not receiving a
channel list): press and hold the jor
k button. Example
1
Function (preset number, only if the chan-
nel is stored)
2 Current channel
Operating the DVD video* X
Switch on COMAND and select DVD video
(see the separate operating instructions).
X Use the èor· button to select the
Audio/TV/DVD menu.
X Press the jork button to select a
scene. Example
1
Disc number (only for DVD changer*)
2 Current scene Navigation* menu
In the Navigation menu, the multi-function
display shows information from the naviga-
tion system.
i Menu overview: (Y page 123).
Use the buttons on the multi-function steer-
ing wheel.
X Press the èorÿ button to select the
Navigation menu.
X Switch on the audio system or COMAND
APS* (see separate operating instruc-
tions). Controls
* optional
251_AKB; 5; 7, en-GB
wobuchh,
Version: 2.10.6 2008-05-11T14:51:51+02:00 - Seite 127 ZDateiname: 6515_1825_02_buchblock.pdf; preflight
Page 131 of 373
On-board computer
128
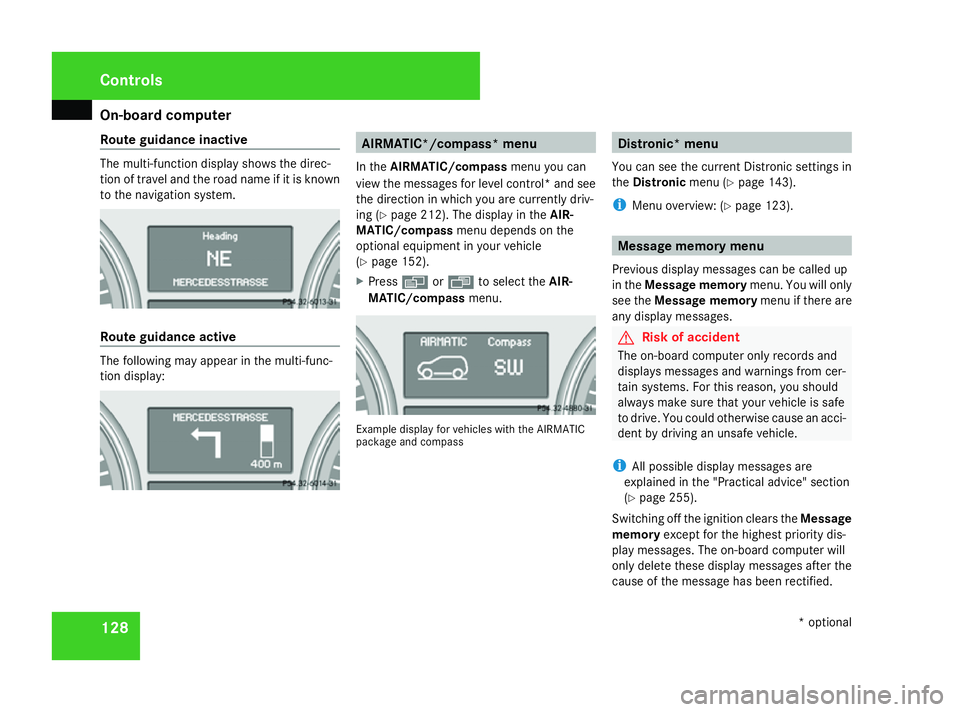
Route guidance inactive The multi-function display shows the direc-
tion of travel and the road name if it is known
to the navigation system. Route guidance active
The following may appear in the multi-func-
tion display: AIRMATIC*/compass* menu
In the AIRMATIC/compass menu you can
view the messages for level control* and see
the direction in which you are currently driv-
ing (Y page 212). The display in the AIR-
MATIC/compass menu depends on the
optional equipment in your vehicle
(Y page 152).
X Press èor· to select the AIR-
MATIC/compass menu. Example display for vehicles with the AIRMATIC
package and compass Distronic* menu
You can see the current Distronic settings in
the Distronic menu (Ypage 143).
i Menu overview: (Y page 123). Message memory menu
Previous display messages can be called up
in the Message memory menu. You will only
see the Message memory menu if there are
any display messages. G
Risk of accident
The on-board computer only records and
displays messages and warnings from cer-
tain systems. For this reason, you should
always make sure that your vehicle is safe
to drive. You could otherwise cause an acci-
dent by driving an unsafe vehicle.
i All possible display messages are
explained in the "Practical advice" section
(Y page 255).
Switching off the ignition clears the Message
memory except for the highest priority dis-
play messages. The on-board computer will
only delete these display messages after the
cause of the message has been rectified. Controls
* optional
251_AKB; 5; 7, en-GB
wobuchh,
Version: 2.10.6 2008-05-11T14:51:51+02:00 - Seite 128Dateiname: 6515_1825_02_buchblock.pdf; preflight
Page 132 of 373
On-board computer
129
i
Menu overview: (Y page 123).
Displaying messages Use the buttons on the multi-function steer-
ing wheel.
X Press the èor· button repeatedly
until either the original menu or the Mes-
sage memory menu appears.
If the Message memory menu does not
appear, there are no display messages.
If there are messages, the following mes-
sage may appear in the multi-function dis-
play, for example: 2 messages.
X Use the jork button to scroll
through the display messages. Settings menu
In the Settings menu, you can use the To
reset: Press reset button for 3 sec-
onds function to restore most settings to the
factory settings. And there are submenus via
which you can make individual settings for
your vehicle.
i Menu overview: (Y page 123). Use the buttons on the multi-function steer-
ing wheel.
Resetting to factory settings For safety reasons, not all functions are reset:
permanent Speedtronic can only be set in the
Vehicle
submenu. The Headlamp mode
function in the Lightingsubmenu is only
reset if the vehicle is stationary.
X Press the èor· button to select the
Settings menu.
X Press and hold reset button Jon the
instrument cluster for approximately three
seconds.
A prompt appears in the multi-function dis-
play asking you to press the reset button
again to confirm.
X Press reset button Jagain.
The functions of most submenus are
restored to the factory settings.
or
X If you want to retain the settings, do not
press reset button Ja second time.
You will see the Settingsmenu again after
approximately 5 seconds.
X Press the èor· button to select a
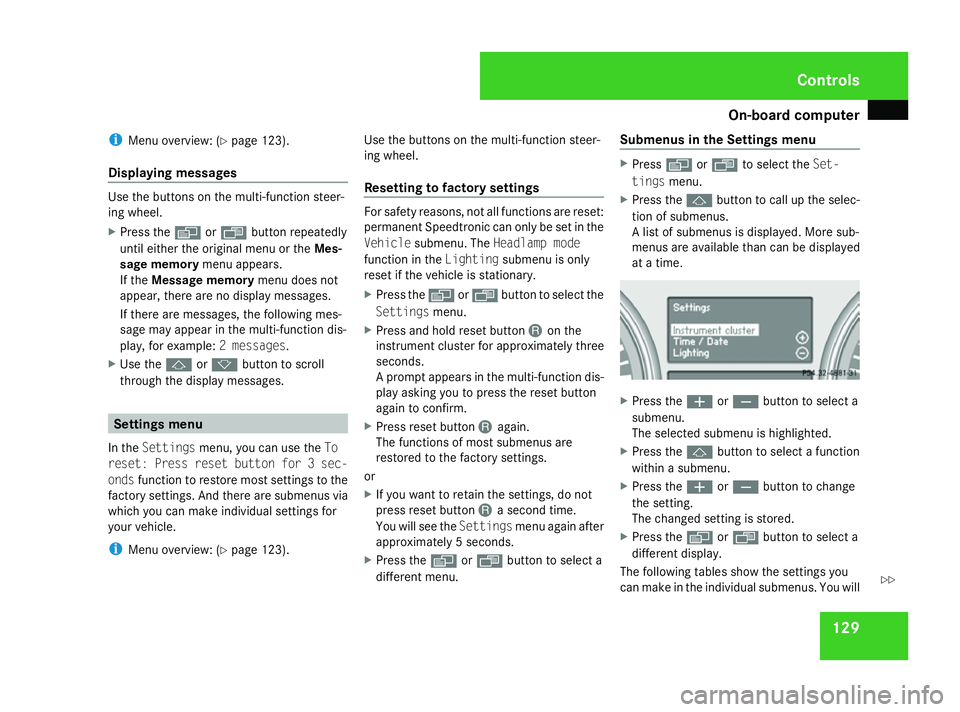
different menu. Submenus in the Settings menu X
Press èor· to select the Set-
tings menu.
X Press the jbutton to call up the selec-
tion of submenus.
A list of submenus is displayed. More sub-
menus are available than can be displayed
at a time. X
Press the æorç button to select a
submenu.
The selected submenu is highlighted.
X Press the jbutton to select a function
within a submenu.
X Press the æorç button to change
the setting.
The changed setting is stored.
X Press the èorÿ button to select a
different display.
The following tables show the settings you
can make in the individual submenus. You will Controls
251_AKB; 5; 7, en-GB
wobuchh,
Version: 2.10.6 2008-05-11T14:51:51+02:00 - Seite 129 ZDateiname: 6515_1825_02_buchblock.pdf; preflight
Page 133 of 373
On-board computer
130
find additional information on the pages
shown. Instrument cluster submenu
R
Unit of measurement for distance
(Y page 130)
R Distance units for digital speedometer
(Y page 131)
R Language (Y page 131)
R Status line display (Y page 131)Time/date submenu
23R
Time and date ( Ypage 131) Lighting submenu
R
Constant headlamp mode (Y page 132)
R Surround lighting (Y page 132)
R Exterior lighting delayed switch-off
(Y page 133)
R Interior lighting delayed switch-off
(Y page 133) Vehicle submenu
R
Compass* (Y page 212)
R Display when the ignition is switched off
(Y page 133)
R Permanent Speedtronic (Y page 149)
R Automatic locking feature (Y page 134) Heating* submenu
R
Selecting the switch-on time for the aux-
iliary heating * (Ypage 134)
R Changing the switch-on time for the aux-
iliary heating* (Y page 135) Convenience submenu
R
Easy-entry/exit feature* (Y page 135)
R Folding in the exterior mirrors when lock-
ing the vehicle* (Y page 135) Selecting the unit of measurement for
distance
This function is not available on vehicles with
speedometers in mph.The selected unit of measurement for dis-
tance applies to:
R
the analogue speedometer
R the total distance recorder and the trip
meter
R the trip computer
R cruise control
R Speedtronic
R Distronic*
X Press èor· to select the Set-
tings... menu.
X Press the jbutton to call up the selec-
tion of submenus.
X Press the æorç button to select the
Instrument cluster submenu.
X Press the jbutton to select Display
unit Speed-/odometer.
X Press the æorç button to select
km (kilometres) or milesas the unit of
measurement for distance.
X Press the j,èorÿ button to
select a different display.
23 This function is not available on vehicles with Audio 50 APS* or COMAND APS*. Controls
* optional
251_AKB; 5; 7, en-GB
wobuchh,
Version: 2.10.6 2008-05-11T14:51:51+02:00 - Seite 130Dateiname: 6515_1825_02_buchblock.pdf; preflight
Page 134 of 373
On-board computer
131
Selecting the distance units for the dig-
ital speedometer This function is not available on vehicles with
speedometers in mph.
X
Press èor· to select the Set-
tings menu.
X Press the jbutton to call up the selec-
tion of submenus.
X Press the æorç button to select the
Instrument cluster submenu.
X Press the jbutton to select Display
unit Digital speedometer.
X Press the æorç button to select
km (kilometres) or milesas the unit of
measurement for distance.
X Press the j,èorÿ button to
select a different display.
Selecting the language X
Press èor· to select the Set-
tings menu.
X Press the jbutton to call up the selec-
tion of submenus.
X Press the æorç button to select the
Instrument cluster submenu.
X Press jto select Language. X
Press the æorç button to select the
desired language.
X Press the j,èorÿ button to
select a different display.
Selecting the status line display Vehicles for the United Kingdom: this func-
tion is not available.
X
Press èor· to select the Set-
tings menu.
X Press the jbutton to call up the selec-
tion of submenus.
X Press the æorç button to select the
Instrument cluster submenu.
X Press the jbutton to select Status
line display .
X Press the æorç button to select the
display in the status line: vehicle speed
(Speed) or outside temperature ( Outside
temp.).
The selected display now appears continu-
ously in the multi-function display. You will
see the display you have not selected when you scroll through the
Standard display
menu (Y page 125).
X Press the j,èorÿ button to
select a different display.
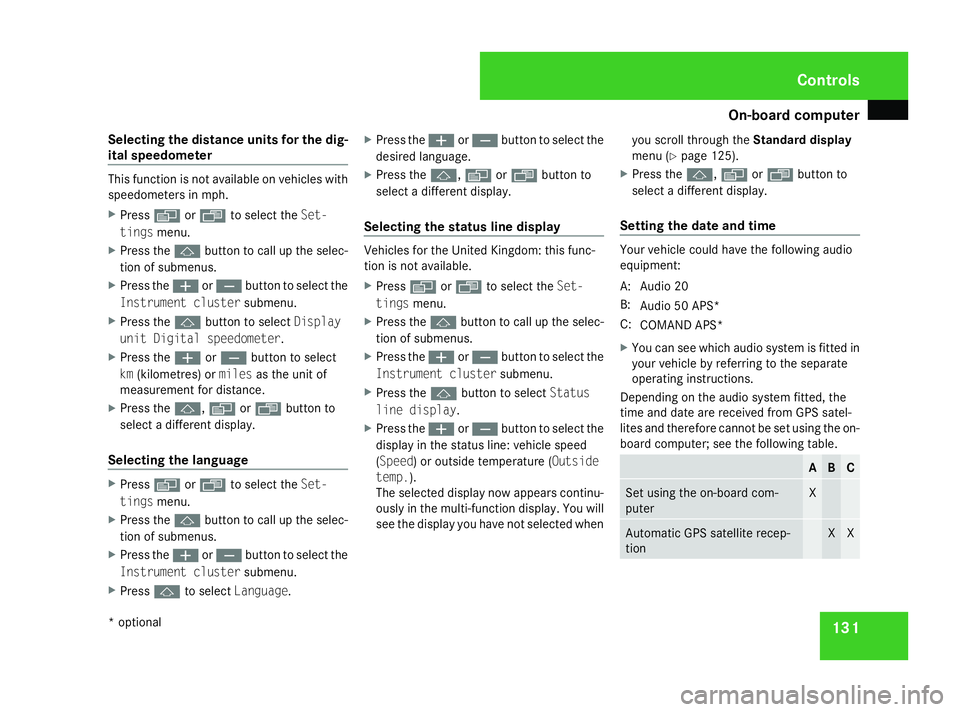
Setting the date and time Your vehicle could have the following audio
equipment:
A: Audio 20
B:
Audio 50 APS*
C: COMAND APS*
X You can see which audio system is fitted in
your vehicle by referring to the separate
operating instructions.
Depending on the audio system fitted, the
time and date are received from GPS satel-
lites and therefore cannot be set using the on-
board computer; see the following table. A B C
Set using the on-board com-
puter X
Automatic GPS satellite recep-
tion X XControls
* optional
251_AKB; 5; 7, en-GB
wobuchh,
Version: 2.10.6 2008-05-11T14:51:51+02:00 - Seite 131 ZDateiname: 6515_1825_02_buchblock.pdf; preflight
Page 135 of 373
On-board computer
132
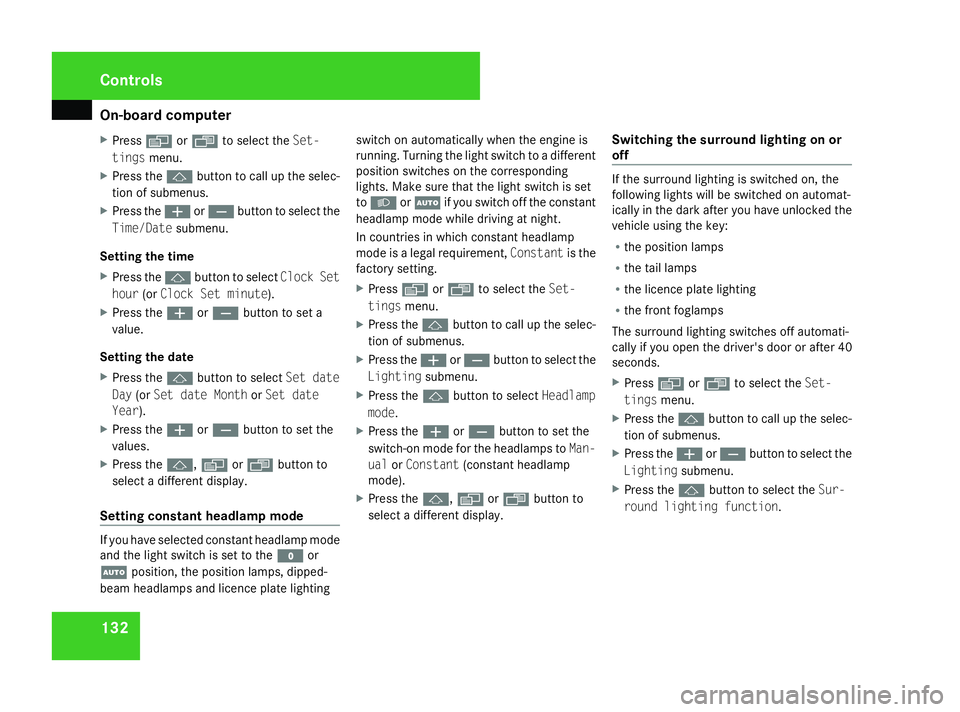
X
Press èor· to select the Set-
tings menu.
X Press the jbutton to call up the selec-
tion of submenus.
X Press the æorç button to select the
Time/Date submenu.
Setting the time
X Press the jbutton to select Clock Set
hour (orClock Set minute).
X Press the æorç button to set a
value.
Setting the date
X Press the jbutton to select Set date
Day (orSet date Month orSet date
Year).
X Press the æorç button to set the
values.
X Press the j,èorÿ button to
select a different display.
Setting constant headlamp mode If you have selected constant headlamp mode
and the light switch is set to the Mor
U position, the position lamps, dipped-
beam headlamps and licence plate lighting switch on automatically when the engine is
running. Turning the light switch to a different
position switches on the corresponding
lights. Make sure that the light switch is set
to
B orU if you switch off the constant
headlamp mode while driving at night.
In countries in which constant headlamp
mode is a legal requirement, Constantis the
factory setting.
X Press èor· to select the Set-
tings menu.
X Press the jbutton to call up the selec-
tion of submenus.
X Press the æorç button to select the
Lighting submenu.
X Press the jbutton to select Headlamp
mode.
X Press the æorç button to set the
switch-on mode for the headlamps to Man-
ual orConstant (constant headlamp
mode).
X Press the j,èorÿ button to
select a different display. Switching the surround lighting on or
off If the surround lighting is switched on, the
following lights will be switched on automat-
ically in the dark after you have unlocked the
vehicle using the key:
R
the position lamps
R the tail lamps
R the licence plate lighting
R the front foglamps
The surround lighting switches off automati-
cally if you open the driver's door or after 40
seconds.
X Press èor· to select the Set-
tings menu.
X Press the jbutton to call up the selec-
tion of submenus.
X Press the æorç button to select the
Lighting submenu.
X Press the jbutton to select the Sur-
round lighting function. Controls
251_AKB; 5; 7, en-GB
wobuchh,
Version: 2.10.6 2008-05-11T14:51:51+02:00 - Seite 132Dateiname: 6515_1825_02_buchblock.pdf; preflight