USB port MERCEDES-BENZ S-Class 2014 W222 Comand Manual
[x] Cancel search | Manufacturer: MERCEDES-BENZ, Model Year: 2014, Model line: S-Class, Model: MERCEDES-BENZ S-Class 2014 W222Pages: 278, PDF Size: 6.65 MB
Page 13 of 278
Toggling
......................................... 134
Using the telephone ....................... 130
see Bluetooth ®
Telephone basic menu Bluetooth ®
interface ...................... 129
Telephone keypad overview
COMAND ......................................... 22
Telephone mode
Redialing ........................................ 131
Telephone number
Entering ......................................... 131
Text messages (SMS)
Calling the sende r.......................... 147
Deleting ......................................... 148
Inbox .............................................. 144
Information and requirements .......142
Reading .......................................... 145
Reading aloud ................................ 145
Setting reception ........................... 143
Storing sender in address book .....148
Storing the sender as a new
address book entry ........................147
Texts
see Text messages (SMS)
Time
Setting ............................................. 40
Setting summer/standard time .......41
Setting the format ............................ 40
Setting the time ............................... 40
Setting the time/date forma t.......... 40
Setting the time zone ....................... 41
Tow-away alarm
Arming/deactivating (COMAND) .....54
Track information .............................. 256
Traffic jam function ........................... 100
Traffic reports Calling up a lis t.............................. 103
Reading out on route .....................105
Real-time traffic report ..................104
Trunk lid opening height
restriction
Activating/deactivating (COMAND) .55U
Updating the digital map ..................116
USB audio mode Selecting a track ............................ 197USB devices
Connecting to the Media Interface 195 V
Vehicle Data acquisition ............................... 14
Vehicle settings ................................... 50
Video see Video DVD
Video-AUX
Connecting an external video
source ............................................ 219
Switching to ................................... 219
Video DVD
Control option ................................ 221
DVD's control menu ......................224
DVD functions ............................... 225
DVD menu ..................................... 225
Function restrictions ......................221
Menu options ................................ .223
Notes on discs ............................... 221
Operation ....................................... 220
Overview ........................................ 223
Pause function ............................... 226
Picture settings .............................. 224
Playing conditions .......................... 221
Safety notes .................................. 220
Selecting a scene/chapter ............226
Stop function ................................. 226
Switching to ................................... 222
Video menu ................................... 225
Voice Control
see Voice Control System
Voice Control System
Settings ........................................... 41
Volume, adjusting
Navigation messages .......................23 W
Waypoints Accepting waypoints for the route ...87
Creating ........................................... 86
Editing .............................................. 87 Index
11
Page 21 of 278
Overview
Components
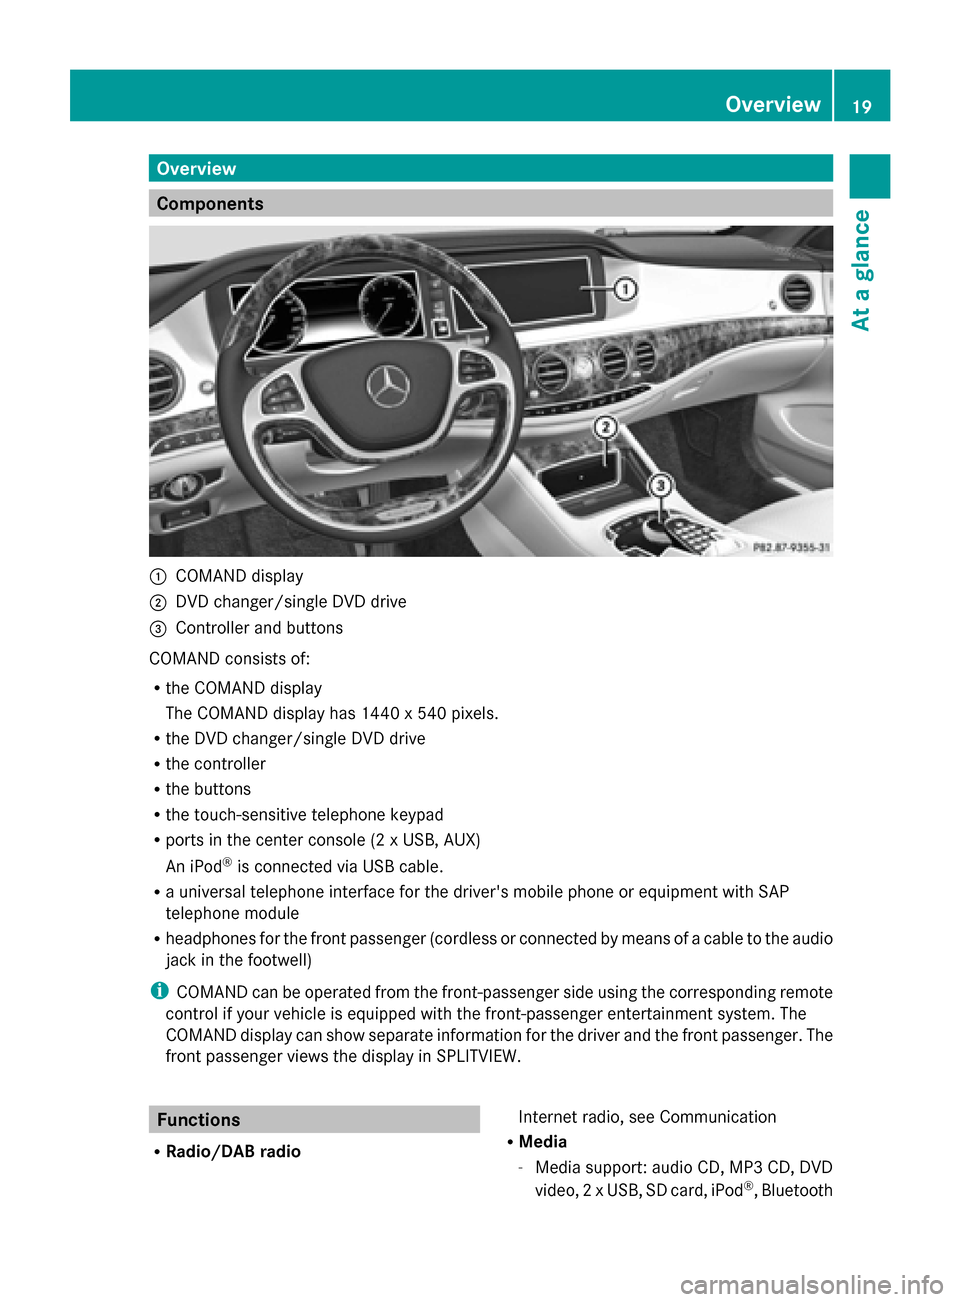
0043
COMAND display
0044 DVD changer/single DVD drive
0087 Controller and buttons
COMAND consists of:
R the COMAND display
The COMAND display has 1440 x 540 pixels.
R the DVD changer/single DVD drive
R the controller
R the buttons
R the touch-sensitive telephone keypad
R ports in the center console (2 x USB, AUX)
An iPod ®
is connected via USB cable.
R a universal telephone interface for the driver's mobile phone or equipment with SAP
telephone module
R headphones for the front passenger (cordless or connected by means of a cable to the audio
jack in the footwell)
i COMAND can be operated from the front-passenger side using the corresponding remote
control if your vehicle is equipped with the front-passenger entertainment system. The
COMAND display can show separate information for the driver and the front passenger. The
front passenger views the display in SPLITVIEW. Functions
R Radio/DAB radio Internet radio, see Communication
R Media
-Media support: audio CD, MP3 CD, DVD
video, 2 x USB, SD card, iPod ®
, Bluetooth Overview
19At a glance
Page 30 of 278
X
Enter the destination using the COMAND
remote control and press the 0070button.
The Google™ results list appears.
X Select the destination using the COMAND
remote control.
A menu appears.
X Select Set as Destination
Set as Destination.
X The prompt Accept the navigation Accept the navigation
data from Mercedes-Benz Apps?
data from Mercedes-Benz Apps?
appears on the driver's side.
X Select Yes
Yes orNo
No.
If you select Yes
Yes, the navigation data is
used for route guidance. Multi-Seat Entertainment System
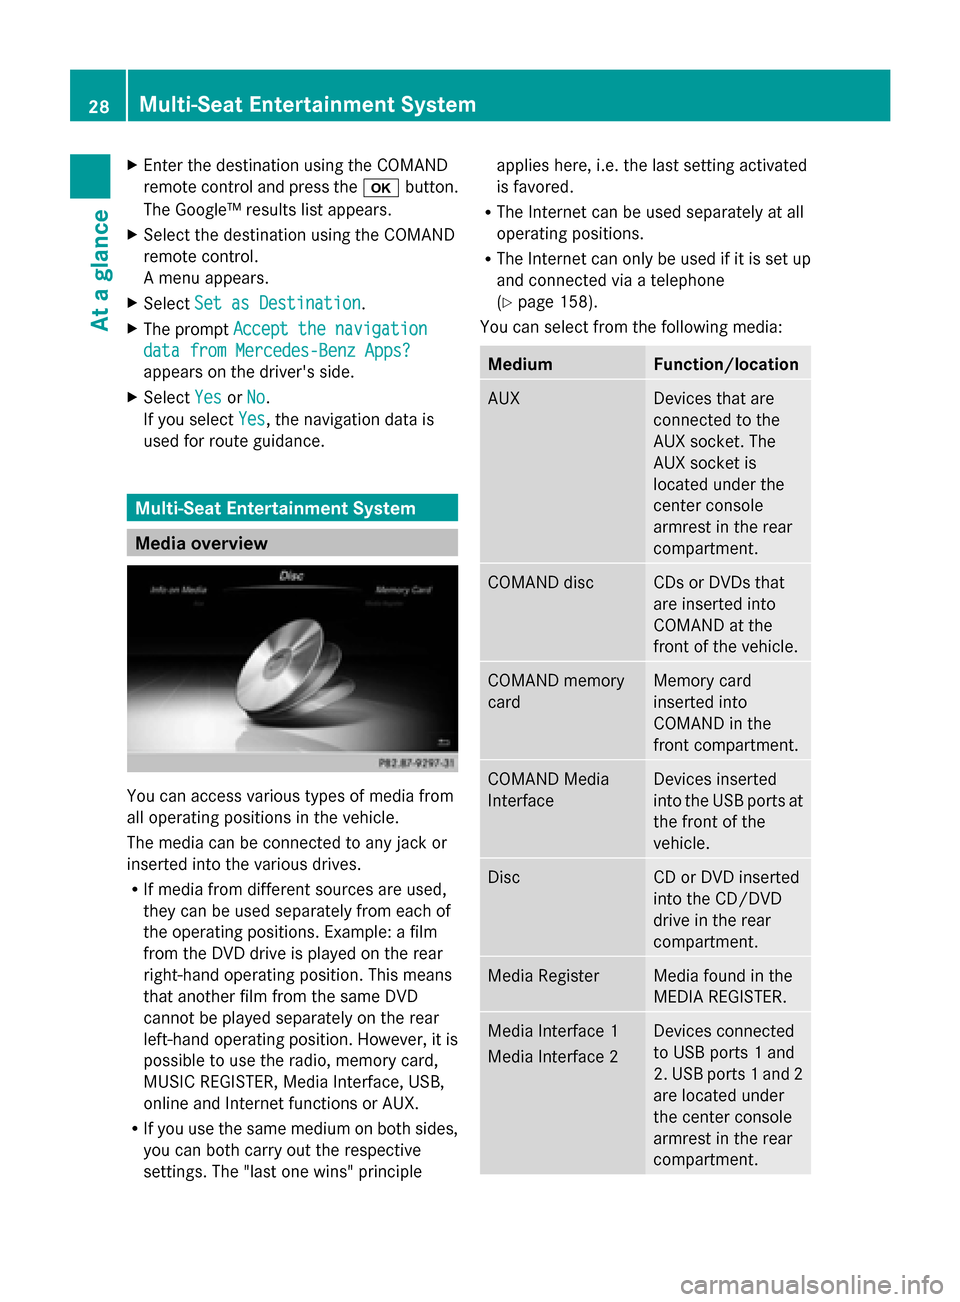
Media overview
You can access various types of media from
all operating positions in the vehicle.
The media can be connected to any jack or
inserted into the various drives.
R If media from different sources are used,
they can be used separately from each of
the operating positions. Example: a film
from the DVD drive is played on the rear
right-hand operating position. This means
that another film from the same DVD
cannot be played separately on the rear
left-hand operating position. However, it is
possible to use the radio, memory card,
MUSIC REGISTER, Media Interface, USB,
online and Internet functions or AUX.
R If you use the same medium on both sides,
you can both carry out the respective
settings. The "last one wins" principle applies here, i.e. the last setting activated
is favored.
R The Internet can be used separately at all
operating positions.
R The Internet can only be used if it is set up
and connected via a telephone
(Y page 158).
You can select from the following media: Medium Function/location
AUX Devices that are
connected to the
AUX socket. The
AUX socket is
located under the
center console
armrest in the rear
compartment. COMAND disc CDs or DVDs that
are inserted into
COMAND at the
front of the vehicle.
COMAND memory
card Memory card
inserted into
COMAND in the
front compartment.
COMAND Media
Interface Devices inserted
into the USB ports at
the front of the
vehicle.
Disc CD or DVD inserted
into the CD/DVD
drive in the rear
compartment.
Media Register Media found in the
MEDIA REGISTER.
Media Interface 1
Media Interface 2 Devices connected
to USB ports 1 and
2. USB ports 1 and 2
are located under
the center console
armrest in the rear
compartment. 28
Multi-Seat Entertainment SystemAt a glance
Page 49 of 278
Importing/exporting data
General notes
! Never remove the stick or card when
writing data to the USB stick or the memory
card. You may otherwise lose data.
Using this function, you can:
R transfer your personal COMAND data from
one system/vehicle to another.
R make a backup copy of your personal data
(export data) and load it again (import
data).
R protect your data from unwanted export by
activating a pin prompt (presetting:
deactivated 0053).
You can either use an SD memory card or a
USB storage device (e.g. a USB stick) as
temporary storage. Activating/deactivating PIN
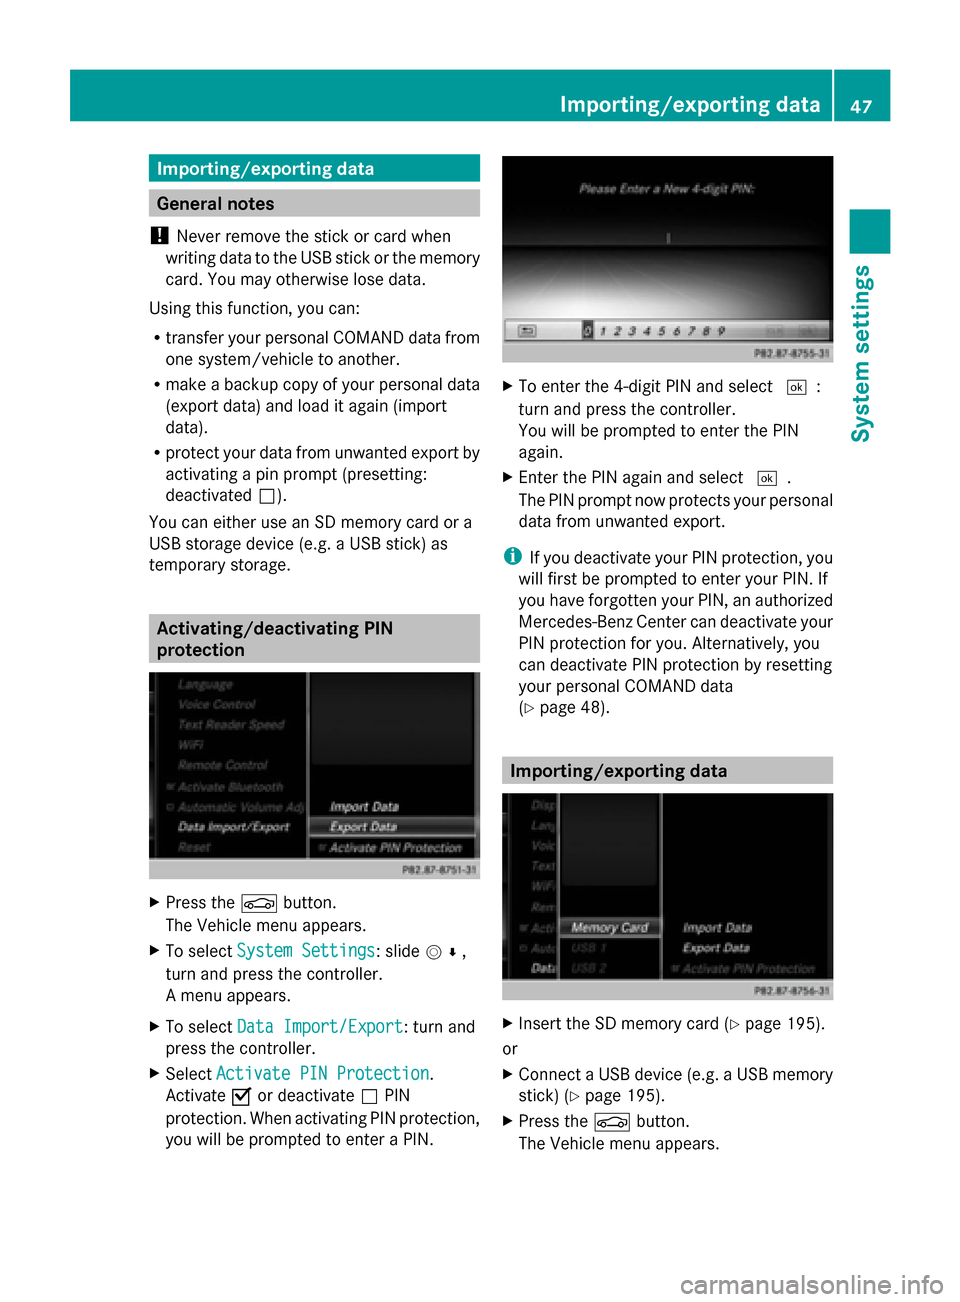
protection
X
Press the 00D4button.
The Vehicle menu appears.
X To select System Settings System Settings: slide 005200C5,
turn and press the controller.
A menu appears.
X To select Data Import/Export
Data Import/Export: turn and
press the controller.
X Select Activate PIN Protection
Activate PIN Protection.
Activate 0073or deactivate 0053PIN
protection. When activating PIN protection,
you will be prompted to enter a PIN. X
To enter the 4-digit PIN and select 0054:
turn and press the controller.
You will be prompted to enter the PIN
again.
X Enter the PIN again and select 0054.
The PIN prompt now protects your personal
data from unwanted export.
i If you deactivate your PIN protection, you
will first be prompted to enter your PIN. If
you have forgotten your PIN, an authorized
Mercedes-Benz Center can deactivate your
PIN protection for you. Alternatively, you
can deactivate PIN protection by resetting
your personal COMAND data
(Y page 48). Importing/exporting data
X
Insert the SD memory card (Y page 195).
or
X Connect a USB device (e.g. a USB memory
stick) (Y page 195).
X Press the 00D4button.
The Vehicle menu appears. Importing/exporting data
47System settings
Page 50 of 278
X
To select System Settings
System Settings: slide 005200C5
and press the controller.
A menu appears.
X To select Data Import/Export
Data Import/Export: turn and
press the controller.
X Select Import Data
Import Data orExport Data Export Data.
i If you import data such as address data,
the existing data on COMAND is
overwritten. You will see a message to this
effect. COMAND is restarted after the data
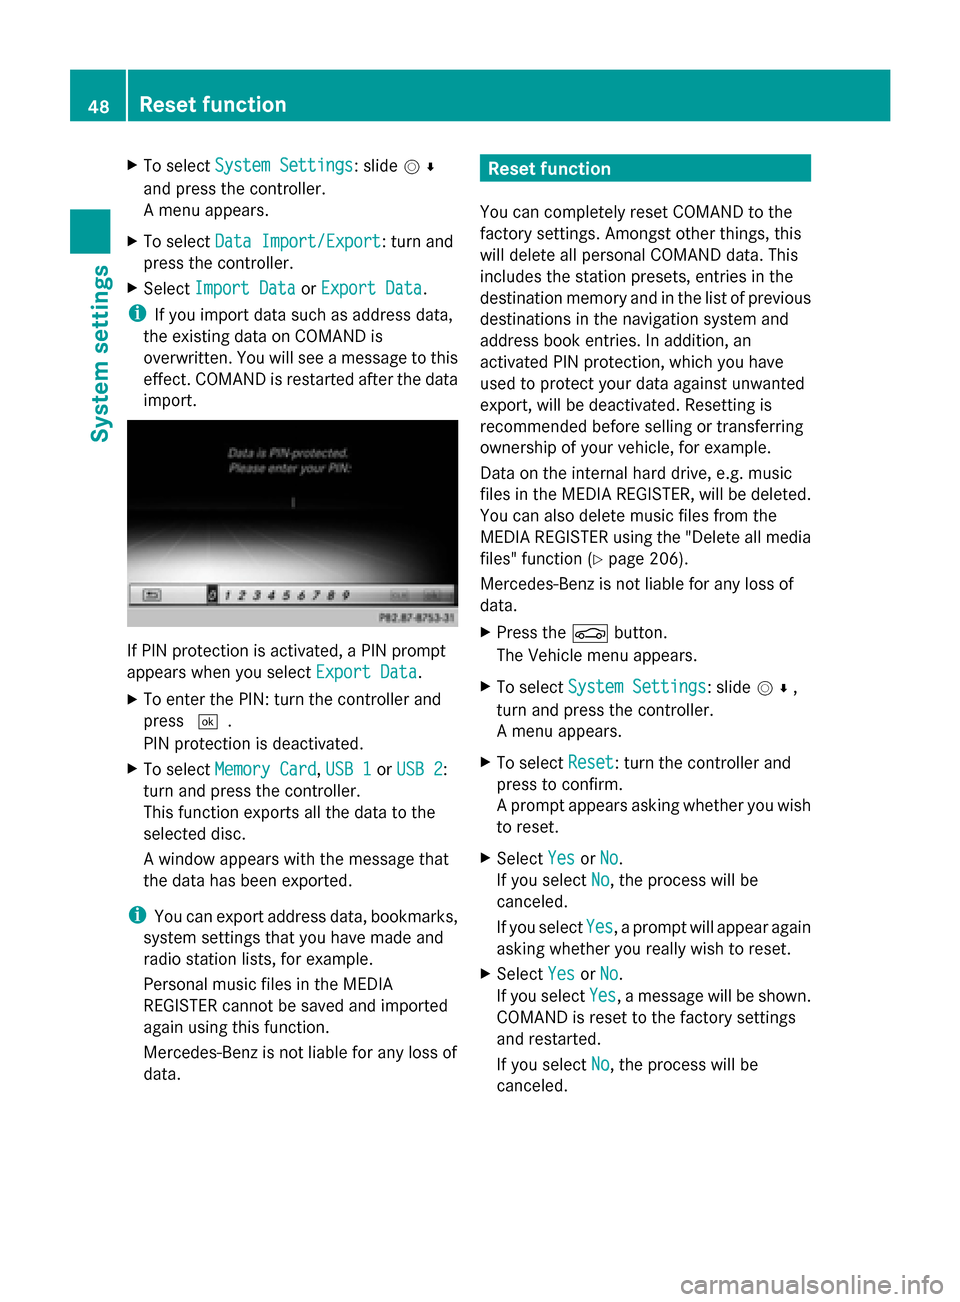
import. If PIN protection is activated, a PIN prompt
appears when you select Export Data Export Data.
X To enter the PIN: turn the controller and
press 0054.
PIN protection is deactivated.
X To select Memory Card
Memory Card, USB 1 USB 1orUSB 2
USB 2:
turn and press the controller.
This function exports all the data to the
selected disc.
A window appears with the message that
the data has been exported.
i You can export address data, bookmarks,
system settings that you have made and
radio station lists, for example.
Personal music files in the MEDIA
REGISTER cannot be saved and imported
again using this function.
Mercedes-Benz is not liable for any loss of
data. Reset function
You can completely reset COMAND to the
factory settings. Amongst other things, this
will delete all personal COMAND data. This
includes the station presets, entries in the
destination memory and in the list of previous
destinations in the navigation system and
address book entries. In addition, an
activated PIN protection, which you have
used to protect your data against unwanted
export, will be deactivated. Resetting is
recommended before selling or transferring
ownership of your vehicle, for example.
Data on the internal hard drive, e.g. music
files in the MEDIA REGISTER, will be deleted.
You can also delete music files from the
MEDIA REGISTER using the "Delete all media
files" function (Y page 206).
Mercedes-Benz is not liable for any loss of
data.
X Press the 00D4button.
The Vehicle menu appears.
X To select System Settings
System Settings: slide 005200C5,
turn and press the controller.
A menu appears.
X To select Reset Reset: turn the controller and
press to confirm.
A prompt appears asking whether you wish
to reset.
X Select Yes YesorNo
No.
If you select No No, the process will be
canceled.
If you select Yes Yes, a prompt will appear again
asking whether you really wish to reset.
X Select Yes
YesorNo
No.
If you select Yes
Yes, a message will be shown.
COMAND is reset to the factory settings
and restarted.
If you select No No, the process will be
canceled. 48
Reset functionSystem settings
Page 137 of 278
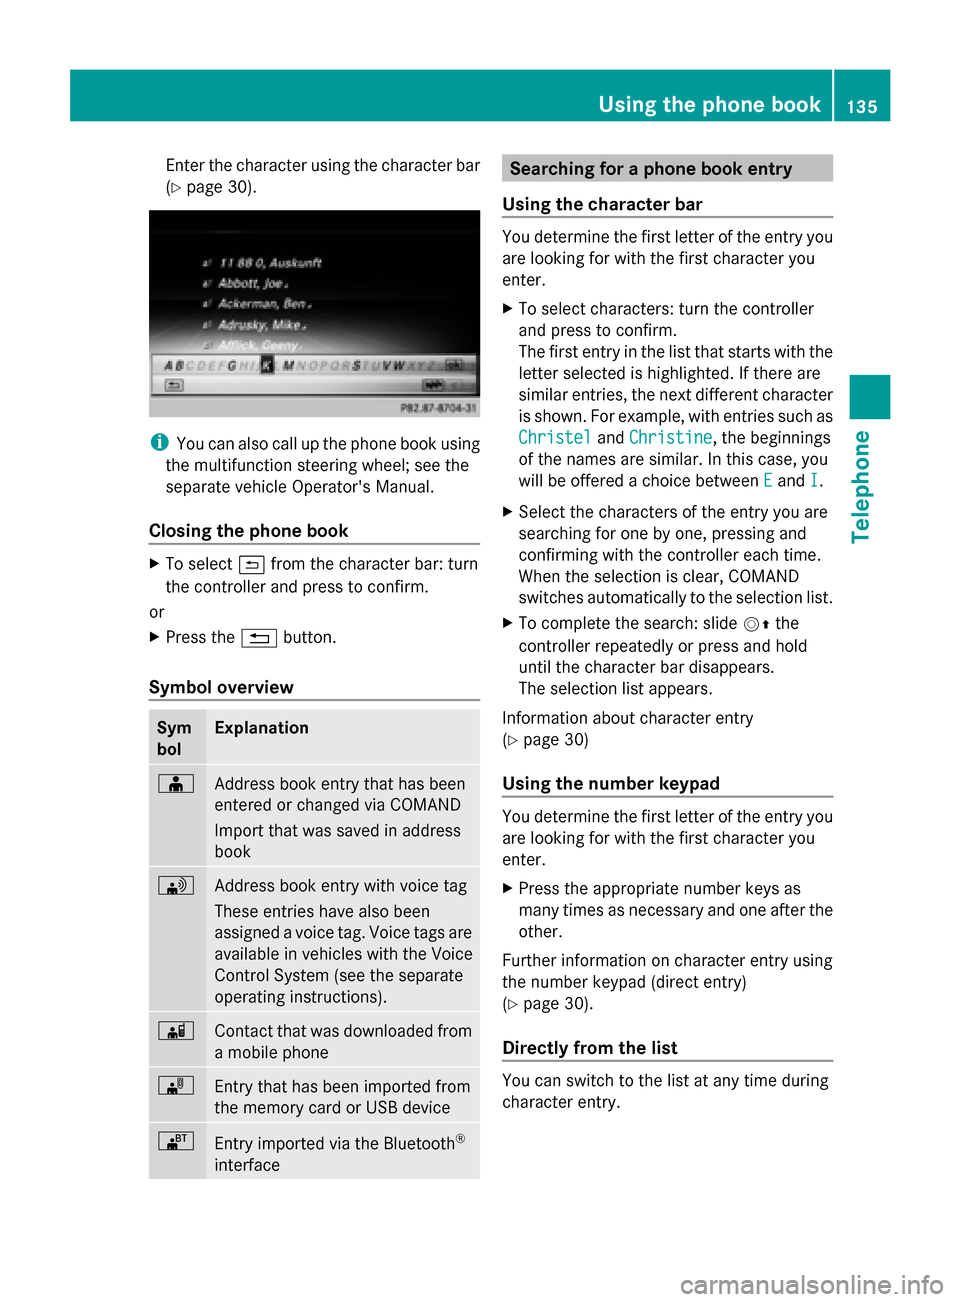
Enter the character using the character bar
(Y
page 30). i
You can also call up the phone book using
the multifunction steering wheel; see the
separate vehicle Operator's Manual.
Closing the phone book X
To select 0039from the character bar: turn
the controller and press to confirm.
or
X Press the 0038button.
Symbol overview Sym
bol Explanation
00D8
Address book entry that has been
entered or changed via COMAND
Import that was saved in address
book 0094
Address book entry with voice tag
These entries have also been
assigned a voice tag. Voice tags are
available in vehicles with the Voice
Control System (see the separate
operating instructions).
00D7
Contact that was downloaded from
a mobile phone
00BB
Entry that has been imported from
the memory card or USB device
00BA
Entry imported via the Bluetooth
®
interface Searching for a phone book entry
Using the character bar You determine the first letter of the entry you
are looking for with the first character you
enter.
X
To select characters: turn the controller
and press to confirm.
The first entry in the list that starts with the
letter selected is highlighted. If there are
similar entries, the next different character
is shown. For example, with entries such as
Christel Christel andChristine
Christine , the beginnings
of the names are similar. In this case, you
will be offered a choice between E
Eand I
I.
X Select the characters of the entry you are
searching for one by one, pressing and
confirming with the controller each time.
When the selection is clear, COMAND
switches automatically to the selection list.
X To complete the search: slide 00520097the
controller repeatedly or press and hold
until the character bar disappears.
The selection list appears.
Information about character entry
(Y page 30)
Using the number keypad You determine the first letter of the entry you
are looking for with the first character you
enter.
X
Press the appropriate number keys as
many times as necessary and one after the
other.
Further information on character entry using
the number keypad (direct entry)
(Y page 30).
Directly from the list You can switch to the list at any time during
character entry. Using the phone book
135Telephone Z
Page 150 of 278
Adding the sender to an address book
entry X
Press 0098the controller while the message
is being displayed.
X Text messages:
To select Save
Save Number Number : turn and press the
controller.
X E-mails:
To select Save Sender's E-Mail
Save Sender's E-Mail
Address Address: turn and press the controller.
X To select Add
Add: turn and press the controller.
X Proceed from the step "Selecting a
category" ( Ypage 137).
Deleting messages X
Call up the message folder ( Ypage 144).
X To select the message: turn and press the
controller.
X To select the list symbol on the right-hand
side next to the message: slide 00520096and
press the controller.
X To select Delete
Delete : turn and press the
controller.
A deletion prompt appears.
X To select Yes
Yes orNo No: turn and press the
controller.
If you select Yes
Yes , the message is deleted.
If you select No
No, the process will be
canceled.
i This delete function is not supported by
all mobile phones. The Delete Failed Delete Failed
message appears. Using the address book
Introduction
Always pay attention to traffic conditions.
Before starting the journey, familiarize
yourself with the address book functions.
Only use COMAND when the road and traffic
conditions permit. You could otherwise become involved in an accident in which you
or others could be injured.
The address book organizes and stores
entries that are entered from different
sources (mobile phone, memory card, USB
device, COMAND phone book, navigation
system).
You can use these entries to make telephone
calls and for navigation.
i Number of contacts in the address
book: the address book can store a total of
5000 contacts.
Of these:
R 2000 entries are reserved for
permanently saved contacts and
R 3000 entries are reserved for contacts
that you can load from the mobile phone.
i Display of mobile phone contacts:
contacts downloaded from the mobile
phone will no longer be displayed in the
address book if you disconnect the mobile
phone from COMAND. However, the
contact data of the last two mobile phones
connected are still stored in an internal
memory. When the relevant mobile phone
is reconnected, the contacts are displayed
immediately. When automatic download is
activated (Y page 153), COMAND
downloads the mobile phone contacts
again and updates the address book.
When the mobile phone is removed, only
the phone book entries from the mobile
phone are removed from the address book.
The remaining entries are retained. For this
reason, delete your personal data using the
reset function before selling your vehicle,
for example (Y page 48). Calling up the address book
Using the telephone button:
X Press the 002Bbutton one or more times. 148
Using the address bookTelephone
Page 151 of 278
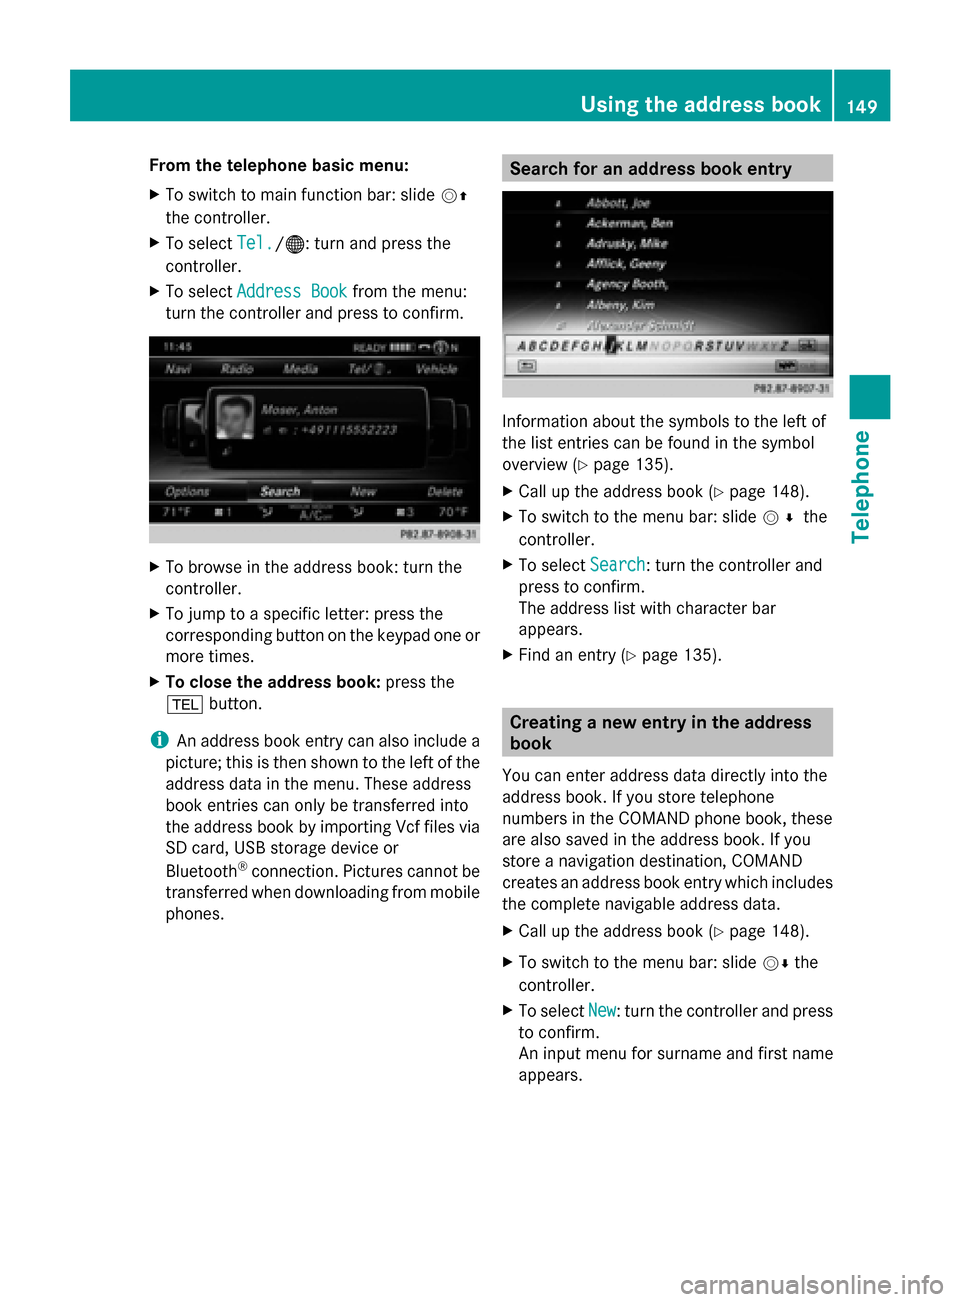
From the telephone basic menu:
X
To switch to main function bar: slide 00520097
the controller.
X To select Tel.
Tel./00A7 : turn and press the
controller.
X To select Address Book Address Book from the menu:
turn the controller and press to confirm. X
To browse in the address book: turn the
controller.
X To jump to a specific letter: press the
corresponding button on the keypad one or
more times.
X To close the address book: press the
002B button.
i An address book entry can also include a
picture; this is then shown to the left of the
address data in the menu. These address
book entries can only be transferred into
the address book by importing Vcf files via
SD card, USB storage device or
Bluetooth ®
connection. Pictures cannot be
transferred when downloading from mobile
phones. Search for an address book entry
Information about the symbols to the left of
the list entries can be found in the symbol
overview (Y
page 135).
X Call up the address book (Y page 148).
X To switch to the menu bar: slide 005200C5the
controller.
X To select Search
Search : turn the controller and
press to confirm.
The address list with character bar
appears.
X Find an entry (Y page 135). Creating a new entry in the address
book
You can enter address data directly into the
address book. If you store telephone
numbers in the COMAND phone book, these
are also saved in the address book. If you
store a navigation destination, COMAND
creates an address book entry which includes
the complete navigable address data.
X Call up the address book (Y page 148).
X To switch to the menu bar: slide 00520064the
controller.
X To select New
New : turn the controller and press
to confirm.
An input menu for surname and first name
appears. Using the address book
149Telephone Z
Page 155 of 278
Listening to a voice tag
X
Search for an address book entry with a
voice tag (Y page 149).
X To select the list symbol to the right of the
entry: slide 00520096the controller and press to
confirm.
X To select Voice Tag
Voice Tag : turn the controller
and press to confirm.
X To select Voice Tag
Voice Tag : turn the controller
and press to confirm.
X To select Listen
Listen turn the controller and
press to confirm.
You hear the voice tag. Importing phone book entries
This function allows you to store phone book
entries from the mobile phone in the address
book.
The following can be used as a source:
R the mobile phone
R the memory card
R the USB device
R the Bluetooth ®
Interface
Imported phone book entries are indicated in
the phone book by different symbols
(Y page 135).
X Search for an entry in the phone book on
the mobile phone 0034(Ypage 135).
X To select the list symbol to the right of the
entry: slide 00520096the controller and press to
confirm.
X To select Do you want to save the Do you want to save the
entry? entry? : turn the controller and press to
confirm.
The Data Saved Data Saved message appears. The
phone book entry is now saved as an
address book entry.
The 0034symbol is replaced by the ¥
symbol.
R Contacts marked with the ¥symbol are
accessible to all COMAND users, regardless of the mobile phone
connected.
R Saving or editing the contact data on
COMAND does not change the contacts
on the mobile phone. If automatic
downloading of phone contacts is
activated, COMAND displays the copy
¥ with the changed data. To add
additional data, such as additional phone
numbers or e-mail addresses, select this
contact. In this way, you avoid creating
additional copies of the mobile phone
entry. Importing contacts
Information and requirements You can import contacts (vCards) from the
memory card and a USB device into the
address book, or receive vCards via
Bluetooth
®
.
i Up to 2000 entries can be imported into
the address book. A message notifies you
when the maximum number is reached.
You then have to delete existing entries in
order to import new entries (Y page 150).
Depending on the source of the contact data,
different requirements apply: Source Prerequisites
Memory card The SD memory card is
inserted. It contains
importable contact details.
USB device The USB device is inserted
into the USB port. It
contains importable
contact details.
Requirements for receiving vCards via
Bluetooth
®
You can receive vCards from devices (e.g.
from a PC) that support the sending of vCards
via Bluetooth ®
. Using the address book
153Telephone Z
Page 156 of 278
It is not necessary to authorize the device in
COMAND to do so.
Please bear the following in mind:
R Bluetooth ®
must be activated in COMAND
and on the Bluetooth ®
device, see the
operating instructions for the device.
R the Bluetooth ®
device must be able to send
vCards via Bluetooth ®
(see operating
instructions for the device).
R the Bluetooth ®
device in the vehicle must
be switched on.
Importing from the memory card or USB
device Entries imported from the memory card or
from a USB device have the 00BBsymbol.
The following conditions must be fulfilled in
order to import vCards:
R vCards (vcf files) may be located in the main
directory or in folders. COMAND allows you
to select the relevant folders directly.
R vCards must have the file extension ".vcf".
i One vcf file may contain several vCards.
COMAND supports vCards in versions 2.1
and 3.0.
X To change to the menu bar when in the
address book or the telephone basic menu:
slide 00520064the controller.
X To select Options
Options: turn and press the
controller.
X To select Import Contacts
Import Contacts: turn the
controller and press to confirm.
A menu appears.
X To select From
From Memory Memory Card
CardorFrom
From USB
USB
Device
Device in the menu: turn the controller and
press to confirm. Receiving vCards via Bluetooth
® X
To change to the menu bar when in the
address book or the telephone basic menu:
slide 00520064the controller.
X To select Options Options: turn and press the
controller.
X To select Import Contacts
Import Contacts: turn the
controller and press to confirm.
A menu appears.
X To select From Bluetooth Device From Bluetooth Device: turn
the controller and press to confirm.
This interrupts the Bluetooth ®
connection
between COMAND and your active mobile
phone. COMAND is, however, ready to
receive vCards from another Bluetooth ®
device (PC, mobile phone).
X Start the data transfer on the external
Bluetooth ®
device (see the operating
instructions for the device).
The number of vCards received is
displayed.
X To end reception: press the controller or
the 0038 button.
COMAND then reconnects to the mobile
phone.
Received vCards are identified by the 00BA
symbol in the address book.
i If you switch to another main function,
e.g. navigation, while receiving vCards, the
reception of vCards will be terminated.
Deleting contacts X
To change to the menu bar when in the
address book or the basic telephone menu:
slide 00520064the controller.
X To select Options Options: turn and press the
controller.
X To select Delete Contacts
Delete Contacts: turn the
controller and press to confirm.
X Select one of the following options:
R
Internal Contacts Internal Contacts
R Imported From Storage Devices
Imported From Storage Devices 154
Using the address bookTelephone