check engine light MERCEDES-BENZ S-Class 2014 W222 User Guide
[x] Cancel search | Manufacturer: MERCEDES-BENZ, Model Year: 2014, Model line: S-Class, Model: MERCEDES-BENZ S-Class 2014 W222Pages: 434, PDF Size: 29.51 MB
Page 87 of 434
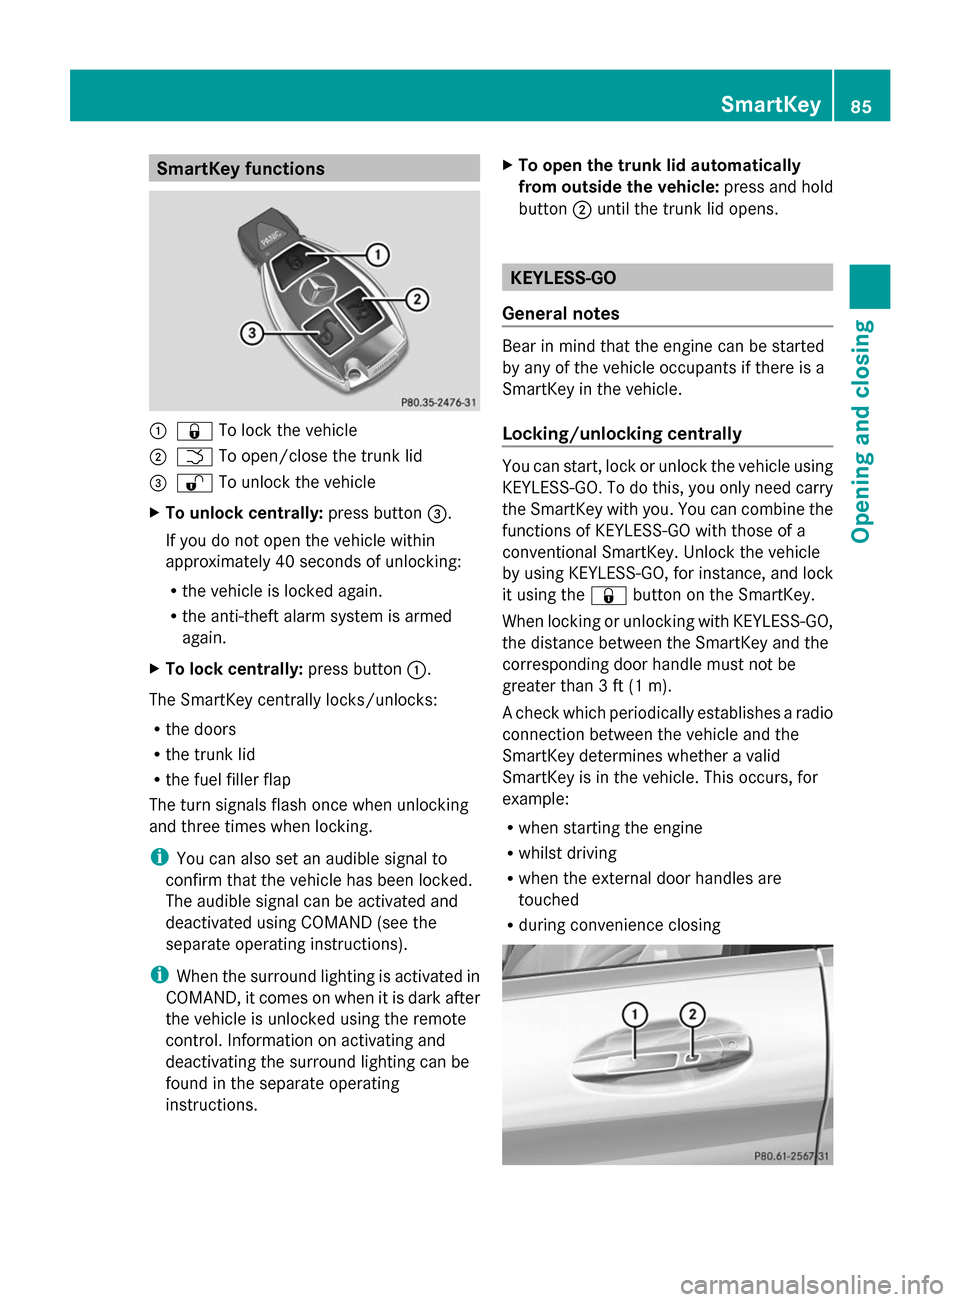
SmartKey functions
0043
0037 To lock the vehicle
0044 0054 To open/close the trunk lid
0087 0036 To unlock the vehicle
X To unlock centrally: press button0087.
If you do not open the vehicle within
approximately 40 seconds of unlocking:
R the vehicle is locked again.
R the anti-theft alarm system is armed
again.
X To lock centrally: press button0043.
The SmartKey centrally locks/unlocks:
R the doors
R the trunk lid
R the fuel filler flap
The turn signals flash once when unlocking
and three times when locking.
i You can also set an audible signal to
confirm that the vehicle has been locked.
The audible signal can be activated and
deactivated using COMAND (see the
separate operating instructions).
i When the surround lighting is activated in
COMAND, it comes on when it is dark after
the vehicle is unlocked using the remote
control. Information on activating and
deactivating the surround lighting can be
found in the separate operating
instructions. X
To open the trunk lid automatically
from outside the vehicle: press and hold
button 0044until the trunk lid opens. KEYLESS-GO
General notes Bear in mind that the engine can be started
by any of the vehicle occupants if there is a
SmartKey in the vehicle.
Locking/unlocking centrally
You can start, lock or unlock the vehicle using
KEYLESS-GO. To do this, you only need carry
the SmartKey with you. You can combine the
functions of KEYLESS-GO with those of a
conventional SmartKey. Unlock the vehicle
by using KEYLESS-GO, for instance, and lock
it using the
0037button on the SmartKey.
When locking or unlocking with KEYLESS-GO,
the distance between the SmartKey and the
corresponding door handle must not be
greater than 3 ft (1 m).
A check which periodically establishes a radio
connection between the vehicle and the
SmartKey determines whether a valid
SmartKey is in the vehicle. This occurs, for
example:
R when starting the engine
R whilst driving
R when the external door handles are
touched
R during convenience closing SmartKey
85Opening and closing Z
Page 92 of 434
Problem Possible causes/consequences and
0050
0050Solutions The engine cannot be
started using the
SmartKey. The on-board voltage is too low.
X
Switch off non-essential consumers, e.g. seat heating or interior
lighting, and try to start the engine again.
If this does not work:
X Check the starter battery and charge it if necessary
(Y page 371).
or
X Jump-start the vehicle (Y page 373).
or
X Consult a qualified specialist workshop. The engine cannot be
started using the Start/
Stop button. The
SmartKey is in the
vehicle. The vehicle is locked.
X
Unlock the vehicle and try to start the vehicle again. There is interference from a powerful source of radio waves.
X
Start your vehicle with the SmartKey in the ignition lock. You have lost a
SmartKey. X
Have the SmartKey deactivated at a qualified specialist
workshop.
X Report the loss immediately to the vehicle insurers.
X If necessary, have the locks changed as well. You have lost the
mechanical key. X
Report the loss immediately to the vehicle insurers.
X If necessary, have the locks changed as well. Doors
Important safety notes
G
WARNING
If children are left unsupervised in the vehicle,
they could:
R open the doors, thus endangering other
people or road users.
R get out and disrupt traffic.
R operate the vehicle's equipment. Additionally, children could set the vehicle in
motion if, for example, they:
R
release the parking brake.
R shifting the automatic transmission out of
park position P
R Start the engine.
There is a risk of an accident and injury.
When leaving the vehicle, always take the
SmartKey with you and lock the vehicle. Never
leave children or animals unattended in the
vehicle. Always keep the SmartKey out of
reach of children. G
WARNING
If persons, particularly children are subjected
to prolonged exposure to extreme heat or 90
DoorsOpening and closing
Page 112 of 434
Useful information
i This Operator's Manual describes all
models and all standard and optional
equipment of your vehicle available at the
time of publication of the Operator's
Manual. Country-specific differences are
possible. Please note that your vehicle may
not be equipped with all features
described. This also applies to safety-
related systems and functions.
i Read the information on qualified
specialist workshops: (Y page 27).Correct driver's seat position
G
WARNING
You could lose control of your vehicle if you
do the following while driving:
R adjust the driver's seat, head restraint,
steering wheel or mirrors
R fasten the seat belt
There is a risk of an accident.
Adjust the driver's seat, head restraint,
steering wheel and mirror and fasten your
seat belt before starting the engine. X
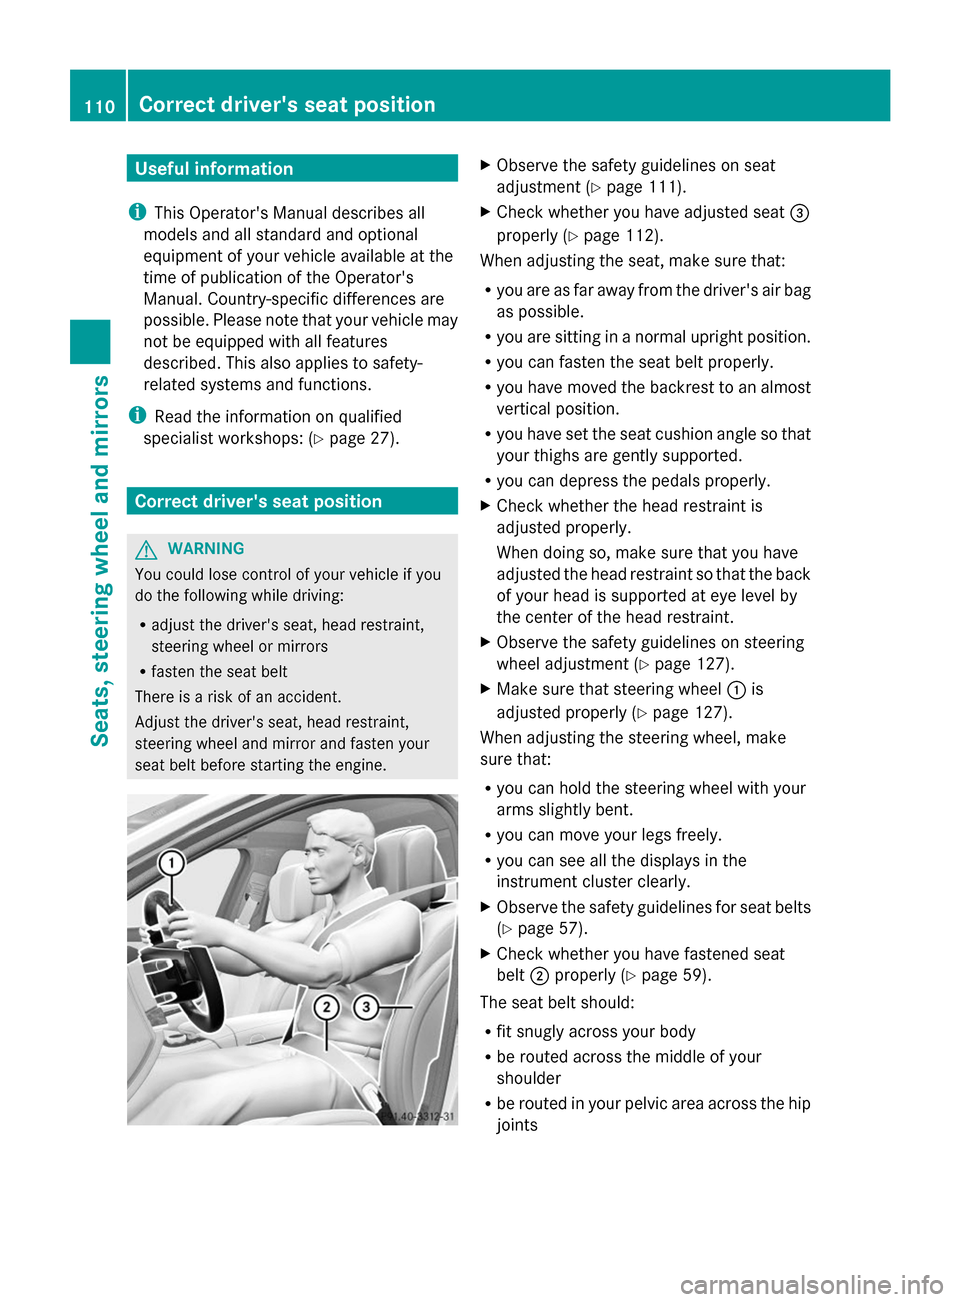
Observe the safety guidelines on seat
adjustment (Y page 111).
X Check whether you have adjusted seat 0087
properly (Y page 112).
When adjusting the seat, make sure that:
R you are as far away from the driver's air bag
as possible.
R you are sitting in a normal upright position.
R you can fasten the seat belt properly.
R you have moved the backrest to an almost
vertical position.
R you have set the seat cushion angle so that
your thighs are gently supported.
R you can depress the pedals properly.
X Check whether the head restraint is
adjusted properly.
When doing so, make sure that you have
adjusted the head restraint so that the back
of your head is supported at eye level by
the center of the head restraint.
X Observe the safety guidelines on steering
wheel adjustment (Y page 127).
X Make sure that steering wheel 0043is
adjusted properly (Y page 127).
When adjusting the steering wheel, make
sure that:
R you can hold the steering wheel with your
arms slightly bent.
R you can move your legs freely.
R you can see all the displays in the
instrument cluster clearly.
X Observe the safety guidelines for seat belts
(Y page 57).
X Check whether you have fastened seat
belt 0044properly (Y page 59).
The seat belt should:
R fit snugly across your body
R be routed across the middle of your
shoulder
R be routed in your pelvic area across the hip
joints 110
Correct driver's seat positionSeats, steering wheel and mirrors
Page 151 of 434
Problems with the windshield wipers
Problem Possible causes/consequences and
0050
0050Solutions The windshield wipers
are obstructed Leaves or snow, for example, may be obstructing the windshield
wiper movement. The wiper motor has been deactivated.
X
Switch off the engine using the Start/Stop button and open the
driver's door.
X Remove the cause of the obstruction.
X Switch the windshield wipers back on. The windshield wipers
fail completely. The windshield wiper drive is malfunctioning.
X
Select another wiper speed on the combination switch.
X Have the windshield wipers checked at a qualified specialist
workshop. The wiper motor has been deactivated.
X
Switch off the engine using the Start/Stop button and open the
driver's door.
X Remove the cause of the obstruction.
X Switch the windshield wipers back on. For a standard wiper
system only: the
windshield washer fluid
from the spray nozzles
no longer hits the
center of the
windshield. The spray nozzles are misaligned.
X
Have the spray nozzles adjusted at a qualified specialist
workshop. Windshield wipers
149Lights and windshield wipers Z
Page 180 of 434
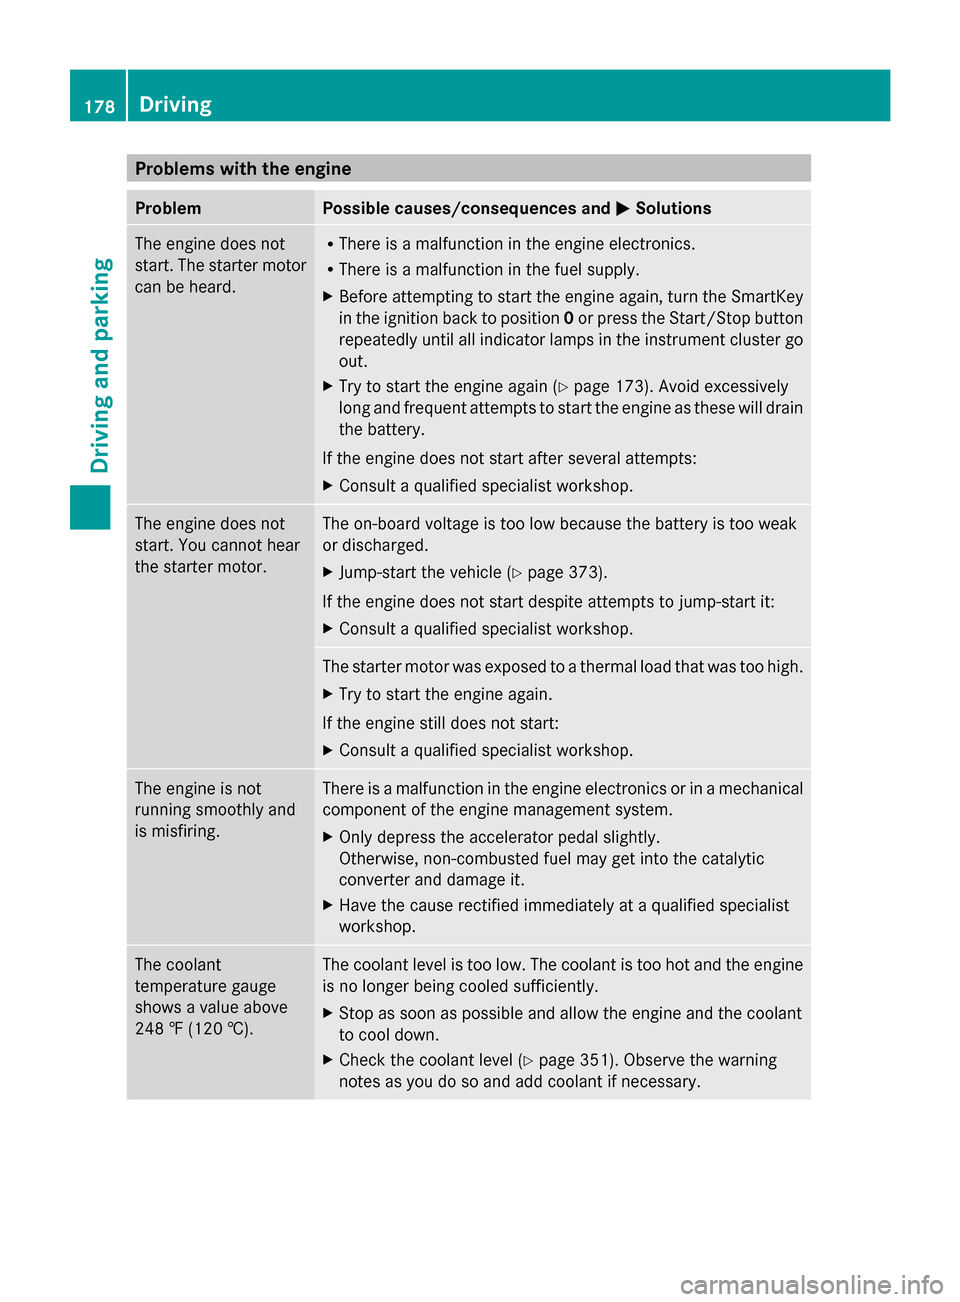
Problems with the engine
Problem Possible causes/consequences and
0050
0050Solutions The engine does not
start. The starter motor
can be heard. R
There is a malfunction in the engine electronics.
R There is a malfunction in the fuel supply.
X Before attempting to start the engine again, turn the SmartKey
in the ignition back to position 0or press the Start/Stop button
repeatedly until all indicator lamps in the instrument cluster go
out.
X Try to start the engine again (Y page 173). Avoid excessively
long and frequent attempts to start the engine as these will drain
the battery.
If the engine does not start after several attempts:
X Consult a qualified specialist workshop. The engine does not
start. You cannot hear
the starter motor. The on-board voltage is too low because the battery is too weak
or discharged.
X
Jump-start the vehicle (Y page 373).
If the engine does not start despite attempts to jump-start it:
X Consult a qualified specialist workshop. The starter motor was exposed to a thermal load that was too high.
X
Try to start the engine again.
If the engine still does not start:
X Consult a qualified specialist workshop. The engine is not
running smoothly and
is misfiring. There is a malfunction in the engine electronics or in a mechanical
component of the engine management system.
X
Only depress the accelerator pedal slightly.
Otherwise, non-combusted fuel may get into the catalytic
converter and damage it.
X Have the cause rectified immediately at a qualified specialist
workshop. The coolant
temperature gauge
shows a value above
248 ‡ (120 †). The coolant level is too low. The coolant is too hot and the engine
is no longer being cooled sufficiently.
X Stop as soon as possible and allow the engine and the coolant
to cool down.
X Check the coolant level (Y page 351). Observe the warning
notes as you do so and add coolant if necessary. 178
DrivingDriving and parking
Page 191 of 434
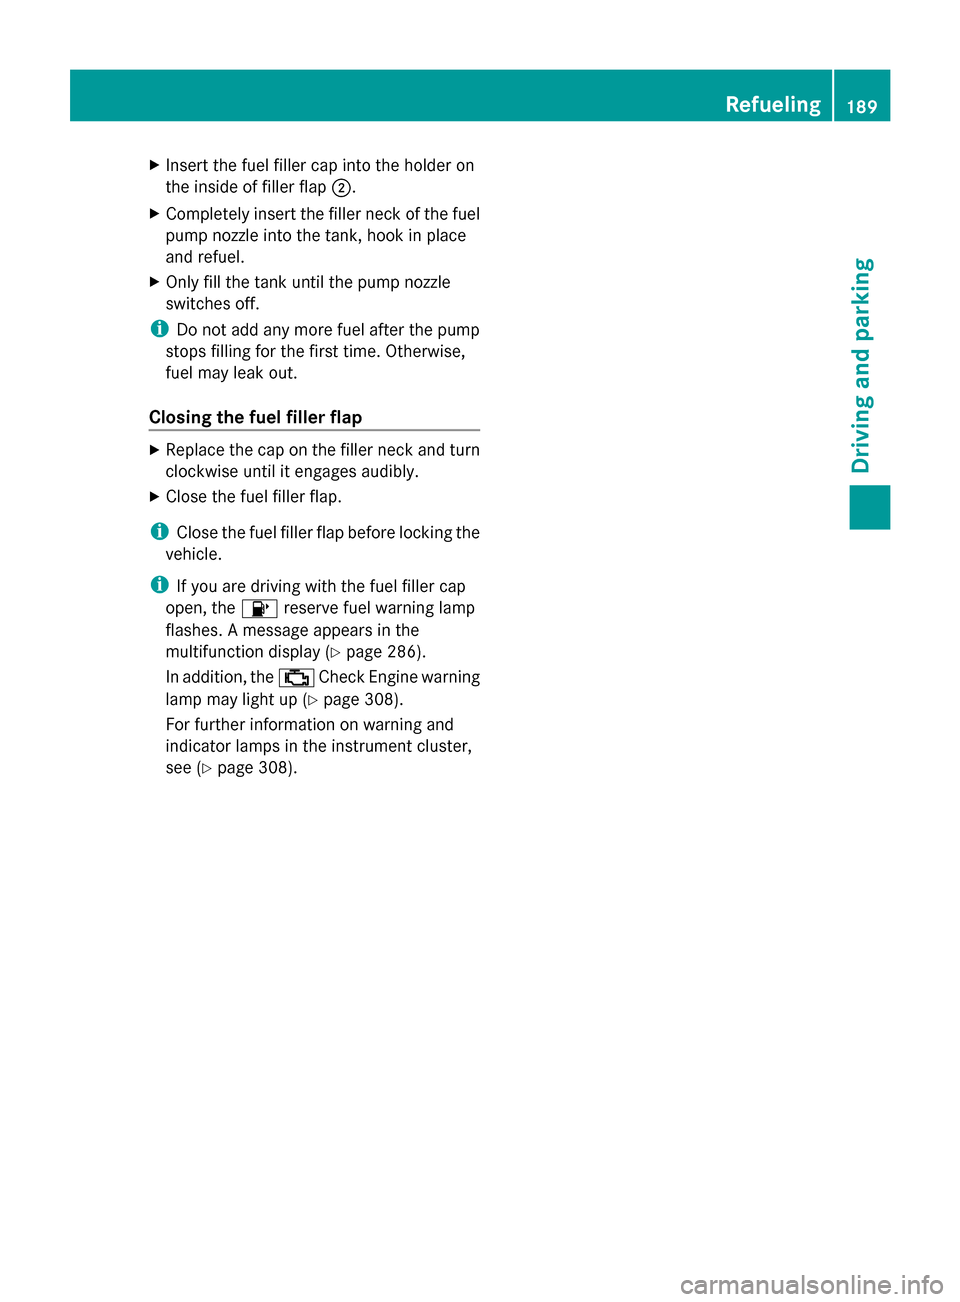
X
Insert the fuel filler cap into the holder on
the inside of filler flap 0044.
X Completely insert the filler neck of the fuel
pump nozzle into the tank, hook in place
and refuel.
X Only fill the tank until the pump nozzle
switches off.
i Do not add any more fuel after the pump
stops filling for the first time. Otherwise,
fuel may leak out.
Closing the fuel filler flap X
Replace the cap on the filler neck and turn
clockwise until it engages audibly.
X Close the fuel filler flap.
i Close the fuel filler flap before locking the
vehicle.
i If you are driving with the fuel filler cap
open, the 00B6reserve fuel warning lamp
flashes. A message appears in the
multifunction display (Y page 286).
In addition, the 00B9Check Engine warning
lamp may light up (Y page 308).
For further information on warning and
indicator lamps in the instrument cluster,
see (Y page 308). Refueling
189Driving and parking Z
Page 198 of 434
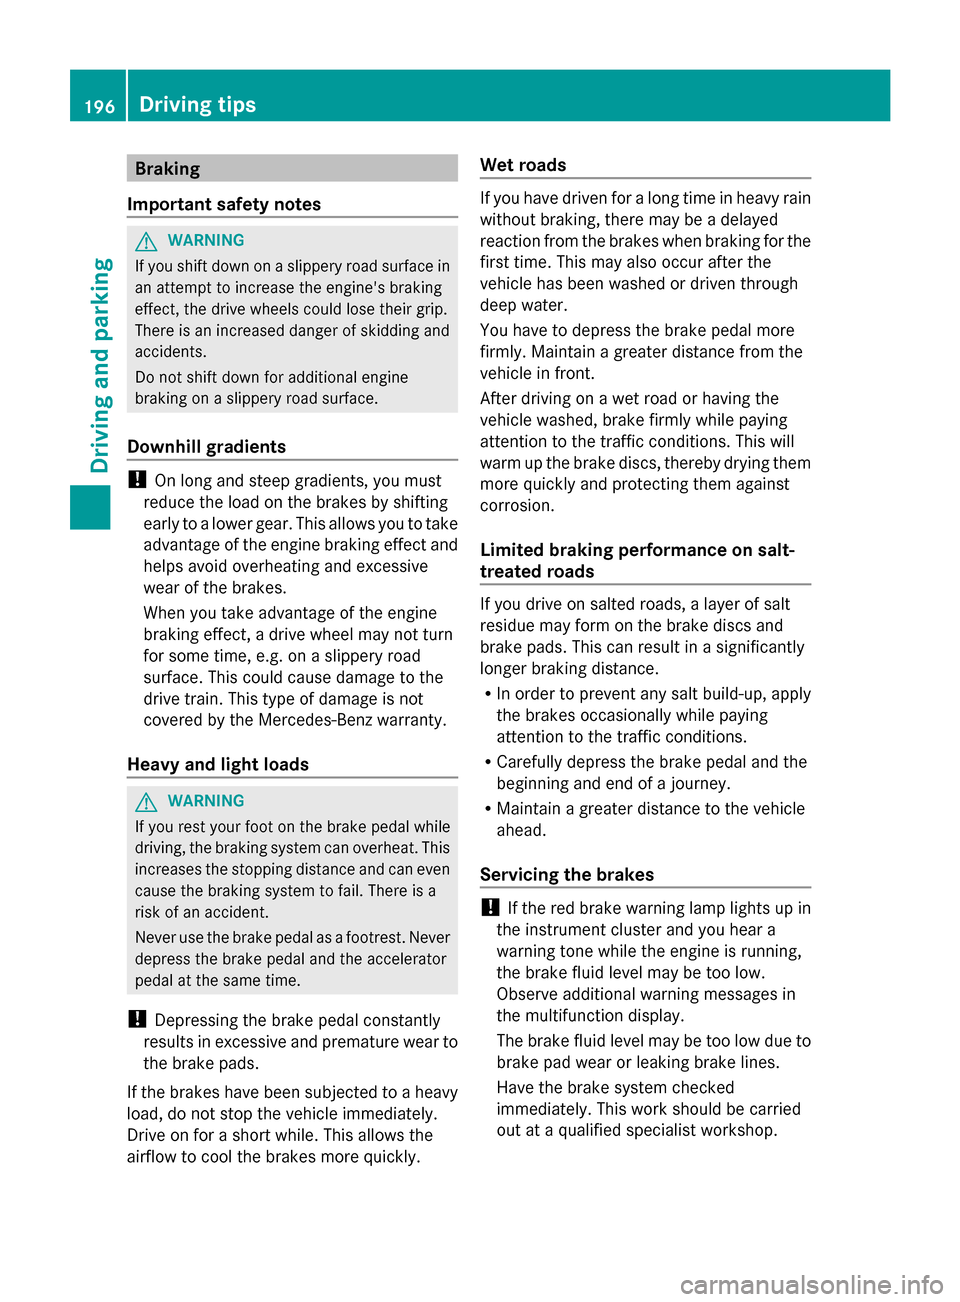
Braking
Important safety notes G
WARNING
If you shift down on a slippery road surface in
an attempt to increase the engine's braking
effect, the drive wheels could lose their grip.
There is an increased danger of skidding and
accidents.
Do not shift down for additional engine
braking on a slippery road surface.
Downhill gradients !
On long and steep gradients, you must
reduce the load on the brakes by shifting
early to a lower gear. This allows you to take
advantage of the engine braking effect and
helps avoid overheating and excessive
wear of the brakes.
When you take advantage of the engine
braking effect, a drive wheel may not turn
for some time, e.g. on a slippery road
surface. This could cause damage to the
drive train. This type of damage is not
covered by the Mercedes-Benz warranty.
Heavy and light loads G
WARNING
If you rest your foot on the brake pedal while
driving, the braking system can overheat. This
increases the stopping distance and can even
cause the braking system to fail. There is a
risk of an accident.
Never use the brake pedal as a footrest. Never
depress the brake pedal and the accelerator
pedal at the same time.
! Depressing the brake pedal constantly
results in excessive and premature wear to
the brake pads.
If the brakes have been subjected to a heavy
load, do not stop the vehicle immediately.
Drive on for a short while. This allows the
airflow to cool the brakes more quickly. Wet roads If you have driven for a long time in heavy rain
without braking, there may be a delayed
reaction from the brakes when braking for the
first time. This may also occur after the
vehicle has been washed or driven through
deep water.
You have to depress the brake pedal more
firmly. Maintain a greater distance from the
vehicle in front.
After driving on a wet road or having the
vehicle washed, brake firmly while paying
attention to the traffic conditions. This will
warm up the brake discs, thereby drying them
more quickly and protecting them against
corrosion.
Limited braking performance on salt-
treated roads If you drive on salted roads, a layer of salt
residue may form on the brake discs and
brake pads. This can result in a significantly
longer braking distance.
R In order to prevent any salt build-up, apply
the brakes occasionally while paying
attention to the traffic conditions.
R Carefully depress the brake pedal and the
beginning and end of a journey.
R Maintain a greater distance to the vehicle
ahead.
Servicing the brakes !
If the red brake warning lamp lights up in
the instrument cluster and you hear a
warning tone while the engine is running,
the brake fluid level may be too low.
Observe additional warning messages in
the multifunction display.
The brake fluid level may be too low due to
brake pad wear or leaking brake lines.
Have the brake system checked
immediately. This work should be carried
out at a qualified specialist workshop. 196
Driving tipsDriving an
d parking
Page 199 of 434
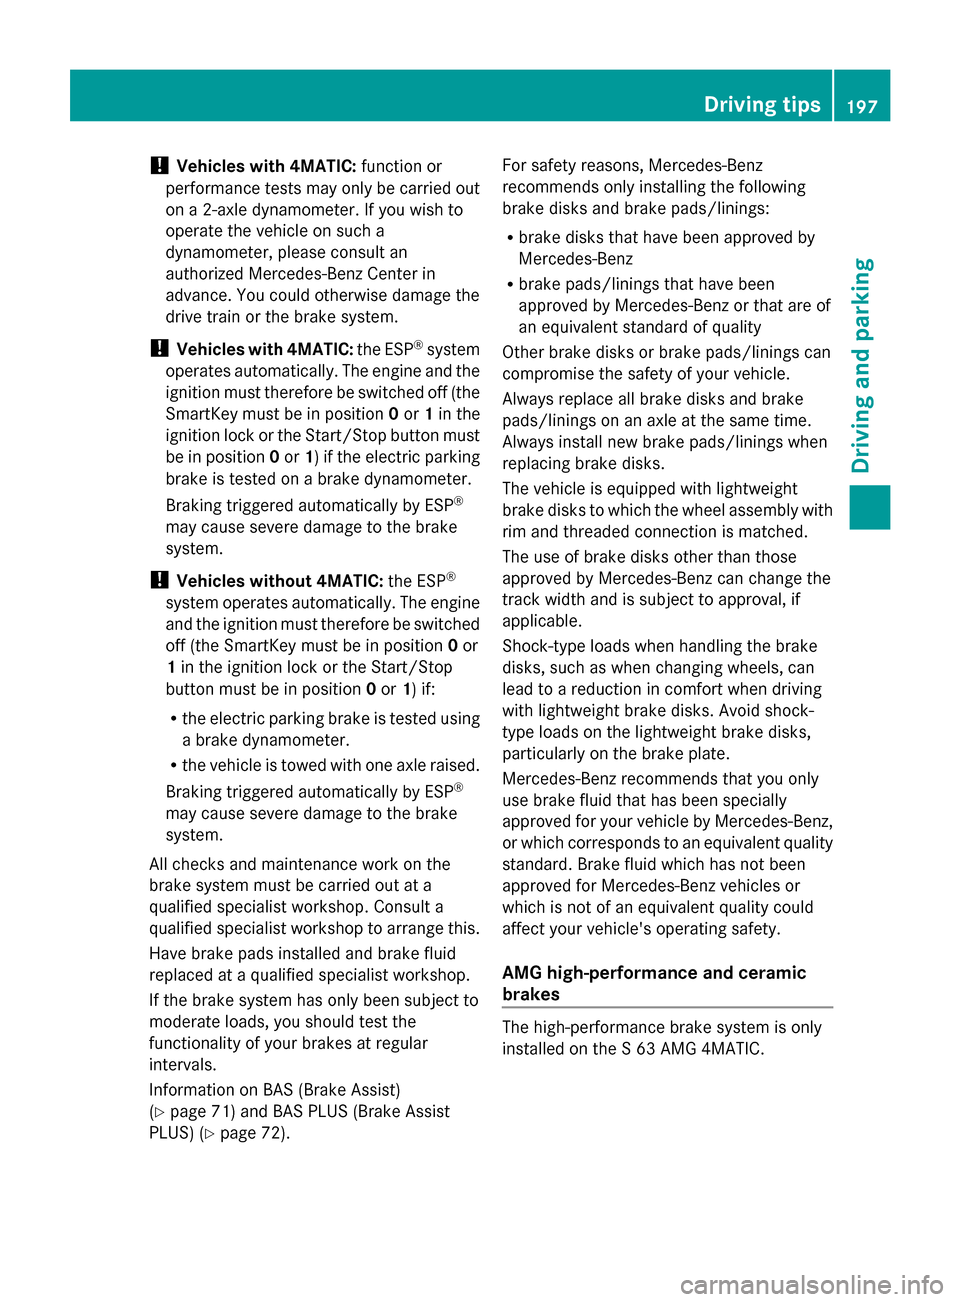
!
Vehicles with 4MATIC: function or
performance tests may only be carried out
on a 2-axle dynamometer. If you wish to
operate the vehicle on such a
dynamometer, please consult an
authorized Mercedes-Benz Center in
advance. You could otherwise damage the
drive train or the brake system.
! Vehicles with 4MATIC: the ESP®
system
operates automatically. The engine and the
ignition must therefore be switched off (the
SmartKey must be in position 0or 1in the
ignition lock or the Start/Stop button must
be in position 0or 1) if the electric parking
brake is tested on a brake dynamometer.
Braking triggered automatically by ESP ®
may cause severe damage to the brake
system.
! Vehicles without 4MATIC: the ESP®
system operates automatically. The engine
and the ignition must therefore be switched
off (the SmartKey must be in position 0or
1 in the ignition lock or the Start/Stop
button must be in position 0or 1) if:
R the electric parking brake is tested using
a brake dynamometer.
R the vehicle is towed with one axle raised.
Braking triggered automatically by ESP ®
may cause severe damage to the brake
system.
All checks and maintenance work on the
brake system must be carried out at a
qualified specialist workshop. Consult a
qualified specialist workshop to arrange this.
Have brake pads installed and brake fluid
replaced at a qualified specialist workshop.
If the brake system has only been subject to
moderate loads, you should test the
functionality of your brakes at regular
intervals.
Information on BAS (Brake Assist)
(Y page 71) and BAS PLUS (Brake Assist
PLUS) (Y page 72). For safety reasons, Mercedes-Benz
recommends only installing the following
brake disks and brake pads/linings:
R
brake disks that have been approved by
Mercedes-Benz
R brake pads/linings that have been
approved by Mercedes-Benz or that are of
an equivalent standard of quality
Other brake disks or brake pads/linings can
compromise the safety of your vehicle.
Always replace all brake disks and brake
pads/linings on an axle at the same time.
Always install new brake pads/linings when
replacing brake disks.
The vehicle is equipped with lightweight
brake disks to which the wheel assembly with
rim and threaded connection is matched.
The use of brake disks other than those
approved by Mercedes-Benz can change the
track width and is subject to approval, if
applicable.
Shock-type loads when handling the brake
disks, such as when changing wheels, can
lead to a reduction in comfort when driving
with lightweight brake disks. Avoid shock-
type loads on the lightweight brake disks,
particularly on the brake plate.
Mercedes-Benz recommends that you only
use brake fluid that has been specially
approved for your vehicle by Mercedes-Benz,
or which corresponds to an equivalent quality
standard. Brake fluid which has not been
approved for Mercedes-Benz vehicles or
which is not of an equivalent quality could
affect your vehicle's operating safety.
AMG high-performance and ceramic
brakes The high-performance brake system is only
installed on the S 63 AMG 4MATIC. Driving tips
197Driving and parking Z
Page 228 of 434
R
you are driving faster than 6 mph
(10 km/h)
R a wheel spins, ESP ®
intervenes or fails. The
00E5 warning lamp lights up in the
instrument cluster.
A warning tone sounds. The parking symbol
disappears and the multifunction display
shows the Park Assist Canceled
Park Assist Canceled
message.
When Active Parking Assist is canceled, you
must steer and brake again yourself.
If a system malfunction occurs, the vehicle is
braked to a standstill. To drive on, depress the
accelerator again. Rear view camera
General notes Rear view camera
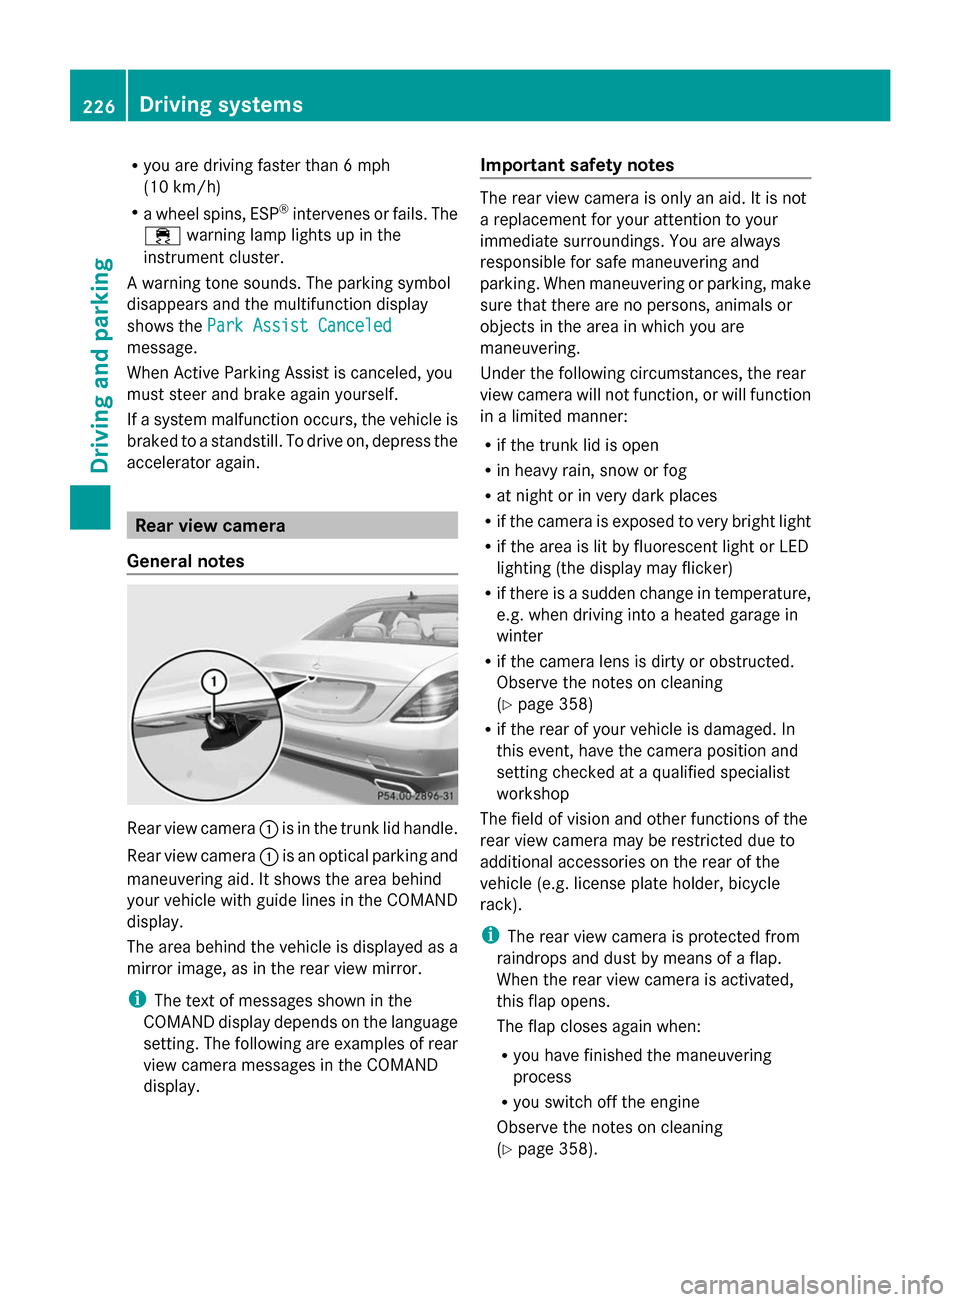
0043is in the trunk lid handle.
Rear view camera 0043is an optical parking and
maneuvering aid. It shows the area behind
your vehicle with guide lines in the COMAND
display.
The area behind the vehicle is displayed as a
mirror image, as in the rear view mirror.
i The text of messages shown in the
COMAND display depends on the language
setting. The following are examples of rear
view camera messages in the COMAND
display. Important safety notes The rear view camera is only an aid. It is not
a replacement for your attention to your
immediate surroundings. You are always
responsible for safe maneuvering and
parking. When maneuvering or parking, make
sure that there are no persons, animals or
objects in the area in which you are
maneuvering.
Under the following circumstances, the rear
view camera will not function, or will function
in a limited manner:
R
if the trunk lid is open
R in heavy rain, snow or fog
R at night or in very dark places
R if the camera is exposed to very bright light
R if the area is lit by fluorescent light or LED
lighting (the display may flicker)
R if there is a sudden change in temperature,
e.g. when driving into a heated garage in
winter
R if the camera lens is dirty or obstructed.
Observe the notes on cleaning
(Y page 358)
R if the rear of your vehicle is damaged. In
this event, have the camera position and
setting checked at a qualified specialist
workshop
The field of vision and other functions of the
rear view camera may be restricted due to
additional accessories on the rear of the
vehicle (e.g. license plate holder, bicycle
rack).
i The rear view camera is protected from
raindrops and dust by means of a flap.
When the rear view camera is activated,
this flap opens.
The flap closes again when:
R you have finished the maneuvering
process
R you switch off the engine
Observe the notes on cleaning
(Y page 358). 226
Driving syste
msDriving and parking
Page 240 of 434
Night View Assist Plus can recognize larger
animals such as deer, cows or horses using
typical characteristics.
The system does not detect:
R smaller animals, e.g. dogs and cats
R animals whose silhouette is not clearly
recognizable.
When detected, animals are marked with
small color frame corners. In contrast to
pedestrian recognition, there is no separate
readiness symbol in the multifunction
display.
Switching Night View Assist on/off Activation conditions
You can only activate Night View Assist Plus
if all of the following conditions are met:
R the ignition is switched on (Y page 171) or
the engine has been started.
R the light switch is in the 0058or0058
position.
R reverse gear has not been engaged.
Activating Night View Assist Plus X
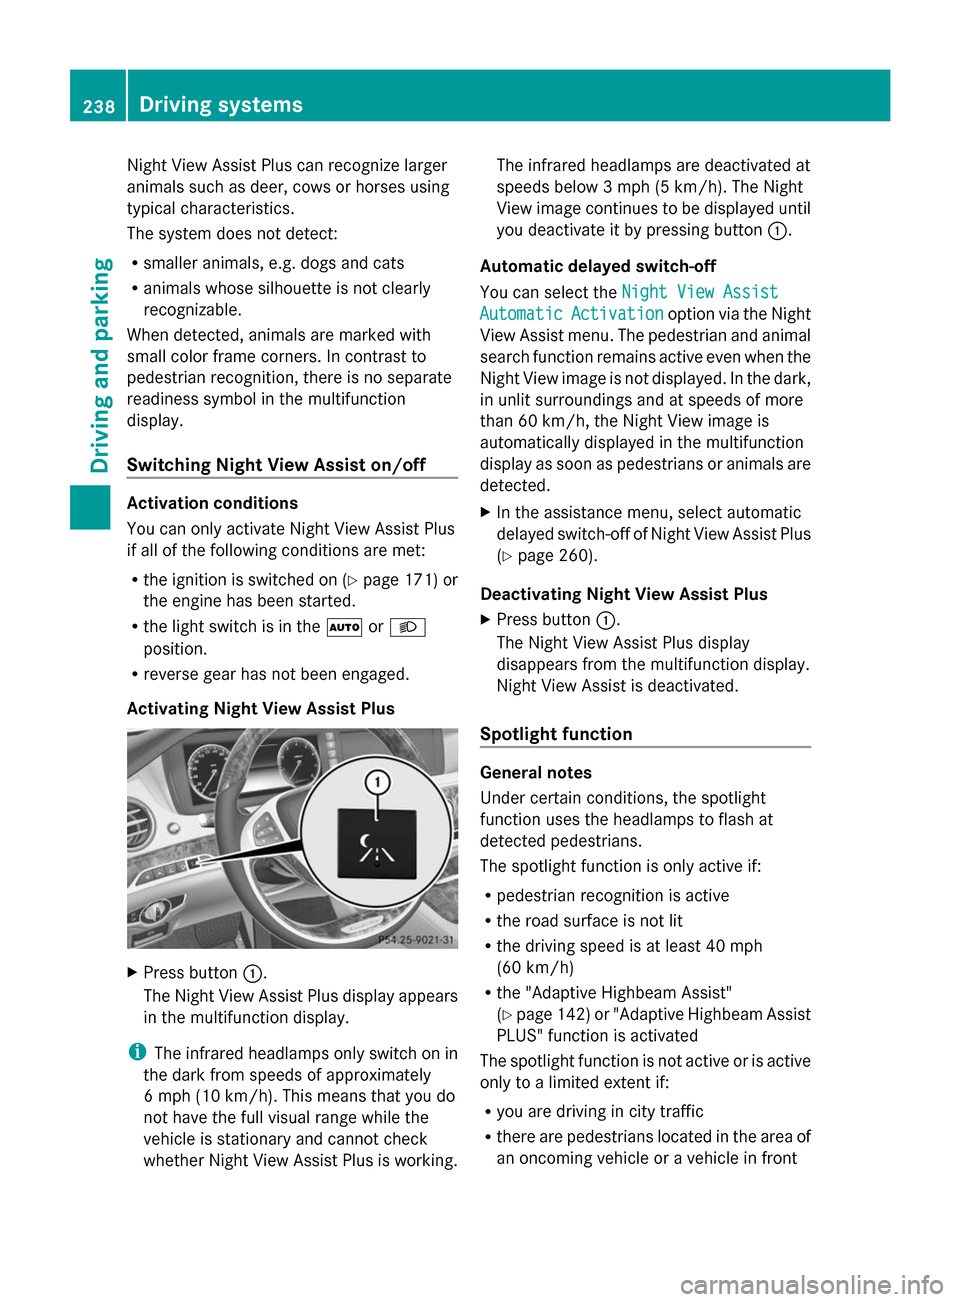
Press button 0043.
The Night View Assist Plus display appears
in the multifunction display.
i The infrared headlamps only switch on in
the dark from speeds of approximately
6 mph (10 km/h). This means that you do
not have the full visual range while the
vehicle is stationary and cannot check
whether Night View Assist Plus is working. The infrared headlamps are deactivated at
speeds below 3 mph (5 km/h). The Night
View image continues to be displayed until
you deactivate it by pressing button 0043.
Automatic delayed switch-off
You can select the Night View Assist Night View Assist
Automatic
Automatic Activation
Activation option via the Night
View Assist menu. The pedestrian and animal
search function remains active even when the
Night View image is not displayed. In the dark,
in unlit surroundings and at speeds of more
than 60 km/h, the Night View image is
automatically displayed in the multifunction
display as soon as pedestrians or animals are
detected.
X In the assistance menu, select automatic
delayed switch-off of Night View Assist Plus
(Y page 260).
Deactivating Night View Assist Plus
X Press button 0043.
The Night View Assist Plus display
disappears from the multifunction display.
Night View Assist is deactivated.
Spotlight function General notes
Under certain conditions, the spotlight
function uses the headlamps to flash at
detected pedestrians.
The spotlight function is only active if:
R
pedestrian recognition is active
R the road surface is not lit
R the driving speed is at least 40 mph
(60 km/h)
R the "Adaptive Highbeam Assist"
(Y page 142) or "Adaptive Highbeam Assist
PLUS" function is activated
The spotlight function is not active or is active
only to a limited extent if:
R you are driving in city traffic
R there are pedestrians located in the area of
an oncoming vehicle or a vehicle in front 238
Driving systemsDriving and parking