repeat MERCEDES-BENZ S-Class 2015 W222 Comand Manual
[x] Cancel search | Manufacturer: MERCEDES-BENZ, Model Year: 2015, Model line: S-Class, Model: MERCEDES-BENZ S-Class 2015 W222Pages: 298, PDF Size: 6.39 MB
Page 152 of 298
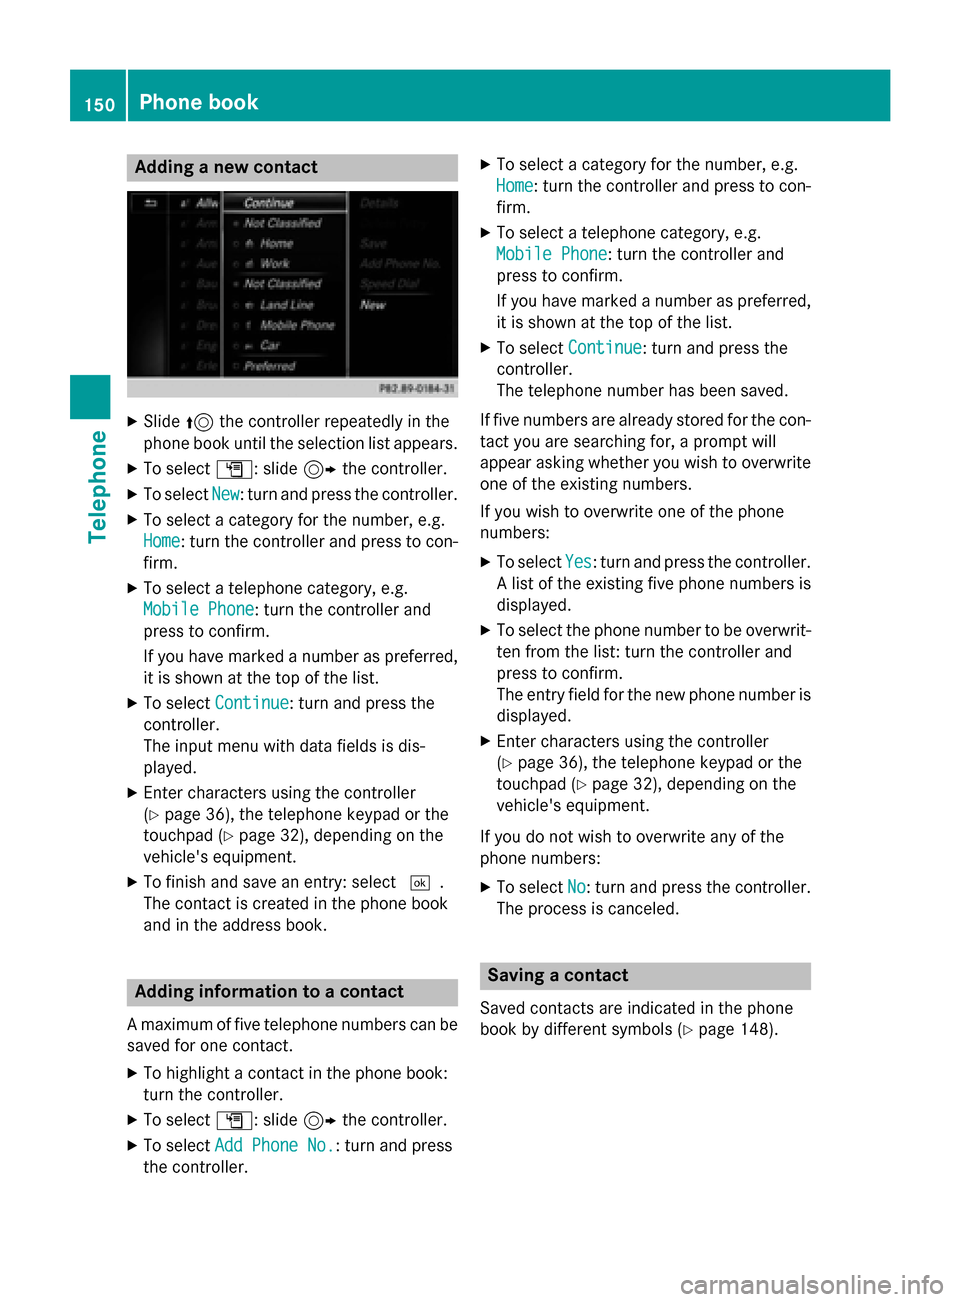
Adding a new contact
X
Slide 5the controller repeatedly in the
phone book until the selection list appears.
X To select G: slide 9the controller.
X To select New
New : turn and press the controller.
X To select a category for the number, e.g.
Home
Home: turn the controller and press to con-
firm.
X To select a telephone category, e.g.
Mobile Phone
Mobile Phone: turn the controller and
press to confirm.
If you have marked a number as preferred,
it is shown at the top of the list.
X To select Continue
Continue: turn and press the
controller.
The input menu with data fields is dis-
played.
X Enter characters using the controller
(Y page 36), the telephone keypad or the
touchpad (Y page 32), depending on the
vehicle's equipment.
X To finish and save an entry: select 0054.
The contact is created in the phone book
and in the address book. Adding information to a contact
A maximum of five telephone numbers can be saved for one contact.
X To highlight a contact in the phone book:
turn the controller.
X To select G: slide 9the controller.
X To select Add Phone No.
Add Phone No. : turn and press
the controller. X
To select a category for the number, e.g.
Home
Home: turn the controller and press to con-
firm.
X To select a telephone category, e.g.
Mobile Phone
Mobile Phone: turn the controller and
press to confirm.
If you have marked a number as preferred,
it is shown at the top of the list.
X To select Continue Continue: turn and press the
controller.
The telephone number has been saved.
If five numbers are already stored for the con- tact you are searching for, a prompt will
appear asking whether you wish to overwrite
one of the existing numbers.
If you wish to overwrite one of the phone
numbers:
X To select Yes
Yes : turn and press the controller.
A list of the existing five phone numbers is
displayed.
X To select the phone number to be overwrit-
ten from the list: turn the controller and
press to confirm.
The entry field for the new phone number is
displayed.
X Enter characters using the controller
(Y page 36), the telephone keypad or the
touchpad (Y page 32), depending on the
vehicle's equipment.
If you do not wish to overwrite any of the
phone numbers: X To select No No: turn and press the controller.
The process is canceled. Saving a contact
Saved contacts are indicated in the phone
book by different symbols (Y page 148).150
Phone bookTelephone
Page 154 of 298
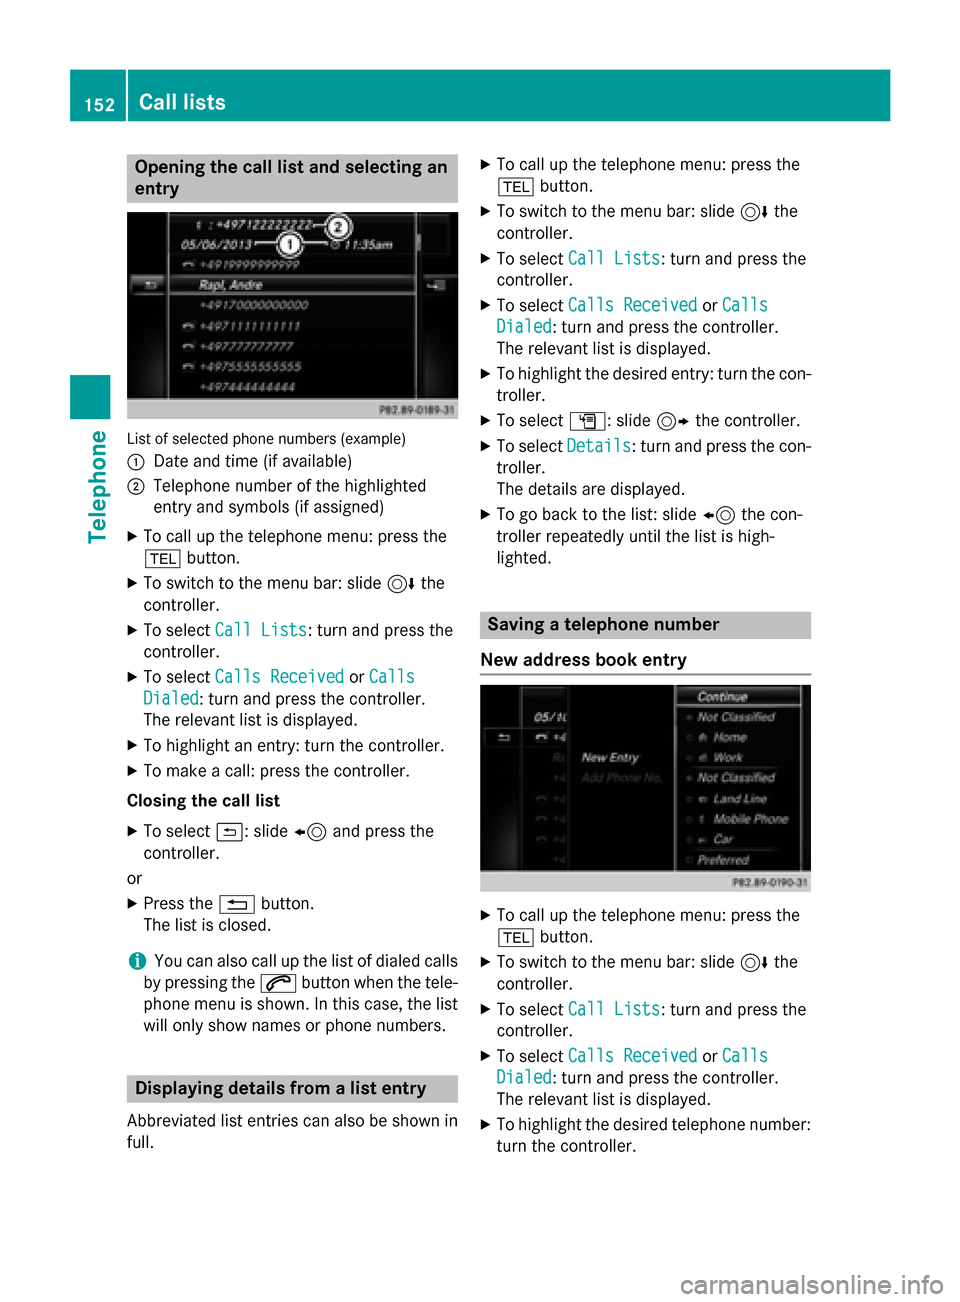
Opening the call list and selecting an
entry List of selected phone numbers (example)
0043
Date and time (if available)
0044 Telephone number of the highlighted
entry and symbols (if assigned)
X To call up the telephone menu: press the
002B button.
X To switch to the menu bar: slide 6the
controller.
X To select Call Lists
Call Lists: turn and press the
controller.
X To select Calls Received Calls Received orCalls
Calls
Dialed
Dialed: turn and press the controller.
The relevant list is displayed.
X To highlight an entry: turn the controller.
X To make a call: press the controller.
Closing the call list X To select 0039: slide 8and press the
controller.
or X Press the 0038button.
The list is closed.
i You can also call up the list of dialed calls
by pressing the 0061button when the tele-
phone menu is shown. In this case, the list
will only show names or phone numbers. Displaying details from a list entry
Abbreviated list entries can also be shown in
full. X
To call up the telephone menu: press the
002B button.
X To switch to the menu bar: slide 6the
controller.
X To select Call Lists
Call Lists: turn and press the
controller.
X To select Calls Received Calls Received orCalls
Calls
Dialed
Dialed: turn and press the controller.
The relevant list is displayed.
X To highlight the desired entry: turn the con-
troller.
X To select G: slide 9the controller.
X To select Details Details: turn and press the con-
troller.
The details are displayed.
X To go back to the list: slide 8the con-
troller repeatedly until the list is high-
lighted. Saving a telephone number
New address book entry X
To call up the telephone menu: press the
002B button.
X To switch to the menu bar: slide 6the
controller.
X To select Call Lists
Call Lists: turn and press the
controller.
X To select Calls Received Calls Received orCalls Calls
Dialed Dialed: turn and press the controller.
The relevant list is displayed.
X To highlight the desired telephone number:
turn the controller. 152
Call listsTelephone
Page 165 of 298
You can view these contacts even without a
mobile phone.
i The address book can store a total of
5000 contacts.
R 2000 entries are reserved for perma-
nently saved contacts.
R 3000 entries are reserved for contacts
that you can load from the mobile phone.
i Before selling your vehicle, delete the
contacts saved in COMAND using the reset function (Y page 55). Calling up the address book
X To call up the telephone menu: press the
002B button.
X To switch to the main function bar: slide
5 the controller.
X To select Tel Tel: turn the controller and press
to confirm.
X To select Address Book
Address Book : turn and press
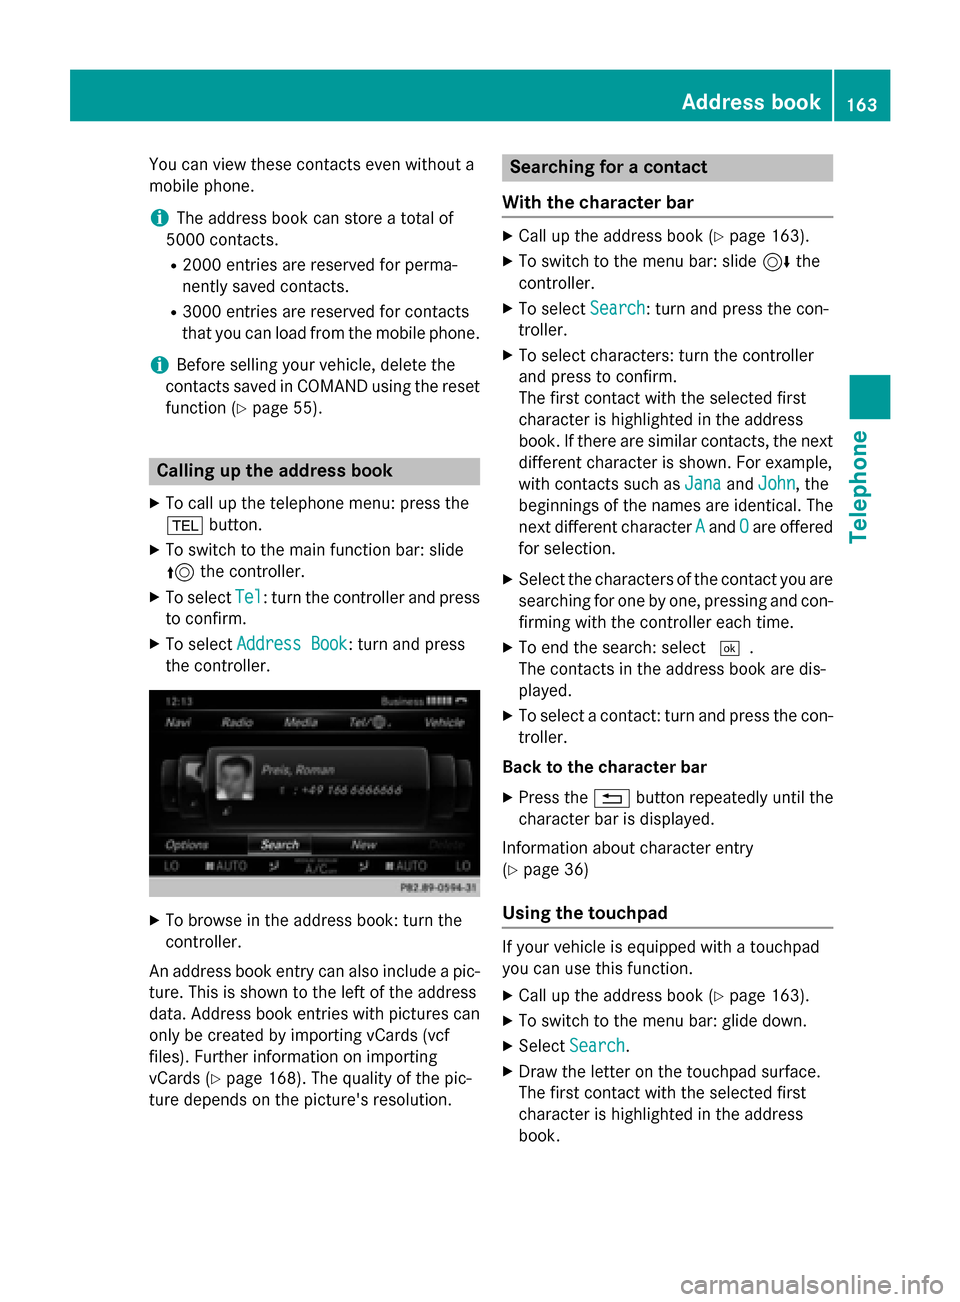
the controller. X
To browse in the address book: turn the
controller.
An address book entry can also include a pic- ture. This is shown to the left of the address
data. Address book entries with pictures can
only be created by importing vCards (vcf
files). Further information on importing
vCards (Y page 168). The quality of the pic-
ture depends on the picture's resolution. Searching for a contact
With the character bar X
Call up the address book (Y page 163).
X To switch to the menu bar: slide 6the
controller.
X To select Search Search: turn and press the con-
troller.
X To select characters: turn the controller
and press to confirm.
The first contact with the selected first
character is highlighted in the address
book. If there are similar contacts, the next
different character is shown. For example,
with contacts such as Jana JanaandJohn John , the
beginnings of the names are identical. The
next different character A Aand O
Oare offered
for selection.
X Select the characters of the contact you are
searching for one by one, pressing and con- firming with the controller each time.
X To end the search: select 0054.
The contacts in the address book are dis-
played.
X To select a contact: turn and press the con-
troller.
Back to the character bar X Press the 0038button repeatedly until the
character bar is displayed.
Information about character entry
(Y page 36)
Using the touchpad If your vehicle is equipped with a touchpad
you can use this function.
X Call up the address book (Y page 163).
X To switch to the menu bar: glide down.
X Select Search Search.
X Draw the letter on the touchpad surface.
The first contact with the selected first
character is highlighted in the address
book. Address book
163Telephone Z
Page 216 of 298
You will then see the
Please insert
Please insert
disc Slot_number.
disc Slot_number. message.
X Insert a disc into the disc slot with the
printed side facing upwards. X
To load all empty magazine trays: press
the 0065 button
The magazine menu appears.
X To select Load Empty Slots Load Empty Slots: slide 005200C5,
turn and press controller.
COMAND switches to the next empty mag-
azine tray.
You will see the Please Wait...
Please Wait... mes-
sage.
You then see the Please insert disc Please insert disc
X Insert a disc into the disc slot with the
printed side facing upwards.
Once the disc is loaded, the DVD changer
switches to the next empty tray.
X Repeat these steps until all magazine trays
are filled.
The DVD changer plays the last inserted
disc.
X To cancel the loading process: press the
0065 button.
or
X To select 0038in the magazine menu: turn
and press the controller. Ejecting discs from the DVD changer
i If you remove one disc while playing
another disc, the DVD changer interrupts playback. Playback continues once the disc
has been ejected.
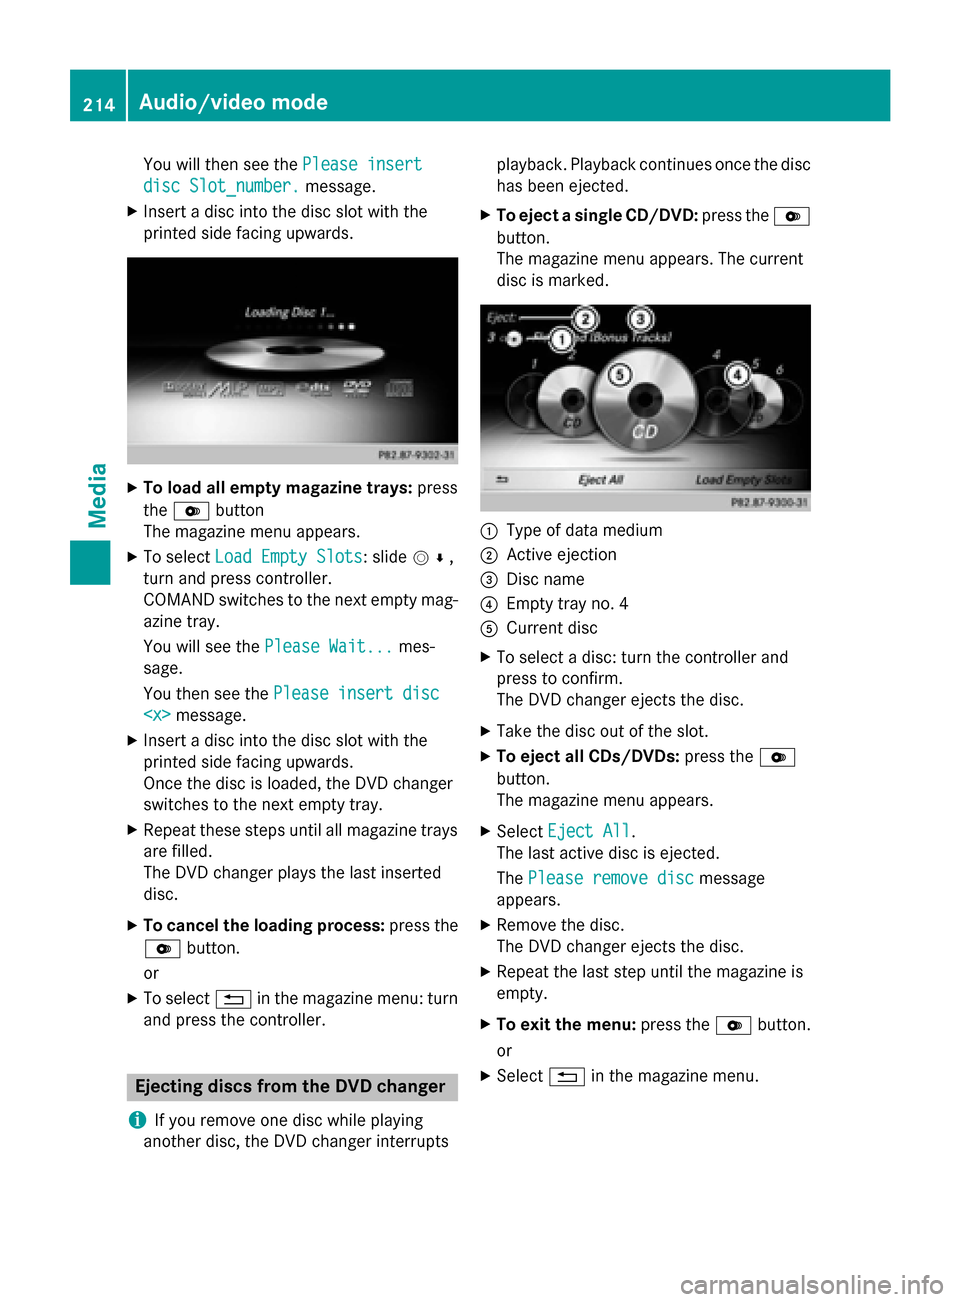
X To eject a single CD/DVD: press the0065
button.
The magazine menu appears. The current
disc is marked. 0043
Type of data medium
0044 Active ejection
0087 Disc name
0085 Empty tray no. 4
0083 Current disc
X To select a disc: turn the controller and
press to confirm.
The DVD changer ejects the disc.
X Take the disc out of the slot.
X To eject all CDs/DVDs: press the0065
button.
The magazine menu appears.
X Select Eject All Eject All.
The last active disc is ejected.
The Please remove disc Please remove disc message
appears.
X Remove the disc.
The DVD changer ejects the disc.
X Repeat the last step until the magazine is
empty.
X To exit the menu: press the0065button.
or
X Select 0038in the magazine menu. 214
Audio/video modeMedia
Page 277 of 298
Example: track 2
X
Press number button 2.
Example: track 12 X Press the corresponding number keys in
rapid succession.
X Wait for approximately three seconds after
making the entry.
You will hear the track which has been
entered. The corresponding basic menu
then reappears.
i It is not possible to enter numbers that
exceed the number of tracks on the CD or in
the currently active folder. Fast forwarding/rewinding
X With the display/selection window active,
press the 0059or0065 button on the
remote control repeatedly until you reach
the desired position.
or
X Press and hold the 0048or0049 button
until the desired position is reached. Selecting a folder
This function is only available in MP3 mode.
X Select Search
Search using the 006400590065
buttons on the remote control and press
the 008Bbutton to confirm.
X Select Folder
Folder using the 006400590065
buttons and press the 008Bbutton to confirm.
The folder content appears.
X To switch to the next folder up: press the
0059 button on the remote control.
The display shows the next folder up.
X Select the folder with the 00630064but-
tons and press the 008Bbutton to confirm.
You will see the tracks in the folder.
X Select the track using the 00630064but-
tons and press the 008Bbutton to confirm.
The track is played and the corresponding
folder is now the active folder. Pause/Playback
X To pause playback: press the0065/
00CF button on the remote control.
The 00CF display changes to 00D0.
X To continue playback: press the0065/
00CF button.
The 00D0 display changes to 00CF. Playback options
X Select Options Options using the 006400590065
buttons and press the 008Bbutton to confirm.
X The options list appears. The 0036dot indi-
cates the option currently selected.
X Select Normal Normal Track
TrackSequence
Sequence ,Random
Random
Tracks
Tracks orRandom Folder
Random Folder using the
00630064 buttons and press the 008Bbutton
to confirm.
The option is switched on. For all options
except Normal Track Sequence
Normal Track Sequence, you will
see a corresponding display in the display/
selection window.
i If you switch the data carrier which you
are currently listening to, the Normal
Normal
Track Sequence Track Sequence option is activated auto-
matically. If an option is selected, it
remains selected after the system is
switched on or off. Switching track information on/off
If the function is switched on, the information saved in the audio files, such as track, artist or
album, will be shown (if available).
If the function is switched off, the names of
the files and folders on the disc are shown.
X Select Options Options using the 006400590065
buttons and press the 008Bbutton to confirm.
X Select Show Track Information
Show Track Information using
the 00630064 buttons and press the 008B
button to confirm.
The function is switched on 0073or off 0053,
depending on the previous status. Audio/video mode
275Rear Seat Entertainment System Z
Page 278 of 298
Video DVD mode
Important safety notes
G
WARNING
The CD/DVD drive is a class 1 laser product. If you open the housing of the CD/DVD drive,
there is a risk of exposure to invisible laser
radiation. This laser radiation could damage
your retina. There is a risk of injury.
Never open the housing. Always have main-
tenance and repair work carried out at a quali- fied specialist workshop. General notes
DVD playback conditions Playback problems may occur when playing
copied discs. There is a large variety of discs,
DVD authoring software, writing software and writers available. This variety means that
there is no guarantee that the system will be
able to play video DVDs you have copied your-
self.
More information on the playback criteria
(Y page 241).
Function restrictions Depending on the DVD, certain functions or
actions may be temporarily blocked or not
function at all. As soon as you try to activate
these functions, you will see the
0047symbol in
the display. Switching to video DVD mode
X Insert a video DVD (Y page 264).
The system loads the disc.
If disc mode was the last mode selected, it will now be active.
X Manually switch to video DVD mode:
repeatedly press the 00FDbutton on the remote control until the video DVD mode is
switched on.
If the video DVD fulfills the playback crite-
ria, the film starts automatically or the DVD
menu appears. If the DVD menu appears,
you must start the film manually.
X Select the corresponding menu item in the
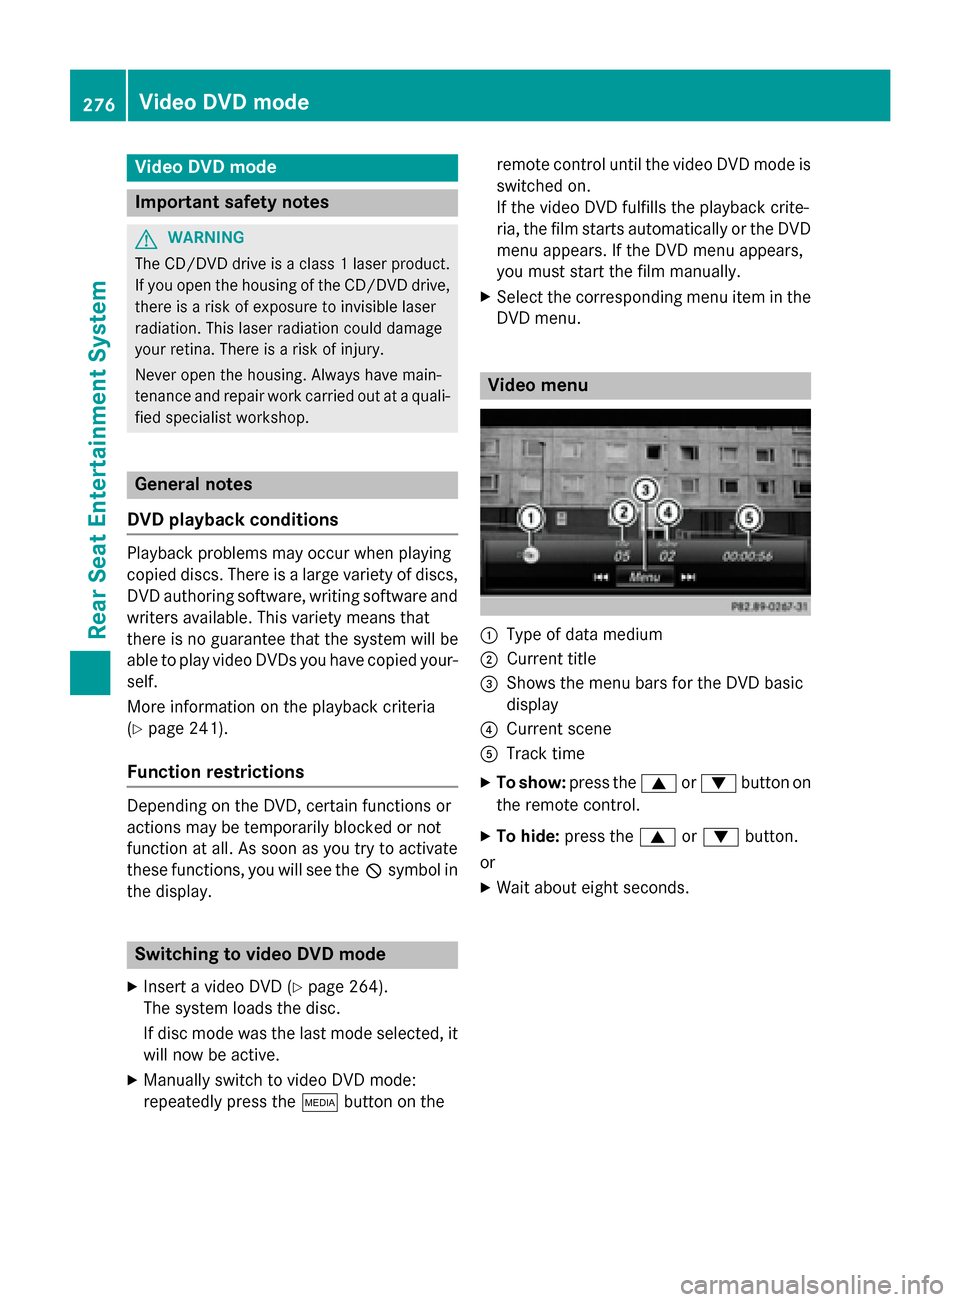
DVD menu. Video menu
0043
Type of data medium
0044 Current title
0087 Shows the menu bars for the DVD basic
display
0085 Current scene
0083 Track time
X To show: press the0063or0064 button on
the remote control.
X To hide: press the 0063or0064 button.
or X Wait about eight seconds. 276
Video DVD modeRear Seat Entertainment System
Page 281 of 298
To indicate this, the
0047symbol appears in
the display.
Stopping a film or skipping to the begin-
ning or end of a scene X
Select any menu item from the DVD menu.
The menu appears.
X To stop the film: select theStop
Stopmenu
item and press the 008Bbutton on the remote
control to confirm.
X To skip to the end of a scene: select the
0049 menu item and press 008Bto confirm.
X To skip to the start of a scene: select the
0048 menu item and press 008Bto confirm.
Moving up one level in the DVD menu X
Show the DVD menu.
X Press the 0038back button on the remote
control or select the corresponding menu
item in the DVD menu.
Back to the film X
Press the 0038back button repeatedly
until you see the movie. Setting the audio format
This function is not available on all DVDs. If it
is available, you can set the audio language or the audio format. The number of settings is
determined by the DVD content. It may also
be possible to access the settings from the
DVD menu.
X Press the 008Bbutton on the remote control
and show the menu.
X Select DVD-Video
DVD-Video using the
0063006400590065 buttons on the
remote control and press the 008Bbutton to
confirm.
X Select DVD Functions
DVD Functions and press the008B
button to confirm. X
Select Audio Language Audio Language and press the008B
button to confirm.
A menu appears after a short while. The 003B
dot in front of an entry indicates the cur-
rently selected language.
X Select the language using the 00630064
buttons and press the 008Bbutton to confirm.
X To exit the menu: press the0059or0065
button. Subtitles and camera angle
These functions are not available on all DVDs.
The number of subtitle languages and camera
angles available depends on the content of
the DVD. It may also be possible to access the settings from the DVD menu.
X Press the 008Bbutton on the remote control
and show the menu.
X Select DVD-Video DVD-Video using the
0063006400590065 buttons on the
remote control and press the 008Bbutton to
confirm.
X Select DVD Functions
DVD Functions and press the008B
button to confirm.
X Select Subtitles
Subtitles orCamera Angle
Camera Angle and
press the 008Bbutton to confirm.
In both cases, a menu appears after a few
seconds. The 003Bdot in front of an entry indi-
cates the current setting.
X Select the setting using the 00630064but-
tons and press the 008Bbutton to confirm.
X To exit the menu: press the0059or0065
button. Interactive content
DVDs can also contain interactive content
(e.g. a video game). In a video game, you may be able to influence events by selecting and
triggering actions. The type and number of
actions depend on the DVD. Video DVD mode
279Rear Seat Entertainment System Z