low oil pressure MERCEDES-BENZ S-Class 2015 W222 Owner's Manual
[x] Cancel search | Manufacturer: MERCEDES-BENZ, Model Year: 2015, Model line: S-Class, Model: MERCEDES-BENZ S-Class 2015 W222Pages: 502, PDF Size: 9.59 MB
Page 309 of 502

X
Press the 6button to switch to the
redial memory.
X Press the :or9 button to select the
desired name or number.
X Press the 6ora button to start dial-
ing.
or X To exit the redial memory: press the
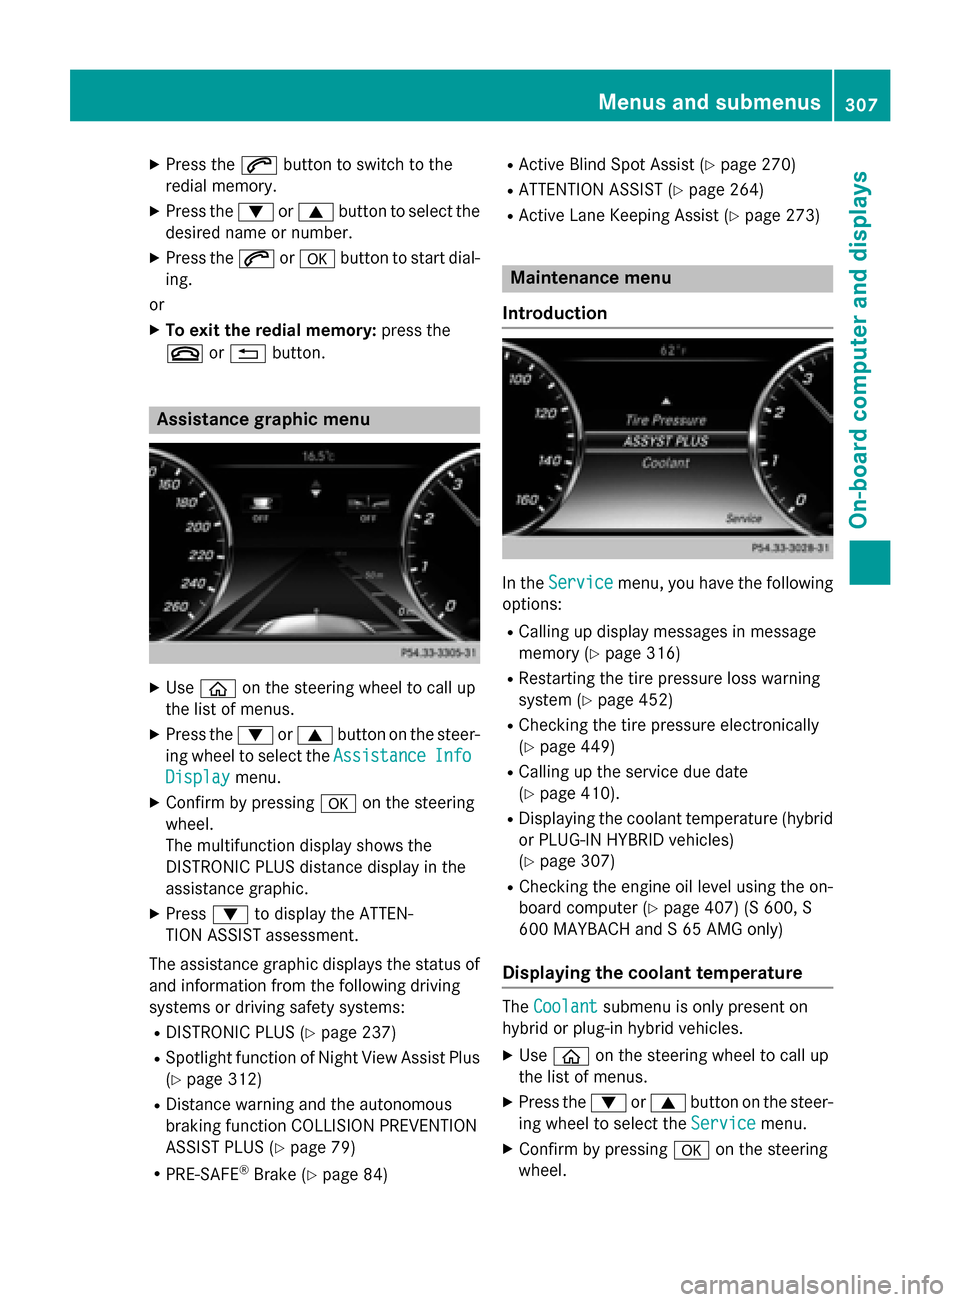
~ or% button. Assistance graphic menu
X
Use ò on the steering wheel to call up
the list of menus.
X Press the :or9 button on the steer-
ing wheel to select the Assistance
AssistanceInfo
Info
Display
Display menu.
X Confirm by pressing aon the steering
wheel.
The multifunction display shows the
DISTRONIC PLUS distance display in the
assistance graphic.
X Press :to display the ATTEN-
TION ASSIST assessment.
The assistance graphic displays the status of and information from the following driving
systems or driving safety systems:
R DISTRONIC PLUS (Y page 237)
R Spotlight function of Night View Assist Plus
(Y page 312)
R Distance warning and the autonomous
braking function COLLISION PREVENTION
ASSIST PLUS (Y page 79)
R PRE-SAFE ®
Brake (Y page 84) R
Active Blind Spot Assist (Y page 270)
R ATTENTION ASSIST (Y page 264)
R Active Lane Keeping Assist (Y page 273) Maintenance menu
Introduction In the
Service Service menu, you have the following
options:
R Calling up display messages in message
memory (Y page 316)
R Restarting the tire pressure loss warning
system (Y page 452)
R Checking the tire pressure electronically
(Y page 449)
R Calling up the service due date
(Y page 410).
R Displaying the coolant temperature (hybrid
or PLUG-IN HYBRID vehicles)
(Y page 307)
R Checking the engine oil level using the on-
board computer (Y page 407) (S 600, S
600 MAYBACH and S 65 AMG only)
Displaying the coolant temperature The
Coolant Coolant submenu is only present on
hybrid or plug-in hybrid vehicles.
X Use ò on the steering wheel to call up
the list of menus.
X Press the :or9 button on the steer-
ing wheel to select the Service Servicemenu.
X Confirm by pressing aon the steering
wheel. Menus and submenus
307On-board computer and displays Z
Page 341 of 502

Display messages
Possible causes/consequences and
M
MSolutions 4
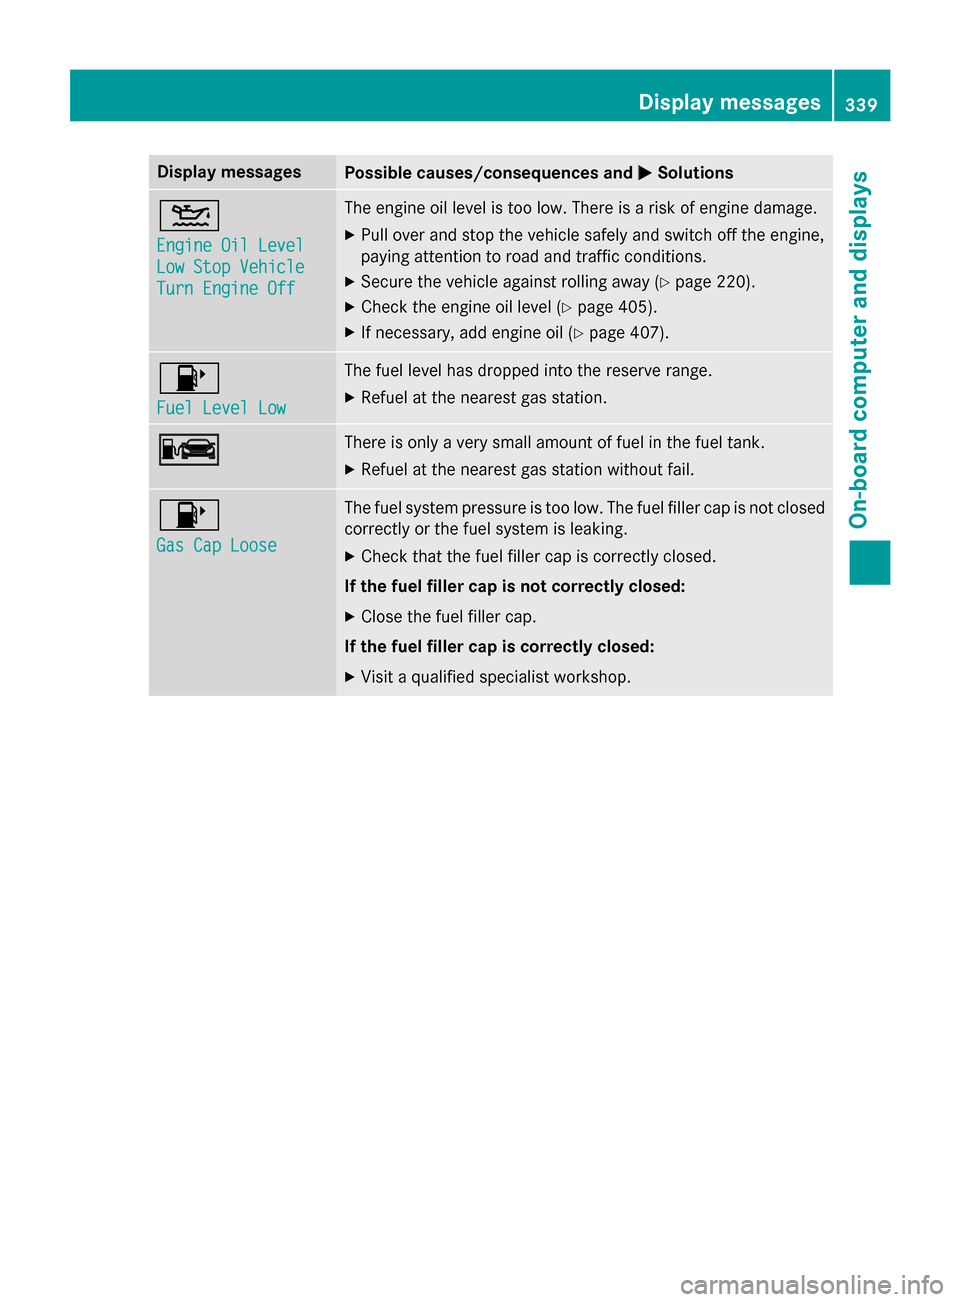
Engine Oil Level Engine Oil Level
Low Stop Vehicle Low Stop Vehicle
Turn Engine Off Turn Engine Off The engine oil level is too low. There is a risk of engine damage.
X Pull over and stop the vehicle safely and switch off the engine,
paying attention to road and traffic conditions.
X Secure the vehicle against rolling away (Y page 220).
X Check the engine oil level (Y page 405).
X If necessary, add engine oil (Y page 407).8
Fuel Level Low Fuel Level Low The fuel level has dropped into the reserve range.
X Refuel at the nearest gas station. C
C There is only a very small amount of fuel in the fuel tank.
X Refuel at the nearest gas station without fail. 8
Gas Cap Loose Gas Cap Loose The fuel system pressure is too low. The fuel filler cap is not closed
correctly or the fuel system is leaking.
X Check that the fuel filler cap is correctly closed.
If the fuel filler cap is not correctly closed: X Close the fuel filler cap.
If the fuel filler cap is correctly closed: X Visit a qualified specialist workshop. Display
messages
339On-board computer and displays Z
Page 428 of 502

Do not switch off the tire inflation com-
pressor during this phase.
X Allow the tire inflation compressor to run
for five minutes. The tire should then have
attained a pressure of at least 180 kPa
(1.8 bar/26 psi).
If a pressure of 180 kP a(1.8 bar/26 psi) has
been attained after five minutes, see "Tire
pressure reached" (Y page 426).
If a tire pressure of 180 kPa (1.8 bar/26 psi) has not been attained after five minutes, see"Tire pressure not reached" (Y page 426).
i If tire sealant leaks out, allow it to dry. It
can then be removed like a layer of film.
If your clothes are soiled with tire sealant,
have them cleaned with perchloroethylene at a dry cleaner as soon as possible.
Tire pressure not reached If a pressure of 180 kPa (1.8 bar/26 psi) has
not been attained after five minutes:
X Switch off the tire inflation compressor.
X Unscrew the filler hose from the valve of
the faulty tire.
X Very slowly drive forwards or reverse
approximately 30 ft (10 m).
X Pump up the tire again.
After a maximum of five minutes the tire
pressure must be at least 180 kPa (1.8 bar/
26 psi). G
WARNING
If the required tire pressure is not reached
after the specified time, the tire is too badly
damaged. The tire sealant cannot repair the
tire in this instance. Damaged tires and a tire pressure that is too low can significantly
impair the vehicle's braking and driving char-
acteristics. There is a risk of accident.
Do not continue driving. Contact a qualified
specialist workshop. Tire pressure reached G
WARNING
A tire temporarily sealed with tire sealant
impairs the driving characteristics and is not
suitable for higher speeds. There is a risk of
accident.
You should therefore adapt your driving style
accordingly and drive carefully. Do not exceed the specified maximum speed with a tire that
has been repaired using tire sealant.
The maximum speed for a tire sealed with tire
sealant is 50 mph (80 km/h). The upper part of the TIREFIT sticker must be affixed to the
instrument cluster in the driver's field of
vision.
! Residue from the tire sealant may come
out of the filler hose after use. This could
cause stains.
Therefore, place the filler hose in the plastic bag which contained the TIREFIT kit. H
Environmental note
Have the used tire sealant bottle disposed of
professionally, e.g. at a qualified specialist
workshop.
If a tire pressure of 180 kPa (1.8 bar/26 psi)
has been attained after five minutes:
X Switch off the tire inflation compressor.
X Unscrew the filler hose from the valve of
the faulty tire.
X Stow the tire sealant bottle and the tire
inflation compressor.
X Pull away immediately.
X Stop after driving for approximately ten
minutes and check the tire pressure with
the tire inflation compressor.
The tire pressure must now be at least
130 kPa (1.3 bar/19 psi). G
WARNING
If the required tire pressure is not reached
after driving for a short period, the tire is too
badly damaged. The tire sealant cannot repair 426
Flat tireRoadside Assistance
Page 468 of 502

Rotate the wheels before a clear wear pattern
has formed on the tires. Front tires typically
wear more on the shoulders and the rear tires in the center.
If your vehicle's tire configuration allows, you
can rotate the wheels according to the inter-
vals in the tire manufacturer's warranty book in your vehicle documents. If no warranty
book is available, the tires should be rotated
every 3,000 to 6,000 miles (5,000 to
10,000 km), or earlier if tire wear requires.
Ensure the direction of rotation is maintained.
Clean the contact surfaces of the wheel and
the brake disc thoroughly every time a wheel
is rotated. Check the tire pressure and, if nec- essary, restart the tire pressure loss warningsystem (Y page 452) or the tire pressure
monitor (Y page 451). Direction of rotation
Tires with a specified direction of rotation
have additional benefits, e.g. if there is a risk of hydroplaning. These advantages can only
be gained if the tires are installed correspond-
ing to the direction of rotation.
An arrow on the sidewall of the tire indicates its correct direction of rotation. Storing wheels
Store wheels that are not being used in a cool, dry and preferably dark place. Protect the
tires from oil, grease, gasoline and diesel. Mounting a wheel
Preparing the vehicle X
Stop the vehicle on solid, non-slippery and
level ground.
X Apply the electric parking brake manually.
X Bring the front wheels into the straight-
ahead position.
X Shift the transmission to position P.X
Make sure that "normal" level is selected
for AIRMATIC (Y page 246).
X Switch off the engine.
X Open the driver's door.
The on-board electronics now have status
0. This is the same as the SmartKey having
been removed.
X Remove Start/Stop button from ignition
lock (Y page 189).
or, if the SmartKey is inserted in the ignition
lock:
X Remove the SmartKey from the ignition
lock.
X If included in the vehicle equipment,
remove the tire-change tool kit from the
vehicle.
X Secure the vehicle to prevent it from rolling
away.
Securing the vehicle to prevent it from
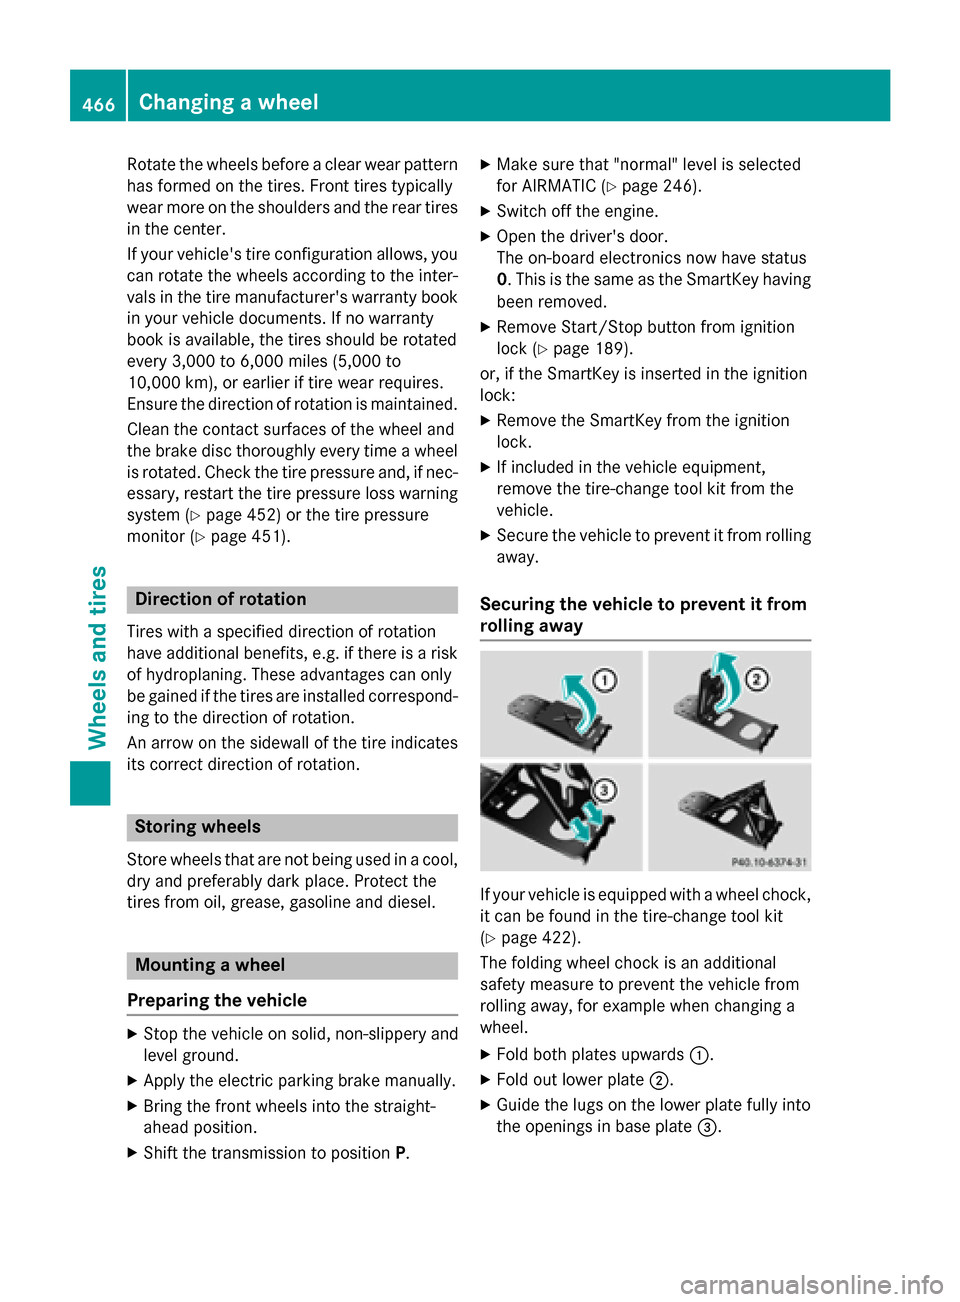
rolling away If your vehicle is equipped with a wheel chock,
it can be found in the tire-change tool kit
(Y page 422).
The folding wheel chock is an additional
safety measure to prevent the vehicle from
rolling away, for example when changing a
wheel.
X Fold both plates upwards :.
X Fold out lower plate ;.
X Guide the lugs on the lower plate fully into
the openings in base plate =.466
Changing a wheelWheels and
tires