tire size MERCEDES-BENZ S-Class CABRIOLET 2017 A217 Owner's Manual
[x] Cancel search | Manufacturer: MERCEDES-BENZ, Model Year: 2017, Model line: S-Class CABRIOLET, Model: MERCEDES-BENZ S-Class CABRIOLET 2017 A217Pages: 338, PDF Size: 8.14 MB
Page 23 of 338
Optional equipment weight (defi-
nition) ............................................ 320
PSI (pounds per square inch) (def-
inition) ...........................................319
Replacing ....................................... 320
Service life ..................................... 303
Sidewall (definition) ....................... 320
Snow chains .................................. 304
Speed rating (definition) ................ 319
Storing ...........................................3 21
Structure and characteristics
(definition) ..................................... 318
Summer tires in winter .................. 304
Temperature .................................. 315
TIN (Tire Identification Number)
(definition) ..................................... 320
Tire bead (definition) ......................3 20
Tire pressure (definition) ................ 320
Tire pressures (recommended) ...... 319
Tire size (data) ............................... 325
Tire size designation, load-bearing
capacity, speed rating .................... 315
Tire tread ....................................... 303
Tire tread (definition) ..................... 320
Total load limit (definition) ............. 320
Traction ......................................... 314
Traction (definition) ....................... 320
Tread wear ..................................... 314
Uniform Tire Quality Grading
Standards ...................................... 314
Uniform Tire Quality Grading
Standards (definition) .................... 318
Wear indicator (definition) ............. 320
Wheel and tire combination ........... 325
Wheel rim (definition) .................... 319
see Flat tire
Touchpad
Changing the station/music
track .............................................. 246
Character suggestions ................... 245
Deleting characters ....................... 246
Entering a space ............................ 246
Entering characters ....................... 245
Gesture control .............................. 245
Handwriting recognition ................ 246
Operating the touchpad ................. 245
Overview ........................................ 245
Qu
ick access for Audio .................. 246 Quick access for telephone ........... 246
Switching ....................................... 245
Switching input line ....................... 246
Tow-starting
Emergency engine starting ............ 299
Important safety notes .................. 297
Towing away
Important safety guidelines ........... 297
Installing the towing eye ................ 298
Notes for 4MATIC vehicles ............ 299
Removing the towing eye ............... 298
Transporting the vehicle ................ 299
With both axles on the ground ....... 298
Towing eye ......................................... 288
Traffic reports
see also Digital Operator's Man-
ual .................................................. 243
Traffic Sign Assist
Activating ....................................... 177
Display message ............................ 223
Function/notes ............................. 177
Important safety notes .................. 177
Instrument cluster display ............. 178
Switching on/off ........................... 199
Transfer case ..................................... 138
Transmission
see Automatic transmission
Transporting the vehicle .................. 299
Trim pieces (cleaning instruc-
tions) .................................................. 286
Trip computer (on-board com-
puter) .................................................. 192
Trip odometer
Calling up ....................................... 191
Resetting (on-board computer) ...... 192
Trunk
Emergency release .......................... 84
Emergency release button ............... 85
Important safety notes .................... 80
Locking separately ........................... 84
Opening ........................................... 81
Opening/closing (automatically
from inside) ...................................... 83
Opening/closing (automatically
from outside) ................................... 81
Opening/closing (from outside,
HANDS-FREE ACCESS) .................... 82
Index21
Page 25 of 338
Restraintsystem ............................ 23 7
Seat belt ........................................ 23 2
Steerin g........................................ .242
Tire pressure monitor .................... 241
Warranty .............................................. 26
Washer fluid
Display message ............................ 230
Weather display (COMAND)
see also Digital Operator's Man-
ual ..................................................2 43
Wheel and tire combinations
Tires ............................................... 325
Wheel bolt tightening torque ........... 325
Wheel chock ...................................... 321
Wheels
Changing a wheel .......................... 320
Checking ........................................ 302
Cleaning ......................................... 283
Important safety notes .................. 302
Information on driving .................... 302
Interchanging/changing ................ 320
Mounting a new wheel ................... 324
Mounting a wheel .......................... 321
Removing a wheel .......................... 324
Snow chains .................................. 304
Storing ...........................................3 21
Tightening torque ........................... 325
Wheel size/tire size ....................... 325
Wind deflector (cleaning instruc-
tions) ..................................................2 82
Wind screen (cleaning instruc-
tions) ..................................................2 83
Windows
see Side windows
Windshield
Defrosting ...................................... 118
Infrared reflective .......................... 271
Windshield washer fluid
see Windshield washer system
Windshield washer system
Adding washer fluid ....................... 277
Important safety notes .................. 333
Notes ............................................. 333
Windshield wipe
rs
Problem (malfunction) ................... 113
Replacing the wiper blades ............ 112
Switching on/off ........................... 111 Winter driving
Important safety notes .................. 304
Slippery road surfaces ................... 148
Snow chains .................................. 304
Winter operation
Radiator cover ............................... 273
Summer tires ................................. 304
Winter tires
M+S tires ....................................... 304
Wiper blades
Cleaning ......................................... 283
Important safety notes .................. 112
Replacing ....................................... 112
Wooden trim (cleaning instruc-
tions) ..................................................2 86
Workshop
see Qualified specialist workshop
Index23
Page 69 of 338
be shown in the instrument cluster
(Ypage 205).
Only use wheels with the recommended tire
sizes. Only then will ESP
®function properly.
Characteristics of ESP®
General information
If the ÷ ESP warning lamp goes out before
beginning the journey, ESP®is automatically
active.
If ESP
®intervenes, the ÷ESP®warning lamp
flashes in the instrument cluster.
If ESP
®intervenes:
XDo not deactivate ESP®under any circum-
stances.
XOnly depress the accelerator pedal as far as
necessary when pulling away.
XAdapt your driving style to suit the prevailing
road and weather conditions.
ECO start/stop function
The ECO start/stop function switches the
engine off automatically when the vehicle stops
moving. The engine starts automatically when
the driver wants to pull away again. ESP
®
remains in its previously selected status, e.g. if
ESP®was deactivated before the engine was
automatically switched off.
Deactivating/activating ESP®
Important safety notes
iObserve the "Important safety notes" sec-
tion (Ypage 61).
You can select between the following states of
ESP
®:
RESP®is activated.
RESP®is deactivated.
GWARNING
If you deactivate ESP
®, ESP®no longer sta-
bilizes the vehicle. There is an increased risk
of skidding and an accident.
Only deactivate ESP
®in the situations descri-
bed in the following. It may be best to deactivate ESP
®in the follow-
ing situations:
Rwhen using snow chains
Rin deep snow
Ron sand or gravel
Spinning the wheels results in a cutting action
which provides better grip.
iActivate ESP®as soon as the situations
described above no longer apply. ESP®will
otherwise not be able to stabilize the vehicle if
the vehicle starts to skid or a wheel starts to
spin.
!Avoid spinning the driven wheels for an
extended period with ESP®deactivated. You
could otherwise damage the drivetrain.
Deactivating/activating ESP®
You can deactivate or activate ESP®via the on-
board computer (Ypage 198).
ESP®deactivated:
The å ESP®OFF warning lamp in the instru-
ment cluster lights up.
ESP
®activated:
The å ESP®OFF warning lamp in the instru-
ment cluster goes out.
Characteristics when ESP®is deactivated
If ESP®is deactivated and one or more wheels
start to spin, the ÷ESP®warning lamp in the
instrument cluster flashes. In such situations,
ESP
®will not stabilize the vehicle.
If you deactivate ESP®:
RESP®no longer improves driving stability.
REngine torque is no longer limited and the
drive wheels are able to spin.
RTraction control is still activated.
RCOLLISION PREVENTION ASSIST is no longer
available; nor is it activated if you brake firmly
with assistance from ESP
®.
RPRE-SAFE®is no longer available, nor is it
activated if you brake firmly and ESP®inter-
venes.
RPRE-SAFE®Brake is no longer available, it is
also not activated if you brake firmly and ESP®
intervenes.
RESP®still provides support when you brake
firmly.
Driving safety systems67
Safety
Z
Page 181 of 338
The system may be impaired or may not function
if:
Rthere is poor visibility, e.g. due to snow, rain,
fog or spray
Rthe windshield is dirty, fogged up or covered,
for instance by a sticker, in the vicinity of the
camera
Rthe infrared camera in the radiator trim is
dirty, fogged up or obscured
Ron bends, hilltops or downhill gradients
Rat high outside temperatures
Night View Assist Plus cannot display objects
directly in front of or beside the vehicle.
It is possible that, in addition to people and ani-
mals, other objects are also marked or highligh-
ted .
Pedestrian and animal recognition
General notes
Pedestrian or animal recognition may be
impaired or inoperative if:
Rpedestrians or animals are partially or entirely
obscured by other objects, e.g. parked vehi-
cles
Rthe silhouette of the pedestrian or of the ani- mal in the Night View Assist Plus display is
incomplete or interrupted, e.g. by powerful
light reflections
Rpedestrians or animals do not contrast with
the surroundings
Rthe camera system no longer recognizes
pedestrians as persons due to special cloth-
ing or other objects
Rpedestrians are not in an upright position, e.g.
sitting, squatting or lying
Ranimals are not recognized by the system,
e.g. because of their size or shape
Pedestrian and animal recognition is deactiva-
ted at temperatures above 90 ‡ (32 †). The
spotlight function and automatic delayed
switch-off are then no longer active.
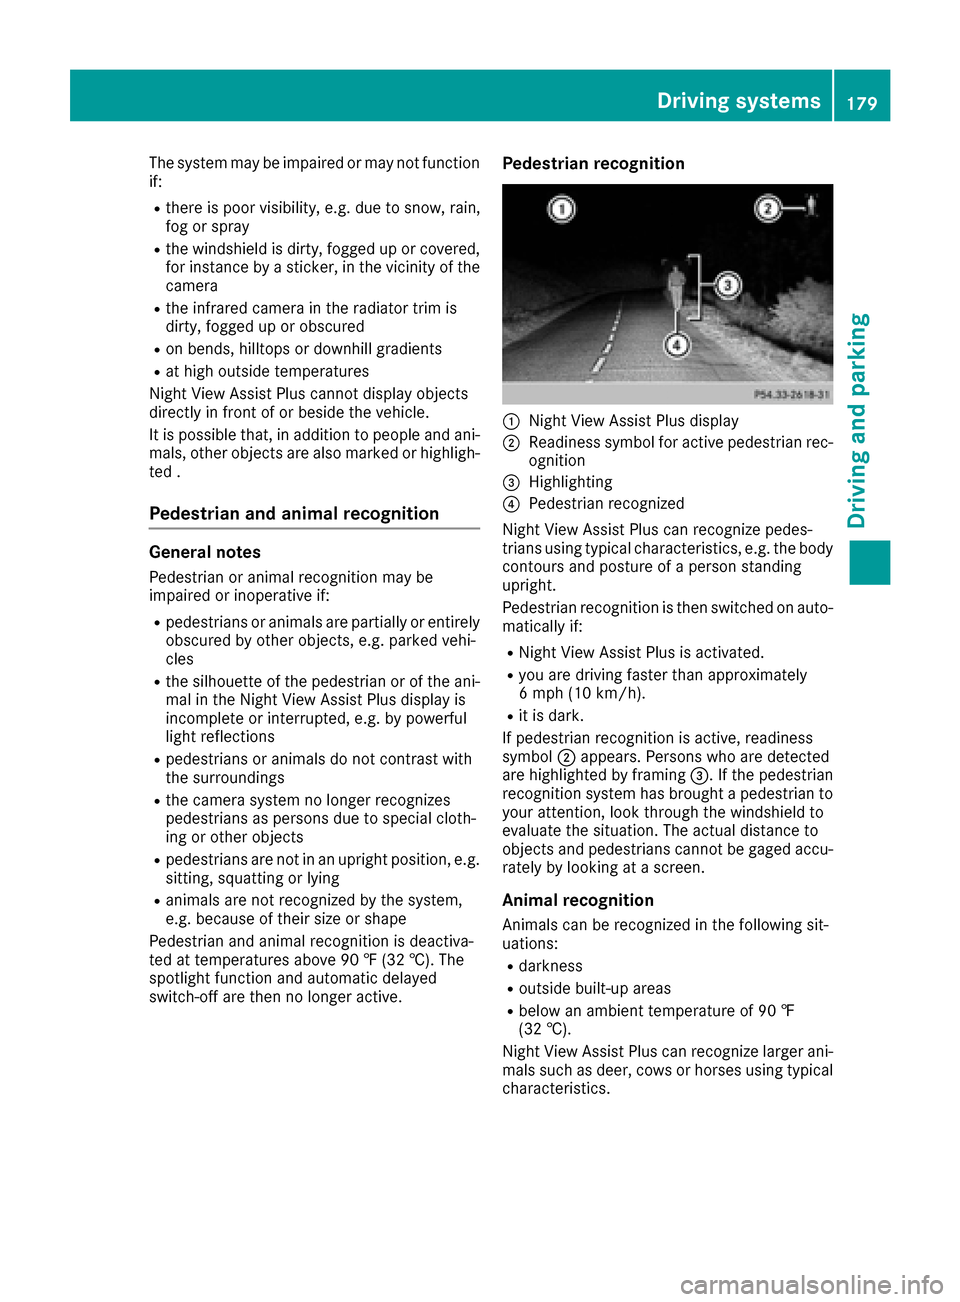
Pedestrian recognition
:Night View Assist Plus display
;Readiness symbol for active pedestrian rec- ognition
=Highlighting
?Pedestrian recognized
Night View Assist Plus can recognize pedes-
trians using typical characteristics, e.g. the body
contours and posture of a person standing
upright.
Pedestrian recognition is then switched on auto- matically if:
RNight View Assist Plus is activated.
Ryou are driving faster than approximately
6 mph (10 km/h).
Rit is dark.
If pedestrian recognition is active, readiness
symbol ;appears. Persons who are detected
are highlighted by framing =. If the pedestrian
recognition system has brought a pedestrian to
your attention, look through the windshield to
evaluate the situation. The actual distance to
objects and pedestrians cannot be gaged accu-
rately by looking at a screen.
Animal recognition
Animals can be recognized in the following sit-
uations:
Rdarkness
Routside built-up areas
Rbelow an ambient temperature of 90 ‡
(32 †).
Night View Assist Plus can recognize larger ani-
mals such as deer, cows or horses using typical
characteristics.
Driving systems179
Driving and parking
Z
Page 291 of 338
MOExtended tires (tires with run-flat
properties)
General notes
With MOExtended tires (tires with run flat char-
acteristics), you can continue to drive your vehi-
cle even if there is a total loss of pressure in one
or more tires. The affected tire must not show
any clearly visible damage.
You can recognize MOExtended tires by the
MOExtended marking which appears on the
sidewall of the tire. You will find this marking
next to the tire size designation, the load-bear-
ing capacity and the speed index (
Ypage 315).
MOExtended tires may only be used in conjunc-
tion with an active tire pressure monitor.
If a pressure loss warning message appears
in the multifunction display:
Robserve the instructions in the display mes-
sages (Ypage 226).
Rcheck the tire for damage.
Rif driving on, observe the following notes.
The driving distance possible in run-flat mode is
approximately 50 miles (80 km) when the vehi-
cle is partially laden. When the vehicle is fully
laden it is approximately 19 miles (30 km).
In addition to the vehicle load, the driving dis-
tance possible depends upon:
RVehicle speed
RRoad condition
ROutside temperature
The driving distance possible in run-flat mode
may be reduced by extreme driving conditions
or maneuvers, or it can be increased through a
moderate style of driving.
The driving distance possible in run-flat mode is
counted from the moment the tire pressure loss
warning appears in the multifunction display.
You must not exceed a maximum permissible
speed of 50 mph (80 km/h).
When replacing one or all tires, please observe
the following specifications for your vehicle's
tires:
Rsize
Rthe type and
Rthe "MOExtended" mark
If a tire has gone flat and cannot be replaced
with a MOExtended tire, a standard tire may be
used as a tempora ry mea
sure. Make sure that you use the proper size and type (summer or
winter tires).
Vehicles equipped with MOExtended tires are
not equipped with a TIREFIT kit at the factory. It
is therefore recommended that you additionally
equip your vehicle with a TIREFIT kit if you mount
tires that do not feature run-flat properties, e.g.
winter tires. A TIREFIT kit may be obtained from
a qualified specialist workshop.
Important safety notes
GWARNING
When driving in emergency mode, the driving
characteristics deteriorate, e.g. when corner-
ing, accelerating quickly and when braking.
There is a risk of an accident.
Do not exceed the stated maximum speed.
Avoid abrupt steering and driving maneuvers,
and driving over obstacles (curbs, potholes,
off-road). This applies in particular to a laden
vehicle.
Stop driving in emergency mode if:
Ryou hear banging noises.
Rthe vehicle starts to shake.
Ryou see smoke and smell rubber.
RESP®is intervening constantly.
Rthere are tears in the sidewalls of the tire.
After driving in emergency mode, have the
wheel rims checked at a qualified specialist
workshop with regard to their further use. The
defective tire must be replaced in every case.
TIREFIT kit
Important safety notes
TIREFIT is a tire sealant.
You can use TIREFIT to seal punctures of up to
0.16 in (4 mm), particularly those in the tire
tread. You can use TIREFIT at outside tempera-
tures down to Ò4 ‡ (Ò20 †).
Flat tire289
Breakdown assistance
Z
Page 304 of 338
Important safety notes
GWARNING
If wheels and tires of th ewrong siz eare used,
th ewhee lbrakes or suspension component s
may be damaged. Ther eis aris kof an acci-
dent.
Always replace wheels and tires wit hthose
that fulfill th especification sof th eoriginal
part .
When replacing wheels, mak esur eto use th e
correct:
Rdesignation
Rmodel
When replacing tires ,mak esur eto use th e
correct:
Rdesignation
Rmanufacturer
Rmodel
GWARNIN G
A flat tire severely impairs th edriving ,steer -
ing and braking characteristics of th evehicle.
Ther eis aris kof accident.
Tires without run-flat characteristics :
Rdo notdriv ewit h a flat tire.
Rimmediately replace th eflat tire wit hyour
emergenc yspar ewhee lor spar ewheel, or
consult aqualified specialist workshop.
Tires wit hrun-flat characteristics :
Rpay attention to theinformation and warn -
ing notice son MOExtended tires (tire swit h
run-flat characteristics).
Accessories that are no tapprove dfor your vehi-
cle by Mercedes-Ben zor are no tbein gused cor-
rectl ycan impair th eoperating safety.
Before purchasing and usin gnon-approve d
accessories, visit aqualified specialist work-
sho pand inquire about :
Rsuitability
Rlegal stipulation s
Rfactory recommendation sInformation on th
esizes and types of wheels and
tires for your vehicl ecan be foun dunder
"Wheel/tire combinations" (
Ypage 325).
Information on tire pressur ecan be found:
Ron th evehicle's Tir eand Loading Information
placard on th eB-pillar (Ypage 311)
Rin thetire pressur etable in th efuel filler flap
(Ypage 140)
Runder "Tir epressure" (Ypage 305)
Operation
Information on driving
Checkth etire pressur ewhen th evehicl eis
heavily laden and adjust prio rto atrip.
While driving ,pay attention to vibrations, noises
and unusual handlin gcharacteristics ,e.g. pull-
ing to on eside .This may indicat ethat th e
wheels or tires are damaged. If you suspec tthat
a tire is defective, reduce your spee dimmedi-
ately. Stop th evehicl eas soo nas possible to
chec kth ewheels and tires for damage. Hidden
tire damag ecould also be causing th eunusual
handlin gcharacteristics .If you fin dno sign sof
damage, hav eth etires and wheels checke dat a
qualified specialist workshop.
When parking your vehicle, mak esur ethat th e
tires do no tget deformed by th ecur bor other
obstacles. If they canno tbe avoided, driv eove r
obstacles suc has curbs slowly and at an obtuse
angle. Otherwise, you may damag eth ewheels
or tires .
Regular checking of wheels and tires
GWARNIN G
Damaged tires can caus etire inflation pres-
sur eloss .As aresult ,you could lose control of
your vehicle. Ther eis aris kof accident.
Chec kth etires regularly for sign sof damag e
and replace any damaged tires immediately.
Chec kwheels and tires for damag eat least once
a month .Chec kwheels and tires after driving
off-road or on roug hroads. Damaged wheels
can caus e aloss of tire pressure.
Pay particular attention to damag esuc has:
Rcut sin th etires
Rpunctures in th etires
302Operation
Wheels and tires
Page 305 of 338
Rtears in the tires
Rbulges on tires
Rdeformation or severe corrosion on wheels
Regularly check the tire tread depth and the
condition of the tread across the whole width of
the tire (
Ypage 303). If necessary, turn the
front wheels to full lock in order to inspect the
inner side of the tire surface.
All wheels must have a valve cap to protect the
valve against dirt and moisture. Do not mount
anything onto the valve other than the standard
valve cap or other valve caps approved by
Mercedes-Benz for your vehicle. Do not use any
other valve caps or systems, e.g. tire pressure
monitoring systems.
Regularly check the pressure of all the tires par-
ticularly prior to long trips. Adjust the tire pres-
sure as necessary (
Ypage 305).
The service life of tires depends, among other
things, on the following factors:
RDriving style
RTire pressure
RDistance covered
Notes on tire tread
GWARNING
Insufficient tire tread will reduce tire traction.
The tire is no longer able to dissipate water.
This means that on wet road surfaces, the risk
of hydroplaning increases, in particular where speed is not adapted to suit the driving con-
ditions. There is a risk of accident.
If the tire pressure is too high or too low, tires
may exhibit different levels of wear at differ-
ent locations on the tire tread. Thus, you
should regularly check the tread depth and
the condition of the tread across the entire
width of all tires.
Minimum tire tread depth for:
RSummer tires: âin (3 mm)
RM+S tires: ãin (4 mm)
For safety reasons, replace the tires before
the legally prescribed limit for the minimum
tire tread depth is reached.
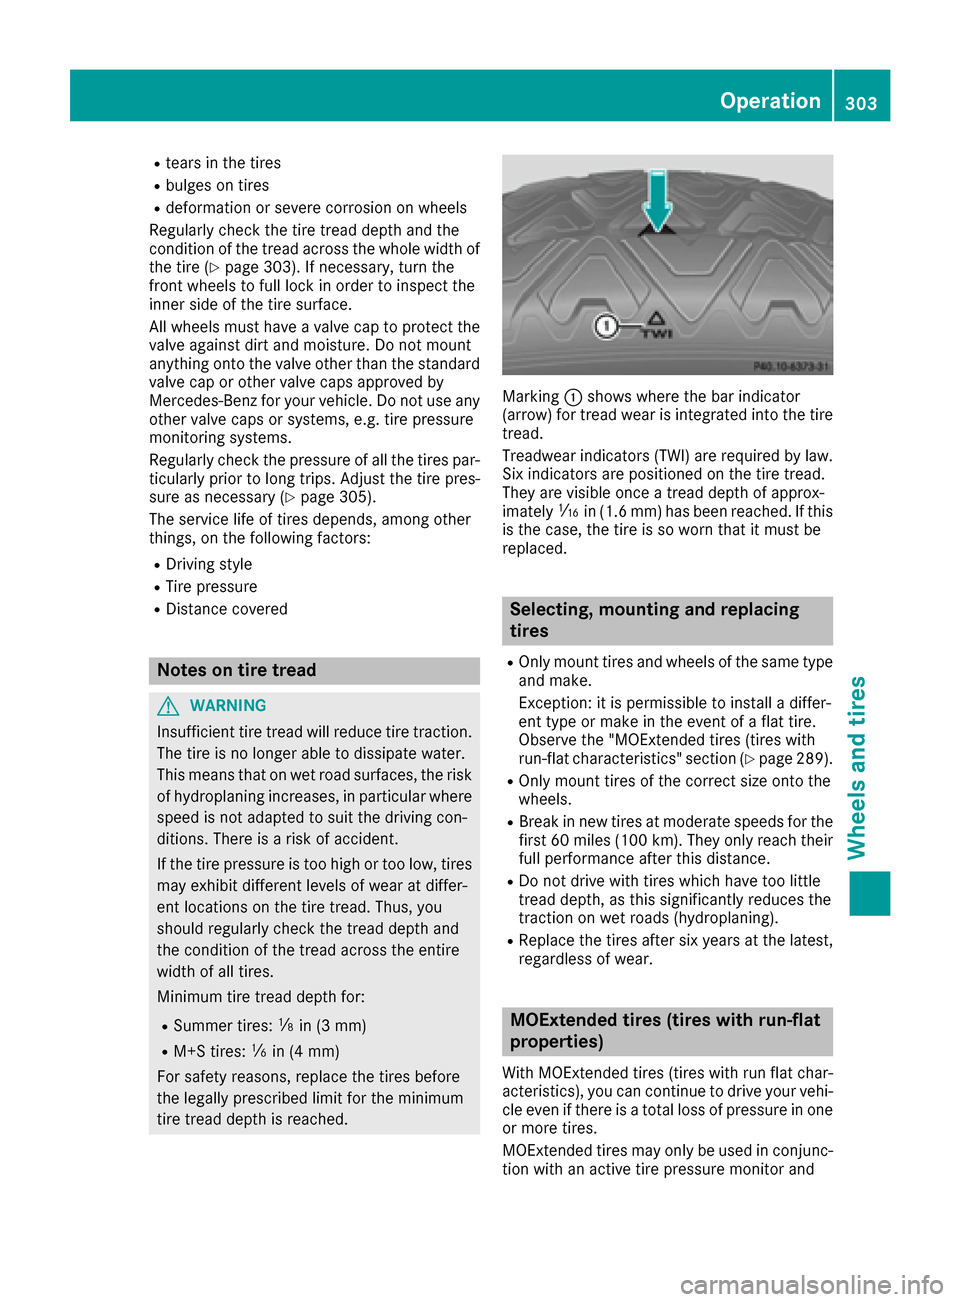
Marking :shows where the bar indicator
(arrow) for tread wear is integrated into the tire
tread.
Treadwear indicators (TWI) are required by law. Six indicators are positioned on the tire tread.
They are visible once a tread depth of approx-
imately áin (1.6 mm) has been reached. If this
is the case, the tire is so worn that it must be
replaced.
Selecting, mounting and replacing
tires
ROnly mount tires and wheels of the same type
and make.
Exception: it is permissible to install a differ-
ent type or make in the event of a flat tire.
Observe the "MOExtended tires (tires with
run-flat characteristics" section (
Ypage 289).
ROnly mount tires of the correct size onto the
wheels.
RBreak in new tires at moderate speeds for the
first 60 mile s(100 km). They only reach their
full performance after this distance.
RDo not drive with tires which have too little
tread depth, as this significantly reduces the
traction on wet roads (hydroplaning).
RReplace the tires after six years at the latest,
regardless of wear.
MOExtended tires (tires with run-flat
properties)
With MOExtended tires (tires with run flat char-
acteristics), you can continue to drive your vehi-
cle even if there is a total loss of pressure in one
or more tires.
MOExtended tires may only be used in conjunc-
tion with an active tire pressure monitor and
Operation303
Wheels and tires
Z
Page 308 of 338
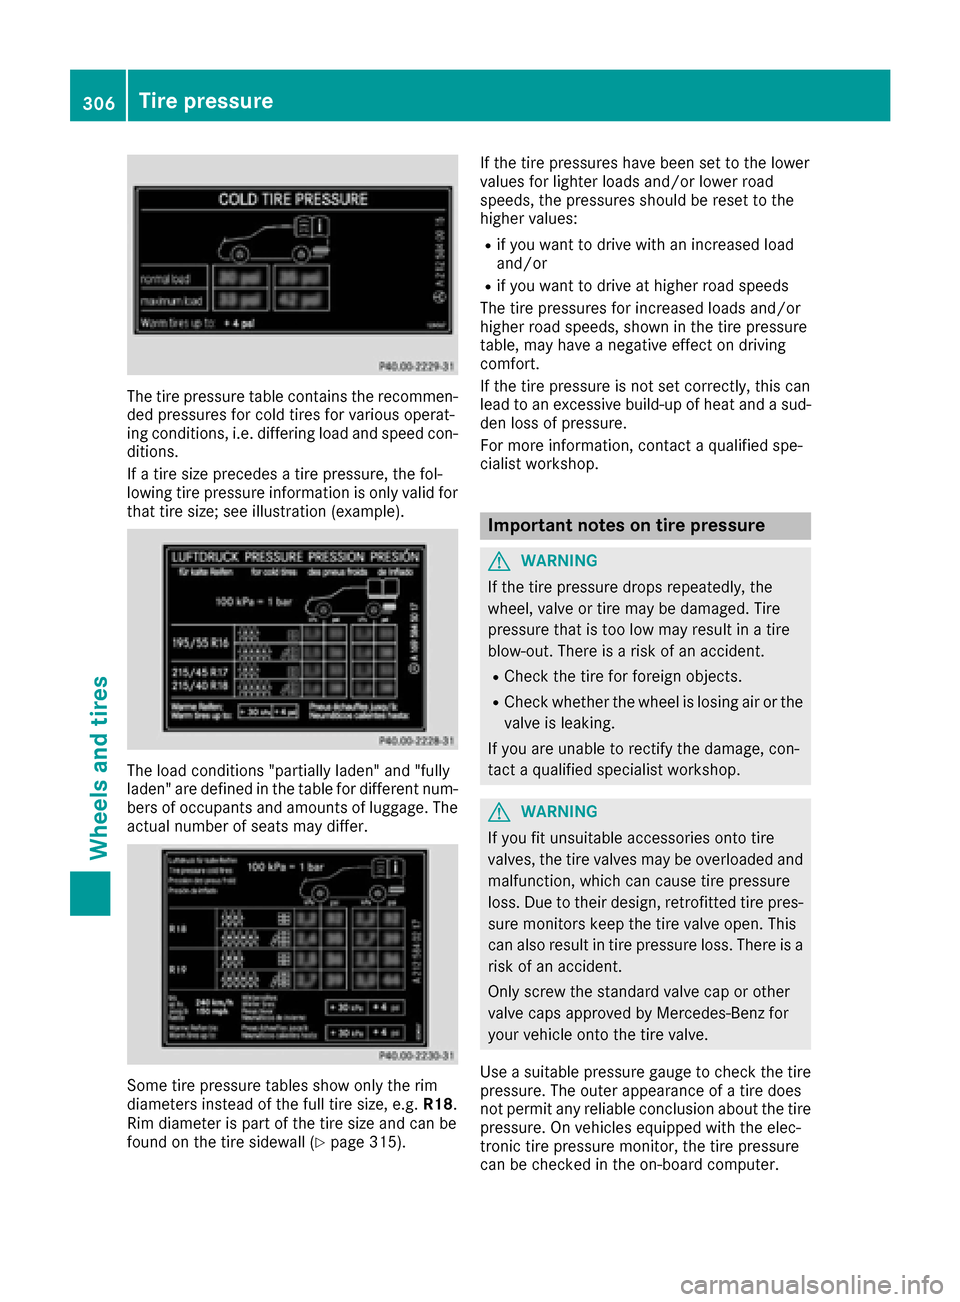
The tire pressure table contains the recommen-
ded pressures for cold tires for various operat-
ing conditions, i.e. differing load and speed con-
ditions.
If a tire size precedes a tire pressure, the fol-
lowing tire pressure information is only valid forthat tire size; see illustration (example).
The load conditions "partially laden" and "fully
laden" are defined in the table for different num-
bers of occupants and amounts of luggage. The
actual number of seats may differ.
Some tire pressure tables show only the rim
diameters instead of the full tire size, e.g. R18.
Rim diameter is part of the tire size and can be
found on the tire sidewall (
Ypage 315). If the tire pressures have been set to the lower
values for lighter loads and/or lower road
speeds, the pressures should be reset to the
higher values:
Rif you want to drive with an increased load
and/or
Rif you want to drive at higher road speeds
The tire pressures for increased loads and/or
higher road speeds, shown in the tire pressure
table, may have a negative effect on driving
comfort.
If the tire pressure is not set correctly, this can
lead to an excessive build-up of heat and a sud-
den loss of pressure.
For more information, contact a qualified spe-
cialist workshop.
Important notes on tire pressure
GWARNING
If the tire pressure drops repeatedly, the
wheel, valve or tire may be damaged. Tire
pressure that is too low may result in a tire
blow-out. There is a risk of an accident.
RCheck the tire for foreign objects.
RCheck whether the wheel is losing air or the valve is leaking.
If you are unable to rectify the damage, con-
tact a qualified specialist workshop.
GWARNING
If you fit unsuitable accessories onto tire
valves, the tire valves may be overloaded and
malfunction, which can cause tire pressure
loss. Due to their design, retrofitted tire pres- sure monitors keep the tire valve open. This
can also result in tire pressure loss. There is a
risk of an accident.
Only screw the standard valve cap or other
valve caps approved by Mercedes-Benz for
your vehicle onto the tire valve.
Use a suitable pressure gauge to check the tire
pressure. The outer appearance of a tire does
not permit any reliable conclusion about the tire pressure. On vehicles equipped with the elec-
tronic tire pressure monitor, the tire pressure
can be checked in the on-board computer.
306Tire pressure
Wheels and tires
Page 310 of 338
Checking the tire pressures
Important safety notes
Observe the notes on tire pressure
(Ypage 305).
Information on air pressure for the tires on your
vehicle can be found:
Ron the vehicle's Tire and Loading Information
placard on the B-pillar (Ypage 311)
Rin the tire pressure table in the fuel filler flap
(Ypage 140)
Rin the "Tire pressure" section
Checking tire pressures manually
To determine and set the correct tire pressure,
proceed as follows:
XRemove the valve cap of the tire that is to be
checked.
XPress the tire pressure gage securely onto the
valve.
XRead the tire pressure and compare it to the
recommended value on the Tire and Loading
Information placard or the tire pressure table (
Ypage 305).
XIf the tire pressure is too low, increase the tire
pressure to the recommended value.
XIf the tire pressure is too high, release air. To
do so, press down the metal pin in the valve,
using the tip of a pen for example. Then check
the tire pressure again using the tire pressure
checker.
XScrew the valve cap onto the valve.
XRepeat these steps for the other tires.
Tire pressure monitor
General notes
If a tire pressure monitor is installed, the vehi-
cle's wheels have sensors that monitor the tire
pressures in all four tires. The tire pressure mon-
itor warns you if the pressure drops in one or
more of the tires. The tire pressure monitor only
functions if the corresponding sensors are
installed in all wheels.
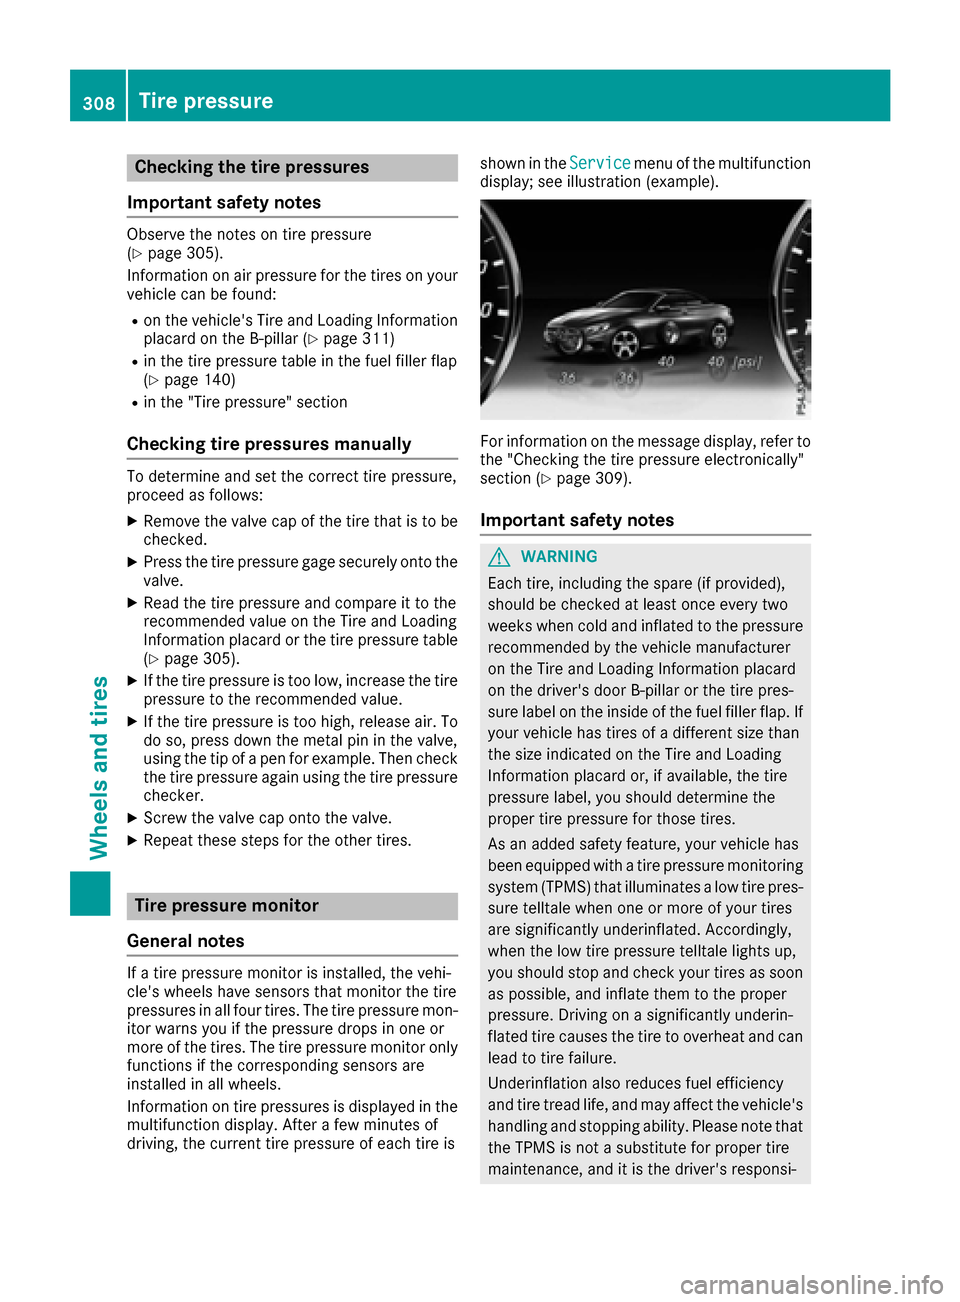
Information on tire pressures is displayed in the
multifunction display. After a few minutes of
driving, the current tire pressure of each tire is shown in the
Service
menu of the multifunction
display; see illustration (example).
For information on the message display, refer to
the "Checking the tire pressure electronically"
section (
Ypage 309).
Important safety notes
GWARNING
Each tire, including the spare (if provided),
should be checked at least once every two
weeks when cold and inflated to the pressure recommended by the vehicle manufacturer
on the Tire and Loading Information placard
on the driver's door B-pillar or the tire pres-
sure label on the inside of the fuel filler flap. If
your vehicle has tires of a different size than
the size indicated on the Tire and Loading
Information placard or, if available, the tire
pressure label, you should determine the
proper tire pressure for those tires.
As an added safety feature, your vehicle has
been equipped with a tire pressure monitoring
system (TPMS) that illuminates a low tire pres-
sure telltale when one or more of your tires
are significantly underinflated. Accordingly,
when the low tire pressure telltale lights up,
you should stop and check your tires as soon
as possible, and inflate them to the proper
pressure. Driving on a significantly underin-
flated tire causes the tire to overheat and can
lead to tire failure.
Underinflation also reduces fuel efficiency
and tire tread life, and may affect the vehicle's
handling and stopping ability. Please note thatthe TPMS is not a substitute for proper tire
maintenance, and it is the driver's responsi-
308Tire pressure
Wheels and tires
Page 313 of 338
Radio type approval for the tire pres-
sure monitor
CountryRadio type approval number
USAFCC ID: MRXMW2433A
FCC ID: MRXGG4
FCC ID: MRXMC34MA4
CanadaIC: 2546A-MW2433A
IC: 2546A-GG4
IC: 2546A-MC34MA4
Loading the vehicle
Instruction labels for tires and loads
GWARNING
Overloaded tires can overheat, causing a
blowout. Overloaded tires can also impair the steering and driving characteristics and lead
to brake failure. There is a risk of accident.
Observe the load rating of the tires. The load
rating must be at least half of the GAWR of
your vehicle. Never overload the tires by
exceeding the maximum load.
Two instruction labels on your vehicle show the maximum possible load.
(1) The Tire and Loading Information placard is on the B-pillar on the driver's side. The Tire
and Loading Information placard shows the
maximum permissible number of occu-
pants and the maximum permissible vehicle
load. It also contains details of the tire sizes
and corresponding pressures for tires
mounted at the factory.
(2) The vehicle identification plate is on the B- pillar on the driver's side. The vehicle iden-
tification plate informs you of the gross
vehicle weight rating. It is made up of the
vehicle weight, all vehicle occupants, the
fuel and the cargo. You can also find infor-
mation about the maximum gross axle
weight rating on the front and rear axle.
The maximum gross axle weight rating is
the maximum weight that can be carried by
one axle (front or rear axle). Never exceed
the maximum load or the maximum gross
a
xle weight rating for the front or rear axle.
:B-pillar, driver's side
Maximum permissible gross vehicle
weight rating
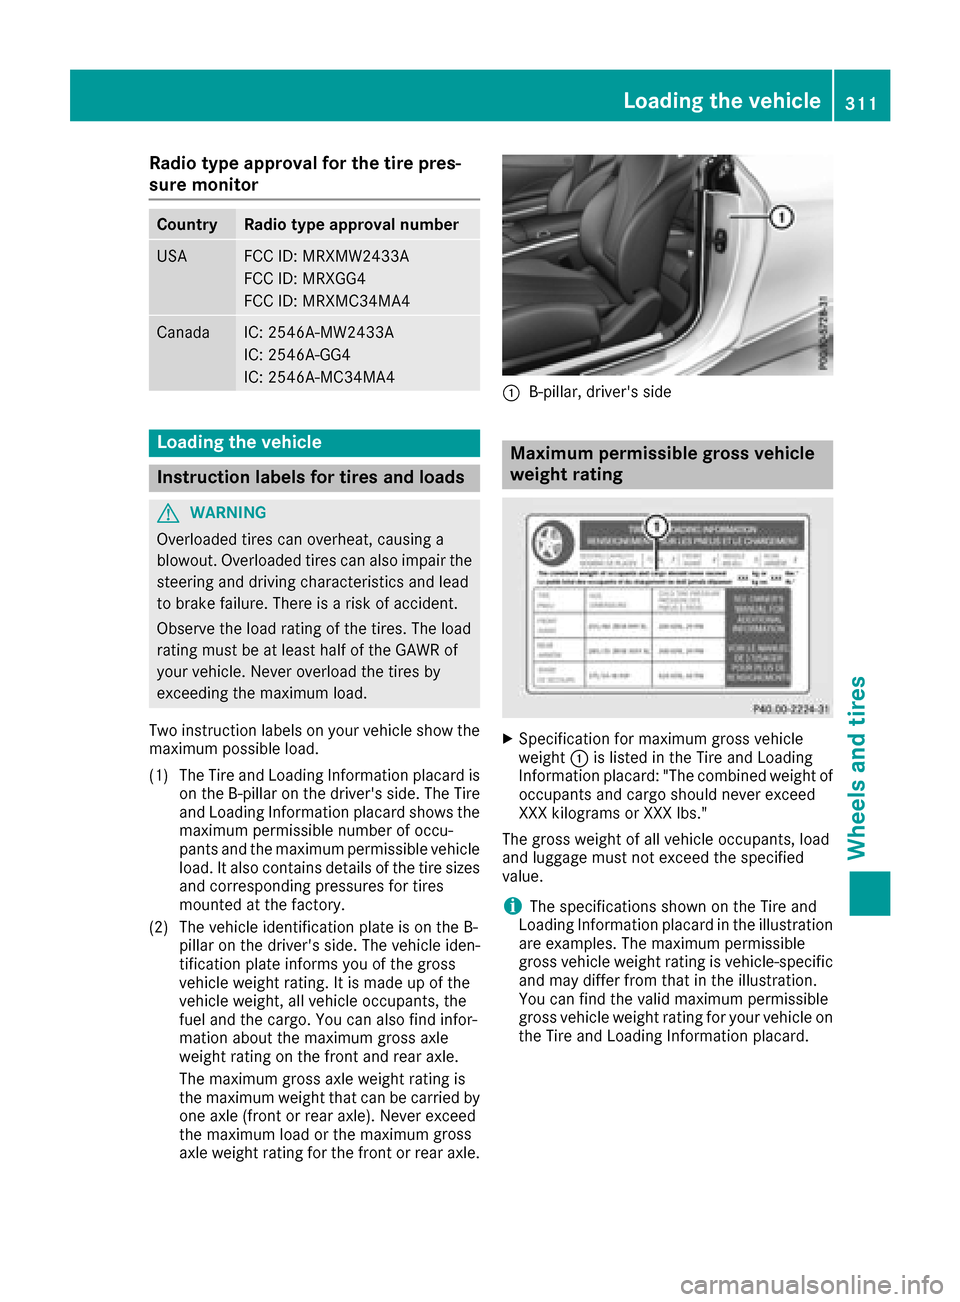
XSpecification for maximum gross vehicle
weight :is listed in the Tire and Loading
Information placard: "The combined weight of occupants and cargo should never exceed
XXX kilograms or XXX lbs."
The gross weight of all vehicle occupants, load
and luggage must not exceed the specified
value.
iThe specifications shown on the Tire and
Loading Information placard in the illustration are examples. The maximum permissible
gross vehicle weight rating is vehicle-specific
and may differ from that in the illustration.
You can find the valid maximum permissible
gross vehicle weight rating for your vehicle on
the Tire and Loading Information placard.
Loading the vehicle311
Wheels and tires
Z