check engine MERCEDES-BENZ S-Class COUPE 2015 C217 User Guide
[x] Cancel search | Manufacturer: MERCEDES-BENZ, Model Year: 2015, Model line: S-Class COUPE, Model: MERCEDES-BENZ S-Class COUPE 2015 C217Pages: 402, PDF Size: 7.3 MB
Page 45 of 402
Important safety notes
G
WARNING
Modifications to the restraint system may
cause it to no longer work as intended. The
restraint system may then not perform its
intended protective function and may fail in an accident or trigger unexpectedly, for example.
This poses an increased risk of injury or even fatal injury.
Never modify parts of the restraint system.
Never tamper with the wiring, the electronic
components or their software.
If it is necessary to modify an air bag system to
accommodate a person with disabilities, con- tact an authorized Mercedes-Benz Center for
details. USA only: for further information con- tact our Customer Assistance Center at
1-800-FOR-MERCedes (1 ‑800‑367‑6372).Restraint system warning lamp
The functions of the restraint system are
checked after the ignition is switched on and
at regular intervals while the engine is run-
ning. Therefore, malfunctions can be detec-
ted in good time.
The 0075 restraint system warning lamp in
the instrument cluster lights up when the igni- tion is switched on. It goes out no later than afew seconds after the vehicle is started. The
components of the restraint system are in
operational readiness.
A malfunction has occurred if the 0075
restraint system warning lamp:
R does not light up after the ignition is
switched on
R does not go out after a few seconds with
the engine running
R lights up again while the engine is running G
WARNING
If restraint system is malfunctioning, restraint system components may be triggered unin-
tentionally or might not be triggered at all in
the event of an accident with a high rate of vehicle deceleration. This can affect the Emer-
gency Tensioning Device or air bag, for exam-
ple. This poses an increased risk of injury or
even fatal injury.
Have the restraint system checked and
repaired in a qualified specialist workshop as
soon as possible. PASSENGER AIR BAG indicator lamp
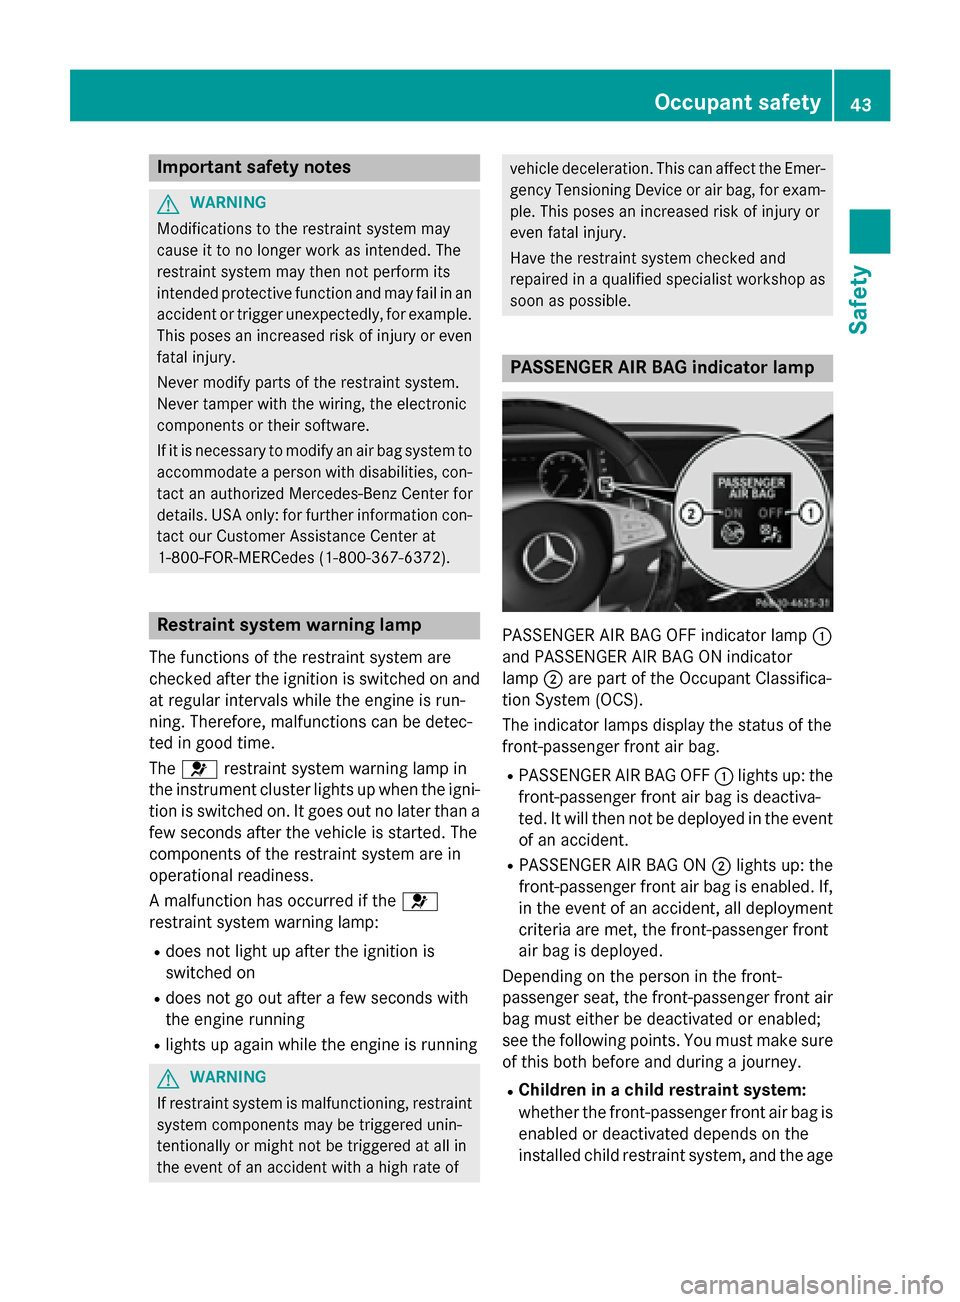
PASSENGER AIR BAG OFF indicator lamp
0043
and PASSENGER AIR BAG ON indicator
lamp 0044are part of the Occupant Classifica-
tion System (OCS).
The indicator lamps display the status of the
front-passenger front air bag.
R PASSENGER AIR BAG OFF 0043lights up: the
front-passenger front air bag is deactiva-
ted. It will then not be deployed in the event of an accident.
R PASSENGER AIR BAG ON 0044lights up: the
front-passenger front air bag is enabled. If,
in the event of an accident, all deployment
criteria are met, the front-passenger front
air bag is deployed.
Depending on the person in the front-
passenger seat, the front-passenger front air
bag must either be deactivated or enabled;
see the following points. You must make sure
of this both before and during a journey.
R Children in a child restraint system:
whether the front-passenger front air bag is
enabled or deactivated depends on the
installed child restraint system, and the age Occupant safety
43Safety Z
Page 68 of 402
The driving safety systems described only
work as effectively as possible when there is
adequate contact between the tires and the
road surface. Please pay special attention to
the notes on tires, recommended minimum
tire tread depths, etc. (Y page 356).
In wintry driving conditions, always use winter
tires (M+S tires) and if necessary, snow
chains. Only in this way will the driving safety systems described in this section work as
effectively as possible. ABS (Anti-lock Braking System)
General information ABS regulates brake pressure in such a way
that the wheels do not lock when you brake.
This allows you to continue steering the vehi-
cle when braking.
The 0025 ABS warning lamp in the instrument
cluster lights up when the ignition is switched on. It goes out when the engine is running.
Important safety notes i
Observe the "Important safety notes" sec-
tion (Y page 65). G
WARNING
If ABS is faulty, the wheels could lock when
braking. The steerability and braking charac-
teristics may be severely impaired. Addition-
ally, further driving safety systems are deac-
tivated. There is an increased danger of skid- ding and accidents.
Drive on carefully. Have ABS checked imme-
diately at a qualified specialist workshop.
When ABS is malfunctioning, other systems,
including driving safety systems, will also
become inoperative. Observe the information on the ABS warning lamp (Y page 281) and
display messages which may be shown in the
instrument cluster (Y page 247).
ABS works from a speed of about 5 mph
(8 km/h) , regardless of road-surface condi- tions. ABS works on slippery surfaces, even
when you only brake gently.
Braking X
If ABS intervenes: continue to depress the
brake pedal vigorously until the braking sit- uation is over.
X To make a full brake application:
depress the brake pedal with full force.
If ABS intervenes when braking, you will feel a pulsing in the brake pedal.
The pulsating brake pedal can be an indica-
tion of hazardous road conditions, and func-
tions as a reminder to take extra care while
driving. BAS (Brake Assist System)
General information BAS operates in emergency braking situa-
tions. If you depress the brake pedal quickly,
BAS automatically boosts the braking force,
thus shortening the stopping distance.
Important safety notes i
Observe the "Important safety notes" sec-
tion (Y page 65). G
WARNING
If BAS is malfunctioning, the braking distance
in an emergency braking situation is
increased. There is a risk of an accident.
In an emergency braking situation, depress
the brake pedal with full force. ABS prevents
the wheels from locking.
Braking X
Keep the brake pedal firmly depressed until
the emergency braking situation is over.
ABS prevents the wheels from locking.
The brakes will function as usual once you
release the brake pedal. BAS is deactivated. 66
Driving safety systemsSafety
Page 73 of 402
The brakes will work normally again if:
R you release the brake pedal.
R there is no longer any danger of a collision.
R no obstacle is detected in front of your
vehicle.
Adaptive Brake Assist is then deactivated.
If adaptive Brake Assist demands particularly
high braking force, preventative passenger
protection measures (PRE-SAFE ®
) are activa-
ted simultaneously.
Up to a speed of approximately 155 mph
(250 km/h) , adaptive Brake Assist is capable
of reacting to moving objects that have
already been detected as such at least once
over the period of observation.
Up to a speed of approximately 44 mph
(70 km/h), adaptive Brake Assist reacts to
stationary obstacles. ESP
®
(Electronic Stability Program)
General notes i
Observe the "Important safety notes" sec-
tion (Y page 65).
ESP ®
monitors driving stability and traction,
i.e. power transmission between the tires and
the road surface.
If ESP ®
detects that the vehicle is deviating
from the direction desired by the driver, one
or more wheels are braked to stabilize the
vehicle. The engine output is also modified to keep the vehicle on the desired course within
physical limits. ESP ®
assists the driver when
pulling away on wet or slippery roads. ESP ®
can also stabilize the vehicle during braking.
ETS/4ETS (Electronic Traction System) i
Observe the "Important safety notes" sec-
tion (Y page 65).
ETS traction control is part of ESP ®
. On vehi-
cles with 4MATIC, 4ETS is part of ESP ®
.
Traction control brakes the drive wheels indi-
vidually if they spin. This enables you to pull away and accelerate on slippery surfaces, for
example if the road surface is slippery on one side. In addition, more drive torque is trans-
ferred to the wheel or wheels with traction.
Traction control remains active, even if you
deactivate ESP ®
.
Important safety notes G
WARNING
If ESP ®
is malfunctioning, ESP ®
is unable to
stabilize the vehicle. Additionally, further driv- ing safety systems are deactivated. This
increases the risk of skidding and an accident.
Drive on carefully. Have ESP ®
checked at a
qualified specialist workshop.
Vehicles without 4MATIC: observe the notes
on ESP ®
(Y page 350) when towing the vehi-
cle with a raised rear axle.
ESP ®
is only deactivated if the 00BBwarning
lamp is lit continuously.
If the 00E5 warning lamp lights up continu-
ously, ESP ®
is not available due to a malfunc-
tion.
Observe the information on warning lamps
(Y page 283) and display messages which
may be shown in the instrument cluster
(Y page 247).
Only use wheels with the recommended tire
sizes. Only then will ESP ®
function properly.
Characteristics of ESP ® General information
If the
00E5 ESP warning lamp goes out before
beginning the journey, ESP ®
is automatically
active.
If ESP ®
intervenes, the 00E5ESP®
warning
lamp flashes in the instrument cluster. Driving safety systems
71Safety Z
Page 80 of 402
Useful information
i This Operator's Manual describes all
models and all standard and optional equip- ment of your vehicle available at the time of
publication of the Operator's Manual.
Country-specific differences are possible.
Please note that your vehicle may not be
equipped with all features described. This
also applies to safety-related systems and
functions.
i Read the information on qualified special-
ist workshops (Y page 25). SmartKey
Important safety notes
G
WARNING
If children are left unsupervised in the vehicle, they could:
R open the doors, thus endangering other
people or road users.
R get out and disrupt traffic.
R operate the vehicle's equipment.
Additionally, children could set the vehicle in
motion if, for example, they:
R release the parking brake.
R shifting the automatic transmission out of
park position P
R Start the engine.
There is a risk of an accident and injury.
When leaving the vehicle, always take the
SmartKey with you and lock the vehicle. Never
leave children or animals unattended in the
vehicle. Always keep the SmartKey out of
reach of children. G
WARNING
If you attach heavy or large objects to the
SmartKey, the SmartKey could be uninten-
tionally turned in the ignition lock. This could
cause the engine to be switched off. There is a risk of an accident. Do not attach any heavy or large objects to the
SmartKey. Remove any bulky key rings before
inserting the SmartKey into the ignition lock.
! Keep the SmartKey away from strong
magnetic fields. Otherwise, the remote
control function could be affected.
Strong magnetic fields can occur in the
vicinity of powerful electrical installations.
Do not keep the SmartKey: R with electronic devices, e.g. a mobile
phone or another SmartKey
R with metallic objects, e.g. coins or metal
foil
R inside metallic objects, e.g. a metal case
This can affect the functionality of the
SmartKey.
Vehicles with KEYLESS-GO start function: do not keep the SmartKey on the parcel shelf or in the trunk. Otherwise, the SmartKey maynot be detected, e.g. when starting the engine
using the Start/Stop button.
A check which periodically establishes a radio
connection between the vehicle and the
SmartKey determines whether a valid Smart- Key is in the vehicle. This occurs, for example:
R when starting the engine
R whilst driving
R when using HANDS-FREE ACCESS
R when the external door handles are
touched
R during convenience closing 78
SmartKeyOpening and closing
Page 81 of 402
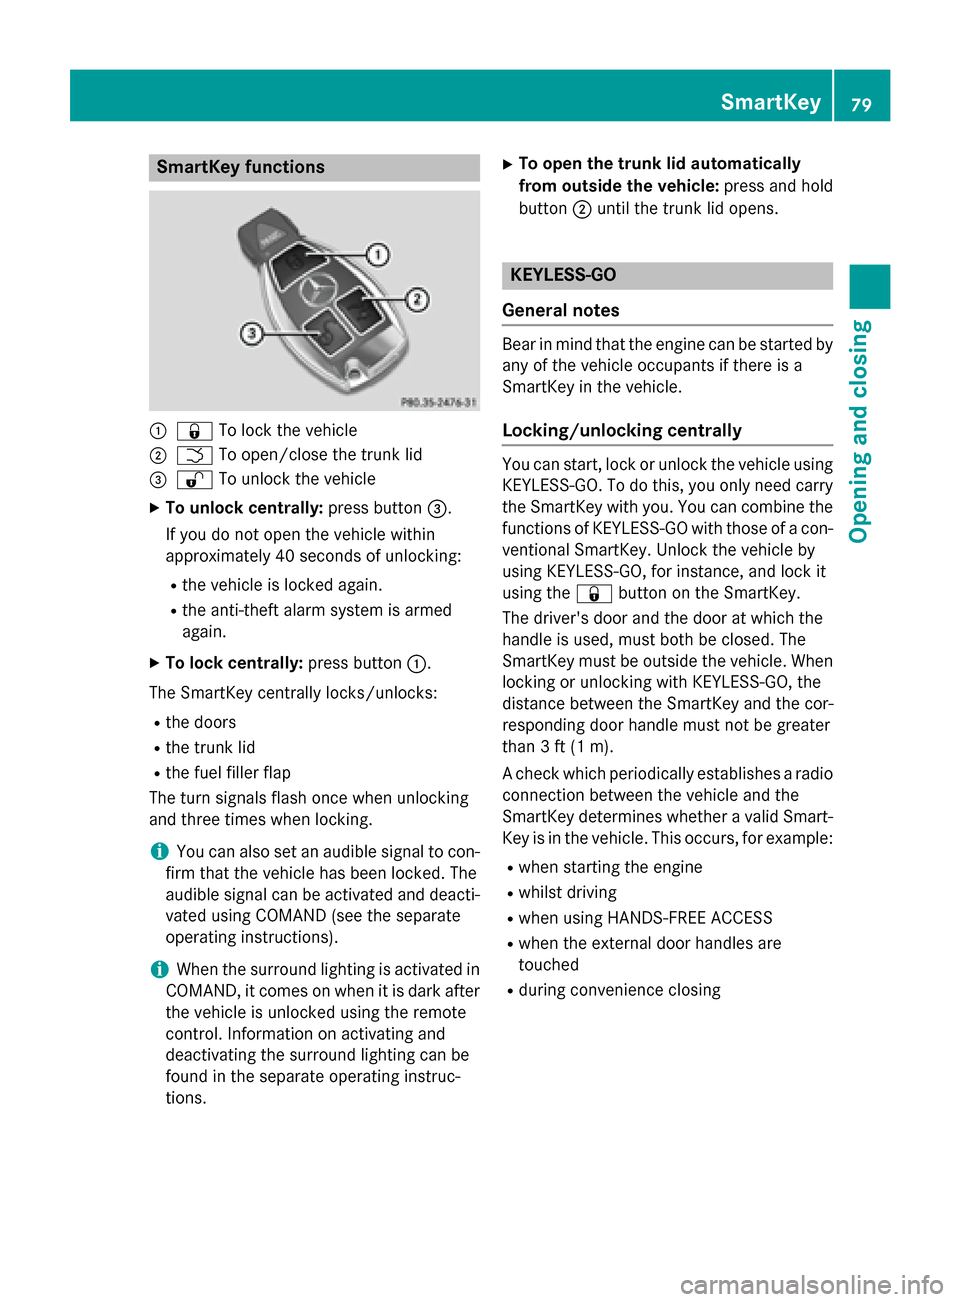
SmartKey functions
0043
0037 To lock the vehicle
0044 0054 To open/close the trunk lid
0087 0036 To unlock the vehicle
X To unlock centrally: press button0087.
If you do not open the vehicle within
approximately 40 seconds of unlocking:
R the vehicle is locked again.
R the anti-theft alarm system is armed
again.
X To lock centrally: press button0043.
The SmartKey centrally locks/unlocks:
R the doors
R the trunk lid
R the fuel filler flap
The turn signals flash once when unlocking
and three times when locking.
i You can also set an audible signal to con-
firm that the vehicle has been locked. The
audible signal can be activated and deacti-
vated using COMAND (see the separate
operating instructions).
i When the surround lighting is activated in
COMAND, it comes on when it is dark after
the vehicle is unlocked using the remote
control. Information on activating and
deactivating the surround lighting can be
found in the separate operating instruc-
tions. X
To open the trunk lid automatically
from outside the vehicle: press and hold
button 0044until the trunk lid opens. KEYLESS-GO
General notes Bear in mind that the engine can be started by
any of the vehicle occupants if there is a
SmartKey in the vehicle.
Locking/unlocking centrally You can start, lock or unlock the vehicle using
KEYLESS-GO. To do this, you only need carry
the SmartKey with you. You can combine the
functions of KEYLESS-GO with those of a con- ventional SmartKey. Unlock the vehicle by
using KEYLESS-GO, for instance, and lock it
using the 0037button on the SmartKey.
The driver's door and the door at which the
handle is used, must both be closed. The
SmartKey must be outside the vehicle. When
locking or unlocking with KEYLESS-GO, the
distance between the SmartKey and the cor-
responding door handle must not be greater
than 3 ft (1 m).
A check which periodically establishes a radio
connection between the vehicle and the
SmartKey determines whether a valid Smart- Key is in the vehicle. This occurs, for example:
R when starting the engine
R whilst driving
R when using HANDS-FREE ACCESS
R when the external door handles are
touched
R during convenience closing SmartKey
79Opening and closing Z
Page 82 of 402
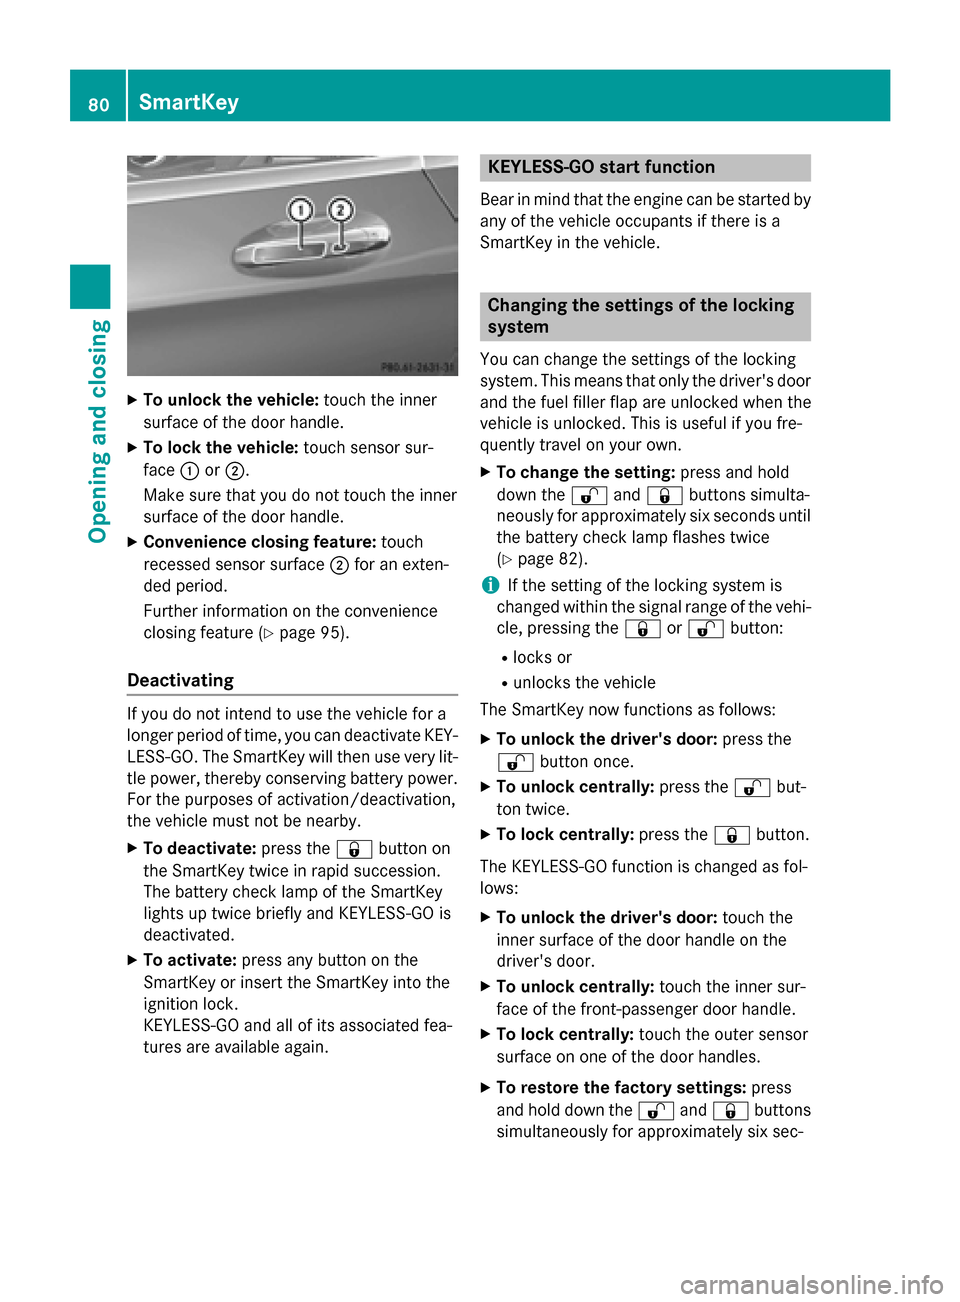
X
To unlock the vehicle: touch the inner
surface of the door handle.
X To lock the vehicle: touch sensor sur-
face 0043or0044.
Make sure that you do not touch the inner
surface of the door handle.
X Convenience closing feature: touch
recessed sensor surface 0044for an exten-
ded period.
Further information on the convenience
closing feature (Y page 95).
Deactivating If you do not intend to use the vehicle for a
longer period of time, you can deactivate KEY- LESS-GO. The SmartKey will then use very lit-
tle power, thereby conserving battery power.
For the purposes of activation/deactivation,
the vehicle must not be nearby.
X To deactivate: press the0037button on
the SmartKey twice in rapid succession.
The battery check lamp of the SmartKey
lights up twice briefly and KEYLESS-GO is
deactivated.
X To activate: press any button on the
SmartKey or insert the SmartKey into the
ignition lock.
KEYLESS-GO and all of its associated fea-
tures are available again. KEYLESS-GO start function
Bear in mind that the engine can be started by any of the vehicle occupants if there is a
SmartKey in the vehicle. Changing the settings of the locking
system
You can change the settings of the locking
system. This means that only the driver's door and the fuel filler flap are unlocked when the
vehicle is unlocked. This is useful if you fre-
quently travel on your own.
X To change the setting: press and hold
down the 0036and0037 buttons simulta-
neously for approximately six seconds until
the battery check lamp flashes twice
(Y page 82).
i If the setting of the locking system is
changed within the signal range of the vehi- cle, pressing the 0037or0036 button:
R locks or
R unlocks the vehicle
The SmartKey now functions as follows:
X To unlock the driver's door: press the
0036 button once.
X To unlock centrally: press the0036but-
ton twice.
X To lock centrally: press the0037button.
The KEYLESS-GO function is changed as fol-
lows:
X To unlock the driver's door: touch the
inner surface of the door handle on the
driver's door.
X To unlock centrally: touch the inner sur-
face of the front-passenger door handle.
X To lock centrally: touch the outer sensor
surface on one of the door handles.
X To restore the factory settings: press
and hold down the 0036and0037 buttons
simultaneously for approximately six sec- 80
SmartKeyOpening and closing
Page 86 of 402
Problem
Possible causes/consequences and
0050
0050Solutions The engine cannot be
started using the
SmartKey. The on-board voltage is too low.
X Switch off non-essential consumers, e.g. seat heating or interior
lighting, and try to start the engine again.
If this does not work:
X Check the starter battery and charge it if necessary
(Y page 343).
or
X Jump-start the vehicle (Y page 345).
or
X Consult a qualified specialist workshop. The engine cannot be
started using the Start/
Stop button. The
SmartKey is in the vehi-
cle. The vehicle is locked.
X Unlock the vehicle and try to start the vehicle again. The SmartKey battery is discharged or nearly discharged.
X Check the SmartKey battery (Y page 82) and replace it if nec-
essary (Y page 82).
If this does not work:
X Start your vehicle with the SmartKey in the ignition lock. There is interference from a powerful source of radio waves.
X Start your vehicle with the SmartKey in the ignition lock. You have lost a Smart-
Key. X
Have the SmartKey deactivated at a qualified specialist work-
shop.
X Report the loss immediately to the vehicle insurers.
X If necessary, have the locks changed as well. You have lost the
mechanical key. X
Report the loss immediately to the vehicle insurers.
X If necessary, have the locks changed as well. 84
SmartKeyOpening and closing
Page 97 of 402
remove the SmartKey. This function
remains active for five minutes or until you
open a door.
i Before opening or closing the side win-
dows, a check is carried out to see whether a valid SmartKey is in the vehicle, if:
R a side window switch is pressed or pulled
and
R the Start/Stop button is used instead of
the SmartKey in the ignition lock
and
R the engine is not running
This is carried out by means of a brief radio connection between the vehicle and the
SmartKey. Convenience opening
General notes You can ventilate the vehicle before you start
driving.
If the SmartKey is in close proximity to the
vehicle, the convenience opening function is
available.
To do this, the SmartKey is used to carry out
the following functions simultaneously:
R unlock the vehicle
R open the side windows
R open the panorama roof roller sunblind
R switch on the seat ventilation for the driv-
er's seat
Convenience opening X
Press and hold the 0036button until the
side windows are in the desired position.
The panorama roof roller sunblind opens.
X To interrupt convenience opening:
release the 0036button. Convenience closing feature
Important safety notes G
WARNING
When using the convenience closing feature,
parts of the body could be trapped in the clos- ing area when a side window is being closed. There is a risk of injury.
Observe the complete closing procedure
when the convenience closing feature is oper-
ating. Make sure that no body parts are in
close proximity during the closing procedure.
You can close the side windows and the roller sunblind for the panorama roof after you lock
the vehicle.
i Notes on the automatic reversing feature
for:
R the side window (Y page 94)
R the roller sunblind (Y page 97)
Using the SmartKey X
Press and hold the 0037button until the
side windows and the roller sunblind for the
panorama roof are fully closed.
X Make sure that all the side windows are
closed.
X To interrupt convenience closing:
release the 0037button.
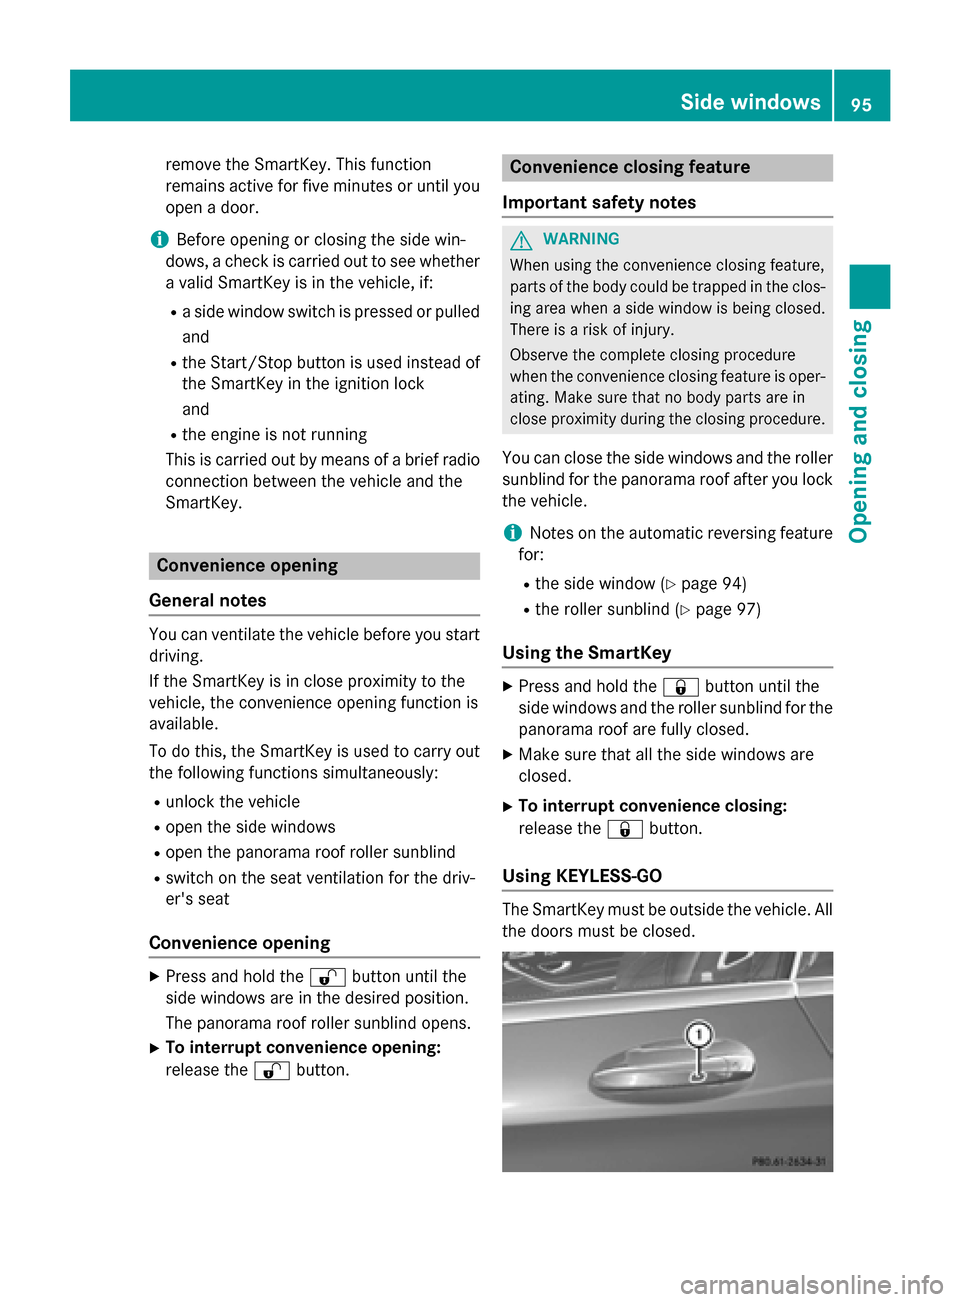
Using KEYLESS-GO The SmartKey must be outside the vehicle. All
the doors must be closed. Side windows
95Opening and closing Z
Page 104 of 402
Useful information
i This Operator's Manual describes all
models and all standard and optional equip- ment of your vehicle available at the time of
publication of the Operator's Manual.
Country-specific differences are possible.
Please note that your vehicle may not be
equipped with all features described. This
also applies to safety-related systems and
functions.
i Read the information on qualified special-
ist workshops (Y page 25). Correct driver's seat position
G
WARNING
You could lose control of your vehicle if you do the following while driving:
R adjust the driver's seat, head restraint,
steering wheel or mirrors
R fasten the seat belt
There is a risk of an accident.
Adjust the driver's seat, head restraint, steer-
ing wheel and mirror and fasten your seat belt before starting the engine. X
Observe the safety guidelines on seat
adjustment (Y page 103).
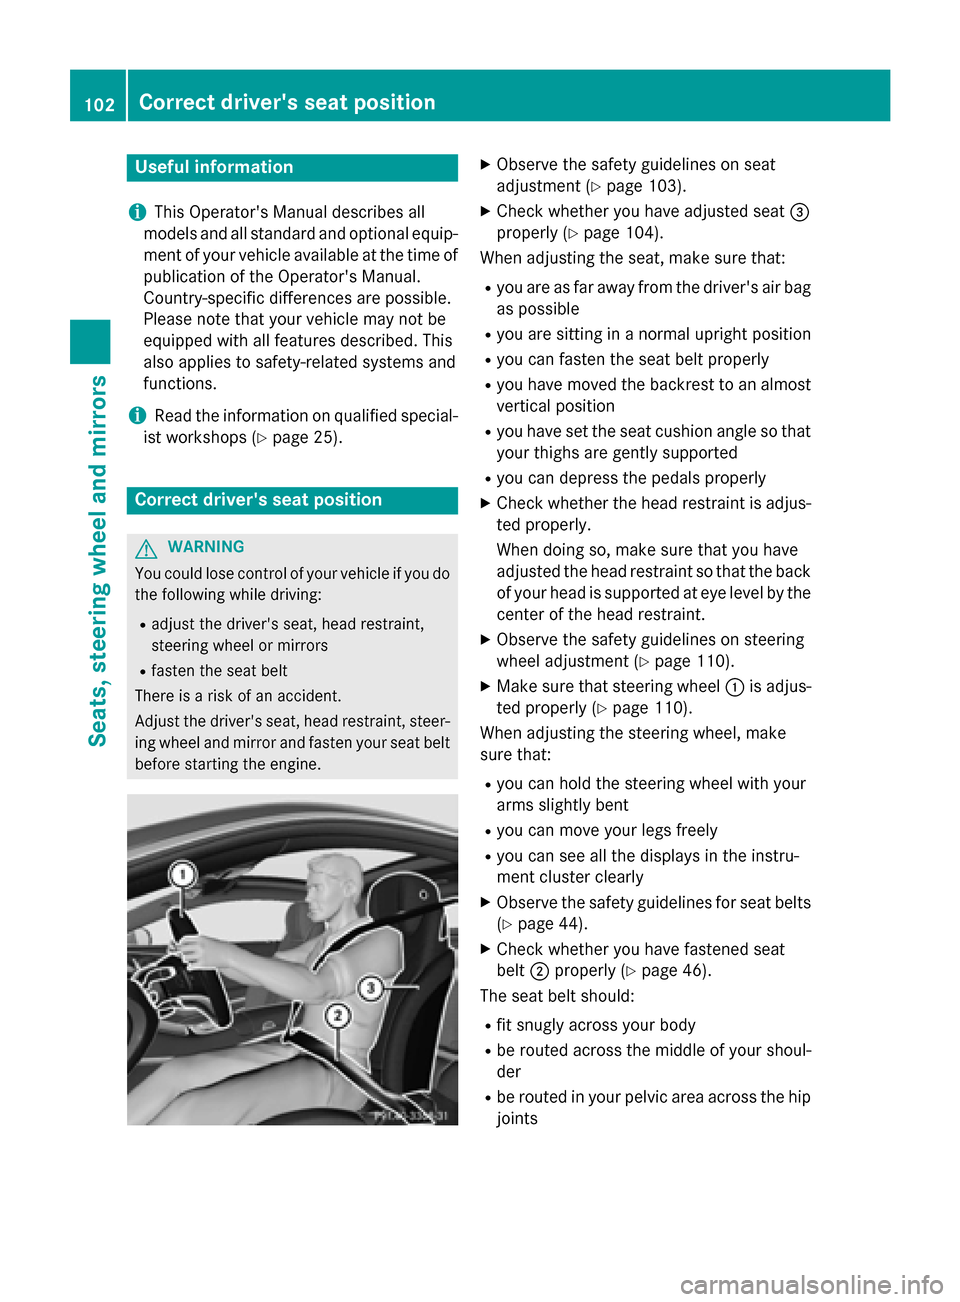
X Check whether you have adjusted seat 0087
properly (Y page 104).
When adjusting the seat, make sure that:
R you are as far away from the driver's air bag
as possible
R you are sitting in a normal upright position
R you can fasten the seat belt properly
R you have moved the backrest to an almost
vertical position
R you have set the seat cushion angle so that
your thighs are gently supported
R you can depress the pedals properly
X Check whether the head restraint is adjus-
ted properly.
When doing so, make sure that you have
adjusted the head restraint so that the back of your head is supported at eye level by the center of the head restraint.
X Observe the safety guidelines on steering
wheel adjustment (Y page 110).
X Make sure that steering wheel 0043is adjus-
ted properly (Y page 110).
When adjusting the steering wheel, make
sure that:
R you can hold the steering wheel with your
arms slightly bent
R you can move your legs freely
R you can see all the displays in the instru-
ment cluster clearly
X Observe the safety guidelines for seat belts
(Y page 44).
X Check whether you have fastened seat
belt 0044properly (Y page 46).
The seat belt should:
R fit snugly across your body
R be routed across the middle of your shoul-
der
R be routed in your pelvic area across the hip
joints 102
Correct driver's seat positionSeats, steering wheel and mirrors
Page 131 of 402
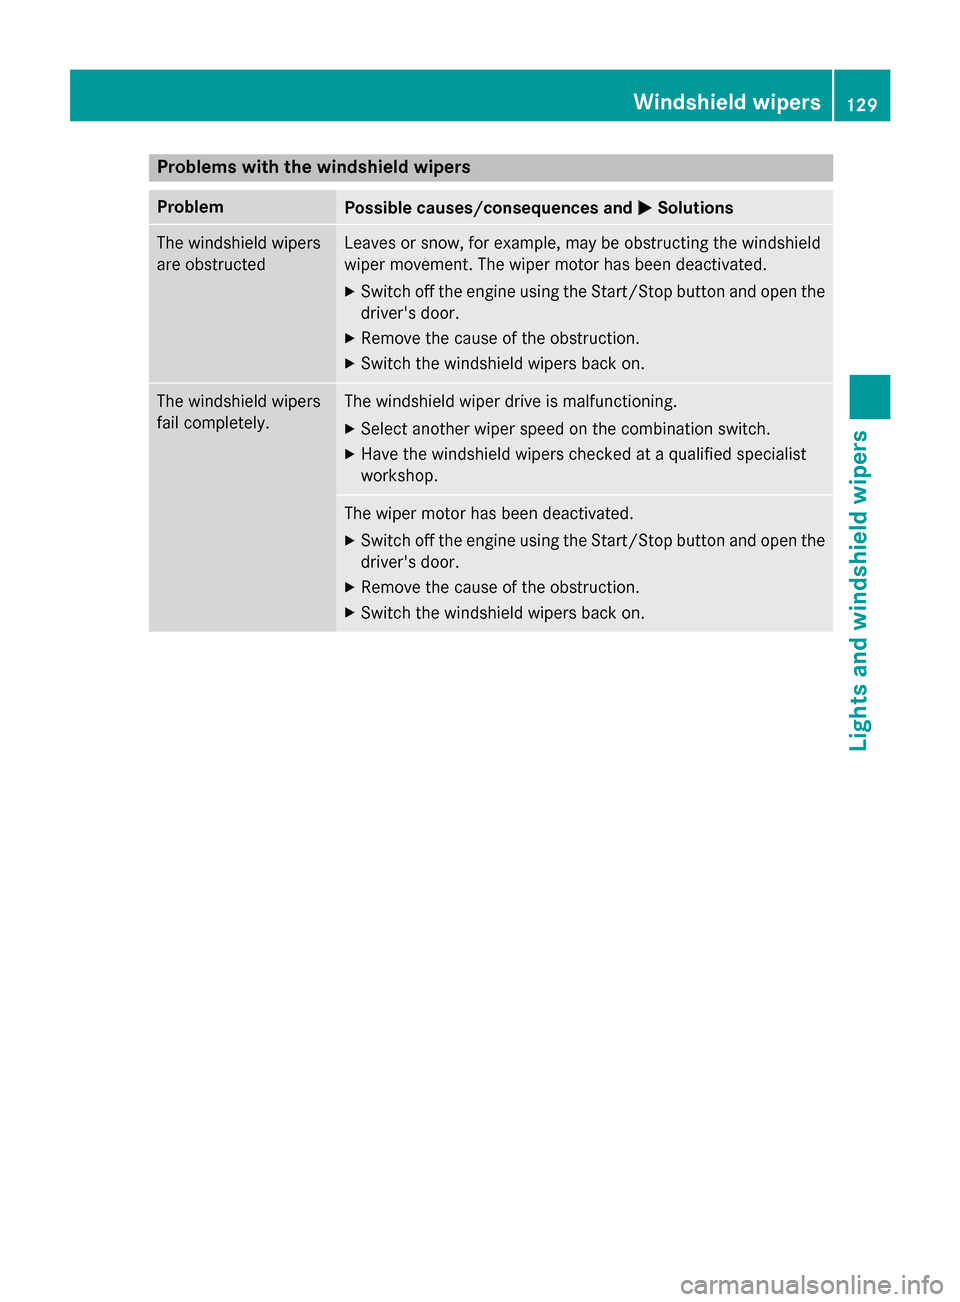
Problems with the windshield wipers
Problem
Possible causes/consequences and
0050
0050Solutions The windshield wipers
are obstructed Leaves or snow, for example, may be obstructing the windshield
wiper movement. The wiper motor has been deactivated.
X Switch off the engine using the Start/Stop button and open the
driver's door.
X Remove the cause of the obstruction.
X Switch the windshield wipers back on. The windshield wipers
fail completely. The windshield wiper drive is malfunctioning.
X Select another wiper speed on the combination switch.
X Have the windshield wipers checked at a qualified specialist
workshop. The wiper motor has been deactivated.
X Switch off the engine using the Start/Stop button and open the
driver's door.
X Remove the cause of the obstruction.
X Switch the windshield wipers back on. Windshield wipers
129Lights and windshield wipers Z