buttons MERCEDES-BENZ S-CLASS SALOON LONG 2020 Owners Manual
[x] Cancel search | Manufacturer: MERCEDES-BENZ, Model Year: 2020, Model line: S-CLASS SALOON LONG, Model: MERCEDES-BENZ S-CLASS SALOON LONG 2020Pages: 609, PDF Size: 10.5 MB
Page 79 of 609
#
Make sure that thech ild saf ety loc ksare
wo rking properly.
Ac tivating/deactivating the child saf ety lock
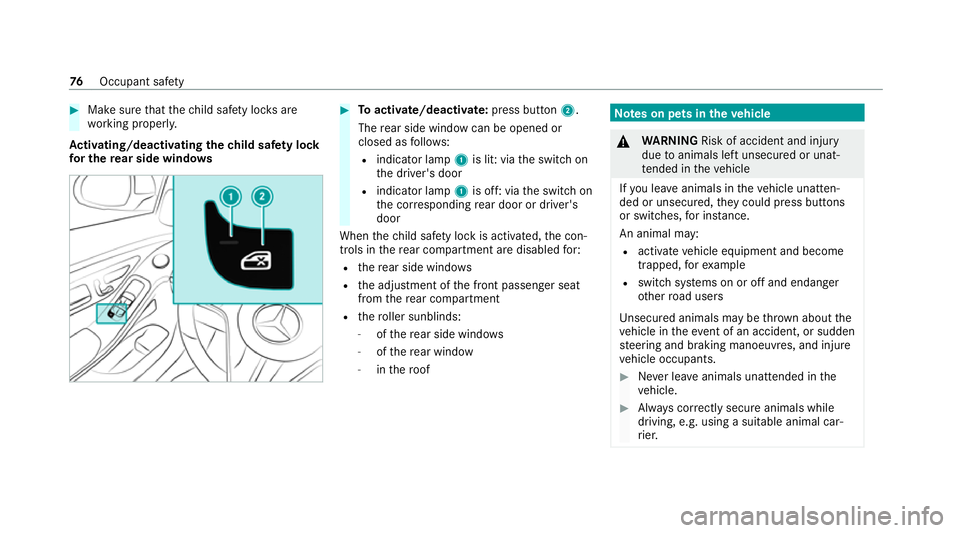
fo r the rear side windo ws #
Toactivate/deacti vate:press button 2.
The rear side wind owcan be opened or
closed as follo ws:
R indicator lamp 1is lit: via the switch on
th e driver's door
R indicator lamp 1is off: via the switch on
th e cor responding rear door or driver's
door
When thech ild saf ety lock is activated, the con‐
trols in there ar compartment are disabled for:
R there ar side wind ows
R the adjustment of the front passenger seat
from there ar compartment
R thero ller sunblinds:
- ofthere ar side wind ows
- ofthere ar wind ow
- inthero of Note
s on pets in theve hicle &
WARNING Risk of accident and inju ry
due toanimals left unsecured or unat‐
te nded in theve hicle
If yo u lea veanimals in theve hicle unatten‐
ded or unsecured, they could press buttons
or switches, for ins tance.
An animal may:
R acti vate ve hicle equipment and become
trapped, forex ample
R swit chsystems on or off and endanger
ot her road users
Un secured animals may be throw n about the
ve hicle in theev ent of an accident, or sudden
st eering and braking manoeuvres, and injure
ve hicle occupants. #
Never lea veanimals unat tended in the
ve hicle. #
Alw ays cor rectly secu reanimals while
driving, e.g. using a suitable animal car‐
ri er. 76
Occupant saf ety
Page 81 of 609
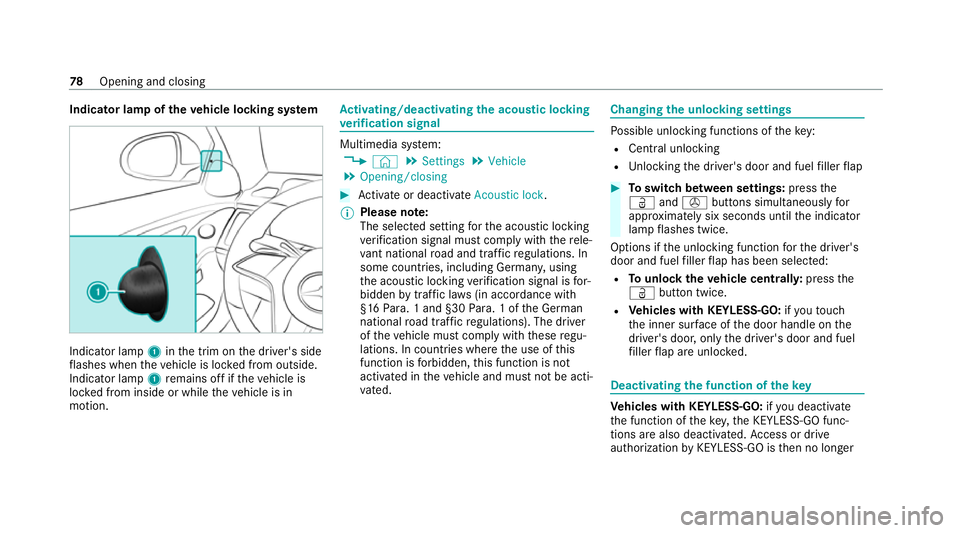
Indicator lamp of
theve hicle locking sy stem Indicator lamp
1inthe trim on the driver's side
fl ashes when theve hicle is loc ked from outside.
Indicator lamp 1remains off if theve hicle is
loc ked from inside or while theve hicle is in
motion. Ac
tivating/deactivating the acoustic lo cking
ve rification signal Multimedia sy
stem:
4 © 5
Settings 5
Vehicle
5 Opening/closing #
Activate or deacti vate Acoustic lock .
% Please no
te:
The selected setting forth e acoustic locking
ve rification signal must comply wi th there le‐
va nt national road and traf fic re gulations. In
some countri es, including German y,using
th e acoustic locking verification signal is for‐
bidden bytraf fic la ws(in accordance with
§16 Para. 1 and §30 Para. 1 of the German
national road traf fic re gulations). The driver
of theve hicle must comply with these regu‐
lations. In countri es wherethe use of this
function is forbidden, this function is not
activated in theve hicle and must not be acti‐
va ted. Changing
the unlocking settings Po
ssible unlocking functions of theke y:
R Central unlocking
R Unlocking the driver's door and fuel filler flap #
Toswitch between settings: pressthe
Ü ands buttons simultaneously for
appr oximately six seconds until the indicator
lamp flashes twice.
Options if the unlocking function forth e driver's
door and fuel filler flap has been selec ted:
R Tounlo cktheve hicle centrall y:press the
Ü button twice.
R Vehicles with KEYLESS-GO: ifyo uto uch
th e inner sur face of the door handle on the
driver's door, only the driver's door and fuel
fi ller flap are unlo cked. Deactivating
the function of thekey Ve
hicles with KEYLESS-GO: ifyo u deactivate
th e function of theke y,the KEYLESS-GO func‐
tions are also deactivated. Access or drive
au thorization byKEYLESS-GO is then no longer 78
Opening and closing
Page 85 of 609
The additional door lock is automatically activa‐
te d in thefo llowing situations:
R The vehicle is loc ked using thekey.
R The vehicle is loc ked using KEYLESS-GO.
If th eve hicle has been loc ked via Mercedes me
connect, the additional door lock is not activa‐
te d.
If th e additional door lock is activated, the doors
cann otbe opened from the inside.
% After locking you can issue a signal with the
horn.
Yo u can pr eventthe additional door lock from
being activated bydeactivating interior pr otec‐
tion before locking theve hicle (/ page106). Un
locking/opening the doors from the inside #
United Kingdom onl y:obser vethe no tes on
th e additional door lock (/ page81). #
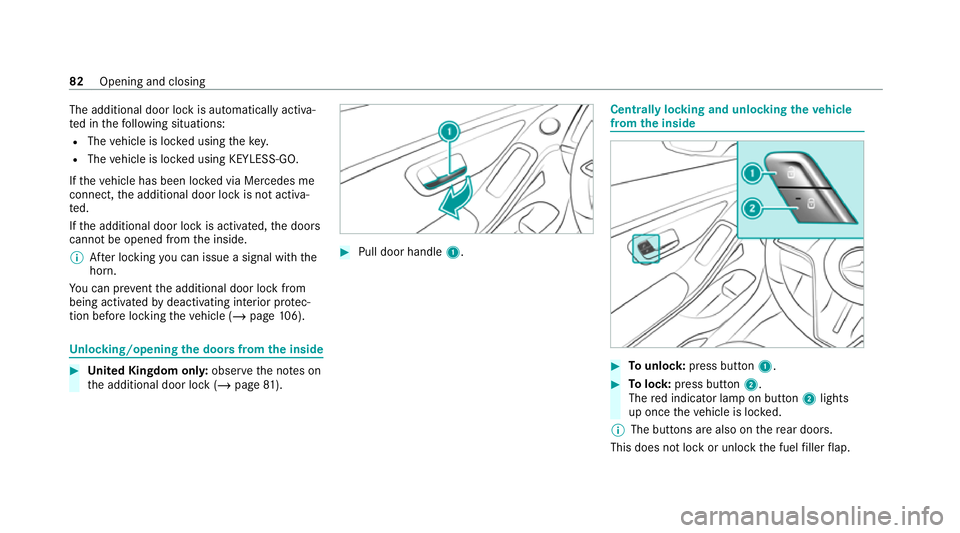
Pull door handle 1. Centrally locking and unlocking
theve hicle
from the inside #
Tounlo ck:press button 1. #
Tolock: press button 2.
The red indicator lamp on button 2lights
up once theve hicle is loc ked.
% The buttons are also on there ar doors.
This does not lock or unlo ckthe fuel filler flap. 82
Opening and closing
Page 105 of 609
The
rear roller sunblind is not operating
smoo thly. #
Reset there ar roller sunblind.
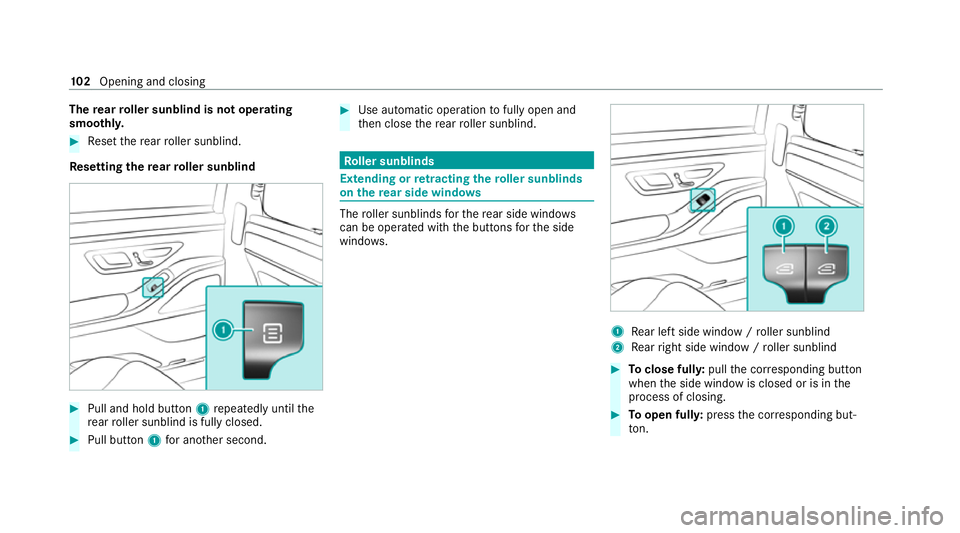
Re setting there ar roller sunblind #
Pull and hold button 1repeatedly until the
re ar roller sunblind is fully closed. #
Pull button 1for ano ther second. #
Use automatic operation tofully open and
th en close there ar roller sunblind. Ro
ller sunblinds Extending or
retracting the roller sunblinds
on there ar side windo ws The
roller sunblinds forth ere ar side wind ows
can be ope rated with the buttons forth e side
windo ws. 1
Rear left side wind ow/ro ller sunblind
2 Rear right side window / roller sunblind #
Toclose full y:pull the cor responding button
when the side window is closed or is in the
process of closing. #
Toopen ful ly:press the cor responding but‐
to n. 102
Opening and closing
Page 111 of 609
Yo
u can adjust the seats when the ignition is
switched off. &
WARNING Risk of becoming trapped
du ring seat adjustment
When you adjust a seat, you or other vehicle
occupants could become trapped, e.g. on the
seat guide rail. #
Make sure when adjusting a seat that
no one has any body parts in the sweep
of the seat. Obser
vethe saf ety no tes on "Airbags" and "Chil‐
dren in theve hicle". &
WARNING Risk of inju ryifve hicle set‐
tings are adjus ted while theve hicle is in
motion
Yo u could lose cont rol of theve hicle in par‐
ticular in thefo llowing situations:
R Ifyo u adjust the driver's seat, the head
re stra ints, thesteering wheel or the mir‐
ro r while theve hicle is in motion. R
Ifyo ufast enyour seat belt while theve hi‐
cle is in motion. #
Before starting the engine: adjust the
driver's seat, head restra ints, steering
wheel and mir ror in particular and fas‐
te nyo ur seat belt. &
WARNING Risk of becoming trapped if
th e seat height is adjus ted carelessly
If yo u adjust the seat height carelessly, you
or other vehicle occupants could be trapped
and thereby injured.
Children in particular could acciden tally
press the electrical seat adjustment buttons
and become trapped. #
While moving the seats, make sure that
hands or other body parts do not get
under the le ver assembly of the seat
adjustment sy stem. &
WARNING Risk of inju rydue toincor‐
re ctly adjus ted head restra ints
If head restra ints ha venot been adjus ted
cor rectly, there is an increased risk of injury
in the head and neck area, e.g. in theev ent
of an accident or sudden braking. #
Before driving off, make sure forev ery
ve hicle occupant that the cent reofthe
head restra int supports the back of the
head at about eye le vel. Ad
just the head restra int fore -and-aft position so
th at it is as close as possible tothe back of your
head. &
WARNING Risk of inju ryor death due to
incor rect seat position
The seat belt will not of ferth e intended le vel
of pr otection if you ha venot mo vedth e seat
backrest toan almost vertical position.
In particular, you may slip under the seatbelt
and injure yourself. 108
Seats and stowing
Page 113 of 609
#
Save the settings with the memory function
(/ page 131).
% The head restra int height will be adjus ted
automatically when you adjust the seat
height or the seat fore -and-aft position.
% Ve
hicles with EASY ADJUST luxury head
re stra ints: thefo re -and-aft position of the
head restra int will be adjus ted automatically
when you adjust the backrest angle. Ad
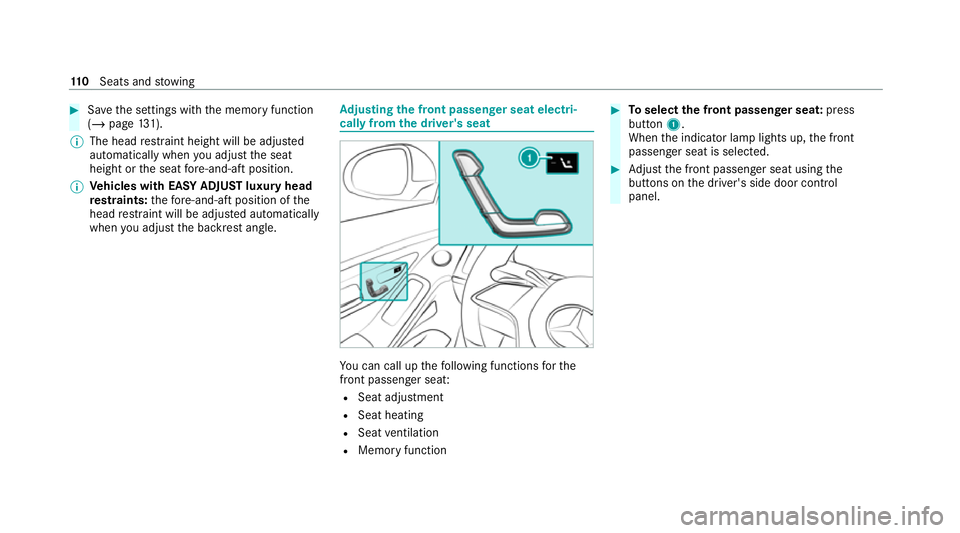
justing the front passen ger seat electri‐
cally from the driver's seat Yo
u can call up thefo llowing functions forthe
front passenger sea t:
R Seat adjustment
R Seat heating
R Seat ventilation
R Memory function #
Toselect the front passenger seat: press
button 1.
When the indicator lamp lights up, the front
passenger seat is selected. #
Adjust the front passenger seat using the
buttons on the driver's side door control
panel. 11 0
Seats and stowing
Page 114 of 609
Ad
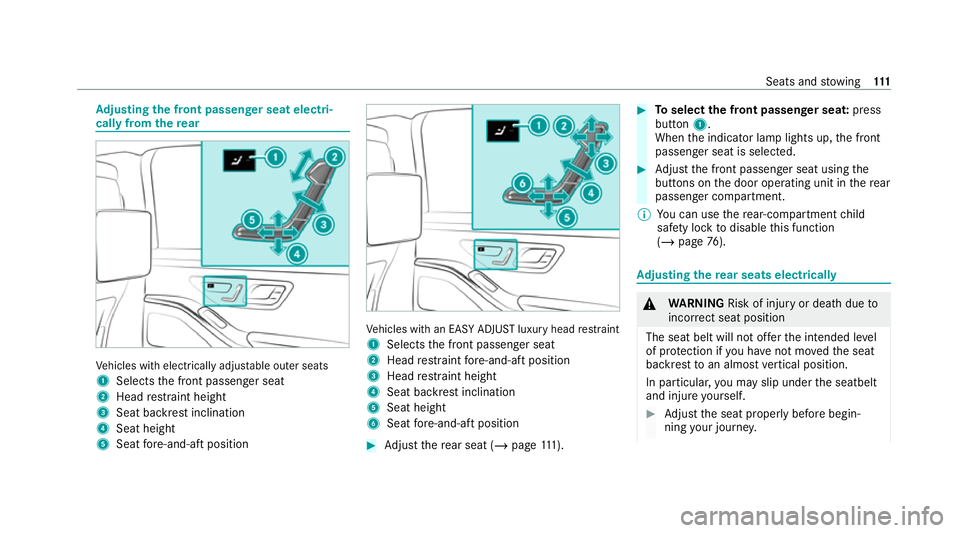
justing the front passen ger seat electri‐
cally from the rear Ve
hicles with electrically adjus table outer seats
1 Selects the front passenger seat
2 Head restra int height
3 Seat backrest inclination
4 Seat height
5 Seat fore -and-aft position Ve
hicles with an EASY ADJUST luxury head restra int
1 Selects the front passenger seat
2 Head restra int fore -and-aft position
3 Head restra int height
4 Seat backrest inclination
5 Seat height
6 Seat fore -and-aft position #
Adjust there ar seat (/ page111). #
Toselect the front passenger seat: press
button 1.
When the indicator lamp lights up, the front
passenger seat is selected. #
Adjust the front passenger seat using the
buttons on the door operating unit in there ar
passenger compartment.
% You can use there ar-compartment child
saf ety lock todisable this function
(/ page 76). Ad
justing the rear seats electrical ly &
WARNING Risk of inju ryor death due to
incor rect seat position
The seat belt will not of ferth e intended le vel
of pr otection if you ha venot mo vedth e seat
backrest toan almost vertical position.
In particular, you may slip under the seatbelt
and injure yourself. #
Adjust the seat proper lybefore begin‐
ning your journe y. Seats and
stowing 111
Page 117 of 609
*
NO
TEDama getothe seats when moving
th e seats back The seats may be damaged
byobjects when
moving the seats bac k. #
When moving the seats bac k,make
sure that there are no objects in the
fo ot we ll, under or behind the seats. The switches
for adju sting the seats do not
mo ve.Yo u will therefore recei veno di rect feed‐
back on the switch while pressing the switch.
Fe edback is pr ovided only bythe mo vement of
th e seat.
Obser vethefo llowing:
R Adjust the front passenger seat forch auf feur
mode before the journey
Fo rch auf feur mode, thefo llowing settings are
made forth e front passenger seat:
R The seat is mo vedfo rw ards
R The backrest is til tedfo rw ards
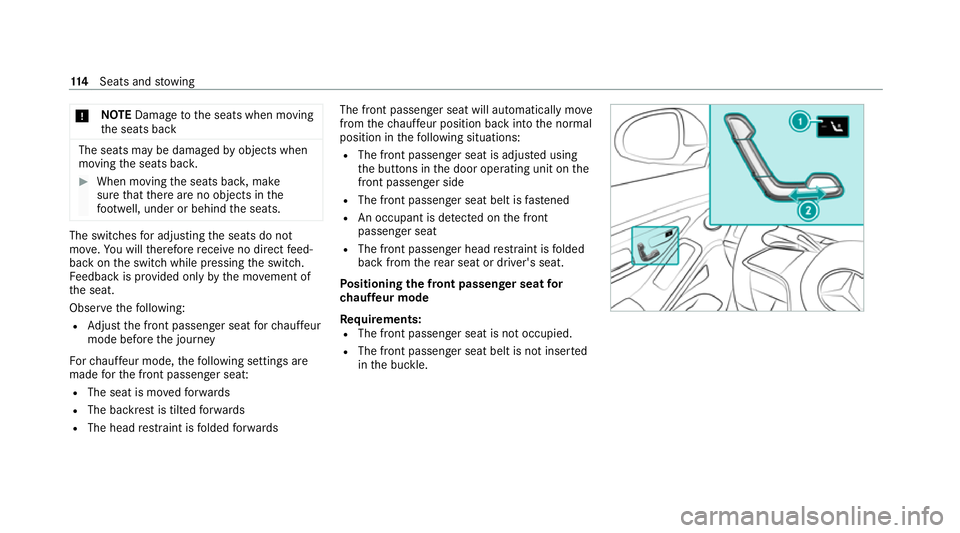
R The head restra int is folded forw ards The front passenger seat will automatically mo
ve
from thech auf feur position back into the normal
position in thefo llowing situations:
R The front passen ger seat is adju sted using
th e buttons in the door operating unit on the
front passenger side
R The front passenger seat belt is fastened
R An occupant is de tected on the front
passenger seat
R The front passenger head restra int is folded
back from there ar seat or driver's seat.
Po sitioning the front passenger seat for
ch auf feur mode
Requ irements:
R The front passen ger seat is not occupied.
R The front passenger seat belt is not inser ted
in the buckle. 11 4
Seats and stowing
Page 126 of 609
#
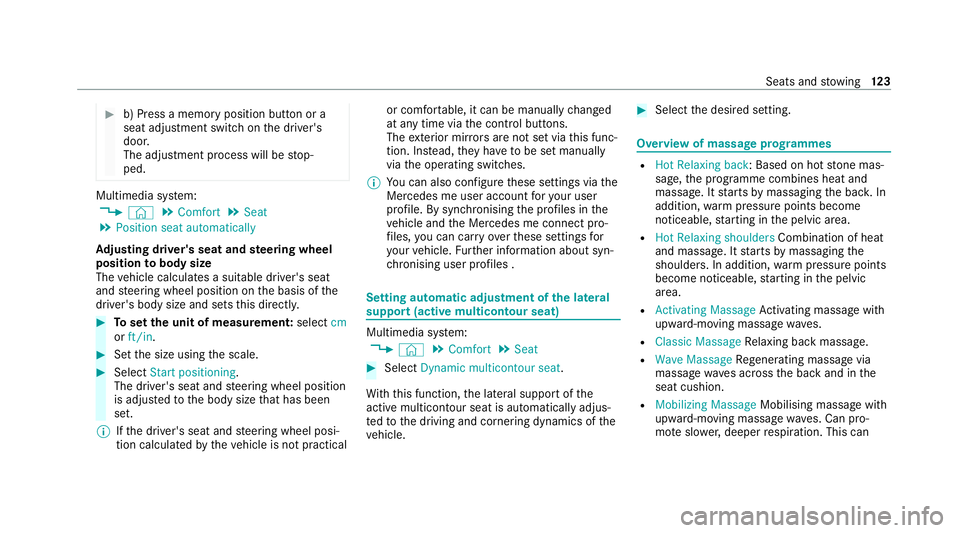
b) Press a memory position button or a
seat adjustment switch on the driver's
door.
The adjustment process will be stop‐
ped. Multimedia sy
stem:
4 © 5
Comfort 5
Seat
5 Position seat automatically
Ad justing driver's seat and steering wheel
position tobody size
The vehicle calculates a suitable driver's seat
and steering wheel position on the basis of the
driver's body size and sets this directly. #
Toset the unit of measurement: selectcm
or ft/in. #
Set the size using the scale. #
Select Start positioning.
The driver's seat and steering wheel position
is adjus tedto the body size that has been
set.
% Ifth e driver's seat and steering wheel posi‐
tion calculated bytheve hicle is not practical or comfor
table, it can be manually changed
at any time via the control buttons.
The exterior mir rors are not set via this func‐
tion. Ins tead, they have tobe set manually
via the operating switches.
% You can also configure these settings via the
Mercedes me user account foryo ur user
profile. By syn chronising the profiles in the
ve hicle and the Mercedes me connect pro‐
fi les, you can car ryover these settings for
yo ur vehicle. Further information about syn‐
chro nising user profiles . Setting automatic adjustment of the lateral
suppo
rt(active multicontour seat) Multimedia sy
stem:
4 © 5
Comfort 5
Seat #
Select Dynamic multicontour seat.
Wi th th is function, the lateral support of the
active multicontour seat is automatically adjus‐
te dto the driving and cornering dynamics of the
ve hicle. #
Select the desired setting. Overview of massa
geprog rammes R
Hot Relaxing back: Based on hot stone mas‐
sage, the programme combines heat and
massage. It starts bymassaging the bac k.In
addition, warm pressure points become
noticeable, starting in the pelvic area.
R Hot Relaxing shoulders Combination of heat
and massage. It starts bymassaging the
shoulders . In addition, warm pressure points
become noticeable, starting in the pelvic
area.
R Activating Massage Activating massa gewith
upward-m oving massage waves.
R Classic Massage Relaxing back massage.
R Wave Massage Regenerating massa gevia
massa gewav es across the back and in the
seat cushion.
R Mobilizing Massage Mobilising massage with
upward-moving massage waves. Can pro‐
mo teslo wer,deeper respiration. This can Seats and
stowing 12 3
Page 134 of 609
Yo
u can sa vethefo llowing settings forth e front
seat:
R Seat, backrest, head restra int position and
con tour of the seat backrest in the lumbar
re gion
R Vehicles with an active multicontour
seat:
- Side bols ters of the seat backrest
- Shoulder of the seat backrest
- Contour of the seat backrest
- Dynamic function le vel
R Seat heating: di stribution of the heated sec‐
tions of the seat cushion and seat backrest
R Driver's side: steering wheel position and
position of the outside mir rors on the driver's
and front passenger sides
R Head-up display (depending on vehicle equip‐
ment) Operating
the memory function St
oring #
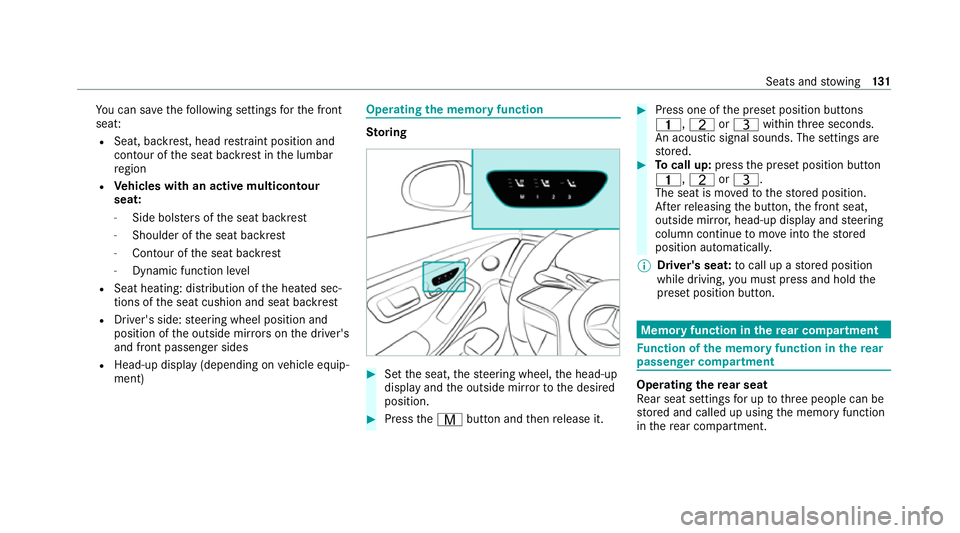
Set the seat, thesteering wheel, the head-up
display and the outside mir rorto the desired
position. #
Press theV button and then release it. #
Press one of the preset position buttons
4, TorU within thre e seconds.
An acoustic signal sounds. The settings are
st ored. #
Tocall up: pressthe preset position button
4, TorU.
The seat is mo vedto thestored position.
Af terre leasing the button, the front seat,
outside mir ror,head-up display and steering
column continue tomo veinto thestored
position automaticall y.
% Driver's sea t:to call up a stored position
while driving, you must press and hold the
preset position button. Memory function in
there ar comp artment Fu
nction of the memory function in there ar
passenger comp artment Operating
there ar seat
Re ar seat settings for up tothre e people can be
st ored and called up using the memory function
in there ar compartment. Seats and
stowing 131