window MERCEDES-BENZ S-CLASS SEDAN 2013 Manual PDF
[x] Cancel search | Manufacturer: MERCEDES-BENZ, Model Year: 2013, Model line: S-CLASS SEDAN, Model: MERCEDES-BENZ S-CLASS SEDAN 2013Pages: 536, PDF Size: 24.14 MB
Page 400 of 536
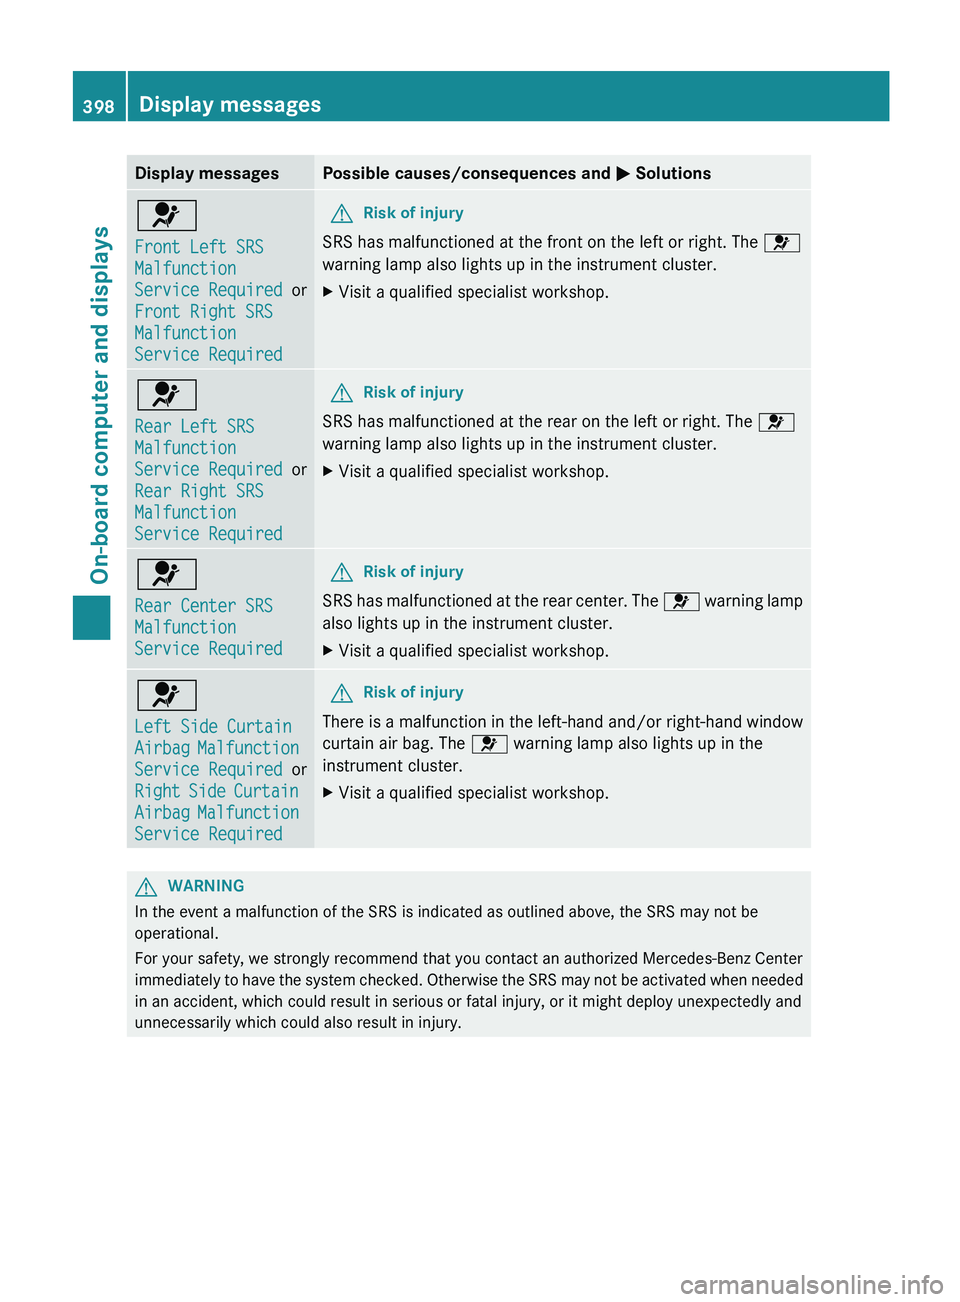
Display messages Possible causes/consequences and
M Solutions6
Front Left SRS
Malfunction
Service Required
or
Front Right SRS
Malfunction
Service Required G
Risk of injury
SRS has malfunctioned at the front on the left or right. The 6
warning lamp also lights up in the instrument cluster.
X Visit a qualified specialist workshop. 6
Rear Left SRS
Malfunction
Service Required
or
Rear Right SRS
Malfunction
Service Required G
Risk of injury
SRS has malfunctioned at the rear on the left or right. The 6
warning lamp also lights up in the instrument cluster.
X Visit a qualified specialist workshop. 6
Rear Center SRS
Malfunction
Service Required G
Risk of injury
SRS has malfunctioned at the rear center. The 6
warning lamp
also lights up in the instrument cluster.
X Visit a qualified specialist workshop. 6
Left Side Curtain
Airbag
Malfunction
Service Required or
Right Side Curtain
Airbag Malfunction
Service Required G
Risk of injury
There is a malfunction in the left-hand and/or right-hand window
curtain air bag. The 6 warning lamp also lights up in the
instrument cluster.
X Visit a qualified specialist workshop. G
WARNING
In the event a malfunction of the SRS is indicated as outlined above, the SRS may not be
operational.
For your safety, we strongly recommend that you contact an authorized Mercedes-Benz Center
immediately
to have the system checked. Otherwise the SRS may not be activated when needed
in an accident, which could result in serious or fatal injury, or it might deploy unexpectedly and
unnecessarily which could also result in injury. 398
Display messages
On-board computer and displays
Page 441 of 536
Rear window roller sunblind
Important safety notes G
WARNING
When leaving the vehicle, always remove the
SmartKey from the ignition lock. Always take
the SmartKey with you and lock the vehicle.
Do not leave children unattended in the
vehicle, even if they are secured in a child
restraint system, or with access to an
unlocked vehicle. A child's unsupervised
access
to a vehicle could result in an accident
and/or serious personal injury. The children
could:
R injure themselves on parts of the vehicle
R be seriously or fatally injured through
excessive exposure to extreme heat or cold
R injure themselves or cause an accident with
vehicle equipment that can be operated
even if the SmartKey is removed from the
ignition lock or removed from the vehicle,
such as seat adjustment, steering wheel
adjustment, or the memory function
If children open a door, they could injure other
persons or get out of the vehicle and injure
themselves or be injured by following traffic.
Do not expose the child restraint system to
direct sunlight. The child restraint system's
metal parts, for example, could become very
hot, and the child could be burned on these
parts. G
WARNING
When adjusting a roller sunblind, the roller
blind moves up or down. You might become
trapped in the process.
In
the event of danger, briefly press the button
for the roller sunblind to change the roller
blind's direction of movement.
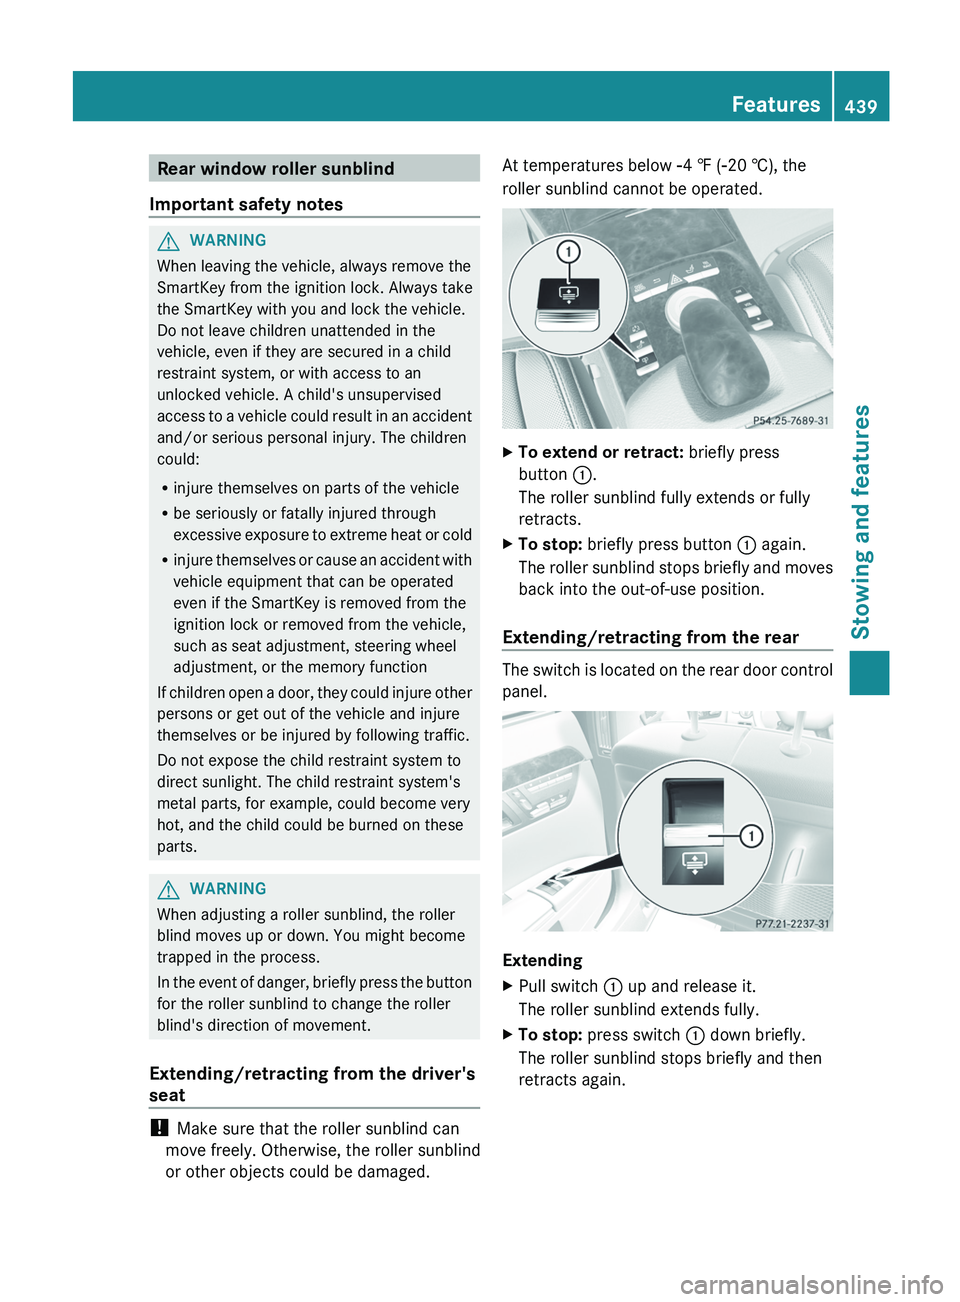
Extending/retracting from the driver's
seat !
Make sure that the roller sunblind can
move freely. Otherwise, the roller sunblind
or other objects could be damaged. At temperatures below Ò4 ‡ (Ò20 †), the
roller sunblind cannot be operated. X
To extend or retract: briefly press
button :.
The roller sunblind fully extends or fully
retracts.
X To stop: briefly press button : again.
The
roller sunblind stops briefly and moves
back into the out-of-use position.
Extending/retracting from the rear The switch is located on the rear door control
panel.
Extending
X
Pull switch : up and release it.
The roller sunblind extends fully.
X To stop: press switch : down briefly.
The roller sunblind stops briefly and then
retracts again. Features
439
Stowing and features Z
Page 450 of 536
(POIs)/important destinations in the
surrounding area.
You are prompted to confirm route guidance
to the address entered.
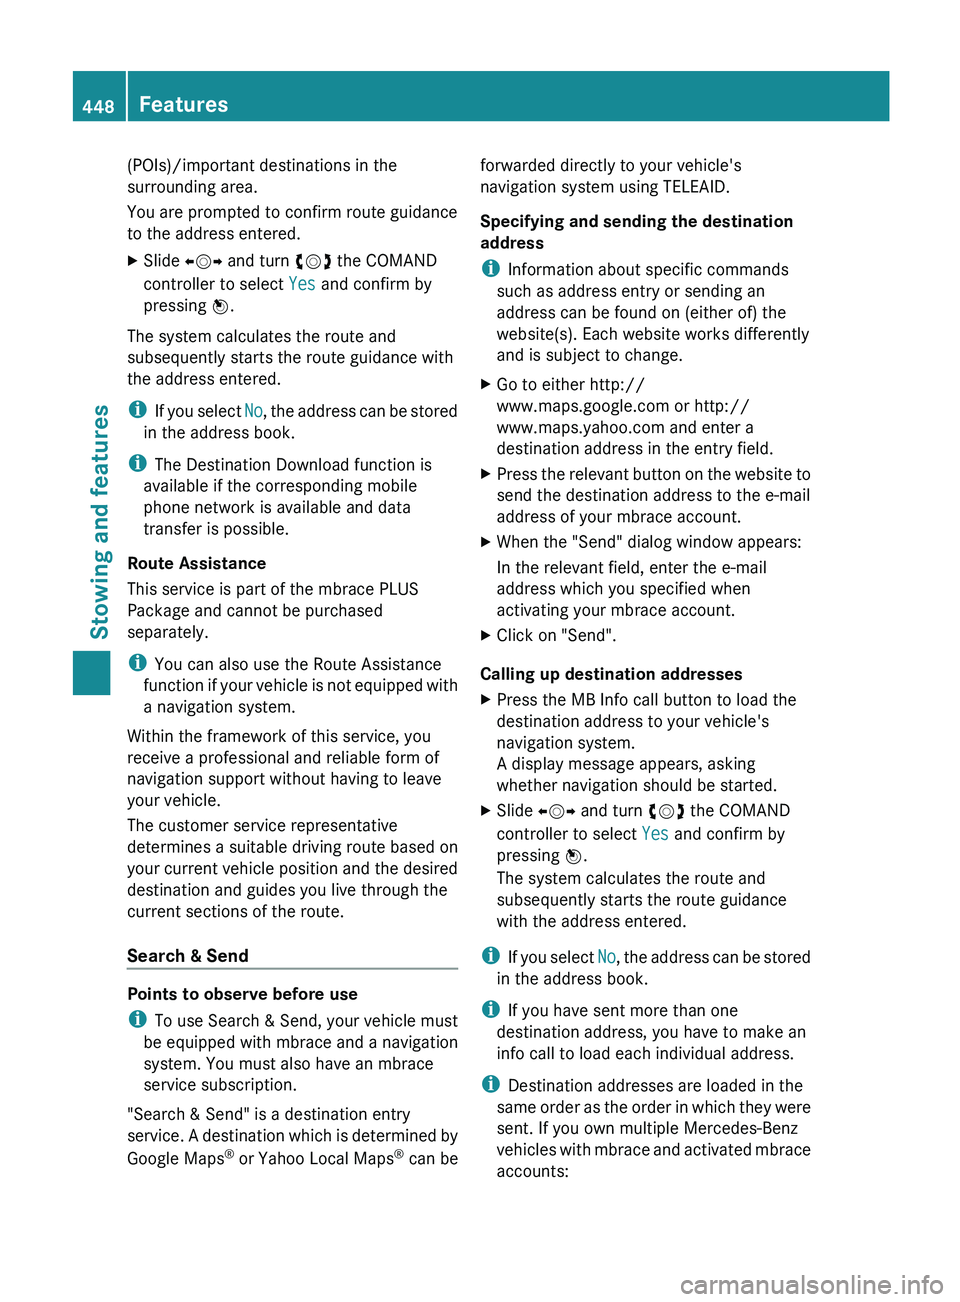
X
Slide XVY and turn cVd the COMAND
controller to select Yes and confirm by
pressing W.
The system calculates the route and
subsequently starts the route guidance with
the address entered.
i If
you select No, the address can be stored
in the address book.
i The Destination Download function is
available if the corresponding mobile
phone network is available and data
transfer is possible.
Route Assistance
This service is part of the mbrace PLUS
Package and cannot be purchased
separately.
i You can also use the Route Assistance
function if your vehicle is not equipped with
a navigation system.
Within the framework of this service, you
receive a professional and reliable form of
navigation support without having to leave
your vehicle.
The customer service representative
determines a suitable driving route based on
your current vehicle position and the desired
destination and guides you live through the
current sections of the route.
Search & Send Points to observe before use
i
To use Search & Send, your vehicle must
be equipped with mbrace and a navigation
system. You must also have an mbrace
service subscription.
"Search & Send" is a destination entry
service.
A destination which is determined by
Google Maps ®
or Yahoo Local Maps ®
can be forwarded directly to your vehicle's
navigation system using TELEAID.
Specifying and sending the destination
address
i
Information about specific commands
such as address entry or sending an
address can be found on (either of) the
website(s). Each website works differently
and is subject to change.
X Go to either http://
www.maps.google.com or http://
www.maps.yahoo.com
and enter a
destination address in the entry field.
X Press the relevant button on the website to
send the destination address to the e-mail
address of your mbrace account.
X When the "Send" dialog window appears:
In the relevant field, enter the e-mail
address which you specified when
activating your mbrace account.
X Click on "Send".
Calling up destination addresses
X Press the MB Info call button to load the
destination address to your vehicle's
navigation system.
A display message appears, asking
whether navigation should be started.
X Slide XVY and turn cVd the COMAND
controller to select Yes and confirm by
pressing W.
The system calculates the route and
subsequently starts the route guidance
with the address entered.
i If
you select No, the address can be stored
in the address book.
i If you have sent more than one
destination address, you have to make an
info call to load each individual address.
i Destination addresses are loaded in the
same order as the order in which they were
sent. If you own multiple Mercedes-Benz
vehicles with mbrace and activated mbrace
accounts: 448
Features
Stowing and features
Page 465 of 536
lead to increased wear and damage to the
major assemblies or the vehicle.
Driving abroad
An
extensive Mercedes-Benz Service network
is also available in other countries. You can
obtain further information from any
authorized Mercedes-Benz Center. Care
Notes on care
Regular
care of your vehicle is a condition for
retaining the quality in the long term.
Use care products and cleaning agents
recommended and approved by Mercedes-
Benz. G
WARNING
Many cleaning products can be hazardous.
Some are poisonous, others are flammable.
Always follow the instructions on the
particular container. Always open your
vehicle's
doors or windows when cleaning the
inside.
Never use fluids or solvents that are not
designed for cleaning your vehicle.
Always lock away cleaning products and keep
them out of reach of children.
! For cleaning your vehicle, do not use any
of the following:
R dry, rough or hard cloths
R abrasive cleaning agents
R solvents
R cleaning agents containing solvents
Do not scrub.
Do not touch the surfaces or protective
films with hard objects, e.g. a ring or ice
scraper. You could otherwise scratch or
damage the surfaces and protective film. H
Environmental note
Dispose of empty packaging and cleaning
cloths in an environmentally responsible
manner.
! Do not park the vehicle for an extended
period
straight after cleaning it, particularly
after having cleaned the wheels with wheel
cleaner. Wheel cleaners could cause
increased corrosion of the brake discs and
brake pads/linings. For this reason, you
should drive for a few minutes after
cleaning. Braking heats the brake discs and
the brake pads/linings, thus drying them.
The vehicle can then be parked. Exterior care
Automatic car wash G
WARNING
Braking efficiency is reduced after washing
the
vehicle. This could cause an accident. For
this reason, you must drive particularly
carefully after washing the vehicle until the
brakes have dried. G
WARNING
The vehicle is braked when the HOLD function
or DISTRONIC PLUS is activated. Therefore,
deactivate
the HOLD function and DISTRONIC
PLUS before the vehicle is washed in an
automatic car wash.
You can wash the vehicle in an automatic car
wash from the very start.
! Never clean your vehicle in a Touchless
Automatic Car Wash as these use special
cleaning agents. These cleaning agents can
damage the paintwork or plastic parts.
If the vehicle is very dirty, pre-wash it before
cleaning it in an automatic car wash.
! In car washes with a towing mechanism,
make sure that the automatic transmission
is in transmission position N, otherwise the
vehicle could be damaged. Care
463
Maintenance and care Z
Page 466 of 536
R
Vehicles with a SmartKey:
Do not remove the SmartKey from the
ignition lock. Do not open the driver's
door or front-passenger door when the
engine is switched off. Otherwise, the
automatic transmission selects park
position P automatically and locks the
wheels. You can prevent this by shifting
the automatic transmission to N
beforehand.
R Vehicles with KEYLESS-GO:
Do not open the driver's door or front-
passenger door when the engine is
switched off. Otherwise, the automatic
transmission selects park position P
automatically and locks the wheels.
Observe the following to make sure that the
automatic transmission stays in position N:
X Make sure the vehicle is stationary and the
ignition is switched off.
X Turn the SmartKey to position
2 (Y page 303) in the ignition lock.
Use the SmartKey instead of the Start/
Stop
button on vehicles with KEYLESS-GO.
X Depress and hold the brake pedal.
X Shift the automatic transmission to
position N.
X Release the brake pedal.
X Release the electric parking brake.
X Switch off the ignition and leave the
SmartKey in the ignition lock.
! Make sure that:
R the
side windows and the sliding sunroof
are fully closed.
R the ventilation/heating is switched off
(the OFF button has been pressed).
R the windshield wiper switch is in position
0.
Otherwise, the vehicle might be damaged.
After using an automatic car wash, wipe off
wax from the windshield and the wiper
blades. This will prevent smears and reduce
wiping noises caused by residue on the
windshield. Washing by hand Carefully remove all deposits of road salt as
soon as possible when driving in winter.
Also, clean the insides of the wheels when
washing the underbody of the vehicle.
X
Do not use hot water and do not wash the
vehicle in direct sunlight.
X Use a soft car sponge for cleaning.
X Use a gentle cleaning agent, e.g. a
Mercedes-Benz approved car shampoo.
X Wash down the vehicle with a gentle water
jet.
X Do not point the water jet directly at the air
inlets.
X Use plenty of water and rinse the sponge
frequently.
X Rinse the vehicle with clean water and dry
it thoroughly with a chamois.
X Do not allow the cleaning agent to dry on
the paintwork.
Power washers G
WARNING
Do not use power washers with circular-jet
nozzles
(dirt grinders) to clean your vehicle, in
particular the tires. You could otherwise
damage the tires and cause an accident.
! Always maintain a distance of at least
11.8 in (30 cm) between the vehicle and the
power washer nozzle. Information about
the correct distance is available from the
equipment manufacturer.
Move the power washer nozzle around
when cleaning your vehicle.
Do not aim directly at any of the following:
R tires
R door gaps, roof gaps, joints etc.
R electrical components
R battery
R connectors
R lights
R seals464
Care
Maintenance and care
Page 468 of 536
Always have paintwork repairs performed
at a qualified specialist workshop, e.g. an
authorized Mercedes-Benz Center.
! Do
not use wash programs with a hot wax
treatment under any circumstances.
i The vehicle should preferably be washed
by hand using a soft sponge, car shampoo
and plenty of water.
i Use only insect remover and car shampoo
from the range of recommended and
approved Mercedes-Benz care products.
Cleaning the windows G
WARNING
Before cleaning the windshield or wiper
blades, switch off the windshield wipers and
remove the SmartKey from the ignition lock.
On vehicles with KEYLESS-GO, press the
Start/Stop button repeatedly until all
indicator
lamps in the instrument cluster have
gone out. The windshield wipers could
otherwise move and injure you.
! Only fold the windshield wipers away from
the windshield when vertical. Otherwise,
you will damage the hood.
X Clean the inside and outside of the
windows with a damp cloth and a cleaning
agent that is recommended and approved
by Mercedes-Benz.
! Do
not use dry cloths, abrasive products,
solvents or cleaning agents containing
solvents to clean the inside of the windows.
Do not touch the insides of the windows
with hard objects, e.g. an ice scraper or
ring. There is otherwise a risk of damaging
the windows.
! Clean the water drainage channels of the
windshield and the rear window at regular
intervals. Deposits such as leaves, petals
and pollen may under certain
circumstances prevent water from draining
away. This can lead to corrosion damage
and damage to electronic components. Cleaning the wiper blades G
WARNING
Before cleaning the windshield or wiper
blades, switch off the windshield wipers and
remove the SmartKey from the ignition lock.
On vehicles with KEYLESS-GO, press the
Start/Stop button repeatedly until all
indicator
lamps in the instrument cluster have
gone out. The windshield wipers could
otherwise move and injure you.
! Only fold the windshield wipers away from
the windshield when vertical. Otherwise,
you will damage the hood.
! Do not pull the wiper blade. Otherwise,
the wiper blade could be damaged.
! Do not clean wiper blades too often and
do not rub them too hard. Otherwise, the
graphite coating could be damaged. This
could cause wiper noise.
X Fold the wiper arms away from the
windshield.
X Carefully clean the wiper blades with a
damp cloth.
X Fold the windshield wipers back again
before switching on the ignition.
! Hold
the wiper arm securely when folding
back. The windshield could be damaged if
the wiper arm smacks against it suddenly.
Cleaning the exterior lighting X
Clean the plastic lenses of the exterior
lights
with a wet sponge and a mild cleaning
agent, e.g. Mercedes-Benz car shampoo or
cleaning cloths.
! Only use cleaning agents or cleaning
cloths which are suitable for plastic light
lenses. Unsuitable cleaning agents or
cleaning cloths could scratch or damage
the plastic light lenses. 466
Care
Maintenance and care
Page 470 of 536
G
WARNING
Please do not forget that your primary
responsibility is to drive the vehicle. A driver's
attention to the road must always be his/her
primary focus when driving. For your safety
and the safety of others, stop before trying to
remove window fogging or cleaning the
window in front of the Night View Assist Plus
camera.
Bear in mind that at a speed of just 30 mph
(approximately 50 km/h), your vehicle is
covering a distance of 44 feet (approximately
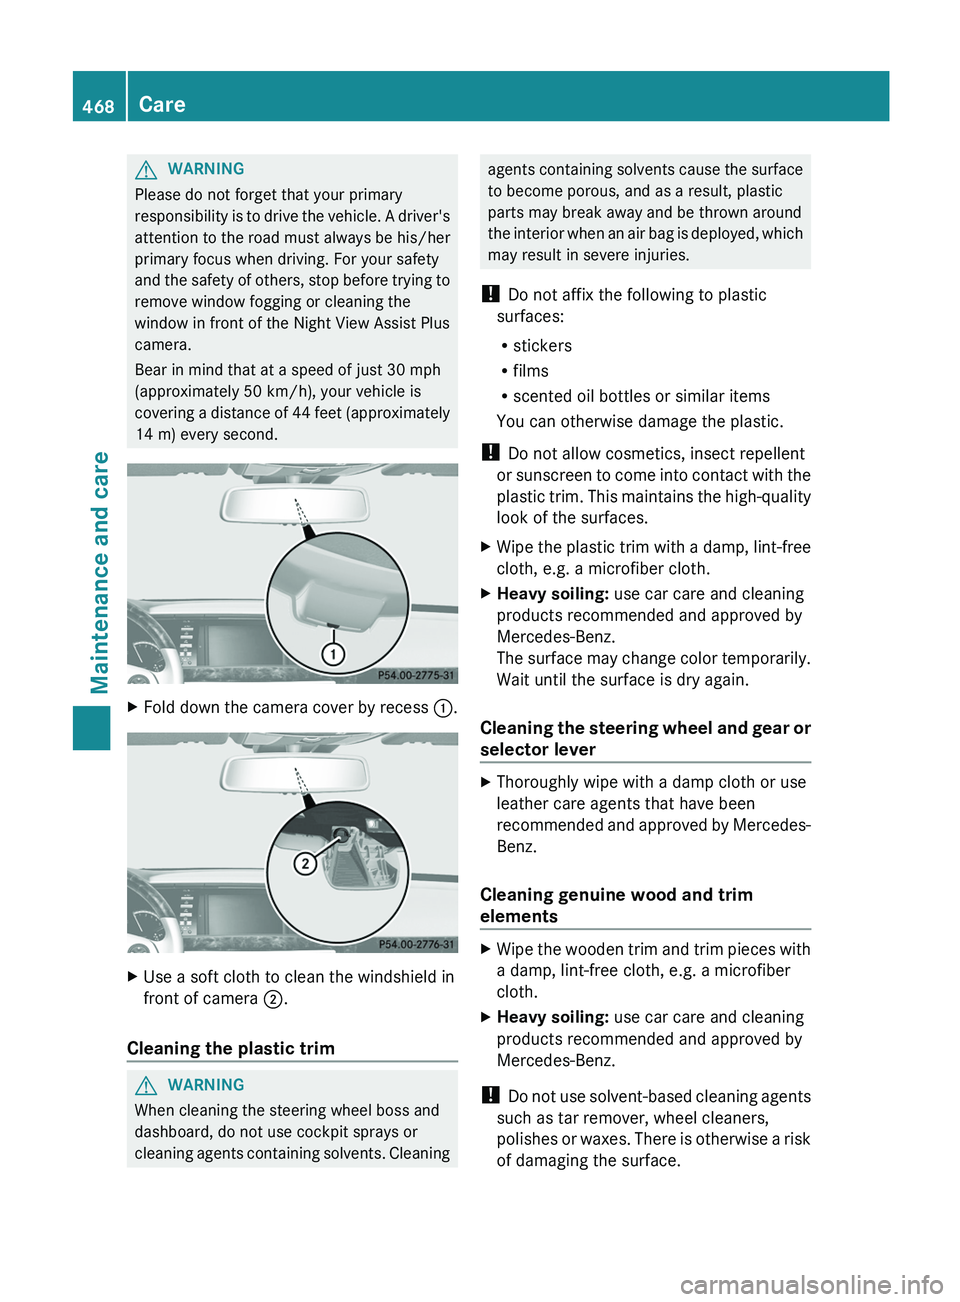
14 m) every second. X
Fold down the camera cover by recess :.X
Use a soft cloth to clean the windshield in
front of camera ;.
Cleaning the plastic trim G
WARNING
When cleaning the steering wheel boss and
dashboard, do not use cockpit sprays or
cleaning
agents containing solvents. Cleaning agents containing solvents cause the surface
to become porous, and as a result, plastic
parts may break away and be thrown around
the
interior when an air bag is deployed, which
may result in severe injuries.
! Do not affix the following to plastic
surfaces:
R stickers
R films
R scented oil bottles or similar items
You can otherwise damage the plastic.
! Do not allow cosmetics, insect repellent
or sunscreen to come into contact with the
plastic trim. This maintains the high-quality
look of the surfaces.
X Wipe the plastic trim with a damp, lint-free
cloth, e.g. a microfiber cloth.
X Heavy soiling: use car care and cleaning
products recommended and approved by
Mercedes-Benz.
The
surface may change color temporarily.
Wait until the surface is dry again.
Cleaning the steering wheel and gear or
selector lever X
Thoroughly wipe with a damp cloth or use
leather care agents that have been
recommended
and approved by Mercedes-
Benz.
Cleaning genuine wood and trim
elements X
Wipe the wooden trim and trim pieces with
a damp, lint-free cloth, e.g. a microfiber
cloth.
X Heavy soiling: use car care and cleaning
products recommended and approved by
Mercedes-Benz.
! Do
not use solvent-based cleaning agents
such as tar remover, wheel cleaners,
polishes or waxes. There is otherwise a risk
of damaging the surface. 468
Care
Maintenance and care