oil dipstick MERCEDES-BENZ S-CLASS SEDAN 2013 Owners Manual
[x] Cancel search | Manufacturer: MERCEDES-BENZ, Model Year: 2013, Model line: S-CLASS SEDAN, Model: MERCEDES-BENZ S-CLASS SEDAN 2013Pages: 536, PDF Size: 24.14 MB
Page 13 of 536
Removing/ejecting (Rear Seat
Entertainment System)
..................251
Selecting a media type .................. 224
Selecting a track ............................ 224
Sound settings (balance, bass,
fader, treble) .................................. 135
DVD audio
Operation using the on-board
computer ....................................... 379E
EASY-ENTRY feature Activating (COMAND)
....................262
Function/notes ............................. 110
EASY-EXIT feature
Activating (COMAND) .................... 262
Crash-responsive ........................... 111
Function/notes ............................. 110
EBD (electronic brake force
distribution)
Display message ............................ 392
Function/notes ................................ 73
ECO function ...................................... 261
ECO start/stop function Deactivating/activating ................. 307
General information ....................... 306
Electrical fuses
see Fuses
Electronic brake force distribution
see EBD (electronic brake force
distribution)
Electronic Stability Program
see ESP ®
(Electronic Stability Program)
Electronic Traction System
see ETS/4ETS (Electronic
Traction System)
Emergency release
Driver's door .................................... 87
Trunk ......................................... 91, 92
Vehicle ............................................. 87
Emergency spare wheel
Storage location ............................ 472
Emergency Tensioning Devices
Function ........................................... 61
Safety guidelines ............................. 45
Emissions purification
Service and warranty information .... 28Engine
Check Engine warning lamp ...........
427
Display message ............................ 404
ECO start/stop function ................ 306
Emergency starting ........................ 485
Engine number ............................... 522
Irregular running ............................ 309
Starting problems .......................... 309
Starting the engine with the
SmartKey ....................................... 305
Starting with KEYLESS-GO ............. 305
Switching off .................................. 323
Engine electronics
Problem (malfunction) ...................309
Engine emergency stop ....................487
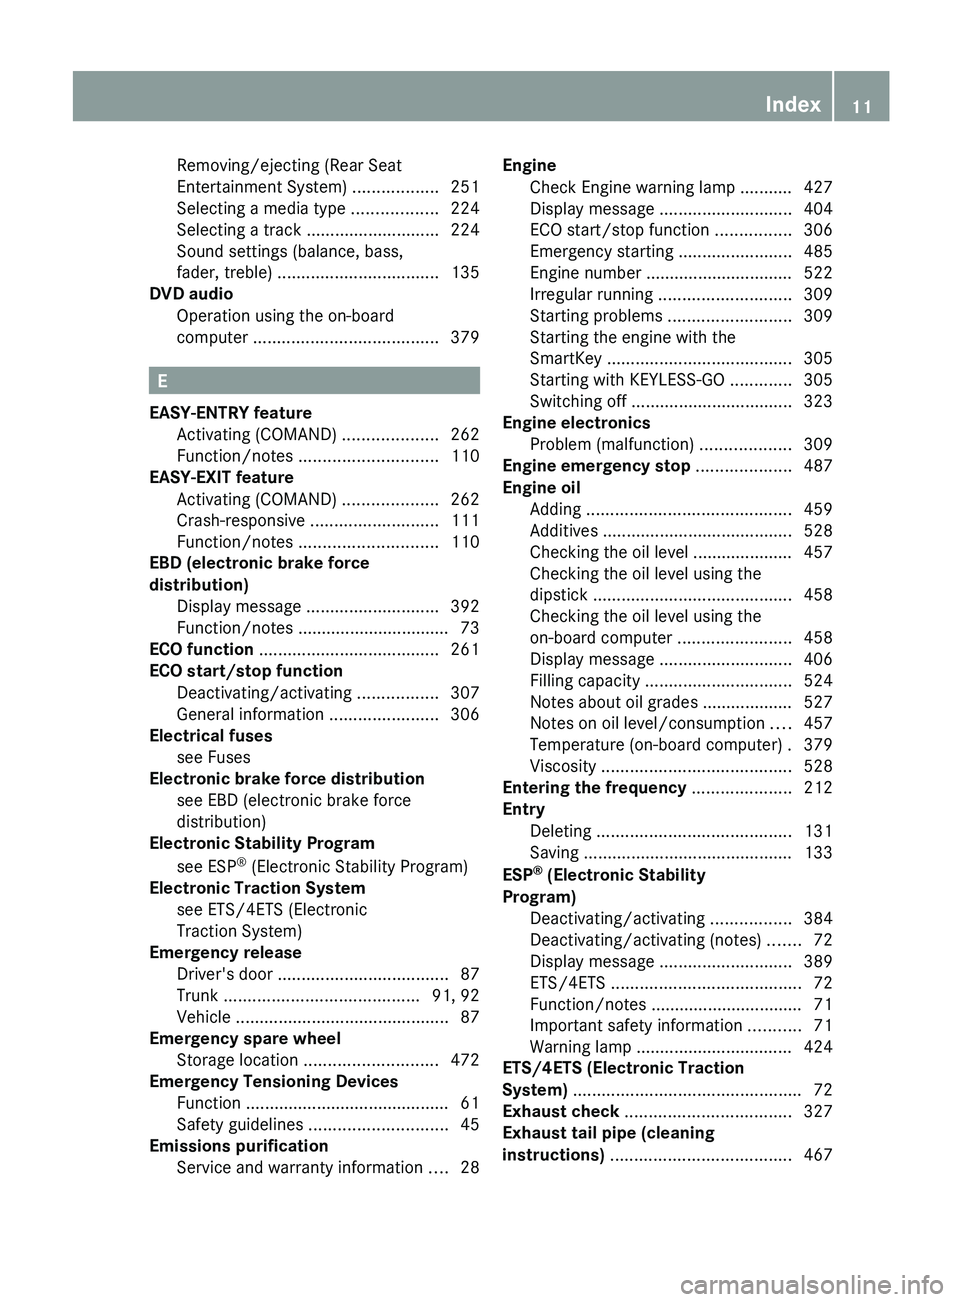
Engine oil Adding ........................................... 459
Additives ........................................ 528
Checking the oil level ..................... 457
Checking the oil level using the
dipstick .......................................... 458
Checking the oil level using the
on-board computer ........................ 458
Display message ............................ 406
Filling capacity ............................... 524
Notes about oil grades ................... 527
Notes on oil level/consumption .... 457
Temperature (on-board computer) . 379
Viscosity ........................................ 528
Entering the frequency .....................212
Entry Deleting ......................................... 131
Saving ............................................ 133
ESP ®
(Electronic Stability
Program) Deactivating/activating ................. 384
Deactivating/activating (notes) ....... 72
Display message ............................ 389
ETS/4ETS ........................................ 72
Function/notes ................................ 71
Important safety information ........... 71
Warning lamp ................................. 424
ETS/4ETS (Electronic Traction
System) ................................................ 72
Exhaust check ................................... 327
Exhaust tail pipe (cleaning
instructions) ...................................... 467 Index
11
Page 408 of 536
Display messages Possible causes/consequences and
M Solutions? The engine fan is defective.
X
At coolant temperatures under 248 ‡ (120 † ), drive to the next
qualified specialist workshop.
X Avoid subjecting the engine to heavy loads, e.g. driving in
mountainous terrain, and stop-and-go traffic. # The battery is not being charged.
Possible causes are:
R
a defective alternator
R a torn poly-V-belt
R a malfunction in the electronics
X Pull over and stop the vehicle safely and switch off the engine,
paying attention to road and traffic conditions.
X Open the hood.
X Check whether the poly-V-belt is torn.
If the poly-V-belt is torn:
! Do
not continue driving. The engine could otherwise overheat.
X Consult a qualified specialist workshop.
If the poly-V-belt is not damaged:
X Visit a qualified specialist workshop. 4
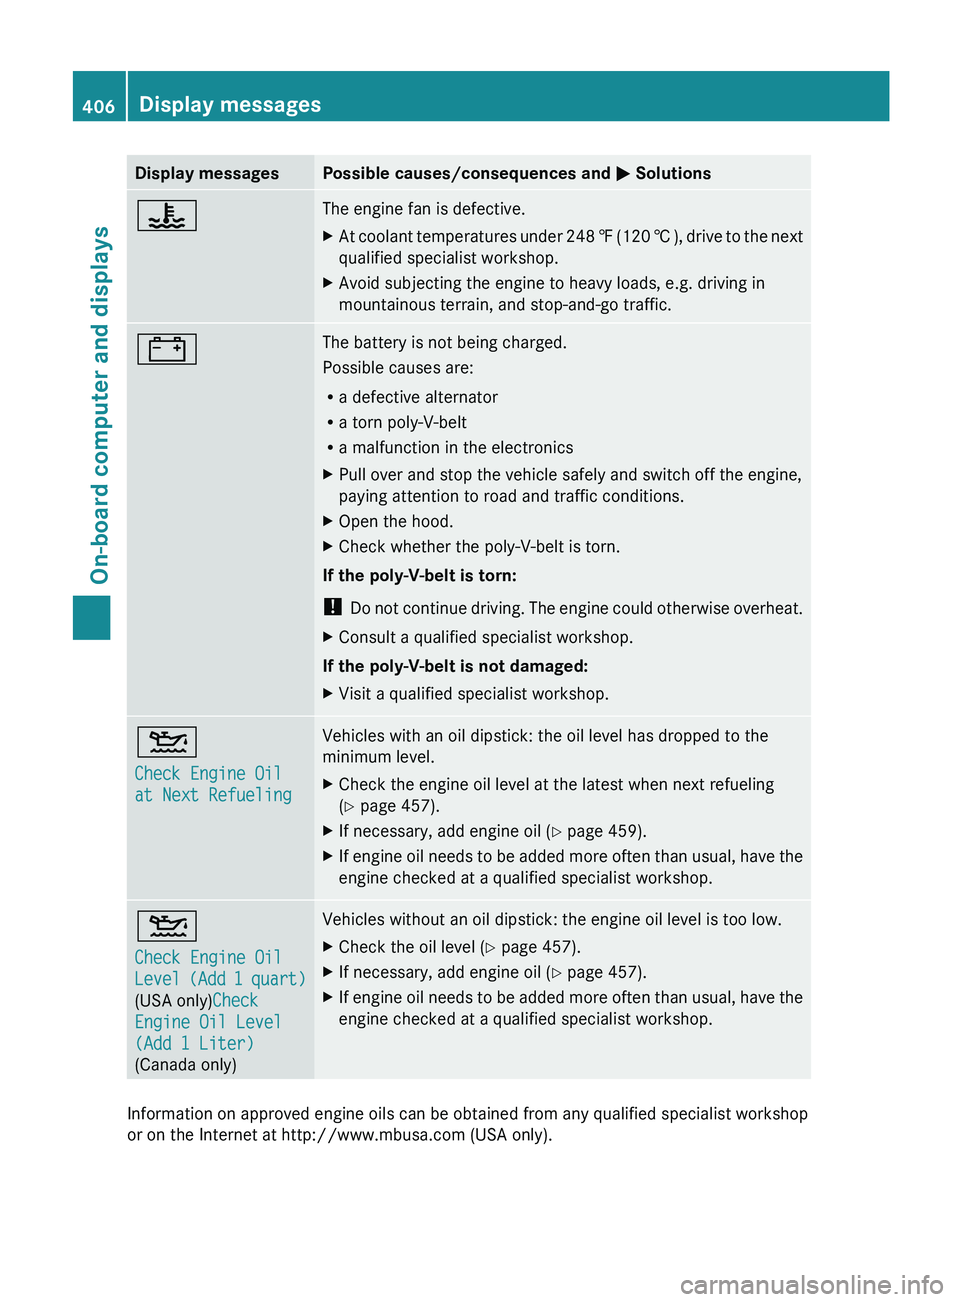
Check Engine Oil
at Next Refueling Vehicles with an oil dipstick: the oil level has dropped to the
minimum level.
X
Check the engine oil level at the latest when next refueling
(Y page 457).
X If necessary, add engine oil ( Y page 459).
X If engine oil needs to be added more often than usual, have the
engine checked at a qualified specialist workshop. 4
Check Engine Oil
Level
(Add 1 quart)
(USA only)Check
Engine Oil Level
(Add 1 Liter)
(Canada only) Vehicles without an oil dipstick: the engine oil level is too low.
X
Check the oil level (Y page 457).
X If necessary, add engine oil ( Y page 457).
X If engine oil needs to be added more often than usual, have the
engine checked at a qualified specialist workshop. Information on approved engine oils can be obtained from any qualified specialist workshop
or on the Internet at
http://www.mbusa.com (USA only).406
Display messages
On-board computer and displays
Page 409 of 536
!
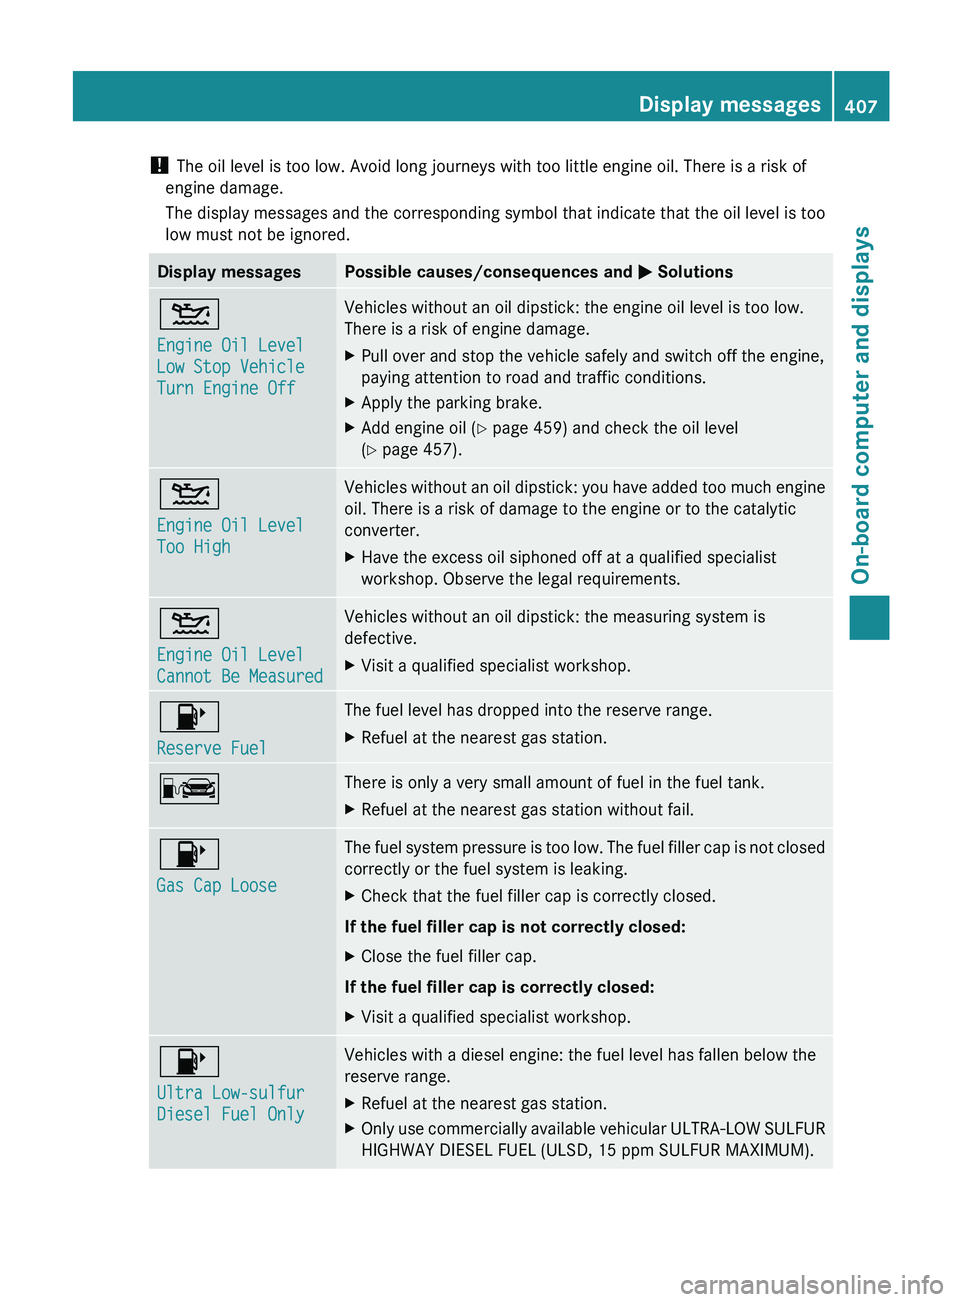
The oil level is too low. Avoid long journeys with too little engine oil. There is a risk of
engine damage.
The display messages and the corresponding symbol that indicate that the oil level is too
low must not be ignored. Display messages Possible causes/consequences and
M Solutions4
Engine Oil Level
Low Stop Vehicle
Turn Engine Off Vehicles without an oil dipstick: the engine oil level is too low.
There is a risk of engine damage.
X
Pull over and stop the vehicle safely and switch off the engine,
paying attention to road and traffic conditions.
X Apply the parking brake.
X Add engine oil ( Y page 459) and check the oil level
(Y page 457). 4
Engine Oil Level
Too High Vehicles without an oil dipstick: you have added too much engine
oil. There is a risk of damage to the engine or to the catalytic
converter.
X
Have the excess oil siphoned off at a qualified specialist
workshop. Observe the legal requirements. 4
Engine Oil Level
Cannot Be Measured Vehicles without an oil dipstick: the measuring system is
defective.
X
Visit a qualified specialist workshop. 8
Reserve Fuel The fuel level has dropped into the reserve range.
X
Refuel at the nearest gas station. C There is only a very small amount of fuel in the fuel tank.
X
Refuel at the nearest gas station without fail. 8
Gas Cap Loose The fuel system pressure is too low. The fuel filler cap is not closed
correctly or the fuel system is leaking.
X
Check that the fuel filler cap is correctly closed.
If the fuel filler cap is not correctly closed:
X Close the fuel filler cap.
If the fuel filler cap is correctly closed:
X Visit a qualified specialist workshop. 8
Ultra Low-sulfur
Diesel Fuel Only Vehicles with a diesel engine: the fuel level has fallen below the
reserve range.
X
Refuel at the nearest gas station.
X Only use commercially available vehicular ULTRA-LOW SULFUR
HIGHWAY DIESEL FUEL (ULSD, 15 ppm SULFUR MAXIMUM). Display messages
407On-board computer and displays Z
Page 460 of 536
consumption may be higher than this when
the
vehicle is new or if you frequently drive at
high engine speeds.
Checking the oil level using the oil
dipstick On vehicles with a 12-cylinder engine, the oil
level can be checked using the on-board
computer. On all other models, the dipstick
must be used to check the engine oil level.
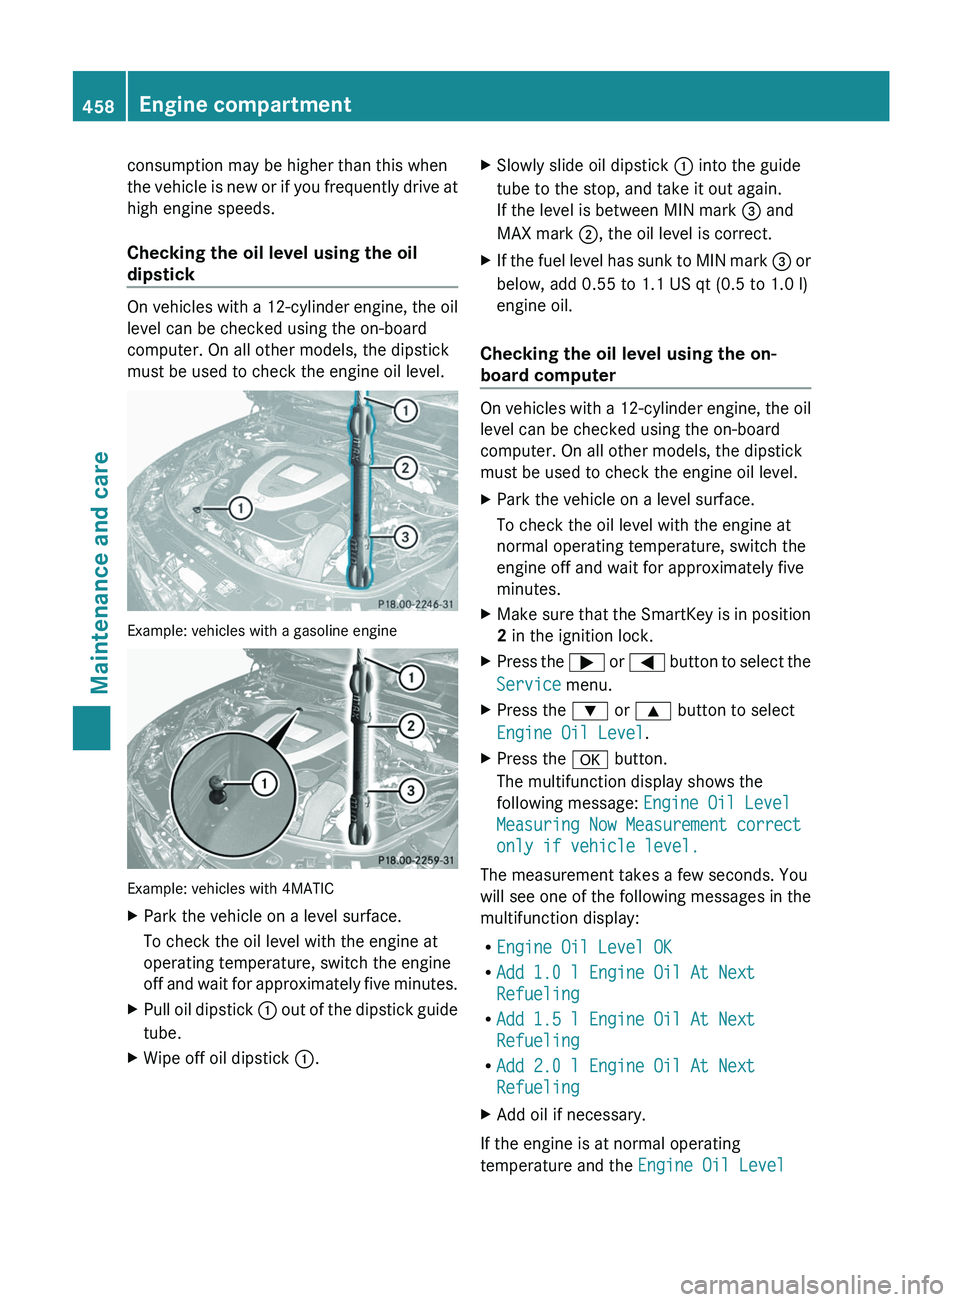
Example: vehicles with a gasoline engine
Example: vehicles with 4MATIC
X
Park the vehicle on a level surface.
To check the oil level with the engine at
operating temperature, switch the engine
off
and wait for approximately five minutes.
X Pull oil dipstick :
out of the dipstick guide
tube.
X Wipe off oil dipstick :. X
Slowly slide oil dipstick : into the guide
tube to the stop, and take it out again.
If the level is between MIN mark = and
MAX mark ;, the oil level is correct.
X If the fuel level has sunk to MIN mark =
or
below, add 0.55 to 1.1 US qt (0.5 to 1.0 l)
engine oil.
Checking the oil level using the on-
board computer On vehicles with a 12-cylinder engine, the oil
level can be checked using the on-board
computer. On all other models, the dipstick
must be used to check the engine oil level.
X
Park the vehicle on a level surface.
To check the oil level with the engine at
normal operating temperature, switch the
engine off and wait for approximately five
minutes.
X Make sure that the SmartKey is in position
2 in the ignition lock.
X Press the ;
or = button to select the
Service menu.
X Press the : or 9 button to select
Engine Oil Level.
X Press the a button.
The multifunction display shows the
following message: Engine Oil Level
Measuring Now Measurement correct
only if vehicle level.
The measurement takes a few seconds. You
will
see one of the following messages in the
multifunction display:
R Engine Oil Level OK
R Add 1.0 l Engine Oil At Next
Refueling
R Add 1.5 l Engine Oil At Next
Refueling
R Add 2.0 l Engine Oil At Next
Refueling
X Add oil if necessary.
If the engine is at normal operating
temperature and the Engine Oil Level 458
Engine compartment
Maintenance and care
Page 461 of 536
Reduce Oil Level message appears, the
engine oil level is too high.
X
Have excess oil siphoned off.
! Do not add too much oil. Adding too much
oil can result in damage to the engine or the
catalytic converter. Have excess oil
siphoned off.
If the For Engine Oil Level Ignition
Must be On message appears:
X Turn the SmartKey to position 2 in the
ignition lock.
If the Need More Time to Check Engine
Oil Level message appears:
X If the engine is at normal operating
temperature: repeat the measurement
after about five minutes.
If the engine is not at normal operating
temperature (e.g. if the engine was only
started briefly): repeat the measurement
after about 30 minutes.
If the Engine Oil Level Not When
Engine On message appears:
X Switch off the engine.
X If the engine is at normal operating
temperature: wait about five minutes
before carrying out the measurement.
If the engine is not at normal operating
temperature, e.g. if the engine was only
started briefly: wait about 30 minutes
before carrying out the measurement.
i If you wish to cancel the measurement,
press
the % button on the multifunction
steering wheel.
Adding engine oil G
WARNING
If engine oil comes into contact with hot
engine
parts, it may ignite and you could burn
yourself. Do not spill any engine oil on hot
engine parts. H
Environmental note
When adding oil, take care not to spill any. If
oil enters the soil or waterways, it is harmful
to the environment.
! Use only engine oils and oil filters that
have been approved for vehicles equipped
with a service system. A list of the engine
oils and oil filters tested and approved in
accordance with the Mercedes-Benz
Specifications for Service Products can be
called up by visiting http://
www.mbusa.com (USA only). More
information about tested and approved
engine oils and oil filters is available from
any authorized Mercedes-Benz Center.
Damage
to the engine or exhaust system is
caused by the following:
R using engine oils and oil filters which
have not been specifically approved for
the service system.
R replacing the engine oil or oil filter after
the replacement interval required by the
service system has elapsed
R using engine oil additives.
! Do not add too much oil. If the oil level is
above the "max" mark on the dipstick, too
much oil has been added. This can lead to
damage to the engine or the catalytic
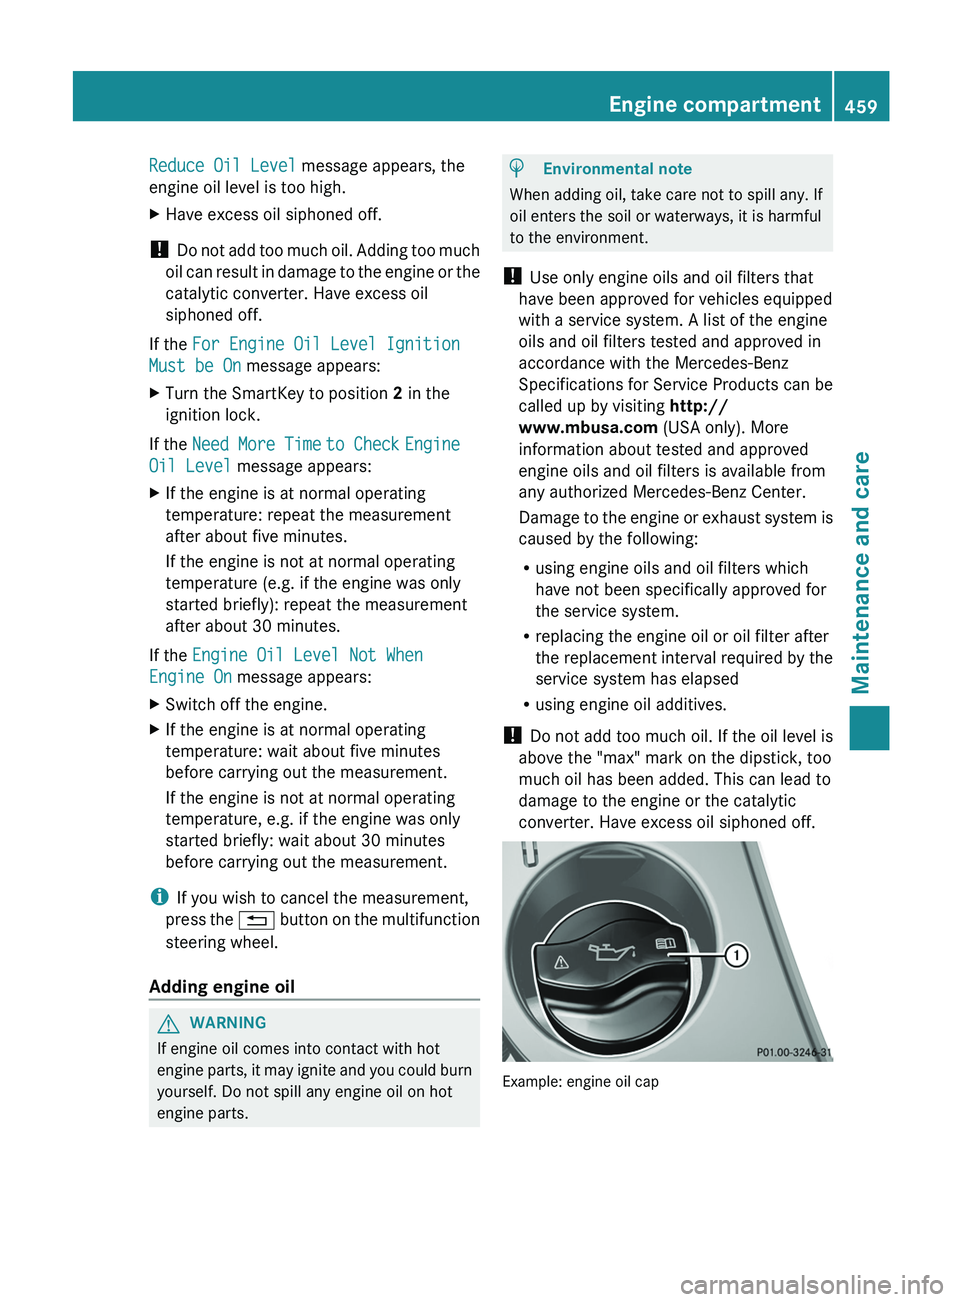
converter. Have excess oil siphoned off. Example: engine oil cap Engine compartment
459
Maintenance and care Z
Page 462 of 536
X
Turn cap : counterclockwise and remove
it.
X Add engine oil.
Vehicles with oil level measurement
function
in the on-board computer: observe
the information in the on-board computer
when doing so. Vehicles with oil dipstick: if
the oil level is at or below the MIN mark on
the oil dipstick,
add 0.55 to 1.1 US qt (0.5 to 1.0 l) engine
oil.
X Replace cap : on the filler neck and turn
clockwise.
Ensure that the cap locks into place
securely.
X Check the oil level again with the oil
dipstick (Y page 458) or the on-board
computer (Y page 458).
Further information on engine oil
(Y page 527). Checking and adding other service
products
Checking the coolant level Only check the coolant level when the vehicle
is
on a level surface and the engine has cooled
down.
X Turn the SmartKey to position
2 (Y page 303) in the ignition lock.
On vehicles with KEYLESS-GO, press the
Start/Stop button twice
(Y page 303).
X Check the coolant temperature display in
the instrument cluster.
The coolant temperature must be below
158 ‡
(70 †). G
WARNING
In order to avoid any potentially serious burns:
R use extreme caution when opening the
hood if there are any signs of steam or
coolant
leaking from the cooling system, or if the coolant temperature display indicates
that the coolant is overheated.
R do not remove the pressure cap on the
coolant
reservoir if the coolant temperature
is above 158 ‡ (70 †). Allow the engine to
cool down before removing the cap. The
coolant reservoir contains hot fluid and is
under pressure.
R using a rag, slowly turn the cap
approximately 1
/ 2 turn to relieve excess
pressure. If opened immediately, scalding
hot fluid and steam will be blown out under
pressure.
R do not spill antifreeze on hot engine parts.
Antifreeze contains ethylene glycol which
may burn if it comes into contact with hot
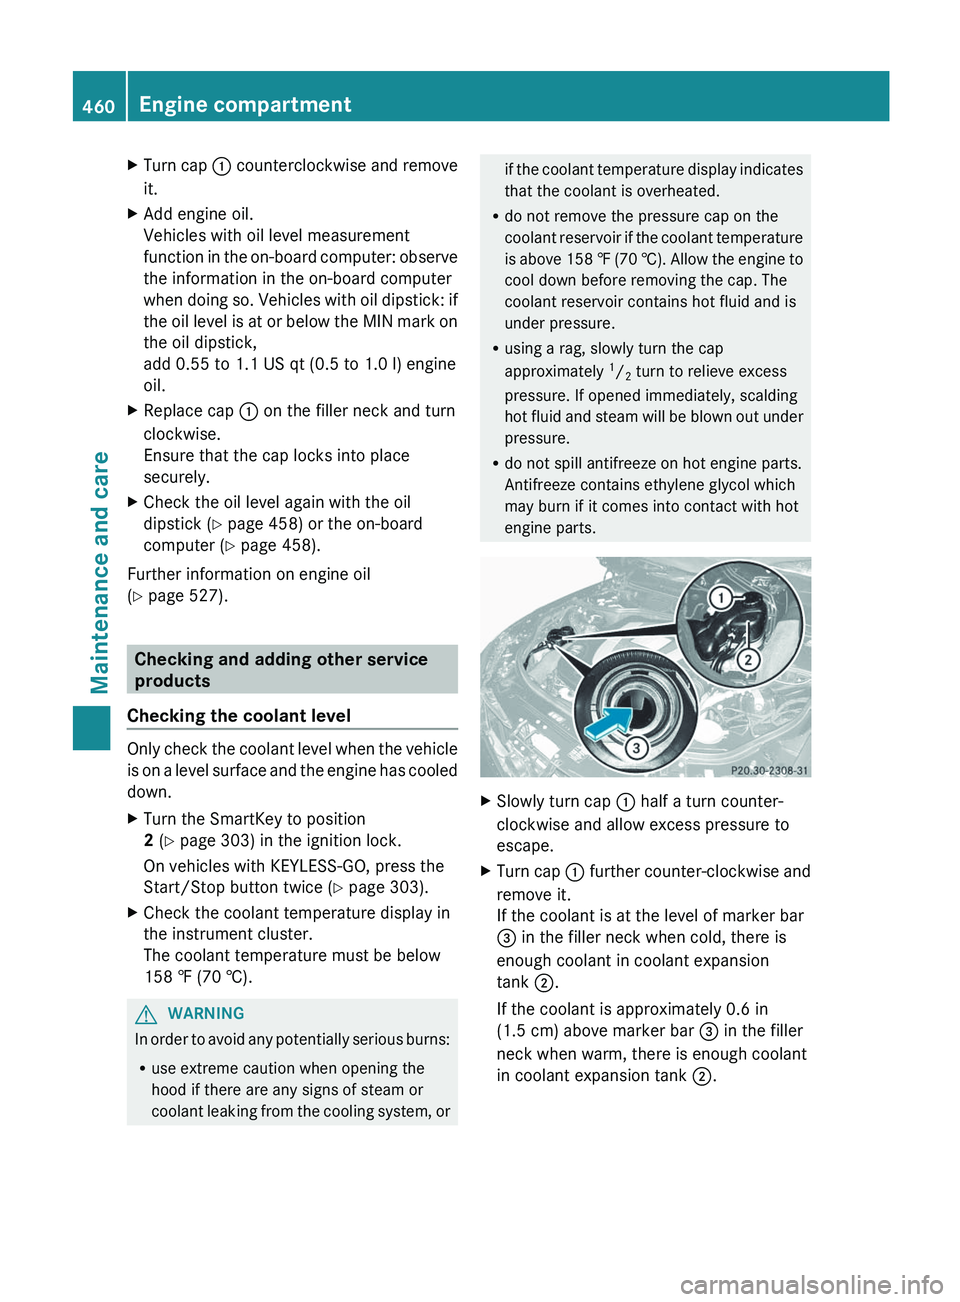
engine parts. X
Slowly turn cap : half a turn counter-
clockwise and allow excess pressure to
escape.
X Turn cap :
further counter-clockwise and
remove it.
If the coolant is at the level of marker bar
= in the filler neck when cold, there is
enough coolant in coolant expansion
tank ;.
If the coolant is approximately 0.6 in
(1.5 cm) above marker bar = in the filler
neck when warm, there is enough coolant
in coolant expansion tank ;.460
Engine compartment
Maintenance and care