comand MERCEDES-BENZ S500 2002 W220 Owner's Manual
[x] Cancel search | Manufacturer: MERCEDES-BENZ, Model Year: 2002, Model line: S500, Model: MERCEDES-BENZ S500 2002 W220Pages: 430, PDF Size: 20.81 MB
Page 28 of 430
25 Instruments and controls
Te ch n i c a l
data Instruments
and controlsOperation DrivingInstrument
cluster displayPractical hints Car care Index 10COMAND system, see separate operating
instructions
11Automatic climate control, see page 166
Rear window defroster switch, see page 183
12Ashtray, see page 204
Lighter, see page 206
13Start-/Stop button
Starter switch for KEYLESS-GO only, see page 23214Lower storage space, see page 198
15Automatic transmission, see page 237
16AIRBAG OFF indicator lamp, see page 308
17Distronic (DTR) – switch for distance warning
function, see page 273.
18Distronic (DTR) – thumbwheel for setting distance,
see page 273.
Page 116 of 430
113 Instrument cluster
Te ch n i c a l
data Instruments
and controlsOperationDrivingInstrument
cluster displayPractical hints Car care Index 1Knob for instrument cluster illumination,
seepage114
2Engine malfunction indicator lamp, see page 302
3Brake fluid low, parking brake engaged,
seepage313
4Supplemental restraint system (SRS) malfunction
indicator lamp, see page 305
5Coolant temperature gauge, see page 115
6Outside temperature indicator, see page 115
7Fuel gauge with reserve warning lamp, see page 305
8Left turn signal indicator lamp, see combination
switch, see page 162
9Speedometer, see page 116
10Electronic stability program (ESP) warning lamp,
system is adjusting to road conditions, see page 307
11Distance warning lamp – vehicles with Distronic
(DTR), distance to the vehicle ahead is insufficient,
see page 272 and 307
Vehicles without Distronic: It illuminates with the
electronic key in starter switch position 2. It should
go out when the engine is running.12Multifunction display, see page 118
Malfunction and warning messages in the
multifunction display, see page 309
13Trip odometer, see page 117 and 122
14Main odometer, see page 122
15Right turn signal indicator lamp, see combination
switch, page 162
16Tachometer, see page 117
17Gear range indicator display, see selector lever
positions, page 240
18Digital clock
To set the time, see COMAND operator’s manual
19Antilock brake system (ABS) malfunction indicator
lamp, see page 306
20High beam headlamp indicator,
see exterior lamp switch on page 158, and
combination switch on page 162
21Fasten seat belts, see page 308
22Reset button J, see page 114 and 117
Page 127 of 430
124 Multifunction steering wheel, multifunction display
Te ch n i c a l
data Instruments
and controlsOperationDrivingInstrument
cluster displayPractical hints Car care Index
Audio systems
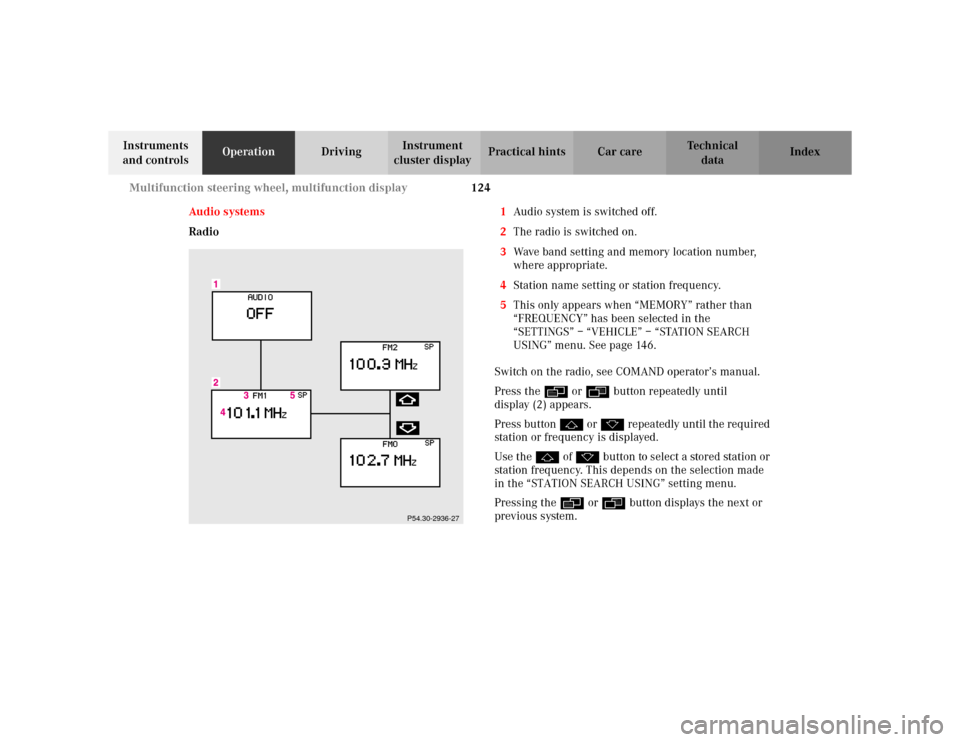
Radio1Audio system is switched off.
2The radio is switched on.
3Wave band setting and memory location number,
where appropriate.
4Station name setting or station frequency.
5This only appears when “MEMORY” rather than
“FREQUENCY” has been selected in the
“SETTINGS” – “VEHICLE” – “STATION SEARCH
USING” menu. See page 146.
Switch on the radio, see COMAND operator’s manual.
Press the è or ÿ button repeatedly until
display (2) appears.
Press button j or k repeatedly until the required
station or frequency is displayed.
Use the j of k button to select a stored station or
station frequency. This depends on the selection made
in the “STATION SEARCH USING” setting menu.
Pressing the è or ÿ button displays the next or
previous system.
P54.30-2936-27
Page 128 of 430
125 Multifunction steering wheel, multifunction display
Te ch n i c a l
data Instruments
and controlsOperationDrivingInstrument
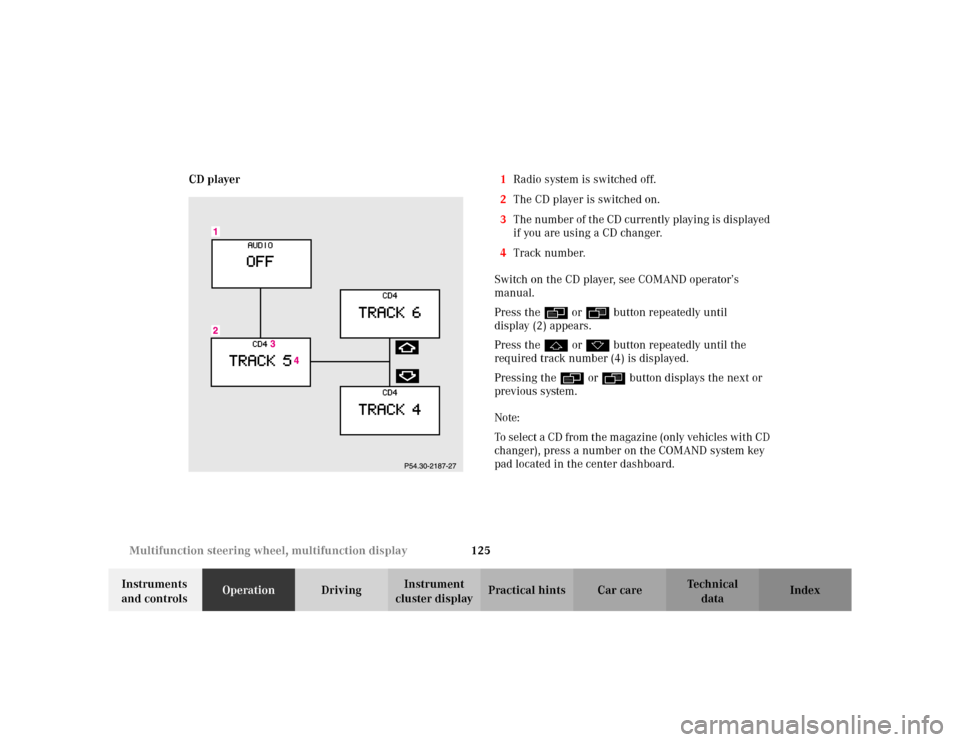
cluster displayPractical hints Car care Index CD player1Radio system is switched off.
2The CD player is switched on.
3The number of the CD currently playing is displayed
if you are using a CD changer.
4Track number.
Switch on the CD player, see COMAND operator’s
manual.
Press the è or ÿ button repeatedly until
display (2) appears.
Press the j or k button repeatedly until the
required track number (4) is displayed.
Pressing the è or ÿ button displays the next or
previous system.
Note:
To select a CD from the magazine (only vehicles with CD
changer), press a number on the COMAND system key
pad located in the center dashboard.
Page 129 of 430
126 Multifunction steering wheel, multifunction display
Te ch n i c a l
data Instruments
and controlsOperationDrivingInstrument
cluster displayPractical hints Car care Index
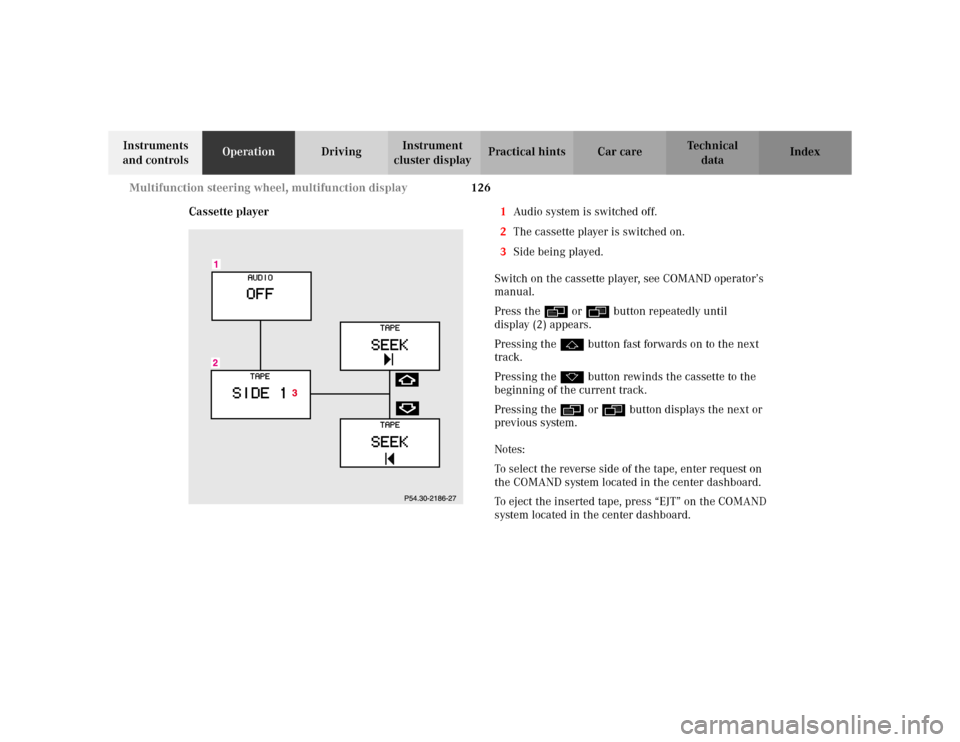
Cassette player1Audio system is switched off.
2The cassette player is switched on.
3Side being played.
Switch on the cassette player, see COMAND operator’s
manual.
Press the è or ÿ button repeatedly until
display (2) appears.
Pressing the j button fast forwards on to the next
track.
Pressing the k button rewinds the cassette to the
beginning of the current track.
Pressing the è or ÿ button displays the next or
previous system.
Notes:
To select the reverse side of the tape, enter request on
the COMAND system located in the center dashboard.
To eject the inserted tape, press “EJT” on the COMAND
system located in the center dashboard.
Page 131 of 430
128 Multifunction steering wheel, multifunction display
Te ch n i c a l
data Instruments
and controlsOperationDrivingInstrument
cluster displayPractical hints Car care Index
The telephone and COMAND system must be switched
on.
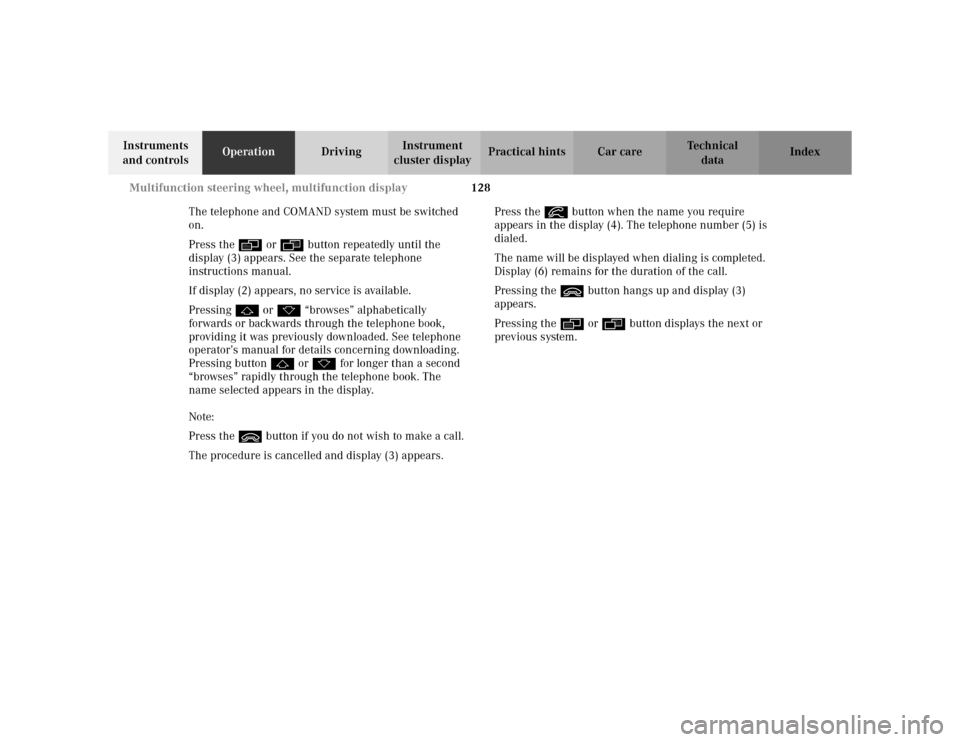
Press the è or ÿ button repeatedly until the
display (3) appears. See the separate telephone
instructions manual.
If display (2) appears, no service is available.
Pressing j or k “browses” alphabetically
forwards or backwards through the telephone book,
providing it was previously downloaded. See telephone
operator’s manual for details concerning downloading.
Pressing button j or k for longer than a second
“browses” rapidly through the telephone book. The
name selected appears in the display.
Note:
Press the ì button if you do not wish to make a call.
The procedure is cancelled and display (3) appears.Press the í button when the name you require
appears in the display (4). The telephone number (5) is
dialed.
The name will be displayed when dialing is completed.
Display (6) remains for the duration of the call.
Pressing the ì button hangs up and display (3)
appears.
Pressing the è or ÿ button displays the next or
previous system.
Page 133 of 430
130 Multifunction steering wheel, multifunction display
Te ch n i c a l
data Instruments
and controlsOperationDrivingInstrument
cluster displayPractical hints Car care Index
The telephone and COMAND system must be switched
on.
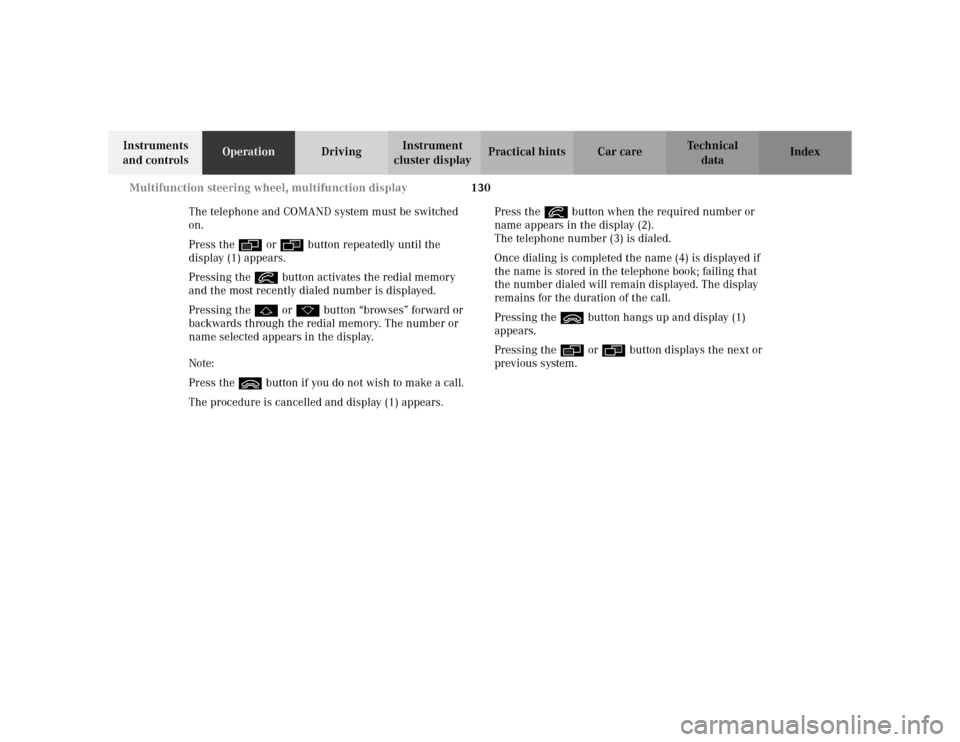
Press the è or ÿ button repeatedly until the
display (1) appears.
Pressing the í button activates the redial memory
and the most recently dialed number is displayed.
Pressing the j or k button “browses” forward or
backwards through the redial memory. The number or
name selected appears in the display.
Note:
Press the ì button if you do not wish to make a call.
The procedure is cancelled and display (1) appears.Press the í button when the required number or
name appears in the display (2).
The telephone number (3) is dialed.
Once dialing is completed the name (4) is displayed if
the name is stored in the telephone book; failing that
the number dialed will remain displayed. The display
remains for the duration of the call.
Pressing the ì button hangs up and display (1)
appears.
Pressing the è or ÿ button displays the next or
previous system.
Page 135 of 430
132 Multifunction steering wheel, multifunction display
Te ch n i c a l
data Instruments
and controlsOperationDrivingInstrument
cluster displayPractical hints Car care Index
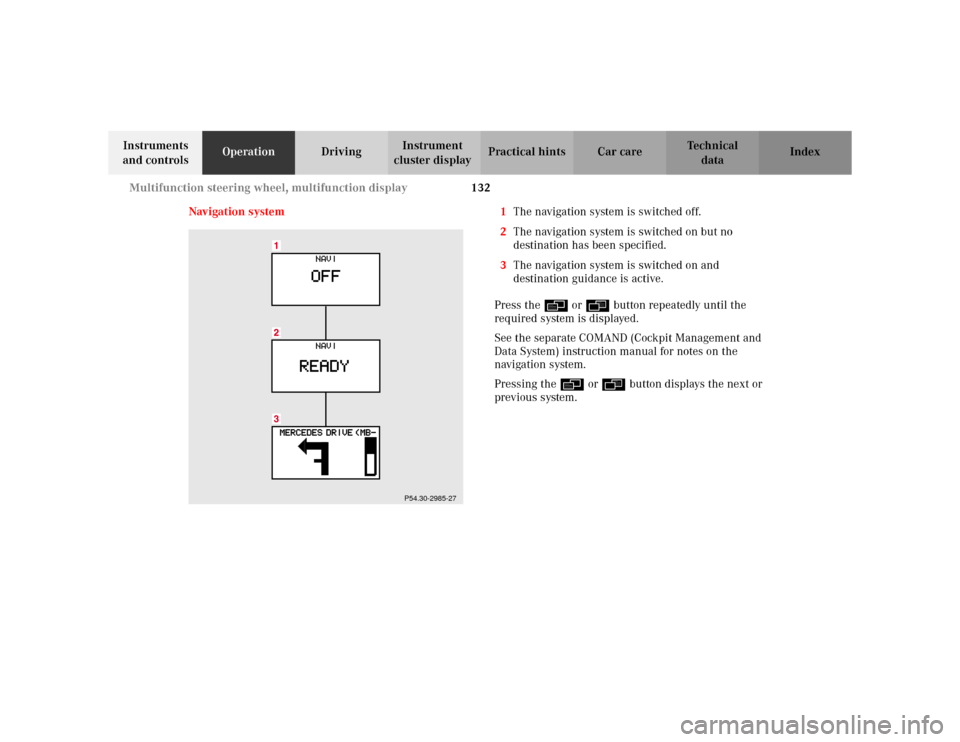
Navigation system 1The navigation system is switched off.
2The navigation system is switched on but no
destination has been specified.
3The navigation system is switched on and
destination guidance is active.
Press the è or ÿ button repeatedly until the
required system is displayed.
See the separate COMAND (Cockpit Management and
Data System) instruction manual for notes on the
navigation system.
Pressing the è or ÿ button displays the next or
previous system.
P54.30-2985-27
Page 144 of 430
141 Multifunction steering wheel, multifunction display
Te ch n i c a l
data Instruments
and controlsOperationDrivingInstrument
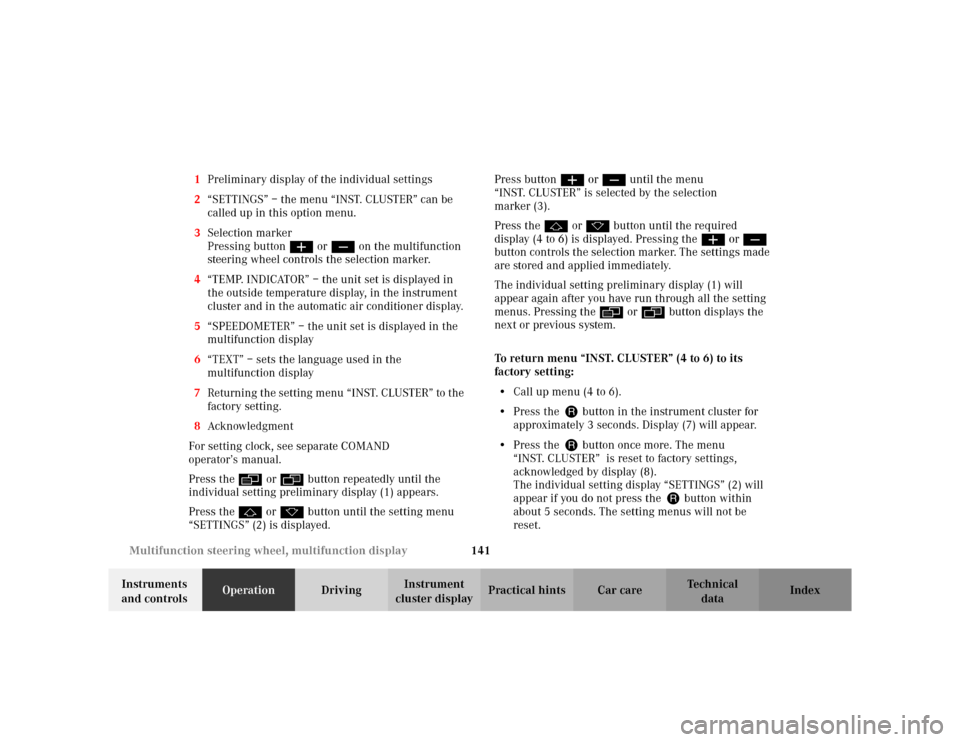
cluster displayPractical hints Car care Index 1Preliminary display of the individual settings
2“SETTINGS” – the menu “INST. CLUSTER” can be
called up in this option menu.
3Selection marker
Pressing buttonæ orç on the multifunction
steering wheel controls the selection marker.
4“TEMP. INDICATOR” – the unit set is displayed in
the outside temperature display, in the instrument
cluster and in the automatic air conditioner display.
5“SPEEDOMETER” – the unit set is displayed in the
multifunction display
6“TEXT” – sets the language used in the
multifunction display
7Returning the setting menu “INST. CLUSTER” to the
factory setting.
8Acknowledgment
For setting clock, see separate COMAND
operator’s manual.
Press the è or ÿ button repeatedly until the
individual setting preliminary display (1) appears.
Press the j or k button until the setting menu
“SETTINGS” (2) is displayed.Press buttonæ orç until the menu
“INST. CLUSTER” is selected by the selection
marker (3).
Press the j or k button until the required
display (4 to 6) is displayed. Pressing the æ orç
button controls the selection marker. The settings made
are stored and applied immediately.
The individual setting preliminary display (1) will
appear again after you have run through all the setting
menus. Pressing the è or ÿ button displays the
next or previous system.
To return menu “INST. CLUSTER” (4 to 6) to its
factory setting:
•Call up menu (4 to 6).
•Press the Jbutton in the instrument cluster for
approximately 3 seconds. Display (7) will appear.
•Press the Jbutton once more. The menu
“INST. CLUSTER” is reset to factory settings,
acknowledged by display (8).
The individual setting display “SETTINGS” (2) will
appear if you do not press the Jbutton within
about 5 seconds. The setting menus will not be
reset.
Page 219 of 430
216 Control and operation of radio transmitters
Te ch n i c a l
data Instruments
and controlsOperationDrivingInstrument
cluster displayPractical hints Car care Index
Control and operation of radio transmitters
COMAND, radio and telephone
1 Observe all legal requirements.
Telephones and two-way radio
Radio transmitters, such as a portable telephone or a
citizens band unit should only be used inside the
vehicle if they are connected to an antenna that is
installed on the outside of the vehicle.
Refer to the radio transmitter operation instructions
regarding use of an external antenna.
Wa r n i n g !
Please do not forget that your primary
responsibility is to drive the vehicle. Only operate
the COMAND (Cockpit Management and Data
System), radio or telephone
1 if road and traffic
conditions permit.
Bear in mind that at a speed of just 30 mph
(approximately 50 km / h), your vehicle is covering
a distance of approximately 50 feet (approximately
14 m) every second.
Wa r n i n g !
Never operate radio transmitters equipped with a
built-in or attached antenna (i.e. without being
connected to an external antenna) from inside the
vehicle while the engine is running. Doing so could
lead to a malfunction of the vehicle’s electronic
system, possibly resulting in an accident and
personal injury.