lock MERCEDES-BENZ S65AMG 2010 W221 Service Manual
[x] Cancel search | Manufacturer: MERCEDES-BENZ, Model Year: 2010, Model line: S65AMG, Model: MERCEDES-BENZ S65AMG 2010 W221Pages: 548, PDF Size: 12.48 MB
Page 209 of 548
FunctionAutomatic Locking (Y page 210)Trunk Opening-height Restriction
(Y page 210)
You can select the individual vehicle
functions in two ways.
Approach 1: Selecting vehicle
functions via the main area of the
COMAND display
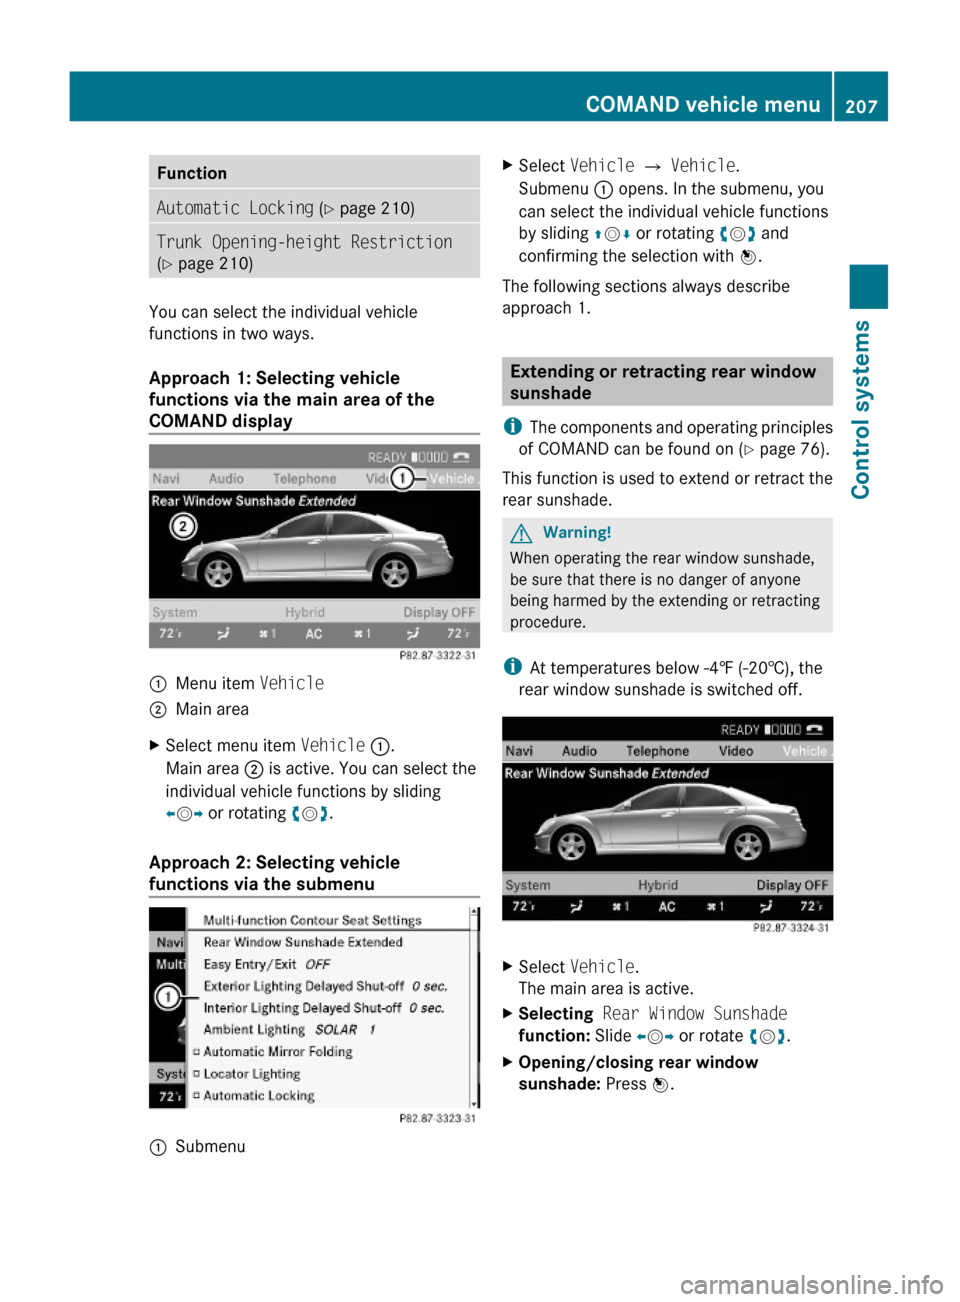
:Menu item Vehicle;Main areaXSelect menu item Vehicle :.
Main area ; is active. You can select the
individual vehicle functions by sliding
XVY or rotating cVd.
Approach 2: Selecting vehicle
functions via the submenu
:SubmenuXSelect Vehicle Q Vehicle.
Submenu : opens. In the submenu, you
can select the individual vehicle functions
by sliding ZVÆ or rotating cVd and
confirming the selection with W.
The following sections always describe
approach 1.
Extending or retracting rear window
sunshade
iThe components and operating principles
of COMAND can be found on (Y page 76).
This function is used to extend or retract the
rear sunshade.
GWarning!
When operating the rear window sunshade,
be sure that there is no danger of anyone
being harmed by the extending or retracting
procedure.
iAt temperatures below -4‡ (-20†), the
rear window sunshade is switched off.
XSelect Vehicle.
The main area is active.
XSelecting Rear Window Sunshade
function: Slide XVY or rotate cVd.
XOpening/closing rear window
sunshade: Press W.
COMAND vehicle menu207Control systems221_AKB; 6; 20, en-USd2ugruen,Version: 2.11.8.12009-09-24T13:28:17+02:00 - Seite 207Z
Page 210 of 548
Setting easy-entry/exit feature
iThe components and operating principles
of COMAND can be found on (Y page 76).
GWarning!
You must make sure no one can become
trapped or injured by the moving steering
wheel and driver’s seat when the easy-entry/
exit feature is activated.
To stop seat/steering wheel movement, do
one of the following:
RPress seat adjustment switch.
RMove steering wheel adjustment stalk.
RPress one of the memory position buttons
or the memory button M.
Do not leave children unattended in the
vehicle, or with access to an unlocked vehicle.
Children could open the driver’s door and
unintentionally activate the easy-entry/exit
feature, which could result in an accident
and/or serious personal injury.
Use this function to have the steering wheel
move up and/or the driver’s seat move back
when entering the vehicle. You select the
following settings:
ROFF, the easy-entry/exit function is
switched off
RSteering Column, the steering wheel
moves up
RSteering Column and Seat, the steering
wheel moves up and the driver’s seat
moves back
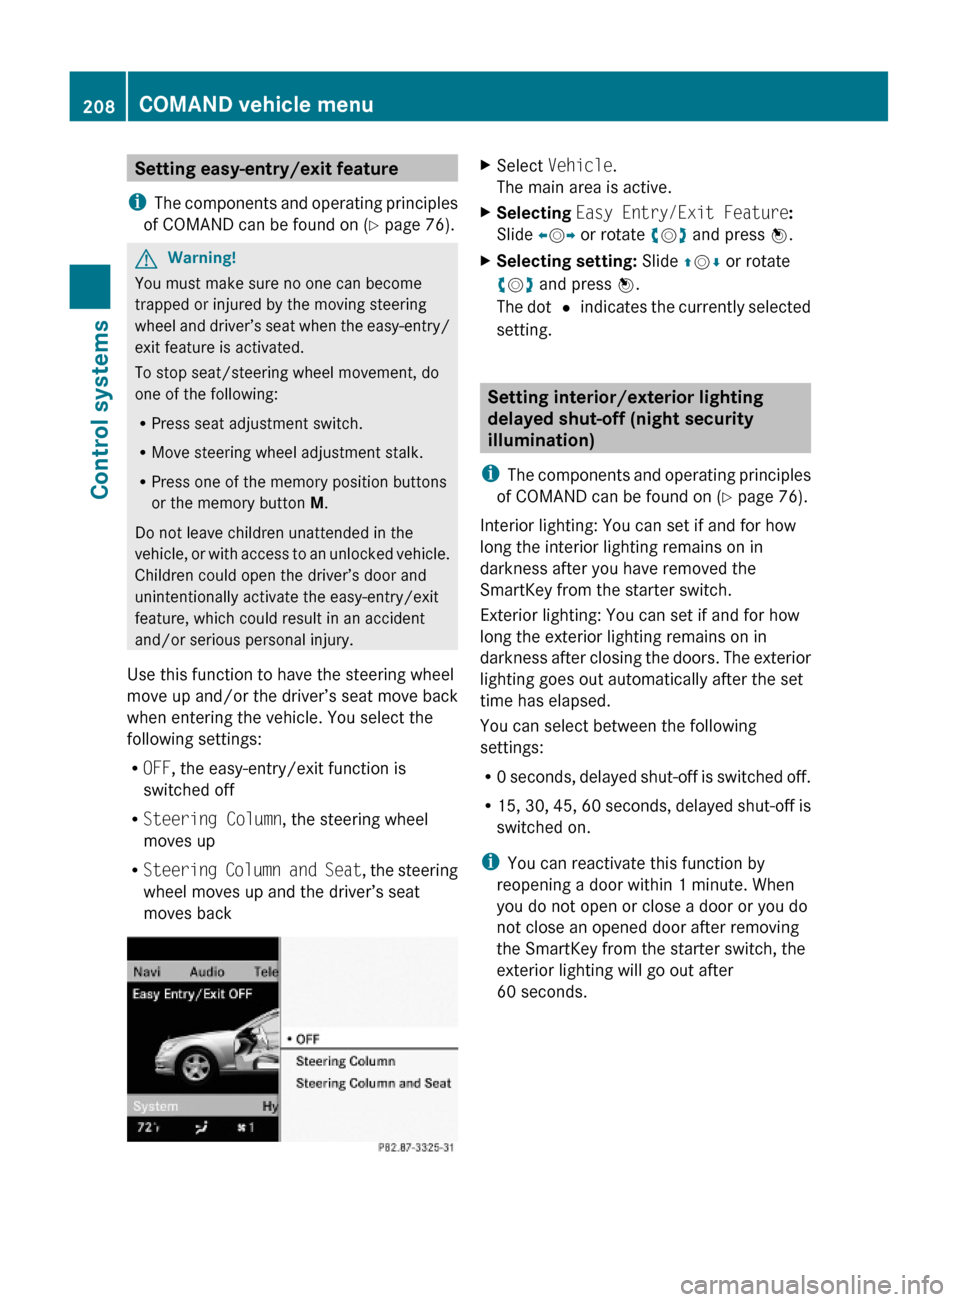
XSelect Vehicle.
The main area is active.
XSelecting Easy Entry/Exit Feature:
Slide XVY or rotate cVd and press W.
XSelecting setting: Slide ZVÆ or rotate
cVd and press W.
The dot # indicates the currently selected
setting.
Setting interior/exterior lighting
delayed shut-off (night security
illumination)
iThe components and operating principles
of COMAND can be found on (Y page 76).
Interior lighting: You can set if and for how
long the interior lighting remains on in
darkness after you have removed the
SmartKey from the starter switch.
Exterior lighting: You can set if and for how
long the exterior lighting remains on in
darkness after closing the doors. The exterior
lighting goes out automatically after the set
time has elapsed.
You can select between the following
settings:
R0 seconds, delayed shut-off is switched off.
R15, 30, 45, 60 seconds, delayed shut-off is
switched on.
iYou can reactivate this function by
reopening a door within 1 minute. When
you do not open or close a door or you do
not close an opened door after removing
the SmartKey from the starter switch, the
exterior lighting will go out after
60 seconds.
208COMAND vehicle menuControl systems
221_AKB; 6; 20, en-USd2ugruen,Version: 2.11.8.12009-09-24T13:28:17+02:00 - Seite 208
Page 211 of 548
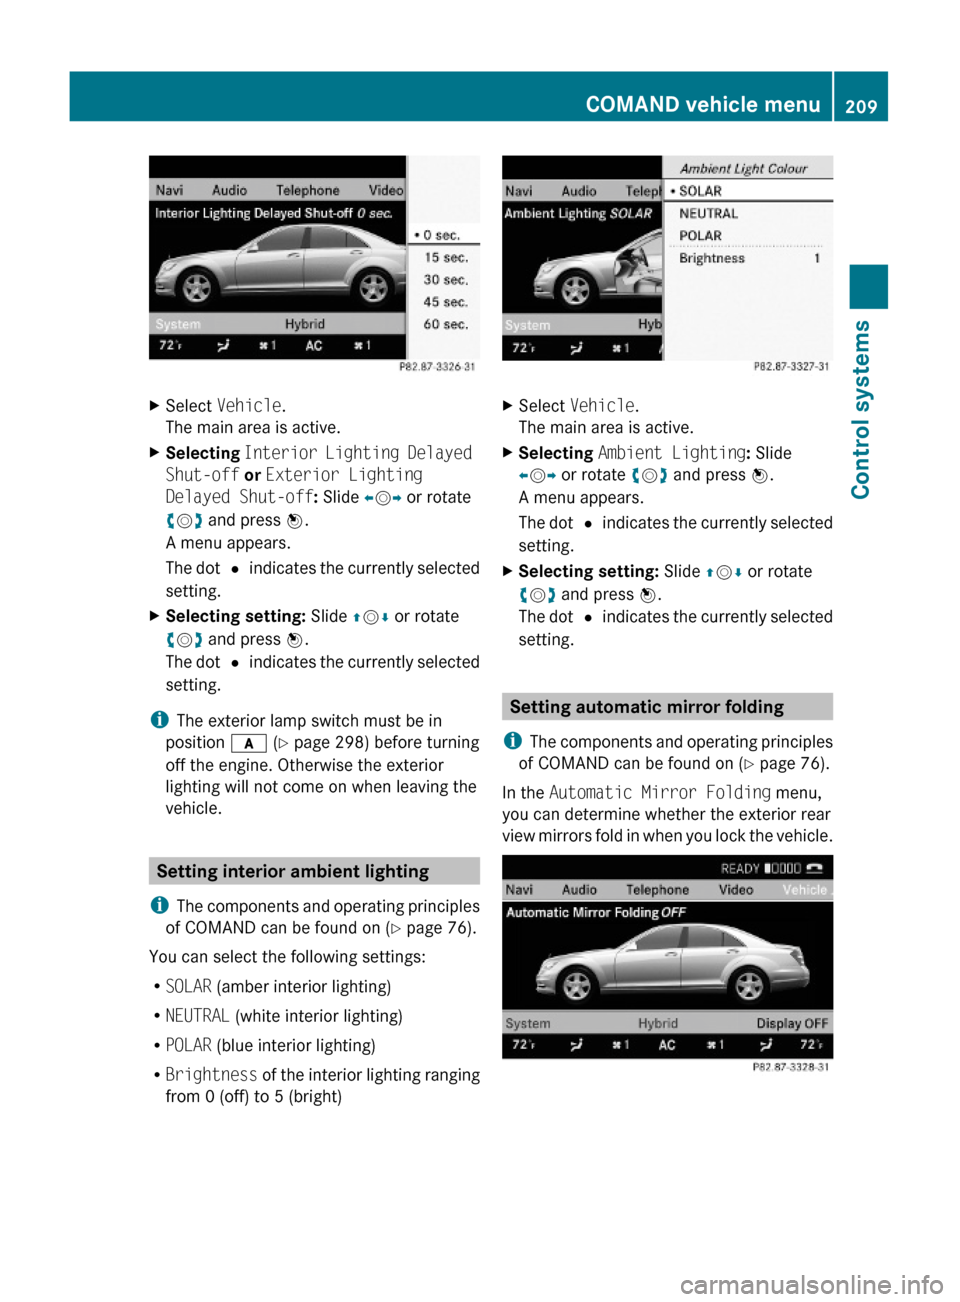
XSelect Vehicle.
The main area is active.
XSelecting Interior Lighting Delayed
Shut-off or Exterior Lighting
Delayed Shut-off: Slide XVY or rotate
cVd and press W.
A menu appears.
The dot # indicates the currently selected
setting.
XSelecting setting: Slide ZVÆ or rotate
cVd and press W.
The dot # indicates the currently selected
setting.
iThe exterior lamp switch must be in
position c (Y page 298) before turning
off the engine. Otherwise the exterior
lighting will not come on when leaving the
vehicle.
Setting interior ambient lighting
iThe components and operating principles
of COMAND can be found on (Y page 76).
You can select the following settings:
RSOLAR (amber interior lighting)
RNEUTRAL (white interior lighting)
RPOLAR (blue interior lighting)
RBrightness of the interior lighting ranging
from 0 (off) to 5 (bright)
XSelect Vehicle.
The main area is active.
XSelecting Ambient Lighting: Slide
XVY or rotate cVd and press W.
A menu appears.
The dot # indicates the currently selected
setting.
XSelecting setting: Slide ZVÆ or rotate
cVd and press W.
The dot # indicates the currently selected
setting.
Setting automatic mirror folding
iThe components and operating principles
of COMAND can be found on (Y page 76).
In the Automatic Mirror Folding menu,
you can determine whether the exterior rear
view mirrors fold in when you lock the vehicle.
COMAND vehicle menu209Control systems221_AKB; 6; 20, en-USd2ugruen,Version: 2.11.8.12009-09-24T13:28:17+02:00 - Seite 209Z
Page 212 of 548
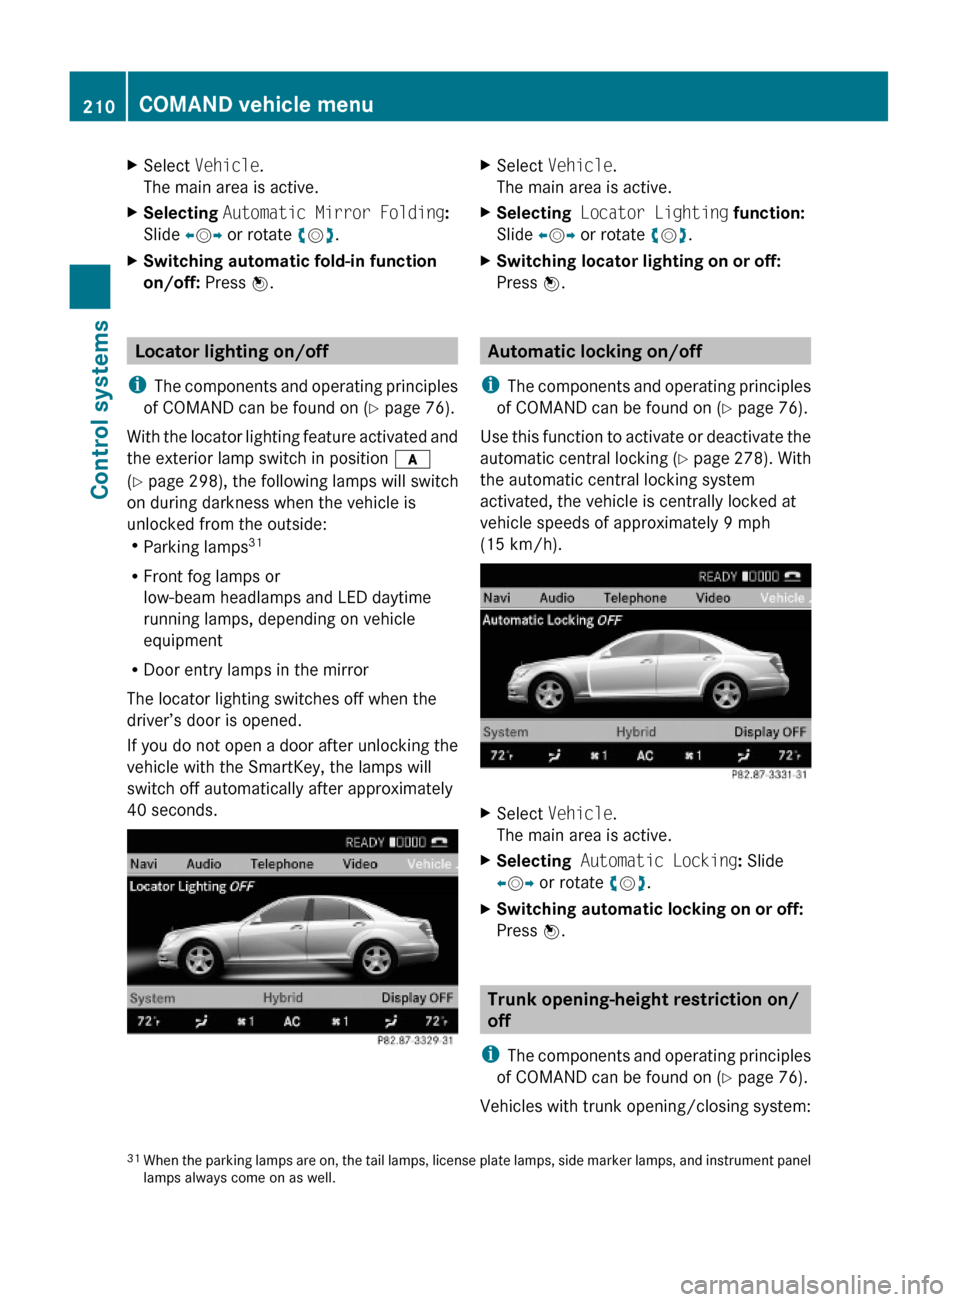
XSelect Vehicle.
The main area is active.
XSelecting Automatic Mirror Folding:
Slide XVY or rotate cVd.
XSwitching automatic fold-in function
on/off: Press W.
Locator lighting on/off
iThe components and operating principles
of COMAND can be found on (Y page 76).
With the locator lighting feature activated and
the exterior lamp switch in position c
(Y page 298), the following lamps will switch
on during darkness when the vehicle is
unlocked from the outside:RParking lamps31
RFront fog lamps or
low-beam headlamps and LED daytime
running lamps, depending on vehicle
equipment
RDoor entry lamps in the mirror
The locator lighting switches off when the
driver’s door is opened.
If you do not open a door after unlocking the
vehicle with the SmartKey, the lamps will
switch off automatically after approximately
40 seconds.
XSelect Vehicle.
The main area is active.
XSelecting Locator Lighting function:
Slide XVY or rotate cVd.
XSwitching locator lighting on or off:
Press W.
Automatic locking on/off
iThe components and operating principles
of COMAND can be found on (Y page 76).
Use this function to activate or deactivate the
automatic central locking (Y page 278). With
the automatic central locking system
activated, the vehicle is centrally locked at
vehicle speeds of approximately 9 mph
(15 km/h).
XSelect Vehicle.
The main area is active.
XSelecting Automatic Locking: Slide
XVY or rotate cVd.
XSwitching automatic locking on or off:
Press W.
Trunk opening-height restriction on/
off
iThe components and operating principles
of COMAND can be found on (Y page 76).
Vehicles with trunk opening/closing system:
31When the parking lamps are on, the tail lamps, license plate lamps, side marker lamps, and instrument panellamps always come on as well.
210COMAND vehicle menuControl systems
221_AKB; 6; 20, en-USd2ugruen,Version: 2.11.8.12009-09-24T13:28:17+02:00 - Seite 210
Page 248 of 548
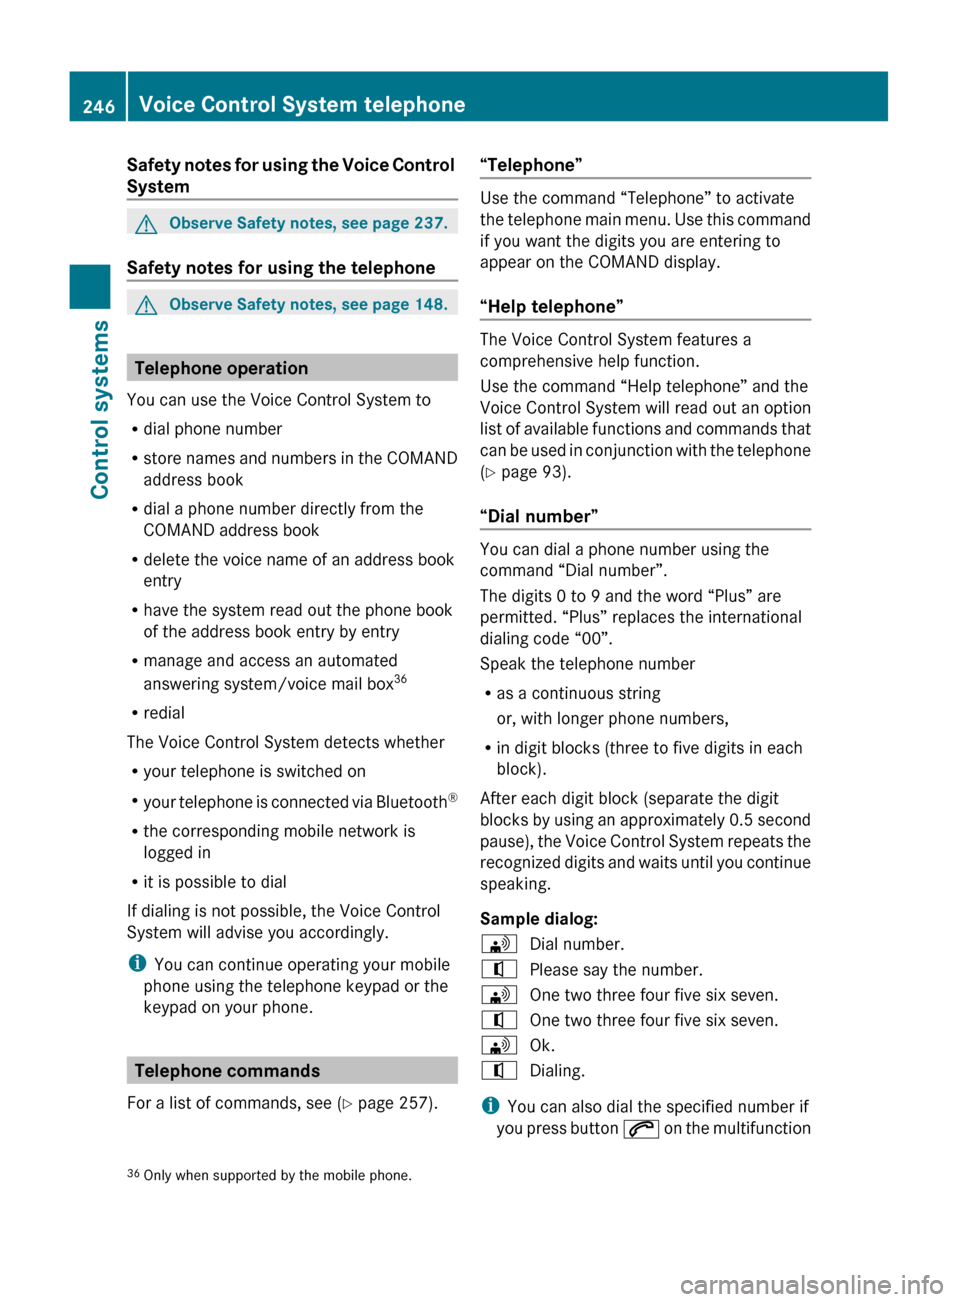
Safety notes for using the Voice Control
SystemGObserve Safety notes, see page 237.
Safety notes for using the telephone
GObserve Safety notes, see page 148.
Telephone operation
You can use the Voice Control System to
R dial phone number
R store names and numbers in the COMAND
address book
R dial a phone number directly from the
COMAND address book
R delete the voice name of an address book
entry
R have the system read out the phone book
of the address book entry by entry
R manage and access an automated
answering system/voice mail box 36
R redial
The Voice Control System detects whether
R your telephone is switched on
R your telephone is connected via Bluetooth ®
R the corresponding mobile network is
logged in
R it is possible to dial
If dialing is not possible, the Voice Control
System will advise you accordingly.
i You can continue operating your mobile
phone using the telephone keypad or the
keypad on your phone.
Telephone commands
For a list of commands, see ( Y page 257).
“Telephone”
Use the command “Telephone” to activate
the telephone main menu. Use this command
if you want the digits you are entering to
appear on the COMAND display.
“Help telephone”
The Voice Control System features a
comprehensive help function.
Use the command “Help telephone” and the
Voice Control System will read out an option
list of available functions and commands that
can be used in conjunction with the telephone
( Y page 93).
“Dial number”
You can dial a phone number using the
command “Dial number”.
The digits 0 to 9 and the word “Plus” are
permitted. “Plus” replaces the international
dialing code “00”.
Speak the telephone number
R as a continuous string
or, with longer phone numbers,
R in digit blocks (three to five digits in each
block).
After each digit block (separate the digit
blocks by using an approximately 0.5 second
pause), the Voice Control System repeats the
recognized digits and waits until you continue
speaking.
Sample dialog:
\Dial number.^Please say the number.\One two three four five six seven.^One two three four five six seven.\Ok.^Dialing.
i You can also dial the specified number if
you press button 6 on the multifunction
36
Only when supported by the mobile phone.246Voice Control System telephoneControl systems
221_AKB; 6; 20, en-USd2ugruen,Version: 2.11.8.12009-09-24T13:28:17+02:00 - Seite 246
Page 249 of 548
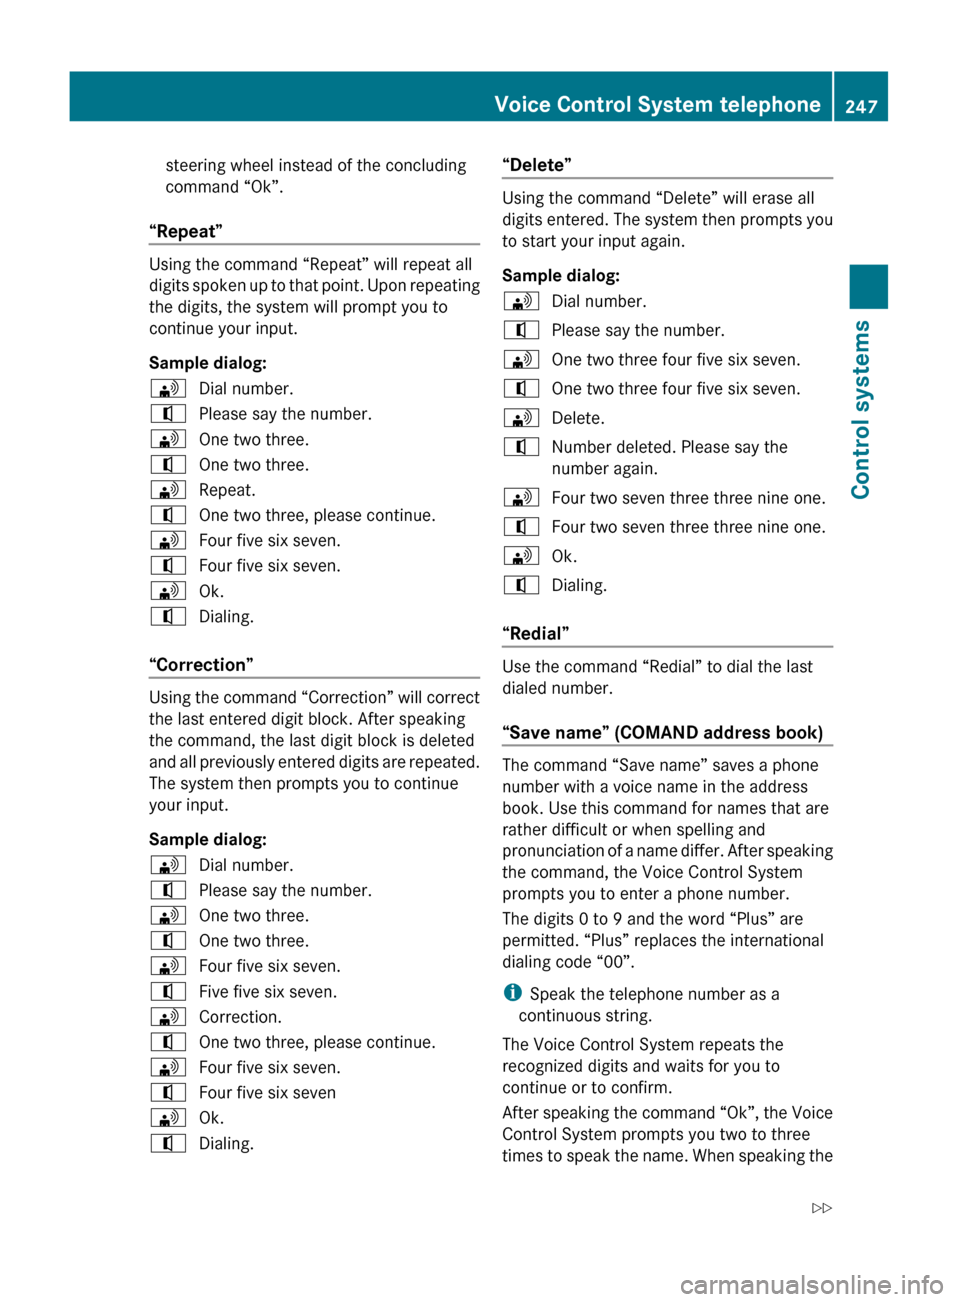
steering wheel instead of the concluding
command “Ok”.
“Repeat”
Using the command “Repeat” will repeat all
digits spoken up to that point. Upon repeating
the digits, the system will prompt you to
continue your input.
Sample dialog:
\Dial number.^Please say the number.\One two three.^One two three.\Repeat.^One two three, please continue.\Four five six seven.^Four five six seven.\Ok.^Dialing.
“Correction”
Using the command “Correction” will correct
the last entered digit block. After speaking
the command, the last digit block is deleted
and all previously entered digits are repeated.
The system then prompts you to continue
your input.
Sample dialog:
\Dial number.^Please say the number.\One two three.^One two three.\Four five six seven.^Five five six seven.\Correction.^One two three, please continue.\Four five six seven.^Four five six seven\Ok.^Dialing.“Delete”
Using the command “Delete” will erase all
digits entered. The system then prompts you
to start your input again.
Sample dialog:
\Dial number.^Please say the number.\One two three four five six seven.^One two three four five six seven.\Delete.^Number deleted. Please say the
number again.\Four two seven three three nine one.^Four two seven three three nine one.\Ok.^Dialing.
“Redial”
Use the command “Redial” to dial the last
dialed number.
“Save name” (COMAND address book)
The command “Save name” saves a phone
number with a voice name in the address
book. Use this command for names that are
rather difficult or when spelling and
pronunciation of a name differ. After speaking
the command, the Voice Control System
prompts you to enter a phone number.
The digits 0 to 9 and the word “Plus” are
permitted. “Plus” replaces the international
dialing code “00”.
i Speak the telephone number as a
continuous string.
The Voice Control System repeats the
recognized digits and waits for you to
continue or to confirm.
After speaking the command “Ok”, the Voice
Control System prompts you two to three
times to speak the name. When speaking the
Voice Control System telephone247Control systems221_AKB; 6; 20, en-USd2ugruen,Version: 2.11.8.12009-09-24T13:28:17+02:00 - Seite 247Z
Page 270 of 548
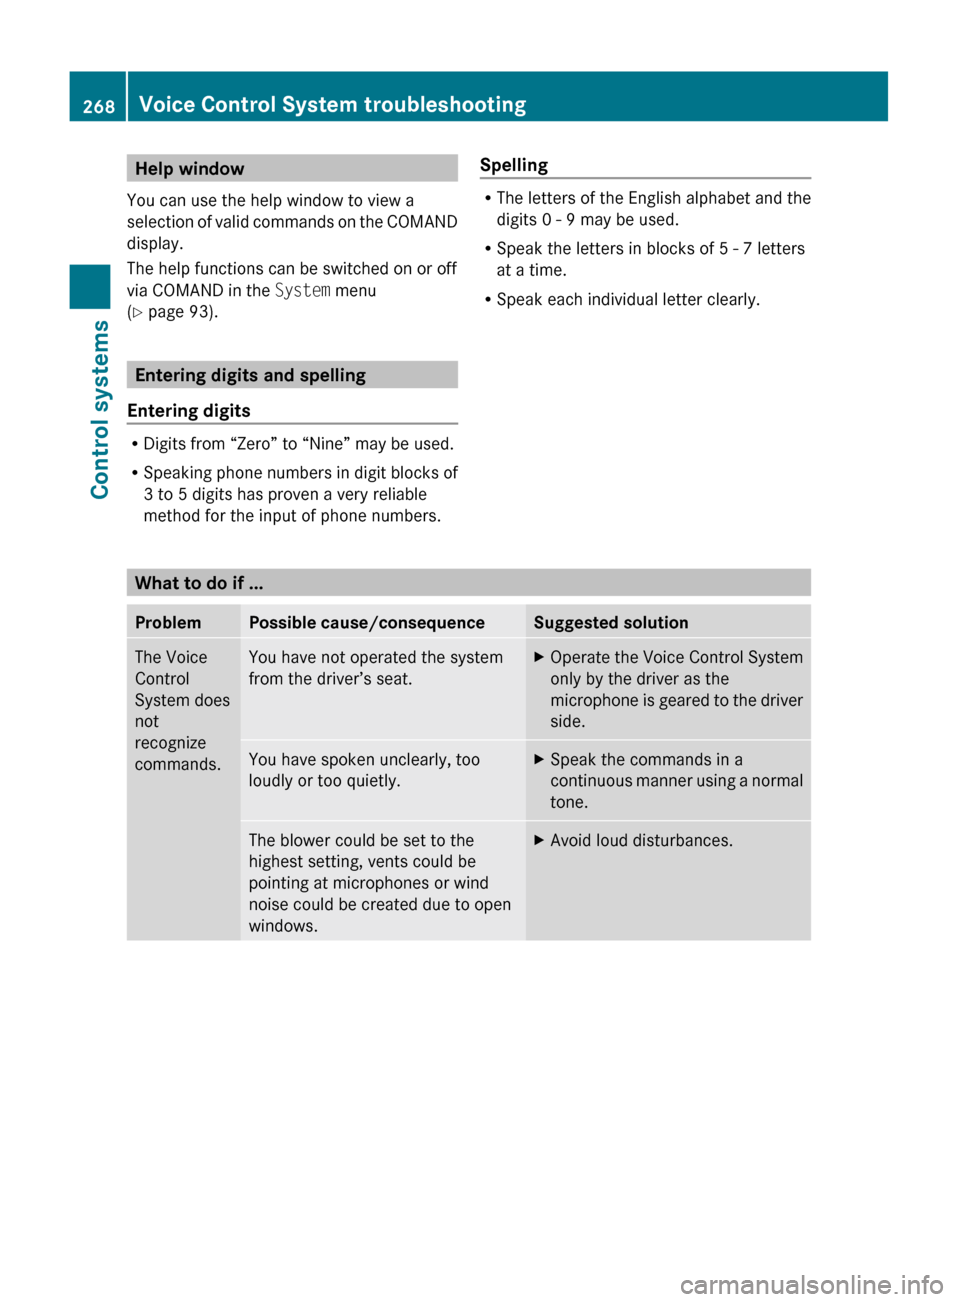
Help window
You can use the help window to view a
selection of valid commands on the COMAND
display.
The help functions can be switched on or off
via COMAND in the System menu
( Y page 93).
Entering digits and spelling
Entering digits
R Digits from “Zero” to “Nine” may be used.
R Speaking phone numbers in digit blocks of
3 to 5 digits has proven a very reliable
method for the input of phone numbers.
Spelling
R The letters of the English alphabet and the
digits 0 - 9 may be used.
R Speak the letters in blocks of 5 - 7 letters
at a time.
R Speak each individual letter clearly.What to do if ...
ProblemPossible cause/consequenceSuggested solutionThe Voice
Control
System does
not
recognize
commands.You have not operated the system
from the driver’s seat.XOperate the Voice Control System
only by the driver as the
microphone is geared to the driver
side.You have spoken unclearly, too
loudly or too quietly.XSpeak the commands in a
continuous manner using a normal
tone.The blower could be set to the
highest setting, vents could be
pointing at microphones or wind
noise could be created due to open
windows.XAvoid loud disturbances.268Voice Control System troubleshootingControl systems
221_AKB; 6; 20, en-USd2ugruen,Version: 2.11.8.12009-09-24T13:28:17+02:00 - Seite 268
Page 275 of 548
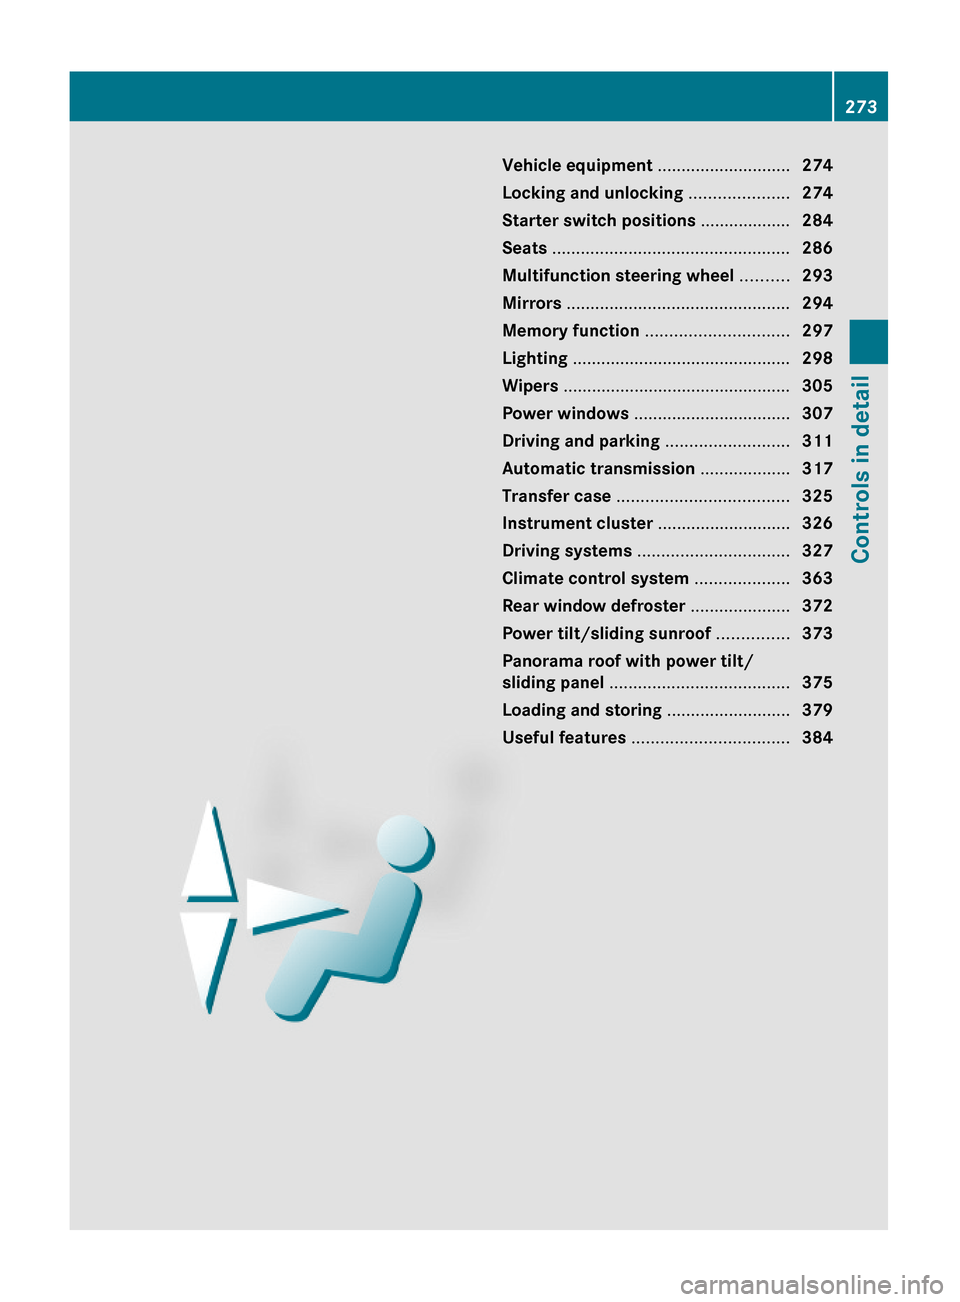
Vehicle equipment ............................274
Locking and unlocking .....................274
Starter switch positions ...................284
Seats ..................................................286
Multifunction steering wheel ..........293
Mirrors ...............................................294
Memory function ..............................297
Lighting ..............................................298
Wipers ................................................305
Power windows .................................307
Driving and parking ..........................311
Automatic transmission ...................317
Transfer case ....................................325
Instrument cluster ............................326
Driving systems ................................327
Climate control system ....................363
Rear window defroster .....................372
Power tilt/sliding sunroof ...............373
Panorama roof with power tilt/
sliding panel ......................................375
Loading and storing ..........................379
Useful features .................................384
273Controls in detail221_AKB; 6; 20, en-USd2ugruen,Version: 2.11.8.12009-09-24T13:28:17+02:00 - Seite 273
Page 276 of 548
Vehicle equipment
iThis Operator’s Manual describes all
features, standard or optional, potentially
available for your vehicle at the time of
purchase. Please be aware that your
vehicle might not be equipped with all
features described in this manual.
Locking and unlocking
Notes
GObserve Safety notes, see page 56.
When unlocking or locking the vehicle with
the SmartKey an acoustic signal sounds. The
acoustic signal is activated at the factory. If
you wish to deactivate the feature, or adjust
its signal volume, contact an authorized
Mercedes-Benz Center.
When unlocking the vehicle, all turn signal
lamps flash once. An acoustic signal sounds
once, and the locking knobs in the doors
move up. The anti-theft alarm system is
disarmed.
When locking the vehicle, all turn signal lamps
flash three times. An acoustic signal sounds
three times, and the locking knobs in the
doors move down. The anti-theft alarm
system is armed.
All doors and the trunk must be closed.
If you cannot lock or unlock the vehicle with
the SmartKey, the batteries in the SmartKey
are discharged, the SmartKey is
malfunctioning, or the vehicle battery is
drained.
XCheck the batteries in the SmartKey
(Y page 277) and replace them if
necessary.
XUse the mechanical key to unlock the
driver’s door and the trunk (Y page 499).
XUse the mechanical key to lock the vehicle
(Y page 500).
XHave the vehicle battery and the vehicle
battery connections checked at an
authorized Mercedes-Benz Center.
If the SmartKey is malfunctioning, contact
Roadside Assistance or an authorized
Mercedes-Benz Center.
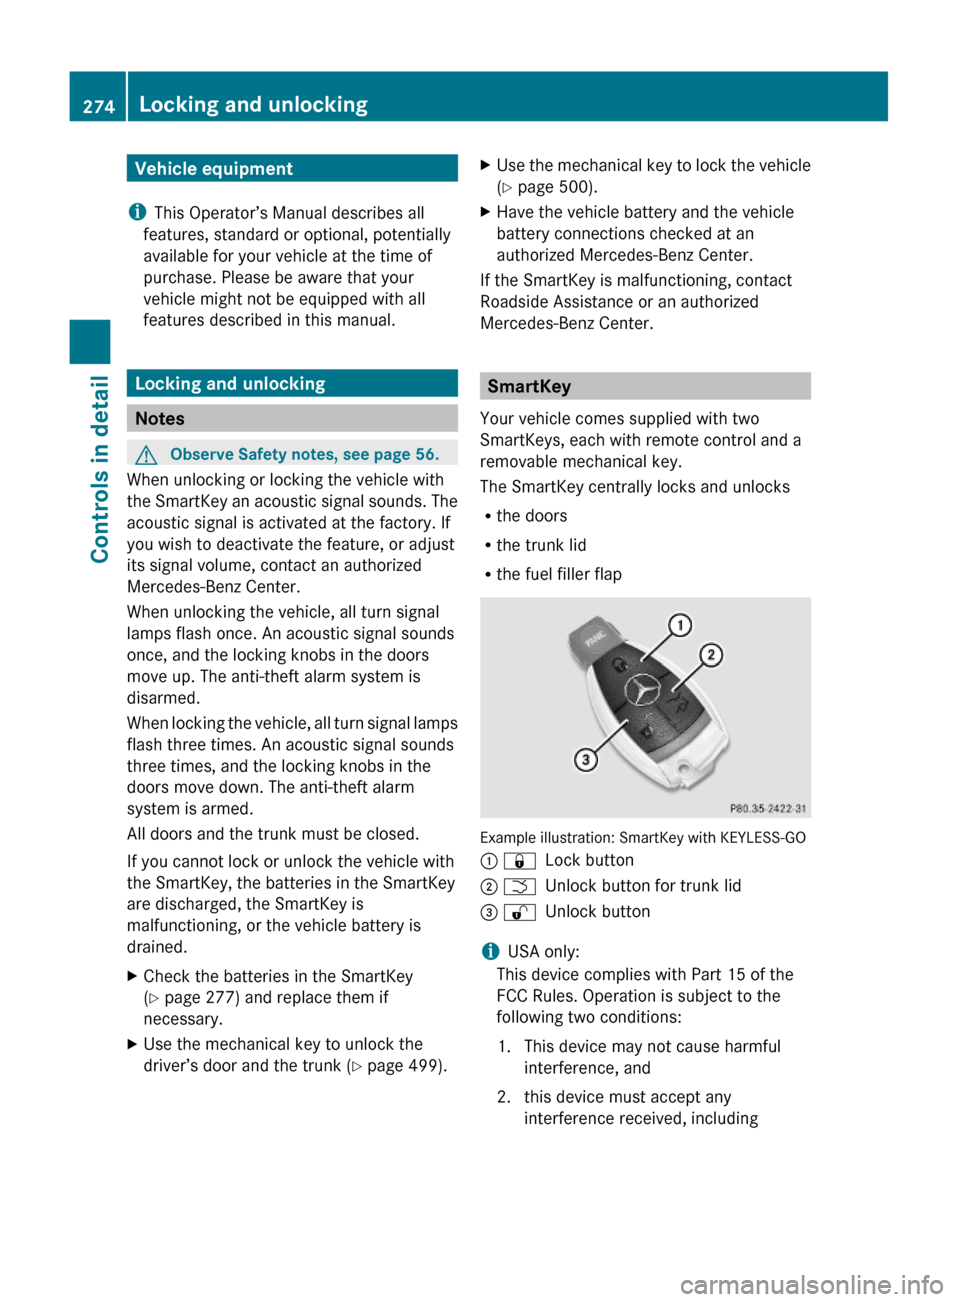
SmartKey
Your vehicle comes supplied with two
SmartKeys, each with remote control and a
removable mechanical key.
The SmartKey centrally locks and unlocks
Rthe doors
Rthe trunk lid
Rthe fuel filler flap
Example illustration: SmartKey with KEYLESS-GO
: &Lock button; FUnlock button for trunk lid= %Unlock button
iUSA only:
This device complies with Part 15 of the
FCC Rules. Operation is subject to the
following two conditions:
1. This device may not cause harmful
interference, and
2. this device must accept any
interference received, including
274Locking and unlockingControls in detail
221_AKB; 6; 20, en-USd2ugruen,Version: 2.11.8.12009-09-24T13:28:17+02:00 - Seite 274
Page 277 of 548
interference that may cause undesired
operation.
Any unauthorized modification to this
device could void the user’s authority to
operate the equipment.
i Canada only:
This device complies with RSS-210 of
Industry Canada. Operation is subject to
the following two conditions:
1. This device may not cause interference,
and
2. this device must accept any interference received, including
interference that may cause undesired
operation of the device.
Any unauthorized modification to this
device could void the user’s authority to
operate the equipment.
Factory setting XGlobal unlocking: Press button %.
Unless you open a door or the trunk within
approximately 40 seconds after unlocking
the vehicle:
R The vehicle will be locked again.
R The anti-theft alarm system will be
rearmed.
XGlobal locking: Press button &.
Selective setting
If you frequently travel alone, you may wish
to reprogramm the SmartKey. Pressing
button % will then only unlock the driver’s
door and the fuel filler flap.
XSwitching on/off: Press and hold buttons
% and & simultaneously for
approximately 6 seconds until the battery
check lamp ( Y page 277) flashes twice.
The SmartKey will then function as follows:
XUnlocking driver’s door and fuel filler
flap: Press button % once.XGlobal unlocking: Press button %
twice.XGlobal locking: Press button &.
KEYLESS-GO
Vehicles equipped with KEYLESS-GO come
with two SmartKeys with KEYLESS-GO, each
with remote control and a removable
mechanical key.
The KEYLESS-GO function is integrated into
the SmartKey. The validity of the SmartKey is
checked every time you grasp an outside door
handle.
When the SmartKey is valid, your vehicle
unlocks
R the doors
R the trunk lid
R the fuel filler flap
i USA only:
This device complies with Part 15 of the
FCC Rules. Operation is subject to the
following two conditions:
1. This device may not cause harmful interference, and
2. this device must accept any interference received, including
interference that may cause undesired
operation.
Any unauthorized modification to this
device could void the user’s authority to
operate the equipment.
Locking and unlocking275Controls in detail221_AKB; 6; 20, en-USd2ugruen,Version: 2.11.8.12009-09-24T13:28:17+02:00 - Seite 275Z