stop start MERCEDES-BENZ SL CLASS 2002 Owners Manual
[x] Cancel search | Manufacturer: MERCEDES-BENZ, Model Year: 2002, Model line: SL CLASS, Model: MERCEDES-BENZ SL CLASS 2002Pages: 302, PDF Size: 7.05 MB
Page 6 of 302

3 ContentsCup holder ...................................... 128
Parcel net in
passenger footwell .................... 128
Door pockets ................................... 129
Rear storage compartment ........... 129
Ashtray with lighter ...................... 130
Lighter ............................................. 131
Telephone, general ........................ 132
Garage door opener ....................... 133
Hardtop or panorama roof ............ 137
Removing hardtop ...................... 137
Attaching hardtop ...................... 140
Soft top ............................................ 143
Lowering soft top ........................ 144
Raising soft top ........................... 145
Wind screen .................................... 148
Antenna ........................................... 151
Driving Control and operation of radio
transmitters ............................... 154
Radio and telephone .................. 154
Telep ho n es an d
two-way radio .............................. 154The first 1 000 miles
(1 500 km) ..................................155
Maintenance ...................................155
Tele Aid ............................................156
Catalytic converter .........................163
Emission control .............................164
Steering lock ...................................165
Starting and turning off
the engine ...................................167
Before starting .............................167
Starting .........................................167
Turning off ...................................167
Automatic transmission ................168
Driving .........................................168
Accelerator Position ...................169
Selector lever positions .............169
Maneuvering .............................. 172
Stopping ...................................... 172
Program mode
selector switch ........................... 173
Emergency Operation ................174
Parking brake ................................ 175
Driving instructions ....................... 176
Drive sensibly - Save fuel .......... 176Drinking and driving ................. 176
Pedals ........................................... 176
Power assistance ........................ 177
Brakes .......................................... 177
Driving off ................................... 178
Parking ........................................ 178
Tires ............................................. 179
Aquaplaning ............................... 180
Tire traction ................................ 180
Tire speed rating ........................ 181
Snow chains ................................ 181
Vehicles with
sport package .............................. 181
Deep water .................................. 182
Winter driving
instructions ................................. 182
Winter driving ............................ 183
Block heater ................................ 183
Traveling abroad ........................ 183
Cruise control ................................. 184
Brake assist system
(BAS) ........................................... 188
Antilock brake system
(ABS) ........................................... 190
Page 112 of 302

108 Audio system
Te ch n ica l
data Instruments
and controlsOperationDrivingInstrument
cluster displayPractical hints Car care Index
Fast forward/reverse
Press the button.
“FORWARD” will appear on
the display and fast forward
will start.
Press the button.
“REWIND” will appear on the
display and fast reverse will
start.
Fast forward/reverse is stopped by pressing the same
button again, or it will stop automatically at the
beginning or the end of the tape. The track will
automatically change at the end or beginning of the tape
and play will begin.Scanning
Press the “SC” key. Each track
on the cassette will be played
for 8 seconds in ascending
order.
Note:
The beginning of a track can only be located if there is a
break of at least 4 seconds between tracks.
Scan will be interrupted if the , , ,
buttons or the “SC” key is pressed.
Dolby NR
1 (noise reduction system)
To en abl e o pti mum
reproduction of cassettes
recorded using the Dolby B
system, press the “AUD” key
followed by the NR key so the
“NR” in the display is not highlighted. To turn off
Dolby B noise reduction, press the “NR” key so the “NR”
in the display is highlighted.
1 Dolby and the double-D symbol
Ù
are trademarks of Dolby
Laboratories Licensing Corporation. The Dolby noise reduction
system is manufactured under licence from Dolby Laboratories
Licensing Corporation.
Page 114 of 302
110 Audio system
Te ch n ica l
data Instruments
and controlsOperationDrivingInstrument
cluster displayPractical hints Car care Index
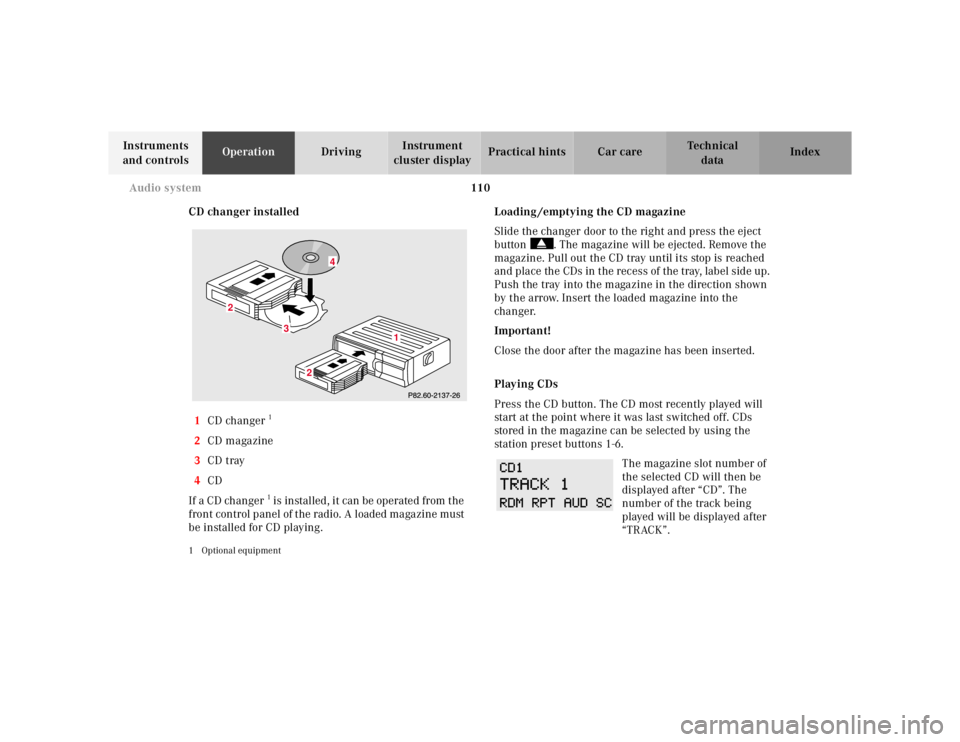
CD changer installed
1CD changer
1
2CD magazine
3CD tray
4CD
If a CD changer1 is instal led , it can be operate d from t he
front control panel of the radio. A loaded magazine must
be installed for CD playing.
1 Optional equipment
Loading /emptying the CD magazine
Slide the changer door to the right and press the eject
button . The magazine will be ejected. Remove the
magazine. Pull out the CD tray until its stop is reached
and place the CDs in the recess of the tray, label side up.
Push the tray into the magazine in the direction shown
by the arrow. Insert the loaded magazine into the
changer.
Important!
Close the door after the magazine has been inserted.
Playing CDs
Press the CD button. The CD most recently played will
start at the point where it was last switched off. CDs
stored in the magazine can be selected by using the
station preset buttons 1-6.
The magazine slot number of
the selected CD will then be
displayed after “CD”. The
number of the track being
played will be displayed after
“TRACK”.
3
2
2
1
4
Page 115 of 302

111 Audio system
Te ch n ica l
data Instruments
and controlsOperationDrivingInstrument
cluster displayPractical hints Car care Index If there is no CD in the
selected magazine slot,
“NO CD” and the
corresponding slot number
will be displayed
(e.g.“NO CD3”). After the last track on a CD has been
played, the next CD will automatically be selected and
played.
Skipping tracks forwards/backwards
Press the button. The next track on the CD will be
played.
Press the button. If the track has been playing for
more than 10 seconds, it will revert to the start of that
track. If it has been playing for less than ten seconds it
will revert to the preceding track. To skip several tracks,
the respective button must be pressed until the desired
track is reached. If the beginning or end of the CD is
reached during the search, the first or last track will be
played.Fast forward/reverse
Press the button and hold it down for audible fast
forward.
Press the button and hold it down for audible
reverse.
The search will stop when the
button is released. The
relative time of the track will
be displayed during the
search. The search mode will
be canceled if the beginning or end of the CD is reached.
Scanning
Press the SC key. Each tra ck w il l be played for 8 second s
in ascending order. The search will stop at the track in
question if the , , , buttons or the
“SC” key is pressed.
Page 146 of 302

142 Hardtop
Te ch n ica l
data Instruments
and controlsOperationDrivingInstrument
cluster displayPractical hints Car care Index
Notes:
For safety reasons, the hardtop can only be unlocked
while the vehicle is standing still, and within
10 seconds after turning the key to steering lock
position 2 or beyond.
If the indicator lamp in the soft top switch blinks while
activating the switch, the battery voltage may be
insufficient - start engine to charge battery before
shutting engine off and attempting to unlock the roof
again.
If the indicator lamp continues to blink, remove the
hardtop (see page 137), and have the system checked at
your authorized Mercedes-Benz Center as soon as
possible.
Wa r n i n g !
The raising or lowering procedure of the soft top is
not completed if the indicator lamp in the soft top
switch:
• does not go out (with key in steering lock
position 2),
• blinks when starting to drive and an alarm
sounds.When safe to do so, immediately stop the vehicle
and lock the soft top:
• Turn key in steering lock to position 2,
• Slide soft/hardtop switch forward.Do not drive the car with the hardtop not locked, as
that could cause personal injury to you or your
passenger, or personal injury or property damage
to others.
Page 150 of 302
146 Soft top
Te ch n ica l
data Instruments
and controlsOperationDrivingInstrument
cluster displayPractical hints Car care Index
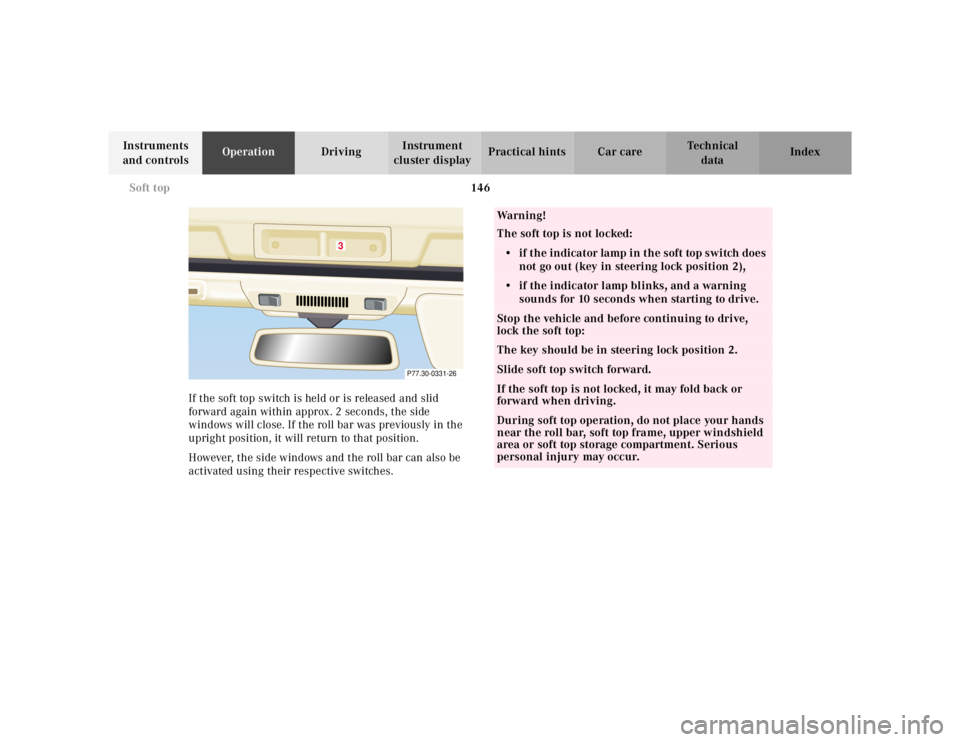
If the soft top switch is held or is released and slid
forward again within approx. 2 seconds, the side
windows will close. If the roll bar was previously in the
upright position, it will return to that position.
However, the side windows and the roll bar can also be
activated using their respective switches.
3
P77.30-0331-26
Wa r n i n g !
The soft top is not locked:• if the indicator lamp in the soft top switch does
not go out (key in steering lock position 2),• if the indicator lamp blinks, and a warning
sounds for 10 seconds when starting to drive.Stop the vehicle and before continuing to drive,
lock the soft top:The key should be in steering lock position 2.Slide soft top switch forward.If the soft top is not locked, it may fold back or
forward when driving.During soft top operation, do not place your hands
near the roll bar, soft top frame, upper windshield
area or soft top storage compartment. Serious
personal injury may occur.
Page 157 of 302
153 Contents - Driving
Te ch n ica l
data Instruments
and controlsOperationDrivingInstrument
cluster displayPractical hints Car care Index
Driving Control and operation of radio
transmitters ............................... 154
Radio and telephone .................. 154
Telep ho n es an d
two-way radio .............................. 154
The first 1 000 miles
(1 500 km) ................................. 155
Maintenance ................................... 155
Tele Aid ........................................... 156
Catalytic converter ........................ 163
Emission control ............................ 164
Steering lock ................................... 165
Starting and turning off
the engine .................................. 167
Before starting ............................ 167
Starting ........................................ 167
Turning off .................................. 167
Automatic transmission ............... 168
Driving ......................................... 168
Accelerator Position ................... 169
Selector lever positions ............. 169
Maneuvering ............................... 172Stopping ...................................... 172
Program mode
selector switch ........................... 173
Emergency Operation ................174
Parking brake ................................ 175
Driving instructions ....................... 176
Drive sensibly - Save fuel .......... 176
Drinking and driving ................. 176
Pedals ........................................... 176
Power assistance ........................ 177
Brakes .......................................... 177
Driving off ................................... 178
Parking ........................................ 178
Tires ............................................. 179
Aquaplaning ................................180
Tire traction .................................180
Tire speed rating ........................181
Snow chains ................................ 181
Vehicles with sport package .....181
Deep water ...................................182
Winter driving
instructions .................................182
Winter driving .............................183
Block heater .................................183Traveling abroad ........................ 183
Cruise control ................................. 184
Brake assist system (BAS) ............ 188
Antilock brake system (ABS) ....... 190
ABS control ................................. 191
Electronic Stability Program
(ESP) ........................................... 192
Synchronizing ESP .................... 193
ESP Control Switch .................... 194
Level control system ...................... 196
Level control
switch positions ......................... 196
Normal Level ............................... 197
Wheel Change Switch ............... 198
Ad aptive Da mping System
(ADS) ........................................... 199
Adaptive damping system
adjustment .................................. 199
What you should know
at the gas station .......................200
Fuel supply ..................................200
Fuel ...............................................200
Check regularly and
before a long trip ......................202
Page 165 of 302
161 Tele Aid
Te ch n ica l
data Instruments
and controlsOperationDrivingInstrument
cluster displayPractical hints Car care Index If the indicator lamp in the Information button¡ is
illuminated continuously and there was no voice
connection to the Response Center established, then the
Tele Aid system could not initiate an Information call
(e.g. the relevant cellular phone network is not
available).
Important!
If the indicator lamps do not start flashing after
pressing one of the buttons or remain illuminated (in
red) at any time, the Tele Aid system has detected a fault
or the service is not currently active, and may not
initiate a call. Visit your Mercedes-Benz Center and
have the system checked or contact the Response Center
at 1-800-756-9018 (in the USA) or 1-888-923-8367 (in
Canada) as soon as possible.Upgrade Signals
Tele Aid system processes calls using the following
priority.
• Automatic emergency – First priority
• Manual emergency – Second priority
• Roadside assistance – Third priority
• Information – Fourth priority
Should a higher priority call be initiated while you are
connected, an upgrade (alternating) tone will be heard,
and the appropriate indicator lamp will flash. If certain
information such as vehicle identification number or
client information is not available, the operator may
need to retransmit. During this time you will hear a
chirp and voice contact will be interrupted. Voice
contact will resume once the retransmission is
completed. Once a call is concluded, a chirp will be
heard and the appropriate indicator lamp will stop
flashing. The audio system operation will resume.
Page 169 of 302

165 Steering lock
Te ch n ica l
data Instruments
and controlsOperationDrivingInstrument
cluster displayPractical hints Car care Index Steering lock
0The key can be withdrawn in this position only. The
steering is locked when the electronic key is
removed from the steering lock. If necessary, move
steering wheel slightly to allow the locking
mechanism to engage.
The key can be removed only with your foot off the
brake pedal and the selector level in position “P”.
After removing the key or with the key in steering
lock position 0, the selector lever is locked in
position “P”.1Steering is unlocked.
(If necessary, move steering wheel slightly to allow
the key to be turned clockwise to position 1.)
Most electrical consumers can be operated. For
detailed information see respective subjects.
2Driving position.
3Starting position.
See page 167 for instructions on starting and stopping
the engine.
2
3
0
1
Wa r n i n g !
When leaving the vehicle always remove the key
from the steering lock, and lock the vehicle. Do not
leave children unattended in the vehicle, or with
access to an unlocked vehicle. Unsupervised use of
vehicle equipment may cause serious personal
injury.
Page 171 of 302
167 Starting and turning off the enging
Te ch n ica l
data Instruments
and controlsOperationDrivingInstrument
cluster displayPractical hints Car care Index Starting and turning off the engine
Before starting
Ensure that parking brake is engaged and that selector
lever is in position “P” or “N”. Turn key in steering lock
to position 2.
Starting
Do not depress accelerator. Briefly turn key in steering
lock clockwise to the stop and release. The starter will
engage until the engine is running.
If engine will not run, and the starting procedure stops,
turn key completely to the left and repeat starting the
engine.
After several unsuccessful attempts, have the system
checked at the nearest authorized Mercedes-Benz
Center.Important!
Due to the installed starter nonrepeat feature, the key
must be turned completely to the left before attempting
to start the engine again.
In areas where temperatures frequently drop below
-4°F (-20°C) we recommend that an engine block heater
be installed. Your authorized Mercedes-Benz Center will
advise you on this subject.
Turning off
Turn the key in the steering lock to position 0 to stop the
engine.
Vehicles with automatic transmission:
The key can only be removed with your foot off the
brake pedal and the selector lever in position “P”.