heating MERCEDES-BENZ SL CLASS 2011 Owners Manual
[x] Cancel search | Manufacturer: MERCEDES-BENZ, Model Year: 2011, Model line: SL CLASS, Model: MERCEDES-BENZ SL CLASS 2011Pages: 316, PDF Size: 6.55 MB
Page 6 of 316
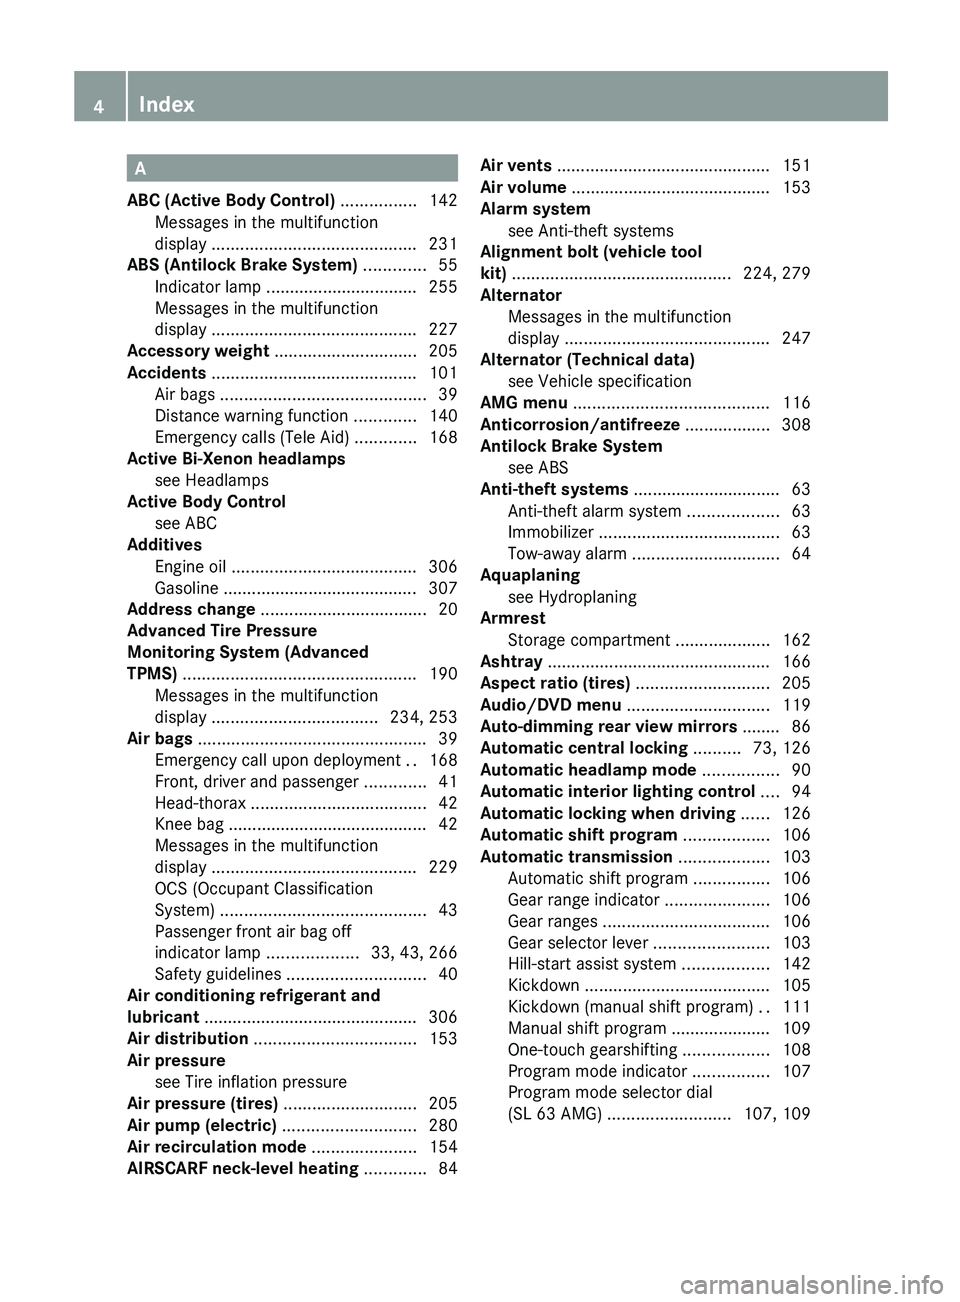
A
ABC (Active Body Control) ................ 142
Messages in the multifunction
display ........................................... 231
ABS (Antilock Brake System) ............. 55
Indicator lamp ................................ 255
Messages in the multifunction
display ........................................... 227
Accessory weight .............................. 205
Accidents ........................................... 101
Air bags ........................................... 39
Distance warning function .............140
Emergency calls (Tele Aid) .............168
Active Bi-Xenon headlamps
see Headlamps
Active Body Control
see ABC
Additives
Engine oil ....................................... 306
Gasoline ......................................... 307
Address change ................................... 20
Advanced Tire Pressure
Monitoring System (Advanced
TPMS) ................................................. 190
Messages in the multifunction
display ................................... 234, 253
Air bags ................................................ 39
Emergency call upon deployment ..168
Front, driver and passenger .............41
Head-thorax ..................................... 42
Knee bag .......................................... 42
Messages in the multifunction
display ........................................... 229
OCS (Occupant Classification
System) ........................................... 43
Passenger front air bag off
indicator lamp ...................33, 43, 266
Safety guidelines ............................. 40
Air conditioning refrigerant and
lubricant ............................................. 306
Air distribution .................................. 153
Air pressure see Tire inflation pressure
Air pressure (tires) ............................ 205
Air pump (electric) ............................ 280
Air recirculation mode ...................... 154
AIRSCARF neck-level heating ............. 84Air vents ............................................. 151
Air volume .......................................... 153
Alarm system see Anti-theft systems
Alignment bolt (vehicle tool
kit) .............................................. 224, 279
Alternator
Messages in the multifunction
display ........................................... 247
Alternator (Technical data)
see Vehicle specification
AMG menu ......................................... 116
Anticorrosion/antifreeze .................. 308
Antilock Brake System see ABS
Anti-theft systems ............................... 63
Anti-theft alarm system ...................63
Immobilizer ...................................... 63
Tow-away alarm ............................... 64
Aquaplaning
see Hydroplaning
Armrest
Storage compartment ....................162
Ashtray ............................................... 166
Aspect ratio (tires) ............................ 205
Audio/DVD menu .............................. 119
Auto-dimming rear view mirrors ........ 86
Automatic central locking .......... 73, 126
Automatic headlamp mode ................ 90
Automatic interior lighting control .... 94
Automatic locking when driving ...... 126
Automatic shift program .................. 106
Automatic transmission ................... 103
Automatic shift program ................106
Gear range indicator ......................106
Gear ranges ................................... 106
Gear selector lever ........................103
Hill-start assist system ..................142
Kickdown ....................................... 105
Kickdown (manual shift program) ..111
Manual shift program ..................... 109
One-touch gearshifting ..................108
Program mode indicator ................107
Program mode selector dial
(SL 63 AMG) .......................... 107, 1094Index230_AKB; 6; 22, en-USd2ureepe,Version: 2.11.8.12009-07-28T18:49:58+02:00 - Seite 4
Page 16 of 316

Reset button ................................ 30, 112
Restraint systems see Occupant safety
Retractable hardtop .......................... 155
Locking .......................................... 157
Luggage cover ............................... 158
Messages in the multifunction
display ........................................... 241
Sunshade ....................................... 160
Wind screen ................................... 157
Rims ........................................... 206, 299
Roadside Assistance ................... 20, 169
Roll bar ................................................. 51
Lowering .......................................... 51
Messages in the multifunction
display ........................................... 240
Raising ............................................. 51
Warning lamp ................................. 258
RON (Research Octane Number) ..... 307
Roof see Retractable hardtop
Rubber parts, cleaning ...................... 220
Run-flat tires see MOExtended tires
S
Safety
Driving safety systems .....................54
Occupant safety ............................... 38
Reporting defects ............................ 22
Safety belts
see Seat belts
Seat belt force limiter ......................... 49
Seat belts ............................................. 46
Automatic comfort-fit feature ..........49
Children in the vehicle .....................51
Cleaning ......................................... 220
Fastening ......................................... 48
Proper use of ................................... 47
Safety guidelines ............................. 40
Safety notes ..................................... 46
Telltale
.................................... 31, 32, 48, 256
Seat heating ......................................... 83
Seating capacity ................................ 194
Seats ..................................................... 80
Adjustment ...................................... 80
Easy-entry/exit feature ....................85
Heating ............................................ 83
Memory function .............................. 88
Multicontour seat ............................ 82
Ventilation ....................................... 82
Selective setting
see Key, SmartKey
Selector lever
see Gear selector lever
Self-test
OCS (Occupant Classification
System) ........................................... 45
Tele Aid .......................................... 167
Service
see Maintenance
Service, parts .................................... 294
Service and warranty information ..... 19
Service intervals see Maintenance System, Service
indicator message
Service life (tires) .............................. 198
Settings
Factory setting (KEYLESS-GO) .........71
Factory setting (SmartKey) ..............69
Memory function .............................. 88
Menu ............................................. 121
Selective setting (KEYLESS-GO) .......71
Selective setting (SmartKey) ............69
Side marker lamps
Cleaning lenses ............................. 218
Messages in the multifunction
display ........................................... 250
Sidewall (tires) .................................. 207
Side windows see Power windows
SmartKey
see Key, SmartKey
SmartKey with KEYLESS-GO
see Key, SmartKey
Snow chains ...................................... 208
Snow tires see Winter tires
Spare wheel ....................................... 299
Mounting ....................................... 277
Storage location ............................ 225
Speedometer ..................................... 13514Index230_AKB; 6; 22, en-USd2ureepe,Version: 2.11.8.12009-07-28T18:49:58+02:00 - Seite 14
Page 85 of 316
XPress seat ventilation switch \000F repeatedly
until the desired ventilation level is set.
XSwitching off: Press seat ventilation
switch \000F repeatedly until all indicator
lamps go out.
If one or more of the indicator lamps in the
seat ventilation switch \000F are flashing, there
is insufficient voltage available since too
many electrical consumers are turned on. The
seat ventilation switches off automatically.
The seat ventilation will switch back on again
automatically as soon as sufficient voltage is
available.
Seat heating
The seat heating will switch back on again
automatically as soon as sufficient voltage is
available.
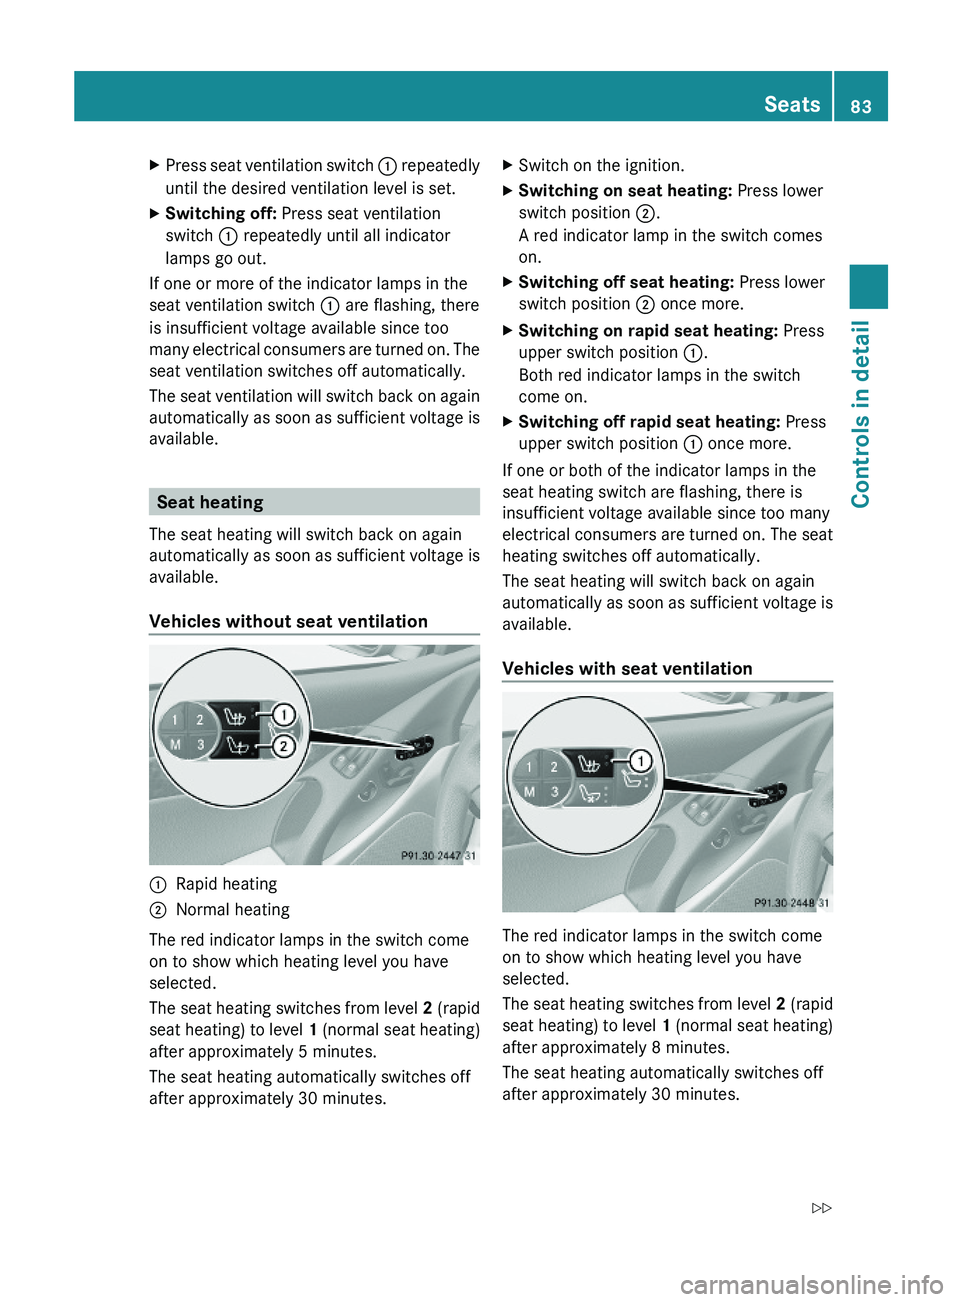
Vehicles without seat ventilation
\000FRapid heating\000GNormal heating
The red indicator lamps in the switch come
on to show which heating level you have
selected.
The seat heating switches from level 2 (rapid
seat heating) to level 1 (normal seat heating)
after approximately 5 minutes.
The seat heating automatically switches off
after approximately 30 minutes.
XSwitch on the ignition.XSwitching on seat heating: Press lower
switch position \000G.
A red indicator lamp in the switch comes
on.
XSwitching off seat heating: Press lower
switch position \000G once more.
XSwitching on rapid seat heating: Press
upper switch position \000F.
Both red indicator lamps in the switch
come on.
XSwitching off rapid seat heating: Press
upper switch position \000F once more.
If one or both of the indicator lamps in the
seat heating switch are flashing, there is
insufficient voltage available since too many
electrical consumers are turned on. The seat
heating switches off automatically.
The seat heating will switch back on again
automatically as soon as sufficient voltage is
available.
Vehicles with seat ventilation
The red indicator lamps in the switch come
on to show which heating level you have
selected.
The seat heating switches from level 2 (rapid
seat heating) to level 1 (normal seat heating)
after approximately 8 minutes.
The seat heating automatically switches off
after approximately 30 minutes.
Seats83Controls in detail230_AKB; 6; 22, en-USd2ureepe,Version: 2.11.8.12009-07-28T18:49:58+02:00 - Seite 83Z
Page 86 of 316
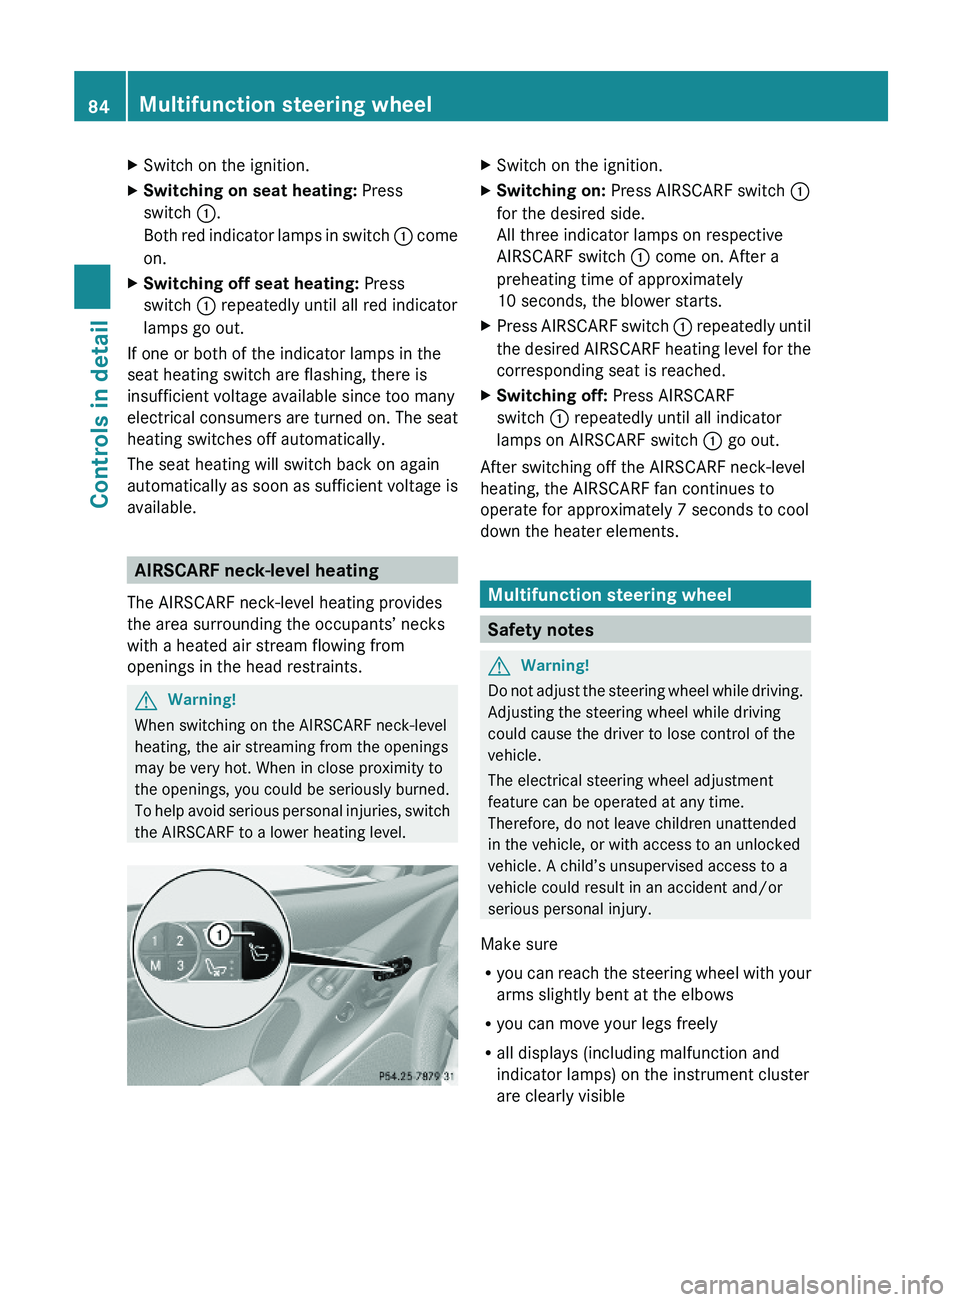
XSwitch on the ignition.XSwitching on seat heating: Press
switch \000F.
Both red indicator lamps in switch \000F come
on.
XSwitching off seat heating: Press
switch \000F repeatedly until all red indicator
lamps go out.
If one or both of the indicator lamps in the
seat heating switch are flashing, there is
insufficient voltage available since too many
electrical consumers are turned on. The seat
heating switches off automatically.
The seat heating will switch back on again
automatically as soon as sufficient voltage is
available.
AIRSCARF neck-level heating
The AIRSCARF neck-level heating provides
the area surrounding the occupants’ necks
with a heated air stream flowing from
openings in the head restraints.
GWarning!
When switching on the AIRSCARF neck-level
heating, the air streaming from the openings
may be very hot. When in close proximity to
the openings, you could be seriously burned.
To help avoid serious personal injuries, switch
the AIRSCARF to a lower heating level.
XSwitch on the ignition.XSwitching on: Press AIRSCARF switch \000F
for the desired side.
All three indicator lamps on respective
AIRSCARF switch \000F come on. After a
preheating time of approximately
10 seconds, the blower starts.
XPress AIRSCARF switch \000F repeatedly until
the desired AIRSCARF heating level for the
corresponding seat is reached.
XSwitching off: Press AIRSCARF
switch \000F repeatedly until all indicator
lamps on AIRSCARF switch \000F go out.
After switching off the AIRSCARF neck-level
heating, the AIRSCARF fan continues to
operate for approximately 7 seconds to cool
down the heater elements.
Multifunction steering wheel
Safety notes
GWarning!
Do not adjust the steering wheel while driving.
Adjusting the steering wheel while driving
could cause the driver to lose control of the
vehicle.
The electrical steering wheel adjustment
feature can be operated at any time.
Therefore, do not leave children unattended
in the vehicle, or with access to an unlocked
vehicle. A child’s unsupervised access to a
vehicle could result in an accident and/or
serious personal injury.
Make sure
Ryou can reach the steering wheel with your
arms slightly bent at the elbows
Ryou can move your legs freely
Rall displays (including malfunction and
indicator lamps) on the instrument cluster
are clearly visible
84Multifunction steering wheelControls in detail
230_AKB; 6; 22, en-USd2ureepe,Version: 2.11.8.12009-07-28T18:49:58+02:00 - Seite 84
Page 151 of 316
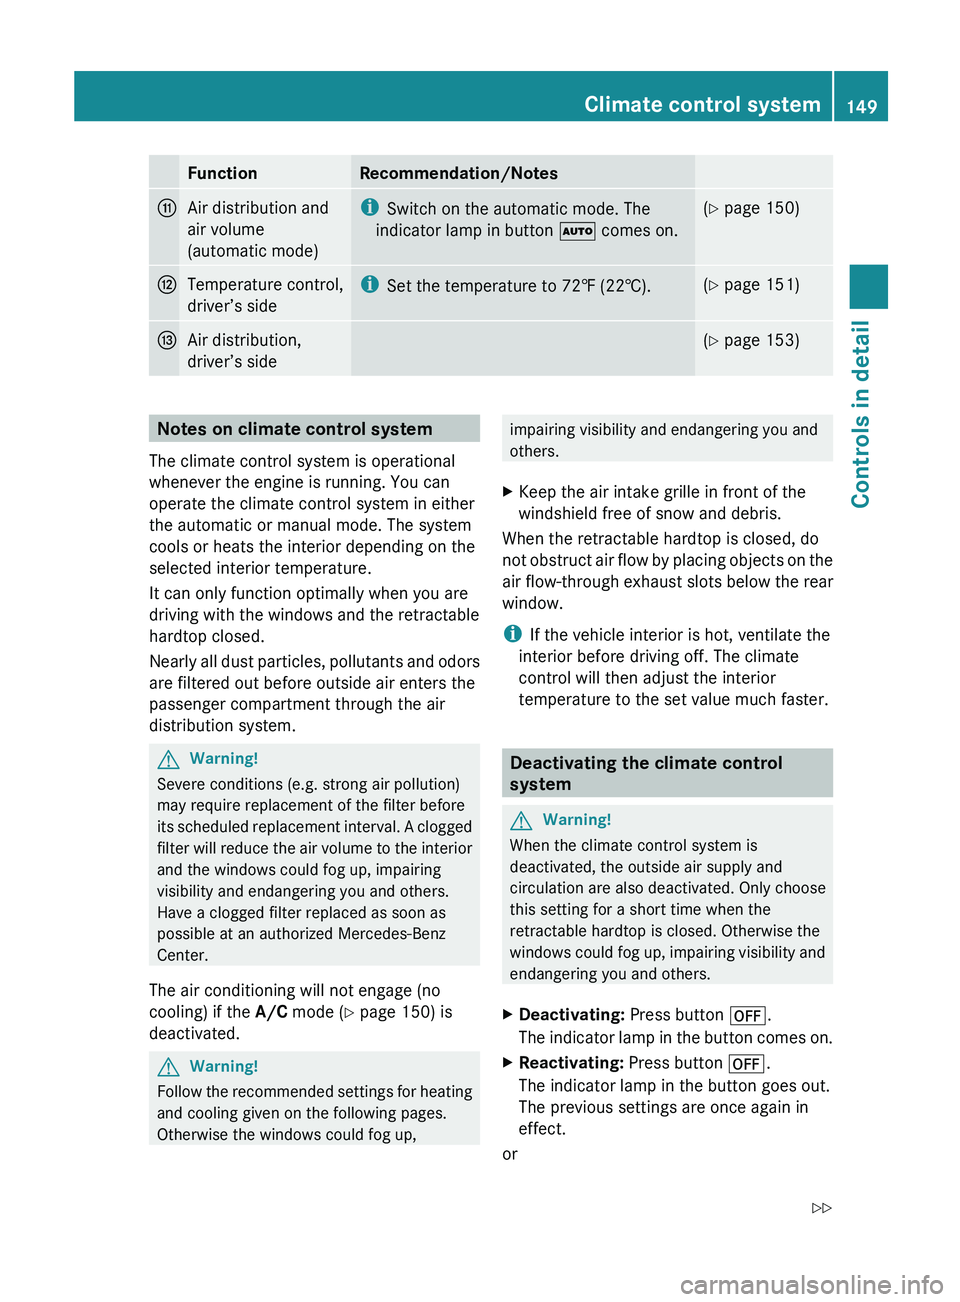
FunctionRecommendation/NotesbAir distribution and
air volume
(automatic mode)i Switch on the automatic mode. The
indicator lamp in button 005A comes on.(Y page 150)cTemperature control,
driver’s sidei Set the temperature to 72‡ (22†).(Y page 151)dAir distribution,
driver’s side( Y page 153)Notes on climate control system
The climate control system is operational
whenever the engine is running. You can
operate the climate control system in either
the automatic or manual mode. The system
cools or heats the interior depending on the
selected interior temperature.
It can only function optimally when you are
driving with the windows and the retractable
hardtop closed.
Nearly all dust particles, pollutants and odors
are filtered out before outside air enters the
passenger compartment through the air
distribution system.GWarning!
Severe conditions (e.g. strong air pollution)
may require replacement of the filter before
its scheduled replacement interval. A clogged
filter will reduce the air volume to the interior
and the windows could fog up, impairing
visibility and endangering you and others.
Have a clogged filter replaced as soon as
possible at an authorized Mercedes-Benz
Center.
The air conditioning will not engage (no
cooling) if the A/C mode ( Y page 150) is
deactivated.
GWarning!
Follow the recommended settings for heating
and cooling given on the following pages.
Otherwise the windows could fog up,
impairing visibility and endangering you and
others.XKeep the air intake grille in front of the
windshield free of snow and debris.
When the retractable hardtop is closed, do
not obstruct air flow by placing objects on the
air flow-through exhaust slots below the rear
window.
i If the vehicle interior is hot, ventilate the
interior before driving off. The climate
control will then adjust the interior
temperature to the set value much faster.
Deactivating the climate control
system
GWarning!
When the climate control system is
deactivated, the outside air supply and
circulation are also deactivated. Only choose
this setting for a short time when the
retractable hardtop is closed. Otherwise the
windows could fog up, impairing visibility and
endangering you and others.
XDeactivating: Press button 0061.
The indicator lamp in the button comes on.XReactivating: Press button 0061.
The indicator lamp in the button goes out.
The previous settings are once again in
effect.
or
Climate control system149Controls in detail230_AKB; 6; 22, en-USd2ureepe,Version: 2.11.8.12009-07-28T18:49:58+02:00 - Seite 149Z
Page 155 of 316
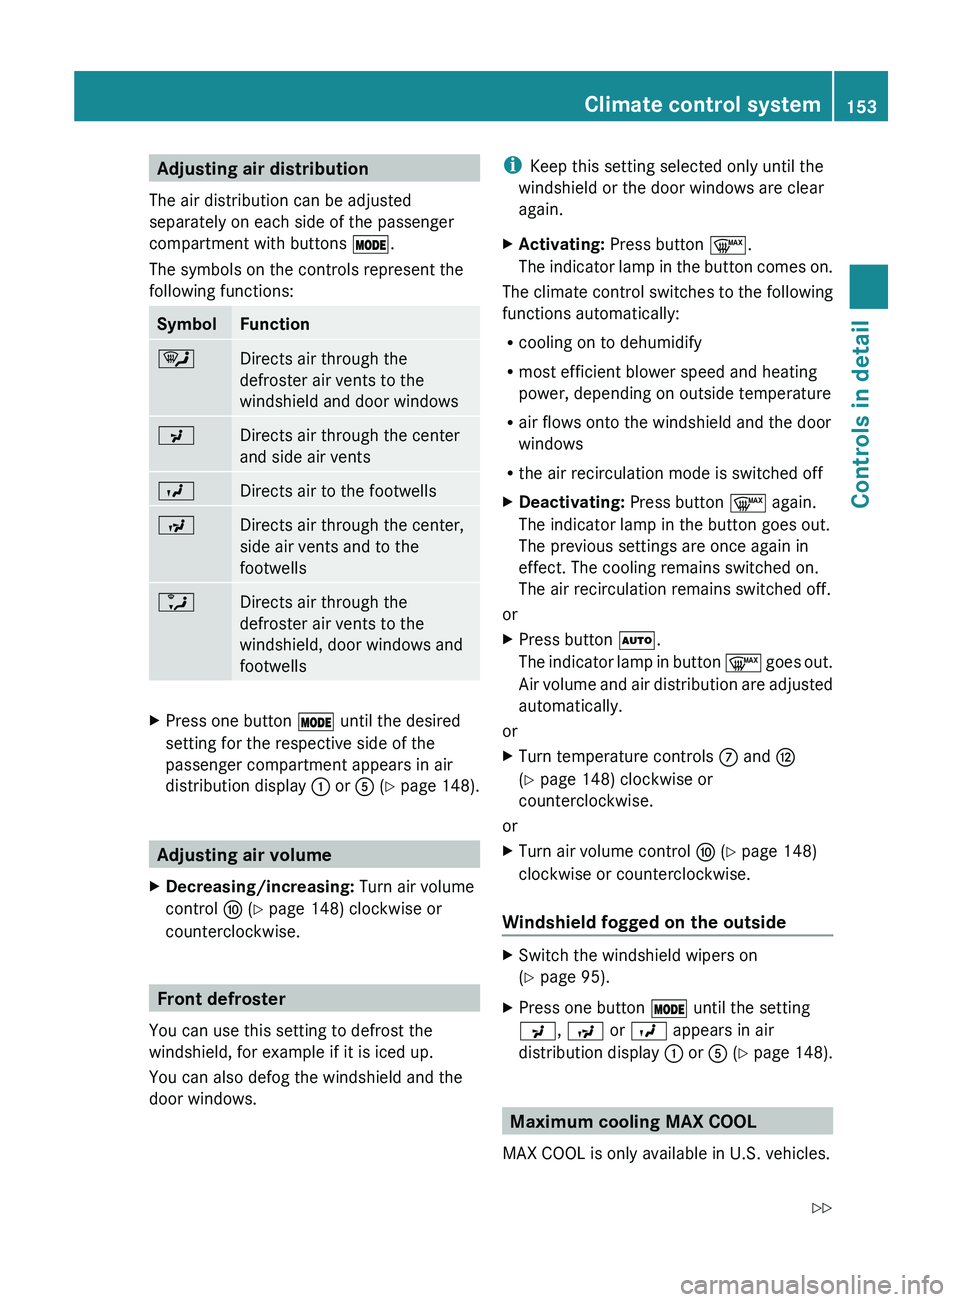
Adjusting air distribution
The air distribution can be adjusted
separately on each side of the passenger
compartment with buttons 0056.
The symbols on the controls represent the
following functions:SymbolFunction0063Directs air through the
defroster air vents to the
windshield and door windows009EDirects air through the center
and side air vents009DDirects air to the footwells009CDirects air through the center,
side air vents and to the
footwells0088Directs air through the
defroster air vents to the
windshield, door windows and
footwellsXPress one button 0056 until the desired
setting for the respective side of the
passenger compartment appears in air
distribution display 0046 or 0086 (Y page 148).
Adjusting air volume
XDecreasing/increasing: Turn air volume
control 0071 (Y page 148) clockwise or
counterclockwise.
Front defroster
You can use this setting to defrost the
windshield, for example if it is iced up.
You can also defog the windshield and the
door windows.
i Keep this setting selected only until the
windshield or the door windows are clear
again.XActivating: Press button 0066.
The indicator lamp in the button comes on.
The climate control switches to the following
functions automatically:
R cooling on to dehumidify
R most efficient blower speed and heating
power, depending on outside temperature
R air flows onto the windshield and the door
windows
R the air recirculation mode is switched off
XDeactivating: Press button 0066 again.
The indicator lamp in the button goes out.
The previous settings are once again in
effect. The cooling remains switched on.
The air recirculation remains switched off.
or
XPress button 005A.
The indicator lamp in button 0066 goes out.
Air volume and air distribution are adjusted
automatically.
or
XTurn temperature controls 006E and 0073
( Y page 148) clockwise or
counterclockwise.
or
XTurn air volume control 0071 (Y page 148)
clockwise or counterclockwise.
Windshield fogged on the outside
XSwitch the windshield wipers on
( Y page 95).XPress one button 0056 until the setting
009E , 009C or 009D appears in air
distribution display 0046 or 0086 (Y page 148).
Maximum cooling MAX COOL
MAX COOL is only available in U.S. vehicles.
Climate control system153Controls in detail230_AKB; 6; 22, en-USd2ureepe,Version: 2.11.8.12009-07-28T18:49:58+02:00 - Seite 153Z
Page 156 of 316
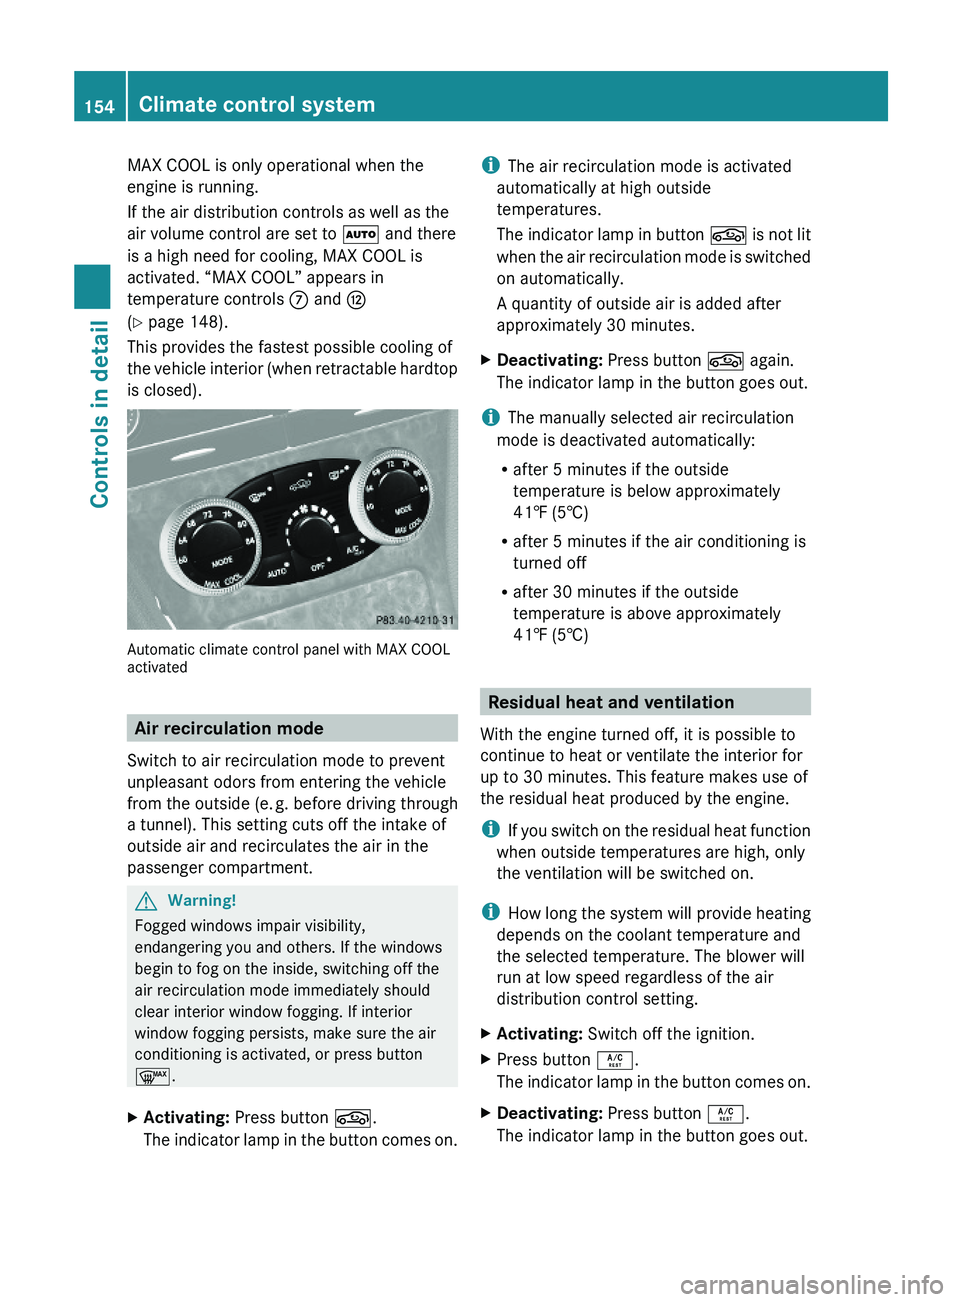
MAX COOL is only operational when the
engine is running.
If the air distribution controls as well as the
air volume control are set to \000Z and there
is a high need for cooling, MAX COOL is
activated. “MAX COOL” appears in
temperature controls \000n and \000s
(Y page 148).
This provides the fastest possible cooling of
the vehicle interior (when retractable hardtop
is closed).
Automatic climate control panel with MAX COOLactivated
Air recirculation mode
Switch to air recirculation mode to prevent
unpleasant odors from entering the vehicle
from the outside (e. g. before driving through
a tunnel). This setting cuts off the intake of
outside air and recirculates the air in the
passenger compartment.
GWarning!
Fogged windows impair visibility,
endangering you and others. If the windows
begin to fog on the inside, switching off the
air recirculation mode immediately should
clear interior window fogging. If interior
window fogging persists, make sure the air
conditioning is activated, or press button
\000f.
XActivating: Press button \000t.
The indicator lamp in the button comes on.
iThe air recirculation mode is activated
automatically at high outside
temperatures.
The indicator lamp in button \000t is not lit
when the air recirculation mode is switched
on automatically.
A quantity of outside air is added after
approximately 30 minutes.
XDeactivating: Press button \000t again.
The indicator lamp in the button goes out.
iThe manually selected air recirculation
mode is deactivated automatically:
Rafter 5 minutes if the outside
temperature is below approximately
41‡ (5†)
Rafter 5 minutes if the air conditioning is
turned off
Rafter 30 minutes if the outside
temperature is above approximately
41‡ (5†)
Residual heat and ventilation
With the engine turned off, it is possible to
continue to heat or ventilate the interior for
up to 30 minutes. This feature makes use of
the residual heat produced by the engine.
iIf you switch on the residual heat function
when outside temperatures are high, only
the ventilation will be switched on.
iHow long the system will provide heating
depends on the coolant temperature and
the selected temperature. The blower will
run at low speed regardless of the air
distribution control setting.
XActivating: Switch off the ignition.XPress button \000X.
The indicator lamp in the button comes on.
XDeactivating: Press button \000X.
The indicator lamp in the button goes out.
154Climate control systemControls in detail
230_AKB; 6; 22, en-USd2ureepe,Version: 2.11.8.12009-07-28T18:49:58+02:00 - Seite 154
Page 168 of 316
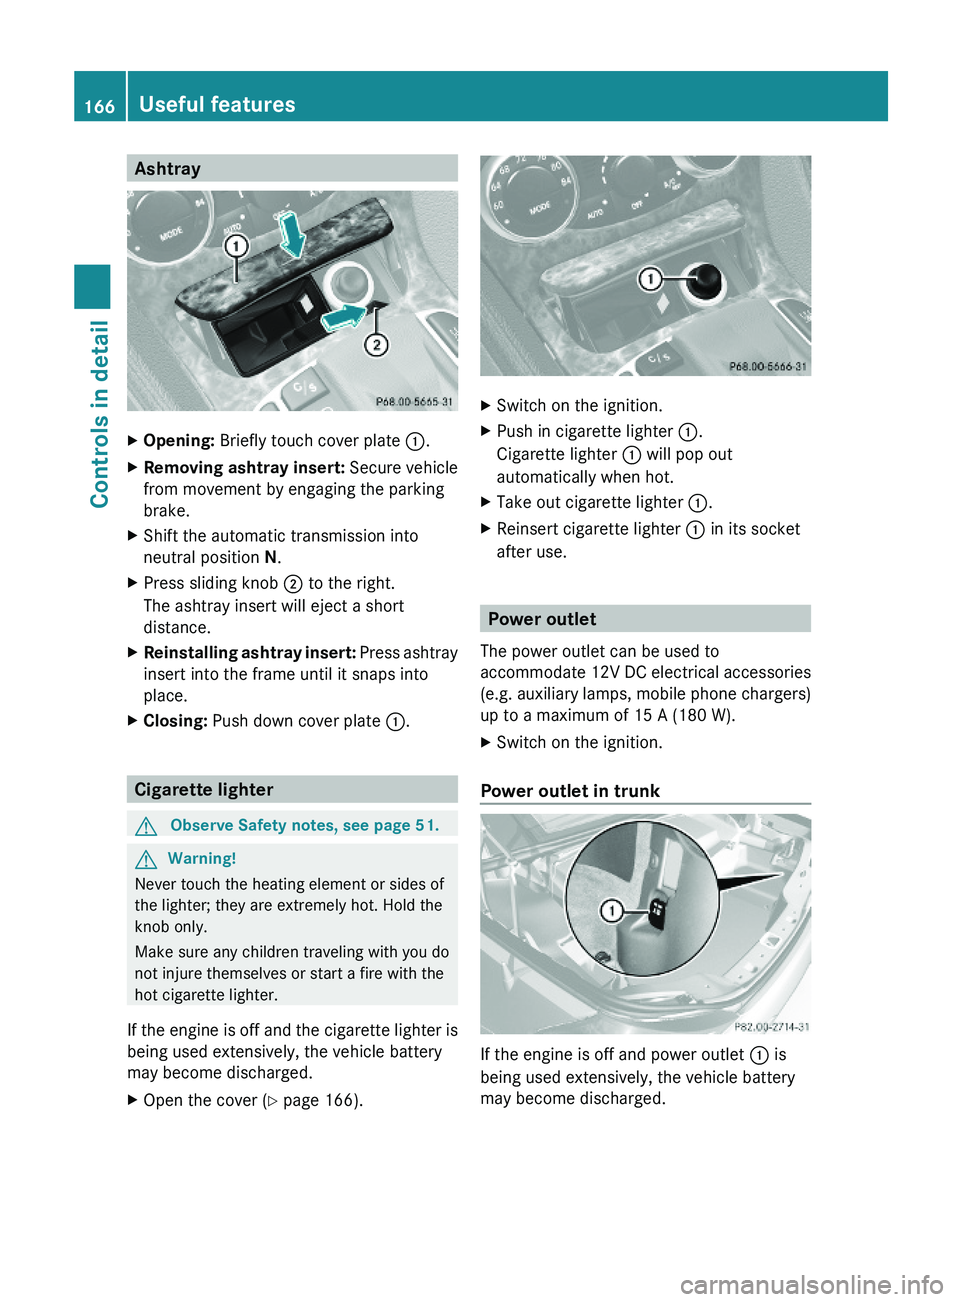
AshtrayXOpening: Briefly touch cover plate \000F.XRemoving ashtray insert: Secure vehicle
from movement by engaging the parking
brake.
XShift the automatic transmission into
neutral position N.
XPress sliding knob \000G to the right.
The ashtray insert will eject a short
distance.
XReinstalling ashtray insert: Press ashtray
insert into the frame until it snaps into
place.
XClosing: Push down cover plate \000F.
Cigarette lighter
GObserve Safety notes, see page 51.GWarning!
Never touch the heating element or sides of
the lighter; they are extremely hot. Hold the
knob only.
Make sure any children traveling with you do
not injure themselves or start a fire with the
hot cigarette lighter.
If the engine is off and the cigarette lighter is
being used extensively, the vehicle battery
may become discharged.
XOpen the cover (Y page 166).XSwitch on the ignition.XPush in cigarette lighter \000F.
Cigarette lighter \000F will pop out
automatically when hot.
XTake out cigarette lighter \000F.XReinsert cigarette lighter \000F in its socket
after use.
Power outlet
The power outlet can be used to
accommodate 12V DC electrical accessories
(e.g. auxiliary lamps, mobile phone chargers)
up to a maximum of 15 A (180 W).
XSwitch on the ignition.
Power outlet in trunk
If the engine is off and power outlet \000F is
being used extensively, the vehicle battery
may become discharged.
166Useful featuresControls in detail
230_AKB; 6; 22, en-USd2ureepe,Version: 2.11.8.12009-07-28T18:49:58+02:00 - Seite 166
Page 212 of 316
carpets in the footwell, make sure that the
pedals still have sufficient clearance.
During sudden driving or braking maneuvers,
the objects could get caught between the
pedals. You could then no longer brake or
accelerate. This could lead to accidents and
injury.
Power assistance
GWarning!
There is no power assistance for the steering
and the brake when the engine is not running.
Steering and braking requires significantly
more effort and you could lose control of the
vehicle and cause an accident as a result.
Do not turn off the engine while the vehicle is
in motion.
GWarning!
The brake system requires electrical energy
for operation.
A malfunction in the vehicle’s power supply or
electrical system may impair brake system
operation and switch it into its emergency
operation mode. In such a case, the red brake
warning lamp and warning messages in the
instrument cluster come on while driving. To
brake, the driver must then apply significantly
greater brake pedal pressure and depress the
pedal much further to obtain the expected
brake effect. If necessary, apply full pressure
to the brake pedal. Brakes are only applied to
the front wheels. Stopping distance is
increased! If there is a malfunction in the
electro-hydraulic brake system, we
recommend that the vehicle be transported
with all wheels off the ground using flatbed or
appropriate wheel lift/dolly equipment.
Brakes
Downhill grades
! When driving down long and steep
grades, relieve the load on the brakes by
shifting into a lower gear to use the
engine’s braking power. This helps prevent
overheating of the brakes and reduces
wear.
When using the engine’s braking power, a
drive wheel may not spin for an extended
period of time, e.g. on slippery road
surfaces. This may cause serious damage
to the drivetrain which is not covered by the
Mercedes-Benz Limited Warranty.
Continuous or hard braking
GWarning!
Resting your foot on the brake pedal will
cause excessive and premature wear of the
brake pads.
It can also result in the brakes overheating,
thereby significantly reducing their
effectiveness. It may not be possible to stop
the vehicle in sufficient time to avoid an
accident.
After hard braking, it is advisable to drive on
for some time, rather than immediately park,
so that the air stream will cool down the
brakes faster.
Wet roads
GWarning!
After driving in heavy rain for some time
without applying the brakes or through water
deep enough to wet brake components, the
first braking action may be somewhat
reduced and increased pedal pressure may be
necessary to obtain expected brake effect.
Maintain a safe distance from vehicles in
front.
To help prevent brake disk corrosion after
driving on wet or salt-covered roads, it is
advisable to brake the vehicle with
210Driving instructionsOperation
230_AKB; 6; 22, en-USd2ureepe,Version: 2.11.8.12009-07-28T18:49:58+02:00 - Seite 210
Page 265 of 316
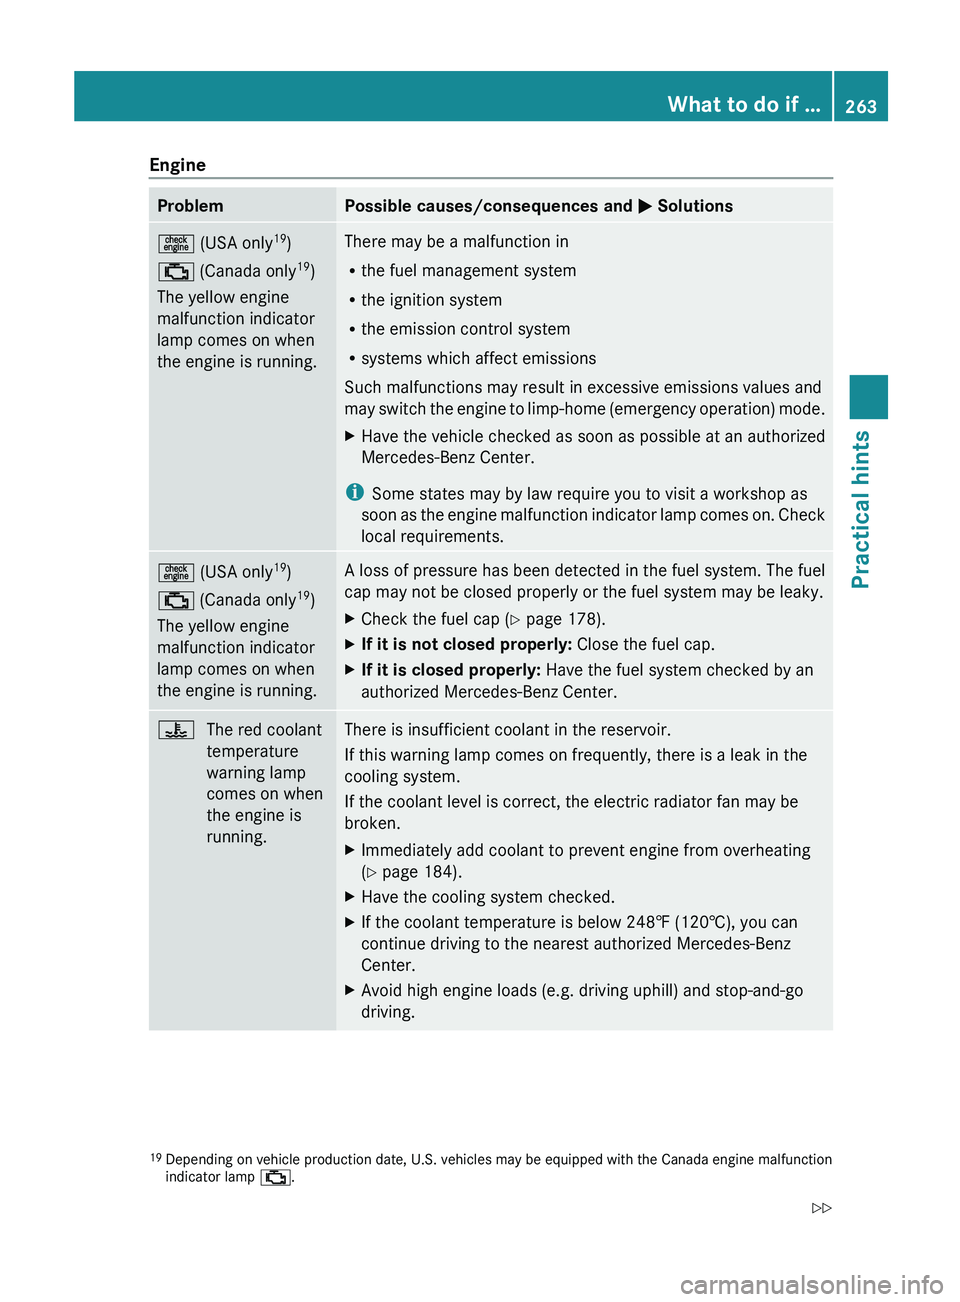
EngineProblemPossible causes/consequences and 0050 Solutions00AF (USA only 19
)
00BB (Canada only 19
)
The yellow engine
malfunction indicator
lamp comes on when
the engine is running.There may be a malfunction in
R the fuel management system
R the ignition system
R the emission control system
R systems which affect emissions
Such malfunctions may result in excessive emissions values and
may switch the engine to limp-home (emergency operation) mode.XHave the vehicle checked as soon as possible at an authorized
Mercedes-Benz Center.
i Some states may by law require you to visit a workshop as
soon as the engine malfunction indicator lamp comes on. Check
local requirements.
00AF (USA only 19
)
00BB (Canada only 19
)
The yellow engine
malfunction indicator
lamp comes on when
the engine is running.A loss of pressure has been detected in the fuel system. The fuel
cap may not be closed properly or the fuel system may be leaky.XCheck the fuel cap ( Y page 178).XIf it is not closed properly: Close the fuel cap.XIf it is closed properly: Have the fuel system checked by an
authorized Mercedes-Benz Center.00AEThe red coolant
temperature
warning lamp
comes on when
the engine is
running.There is insufficient coolant in the reservoir.
If this warning lamp comes on frequently, there is a leak in the
cooling system.
If the coolant level is correct, the electric radiator fan may be
broken.XImmediately add coolant to prevent engine from overheating
( Y page 184).XHave the cooling system checked.XIf the coolant temperature is below 248‡ (120†), you can
continue driving to the nearest authorized Mercedes-Benz
Center.XAvoid high engine loads (e.g. driving uphill) and stop-and-go
driving.19 Depending on vehicle production date, U.S. vehicles may be equipped with the Canada engine malfunction
indicator lamp 00BB.What to do if …263Practical hints230_AKB; 6; 22, en-USd2ureepe,Version: 2.11.8.12009-07-28T18:49:58+02:00 - Seite 263Z