key MERCEDES-BENZ SL-Class 2014 R131 Owners Manual
[x] Cancel search | Manufacturer: MERCEDES-BENZ, Model Year: 2014, Model line: SL-Class, Model: MERCEDES-BENZ SL-Class 2014 R131Pages: 618, PDF Size: 7.88 MB
Page 251 of 618
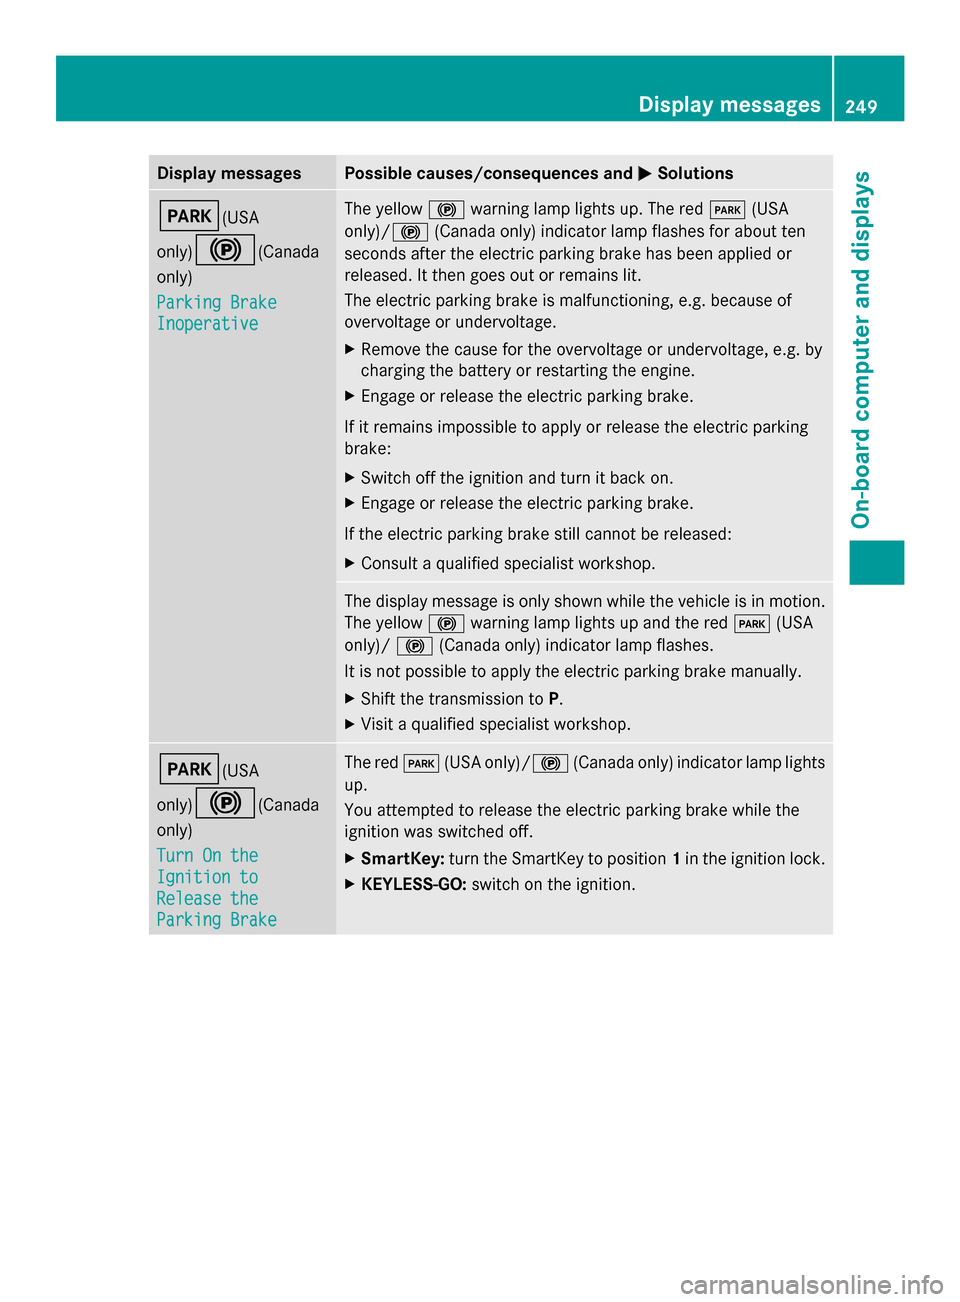
Display messages Possible causes/consequences and
0050
0050Solutions 0049(USA
only)
0024(Canada
only)
Parking Brake Parking Brake
Inoperative Inoperative The yellow
0024warning lamp lights up. The red 0049(USA
only)/ 0024(Canada only) indicator lamp flashes for about ten
seconds after the electric parking brake has been applied or
released. It then goes out or remains lit.
The electric parking brake is malfunctioning, e.g. because of
overvoltage or undervoltage.
X Remove the cause for the overvoltage or undervoltage, e.g. by
charging the battery or restarting the engine.
X Engage or release the electric parking brake.
If it remains impossible to apply or release the electric parking
brake:
X Switch off the ignition and turn it back on.
X Engage or release the electric parking brake.
If the electric parking brake still cannot be released:
X Consult a qualified specialist workshop. The display message is only shown while the vehicle is in motion.
The yellow
0024warning lamp lights up and the red 0049(USA
only)/ 0024(Canada only) indicator lamp flashes.
It is not possible to apply the electric parking brake manually.
X Shift the transmission to P.
X Visit a qualified specialist workshop. 0049(USA
only)
0024(Canada
only)
Turn On the Turn On the
Ignition to Ignition to
Release the Release the
Parking Brake Parking Brake The red
0049(USA only)/ 0024(Canada only) indicator lamp lights
up.
You attempted to release the electric parking brake while the
ignition was switched off.
X SmartKey: turn the SmartKey to position 1in the ignition lock.
X KEYLESS-GO: switch on the ignition. Display
messages
249On-board computer and displays Z
Page 274 of 618
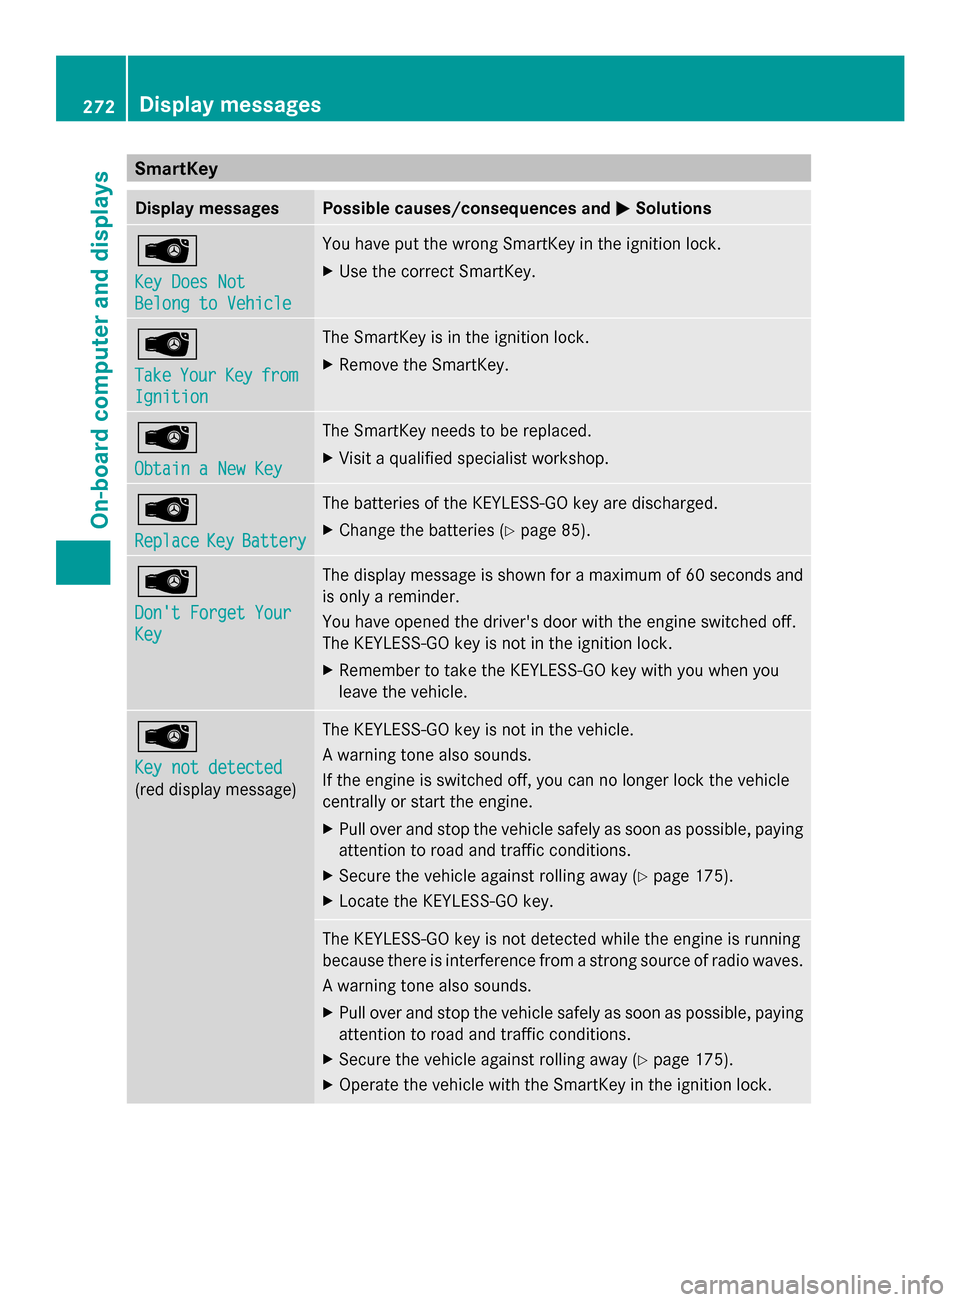
SmartKey
Display messages Possible causes/consequences and
0050
0050Solutions 00AF
Key Does Not Key Does Not
Belong to Vehicle Belong to Vehicle You have put the wrong SmartKey in the ignition lock.
X
Use the correct SmartKey. 00AF
Take Take
Your
YourKey
Keyfrom
from
Ignition
Ignition The SmartKey is in the ignition lock.
X
Remove the SmartKey. 00AF
Obtain a New Key Obtain a New Key The SmartKey needs to be replaced.
X
Visit a qualified specialist workshop. 00AF
Replace Replace
Key
KeyBattery
Battery The batteries of the KEYLESS-GO key are discharged.
X
Change the batteries (Y page 85).00AF
Don't Forget Your Don't Forget Your
Key Key The display message is shown for a maximum of 60 seconds and
is only a reminder.
You have opened the driver's door with the engine switched off.
The KEYLESS-GO key is not in the ignition lock.
X
Remember to take the KEYLESS-GO key with you when you
leave the vehicle. 00AF
Key not detected Key not detected
(red display message) The KEYLESS-GO key is not in the vehicle.
A warning tone also sounds.
If the engine is switched off, you can no longer lock the vehicle
centrally or start the engine.
X
Pull over and stop the vehicle safely as soon as possible, paying
attention to road and traffic conditions.
X Secure the vehicle against rolling away (Y page 175).
X Locate the KEYLESS-GO key. The KEYLESS-GO key is not detected while the engine is running
because there is interference from a strong source of radio waves.
A warning tone also sounds.
X
Pull over and stop the vehicle safely as soon as possible, paying
attention to road and traffic conditions.
X Secure the vehicle against rolling away (Y page 175).
X Operate the vehicle with the SmartKey in the ignition lock. 272
Display messagesOn-board computer and displays
Page 275 of 618
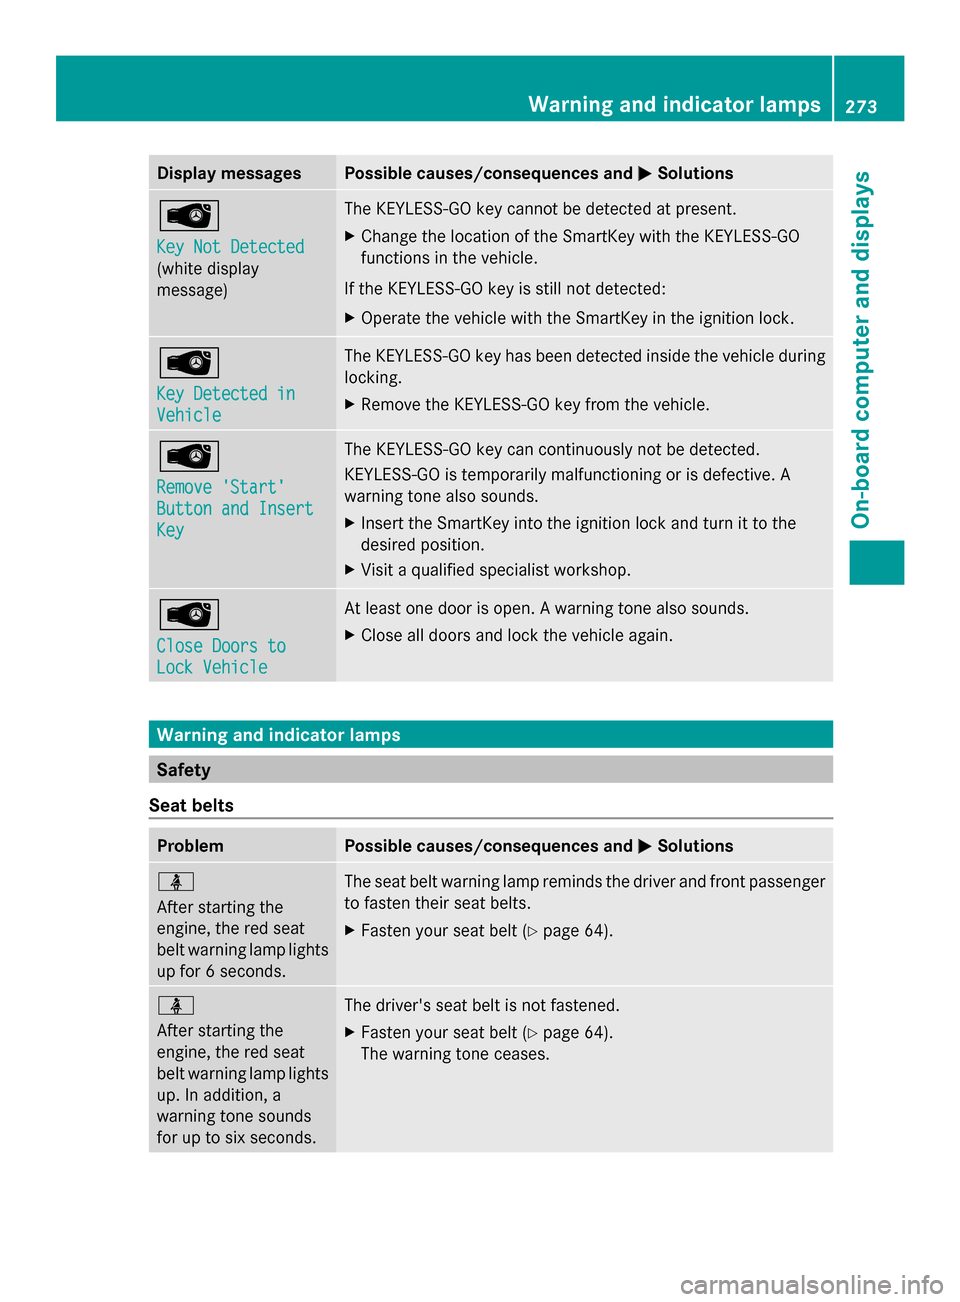
Display messages Possible causes/consequences and
0050
0050Solutions 00AF
Key Not Detected Key Not Detected
(white display
message) The KEYLESS-GO key cannot be detected at present.
X
Change the location of the SmartKey with the KEYLESS-GO
functions in the vehicle.
If the KEYLESS-GO key is still not detected:
X Operate the vehicle with the SmartKey in the ignition lock. 00AF
Key Detected in Key Detected in
Vehicle Vehicle The KEYLESS-GO key has been detected inside the vehicle during
locking.
X
Remove the KEYLESS-GO key from the vehicle. 00AF
Remove 'Start' Remove 'Start'
Button and Insert Button and Insert
Key Key The KEYLESS-GO key can continuously not be detected.
KEYLESS-GO is temporarily malfunctioning or is defective. A
warning tone also sounds.
X
Insert the SmartKey into the ignition lock and turn it to the
desired position.
X Visit a qualified specialist workshop. 00AF
Close Doors to Close Doors to
Lock Vehicle Lock Vehicle At least one door is open. A warning tone also sounds.
X
Close all doors and lock the vehicle again. Warning and indicator lamps
Safety
Seat belts Problem Possible causes/consequences and
0050 0050Solutions 00E9
After starting the
engine, the red seat
belt warning lamp lights
up for 6 seconds.
The seat belt warning lamp reminds the driver and front passenger
to fasten their seat belts.
X
Fasten your seat belt (Y page 64).00E9
After starting the
engine, the red seat
belt warning lamp lights
up. In addition, a
warning tone sounds
for up to six seconds.
The driver's seat belt is not fastened.
X
Fasten your seat belt (Y page 64).
The warning tone ceases. Wa
rning and indi cator lamps
273On-boardcompu ter and displays Z
Page 308 of 618

X
Select the 0084symbol and press and hold
0098 the COMAND controller until the entire
entry has been deleted.
or
X Press and hold the 0084button next to the
COMAND controller until the entire entry
has been deleted. Character entry (navigation)
General information The following paragraphs describe how to
enter characters using city input for NEW
NEW
YORK YORK as an example.
If you want to use the address entry menu to
enter a city, a street or a house number, for
example, COMAND offers you:
R a list with a character bar (option 1)
R a selection list (option 2)
You can enter the characters using either the
character bar or the number keypad. In the
selection list, you select an entry to copy it to
the address entry menu.
Option 1: city list/street list with
character bar X
Call up the city list with character bar
(Y page 327).
The alphabetically sorted city list shows the
first available entries. 0043
Character N Nentered by the user
0044 Characters automatically added by
COMAND ANTICOKE ANTICOKE 0087
List entry that most closely resembles the
current entry by the user
0085 To switch to the selection list
0083 To delete an entry
0084 Characters not currently available
006B Characters currently available
006C Currently selected character
006D Character bar
006E To cancel an entry
006F List
Entering characters using the character
bar
X Select N Nby turning 00790052007Athe COMAND
controller and press 0098to confirm.
List 006Fshows all available city names
beginning with N
N. The list entry most closely
resembling user's current entry 0087is
always highlighted at the top of the list
(NANTICOKE NANTICOKE in the example).
All characters currently entered by the user
are shown in black (letter N N0043in the
example). Letters added by COMAND are
shown in gray 0044(ANTICOKEANTICOKE in the
example).
Character bar 006Dshows the letters still
available for selection in black 006B. These
can be selected. In the example, the letter
O O is highlighted 006C. The characters
available depend on the entry made by the
user so far and the data contained in the
digital map. Characters that are no longer
available 0084are shown in gray. 306
At a glanceCOMAND
Page 309 of 618
X
Select E
E, W
W, space, Y
Yin order and confirm
each with 0098.
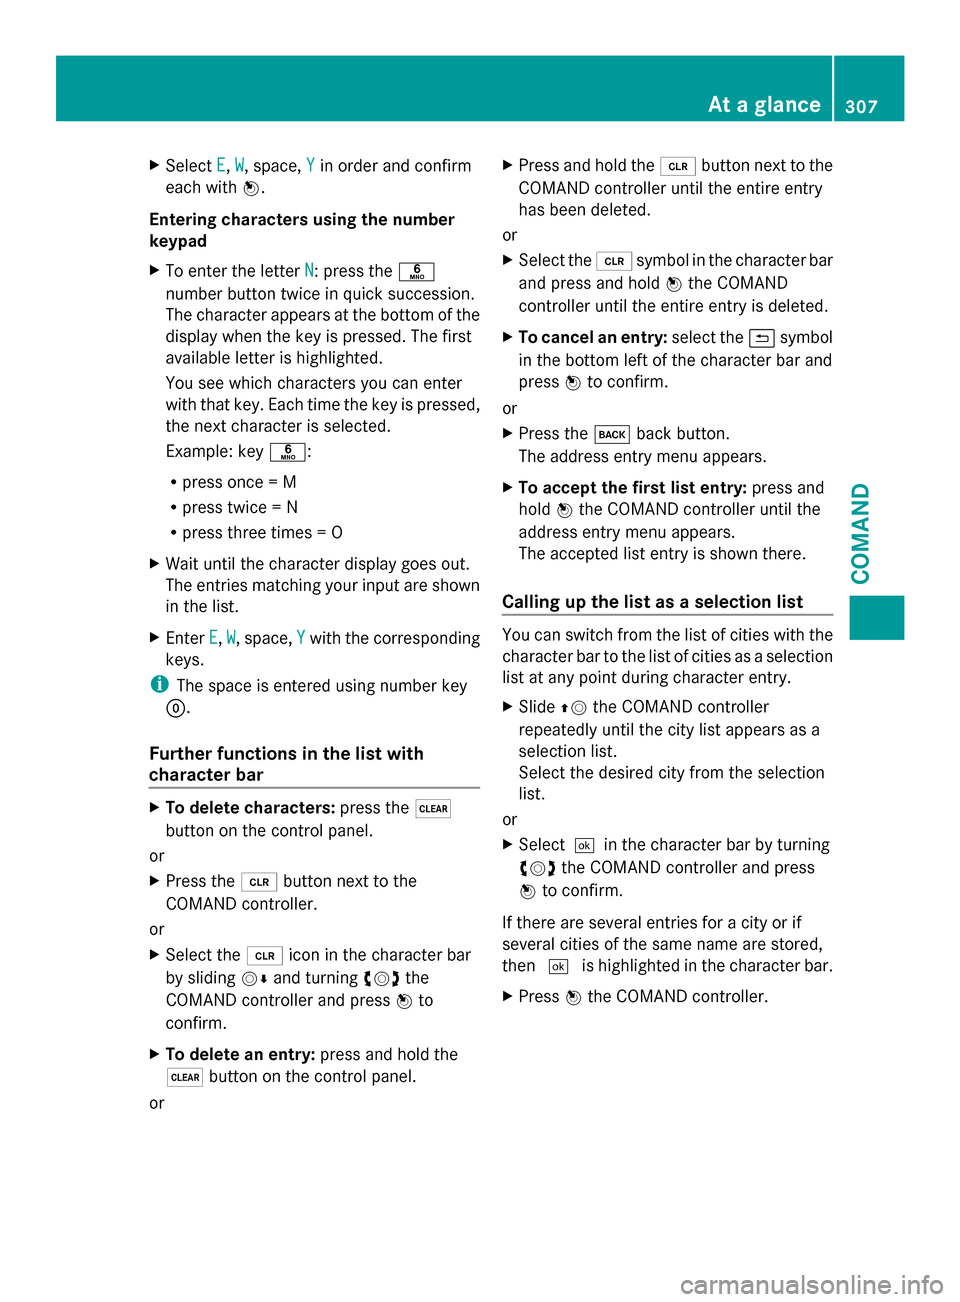
Entering characters using the number
keypad
X To enter the letter N
N: press the 0086
number button twice in quick succession.
The character appears at the bottom of the
display when the key is pressed. The first
available letter is highlighted.
You see which characters you can enter
with that key. Each time the key is pressed,
the next character is selected.
Example: key 0086:
R press once = M
R press twice = N
R press three times = O
X Wait until the character display goes out.
The entries matching your input are shown
in the list.
X Enter E E,W
W, space, Y
Ywith the corresponding
keys.
i The space is entered using number key
0045.
Further functions in the list with
character bar X
To delete characters: press the0037
button on the control panel.
or
X Press the 0084button next to the
COMAND controller.
or
X Select the 0084icon in the character bar
by sliding 00520064and turning 00790052007Athe
COMAND controller and press 0098to
confirm.
X To delete an entry: press and hold the
0037 button on the control panel.
or X
Press and hold the 0084button next to the
COMAND controller until the entire entry
has been deleted.
or
X Select the 0084symbol in the character bar
and press and hold 0098the COMAND
controller until the entire entry is deleted.
X To cancel an entry: select the0039symbol
in the bottom left of the character bar and
press 0098to confirm.
or
X Press the 003Dback button.
The address entry menu appears.
X To accept the first list entry: press and
hold 0098the COMAND controller until the
address entry menu appears.
The accepted list entry is shown there.
Calling up the list as a selection list You can switch from the list of cities with the
character bar to the list of cities as a selection
list at any point during character entry.
X
Slide 00970052the COMAND controller
repeatedly until the city list appears as a
selection list.
Select the desired city from the selection
list.
or
X Select0054 in the character bar by turning
00790052007A the COMAND controller and press
0098 to confirm.
If there are several entries for a city or if
several cities of the same name are stored,
then 0054 is highlighted in the character bar.
X Press 0098the COMAND controller. At a glance
307COMAND Z
Page 311 of 618

Switching on SPLITVIEW
X
Select System
System in the main function bar by
turning 00790052007Athe COMAND controller and
press 0098to confirm.
X Select 0044in the menu bar and confirm.
SPLITVIEW symbol 0043appears in the
display, and display 0044switches to Off
Off.
The front passenger sees the display of the
function last activated. If the switch-on
time was longer than 30 minutes
previously, the display from the driver's
side is shown.
Switching off SPLITVIEW
X Select 0044in the menu bar by turning
00790052007A the COMAND controller and press
0098 to confirm.
SPLITVIEW symbol 0043disappears from the
display. Display 0044switches to On On.
i If COMAND has already been switched
on, you can also use the remote control to
switch SPLITVIEW on and off. Make sure
that the SPLITVIEW symbol is set on the
remote control thumbwheel (Y page 487).
The SPLITVIEW display remains on for
approximately 30 minutes after the SmartKey
has been turned to position 0in the ignition
lock. After this time or after the SmartKey has
been removed, the settings on the front-
passenger side are saved for approximately
30 minutes longer. After this period,
reactivation on the front-passenger side
means that the settings from the driver's side
will be used. Transferring the driver's website X
To switch on SPLITVIEW: select System
System
from the main function bar by turning
00790052007A the COMAND controller and press
0098 to confirm.
X Select 0044in the menu bar and confirm.
SPLITVIEW symbol 0043appears in the
display, and display 0044switches to Off Off.
X Select 00A7in the main function bar with the
remote control.
A carousel view appears with the following
options:
R Operator's Manual Operator's Manual
R Enter URL
Enter URL
R Internet Favorites
Internet Favorites
R Mercedes-Benz Apps
Mercedes-Benz Apps
R Internet Radio
Internet Radio
R Mercedes Mobile Website
Mercedes Mobile Website
R Transfer Driver's Website
Transfer Driver's Website
X Select Transfer
Transfer Driver's
Driver'sWebsite
Websitewith
the remote control.
You see the last website called up by the
driver.
Transferring a destination to the driver Using SPLITVIEW you can select a destination
from the front-passenger side and transfer
this to the driver's side.
X
To switch on SPLITVIEW: select System System
from the main function bar by turning At a glance
309COMAND Z
Page 326 of 618

Entry restriction
On vehicles for certain countries, there is a
restriction on entering data.
The restriction is active from a vehicle speed
of above approximately 3 mph (5 km/h). As
soon as the speed falls below approximately
2 mph (3 km/h), the restriction becomes
inactive.
When the restriction is active, certain entries
cannot be made. This will be indicated by the
fact that certain menu items are grayed out
and cannot be selected.
The following entries are not possible, for
example:
R entering the destination city and street
R entering a destination via the map
R entering POIs in the vicinity of a city or via
a name search
R editing entries
R using the number keypad for direct entry
Other entries are possible, such as entering
points of interest in the vicinity of the
destination or current position.
Switching to navigation mode Map showing the menu; route guidance inactive
0043 Status bar
0044 Main function bar
0087 Current vehicle position
0085 Navigation menu bar
X Press the 00BEfunction button.
The map is displayed with the menu either
shown or hidden. or
X Select Navi Naviin the main function bar by
sliding 00970052and turning 00790052007Athe COMAND
controller and press 0098to confirm.
The map is displayed with the menu shown. Map without the menu (route guidance inactive)
0043
Current vehicle position
0044 Map orientation selected
0087 Map scale selected
i Route guidance active means that you
have entered a destination and that
COMAND has calculated the route. The
display shows the route, changes of
direction and lane recommendations.
Navigation announcements guide you to
your destination.
Route guidance inactive means that no
destination has been entered yet and no
route has been calculated yet.
Showing/hiding the menu You can show or hide the menu on the map.
X
To hide the menu: slide00970052the COMAND
controller and, when the Full Screen Full Screen
menu item is shown, press 0098to confirm.
or
X Press the 003Dback button.
The map can be seen in the full-screen
display.
X To show the menu: press0098the COMAND
controller when the map is shown in full-
screen display. 324
NavigationCOMAND
Page 337 of 618

COMAND controller and pressing
0098to
confirm. X
Select Using Geo-Coordinates
Using Geo-Coordinates and
press 0098to confirm.
An entry menu appears.
You can now enter the latitude and longitude
coordinates with the COMAND controller or
the number keypad ( Ypage 306).
X To change a value: turn00790052007A the
COMAND controller.
X To move the mark within the line: slide
009500520096 the COMAND controller.
X To move the mark between the lines:
slide 009700520064 the COMAND controller.
X To confirm the value: press0098the
COMAND controller.
i If the selected position is outside the
digital map, COMAND uses the nearest
digitized road for route calculation. You will
see the The
The coordinates coordinates are
areoutside
outside
the map area
the map area message. If the selected
position is located over a body of water, you
will see the message: The destination
The destination
is in a body of water. Please is in a body of water. Please
select another destination. select another destination.
Entering a destination using Mercedes-
Benz Apps X
To switch to navigation mode: press the
00BE button.
X To show the menu: press0098the COMAND
controller. X
Select Destination Destination in the navigation
system menu bar by turning 00790052007Athe
COMAND controller and pressing 0098to
confirm.
X Select Mercedes-Benz Apps
Mercedes-Benz Apps and press
0098 to confirm.
If an Internet connection is established, you
will see the message Do you want to Do you want to
accept the navigation data sent
accept the navigation data sent
via Mercedes-Benz Apps? via Mercedes-Benz Apps?
Street View X
To switch to navigation mode: press the
00BE button.
X To show the menu: press0098the COMAND
controller.
X Select Destination
Destination in the lower menu bar
by turning 00790052007Athe COMAND controller
and press 0098to confirm.
X Select Address Entry
Address Entry and press0098to
confirm.
X Select icon 0043in the address entry menu
and press 0098to confirm.
If an Internet connection is established, you
will see the Street View basic display.
X To explore the view of the street: turn
00790052007A or slide 009500520096,
009700520064 the COMAND controller.
X To return to navigation: press the003D
button. Navigation
335COMAND Z
Page 376 of 618

X
Select Navi
Naviin the main function bar by
sliding 00970052and turning 00790052007Athe COMAND
controller and press 0098to confirm.
X Select Map Settings
Map Settings and press0098to
confirm.
The map settings menu appears.
X Select Compass On Map
Compass On Map and press0098to
confirm.
A menu appears.
X Select Never
Never ,When Off-Road When Off-Road orWhen
When
Route Guidance Inactive
Route Guidance Inactive and press0098
to confirm.
The selected setting is accepted.
Switching additional information on/off
Switching the topographic map on/off
X To show the menu: press0098the COMAND
controller.
X Select Navi
Navi in the main function bar by
sliding 00970052and turning 00790052007Athe COMAND
controller and press 0098to confirm.
X Select Map Settings Map Settings and press0098to
confirm.
The map settings menu appears.
X Select Topographic Map
Topographic Map and press0098to
confirm.
Depending on the previous status, switch
the option on 0073or off 0053.
The topographical map uses different colors
to depict elevation. The color key generally
reflects the topography's dominant
vegetation or the ground's perceived color
when seen from the air, for example:
R green (grass) for lowland
R yellow, brown (woodland) for hills
R gray (stone) and white (snow) for
mountains Example: highway information
Switching highway information on/off
When driving on the highway, you can see the
following information on the right of the
display:
R
the nearest gas stations
R the nearest rest areas, etc.
R and their distance from the current vehicle
position
The entries show the number of the
highway and the highway exits as well as
their distance from the current vehicle
position. The name of the highway exit
continues to be displayed.
X To switch to navigation mode: press the
00BE button.
X To show the menu: press0098the COMAND
controller.
X Select Navi
Navi in the main function bar by
sliding 00970052and turning 00790052007Athe COMAND
controller and press 0098to confirm.
X Select Map Settings Map Settings and press0098to
confirm.
The map settings menu appears.
X Select Highway Information Highway Information and press
0098 to confirm.
Depending on the previous status, switch
the option on 0073or off 0053. 374
NavigationCOMAND
Page 387 of 618
Call disconnection while the vehicle is
in motion A call may be disconnected if:
R
there is insufficient network coverage in
certain areas.
R you move from one transmitter/receiver
area (cell) into another and no channels are
free.
R you use a SIM card which is not compatible
with the network available.
Operating options You can operate the telephone by:
R
using the COMAND controller:
turn 00790052007A
slide 009500520096 or009700520064
press 0098
R using the 0061or0076 button and using
the telephone keypad on COMAND
R using the 0061or0076 button on the
multifunction steering wheel
R using the Voice Control System (see the
separate Voice Control System operating
instructions)
Unless stated otherwise, the descriptions and
illustrations in this section refer to COMAND.
Function restrictions The telephone is not ready for use in the
following situations:
R The telephone automatically tries to log on
to a network. If no network is available, you
may not be able to make a " 911"
emergency call. If you attempt to make an
outgoing call, the No
No Service Service message will
appear for a short while.
"911" emergency call The 911 emergency call is a public service.
Using it without due cause is a criminal
offense. The following requirements must be fulfilled
for a
911emergency call:
R the mobile phone must be switched on.
R a network must be available.
R a valid and operational SIM card must be
inserted in the mobile phone.
R the mobile phone is connected to COMAND
via Bluetooth ®
.
If you cannot make an emergency call, you
must arrange rescue measures yourself.
X Enter the number on COMAND
(Y page 392).
X Press 0061.
The telephone makes the connection.
X Wait until the emergency call center
answers and describe the emergency
situation. Telephony via the Bluetooth
®
interface
Prerequisites For telephony via COMAND's Bluetooth
®
interface, a Bluetooth ®
-capable mobile
phone is required.
On COMAND
X Activate the Bluetooth ®
function in
COMAND (Y page 313).
On the mobile phone
X Switch on the mobile phone and enter the
PIN when prompted to do so (see the
mobile phone operating instructions).
X Activate Bluetooth ®
functions and, where
necessary, Bluetooth ®
visibility on the
mobile phone (see the mobile phone
operating instructions).
The battery of the mobile phone should
always be kept sufficiently charged in order
to prevent malfunctions. Telephone
385COMAND Z