change wheel MERCEDES-BENZ SL-CLASS ROADSTER 2013 Owners Manual
[x] Cancel search | Manufacturer: MERCEDES-BENZ, Model Year: 2013, Model line: SL-CLASS ROADSTER, Model: MERCEDES-BENZ SL-CLASS ROADSTER 2013Pages: 572, PDF Size: 9.23 MB
Page 9 of 572
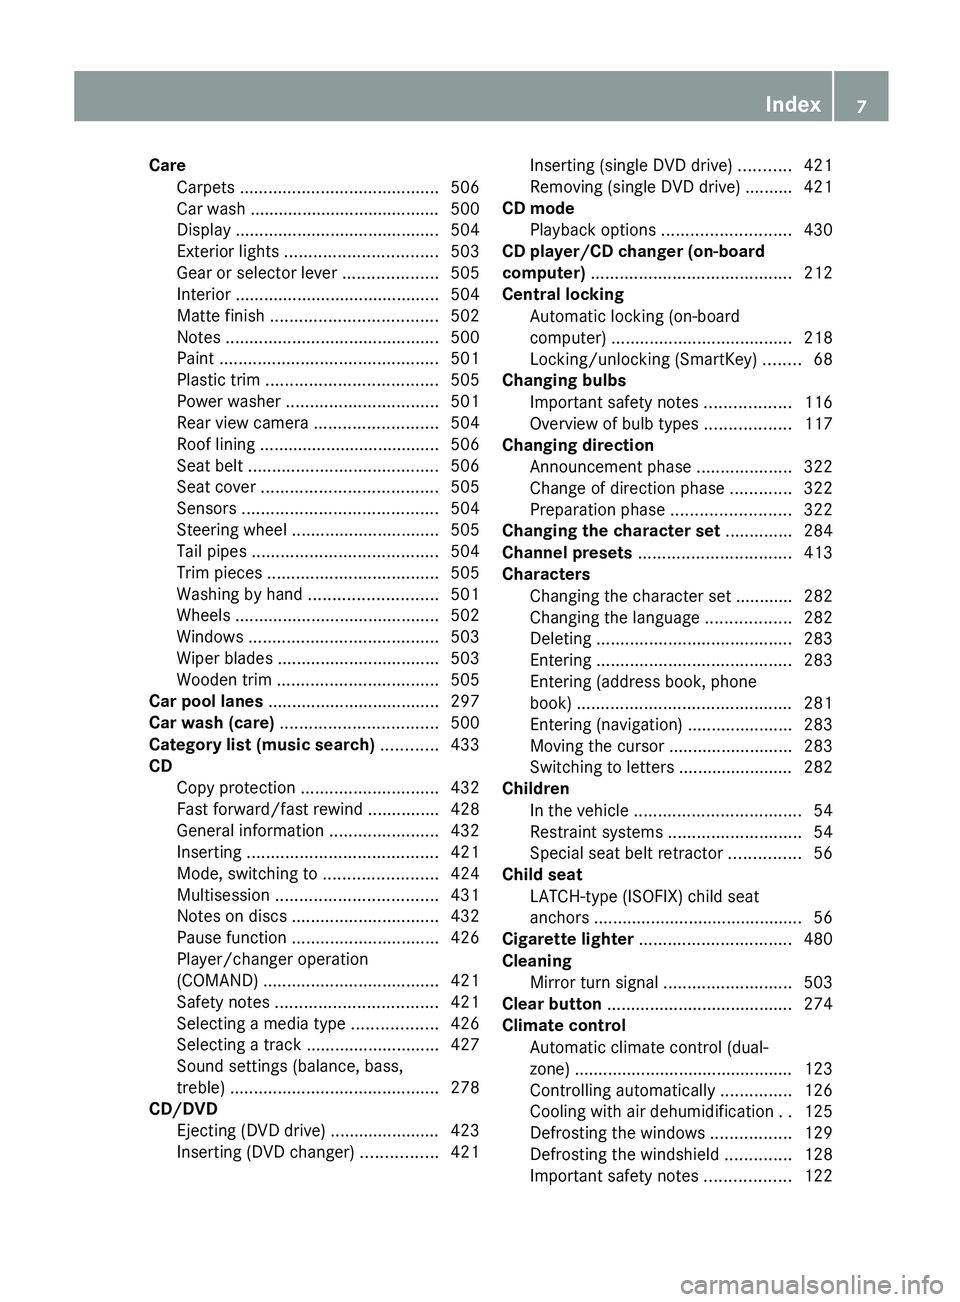
Care
Carpets .......................................... 506
Car wash ........................................
500
Display ........................................... 504
Exterior lights ................................ 503
Gear or selector lever ....................505
Interior ........................................... 504
Matte finish ................................... 502
Notes ............................................. 500
Paint .............................................. 501
Plastic trim .................................... 505
Power washer ................................ 501
Rear view camera .......................... 504
Roof lining ...................................... 506
Seat belt ........................................ 506
Seat cover ..................................... 505
Sensors ......................................... 504
Steering wheel ............................... 505
Tail pipes ....................................... 504
Trim pieces .................................... 505
Washing by hand ........................... 501
Wheels ........................................... 502
Windows ........................................ 503
Wiper blades .................................. 503
Wooden trim .................................. 505
Car pool lanes .................................... 297
Car wash (care) ................................. 500
Category list (music search) ............433
CD Copy protection ............................. 432
Fast forward/fast rewind ............... 428
General information ....................... 432
Inserting ........................................ 421
Mode, switching to ........................ 424
Multisession .................................. 431
Notes on discs ............................... 432
Pause function ............................... 426
Player/changer operation
(COMAND) ..................................... 421
Safety notes .................................. 421
Selecting a media type .................. 426
Selecting a track ............................ 427
Sound settings (balance, bass,
treble) ............................................ 278
CD/DVD
Ejecting (DVD drive) ....................... 423
Inserting (DVD changer) ................421Inserting (single DVD drive)
...........421
Removing (single DVD drive) .......... 421
CD mode
Playback options ........................... 430
CD player/CD changer (on-board
computer)
.......................................... 212
Central locking Automatic locking (on-board
computer) ...................................... 218
Locking/unlocking (SmartKey) ........ 68
Changing bulbs
Important safety notes .................. 116
Overview of bulb types ..................117
Changing direction
Announcement phase .................... 322
Change of direction phase ............. 322
Preparation phase ......................... 322
Changing the character set .............. 284
Channel presets ................................ 413
Characters Changing the character set ............ 282
Changing the language ..................282
Deleting ......................................... 283
Entering ......................................... 283
Entering (address book, phone
book) ............................................. 281
Entering (navigation) ......................283
Moving the cursor .......................... 283
Switching to letters ........................ 282
Children
In the vehicle ................................... 54
Restraint systems ............................ 54
Special seat belt retractor ............... 56
Child seat
LATCH-type (ISOFIX) child seat
anchors ............................................ 56
Cigarette lighter ................................ 480
Cleaning Mirror turn signal ........................... 503
Clear button ....................................... 274
Climate control Automatic climate control (dual-
zone) .............................................. 123
Controlling automatically ...............126
Cooling with air dehumidification ..125
Defrosting the windows ................. 129
Defrosting the windshield .............. 128
Important safety notes .................. 122 Index
7
Page 40 of 572
Safety guidelines for seat belts,
Emergency Tensioning Devices (ETDs)
and air bags
G
WARNING
R Damaged seat
belts or seat belts that have
been subjected to stress in an accident
must be replaced. Their anchoring points
must also be checked. Only use seat belts
installed or supplied by an authorized
Mercedes-Benz Center.
R Air bags and pyrotechnic Emergency
Tensioning Devices (ETDs) contain
perchlorate material, which may require
special handling and regard for the
environment. Check your national disposal
guidelines. California residents, see
www.dtsc.ca.gov/HazardousWaste/
Perchlorate/index.cfm.
R Air bags and ETDs are designed to function
on a one-time-only basis. An air bag or ETD
that has deployed must be replaced.
R Do not pass seat belts over sharp edges.
They could tear.
R Do not make any modification that could
change the effectiveness of the seat belts.
R Do not bleach or dye seat belts as this may
severely weaken them. In a crash they may
not be able to provide adequate protection.
R No modifications of any kind may be made
to any components or wiring of the SRS.
R Do not change or remove any component
or part of the SRS.
R Do not install additional trim material, seat
covers, badges, etc. over the steering
wheel hub, front-passenger front air bag
cover, outer sides of the seat backrests,
door trim panels, or door frame trims.
R Do not install additional electrical/
electronic equipment on or near SRS
components and wiring.
R Keep area between air bags and occupants
free of objects (e.g. packages, purses,
umbrellas, etc.). R
Air bag
system components will be hot after
an air bag has inflated. Do not touch them.
R Never place your feet on the instrument
panel, dashboard, or on the seat. Always
keep both feet on the floor in front of the
seat.
R Improper repair work on the SRS creates a
risk of rendering the SRS inoperative or
causing unintended air bag deployment.
Work on the SRS must therefore only be
performed by qualified technicians.
Contact an authorized Mercedes-Benz
Center.
R For your protection and the protection of
others, when scrapping the air bag unit or
ETD, our safety instructions must be
followed. These instructions are available
from any authorized Mercedes-Benz
Center.
R Given the considerable deployment speed,
required inflation volume, and the material
of the air bags, there is the possibility of
abrasions or other, potentially more serious
injuries resulting from air bag deployment.
If you sell your vehicle, Mercedes-Benz
strongly recommends that you inform the
subsequent owner that the vehicle is
equipped with SRS. Also, refer them to the
applicable section in the Operator's Manual. Air bags
Important safety notes G
WARNING
Air bags are designed to reduce the incidence
of injuries and fatalities in certain situations:
R frontal impacts (driver's and front-
passenger front air bags and knee bags)
R side impacts
(side impact air bags and head
bags)
R rollover (head bags)
However, no system available today can
completely eliminate injuries and fatalities. 38
Occupant safety
Safety
Page 57 of 572
positioning for children over 41 lb (18 kg) until
they reach
a height where a lap-shoulder belt
fits properly without a booster.
When the child restraint is not in use, remove
it from the vehicle or secure it with the seat
belt to prevent the child restraint from
becoming a projectile in the event of an
accident. G
WARNING
When leaving the vehicle, always remove the
SmartKey from the ignition lock. Always take
the SmartKey with you and lock the vehicle.
Do not leave children unattended in the
vehicle, even if they are secured in a child
restraint system, or with access to an
unlocked vehicle. A child's unsupervised
access to
a vehicle could result in an accident
and/or serious personal injury. The children
could:
R injure themselves on parts of the vehicle
R be seriously or fatally injured through
excessive exposure to extreme heat or cold
R injure themselves or cause an accident with
vehicle equipment that can be operated
even if the SmartKey is removed from the
ignition lock or removed from the vehicle,
such as seat adjustment, steering wheel
adjustment, or the memory function
If children open a door, they could injure other
persons or get out of the vehicle and injure
themselves or be injured by following traffic.
Do not expose the child restraint system to
direct sunlight. The child restraint system's
metal parts, for example, could become very
hot, and the child could be burned on these
parts. G
WARNING
Do not carry heavy or hard objects in the
passenger compartment unless they are
firmly secured in place. Unsecured or improperly positioned cargo
increases a child's risk of injury in the event
of:
R
strong braking maneuvers
R sudden changes of direction
R an accident
If an
infant or child is traveling in the vehicle:
X Secure the child with a child or infant seat
restraint system
appropriate to the age and
weight of the child.
X Make sure that the infant or child is
properly secured at all times while the
vehicle is in motion.
Mercedes-Benz recommends that you always
properly secure all infants and children with
a child or infant seat restraint system for the
trip.
The use of seat belts and infant and child
restraint systems is required by law in:
R all 50 states
R U.S. territories
R the District of Columbia
R all Canadian provinces
Infants and
children must always be seated in
an appropriate infant or child restraint system
recommended for the size and weight of the
child. The infant or child restraint system
must be properly secured with a three-point
seat belt in accordance with the
manufacturer's instructions.
All infant or child restraint systems must meet
the following standards:
R U.S. Federal Motor Vehicle Safety
Standards 213 and 225
R Canadian Motor Vehicle Safety Standards
213 and 210.2
An information label on the child restraint
system indicates whether it meets these
standards. This information is also provided
in the installation instructions supplied with
the child restraint system. Child restraint systems
55
Safety Z
Page 76 of 572
Problem Possible causes/consequences and
M SolutionsThe engine cannot be
started using the
SmartKey. the on-board voltage is too low.
X
Switch off non-essential consumers, e.g. seat heating or interior
lighting, and try to start the engine again.
If this does not work:
X Check the starter battery and charge it if necessary
(Y page 515).
or
X Jump-start the vehicle (Y page 516).
or
X Consult a qualified specialist workshop. The engine cannot be
started
using
KEYLESS-
GO. The SmartKey is in
the vehicle. A door is open. Therefore, the SmartKey cannot be detected as
easily.
X
Close the door and try to start the vehicle again. There is interference from a powerful source of radio waves.
X
Start your vehicle with the SmartKey in the ignition lock. Doors
Important safety notes
G
WARNING
When leaving the vehicle, always remove the
SmartKey from the ignition lock. Always take
the SmartKey with you and lock the vehicle.
Do not leave children unsupervised in the
vehicle, even if they are secured in a child
restraint system,
and do not give them access
to an unlocked vehicle. A child's unsupervised
access to a vehicle could result in an accident
and/or serious personal injury. They could:
R injure themselves on vehicle parts
R be seriously or fatally injured by extreme
heat or cold
R injure themselves or have an accident with
vehicle equipment that may still be in
operation even after the SmartKey has
been removed from the ignition, such as the
seat adjustment, steering wheel
adjustment or memory function. If children open a door, they could cause
severe
or
even fatal injury to other persons; if
they get out of the vehicle, they could injure
themselves when doing so or be seriously or
even fatally injured by any passing traffic.
Do not expose the child restraint system to
direct sunlight. The child restraint system's
metal parts, for example, could become very
hot, and a child could be burned on these
parts. G
WARNING
Do not carry heavy or hard objects in the
passenger compartment unless they are
firmly secured in place.
Unsecured or improperly positioned cargo
increases a child's risk of injury in the event
of:
R strong braking maneuvers
R sudden changes of direction
R an accident74
Doors
Opening/closing
Page 80 of 572
seat adjustment, steering wheel
adjustment or memory function.
If children open a door, they could cause
severe or
even fatal injury to other persons; if
they get out of the vehicle, they could injure
themselves when doing so or be seriously or
even fatally injured by any passing traffic.
Do not expose the child restraint system to
direct sunlight. The child restraint system's
metal parts, for example, could become very
hot, and a child could be burned on these
parts. G
WARNING
Do not carry heavy or hard objects in the
passenger compartment
or trunk unless they
are firmly secured in place.
Unsecured or improperly positioned cargo
increases a child's risk of injury in the event
of
R strong braking maneuvers
R sudden changes of direction
R an accident G
WARNING
Make sure the trunk lid is closed when the
engine is running and while driving. Among
other dangers, deadly carbon monoxide (CO)
gases may
enter the vehicle interior resulting
in unconsciousness and death.
! The trunk lid swings upwards when
opened. Therefore, make sure that there is
sufficient clearance above the trunk lid.
i The opening dimensions of the trunk lid
can be found in the "Vehicle data" section
(Y page 565).
i To make loading easier, the stowed roof
can be raised with the loading aid after the
trunk lid has been opened. The trunk
partition can also be detached. The trunk
partition must be put back in position after
loading. Otherwise, the roof cannot be
lowered. You can unlock the trunk lid if the vehicle is
stationary
and
the roof is completely open or
closed.
Do not leave the SmartKey in the trunk. You
could otherwise lock yourself out.
The trunk lid can be:
R opened and closed manually from outside
R opened automatically from outside
(vehicles without trunk lid remote closing
feature)
R opened and closed automatically from
outside (vehicles with trunk lid remote
closing feature)
R opened and closed from outside (vehicles
with KEYLESS-GO and HANDS-FREE
ACCESS)
R opened and closed automatically from
inside (vehicles with trunk lid remote
closing feature)
R locked separately
R unlocked with the mechanical key
R opened with the emergency release button Opening and closing manually from
outside
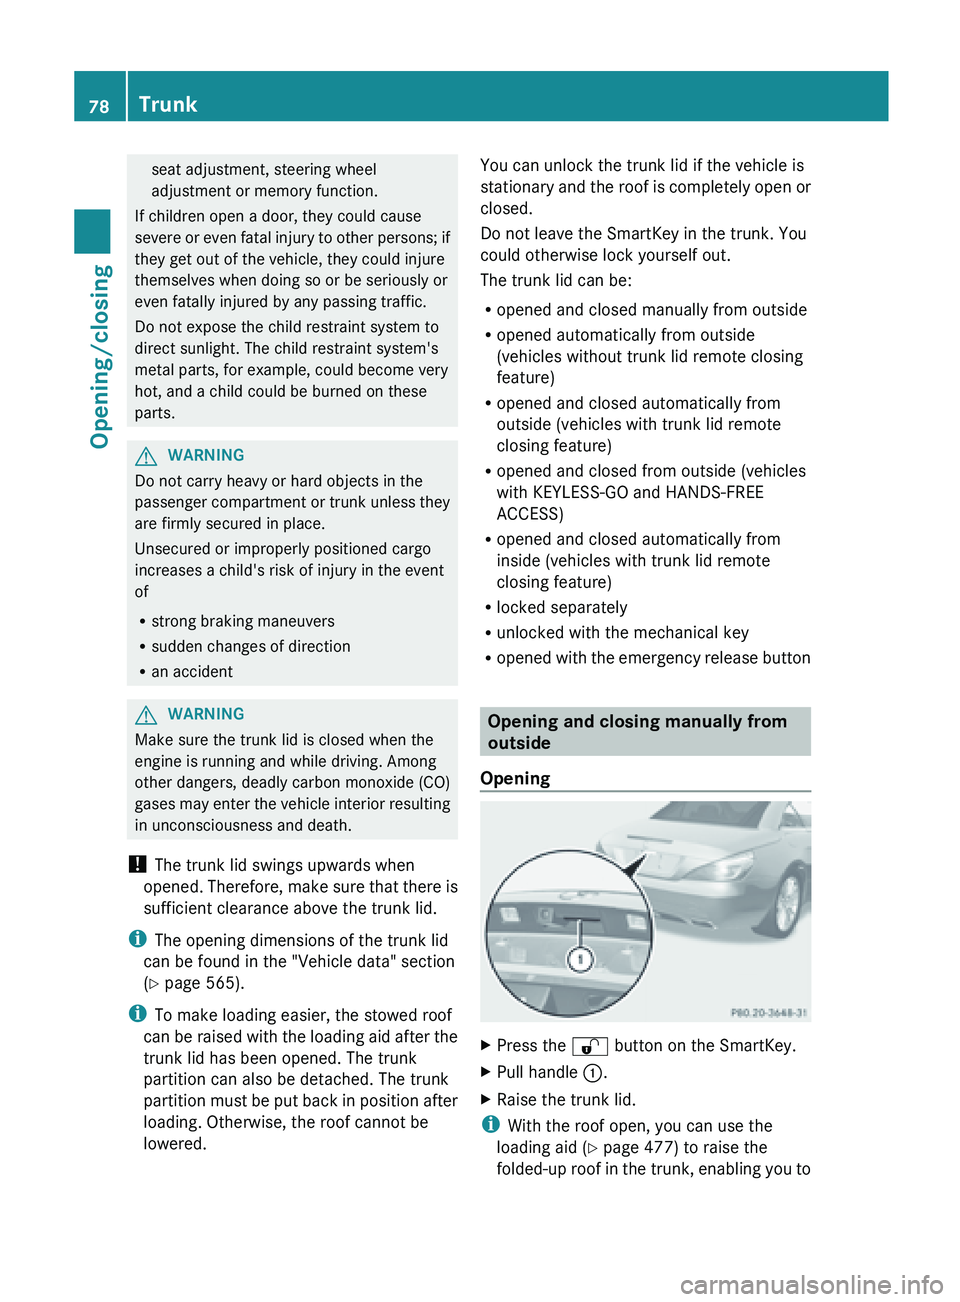
Opening X
Press the
% button on the SmartKey.
X Pull handle :.
X Raise the trunk lid.
i With the roof open, you can use the
loading aid (Y
page 477) to raise the
folded-up roof in the trunk, enabling you to 78
Trunk
Opening/closing
Page 148 of 572
Display when in transmission position
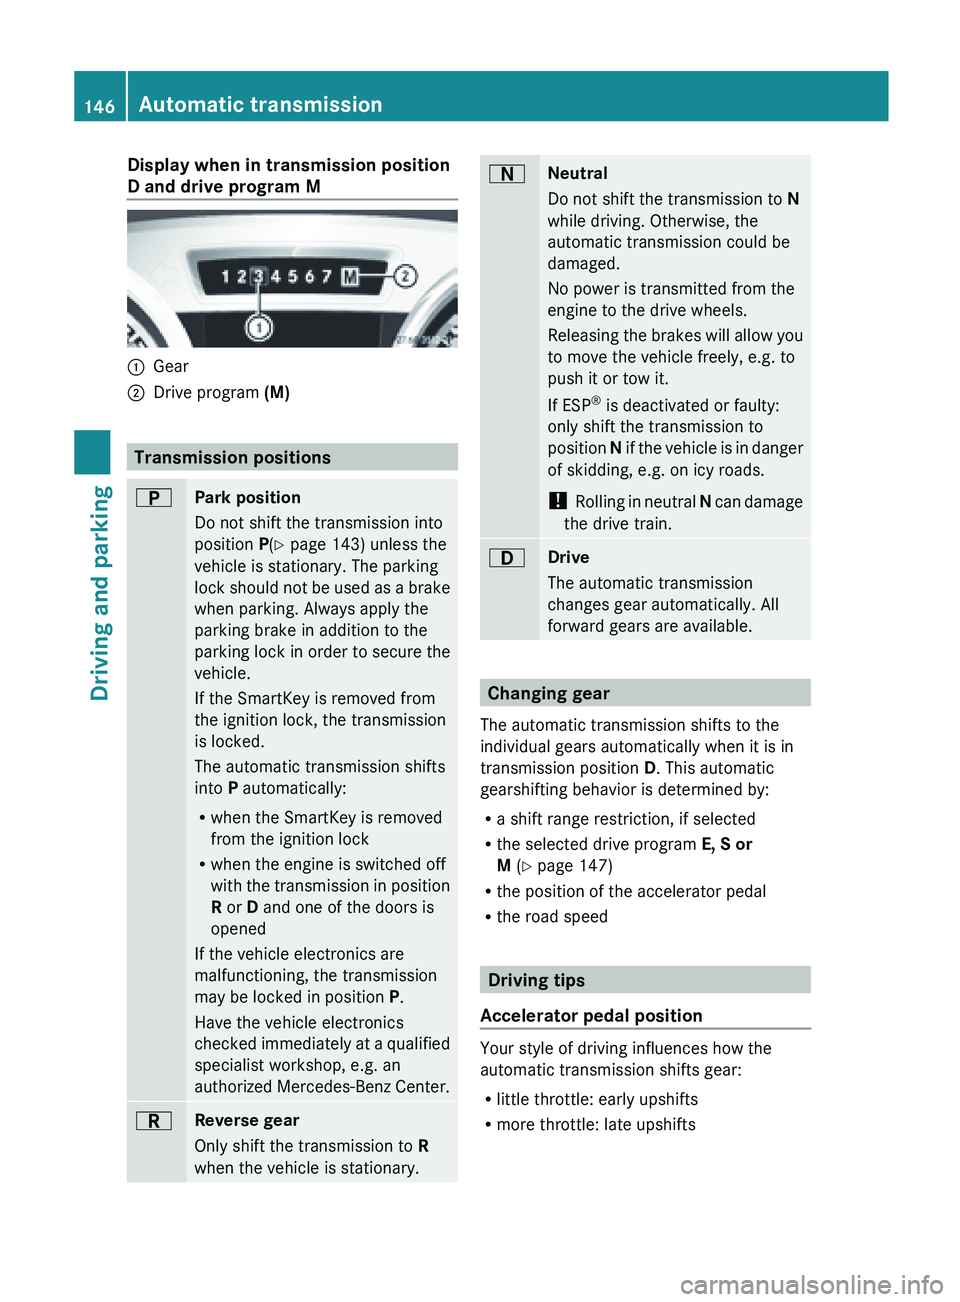
D and drive program M
:
Gear
; Drive program (M) Transmission positions
B
Park position
Do not shift the transmission into
position P(Y page 143) unless the
vehicle is stationary. The parking
lock
should
not be used as a brake
when parking. Always apply the
parking brake in addition to the
parking lock in order to secure the
vehicle.
If the SmartKey is removed from
the ignition lock, the transmission
is locked.
The automatic transmission shifts
into P automatically:
R when the SmartKey is removed
from the ignition lock
R when the engine is switched off
with the transmission in position
R or D and one of the doors is
opened
If the vehicle electronics are
malfunctioning, the transmission
may be locked in position P.
Have the vehicle electronics
checked immediately at a qualified
specialist workshop, e.g. an
authorized Mercedes-Benz Center. C
Reverse gear
Only shift the transmission to
R
when the vehicle is stationary. A
Neutral
Do not shift the transmission to
N
while driving. Otherwise, the
automatic transmission could be
damaged.
No power is transmitted from the
engine to the drive wheels.
Releasing the
brakes will allow you
to move the vehicle freely, e.g. to
push it or tow it.
If ESP ®
is deactivated or faulty:
only shift the transmission to
position N if the vehicle is in danger
of skidding, e.g. on icy roads.
! Rolling in neutral N can damage
the drive train. 7
Drive
The automatic transmission
changes gear automatically. All
forward gears are available.
Changing gear
The automatic transmission shifts to the
individual gears automatically when it is in
transmission position D. This automatic
gearshifting behavior is determined by:
R a shift range restriction, if selected
R the selected drive program E, S or
M (Y page 147)
R the position of the accelerator pedal
R the road speed Driving tips
Accelerator pedal position Your style of driving influences how the
automatic transmission shifts gear:
R
little throttle: early upshifts
R more throttle: late upshifts146
Automatic transmission
Driving and parking
Page 150 of 572
With the drive program selector switch, you
can choose from a range of different
transmission configurations or select the
RACE START drive mode.
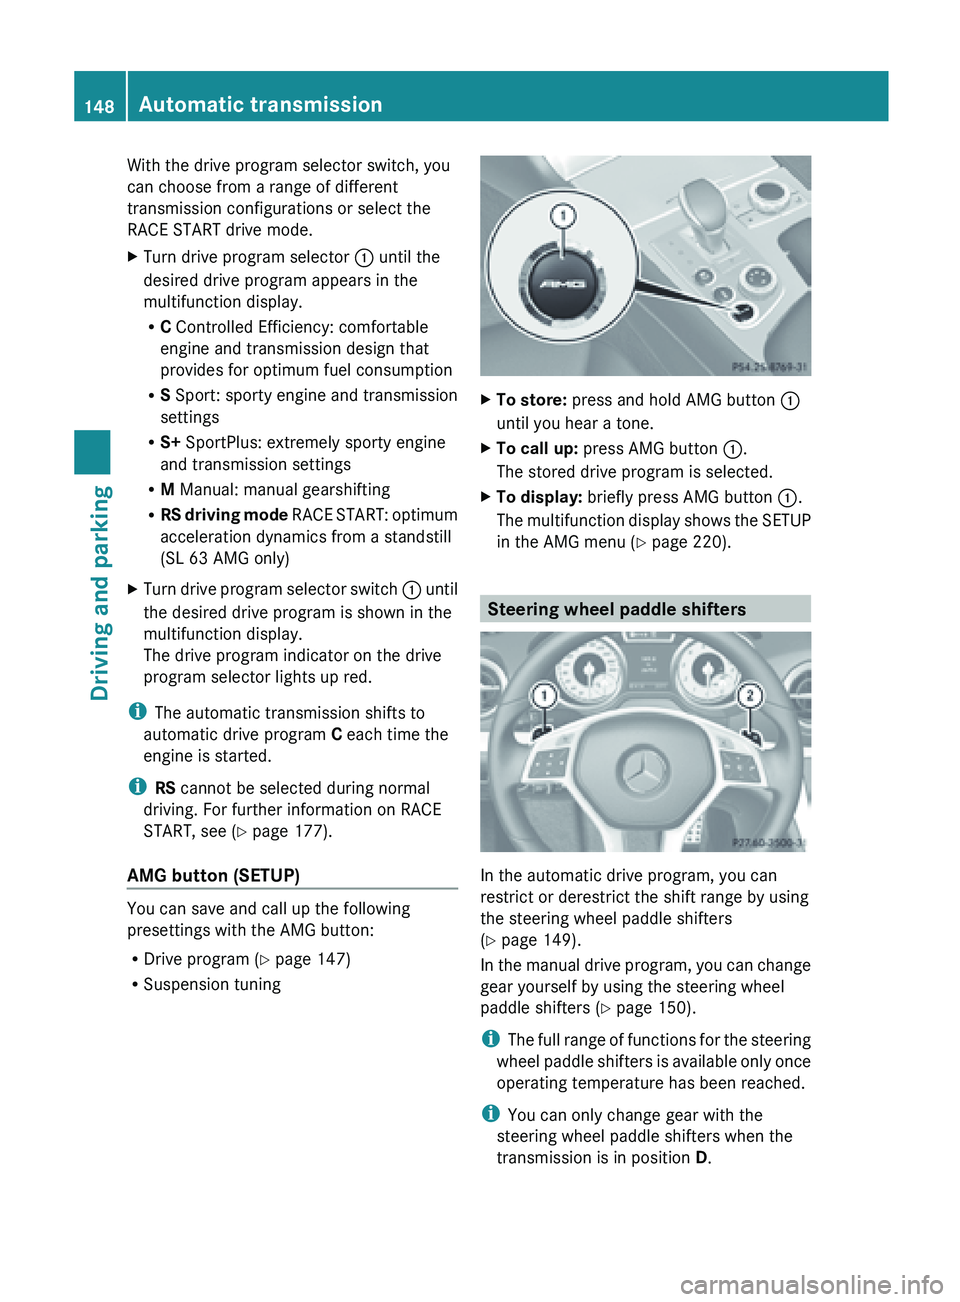
X
Turn drive program selector : until the
desired drive program appears in the
multifunction display.
R
C Controlled Efficiency: comfortable
engine and transmission design that
provides for optimum fuel consumption
R S Sport: sporty engine and transmission
settings
R S+ SportPlus: extremely sporty engine
and transmission settings
R M Manual: manual gearshifting
R RS driving
mode RACE START: optimum
acceleration dynamics from a standstill
(SL 63 AMG only)
X Turn drive program selector switch : until
the desired drive program is shown in the
multifunction display.
The drive program indicator on the drive
program selector lights up red.
i The automatic transmission shifts to
automatic drive program C
each time the
engine is started.
i RS cannot be selected during normal
driving. For further information on RACE
START, see ( Y page 177).
AMG button (SETUP) You can save and call up the following
presettings with the AMG button:
R
Drive program (Y page 147)
R Suspension tuning X
To store: press and hold AMG button :
until you hear a tone.
X To call up: press AMG button :.
The stored drive program is selected.
X To display: briefly press AMG button :.
The multifunction
display shows the SETUP
in the AMG menu (Y page 220). Steering wheel paddle shifters
In the automatic drive program, you can
restrict or derestrict the shift range by using
the steering wheel paddle shifters
(Y page 149).
In
the
manual drive program, you can change
gear yourself by using the steering wheel
paddle shifters ( Y page 150).
i The full range of functions for the steering
wheel paddle shifters is available only once
operating temperature has been reached.
i You can only change gear with the
steering wheel paddle shifters when the
transmission is in position D. 148
Automatic transmission
Driving and parking
Page 152 of 572
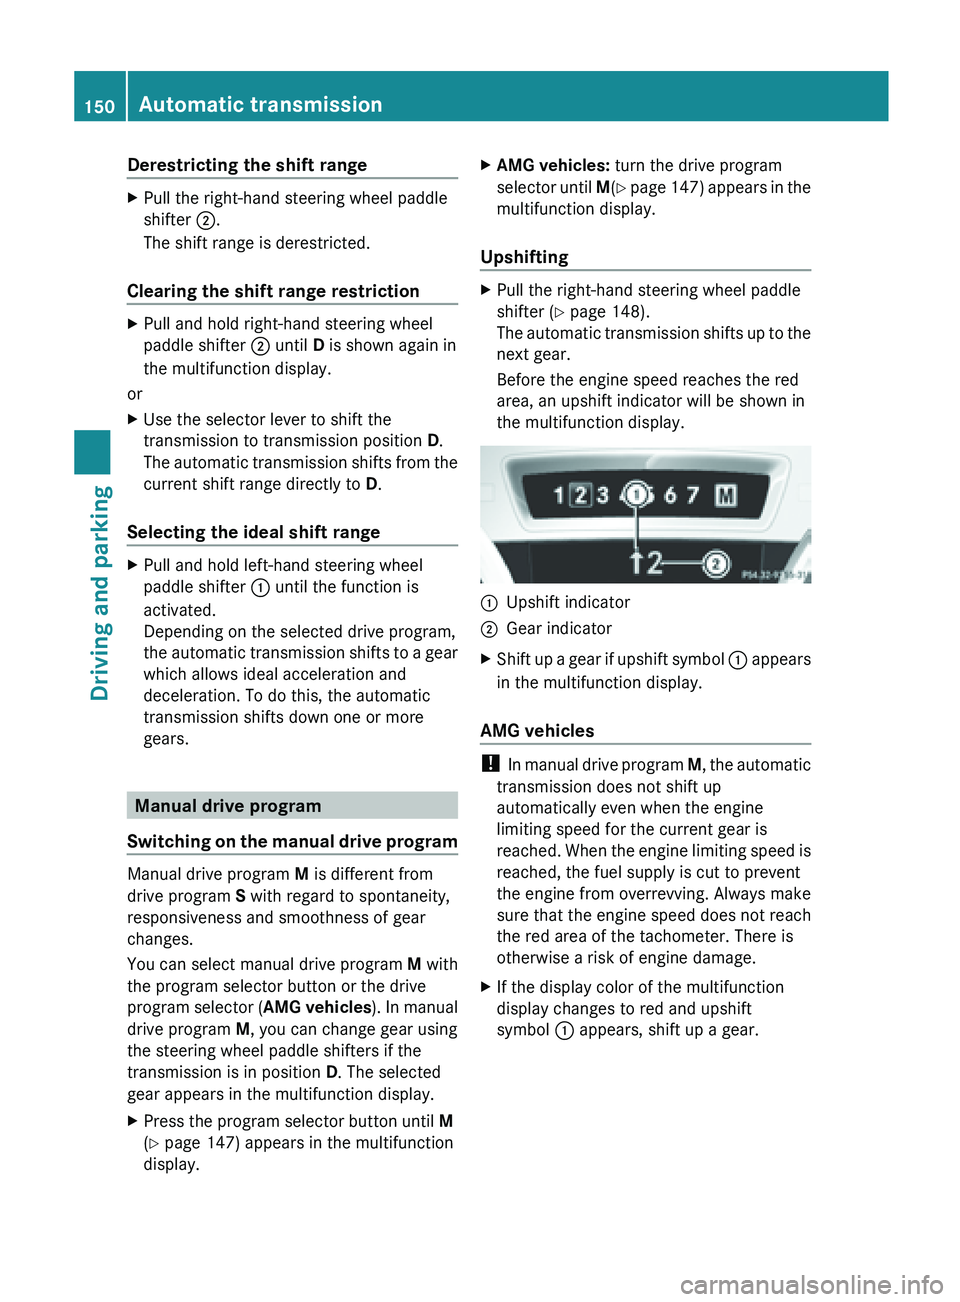
Derestricting the shift range
X
Pull the right-hand steering wheel paddle
shifter ;.
The shift range is derestricted.
Clearing the shift range restriction X
Pull and hold right-hand steering wheel
paddle shifter ; until D is shown again in
the multifunction display.
or
X Use the selector lever to shift the
transmission to transmission position D.
The automatic
transmission shifts from the
current shift range directly to D.
Selecting the ideal shift range X
Pull and hold left-hand steering wheel
paddle shifter : until the function is
activated.
Depending on the selected drive program,
the automatic
transmission shifts to a gear
which allows ideal acceleration and
deceleration. To do this, the automatic
transmission shifts down one or more
gears. Manual drive program
Switching on
the manual drive programManual drive program
M is different from
drive program S with regard to spontaneity,
responsiveness and smoothness of gear
changes.
You can select manual drive program M with
the program selector button or the drive
program selector
(AMG vehicles ). In manual
drive program M, you can change gear using
the steering wheel paddle shifters if the
transmission is in position D. The selected
gear appears in the multifunction display.
X Press the program selector button until M
(Y page 147) appears in the multifunction
display. X
AMG vehicles: turn the drive program
selector until M
(Y page 147) appears in the
multifunction display.
Upshifting X
Pull the right-hand steering wheel paddle
shifter (Y page 148).
The automatic
transmission shifts up to the
next gear.
Before the engine speed reaches the red
area, an upshift indicator will be shown in
the multifunction display. :
Upshift indicator
; Gear indicator
X Shift up a gear if upshift symbol : appears
in the multifunction display.
AMG vehicles !
In manual
drive program M, the automatic
transmission does not shift up
automatically even when the engine
limiting speed for the current gear is
reached. When the engine limiting speed is
reached, the fuel supply is cut to prevent
the engine from overrevving. Always make
sure that the engine speed does not reach
the red area of the tachometer. There is
otherwise a risk of engine damage.
X If the display color of the multifunction
display changes to red and upshift
symbol : appears, shift up a gear.150
Automatic transmission
Driving and parking
Page 160 of 572
Exhaust check
G
WARNING
Inhalation of exhaust gas is hazardous to your
health. All exhaust gas contains carbon
monoxide (CO), and inhaling it can cause
unconsciousness and possible death.
Do not
run the engine in confined areas (such
as a garage) which are not properly ventilated.
If you think that exhaust gas fumes are
entering the vehicle while driving, have the
cause determined and corrected
immediately. If you must drive under these
conditions, drive only with at least one
window fully open at all times.
Certain engine systems are designed to keep
the level of poisonous components in exhaust
fumes within legal limits.
These systems only work at peak efficiency if
they are serviced exactly in accordance with
the manufacturer's specifications. All work
on the engine must be carried out by qualified
and authorized Mercedes-Benz technicians.
The engine settings must not be changed
under any circumstances. Furthermore, all
specific service work must be carried out at
regular intervals and in accordance with the
Mercedes-Benz service requirements. Details
can be found in the Maintenance Booklet. Brakes
Important safety notes G
WARNING
On slippery road surfaces, never downshift in
order to obtain braking action. This could
result in
drive wheel slip and reduced vehicle
control. Your vehicle's ABS will not prevent
this type of loss of control. G
WARNING
Make sure that you do not endanger other
road users when you apply the brakes. Downhill gradients !
On long, steep gradients, you must
reduce the load on the brakes. In order to
use engine
braking effect, restrict the shift
range in good time. This helps you to avoid
overheating the brakes and wearing them
out excessively.
When making use of the engine braking
effect, it is possible that a drive wheel may
not turn for some time, e.g. in the case of
suddenly changing or slippery road surface
conditions. This could cause damage to the
drive train. This type of damage is not
covered by the Mercedes-Benz warranty.
Heavy and light loads G
WARNING
Depressing the brake pedal constantly results
in excessive
and premature wear to the brake
pads.
It may also cause the brakes to overheat,
seriously impairing their effectiveness. It may
then not be possible to stop the vehicle in
sufficient time to avoid an accident.
If the brakes have been subjected to a heavy
load, do not stop the vehicle immediately, but
drive on for a short while. This allows the
airflow to cool the brakes more quickly.
Wet roads G
WARNING
After driving in heavy rain for some time
without applying
the brakes or through water
deep enough to wet brake components, the
first braking action may be somewhat
reduced. You have to depress the brake pedal
more firmly. Maintain a safe distance from
vehicles in front.
After driving on a wet road or having the
vehicle washed, brake firmly while paying
attention to the traffic conditions. This will
warm up the brake discs, thereby drying them 158
Driving tips
Driving and parking
Page 164 of 572
If the vehicle threatens to skid or cannot be
stopped when moving at low speed:
X
Shift the transmission to position N.
Drive particularly carefully on slippery road
surfaces. Avoid
sudden acceleration, steering
and braking maneuvers. Do not use cruise
control.
i For more information on driving with
snow chains, see ( Y page 529).Driving systems
Cruise control
Important safety notes G
WARNING
The cruise control is a convenience system
designed to assist the driver during vehicle
operation. The driver is and must always
remain responsible for the vehicle's speed
and for safe brake operation.
Only use
the cruise control if the road, traffic,
and weather conditions make it advisable to
travel at a constant speed.
R The use of the cruise control can be
dangerous on winding roads or in heavy
traffic because conditions do not allow safe
driving at a constant speed.
R The use of the cruise control can be
dangerous on slippery roads. Rapid
changes in tire traction can result in wheel
spin and loss of control.
R Deactivate the cruise control when driving
in fog.
The "Resume" function should only be
operated if the driver is fully aware of the
previously set speed and wishes to resume
this particular preset speed. G
WARNING
The cruise control brakes automatically so
that the set speed is not exceeded. General notes Cruise control maintains a constant road
speed
for
you. It brakes automatically in order
to avoid exceeding the set speed. On long and
steep downhill gradients, especially if the
vehicle is laden, you must select shift range
1, 2 or 3 in good time (Y page 149). By doing
so, you will make use of the braking effect of
the engine, which relieves the load on the
brake system and prevents the brakes from
overheating and wearing too quickly.
Use cruise control only if road and traffic
conditions make it appropriate to maintain a
steady speed for a prolonged period. You can
store any road speed above 20 mph
(30 km/h).
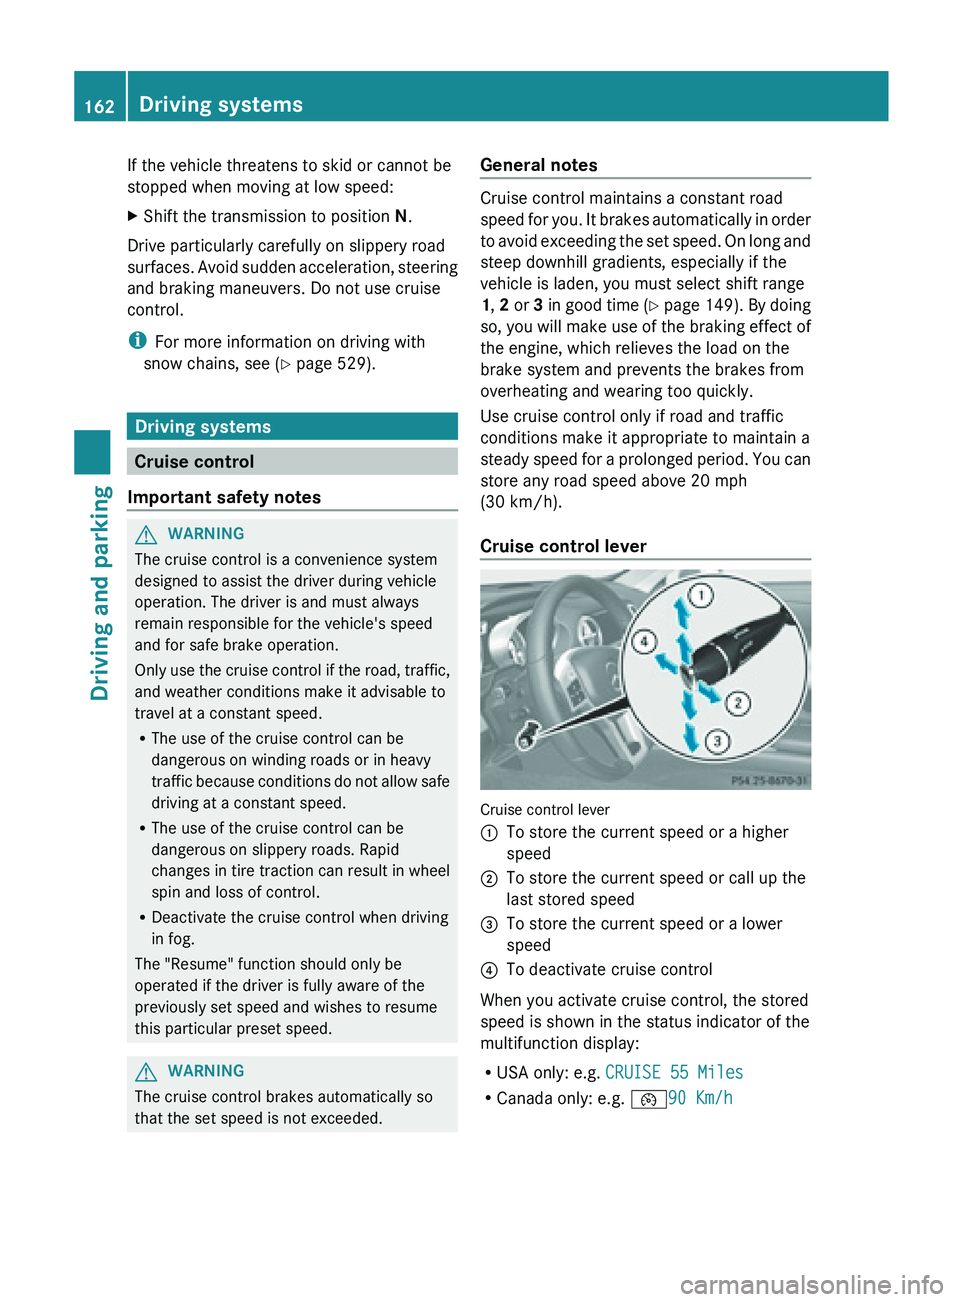
Cruise control lever Cruise control lever
:
To store the current speed or a higher
speed
; To store the current speed or call up the
last stored speed
= To store the current speed or a lower
speed
? To deactivate cruise control
When you activate cruise control, the stored
speed is shown in the status indicator of the
multifunction display:
R USA only: e.g. CRUISE 55 Miles
R Canada only: e.g. ¯90 Km/h162
Driving systems
Driving and parking