wheel size MERCEDES-BENZ SLC 2019 Owners Manual
[x] Cancel search | Manufacturer: MERCEDES-BENZ, Model Year: 2019, Model line: SLC, Model: MERCEDES-BENZ SLC 2019Pages: 306, PDF Size: 15 MB
Page 21 of 306
GVW (Gross Vehicle Weight) (def-
inition) ...........................................287
GVWR (Gross Vehicle Weight
Rating) (definition) ......................... 287
Important safety notes .................. 267
Increased vehicle weight due to
optional equipment (definition) ...... 286
Information on driving .................... 267
Kilopascal (kPa) (definition) ........... 287
Labeling (overview)........................ 283
Load bearing index (definition) ...... 288
Load index ..................................... 285
Load index (definition) ................... 287
M+S tires....................................... 269
Maximum load on a tire (defini-
tion) ............................................... 287
Maximum loaded vehicle weight
(definition) ..................................... 287
Maximum permissible tire pres-
sure (definition) ............................. 287
Maximum tire load ......................... 285
Maximum tire load (definition) ....... 287
MOExtended tires.......................... 269
Optional equipment weight (defi-
nition) ............................................ 288
Overview ........................................ 267
PSI (pounds per square inch)
(definition) ..................................... 287
Replacing ....................................... 288
Service life ..................................... 268
Sidewall (definition) ....................... 288
Speed rating (definition) ................ 287
Storing ........................................... 289
Structure and characteristics
(definition) ..................................... 286
Summer tires ................................. 269
Temperature .................................. 282
TIN (Tire Identification Number)
(definition) ..................................... 288
Tire bead (definition) ...................... 288
Tire pressure (definition) ................ 287
Tire pressures (recommended) ...... 286
Tire size (data)............................... 292
Tire size designation, load-bear-
ing capacity, speed rating .............. 283
Tire tread ....................................... 268
Tire tread (definition) ..................... 288
Total load limit (definition) ............. 288
Traction ......................................... 282
Traction (definition) ....................... 288
Tread wear ..................................... 282
Uniform Tire Quality Grading
Standards ...................................... 281
Uniform Tire Quality Grading
Standards (definition) .................... 286
Wear indicator (definition) ............. 288
Wheel and tire combination ........... 292
Wheel rim (definition) .................... 287
see Flat tire
Tow-starting
Emergency engine starting ............ 265
Important safety notes .................. 263
Towing
Permitted towing methods ............ 264
Towing away
Important safety guidelines ........... 263
Installing the towing eye ................ 263
Removing the towing eye ............... 264
Transporting the vehicle ................ 265
With both axles on the ground ....... 264
With the rear axle raised ................ 264
Traffic reports
see also Digital Operator's Man-
ual .................................................. 217
Transmission
Overview of transmission posi-
tions .............................................. 125
Selector lever ................................ 125
see Automatic transmission
Transmission position display......... 125
Transporting the vehicle.................. 265
Trip computer (on-board com-
puter).................................................. 170
Trip odometer
Calling up ....................................... 170
Resetting (on-board computer) ...... 171
Trunk
Emergency release .......................... 74
Important safety notes .................... 73
Locking separately ........................... 74
Opening/closing (manually from
outside) ............................................ 74
Overview .......................................... 73
Trunk lid
Display message ............................ 204
Opening dimensions ...................... 303
Index19
Page 23 of 306
Weather display (COMAND)
see also Digital Operator's Man-
ual .................................................. 217
Wheel and tire combinations
Tires ............................................... 292
Wheel bolt tightening torque........... 292
Wheel chock...................................... 289
Wheels
Changing a wheel .......................... 288
Checking ........................................ 267
Cleaning ......................................... 249
Emergency spare wheel ................. 293
Important safety notes .................. 267
Information on driving .................... 267
Interchanging/changing ................ 288
Mounting a new wheel ...................291
Mounting a wheel .......................... 289
Overview ........................................ 267
Removing a wheel .......................... 291
Storing ...........................................289
Tightening torque ........................... 292
Wheel size/tire size ....................... 292
Wind screen
Inserting and removing .................... 81
Preparing for installation .................. 81
see AIRGUIDE
Windows
see Side windows
Windshield
Defrosting ...................................... 112
Windshield washer fluid
see Windshield washer system
Windshield washer system
Adding washer fluid ....................... 243
Important safety notes .................. 302
Windshield wipers
Display message ............................ 206
Problem (malfunction) ................... 105
Replacing the wiper blades ............ 104
Switching on/off ........................... 103
Winter driving
Important safety notes .................. 269
Slippery road surfaces ................... 141
Snow chains .................................. 270
Winter operation
Overview ........................................ 269
Winter tires
M+S tires ....................................... 269
Wiper blades
Cleaning ......................................... 249
Important safety notes .................. 104
Replacing ....................................... 104
Workshop
see Qualified specialist workshop
Z
ZONE function
Switching on/off ........................... 112
Index21
Page 94 of 306
or
Ryou press the Start/Stop button once onvehicles with KEYLESS-GO
When you close the driver's door with the igni-tion switched on, the steering wheel is alsoautomatically moved to the previously setposition.
The last position of the steering column isstored when you switch off the ignition orwhen you store the setting with the memoryfunction (Ypage 95).
Crash-responsive EASY-EXIT feature
If the crash-responsive EASY-EXIT feature istriggered in an accident, the steering columnwill move upwards when the driver's door isopened. This occurs irrespective of the posi-tion of the SmartKey in the ignition lock. Thismakes it easier to exit the vehicle and rescuethe occupants.
The crash-responsive EASY-EXIT feature is onlyoperational if the EASY-EXIT/ENTRY feature isactivated in the on-board computer(Ypage 178).
Mirrors
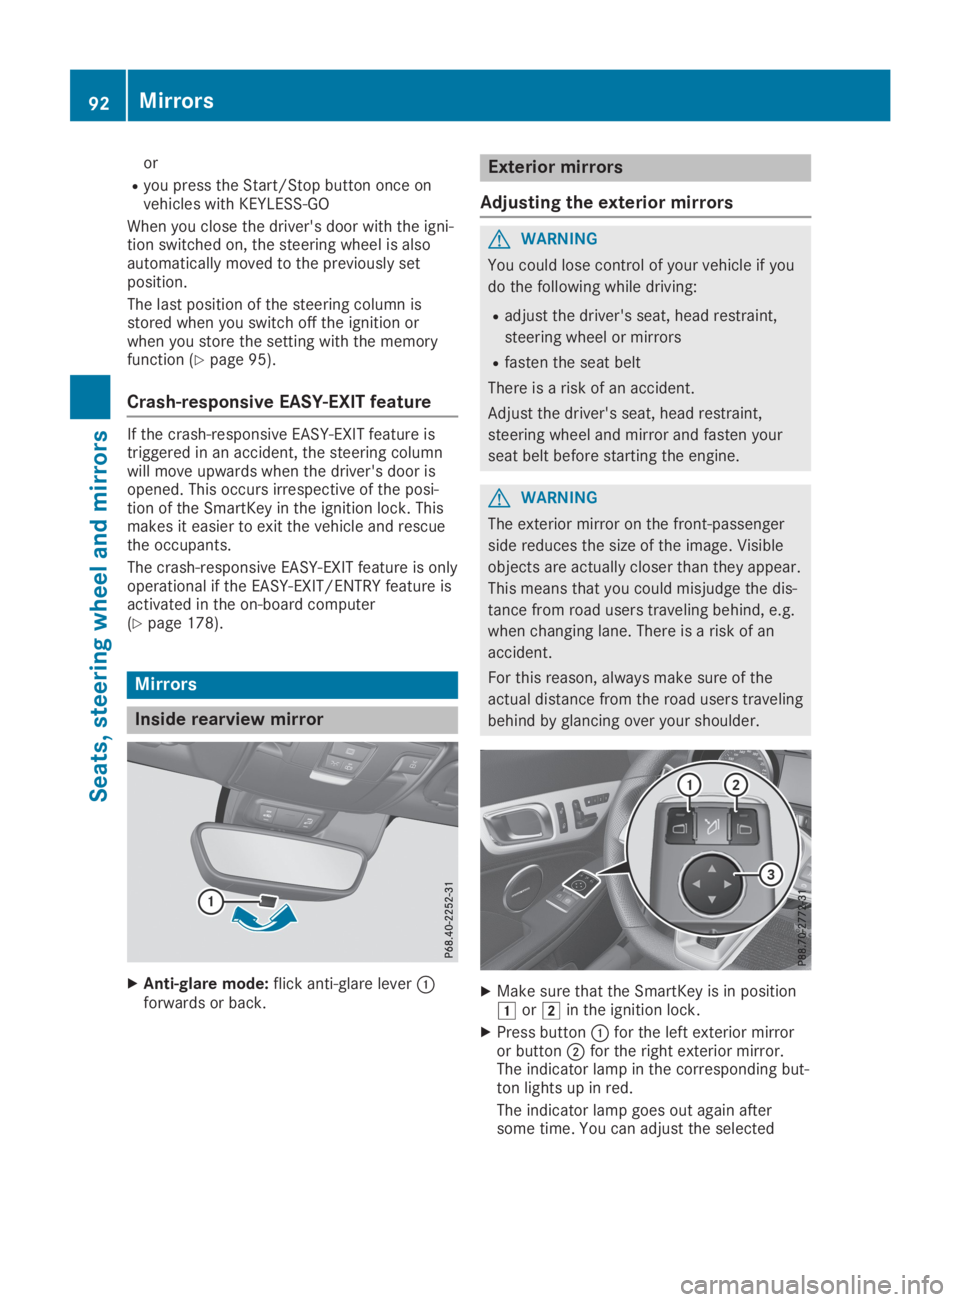
Inside rearview mirror
XAnti-glare mode:flick anti-glare lever�Cforwards or back.
Exterior mirrors
Adjusting the exterior mirrors
GWARNING
You could lose control of your vehicle if you
do the following while driving:
Radjust the driver's seat, head restraint,
steering wheel or mirrors
Rfasten the seat belt
There is a risk of an accident.
Adjust the driver's seat, head restraint,
steering wheel and mirror and fasten your
seat belt before starting the engine.
GWARNING
The exterior mirror on the front-passenger
side reduces the size of the image. Visible
objects are actually closer than they appear.
This means that you could misjudge the dis-
tance from road users traveling behind, e.g.
when changing lane. There is a risk of an
accident.
For this reason, always make sure of the
actual distance from the road users traveling
behind by glancing over your shoulder.
XMake sure that the SmartKey is in position�Gor�Hin the ignition lock.
XPress button�Cfor the left exterior mirroror button�Dfor the right exterior mirror.The indicator lamp in the corresponding but-ton lights up in red.
The indicator lamp goes out again aftersome time. You can adjust the selected
92Mirrors
Seats, steering wheel and mirrors
Page 255 of 306
teristics, e.g. winter tires. A TIREFIT kit may beobtained from a qualified specialist workshop.
Information on changing and mounting wheels(Ypage 288).
XStop the vehicle on solid, non-slippery andlevel ground, as far away as possible fromtraffic.
XSwitch on the hazard warning lamps.
XSecure the vehicle against rolling away(Ypage 134).
XIf possible, bring the front wheels into thestraight-ahead position.
XSwitch off the engine.
XVehicles without KEYLESS-GO:removethe SmartKey from the ignition lock.
XVehicles with KEYLESS-GO:open the driv-er's door.The vehicle electronics are now in position�Z. This is the same as the SmartKey havingbeen removed.
XVehicles with KEYLESS-GO:remove theStart/Stop button from the ignition lock(Ypage 118).
XMake sure that the passengers are notendangered as they do so. Make sure thatno one is near the danger area while awheel is being changed. Anyone who is notdirectly assisting in the wheel changeshould, for example, stand behind the bar-rier.
XGet out of the vehicle. Pay attention to traf-fic conditions when doing so.
XClose the driver's door.
MOExtended tires (tires with run-flat
properties)
General notes
With MOExtended tires (tires with run flatcharacteristics), you can continue to drive yourvehicle even if there is a total loss of pressurein one or more tires. The affected tire must notshow any clearly visible damage.
You can recognize an MOExtended tire by theMOExtended marking which appears on thesidewall of the tire. You will find this markingnext to the tire size designation, the load-bear-ing capacity and the speed index(Ypage 283).
MOExtended tires may only be used in con-junction with an active tire pressure loss warn-ing system or with an active tire pressure mon-itor.
If a pressure loss warning messageappears in the multifunction display:
Robserve the instructions in the display mes-sages (Ypage 201)
Rcheck the tire for damage
Rif driving on, observe the following notes
The driving distance possible in run-flat modeis approximately 50 miles (80 kilometers)when the vehicle is partially laden and approx-imately 19 miles (30 kilometers) when thevehicle is fully laden.
In addition to the vehicle load, the driving dis-tance possible depends upon:
RVehicle speed
RRoad condition
ROutside temperature
The driving distance possible in run-flat modemay be reduced by extreme driving conditionsor maneuvers, or it can be increased through amoderate style of driving.
The driving distance possible in run-flat modeis counted from the moment the tire pressureloss warning appears in the multifunction dis-play.
You must not exceed a maximum designspeed of 50 mph (80 km/h).
When replacing one or all tires, please observethe following specifications for your vehicle'stires:
RSize
RType and
RThe "MOExtended" mark
If a tire has gone flat and cannot be replacedwith an MOExtended tire, a standard tire maybe used as a temporary measure. Make surethat you use the proper size and type (summeror winter tire).
Vehicles equipped with MOExtended tires arenot equipped with a TIREFIT kit at the factory.It is therefore recommended that you addition-ally equip your vehicle with a TIREFIT kit if youmount tires that do not feature run-flat charac-teristics, e.g. winter tires. A TIREFIT kit can beobtained from a qualified specialist workshop,for example.
Flat tire253
Breakdown assistance
Page 273 of 306
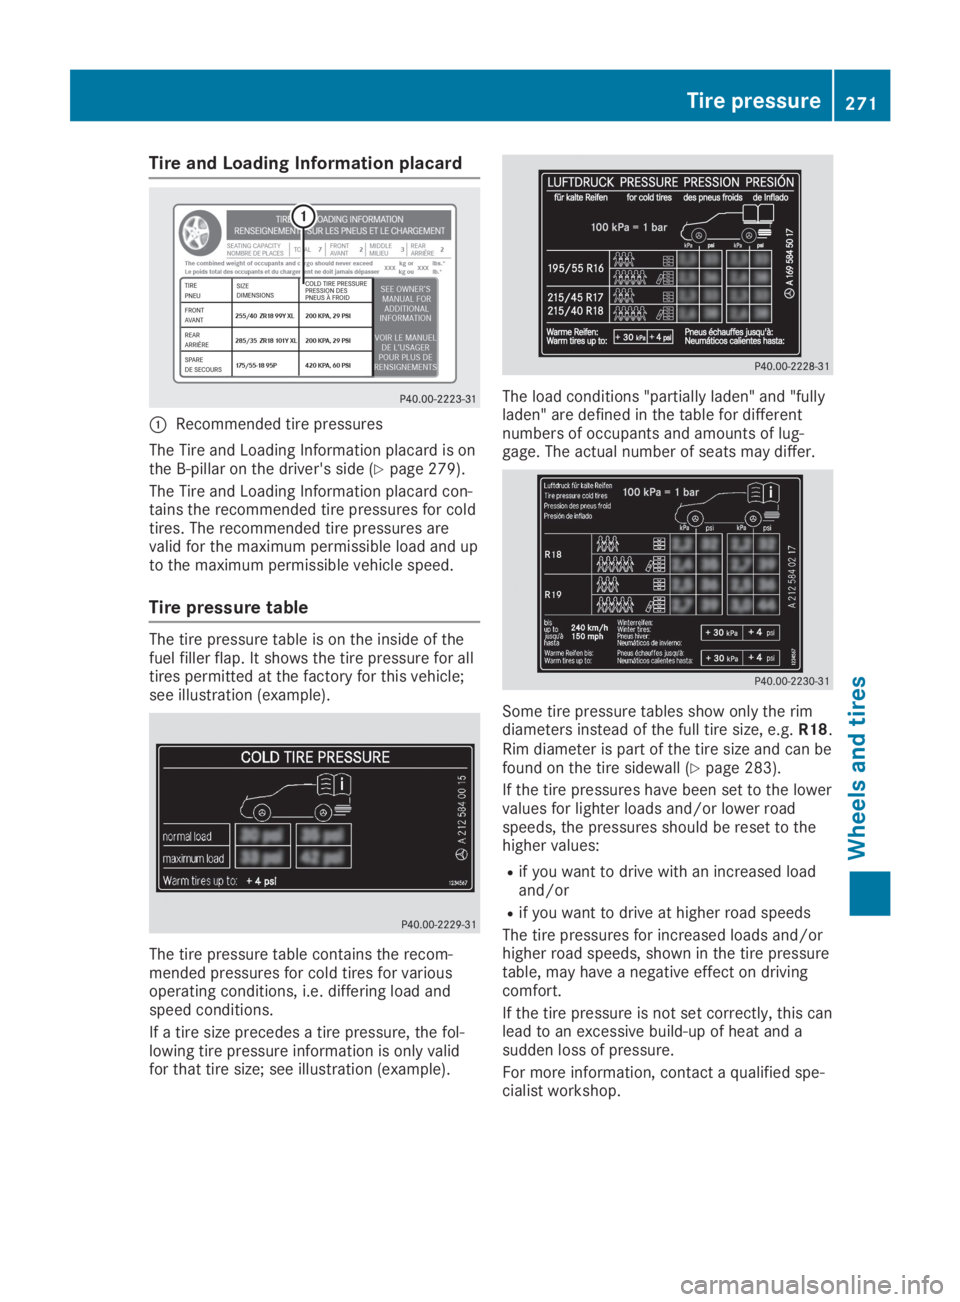
Tire and Loading Information placard
�CRecommended tire pressures
The Tire and Loading Information placard is onthe B-pillar on the driver's side (Ypage 279).
The Tire and Loading Information placard con-tains the recommended tire pressures for coldtires. The recommended tire pressures arevalid for the maximum permissible load and upto the maximum permissible vehicle speed.
Tire pressure table
The tire pressure table is on the inside of thefuel filler flap. It shows the tire pressure for alltires permitted at the factory for this vehicle;see illustration (example).
The tire pressure table contains the recom-mended pressures for cold tires for variousoperating conditions, i.e. differing load andspeed conditions.
If a tire size precedes a tire pressure, the fol-lowing tire pressure information is only validfor that tire size; see illustration (example).
The load conditions "partially laden" and "fullyladen" are defined in the table for differentnumbers of occupants and amounts of lug-gage. The actual number of seats may differ.
Some tire pressure tables show only the rimdiameters instead of the full tire size, e.g.R18.Rim diameter is part of the tire size and can befound on the tire sidewall (Ypage 283).
If the tire pressures have been set to the lowervalues for lighter loads and/or lower roadspeeds, the pressures should be reset to thehigher values:
Rif you want to drive with an increased loadand/or
Rif you want to drive at higher road speeds
The tire pressures for increased loads and/orhigher road speeds, shown in the tire pressuretable, may have a negative effect on drivingcomfort.
If the tire pressure is not set correctly, this canlead to an excessive build-up of heat and asudden loss of pressure.
For more information, contact a qualified spe-cialist workshop.
Tire pressure271
Wheels and tires
Z
Page 277 of 306
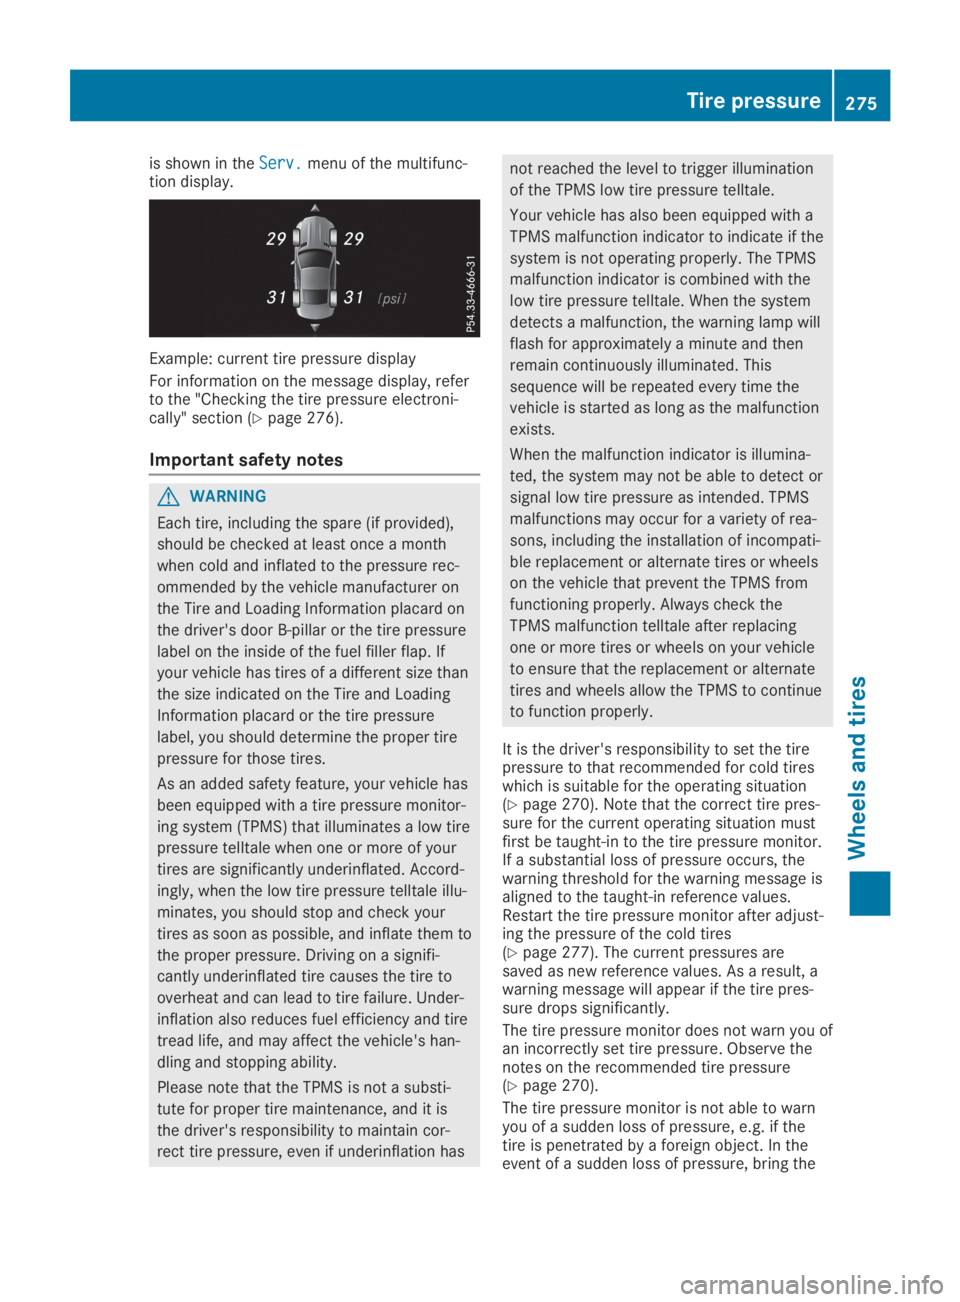
is shown in theServ.Serv.menu of the multifunc-tion display.
Example: current tire pressure display
For information on the message display, referto the "Checking the tire pressure electroni-cally" section (Ypage 276).
Important safety notes
GWARNING
Each tire, including the spare (if provided),
should be checked at least once a month
when cold and inflated to the pressure rec-
ommended by the vehicle manufacturer on
the Tire and Loading Information placard on
the driver's door B-pillar or the tire pressure
label on the inside of the fuel filler flap. If
your vehicle has tires of a different size than
the size indicated on the Tire and Loading
Information placard or the tire pressure
label, you should determine the proper tire
pressure for those tires.
As an added safety feature, your vehicle has
been equipped with a tire pressure monitor-
ing system (TPMS) that illuminates a low tire
pressure telltale when one or more of your
tires are significantly underinflated. Accord-
ingly, when the low tire pressure telltale illu-
minates, you should stop and check your
tires as soon as possible, and inflate them to
the proper pressure. Driving on a signifi-
cantly underinflated tire causes the tire to
overheat and can lead to tire failure. Under-
inflation also reduces fuel efficiency and tire
tread life, and may affect the vehicle's han-
dling and stopping ability.
Please note that the TPMS is not a substi-
tute for proper tire maintenance, and it is
the driver's responsibility to maintain cor-
rect tire pressure, even if underinflation has
not reached the level to trigger illumination
of the TPMS low tire pressure telltale.
Your vehicle has also been equipped with a
TPMS malfunction indicator to indicate if the
system is not operating properly. The TPMS
malfunction indicator is combined with the
low tire pressure telltale. When the system
detects a malfunction, the warning lamp will
flash for approximately a minute and then
remain continuously illuminated. This
sequence will be repeated every time the
vehicle is started as long as the malfunction
exists.
When the malfunction indicator is illumina-
ted, the system may not be able to detect or
signal low tire pressure as intended. TPMS
malfunctions may occur for a variety of rea-
sons, including the installation of incompati-
ble replacement or alternate tires or wheels
on the vehicle that prevent the TPMS from
functioning properly. Always check the
TPMS malfunction telltale after replacing
one or more tires or wheels on your vehicle
to ensure that the replacement or alternate
tires and wheels allow the TPMS to continue
to function properly.
It is the driver's responsibility to set the tirepressure to that recommended for cold tireswhich is suitable for the operating situation(Ypage 270). Note that the correct tire pres-sure for the current operating situation mustfirst be taught-in to the tire pressure monitor.If a substantial loss of pressure occurs, thewarning threshold for the warning message isaligned to the taught-in reference values.Restart the tire pressure monitor after adjust-ing the pressure of the cold tires(Ypage 277). The current pressures aresaved as new reference values. As a result, awarning message will appear if the tire pres-sure drops significantly.
The tire pressure monitor does not warn you ofan incorrectly set tire pressure. Observe thenotes on the recommended tire pressure(Ypage 270).
The tire pressure monitor is not able to warnyou of a sudden loss of pressure, e.g. if thetire is penetrated by a foreign object. In theevent of a sudden loss of pressure, bring the
Tire pressure275
Wheels and tires
Z
Page 281 of 306
CountryRadio type approval number
IC: 2546A-MC34MA4
Loading the vehicle
Instruction labels for tires and loads
GWARNING
Overloaded tires can overheat, causing a
blowout. Overloaded tires can also impair
the steering and driving characteristics and
lead to brake failure. There is a risk of acci-
dent.
Observe the load rating of the tires. The load
rating must be at least half of the GAWR of
your vehicle. Never overload the tires by
exceeding the maximum load.
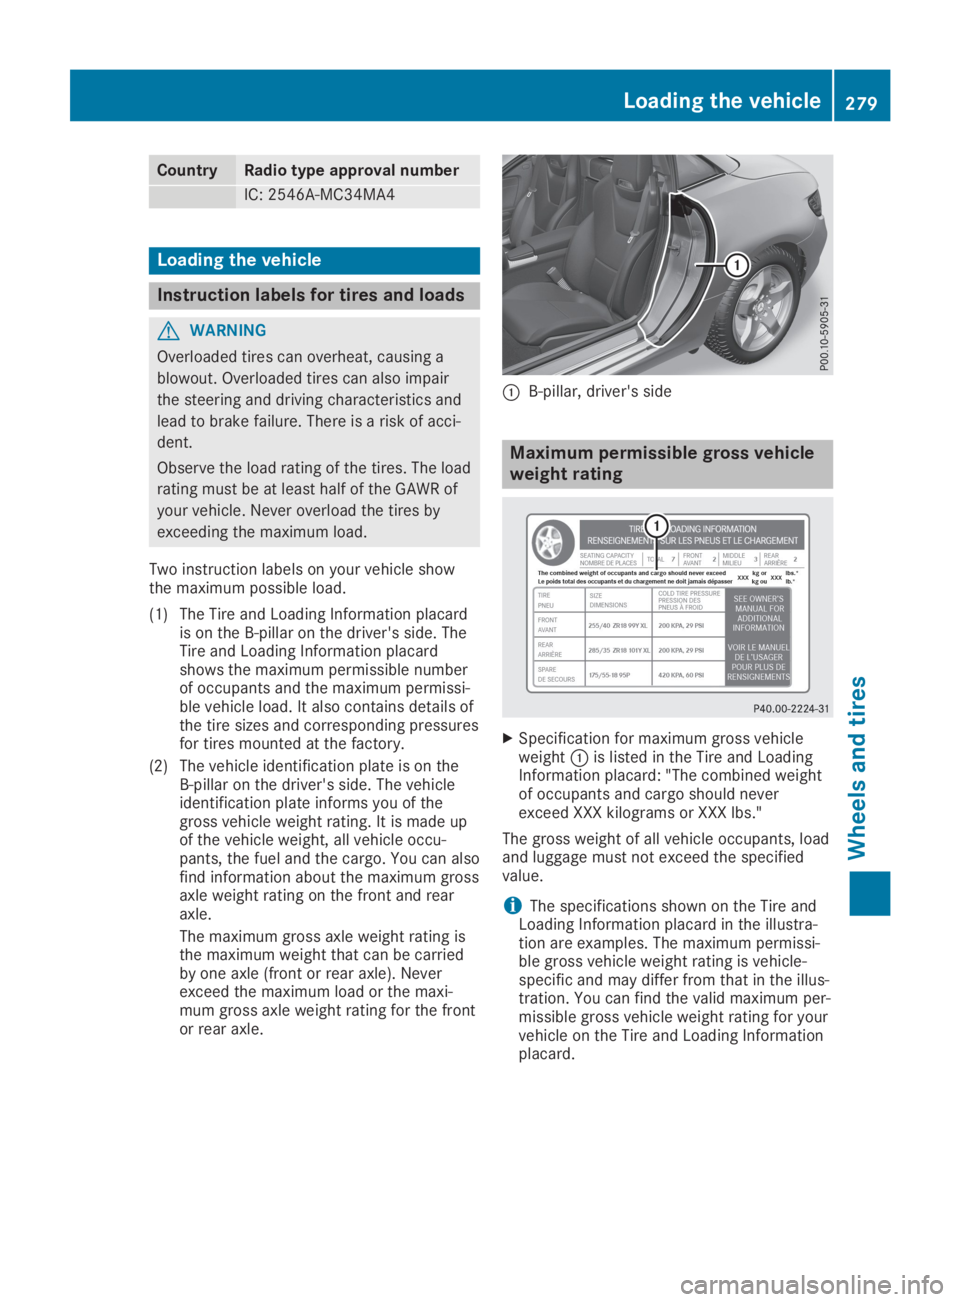
Two instruction labels on your vehicle showthe maximum possible load.
(1) The Tire and Loading Information placardis on the B-pillar on the driver's side. TheTire and Loading Information placardshows the maximum permissible numberof occupants and the maximum permissi-ble vehicle load. It also contains details ofthe tire sizes and corresponding pressuresfor tires mounted at the factory.
(2) The vehicle identification plate is on theB-pillar on the driver's side. The vehicleidentification plate informs you of thegross vehicle weight rating. It is made upof the vehicle weight, all vehicle occu-pants, the fuel and the cargo. You can alsofind information about the maximum grossaxle weight rating on the front and rearaxle.
The maximum gross axle weight rating isthe maximum weight that can be carriedby one axle (front or rear axle). Neverexceed the maximum load or the maxi-mum gross axle weight rating for the frontor rear axle.
�CB-pillar, driver's side
Maximum permissible gross vehicle
weight rating
XSpecification for maximum gross vehicleweight�Cis listed in the Tire and LoadingInformation placard: "The combined weightof occupants and cargo should neverexceed XXX kilograms or XXX lbs."
The gross weight of all vehicle occupants, loadand luggage must not exceed the specifiedvalue.
iThe specifications shown on the Tire andLoading Information placard in the illustra-tion are examples. The maximum permissi-ble gross vehicle weight rating is vehicle-specific and may differ from that in the illus-tration. You can find the valid maximum per-missible gross vehicle weight rating for yourvehicle on the Tire and Loading Informationplacard.
Loading the vehicle279
Wheels and tires
Z
Page 282 of 306
Number of seats
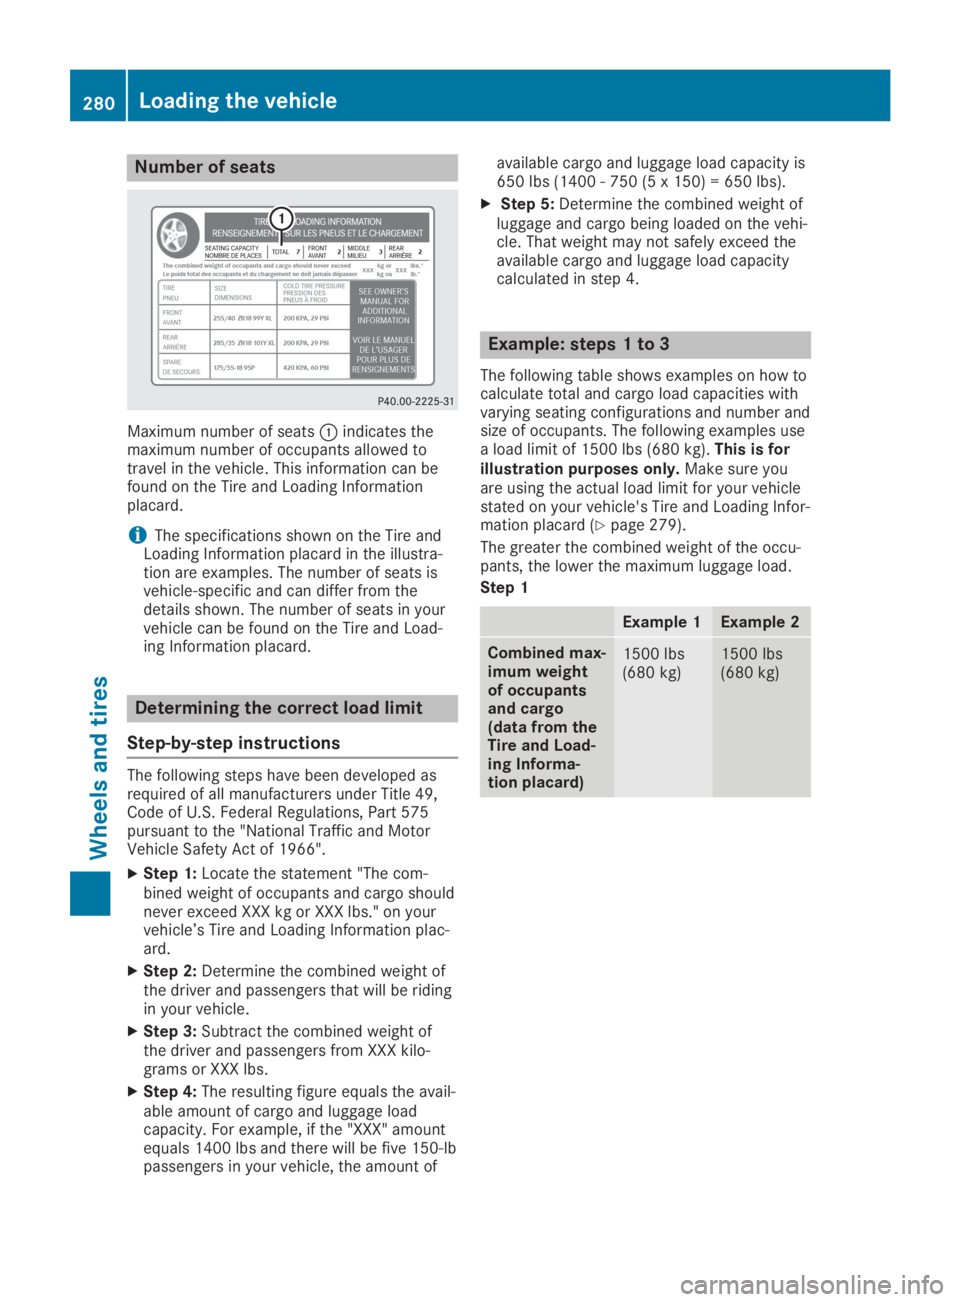
Maximum number of seats�Cindicates themaximum number of occupants allowed totravel in the vehicle. This information can befound on the Tire and Loading Informationplacard.
iThe specifications shown on the Tire andLoading Information placard in the illustra-tion are examples. The number of seats isvehicle-specific and can differ from thedetails shown. The number of seats in yourvehicle can be found on the Tire and Load-ing Information placard.
Determining the correct load limit
Step-by-step instructions
The following steps have been developed asrequired of all manufacturers under Title 49,Code of U.S. Federal Regulations, Part 575pursuant to the "National Traffic and MotorVehicle Safety Act of 1966".
XStep 1:Locate the statement "The com-bined weight of occupants and cargo shouldnever exceed XXX kg or XXX lbs." on yourvehicle’s Tire and Loading Information plac-ard.
XStep 2:Determine the combined weight ofthe driver and passengers that will be ridingin your vehicle.
XStep 3:Subtract the combined weight ofthe driver and passengers from XXX kilo-grams or XXX lbs.
XStep 4:The resulting figure equals the avail-able amount of cargo and luggage loadcapacity. For example, if the "XXX" amountequals 1400 lbs and there will be five 150-lbpassengers in your vehicle, the amount of
available cargo and luggage load capacity is650 lbs (1400 - 750 (5 x 150) = 650 lbs).
XStep 5:Determine the combined weight ofluggage and cargo being loaded on the vehi-cle. That weight may not safely exceed theavailable cargo and luggage load capacitycalculated in step 4.
Example: steps 1 to 3
The following table shows examples on how tocalculate total and cargo load capacities withvarying seating configurations and number andsize of occupants. The following examples usea load limit of 1500 lbs (680 kg).This is forillustration purposes only.Make sure youare using the actual load limit for your vehiclestated on your vehicle's Tire and Loading Infor-mation placard (Ypage 279).
The greater the combined weight of the occu-pants, the lower the maximum luggage load.
Step 1
Example 1Example 2
Combined max-imum weightof occupantsand cargo(data from theTire and Load-ing Informa-tion placard)
1500 lbs(680 kg)1500 lbs(680 kg)
280Loading the vehicle
Wheels and tires
Page 290 of 306
Tread
The part of the tire that comes into contactwith the road.
Bead
The tire bead ensures that the tire sitssecurely on the wheel. There are several steelwires in the bead to prevent the tire from com-ing loose from the wheel rim.
Sidewall
The part of the tire between the tread and thebead.
Weight of optional extras
The combined weight of those optional extrasthat weigh more than the replaced standardparts and more than 2.3 kg (5 lbs). Theseoptional extras, such as high-performancebrakes, level control, a roof rack or a high-per-formance battery, are not included in the curbweight and the weight of the accessories.
TIN (Tire Identification Number)
This is a unique identifier which can be usedby a tire manufacturer to identify tires, forexample for a product recall, and thus identifythe purchasers. The TIN is made up of themanufacturer's identity code, tire size, tiretype code and the manufacturing date.
Load bearing index
The load bearing index (also load index) is acode that contains the maximum load bearingcapacity of a tire.
Traction
Traction is the result of friction between thetires and the road surface.
Treadwear indicators
Narrow bars (tread wear bars) that are distrib-uted over the tire tread. If the tire tread is levelwith the bars, the wear limit of�
Page 295 of 306
These tires have been specially adapted foruse with the control systems, such as ABS
or ESP®, and are marked as follows:
RMO = Mercedes-Benz Original
RMOE = Mercedes-Benz Original Extended(tires featuring run-flat characteristics)
RMO1 = Mercedes-Benz Original (only cer-tain AMG tires)
Mercedes-Benz Original Extended tires mayonly be used on wheels that have been spe-cifically approved by Mercedes-Benz.
Only use tires, wheels or accessories testedand approved by Mercedes-Benz. Certaincharacteristics, e.g. handling, vehicle noiseemissions or fuel consumption, may other-wise be adversely affected. In addition,when driving with a load, tire dimension var-iations could cause the tires to come intocontact with the bodywork and axle compo-nents. This could result in damage to thetires or the vehicle.
Mercedes-Benz accepts no liability for dam-age resulting from the use of tires, wheelsor accessories other than those tested andapproved.
Information on tires, wheels and approvedcombinations can be obtained from anyqualified specialist workshop.
!Retreaded tires are neither tested nor rec-ommended by Mercedes-Benz, since previ-ous damage cannot always be detected onretreaded tires. As a result, Mercedes-Benzcannot guarantee vehicle safety if retreadedtires are mounted. Do not mount used tiresif you have no information about their previ-ous usage.
The recommended pressures for various oper-ating conditions can be found:
Ron the Tire and Loading Information placardon the B-pillar on the driver's side
Rin the tire pressure table on the fuel fillerflap
Observe the notes on recommended tire pres-sures under various operating conditions(Ypage 270).
Check tire pressures regularly, and only whenthe tires are cold. Comply with the mainte-nance recommendations of the tire manufac-turer in the vehicle document wallet.
Notes on the vehicle equipment – alwaysequip the vehicle:
Rwith tires of the same size on a given axle(left and right)
Rwith the same type of tires at a given time(summer tires, winter tires, MOExtendedtires)
Exception: it is permissible to mount a dif-ferent type or make in the event of a flattire. Observe the "MOExtended tires (tireswith run-flat characteristics)" section(Ypage 253).
Vehicles equipped with MOExtended tires arenot equipped with a TIREFIT kit at the factory.It is therefore recommended that you addition-ally equip your vehicle with a TIREFIT kit if youmount tires that do not feature run-flat charac-teristics, e.g. winter tires. A TIREFIT kit may beobtained from a qualified specialist workshop.
Emergency spare wheel
Important safety notes
GWARNING
The wheel or tire size as well as the tire type
of the spare wheel or emergency spare
wheel and the wheel to be replaced may dif-
fer. Mounting an emergency spare wheel
may severely impair the driving characteris-
tics. There is a risk of an accident.
To avoid hazardous situations:
Radapt your driving style accordingly and
drive carefully.
Rnever mount more than one spare wheel
or emergency spare wheel that differs in
size.
Ronly use a spare wheel or emergency
spare wheel of a different size briefly.
Rdo not switch ESP®off.
Rhave a spare wheel or emergency spare
wheel of a different size replaced at the
nearest qualified specialist workshop.
Observe that the wheel and tire dimen-
sions as well as the tire type must be cor-
rect.
Emergency spare wheel293
Wheels and tires
Z