hood release MERCEDES-BENZ SLC ROADSTER 2018 Owner's Manual
[x] Cancel search | Manufacturer: MERCEDES-BENZ, Model Year: 2018, Model line: SLC ROADSTER, Model: MERCEDES-BENZ SLC ROADSTER 2018Pages: 298, PDF Size: 5.26 MB
Page 103 of 298

XTurn housing cover:counter-clockwise and
pull it out.
XAt the bulb holder, push the bulb upwards,
disconnect it and pull it out of bulb holder ;.
XInsert the new bulb into bulb holder;at the
top, push it down and secure it in place.
XAttach housing cover :and turn it clockwise
until it engages.
Side marker lamp s(halogen head-
lamps)
Due to their location, have the bulbs in the side
marker lamp changed at aqualified specialist
workshop.
Windshield wipers
Switching the windshield wipers
on/off
!
Do not operate the windshield wipers when
the windshield is dry, as this could damage
the wiper blades. Moreover, dust that has col-
lected on the windshield can scratc hthe glass
if wiping takes place when the windshield is
dry.
If it is necessary to switch on the windshield
wipers in dry weather conditions, alwaysu se
washer fluid when operating the windshield
wipers.
!If the windshield wipers leave smears on the
windshield after the vehicle has been washed
in an automatic car wash, wax or other resi-
dues may be the reason for this. Clean the
windshield using washer fluid after washing
the vehicle in an automatic car wash.
!Intermittent wiping with rain sensor: due to
optical influences and the windshield becom-
ing dirty in dry weather conditions, the wind-
shield wipers may be activated inadvertently.
This could then damage the windshield wiper
blades or scratc hthe windshield.
For this reason, you should alwayss witch off
the windshield wipers in dry weather.
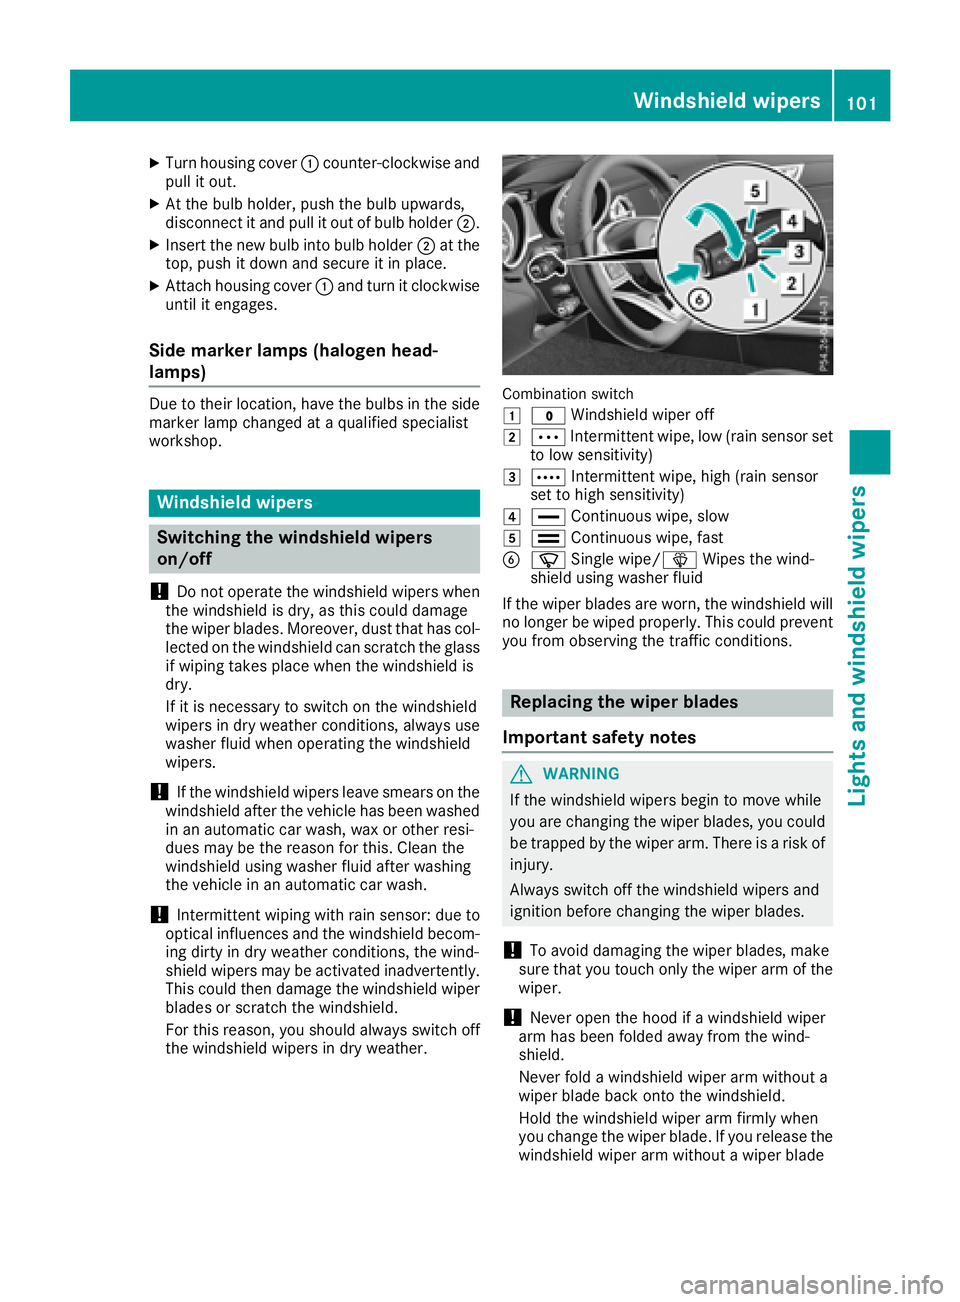
Combination switch
1
$ Windshield wiper off
2ÄIntermittent wipe, low (rain sensor set
to low sensitivity)
3Å Intermittent wipe, high (rain sensor
set to high sensitivity)
4° Continuous wipe, slow
5¯Continuous wipe, fast
BíSingle wipe/î Wipes the wind-
shield using washer fluid
If the wiper blades are worn, the windshield will
no longer be wiped properly. This could prevent
you from observing the traffic conditions.
Replacing the wiper blades
Important safety notes
GWARNING
If the windshield wipers begin to move while
you are changing the wiper blades, you could be trapped by the wiper arm. There is arisk of
injury.
Always switch off the windshield wipers and
ignition before changing the wiper blades.
!To avoid damaging the wiper blades, make
sure that you touch only the wiper arm of the
wiper.
!Never open the hood if awindshield wiper
arm has been folded away from the wind-
shield.
Never fold awindshield wiper arm without a
wiper blade back ontot he windshield.
Hold the windshield wiper arm firmly when
you change the wiper blade. If you release the
windshield wiper arm without awiper blade
Windshield wipers101
Lights and windshield wipers
Z
Page 232 of 298

with Canadian law, some U.S.garage door open-
ers also feature a"break".
Proceed as follows:
Rif you live in Canada.
Rif you have difficulties programming the
garage door opener (regardless of where you live) when following th eprogramming steps.
XPressa nd hold one of buttons ;to? on the
integrated garage door opener.
After ashortt ime, indicator lamp :lightsu p
yellow.
XRelease th ebutton.
Indicator lamp :flashes yellow.
XPressb uttonBof garage door remote con-
trol Afor two seconds, then releaseitf or two
seconds.
XPressb uttonBagain for two seconds.
XRepeat this sequence on button Bof remote
control Auntil indicator lamp :lightsu p
green.
When indicator lamp :lightsupg reen: pro-
grammingisf inished.
When indicator lamp :flashes green: pro-
grammingw as successful. The nex tstepist o
synchronize th erollin gcode.
XRelease button Bof remote control Aof the
garage door drive.
When indicator lamp :lightsupr ed: repeat
th ep rogramming process for th ecorrespond-
ing button on th erear-view mirror. When
doings o, vary th edistanc ebetween remote
control Aand th erear-view mirror.
The required distanc ebetween remote con-
trol Aand th eintegrated garage door opener
depends on th egarage door drives ystem.
Several attemptsm ightbenecessary. You
should tes teveryp osition for at least
25 second sbefore trying another position.
Problems when programming
If you are experiencin gproblems programming
t
h ei ntegrated garage door opener on th erear-
view mirror, tak enoteoft hefollowing instruc-
tions:
RCheck th etransmitter frequenc yused by
garage door driver emote controlAand
whether it is supported .The transmitter fre-
quenc ycan usually be foundont heback of
remote control Afor th egarage door drive.
The integrated garage door opener is com-
patible with devices that have unit swhich operate in th
efrequenc yrange of 28 0to
433M Hz.
RReplace th ebatteries in garage door remote
control A.This increasest helikelihood that
garage door remote control Awill transmit a
stronga nd precise signal to th eintegrated
garage door opener.
RWhen programming, hold remote control A
at varyingd istances and angle sfromb ut-
tons ;to? which you are programming. Try
various angle satadistancebetween 2and
8i nches (5t o20cm) or at th esame angle but
at varyingd istances.
RIfaf urther remote control Ais available for
th es ame garage door drive, repeat th esame
programming steps with this remote control
A.B efore performing these steps, makes ure
that new batteries have been installed in
garage door driver emote controlA.
RNotethatsome remote controls only transmit
for alimited amountoft ime( thei ndicator
lamp on th eremote control goes out) .Press
button Bon remote control Aagain before
transmission ends.
RAlig nthe antenn acable of th egarage door
opener un
it .T his can improve signal recep-
tion/transmission.
Opening/closing th egarage door
After it has been programmed, th eintegrated
garage door opener perform sthe function of the
garage door system remote control. Please also
read th eoperatin ginstructions for th egarage
door system.
XTurn th eSmartKey to position 2in th eigni-
tio nlock (Ypage 116).
XPresse ither button ;,=or? which you
have programmed to operate th egarage
door.
Garage door system with afixed code: indi-
cator lamp :lightsupg reen.
Garage door system with arollin gcode: indi-
cator lamp :flashes green.
The transmitter will transmit asignal as long
as th ebutton is pressed. The transmission is
halted after amaximum of ten second sand
indicator lamp :lightsupy ellow.
XPressbutton;,=or? again if necessary.
230Features
Stowage and features
Page 235 of 298

Engine compartment
Hood
Important safety notes
GWARNING
If th ehood is unlatched, it may open up when
th ev ehicle is in motion and blocky our view.
Thereisar isk of an accident.
Never unlatch th ehood while driving .Before
ever ytrip, ensure that th ehood is locked.
GWARNING
When opening and closingt hehood,itm ay
suddenly fall int othe closed position.T hereis
ar isk of injury to personsw ithin range of
movementoft hehood.
Open and close th ehood only when no onei s
within its range of movement.
GWARNING
Opening th ehood when th eengine is over-
heated or when there is afireint heengine
compartmen tcoul de xpose you to hot gases
or other servic eproducts. Thereisar isk of
injury.
Let an overheate dengine coo ldown before
opening th ehood.Ift here is afireint he
engine compartment, keep th ehood closed
and contac tthe fired epartment.
GWARNING
The engine compartmen tcontain smoving
components. Certain components, sucha s
th er adiator fan ,may continue to run or start
again suddenly when th eignition is off .There
is ar isk of injury.
If you nee dtodoany work inside th eengine
compartment:
Rswitch off th eignition
Rnever reac hintot he area wheret here is a
risk of danger from moving components,
suchast hefan rotatio narea
Rremove jewelry and watches
Rkeep items of clothing and hair, for exam-
ple, away from moving parts
Opening th ehood
GWARNING
Certain component sintheengine compart-
ment, suchast heengine ,radiator and parts
of th eexhaust system, can become ver yhot.
Workin gintheengine compartmen tposesa
risk of injury.
Wherep ossible, let th eengine coo ldown and
touch only th ecomponent sdescribe dinthe
following.
GWARNING
When th ehood is open and th ewindshield
wipersa re set in motion,y ou can be injured by
th ew iper linkage. Thereisar isk of injury.
Always switch off th ewindshield wipersa nd
th ei gnition before opening th ehood.
!Makes ure that th ewindshield wipersa re
no tfolded away from th ewindshield. You
coul dotherwise damag ethe windshield wip-
ers or th ehood.
XMakes ure that th ewindshield wipersa re
turned off.
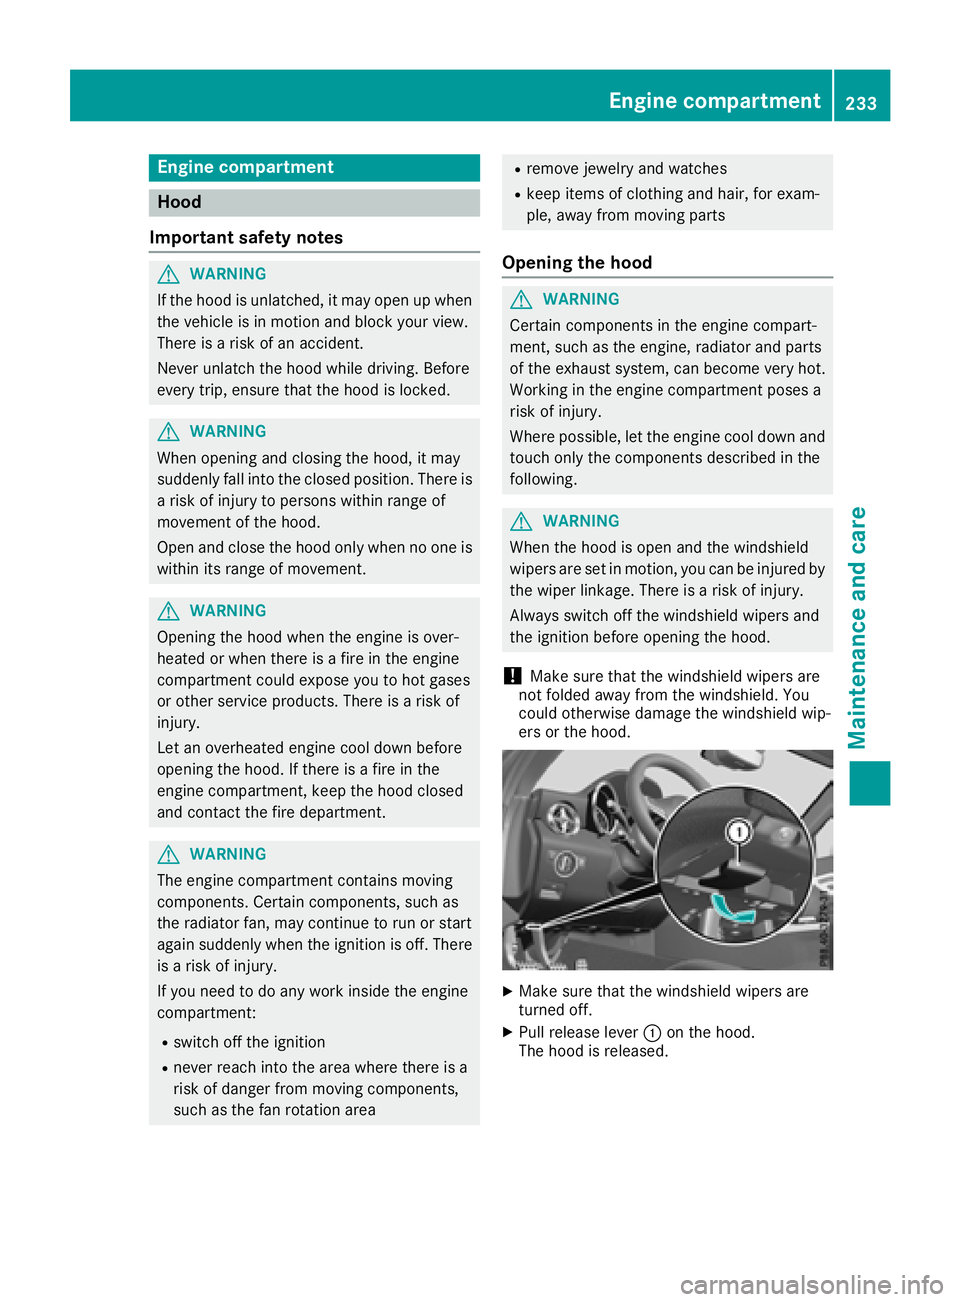
XPull release lever :on th ehood.
The hood is released.
Engine compartment233
Maintenance and care
Z
Page 261 of 298

XMake sure that the ignition is switched off
(Ypage 116).
or
XWhen using the SmartKey, turn the SmartKey to position uin the ignition lock and remove
it (
Ypage 116).
XSecure the vehicle against rolling away
(Ypage 131).
All indicator lamps in the instrumen tcluster
must be off.
The fuses are located in various fuse boxes:
RFuse box in the engine compartmentont he
left-hand side of the vehicle, when viewed in
the direction of travel
RFuse box in the trunk
Fuse box in the engine compartment
i
Observe the "Important safety notes" sec-
tion (Ypage 258).
GWARNING
When the hood is open and the windshield
wipers are set in motion, you can be injured by
the wiper linkage. There is arisk of injury.
Always switch off the windshield wipers and
the ignition before opening the hood.
XMake sure that the windshield wipers are
turned off.
XOpen the hood.
XUse adry cloth to remove any moisture from
the fuse box.
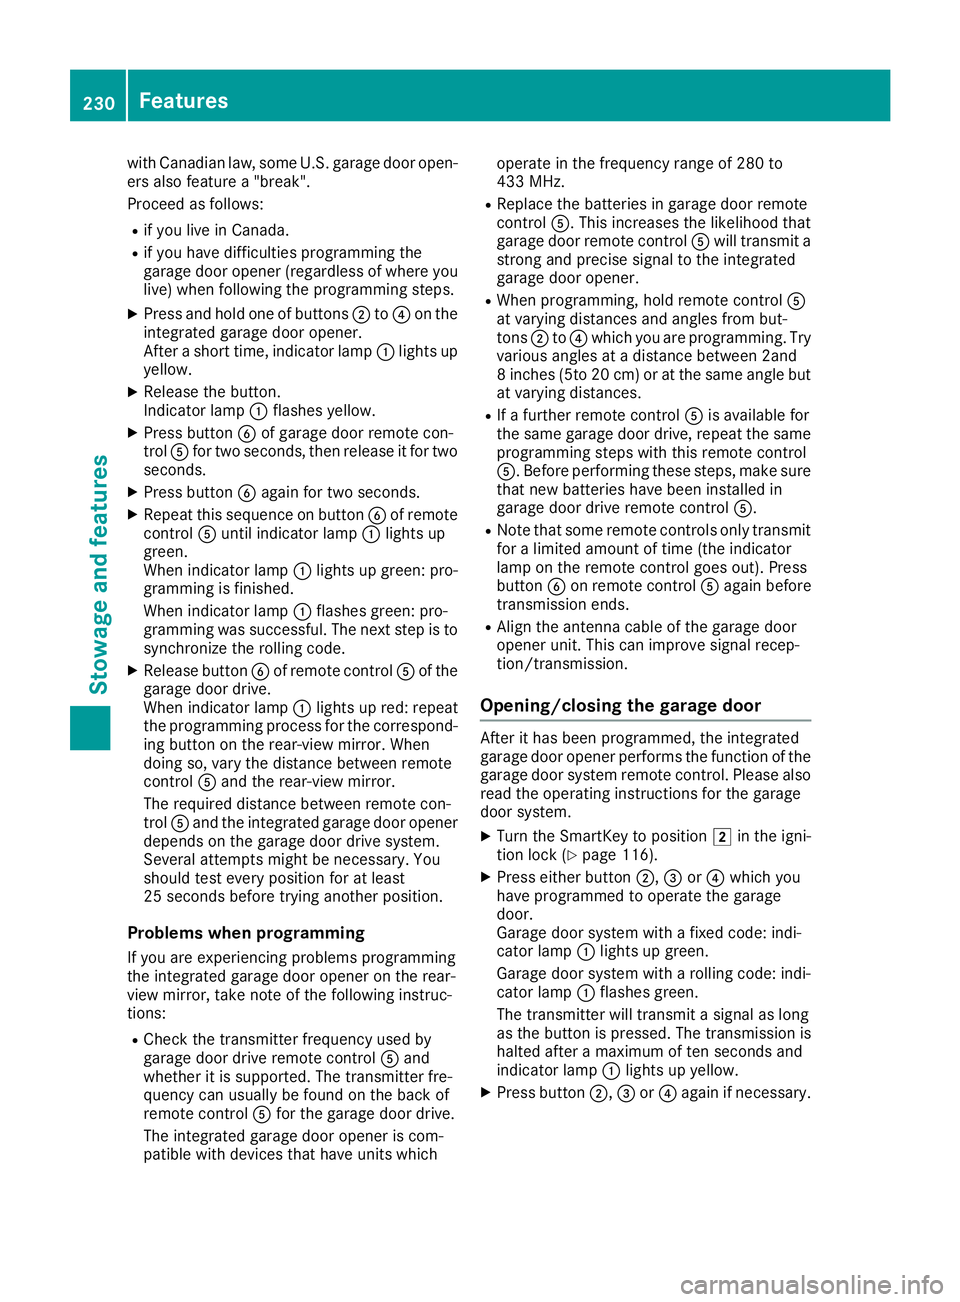
XTo open: open clamps ;.
XRemove fuse box cover :forwards.
XTo close: check whether the seal is lying cor-
rectly in cover :.
XInsert cover:at the rear of the fuse box into
the retainer.
XFold down cover :and close clamps ;.
XClose the hood.
Fuse box in the trunk
i
Observe the "Important safety notes" sec-
tion (Ypage 258).
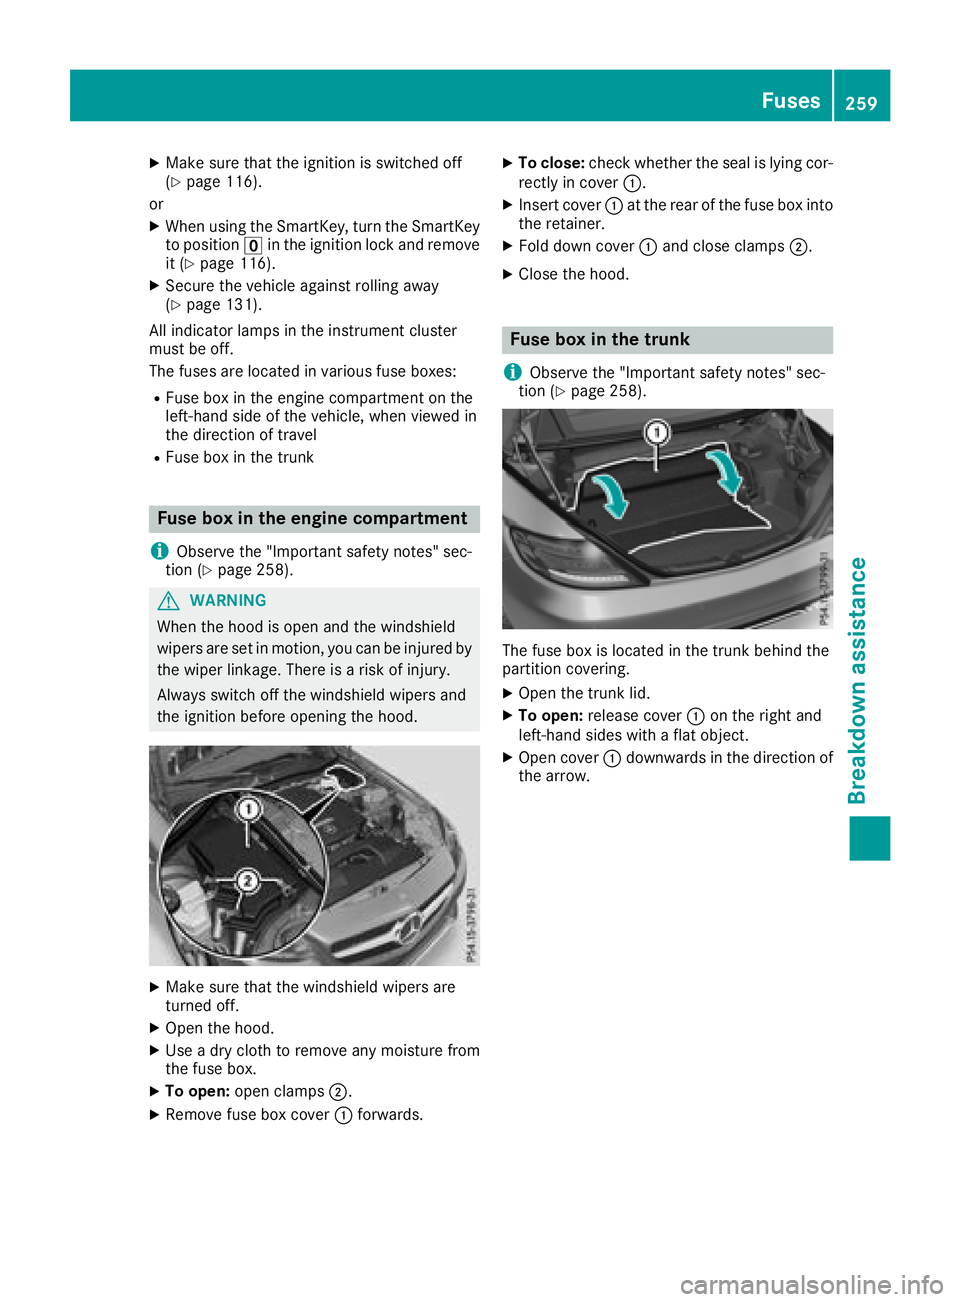
The fuse box is located in the trunk behind the
partition covering.
XOpen the trunk lid.
XTo open: release cover :on the right and
left-hand sides with aflat object.
XOpen cover :downwards in the direction of
the arrow.
Fuses259
Breakdown assistance
Z