seat memory MERCEDES-BENZ SLC ROADSTER 2018 Owner's Manual
[x] Cancel search | Manufacturer: MERCEDES-BENZ, Model Year: 2018, Model line: SLC ROADSTER, Model: MERCEDES-BENZ SLC ROADSTER 2018Pages: 298, PDF Size: 5.26 MB
Page 4 of 298
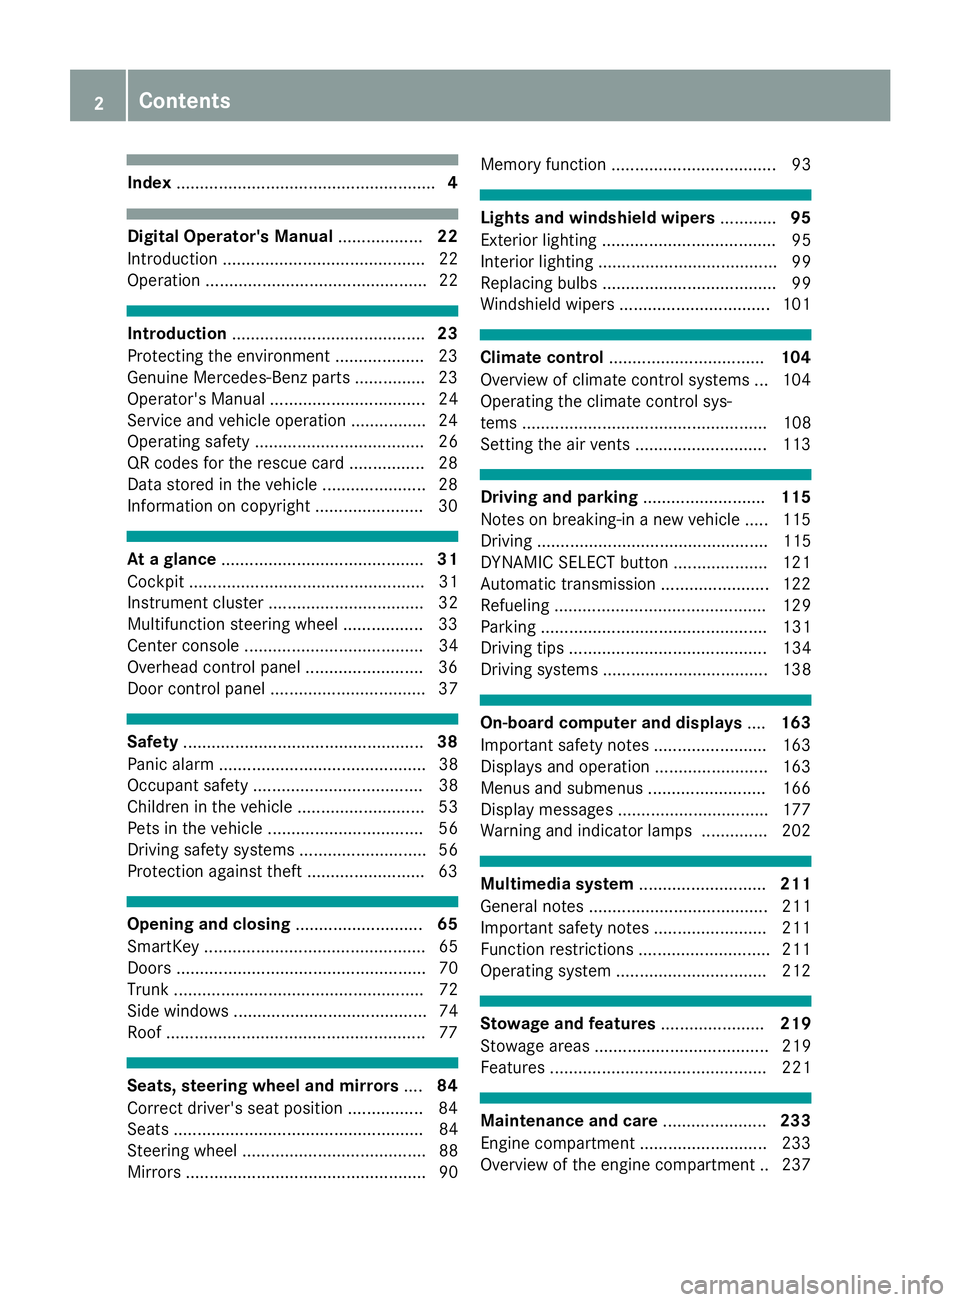
Index....................................................... 4
Digital Operator's Manual..................22
Introductio n........................................... 22
Operation ............................................... 22
Introduction ......................................... 23
Protecting the environment ...................2 3
Genuine Mercedes-Ben zparts............... 23
Operator's Manual ................................. 24
Service and vehicle operation ................2 4
Operating safety .................................... 26
QR codes for the rescue card ................2 8
Data stored in the vehicl e...................... 28
Informatio noncopyright ....................... 30
Atag lance ........................................... 31
Cockpi t.................................................. 31
Instrument cluster. ................................ 32
Multifunctio nsteering whee l................. 33
Center consol e...................................... 34
Overhead contro lpan el .........................3 6
Doorc ontrolpan el ................................. 37
Safety ................................................... 38
Panic alar m............................................ 38
Occupant safety .................................... 38
Childre ninthe vehicl e........................... 53
Pets in the vehicl e................................. 56
Driving safety systems ........................... 56
Protection against theft .........................6 3
Opening and closing...........................65
SmartKey ............................................... 65
Doors ..................................................... 70
Trunk ..................................................... 72
Side windows ......................................... 74
Roof .......................................................7 7
Seats, steering wheel and mirrors....84
Correct driver's seat position ................8 4
Seats ..................................................... 84
Steering wheel ....................................... 88
Mirrors. .................................................. 90 Memory function ................................... 93
Lights and windshield wipers
............95
Exterior lighting ..................................... 95
Interior lighting ...................................... 99
Replacing bulb s..................................... 99
Windshield wipers ................................ 101
Climate control ................................. 104
Overview of climate control systems ... 104
Operating the climate control sys-
tems .................................................... 108
Setting the ai rvents ............................ 113
Drivin gand parking .......................... 115
Notesonb reaking-inanew vehicl e..... 115
Driving ................................................. 115
DYNAMIC SELECT button .................... 121
Automati ctransmissio n....................... 122
Refueling ............................................. 129
Parking ................................................ 131
Driving tip s.......................................... 134
Driving systems ................................... 138
On-board computer and displays ....163
Important safety notes ........................ 163
Displays and operation ........................ 163
Menusa nd submenus ......................... 166
Displa ymessages ................................ 177
Warning and indicator lamps .............. 202
Multimedi asystem ........................... 211
Generaln otes ...................................... 211
Important safety notes ........................ 211
Function restrictions ............................ 211
Operating system ................................ 212
Stowag eand features ...................... 219
Stowag eareas ..................................... 219
Feature s.............................................. 221
Maintenancea nd care...................... 233
Engine compartment ........................... 233
Overview of the engine compartment .. 237
2Contents
Page 18 of 298
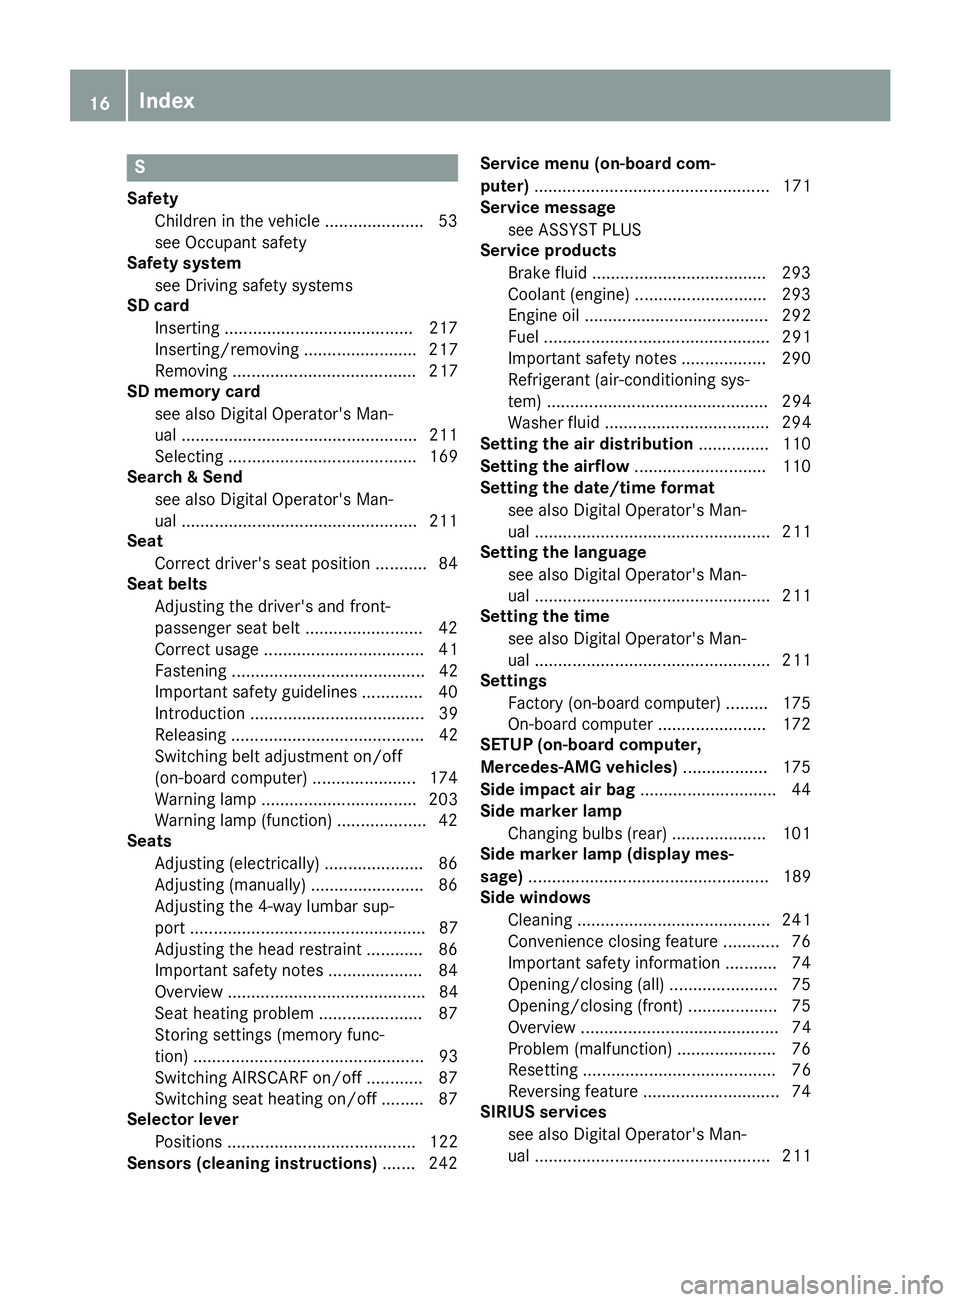
S
SafetyChildren in the vehicle ..................... 53
see Occupant safety
Safety system
see Driving safety systems
SD card
Inserting ........................................2 17
Inserting/removing ........................ 217
Removing ....................................... 217
SD memory card
see also Digita lOperator's Man-
ua l..................................................2 11
Selecting ........................................ 169
Search&S end
see also Digita lOperator's Man-
ua l..................................................2 11
Seat
Correct driver's seatp osition ........... 84
Seat belts
Adjusting the driver's and front-
passenger seatb elt......................... 42
Correct usag e.................................. 41
Fastening ......................................... 42
Important safety guideline s............. 40
Introduction ..................................... 39
Releasing ......................................... 42
Switching belt adjustment on/off
(on-board computer) ...................... 174
Warning lamp ................................. 203
Warning lamp (function) ................... 42
Seats
Adjusting (electrically) ..................... 86
Adjusting (manually) ........................ 86
Adjusting the 4-wa ylum bars up-
por t.................................................. 87
Adjusting the headr estraint ............ 86
Important safety notes .................... 84
Overview .......................................... 84
Seath eating problem ...................... 87
Storing settings (memory func-
tion) ................................................. 93
Switching AIRSCAR Fon/off. ........... 87
Switching seath eating on/off......... 87
Selecto rlever
Positions ........................................ 122
Sensors (cleaning instructions) ....... 242Servic
emenu( on-board com-
puter) .................................................. 171
Servic emessage
see ASSYST PLUS
Servic eproducts
Brake fluid ..................................... 293
Coolant (engine) ............................ 293
Engine oil. ...................................... 292
Fue l................................................ 291
Important safety notes .................. 290
Refrigerant (air-conditioning sys-
tem) ............................................... 294
Washerf lui
d ................................... 294
Settingt he air distribution ............... 110
Setting the airflow ............................ 110
Setting the date/time format
see also Digital Operator's Man-
ual.................................................. 211
Setting the language
see also Digital Operator's Man-
ual.................................................. 211
Setting the time
see also Digital Operator's Man-
ual.................................................. 211
Settings
Factory (on-board computer) ......... 175
On-board compute r....................... 172
SETUP (on-board computer,
Mercedes-AMG vehicles) .................. 175
Side impac tair bag ............................. 44
Side marker lamp
Changing bulb s(rear) .................... 101
Side marker lamp (display mes-
sage) ................................................... 189
Side windows
Cleaning ......................................... 241
Convenience closing feature ............ 76
Important safety information ........... 74
Opening/closing (all )....................... 75
Opening/closing (front) ................... 75
Overview .......................................... 74
Problem (malfunction) ..................... 76
Resetting ......................................... 76
Reversing feature ............................. 74
SIRIU Sservices
see also Digital Operator's Man-
ua l.................................................. 211
16Index
Page 19 of 298
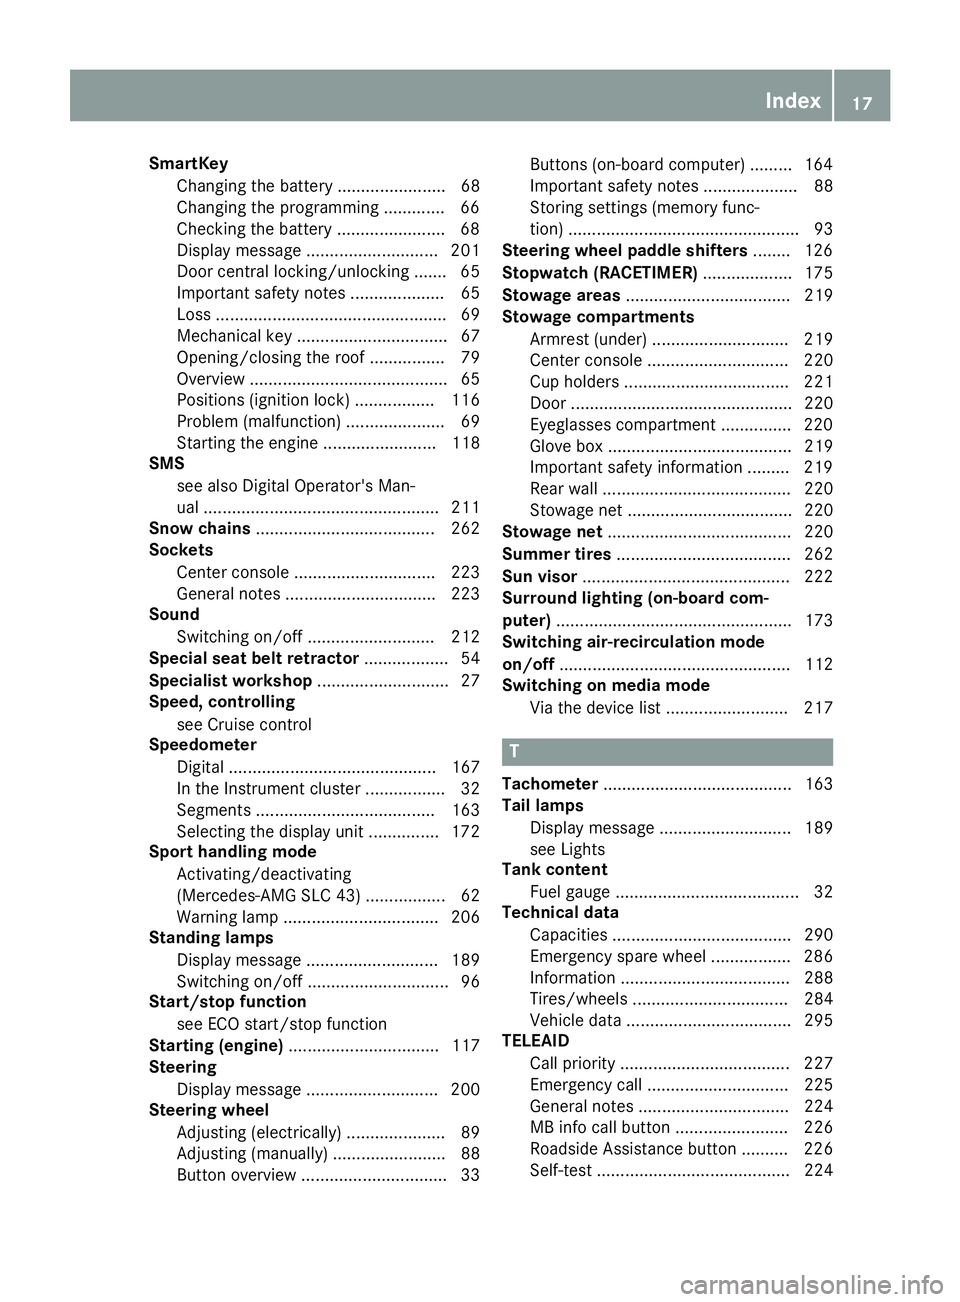
SmartKeyChanging the battery ....................... 68
Changing the programming .............6 6
Checkin gthe battery ...................... .68
Display message ............................ 201
Doorc entral locking/unlocking ....... 65
Important safety note s.................... 65
Loss. ................................................ 69
Mechanical key ................................ 67
Opening/closing the roof. ............... 79
Overview .......................................... 65
Positions (ignition lock) ................. 116
Problem (malfunction) ..................... 69
Starting the engine ........................ 118
SMS
see also Digital Operator's Man-
ual.................................................. 211
Snowc hains...................................... 262
Sockets
Center console .............................. 223
Generaln otes ................................ 223
Sound
Switching on/off. .......................... 212
Special seat belt retractor .................. 54
Specialist workshop ............................ 27
Speed, controlling
see Cruise control
Speedometer
Digital ............................................ 167
In the Instrument cluster ................. 32
Segments ...................................... 163
Selecting the display uni t............... 172
Sport handlin gmode
Activating/deactivating
(Mercedes-AMGS LC 43) ................. 62
Warning lamp ................................. 206
Standin glamps
Displa ymessage ............................ 189
Switching on/off. ............................. 96
Start/stopf unction
see ECO start/stop function
Startin g(engine )................................ 117
Steering
Displa ymessage ............................ 200
Steering wheel
Adjusting (electrically) ..................... 89
Adjusting (manually) ........................ 88
Butto noverview ............................... 33 Buttons (on-board computer) ......... 164
Important safety notes .................... 88
Storing settings (memory func-
tion) ................................................. 93
Steering whee lpaddle shifters ........ 126
Stopwatch (RACETIMER) ................... 175
Stowag eareas ................................... 219
Stowag ecom partments
Armrest (under )............................. 219
Cente
r console .............................. 220
Cu ph olders ................................... 221
Door ............................................... 220
Eyeglasses compartment ............... 220
Glove box ....................................... 219
Important safety information ......... 219
Rear wall ........................................ 220
Stowag enet ................................... 220
Stowag enet....................................... 220
Summert ires..................................... 262
Sun visor ............................................ 222
Surround lighting (on-board com-
puter) .................................................. 173
Switchin gair-recirculatio nmode
on/off ................................................. 112
Switchin gonmediam ode
Via the device list .......................... 217
T
Tachometer ........................................ 163
Tail lamps
Displa ymessage ............................ 189
see Lights
Tank content
Fuelgauge ....................................... 32
Technical data
Capacities ...................................... 290
Emergency spare wheel. ................ 286
Information .................................... 288
Tires/wheels ................................. 284
Vehicl edata. .................................. 295
TELEAID
Call priority .................................... 227
Emergency cal l.............................. 225
Generaln otes ................................ 224
MB info cal lbutton ........................ 226
Roadsid eAssistance button .......... 226
Self-test ......................................... 224
Index17
Page 55 of 298
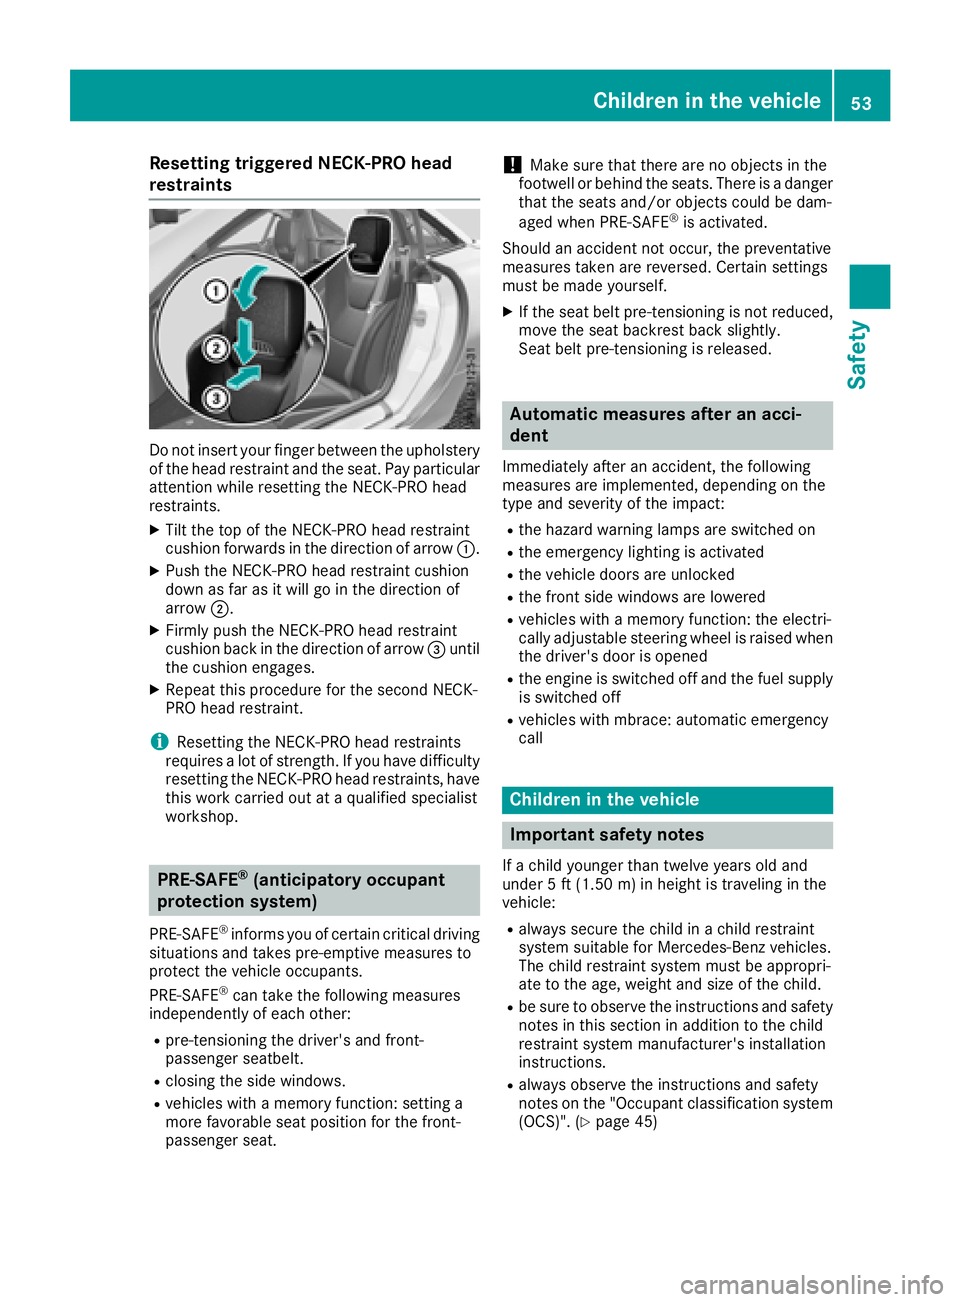
Resetting triggeredNECK-PRO head
restraints
Do not insert your finger between the upholstery of the headr estraint and the seat. Payp articular
attention whil eresetting the NECK-PROh ead
restraints.
XTilt the top of the NECK-PROh eadrestraint
cushio nforward sinthe direction of arrow :.
XPush the NECK-PROh eadrestraint cushion
dow nasfar as it will go in the direction of
arrow ;.
XFirmly push the NECK-PROh eadrestraint
cushio nbackint he direction of arrow =until
the cushio nengages.
XRepea tthis procedure for the second NECK-
PROh eadrestraint.
iResetting the NECK-PROh eadrestraints
requires alot of strength. If yo uhaved ifficulty
resetting the NECK-PROh eadrestraints, have
this work carrie doutataq uali fied specialist
workshop.
PRE-SAFE®(anticipatory occupant
protection system)
PRE-SAFE®informs yo uofcertain critical driving
situations and take spre-emptive measures to
protect the vehicl eoccupants.
PRE-SAFE
®can take the following measures
independentl yofeacho ther:
Rpre-tensioning the driver'sa nd front-
passenger seatbelt.
Rclosing the sid ewindows.
Rvehicles with amemory function: setting a
more favorabl eseatp osition for the front-
passenger seat.
!Make sure that there are no objects in the
footwell or behind the seats. There is adanger
that the seats and/or objects could be dam-
aged when PRE-SAFE
®is activated.
Should an accident not occur, the preventative
measures take nare reversed. Certai nsettings
mus tbem adey ourself.
XIf the seatb eltp re-tensioning is not reduced,
move the seatb ackrest back slightly.
Seatb eltp re-tensioning is released.
Automatic measures after an acci-
dent
Immediately afte ranaccident, the following
measures are implemented, depending on the
typ eand severity of the impact:
Rthe hazard warning lamps are switched on
Rthe emergency lighting is activated
Rthe vehicl edoors are unlocked
Rthe front sid ewindow sare lowered
Rvehicles with amemory function: the electri-
cally adjustabl esteering wheel is raised when
the driver'sd ooriso pened
Rthe engine is switched off and the fue lsuppl y
is switched off
Rvehicles with mbrace: automatic emergency
call
Childrenint he vehicle
Important safety notes
Ifac hild younger than twelve years olda nd
under 5ft(1.50 m) in height is traveling in the
vehicle:
Ralways secur ethe child in achild restraint
systems uitabl efor Mercedes-Benz vehicles.
The child restraint systemm ustbea ppropri-
ate to the age, weight and size of the child.
Rbe sure to observe the instructions and safety
notesint hissectio nina dditiontot he child
restraint systemm anufacturer's installation
instructions.
Ralways observe the instructions and safety
notesont he "Occupant classification system
(OCS)". (
Ypage 45)
Children in the vehicle53
Safety
Z
Page 86 of 298
Correct driver's seat position
GWARNING
You coul dlose control of your vehicle if you do
th ef ollowingw hile driving:
Radjust thedriver'ss eat,head restraint,
steering wheel or mirrors
Rfasten th eseat belt
Thereisar iskofana ccident.
Adjust th edriver'ss eat,head restraint ,steer-
ing wheel and mirror and fasten your seat belt before starting th eengine.
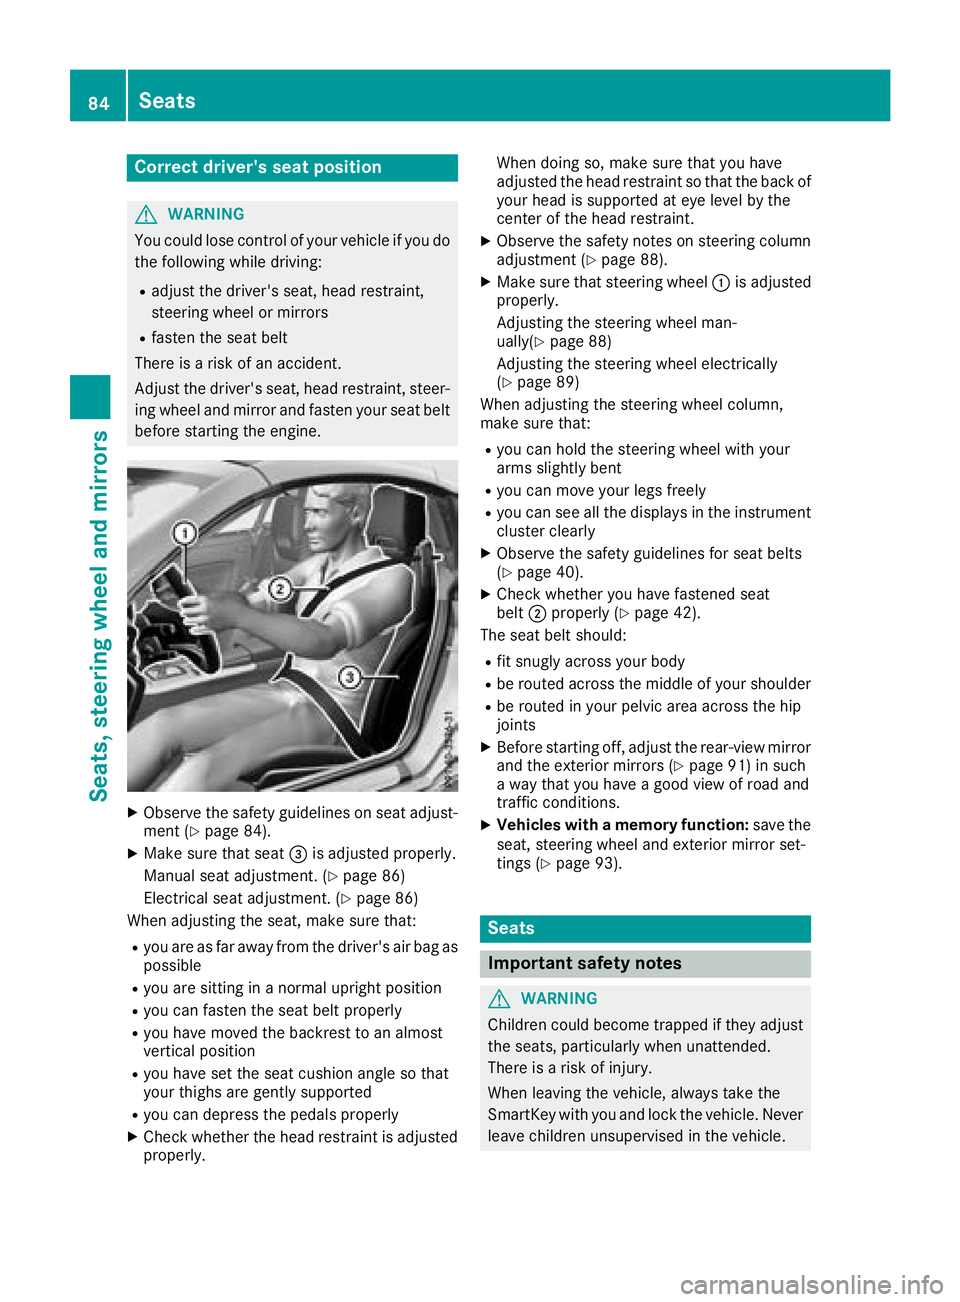
XObserv ethe safety guideline sonseat adjust-
men t(Ypage 84).
XMakes ure that seat =is adjusted properly.
Manual seat adjustment. (
Ypage 86)
Electrical seat adjustment. (
Ypage 86)
When adjusting th eseat,m akes ure that:
Ryou are as far away from th edriver'sa ir bag as
possible
Ryou are sittin ginanormalupright position
Ryou can fasten th eseat belt properly
Ryou have moved th ebackres ttoana lmost
vertical position
Ryou have set th eseat cushion angle so that
your thighs are gently supported
Ryou can depress th epedals properly
XCheckw hether th ehead restraint is adjusted
properly. When doings
o, makesure that you have
adjusted th ehead restraint so that th eback of
your head is supported at eye leve lbythe
cente rofthehead restraint.
XObserv ethe safety note sonsteering column
adjustmen t(Ypage 88).
XMakesure that steering wheel :is adjusted
properly.
Adjusting th esteering wheel man-
ually(
Ypage 88)
Adjustin gthe steering wheel electrically
(
Ypage 89)
When adjusting th esteering wheel column,
mak esure that:
Ryou can hold th esteering wheel withy our
arm sslightly bent
Ryou can mov eyour legs freely
Ryou can see all th edisplays in th einstrument
cluste rclearly
XObserv ethe safety guideline sfor seat belts
(Ypage 40).
XCheckw hether you have fastened seat
belt ;properl y(Ypage 42).
The seat belt should:
Rfit snugly across your body
Rbe routed across th emiddle of your shoulder
Rbe routed in your pelvic area across th ehip
joints
XBefore starting off ,adjust th erear-view mirror
and th eexteri or mirror s(Ypage 91) in such
aw ay that you have agood view of road and
traffic conditions.
XVehicles with amemory function: save the
seat,s teering wheel and exterior mirror set-
tings (
Ypage 93).
Seats
Important safety notes
GWARNING
Children coul dbecome trapped if they adjust
th es eats, particularly when unattended.
Thereisar iskofi njury.
When leaving th evehicle ,always tak ethe
SmartKey withy ou and lockthevehicle .Never
leave childre nunsupervised in th evehicle.
84Seats
Seats, steerin gwheel and mirrors
Page 88 of 298
!Make sure that there are no objects in the
footwell under or behind the seats when mov-
ing the seats back. There is arisk that the
seats and/or the objects could be damaged.
iThe head restraints are equipped with the
NECK-PRO system (Ypage 52). For this rea-
son, it is not possible to remove the head
restraints from the seats.
For more information, contact aqualified spe-
cialist workshop.
Adjusting the seats manually
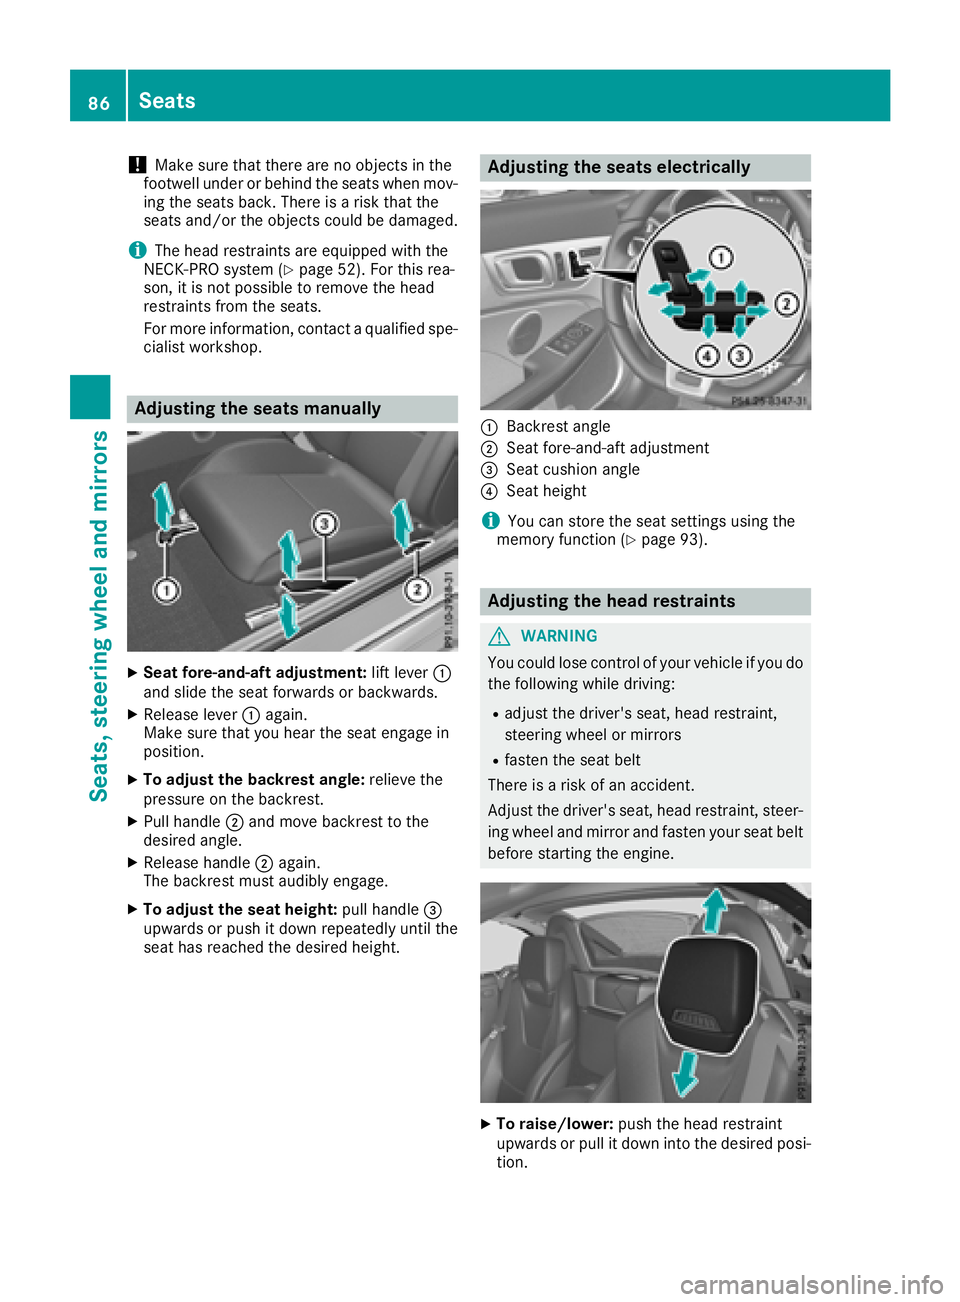
XSeat fore-and-aft adjustment: lift lever:
and slide the seat forwards or backwards.
XRelease lever :again.
Make sure that you hear the seat engage in
position.
XTo adjust the backrest angle: relieve the
pressure on the backrest.
XPull handle ;and move backrest to the
desired angle.
XRelease handle ;again.
The backrest must audibly engage.
XTo adjust the seat height: pull handle=
upwards or push it down repeatedly until the
seat has reached the desired height.
Adjusting the seats electrically
:Backrest angle
;Seat fore-and-aft adjustment
=Seat cushion angle
?Seat height
iYou can store the seat settings using the
memory function (Ypage 93).
Adjusting the head restraints
GWARNING
You could lose control of your vehicle if you do the following while driving:
Radjust the driver's seat, head restraint,
steering wheel or mirrors
Rfasten the seat belt
There is arisk of an accident.
Adjust the driver's seat, head restraint, steer-
ing wheel and mirror and fasten your seat belt before starting the engine.
XTo raise/lower: push the head restraint
upwards or pull it down into the desired posi- tion.
86Seats
Seats, steering wheela nd mirrors
Page 91 of 298
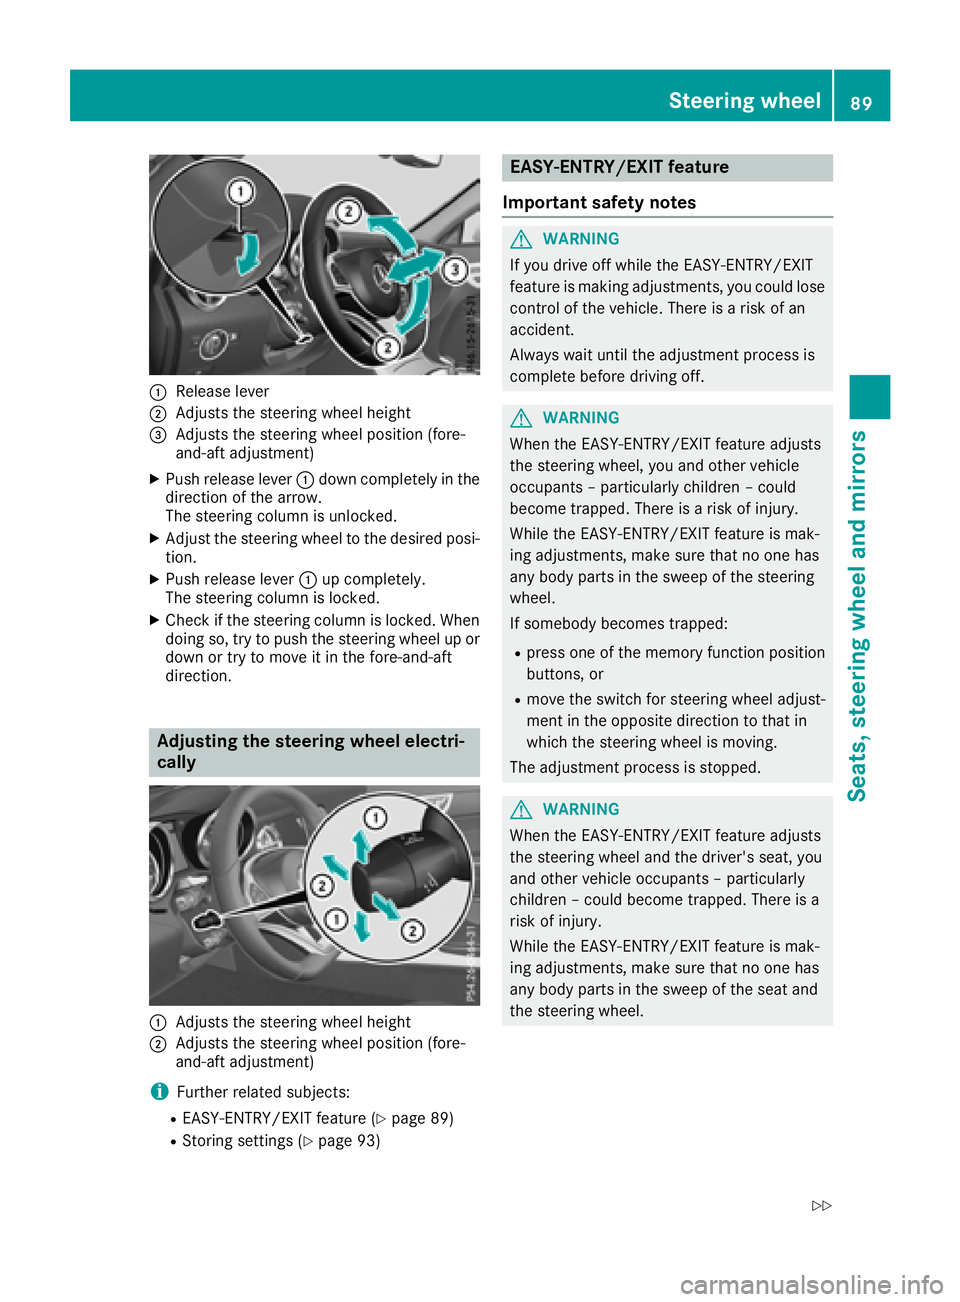
:Releaselever
;Adjusts th esteering whee lheight
=Adjusts th esteering whee lposition (fore-
and-af tadjustment)
XPush release lever :down completely in th e
direction of th earrow.
The steering column is unlocked.
XAdjus tthe steering whee ltot he desired posi-
tion .
XPush release lever :up completely.
The steering column is locked.
XChec kifthesteering column is locked. When
doin gso, tr ytop ush th esteering whee lupor
down or tr ytom oveitint hefore-and-af t
direction .
Adjusting th esteering wheel electri-
cally
:Adjusts th esteering whee lheight
;Adjusts th esteering whee lposition (fore-
and-af tadjustment)
iFurther relate dsubjects :
REASY-ENTRY/EXIT feature (Ypage 89)
RStoring setting s(Ypage 93)
EASY-ENTRY/EXIT feature
Important safety notes
GWARNIN G
If you driv eoff while th eEASY-ENTRY/EXIT
feature is making adjustments ,you could lose
control of th evehicle. There is ariskofa n
accident.
Always wait until th eadjustmen tprocess is
complete before driving off .
GWARNING
When th eEASY-ENTRY/EXIT feature adjust s
th es teering wheel, you and other vehicl e
occupant s–particularly children –could
become trapped .There is ariskofi njury.
Whil ethe EASY-ENTRY/EXIT feature is mak -
ing adjustments ,makes uret hatnoo nehas
any body part sintheswee poft hesteering
wheel.
If somebod ybecome strapped :
Rpress on eofthememory function position
buttons ,or
Rmov ethe switch for steering whee ladjust -
men tint heopposit edirection to that in
whic hthe steering whee lismoving.
The adjustmen tprocess is stopped.
GWARNIN G
When th eEASY-ENTRY/EXIT feature adjust s
th es teering whee land th edriver' sseat ,you
and other vehicl eoccupant s–particularly
children –could become trapped .There is a
ris kofi njury.
Whil ethe EASY-ENTRY/EXIT feature is mak -
ing adjustments ,makes uret hatnoo nehas
any body part sintheswee poft heseat and
th es teering wheel.
Steering wheel89
Seats ,steering wheel and mirrors
Z
Page 92 of 298
If somebodybecomes trapped:
Rpress one of the memory function position
buttons, or
Rpress one of the memory function memory
buttons, or
Rmove the switch for steering wheel adjust-
ment in the opposite direction to that in
which the steering wheel is moving
The adjustment process is stopped.
GWARNING
If you use openings in the bodywork or
detachable parts as steps, you could:
Rslip and/or fall
Rdamage the vehicle and cause yourself to
fall.
There is arisk of injury.
Alway suse secure climbing aids, e.g. asuita-
ble ladder.
The EASY-ENTRY/EXIT feature makes getting in
and out of you rvehicle easier.
You can activate and deactivate the EASY-
ENTRY/EXIT feature in the on-board computer
(
Ypage 174).
Position of the steering whee lwhen the
EASY-ENTRY/EXIT feature is active
The steering wheel swings up when you:
Rremove the SmartKey from the ignition lock
Ropen the driver's door with KEYLESS-GO in
position 1
Ropen the driver's door and the SmartKey is in
position uor1
iThe steering wheel moves upwards only if it
has not already reached the uppers teering
limiter.
Position of the steering whee lfor driv-
ing
The steering wheel is moved to the last selected
positionw hen:
Rthe driver's door is closed
Ryou insert the SmartKey into the ignition lock or
Ryou press the Start/Stop button once on vehi-
cles with KEYLESS-GO
When you close the driver's door with the igni-
tion switched on, the steering wheel is also
automatically moved to the previously set posi-
tion.
The last positionoft he steering column is stored
when you switch off the ignition or when you
store the setting with the memory function
(
Ypage 93).
Crash-responsive EASY-EXIT feature
If the crash-responsive EASY-EXIT feature is trig-
gered in an accident, the steering column will
move upwards when the driver's door is opened.
This occurs irrespective of the positionoft he
SmartKey in the ignition lock. This makes it eas- ier to exit the vehicle and rescue the occupants.
The crash-responsive EASY-EXIT feature is only
operational if the EASY-EXIT/ENTRY feature is
activated in the on-board computer
(
Ypage 174).
Mirrors
Rear-view mirror
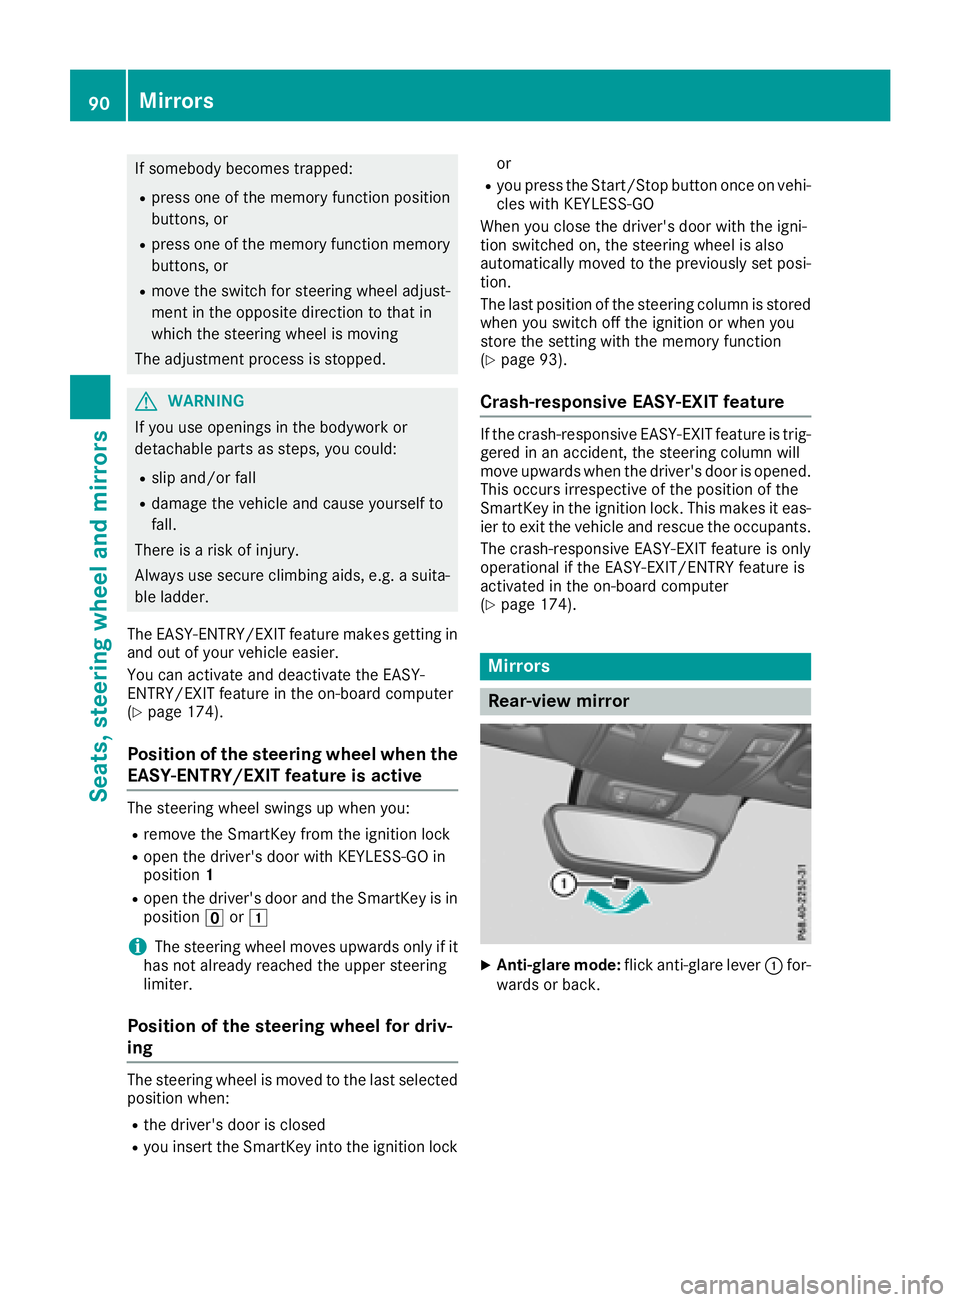
XAnti-glare mode: flick anti-glare lever :for-
ward sorb ack.
90Mirrors
Seats, steeringw heel and mirrors
Page 94 of 298
thenopent he driver's or front-passenger
door.
iThe exterio rmirrors do not fol doutif they
have been folde dinmanually.
Exterior mirro rpushed ou tofposition
If an exterio rmirrorh asbeen pushe doutof
position, procee dasfollows:
XVehicle swithout electricall yfolding exte-
rio rm irrors: movethe exterio rmirrori nto
the correct positio nmanually.
XVehicle swithe lect ricall yfolding exterior
mirrors: press and hol dmirror-folding button
unti lyou hear the mirrorc lick into place
(
Ypage 91).
The mirrorh ousing is engaged agai nand you
can adjus tthe exterio rmirrors as usual
(
Ypage 91).
Automati canti-glare mirrors
GWARNING
Electrolyte maye scap eift he glas sinana uto-
matic anti-glar emirror breaks. Th eelectrolyte
is harmfula nd causesirritation. It must not
come into contact with your skin, eyes ,res-
piratory organs or clothing or be swallowed.
There is ariskofi njury.
If yo ucome into contact with the electrolyte,
observe the following:
RRinse off the electrolyte fromy ours kin
immediatel ywithw ater.
RImmediately rinse the electrolyte ou tof
your eyes thoroughl ywithc lean water.
RIf the electrolyte is swallowed, immediately
rinse your mouth ou tthoroughly. Do not
induce vomiting.
RIf electrolyte come sinto contact with your
skinorh airoriss wallowed ,see km edical
attentio nimm ediately.
RImmediately change ou tofclothing which
hasc ome into contact with electrolyte.
RIf an allergi creactio noccurs, seek medical
attentio nimm ediately. The rear-view mirrora
nd the exteriormirroro n
the driver's side automaticall ygointo anti-glare
mod eift he following conditions ar emet simul-
taneously:
Rthe ignition is switched on and
Rincident light fromh eadlamps strikes the sen-
sor in the rear-view mirror
The mirrors do not go into anti-glar emodei
f
re
vers egearise ngaged or if the interio rlighting
is switched on.
Parking position fort he exterior mir-
ror on the front-passenge rside
Settin gand storin gthe parking position
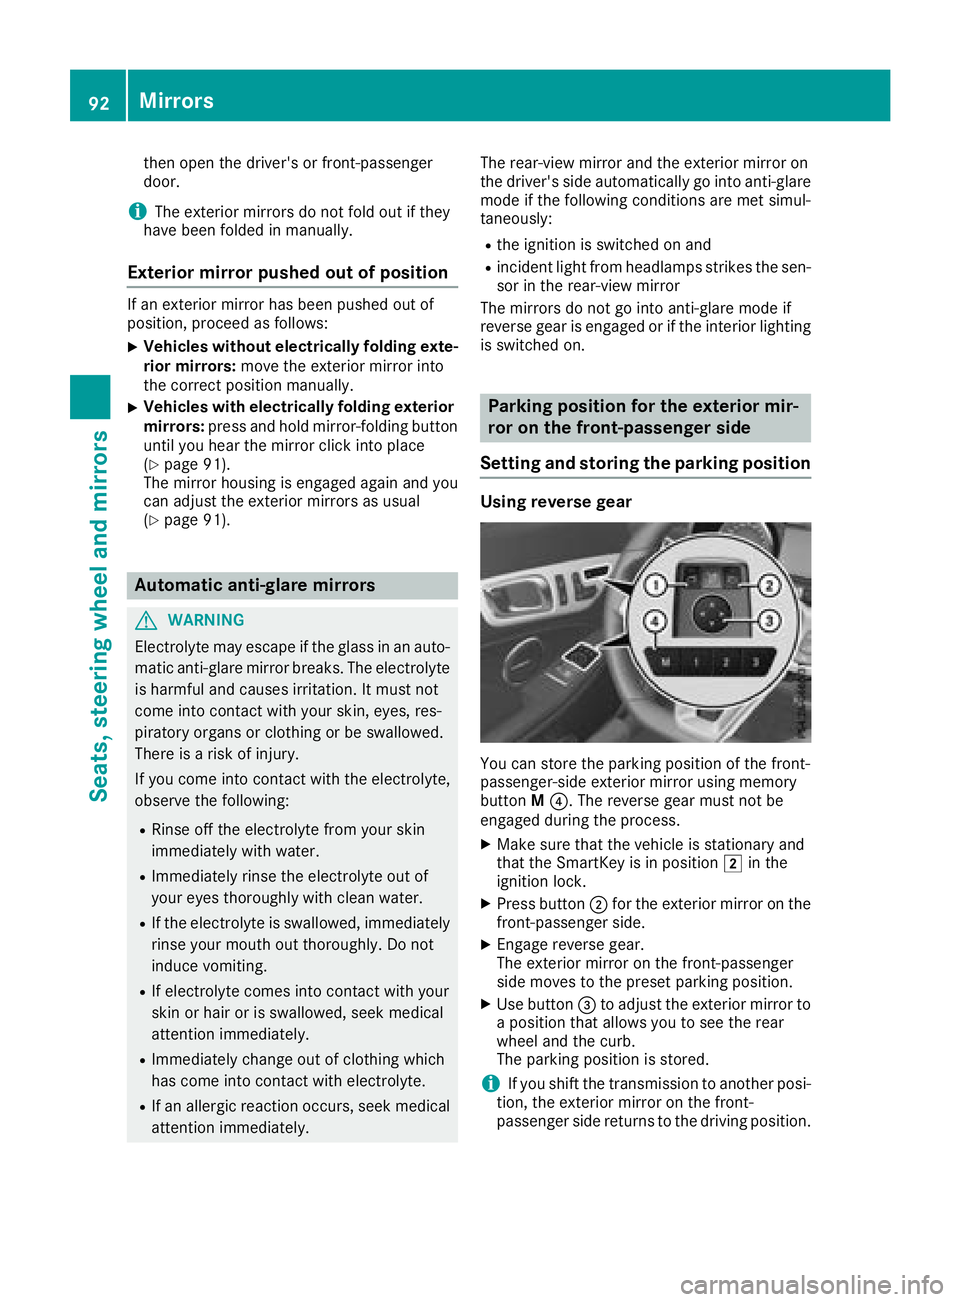
Usin grevers egear
Youc an stor ethe parking positio nofthe front-
passenger-side exterio rmirroru sing memory
button M?.T he reverse gea rmustn ot be
engaged durin gthe process.
XMake sure thatt he vehicleisstationar yand
thatt he SmartKeyisinp osition 2in the
ignition lock.
XPress button ;for the exterio rmirror ont he
front-passenge rside.
XEngage revers egear.
The exterio rmirroront he front-passenger
side moves to the presetp arking position.
XUse button =to adjus tthe exterio rmirrort o
ap osit iont hata llowsyou to seet he rear
whee land the curb.
Th ep arking positio niss tored.
iIf yo ushift the transmission to anotherp osi-
tion, the exterio rmirroront he front-
passenge rsider eturns to the drivin gposit ion.
92Mirrors
Seats, steering wheel andmirrors
Page 95 of 298
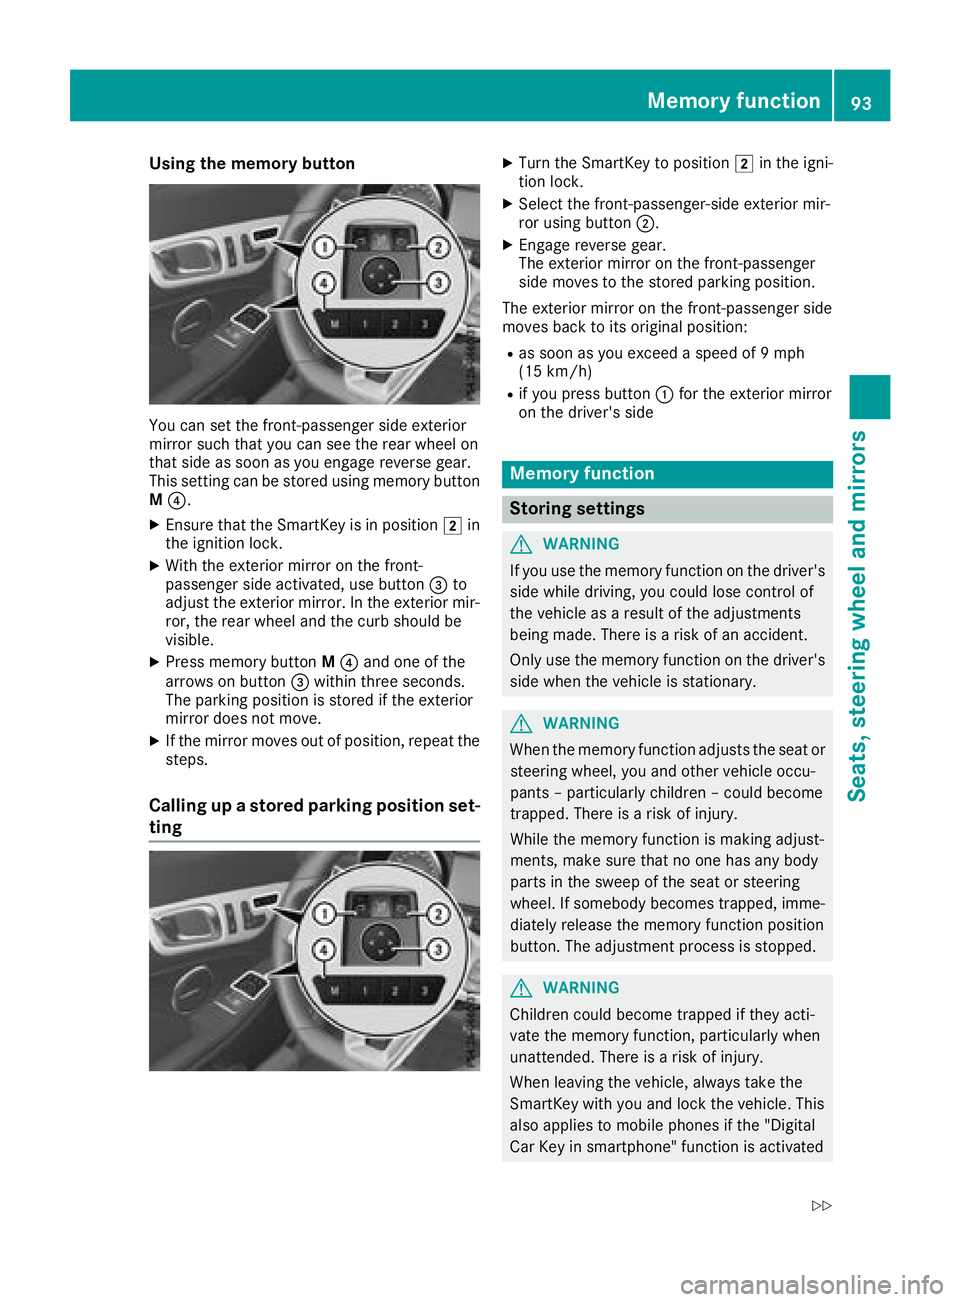
Using the memory button
You can set the front-passenger side exterior
mirror such that you can see the rear wheel on
that side as soon as you engage reverse gear.
This setting can be stored using memorybutton
M ?.
XEnsure that the SmartKey is in position 2in
the ignition lock.
XWith the exterior mirror on the front-
passenger side activated, use button =to
adjust the exterior mirror.Int he exterior mir-
ror, the rear wheel and the curb should be
visible.
XPress memoryb uttonM? and one of the
arrows on button =within three seconds.
The parkin gposition is stored if the exterior
mirror does not move.
XIf the mirror moves out of position ,repeat the
steps.
Calling up astored parking position set-
ting
XTurn the SmartKey to position 2in the igni-
tion lock.
XSelec tthe front-passenger-side exterior mir-
ror using button ;.
XEngage reverse gear.
The exterior mirror on the front-passenger
side moves to the stored parkin gposition.
The exterior mirror on the front-passenger side
moves back to its original position:
Ras soon as you exceed aspeed of 9mph
(15 km/h)
Rif you press button :for the exterior mirror
on the driver'ss ide
Memoryfunction
Storing settings
GWARNING
If you use the memoryf unction on the driver's
side while driving, you could lose contro lof
the vehicle as aresult of the adjustments
being made. There is arisk of an accident.
Only use the memoryf unction on the driver's
side when the vehicle is stationary.
GWARNING
When the memoryf unction adjuststhe seat or
steering wheel, you and other vehicle occu-
pant s–p articularly children –could become
trapped. There is arisk of injury.
While the memoryf unction is makingadjust-
ments, make sure that no one has any body
parts in the sweep of the seat or steering
wheel. If somebody becomes trapped, imme-
diately release the memoryf unction position
button. The adjustment proces sisstopped.
GWARNING
Children could become trapped if they acti-
vate the memoryf unction,particularly when
unattended. There is arisk of injury.
When leaving the vehicle, always tak ethe
SmartKey with you and lock the vehicle. This
also applies to mobile phones if the "Digital
Car Key in smartphone" function is activated
Memor yfunction93
Seats, steering wheel and mirrors
Z