tow MERCEDES-BENZ SLK CLASS 2000 Owners Manual
[x] Cancel search | Manufacturer: MERCEDES-BENZ, Model Year: 2000, Model line: SLK CLASS, Model: MERCEDES-BENZ SLK CLASS 2000Pages: 273, PDF Size: 15.92 MB
Page 4 of 273

1 Contents
IntroductionProduct information .......................... 5
Operator’s manual ............................. 6
Where to find it ................................ 11
Reporting Safety Defects ................ 13Instruments and controlsInstruments and controls ............... 16
Center console .............................. 18
Overhead control panel ............... 19OperationVehicle keys ...................................... 22
Remote control with
folding master key ...................... 22
Start lock-out .................................... 24
General notes on the
central locking system ............... 24
Central locking system ................... 25
Remote control ............................. 25
Panic button .................................. 27
Doors .................................................. 28Central locking switch .................... 30
Automatic central locking ...............31
Emergency unlocking in
case of accident .......................... 32
Trunk ................................................. 33
Emergency release
for trunk lid ................................. 35
Antitheft alarm system ................... 35
Tow-away alarm ............................... 37
Seats .................................................. 38
Seat heater ........................................ 42
Seat belts and integrated
restraint system .......................... 44
Seat belts .......................................... 44
Seat belt nonusage
warning system ............................ 45
BabySmart
TM airbag
deactivation system ................... 50
Self-test BabySmart
TM without
special child
seat installed .................................51
Supplemental restraint
system (SRS) ................................51
Emergency tensioning
retractor (ETR) ............................ 52Airbags .............................................. 52
Safety guidelines for the
seat belt, emergency
tensioning retractor
and airbag .................................... 59
Infant and child
restraint systems ......................... 61
Adjusting telescoping
steering column .......................... 63
Rear view mirrors ............................ 64
Instrument cluster ........................... 68
Flexible service
system (FSS) ................................ 75
Checking engine oil level ............... 77
Engine oil consumption .................. 78
Exterior lamp switch ....................... 79
Headlamp cleaning system ............ 80
Combination switch ........................ 81
Hazard warning flasher
switch ............................................ 83
Climate control ................................. 84
Rear window defroster .................... 88
Audio and telephone,
operation ...................................... 91
Page 6 of 273

3 Contents
Instrument cluster displayMalfunction and indicator
lamps in the instrument
cluster ......................................... 178
On-board diagnostic system ..... 178
Check engine malfunction
indicator lamp ............................. 178
Brake warning lamp .................. 179
Brake pad wear
indicator lamp ............................. 180
Seat belt nonusage
warning lamp .............................. 180
Supplemental restraint
system (SRS)
indicator lamp ............................. 180
Fuel reserve and fuel cap
placement warning .................... 181
Electronic stability
program (ESP) —
warning lamp .............................. 181
BAS / ESP malfunction
indicator lamp ............................. 181
ABS malfunction
indicator lamp ............................. 182Telescoping steering
column warning lamp ................182
Low engine coolant level
warning lamp ..............................183
Low windshield and
headlamp washer system
f luid level warning lamp ...........183
Low engine oil level
warning lamp ..............................184
Charge indicator lamp ...............184
Exterior lamp failure
indicator lamp .............................185
Additional function
indicator lamps
(in the odometer display) ..........185
Malfunction and indicator
lamp in the center console .......185
AIRBAG OFF
indicator lamp .............................185
Practical hintsFirst aid kit ......................................188
Stowing things
in the vehicle .............................188Fuses ................................................ 188
Hood ................................................. 190
Automatic transmission
fluid level ................................... 192
Checking engine oil level ............. 193
Coolant level ................................... 194
Adding coolant ........................... 194
Windshield and
headlamp washer system ........ 195
Air pump, spare wheel,
vehicle tools,
storage compartment ................ 196
Vehicle jack ..................................... 197
Wheels ............................................. 198
Tire replacement ........................ 198
Rotating wheels .......................... 199
Spare wheel ....................................200
Spare wheel bolts ....................... 201
Changing wheels ...........................202
Inflating the collapsible
spare tire .....................................207
Storing spare wheel in
wheel well ...................................208
Tire inflation pressure ..................209
Page 7 of 273

4 Contents
Battery ............................................. 210
Jump starting .................................. 212
Towing the vehicle ......................... 214
Transmission selector lever,
manually unlocking .................. 217
Exterior lamps ................................ 218
Headlamp assembly ................... 219
Taillamp assemblies ..................222
Changing batteries in the
remote control ...........................224
Synchronizing
remote control ............................225
Emergency engine shut-down .....226
Raising hardtop manually ............226
Replacing wiper blade insert ....... 231
Antenna ...........................................232
Manual release of
fuel filler flap .............................232
Vehicle careCleaning and care
of the vehicle .............................234
Power washer ..............................235Paintwork, painted body
components ................................ 235
Tar stains .................................... 235
Engine cleaning ......................... 236
Vehicle washing ......................... 236
Headlamps, taillamps,
turn signal lenses ...................... 237
Window cleaning ....................... 237
Rear window cleaning .............. 237
Wiper blades .............................. 238
Light alloy wheels ..................... 238
Instrument cluster ..................... 238
Steering wheel and
gear selector lever ..................... 239
Cup holder .................................. 239
Hard plastic trim items ............. 239
Plastic and rubber parts ........... 239
Headliner and shelf
behind roll bars .......................... 239
Upholstery .................................. 239
Seat belts ..................................... 240
Technical data
Spare parts service ........................242
Warranty coverage .........................242
Identification labels ......................243
Layout of poly-V-belt drive ............245
Technical data ................................248
Fuels, coolants, lubricants
etc. – capacities .........................252
Engine oils ......................................254
Engine oil additives .......................254
Air conditioner refrigerant ...........254
Brake fluid ......................................254
Premium unleaded gasoline ........255
Fuel requirements .........................255
Gasoline additives .........................256
Coolants ...........................................256
Consumer information ..................258IndexIndex ................................................260
Page 20 of 273
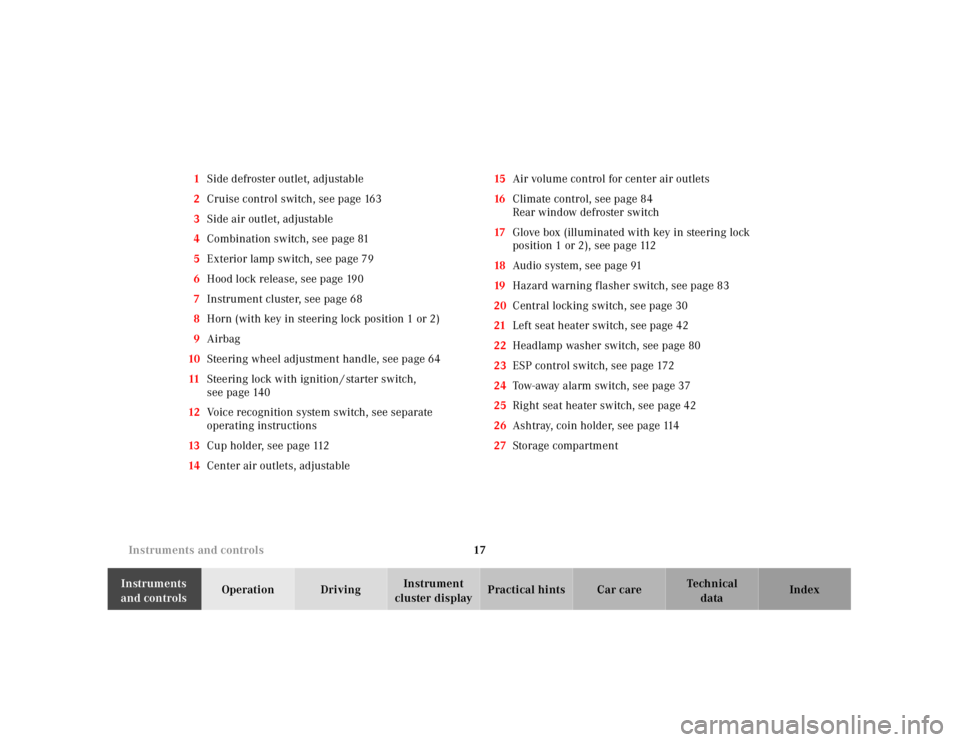
17 Instruments and controls
Te ch n ica l
data Instruments
and controlsOperation DrivingInstrument
cluster displayPractical hints Car care Index 1Side defroster outlet, adjustable
2Cruise control switch, see page 163
3Side air outlet, adjustable
4Combination switch, see page 81
5Exterior lamp switch, see page 79
6Hood lock release, see page 190
7Instrument cluster, see page 68
8Horn (with key in steering lock position 1 or 2)
9Airbag
10Steering wheel adjustment handle, see page 64
11Steering lock with ignition / starter switch,
see page 140
12Voice recognition system switch, see separate
operating instructions
13Cup holder, see page 112
14Center air outlets, adjustable15Air volume control for center air outlets
16Climate control, see page 84
Rear window defroster switch
17Glove box (illuminated with key in steering lock
position 1 or 2), see page 112
18Audio system, see page 91
19Hazard warning f lasher switch, see page 83
20Central locking switch, see page 30
21Left seat heater switch, see page 42
22Headlamp washer switch, see page 80
23ESP control switch, see page 172
24Tow-away alarm switch, see page 37
25Right seat heater switch, see page 42
26Ashtray, coin holder, see page 114
27Storage compartment
Page 23 of 273
20 Contents - Operation
Te ch n ica l
data Instruments
and controlsOperationDrivingInstrument
cluster displayPractical hints Car care Index
OperationVehicle keys ...................................... 22
Remote control
with folding master key ............. 22
Start lock-out .................................... 24
General notes on
the central locking system ........ 24
Central locking system ................... 25
Remote control ............................. 25
Panic button .................................. 27
Doors .................................................. 28
Central locking switch .................... 30
Automatic central locking .............. 31
Emergency unlocking in case of
accident ........................................ 32
Trunk ................................................. 33Emergency release for trunk lid ... 35
Antitheft alarm system ................... 35
Tow-away alarm ............................... 37
Seats .................................................. 38
Seat heater ........................................ 42
Seat belts and integrated restraint
system .......................................... 44
Seat belts .......................................... 44
Seat belt nonusage
warning system ............................ 45
BabySmart
TM airbag deactivation
system .......................................... 50
Self-test BabySmart
TM without
special child seat installed ..........51
Supplemental restraint system
(SRS) ..............................................51
Emergency tensioning retractor
(ETR) ............................................. 52Airbags .............................................. 52
Safety guidelines for the seat belt,
emergency tensioning retractor
and airbag .................................... 59
Infant and child
restraint systems ......................... 61
Adjusting telescoping steering
column .......................................... 63
Rear view mirrors ............................ 64
Instrument cluster ........................... 68
Flexible service system (FSS) ........ 75
Checking engine
oil level ......................................... 77
Engine oil consumption .................. 78
Exterior lamp switch ....................... 79
Headlamp cleaning system ............ 80
Combination switch ........................ 81
Page 34 of 273
31 Central locking system
Te ch n ica l
data Instruments
and controlsOperationDrivingInstrument
cluster displayPractical hints Car care Index Automatic central locking
The central locking switch also operates the automatic
central locking.
Wit h th e automa tic central locking system activated, t he
doors and trunk are locked at vehicle speeds of
approximately 9 mph (15 km / h) or more. The fuel filler
f l ap and th e stora ge compartment in th e arm rest rema in
unlocked.
To a ctiva te:
With key in steering lock position 2 hold upper portion
of switch (1) for a minimum of 5 seconds.
To dea cti vate :
With key in steering lock position 2 hold lower portion
of switch (2) for a minimum of 5 seconds.Notes:
If doors are unlocked with the central locking switch
after activating the automatic central locking, and
neither door is opened, then the doors remain unlocked
even at vehicle speeds of approximately 9 mph
(15 km / h) or more.
If a door is opened from the inside at speeds of
approximately 9 mph (15 km / h) or less with the
automatic central locking activated, the door will again
be automatically locked at speeds of approximately
9 mph (15 km / h) or more.
Important!
When towing the vehicle, or with the vehicle on a
dynamometer test stand, please, note the following:
With the automatic central locking activated and the
key in steering lock position 2, the vehicle doors will
lock if the left front wheel as well as the right rear
wheel spin at vehicle speeds of approximately 9 mph
(15 km / h) or more.
To prevent the vehicle door locks from locking,
deactivate the automatic central locking.
Page 40 of 273
37 Tow-away alarm
Te ch n ica l
data Instruments
and controlsOperationDrivingInstrument
cluster displayPractical hints Car care Index Tow - aw ay al a rm
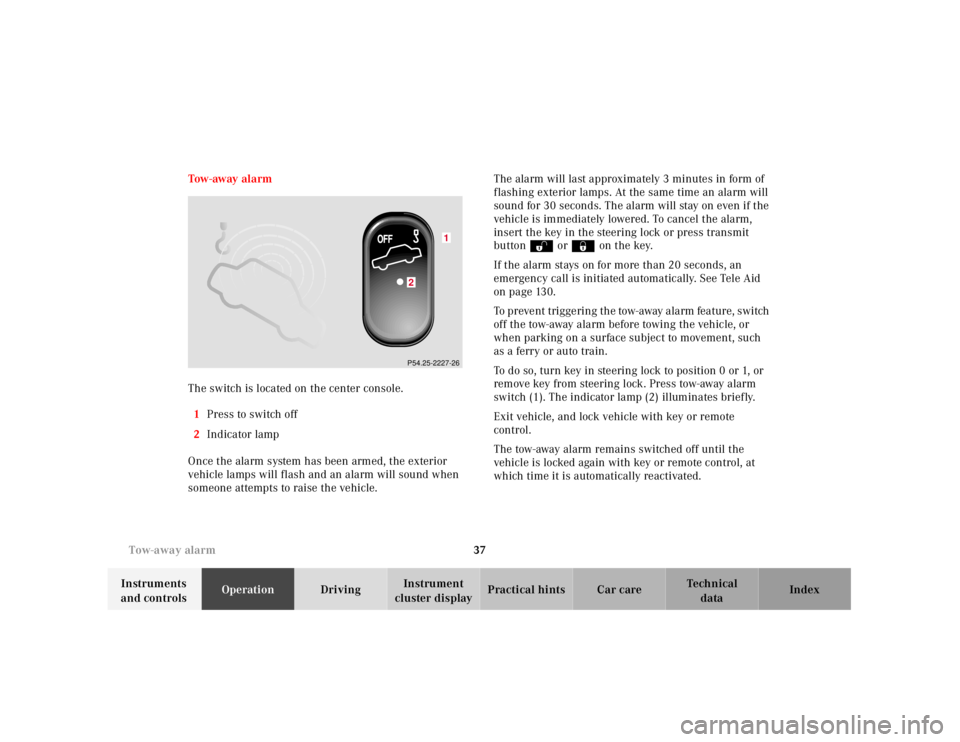
The switch is located on the center console.
1Press to switch off
2Indicator lamp
Once the alarm system has been armed, the exterior
vehicle lamps will flash and an alarm will sound when
someone attempts to raise the vehicle.The alarm will last approximately 3 minutes in form of
flashing exterior lamps. At the same time an alarm will
sound for 30 seconds. The alarm will stay on even if the
vehicle is immediately lowered. To cancel the alarm,
insert the key in the steering lock or press transmit
buttonŒ or‹ on the key.
If the alarm stays on for more than 20 seconds, an
emergency call is initiated automatically. See Tele Aid
on page 130.
To prevent triggering the tow-away alarm feature, switch
off the tow-away alarm before towing the vehicle, or
when parking on a surface subject to movement, such
as a ferry or auto train.
To do so, turn key in steering lock to position 0 or 1, or
remove key from steering lock. Press tow-away alarm
switch (1). The indicator lamp (2) illuminates brief ly.
Exit vehicle, and lock vehicle with key or remote
control.
The tow-away alarm remains switched off until the
vehicle is locked again with key or remote control, at
which time it is automatically reactivated.
1
2P54.25-2227-26
Page 114 of 273
111 Interior equipment
Te ch n ica l
data Instruments
and controlsOperationDrivingInstrument
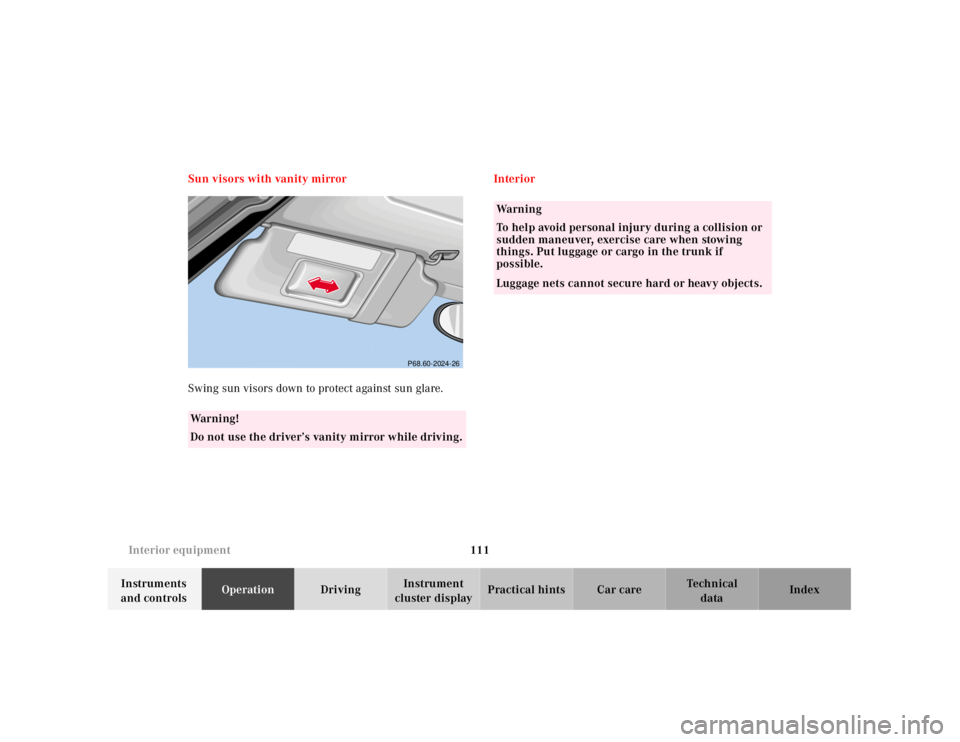
cluster displayPractical hints Car care Index Sun visors with vanity mirror
Swing sun visors down to protect against sun glare.Interior
Wa r n i n g !
Do not use the driver’s vanity mirror while driving.
P68.60-2024-26
Wa r n i n g
To help avoid personal injury during a collision or
sudden maneuver, exercise care when stowing
things. Put luggage or cargo in the trunk if
possible.Luggage nets cannot secure hard or heavy objects.
Page 134 of 273
131 Tele Aid
Te ch n ica l
data Instruments
and controlsOperationDrivingInstrument
cluster displayPractical hints Car care Index Emergency calls
An emergency call is initiated automatically:
•following an accident in which the Emergency
Tensioning Retractors (ETR’s) or airbags deploy,
•if the antitheft alarm or the tow away alarm stays on
for more than 20 seconds, see pages 35 and 37.
An emergency call can also be initiated manually by
opening the cover next to the interior rear view mirror
labeled “SOS”, then pressing the button (for longer than
2 seconds) located under the cover. See below for
instructions on initiating an emergency call manually.
Once the emergency call is in progress, the indicator
lamp in the “SOS” button will begin to f lash. All
information relevant to the emergency, such as the
location of the vehicle (determined by the GPS satellite
location system), vehicle model, identification number
and color are generated.
A voice connection between the Response Center and
the occupants of the vehicle will be established
automatically soon after the emergency call has been
initiated. When a voice connection is established the
audio system mutes. The Response Center will attempt
to determine more precisely the nature of the accident
provided they can speak to an occupant of the vehicle.The Tele Aid system is available if:
•it has been activated and is operational. Activation
requires a subscription for monitoring services and
cellular air time
•the relevant cellular phone network and GPS signals
are available and pass the information on to the
Response Center.
Note:
Location of the vehicle on a map is possible if the
vehicle is able to receive signals from the GPS satellite
network and pass the information on to the Response
Center.
Wa r n i n g !
If the indicator lamp in the “SOS” button is
illuminated continuously and there was no voice
connection to the Response Center established,
then the Tele Aid system could not initiate an
emergency call (e.g. the relevant cellular phone
network is not available).Should this occur, assistance must be summoned
by other means.
Page 136 of 273
133 Tele Aid
Te ch n ica l
data Instruments
and controlsOperationDrivingInstrument
cluster displayPractical hints Car care Index Roadside Assistance button
Located below the center armrest cover is the Roadside
Assistance button. Pressing and holding the
button (for longer than 2 seconds), will initiate a call to
a Mercedes-Benz Roadside Assistance dispatcher. The
button will flash while the call is in progress. The
Tele Aid system will transmit data generating the
vehicle identification number, model, color and location
(subject to availability of cellular and GPS signals).
A voice connection between the Roadside Assistance
dispatcher and the occupants of the vehicle will be
established. The nature of the need for assistance can
then be described. The Mercedes-Benz Roadside assistance dispatcher will
either dispatch a qualified Mercedes-Benz technician or
arrange to tow your vehicle to the nearest
Mercedes-Benz Center. For services such as labor and/
or towing charges may apply. Refer to the Roadside
Assistance manual for more information.
These programs are only available in the USA:
•Sign and Drive services: Serv ices su ch as jump sta rt,
a few gallons of fuel or the replacement of a f lat tire
with the vehicle spare tire are obtainable,
•Remote Vehicle Diagnostics: This function permits
the Mercedes-Benz Roadside Assistance dispatcher
to download malfunction codes and actual vehicle
data.
Notes:
The indicator lamp in the Roadside Assistance
button remains illuminated in red for
approximately 10 seconds during the system self-check
after turning key in steering lock to position 2 (together
with the “SOS” button and the Information
button¡).
Wa r n i n g !
If you feel at any way in jeopardy when in the
vehicle (e.g. smoke or fire in the vehicle, vehicle in
a dangerous road location), please do not wait for
voice contact after you have pressed the emergency
button. Carefully leave the vehicle and move to a
safe location. The Response Center will
automatically contact local emergency officials
with the vehicle’s approximate location if they
receive an automatic “SOS” signal and cannot make
voice contact with the vehicle occupants.