settings menu MERCEDES-BENZ SLK-Class 2015 R172 Comand Manual
[x] Cancel search | Manufacturer: MERCEDES-BENZ, Model Year: 2015, Model line: SLK-Class, Model: MERCEDES-BENZ SLK-Class 2015 R172Pages: 270, PDF Size: 5.82 MB
Page 185 of 270

Settings
Settings menu X
Call up the menu (Y page 179).
X Select Settings
Settings by turning00790052007Aor sliding
009700520064 the COMAND controller and press 0098
to confirm.
You can activate/deactivate the following
settings:
R Download Images Automatically
Download Images Automatically
It may take some time to download the
contents of websites that contain a large
amount of images. Therefore, it may be
useful to deactivate this option.
R Block Pop-Ups
Block Pop-Ups
Pop-ups are windows (usually with adver-
tisements) which are displayed automati-
cally when you call up a website. You can
block these displays.
R Activate Javascript
Activate Javascript
Javascript makes it possible to display and
interact with dynamic content on the web-
site.
R Allow Cookies Allow Cookies
Some websites save information in small
text files (cookies) in COMAND. You can
determine whether cookies may be stored.
R Character Size Character Size
You can select the font size which is used
when displaying the website.
R Character Code
Character Code You can select a different character set
here, e.g. if the characters of a website
appear distorted.
R Delete Private Data Delete Private Data
Deletes data which has been saved by the
browser during Internet use.
Changing settings X
Select a setting by turning 00790052007Athe
COMAND controller and press 0098to con-
firm.
Switch the setting on 0073or off 0053.
X Select Character Size Character Size orCharacter
Character
Code
Code by turning 00790052007Aor sliding 009700520064the
COMAND controller and press 0098to con-
firm.
X Select a setting using the COMAND con-
troller and press 0098to confirm.
i If you change the settings, the websites
may not be displayed correctly.
Deleting private data X
Select Delete Private Data Delete Private Data and press
0098 to confirm.
A menu appears. Internet
183Online and Internet functions Z
Page 188 of 270
Your COMAND equipment
These operating instructions describe all the
standard and optional equipment for your
COMAND system, as available at the time of
going to print. Country-specific differences
are possible. Please note that your
COMAND system may not be equipped with
all the features described. Radio mode
Important notes
Portable electronic devices in the vehicle may seriously impair radio reception. Switching to radio mode
Switching modes using the function
button X
Press the 002Afunction button.
The radio display appears. You will hear the
last station played on the last waveband.
i Repeatedly pressing this function button
switches through the wavebands in this
order: FM, AM, WB. You then call up satel-
lite radio mode. Pressing the button again
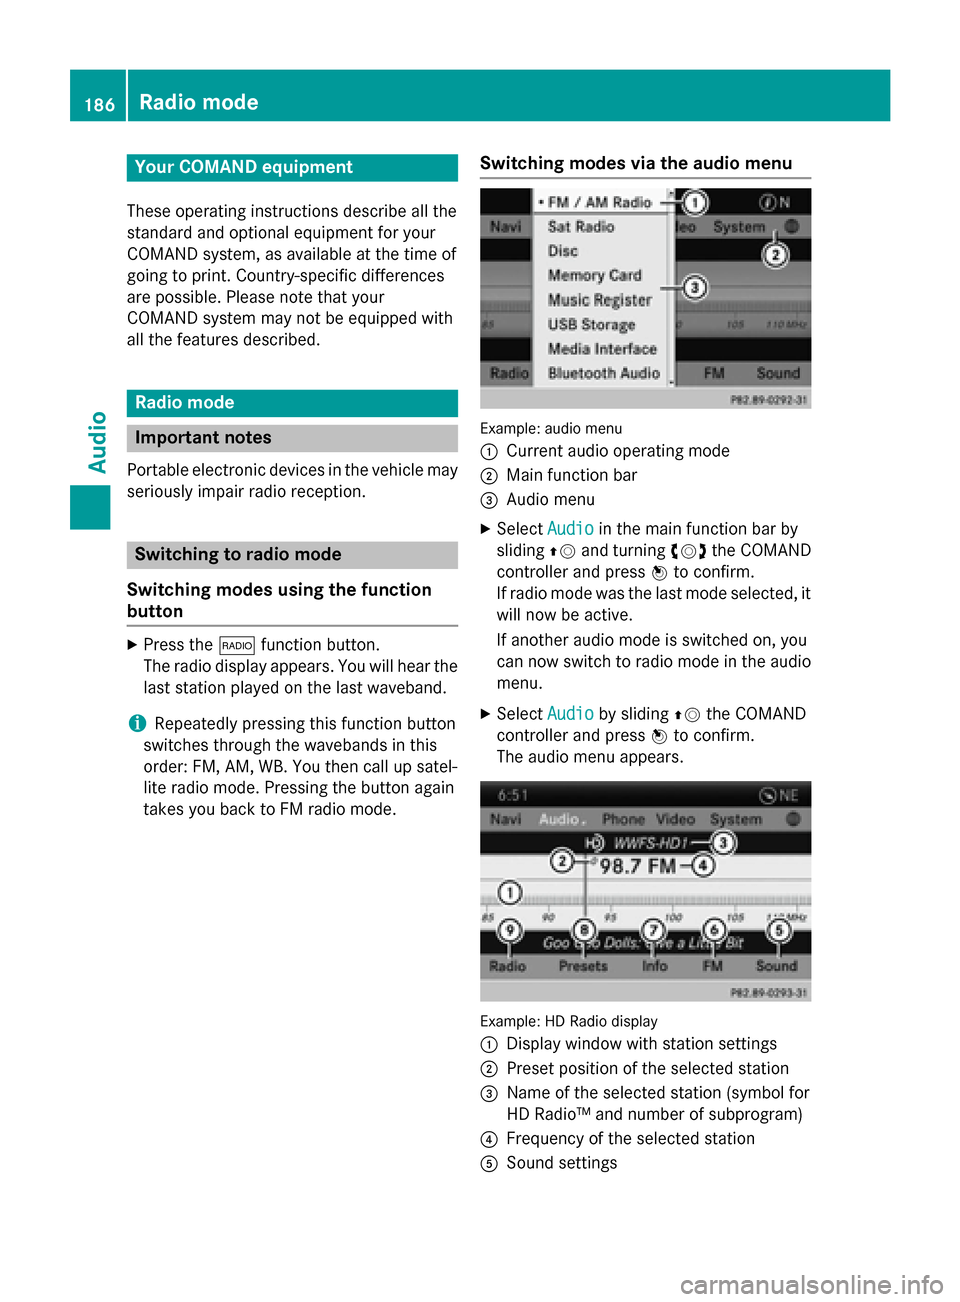
takes you back to FM radio mode. Switching modes via the audio menu Example: audio menu
0043
Current audio operating mode
0044 Main function bar
0087 Audio menu
X Select Audio Audioin the main function bar by
sliding 00970052and turning 00790052the COMAND
controller and press 0098to confirm.
If radio mode was the last mode selected, it
will now be active.
If another audio mode is switched on, you
can now switch to radio mode in the audio menu.
X Select Audio
Audio by sliding 00970052the COMAND
controller and press 0098to confirm.
The audio menu appears. Example: HD Radio display
0043 Display window with station settings
0044 Preset position of the selected station
0087 Name of the selected station (symbol for
HD Radio™ and number of subprogram)
0085 Frequency of the selected station
0083 Sound settings 186
Radio
modeAudio
Page 194 of 270
Option 2
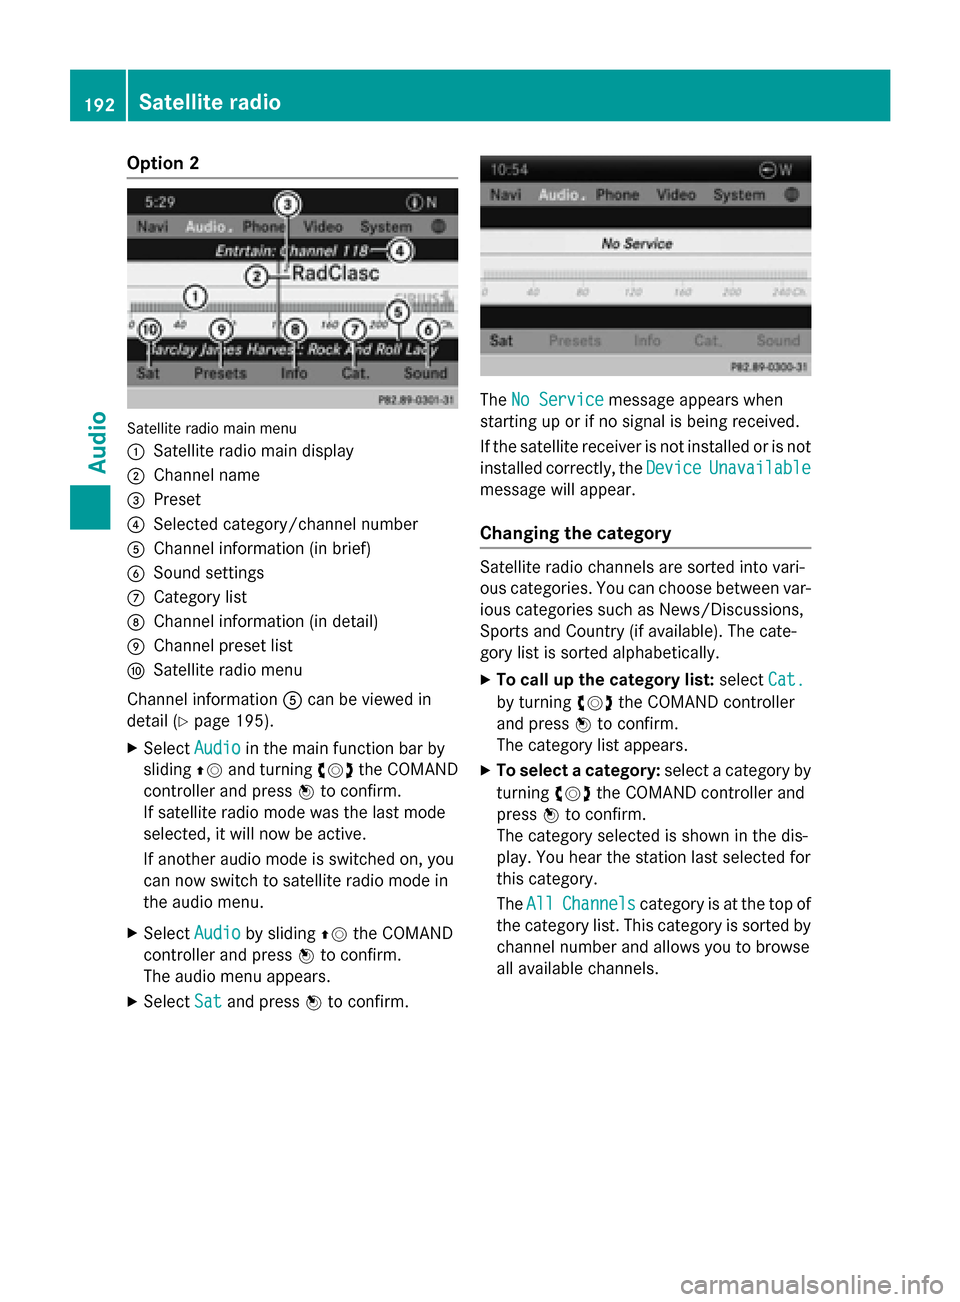
Satellite radio main menu
0043 Satellite radio main display
0044 Channel name
0087 Preset
0085 Selected category/channel number
0083 Channel information (in brief)
0084 Sound settings
006B Category list
006C Channel information (in detail)
006D Channel preset list
006E Satellite radio menu
Channel information 0083can be viewed in
detail (Y page 195).
X Select Audio
Audioin the main function bar by
sliding 00970052and turning 00790052007Athe COMAND
controller and press 0098to confirm.
If satellite radio mode was the last mode
selected, it will now be active.
If another audio mode is switched on, you
can now switch to satellite radio mode in
the audio menu.
X Select Audio
Audio by sliding 00970052the COMAND
controller and press 0098to confirm.
The audio menu appears.
X Select Sat Satand press 0098to confirm. The
No Service
No Service message appears when
starting up or if no signal is being received.
If the satellite receiver is not installed or is not
installed correctly, the Device DeviceUnavailable
Unavailable
message will appear.
Changing the category Satellite radio channels are sorted into vari-
ous categories. You can choose between var-
ious categories such as News/Discussions,
Sports and Country (if available). The cate-
gory list is sorted alphabetically.
X To call up the category list: selectCat.
Cat.
by turning 00790052007Athe COMAND controller
and press 0098to confirm.
The category list appears.
X To select a category: select a category by
turning 00790052007Athe COMAND controller and
press 0098to confirm.
The category selected is shown in the dis-
play. You hear the station last selected for
this category.
The All All Channels
Channels category is at the top of
the category list. This category is sorted by channel number and allows you to browse
all available channels. 192
Satellite radioAudio
Page 197 of 270
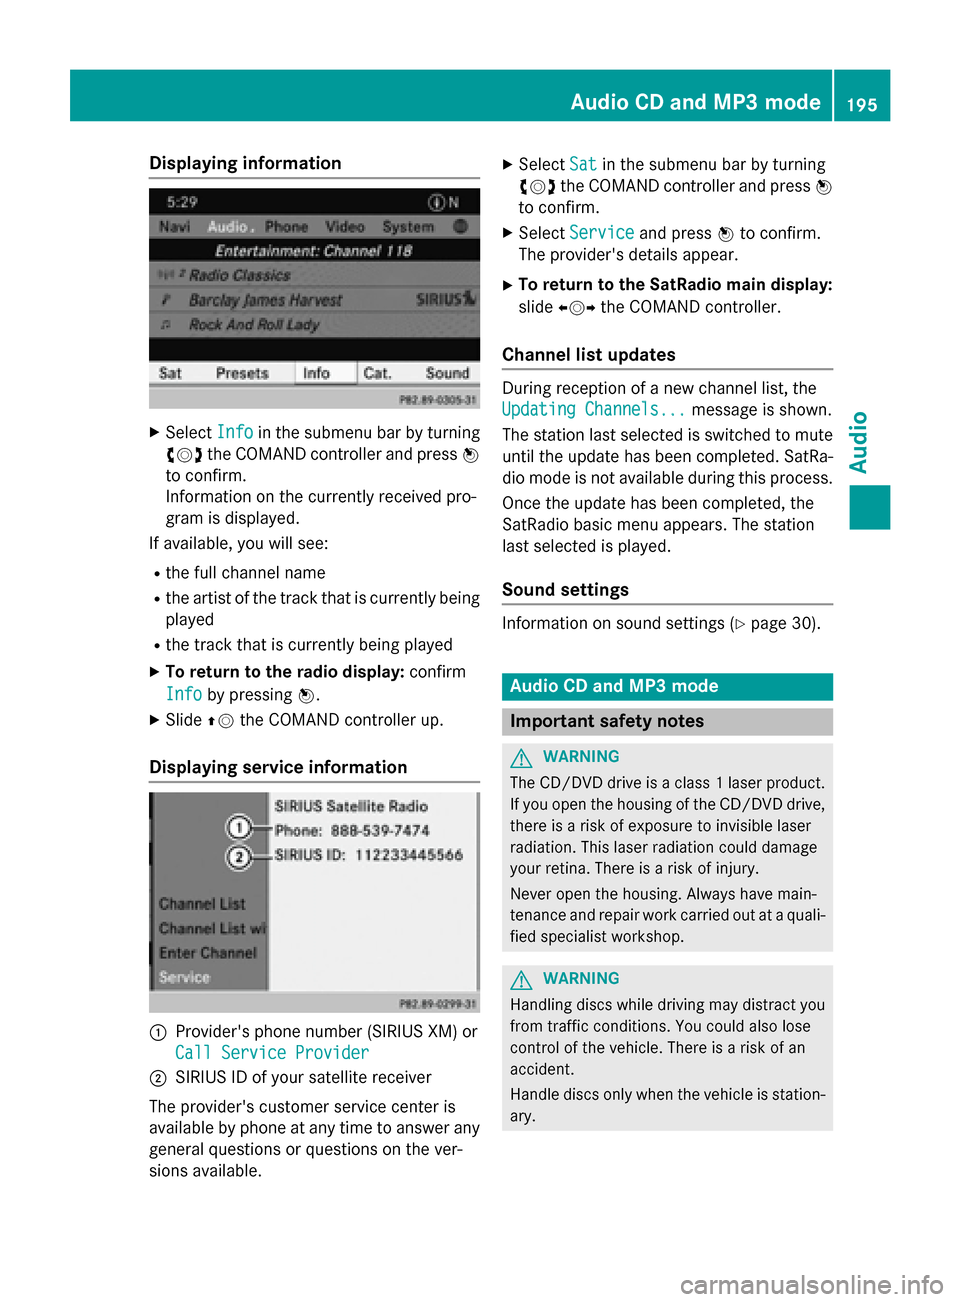
Displaying information
X
Select Info
Info in the submenu bar by turning
00790052007A the COMAND controller and press 0098
to confirm.
Information on the currently received pro-
gram is displayed.
If available, you will see:
R the full channel name
R the artist of the track that is currently being
played
R the track that is currently being played
X To return to the radio display: confirm
Info
Info by pressing 0098.
X Slide 00970052the COMAND controller up.
Displaying service information 0043
Provider's phone number (SIRIUS XM) or
Call Service Provider
Call Service Provider
0044 SIRIUS ID of your satellite receiver
The provider's customer service center is
available by phone at any time to answer any
general questions or questions on the ver-
sions available. X
Select Sat
Sat in the submenu bar by turning
00790052007A the COMAND controller and press 0098
to confirm.
X Select Service Service and press 0098to confirm.
The provider's details appear.
X To return to the SatRadio main display:
slide 009500520096 the COMAND controller.
Channel list updates During reception of a new channel list, the
Updating Channels... Updating Channels...
message is shown.
The station last selected is switched to mute until the update has been completed. SatRa-
dio mode is not available during this process.
Once the update has been completed, the
SatRadio basic menu appears. The station
last selected is played.
Sound settings Information on sound settings (Y
page 30). Audio CD and MP3 mode
Important safety notes
G
WARNING
The CD/DVD drive is a class 1 laser product. If you open the housing of the CD/DVD drive,
there is a risk of exposure to invisible laser
radiation. This laser radiation could damage
your retina. There is a risk of injury.
Never open the housing. Always have main-
tenance and repair work carried out at a quali- fied specialist workshop. G
WARNING
Handling discs while driving may distract you from traffic conditions. You could also lose
control of the vehicle. There is a risk of an
accident.
Handle discs only when the vehicle is station-
ary. Audio CD and MP3
mode
195Audio Z
Page 219 of 270
have been played, the tracks in the next
folder are played.
R Random Tracks
Random Tracks
All the tracks on the medium are played in
random order (e.g. track 3, 8, 5 etc.).
X Select BT
BT Audio Audio by sliding 00520064and turning
00790052007A the COMAND controller and press 0098
to confirm.
The 003Bdot indicates the option selected.
X Select the option by turning 00790052007Athe
COMAND controller and press 0098to con-
firm.
If you select Random
Random Tracks Tracks, you will see a
corresponding symbol in the display/
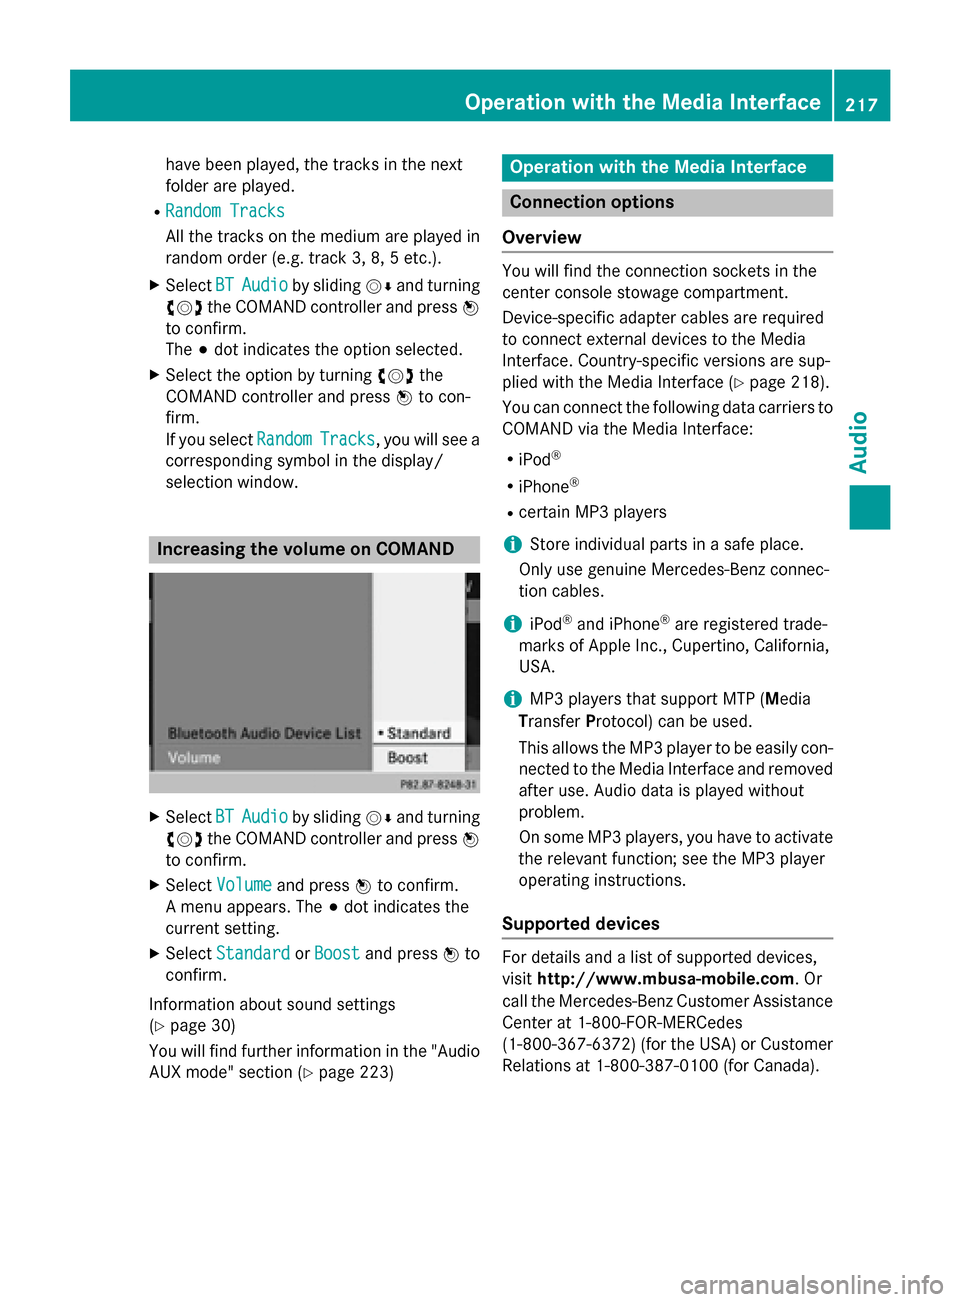
selection window. Increasing the volume on COMAND
X
Select BT
BTAudio
Audio by sliding 00520064and turning
00790052007A the COMAND controller and press 0098
to confirm.
X Select Volume
Volume and press 0098to confirm.
A menu appears. The 003Bdot indicates the
current setting.
X Select Standard
Standard orBoost
Boost and press 0098to
confirm.
Information about sound settings
(Y page 30)
You will find further information in the "Audio AUX mode" section (Y page 223) Operation with the Media Interface
Connection options
Overview You will find the connection sockets in the
center console stowage compartment.
Device-specific adapter cables are required
to connect external devices to the Media
Interface. Country-specific versions are sup-
plied with the Media Interface (Y
page 218).
You can connect the following data carriers to
COMAND via the Media Interface:
R iPod ®
R iPhone ®
R certain MP3 players
i Store individual parts in a safe place.
Only use genuine Mercedes-Benz connec-
tion cables.
i iPod ®
and iPhone ®
are registered trade-
marks of Apple Inc., Cupertino, California,
USA.
i MP3 players that support MTP (
Media
Transfer Protocol) can be used.
This allows the MP3 player to be easily con- nected to the Media Interface and removed
after use. Audio data is played without
problem.
On some MP3 players, you have to activate
the relevant function; see the MP3 player
operating instructions.
Supported devices For details and a list of supported devices,
visit
http://www.mbusa-mobile.com. Or
call the Mercedes-Benz Customer Assistance
Center at 1-800-FOR-MERCedes
(1-800-367-6372) (for the USA) or Customer
Relations at 1-800-387-0100 (for Canada). Operation with the Media Interface
217Audio Z
Page 226 of 270

R
Media Interface or audio AUX mode
R Bluetooth ®
audio mode
Switching modes via the audio menu When you connect an external audio source,
audio AUX is not selected automatically.
X Select Audio Audioin the main function bar by
sliding 00970052and turning 00790052007Athe COMAND
controller and press 0098to confirm.
If AUX mode was the last mode selected, it
will now be active.
If another audio source is switched on, you
can now switch to audio AUX mode in the
audio menu.
X Select Audio
Audio using00970052and press 0098to
confirm.
The audio menu appears.
X Select Aux Auxby turning 00790052007Aand press 0098to
confirm.
The audio AUX menu appears. The medium in the external audio source is played if the
source is connected and playback selec-
ted. Please see the respective operating instruc-
tions for how to operate the external audio
source.
Information on:
R Volume settings (Y page 29)
R Sound settings (Y page 30) Increasing the volume on COMAND
X
Select Volume Volume in the AUX display by turning
00790052007A the COMAND controller and press 0098
to confirm.
A menu appears. The 003Bdot indicates the
current setting.
X Select Standard
Standard orBoost Boost and press 0098to
confirm.
Standard Standard: the volume of the external audio
source is adjusted to a standard value.
Boost Boost: the volume of the external audio
source is raised by approximately 10 dB.
A device which is connected as an external
audio source may seem quieter or louder in
the vehicle, or the usual maximum volume
cannot be achieved. On some devices, it is
possible to adjust the volume separately. In
this case, start at a medium volume and
increase it gradually. This enables you to
determine whether the system is able to play the music at high volume without distorting it. 224
Audio AUX modeAudio
Page 228 of 270
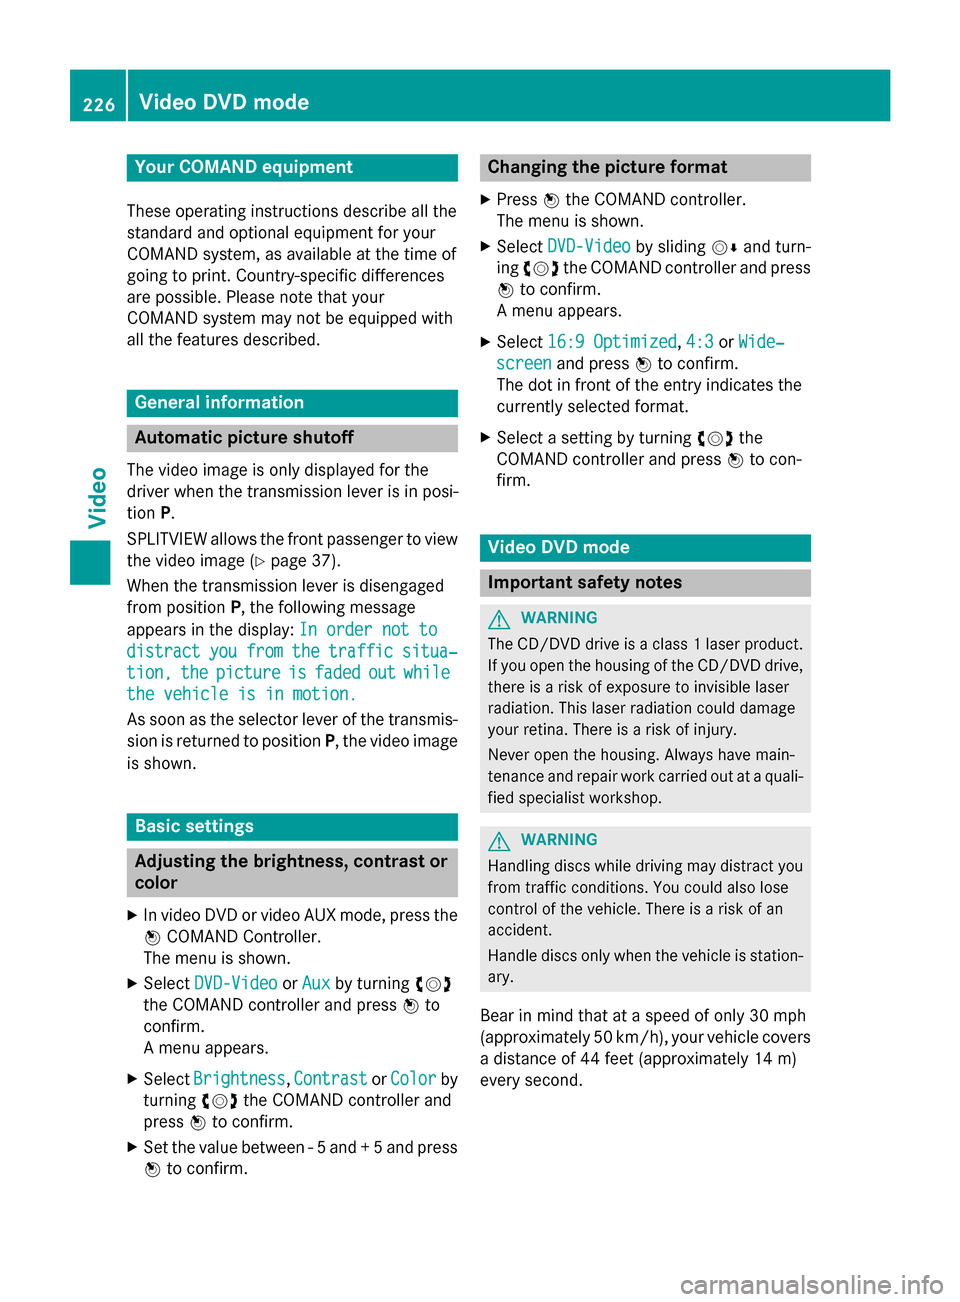
Your COMAND equipment
These operating instructions describe all the
standard and optional equipment for your
COMAND system, as available at the time of
going to print. Country-specific differences
are possible. Please note that your
COMAND system may not be equipped with
all the features described. General information
Automatic picture shutoff
The video image is only displayed for the
driver when the transmission lever is in posi-
tion P.
SPLITVIEW allows the front passenger to view the video image (Y page 37).
When the transmission lever is disengaged
from position P, the following message
appears in the display: In order not to
In order not to
distract distract you
youfrom
from the
thetraffic
traffic situa‐
situa‐
tion,
tion, the
thepicture
picture is
isfaded
faded out
outwhile
while
the vehicle is in motion.
the vehicle is in motion.
As soon as the selector lever of the transmis-
sion is returned to position P, the video image
is shown. Basic settings
Adjusting the brightness, contrast or
color
X In video DVD or video AUX mode, press the
0098 COMAND Controller.
The menu is shown.
X Select DVD-Video DVD-Video orAux
Aux by turning 00790052
the COMAND controller and press 0098to
confirm.
A menu appears.
X Select Brightness
Brightness, Contrast ContrastorColor
Color by
turning 00790052007Athe COMAND controller and
press 0098to confirm.
X Set the value between - 5 and + 5 and press
0098 to confirm. Changing the picture format
X Press 0098the COMAND controller.
The menu is shown.
X Select DVD-Video
DVD-Video by sliding00520064and turn-
ing 00790052 the COMAND controller and press
0098 to confirm.
A menu appears.
X Select 16:9 Optimized 16:9 Optimized, 4:3 4:3orWide‐
Wide‐
screen
screen and press 0098to confirm.
The dot in front of the entry indicates the
currently selected format.
X Select a setting by turning 00790052the
COMAND controller and press 0098to con-
firm. Video DVD mode
Important safety notes
G
WARNING
The CD/DVD drive is a class 1 laser product. If you open the housing of the CD/DVD drive,
there is a risk of exposure to invisible laser
radiation. This laser radiation could damage
your retina. There is a risk of injury.
Never open the housing. Always have main-
tenance and repair work carried out at a quali- fied specialist workshop. G
WARNING
Handling discs while driving may distract you from traffic conditions. You could also lose
control of the vehicle. There is a risk of an
accident.
Handle discs only when the vehicle is station-
ary.
Bear in mind that at a speed of only 30 mph
(approximately 50 km/h), your vehicle covers
a distance of 44 feet (approximately 14 m)
every second. 226
Video DVD
modeVideo
Page 230 of 270

X
Select Media
Mediaby sliding 00520064and turning
00790052007A the COMAND controller and press 0098
to confirm.
X Select a ývideo DVD from the media list
(Y page 230).
Switching on with the video menu X
Select Video
Videoin the main function bar by
sliding 00970052and turning 00790052007Athe COMAND
controller and press 0098to confirm.
Video DVD mode is switched on. Showing/hiding the control menu
X To show: in DVD video mode, slide 009700520064
the COMAND controller.
X To hide: slide009700520064 the COMAND control-
ler.
or X Wait for approximately eight seconds. Control menu displayed
0043
Type of data medium
0044 Current title
0087 Current scene
0085 Track time
0083 Shows the menu
i This function is not available while the
DVD's own menu is being displayed. Showing/hiding the menu
X To show: in full-screen DVD video mode,
press 0098the COMAND controller.
or X Select Menu
Menu while the control menu is
shown and press 0098to confirm.
X To hide: slide00970052the COMAND controller
and confirm Full Screen Full Screen by pressing0098. Menu shown
0043
Video DVD options
0044 Pause function
0087 Stop function
0085 Media selection
0083 Sound settings
i This function is not available while the
DVD's own menu is being displayed. Fast forwarding/rewinding
X In full-screen DVD video mode, slide 009500520096
and hold the COMAND controller until the
desired position is reached.
or
X Press and hold the 0048or0049 button
until the desired position is reached.
You see the control menu. 228
Video DVD modeVideo
Page 232 of 270

Selecting a video DVD from the media
list
X Show the menu (Y page 228).
X Select Media
Mediaby sliding 00520064and turning
00790052007A the COMAND controller and press 0098
to confirm.
The media list appears. The 003Bdot indicates
the current medium being played. Video
DVDs are indicated by the ýicon.
X Press 0098the COMAND controller.
COMAND loads the video DVD and begins
playing it.
i If you select a CD or an MP3 medium, you
switch to the respective audio mode.
Further information on the media list
(Y page 198). DVD menu
Calling up the DVD menu The DVD menu is the menu stored on the DVD
itself. It is structured in various ways accord- ing to the individual DVD and permits certain
actions and settings.
In the case of multi-language DVDs, for exam-
ple, you can change the DVD language in the DVD menu.
X Show the menu (Y page 228).
X Select DVD-Video
DVD-Video in the menu by turning
00790052007A the COMAND controller and press 0098
to confirm.
X Select DVD Functions DVD Functions and press0098to
confirm.
X Select Menu
Menu and press 0098to confirm.
The DVD menu appears. Selecting menu items in the DVD menu X
Show the DVD menu (Y page 230).
X Select a menu item by sliding 009700520064the
COMAND controller and press 0098to con-
firm.
or X Select a menu item by sliding 009500520096the
COMAND controller and press 0098to con-
firm.
The menu appears.
X To reconfirm your selection: confirm
Select Select by pressing 0098.
COMAND carries out the action.
Make a selection from the further options,
if necessary.
COMAND then switches back to the DVD
menu.
i Menu items which cannot be selected are
shown in gray.
i Depending on the DVD, the menu items:
Back (to movie) Back (to movie), Play
Play,Stop
Stop,004E,
004F orGo
Go Up
Upmay either not function at all
or may not function at certain points in the DVD menu. To indicate this, the 0047symbol
appears in the display.
Moving up one level in the DVD menu X
Show the DVD menu (Y page 230).
X Select the corresponding menu item in the
DVD menu and press 0098the COMAND con-
troller to confirm.
or 230
Video DVD modeVideo
Page 233 of 270
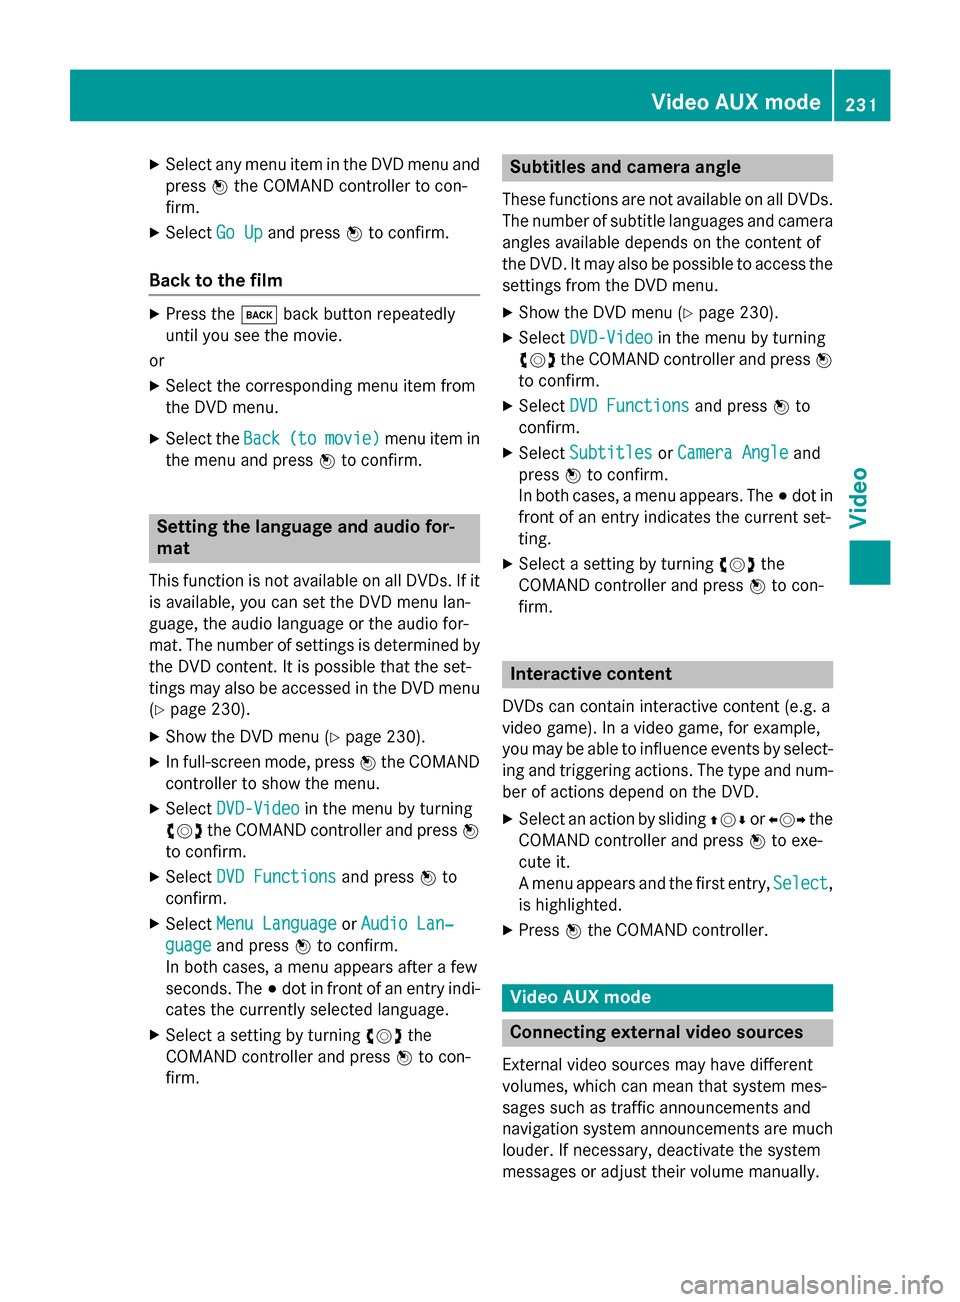
X
Select any menu item in the DVD menu and
press 0098the COMAND controller to con-
firm.
X Select Go Up
Go Up and press 0098to confirm.
Back to the film X
Press the 003Dback button repeatedly
until you see the movie.
or X Select the corresponding menu item from
the DVD menu.
X Select the Back Back(to
(tomovie)
movie) menu item in
the menu and press 0098to confirm. Setting the language and audio for-
mat
This function is not available on all DVDs. If it is available, you can set the DVD menu lan-
guage, the audio language or the audio for-
mat. The number of settings is determined by
the DVD content. It is possible that the set-
tings may also be accessed in the DVD menu (Y page 230).
X Show the DVD menu (Y page 230).
X In full-screen mode, press 0098the COMAND
controller to show the menu.
X Select DVD-Video
DVD-Video in the menu by turning
00790052007A the COMAND controller and press 0098
to confirm.
X Select DVD Functions
DVD Functions and press0098to
confirm.
X Select Menu Language
Menu Language orAudio Lan‐ Audio Lan‐
guage
guage and press 0098to confirm.
In both cases, a menu appears after a few
seconds. The 003Bdot in front of an entry indi-
cates the currently selected language.
X Select a setting by turning 00790052007Athe
COMAND controller and press 0098to con-
firm. Subtitles and camera angle
These functions are not available on all DVDs.
The number of subtitle languages and camera
angles available depends on the content of
the DVD. It may also be possible to access the settings from the DVD menu.
X Show the DVD menu (Y page 230).
X Select DVD-Video DVD-Video in the menu by turning
00790052007A the COMAND controller and press 0098
to confirm.
X Select DVD Functions
DVD Functions and press0098to
confirm.
X Select Subtitles
Subtitles orCamera Angle
Camera Angle and
press 0098to confirm.
In both cases, a menu appears. The 003Bdot in
front of an entry indicates the current set-
ting.
X Select a setting by turning 00790052007Athe
COMAND controller and press 0098to con-
firm. Interactive content
DVDs can contain interactive content (e.g. a
video game). In a video game, for example,
you may be able to influence events by select- ing and triggering actions. The type and num-
ber of actions depend on the DVD.
X Select an action by sliding 009700520064or009500520096 the
COMAND controller and press 0098to exe-
cute it.
A menu appears and the first entry, Select Select,
is highlighted.
X Press 0098the COMAND controller. Video AUX mode
Connecting external video sources
External video sources may have different
volumes, which can mean that system mes-
sages such as traffic announcements and
navigation system announcements are much louder. If necessary, deactivate the system
messages or adjust their volume manually. Video AUX mode
231Video Z