jacking MERCEDES-BENZ SLK ROADSTER 2008 Owners Manual
[x] Cancel search | Manufacturer: MERCEDES-BENZ, Model Year: 2008, Model line: SLK ROADSTER, Model: MERCEDES-BENZ SLK ROADSTER 2008Pages: 273, PDF Size: 4.42 MB
Page 222 of 273

Flat tyre
219
For all vehicles X
All occupants must get out of the vehicle.
Make sure that they are not endangered as
they do so.
X Make sure that no one is near the danger
area whilst a wheel is being changed. Any-
one who is not directly assisting in the
wheel change should, for example, stand
behind the barrier.
X Switch off the engine.
X Remove the key from the ignition lock.
X Place the warning triangle (Y page 172) or
warning lamps at a suitable distance.
Observe legal requirements. G
Risk of injury
The jack is designed only to raise the vehi-
cle for a short time while a wheel is being
changed .
If you intend to work under the vehicle, it
must be placed on stands.
Make sure that the jack is placed on a firm,
non-slip, level surface. Do not use wooden
blocks or similar as jacking supports. Oth-
erwise, the jack will not be able to achieve
its load-bearing capacity due to the restric-
ted height. Do not start the engine at any time while
the wheel is being changed.
Do not lie under the vehicle when it is being
supported by the jack. If you do not rais
e
the vehicle as described, it could slip off the
jack (e.g. if the engine is started or a door
or the boot lid are opened or closed) and
you could be seriously injured . Using the TIREFIT kit
You can use the TIREFIT kit to seal small
punctures, particularly those in the tyre tread.
You can use TIREFIT in outdoor temperature s
down to -20 °C. G
Risk of accident
In the following situations, your safety is at
particular risk and TIREFIT is unable to pro -
vide breakdown assistance:
R if there are cuts or punctures in the tyre
greater than 4 mm
R if the wheel rim is damaged
R if you have driven at very low tyre pres-
sures or on a flat tyre
Do not drive any further. Consult a qualified
specialist workshop which has the neces- sary specialist knowledge and tools to carr
y
out the work required.
Mercedes-Benz recommends that you use
a Mercedes-Benz Service Centre for this
purpose. In particular, work relevant to
safety or on safety-related systems must be
carried out at a qualified specialist work-
shop.
X Do not remove any foreign objects which
have penetrated the tyre, e.g. screws or
nails .
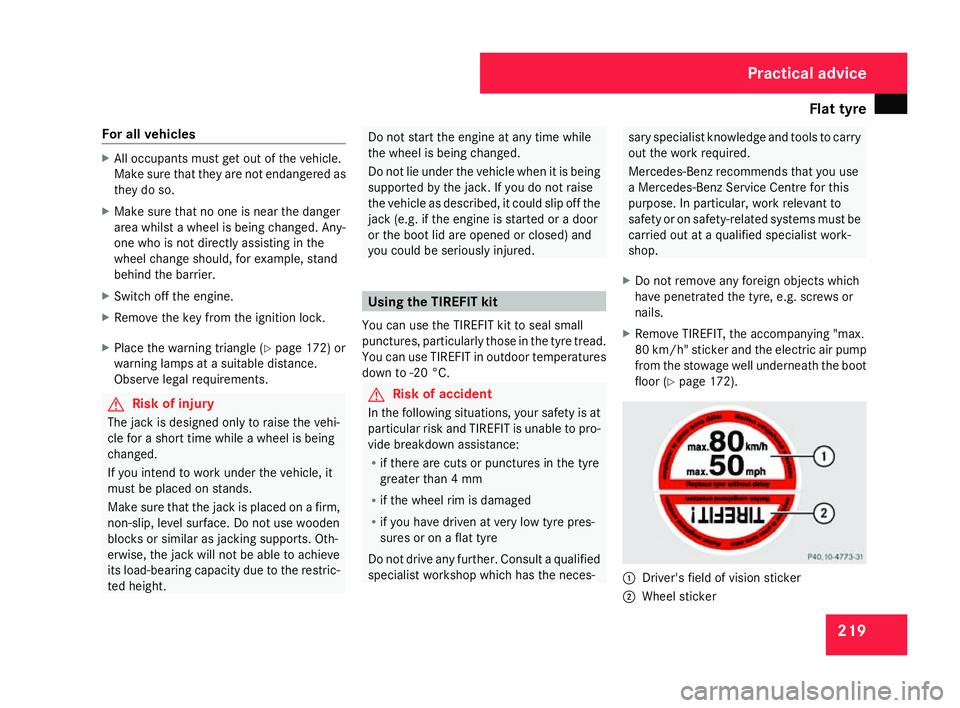
X Remove TIREFIT, the accompanying "max .
80 km/h" sticker and the electric air pum p
from the stowage well underneath the boot
floor (Y page 172). 1
Driver's field of vision sticker
2 Wheel sticker Practical advice
171_AKB; 3; 4, en-GB
vpfaff7
, 2007-11-13T10:50:25+01:00 - Seite 219
Page 228 of 273

Flat tyre
225Changing a wheel and fitting the spar
e
wheel * G
Risk of accident
The wheel dimensions and tyre size of the
emergency spare wheel* may differ from
those of the standard wheels.
Your vehicle's handling characteristics will
change when driving with a collapsibl e
emergency spare wheel*. Adapt your style
of driving accordingly.
The collapsible emergency spare wheel*
must only be used for a short time. Do not
exceed the maximum speed of 80 km/h
and do not deactivate ES P®
.
Never drive the vehicle with more than one
collapsible emergency spare wheel* fitted.G
Risk of accident
Have the collapsible emergency spare
wheel* replaced as soon as possible at a
qualified specialist workshop which has the
necessary specialist knowledge and tools
to carry out the work required. Mercedes-
Benz recommends that you use a
Mercedes-Benz Service Centre for this pur-
pose. In particular, work relevant to safety or on safety-related systems must be car-
ried out at a qualified specialist workshop.
Preparing the vehicle X
Prepare the vehicle as described
(Y page 218).
X Place the wheels in the straight-ahead posi-
tion.
X Take the following from the stowage well
beneath the boot floor:
R
the collapsible emergency spare wheel*
R the vehicle tool kit
R the wheel chock
R the jack
R the air pump
X Secure the vehicle to prevent it from rolling
away .
On level ground :place chocks or similar
under the front and rear of the wheel that
is diagonally opposite the wheel you wish
to change.
X On downhill gradients: place chocks or
similar under both wheels of the other axle. Raising the vehicle
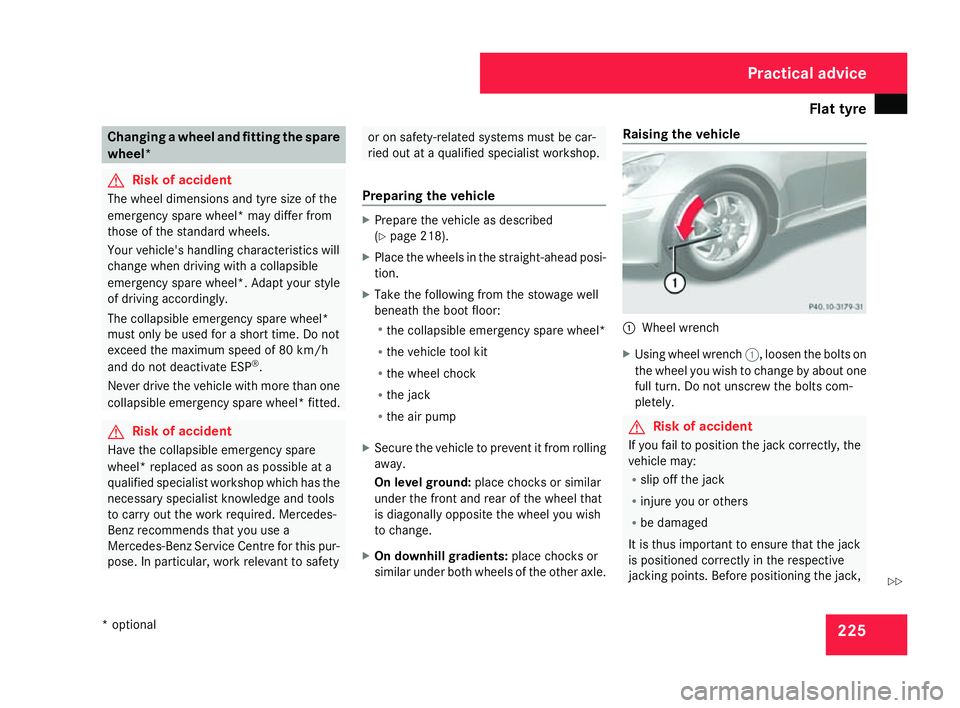
1
Wheel wrenc h
X Using wheel wrench 1, loosen the bolts on
the wheel you wish to change by about one
full turn. Do not unscrew the bolts com -
pletely. G
Risk of accident
If you fail to position the jack correctly, the
vehicle may :
R slip off the jack
R injure you or others
R be damaged
It is thus important to ensure that the jack
is positioned correctly in the respective
jacking points. Before positioning the jack , Practical advice
* optional
171_AKB; 3; 4, en-GB
vpfaff7,
2007-11-13T10:50:25+01:00 - Seite 225 Z
Page 229 of 273

Flat tyre
226 remove any dirt that may have collected in
the jacking points
.
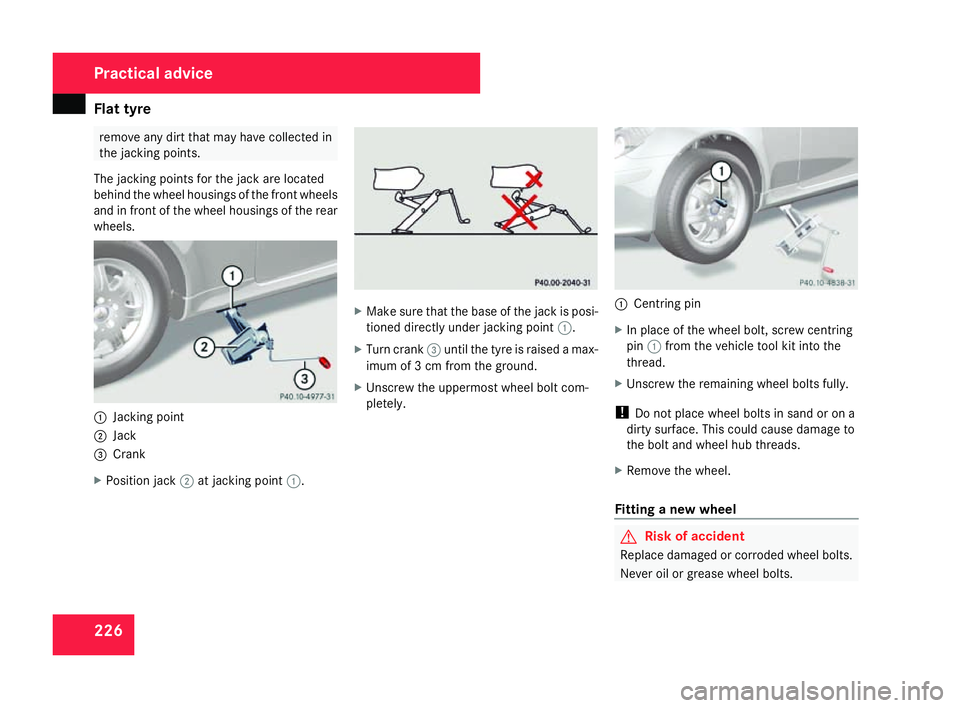
The jacking points for the jack are located
behind the wheel housings of the front wheels
and in front of the wheel housings of the rear
wheels. 1
Jacking point
2 Jack
3 Crank
X Position jack 2at jacking point 1. X
Make sure that the base of the jack is posi-
tioned directly under jacking point 1.
X Turn crank 3until the tyre is raised a max-
imum of 3 cm from the ground.
X Unscrew the uppermost wheel bolt com-
pletely. 1
Centring pin
X In place of the wheel bolt, screw centring
pin 1from the vehicle tool kit into the
thread.
X Unscrew the remaining wheel bolts fully.
! Do not place wheel bolts in sand or on a
dirty surface. This could cause damage to
the bolt and wheel hub threads.
X Remove the wheel.
Fitting a new wheel G
Risk of acciden
t
Replace damaged or corroded wheel bolts.
Never oil or grease wheel bolts. Practical advice
171_AKB; 3; 4, en-GB
vpfaff7,
2007-11-13T10:50:25+01:00 - Seite 226