fuse chart MERCEDES-BENZ SLK ROADSTER 2012 Owners Manual
[x] Cancel search | Manufacturer: MERCEDES-BENZ, Model Year: 2012, Model line: SLK ROADSTER, Model: MERCEDES-BENZ SLK ROADSTER 2012Pages: 321, PDF Size: 6.9 MB
Page 13 of 321

ETS
.................................................. 56
Function/notes ................................ 56
Important safety guidelines .............56
Warning lamp ................................. 228
ETS (Electronic Traction System) ....... 56
Exhaus ttail pipe (cleaning instruc-
tions) .................................................. 257
Exterior lighting see Lights
Exterior mirrors
Adjusting ......................................... 94
Anti-dazzle mode (automatic) ..........95
Folding in/ou t(automatically) .........95
Folding in/ou t(electrically) .............94
Folding in whe nlocking (on-board
computer) ...................................... 195
Out of position (troubleshooting) .....95
Parking position ............................... 95
Resetting ......................................... 95
Storing settings (memory func-
tion) ................................................. 96F
Fatigue Assist see ATTENTION ASSIST
Faul tmessage
see Display messages
Filler cap
see Fuel filler flap
Fire extinguisher ............................... 260
First-aid kit ......................................... 260
Flat tyre Changing a wheel/fitting the
spare wheel ................................... 266
MOExtended run-fla tsystem ......... 272
Preparing the vehicle .....................263
Raising the vehicle .........................268
TIREFIT kit ...................................... 263
see Emergency spare wheel
Floormat ............................................ .246
Foglamps Extended range .............................. 105
Switching on/off ........................... 101
Frequencies
Garage door opene r....................... 246
Mobile phone ................................. 301
Two-way radio ................................ 301 Front foglamps
Display message ............................ 210
Fron twindscreen
see Windscreen
Fuel
Additives ........................................ 305
Consumption statistic s.................. 183
Displaying the current consump-
tion ................................................ 183
Displaying the range ......................183
Fuel gauge ....................................... 28
Grade (petrol) ................................ 304
Important safety notes ..................303
Notes about consumption .............306
Notes for AMG vehicles .................304
Problem (malfunction) ...................145
Quality (diesel )............................... 305
Refuelling ...................................... .142
Tank content/reserve fuel .............304
Fuel filler flap Opening/closing .......143
Fuel level Calling up the range (on-board
computer) ...................................... 183
Gauge .............................................. 28
Fuel reserve
see Fuel
Fuel tank
Capacity ........................................ 304
Problem (malfunction) ...................145
Fuse allocation chart (vehicle tool
kit) ...................................................... 261
Fuses Allocation chart ............................. 282
Before changing ............................. 282
Fuse box in the boot ......................282
Fuse box in the engine compart-
ment .............................................. 282
Important safety notes ..................281 G
Garage door opener Clearing the memory .....................245
Frequencies ................................... 246
Notes ............................................. 24310
Index
Page 264 of 321

X
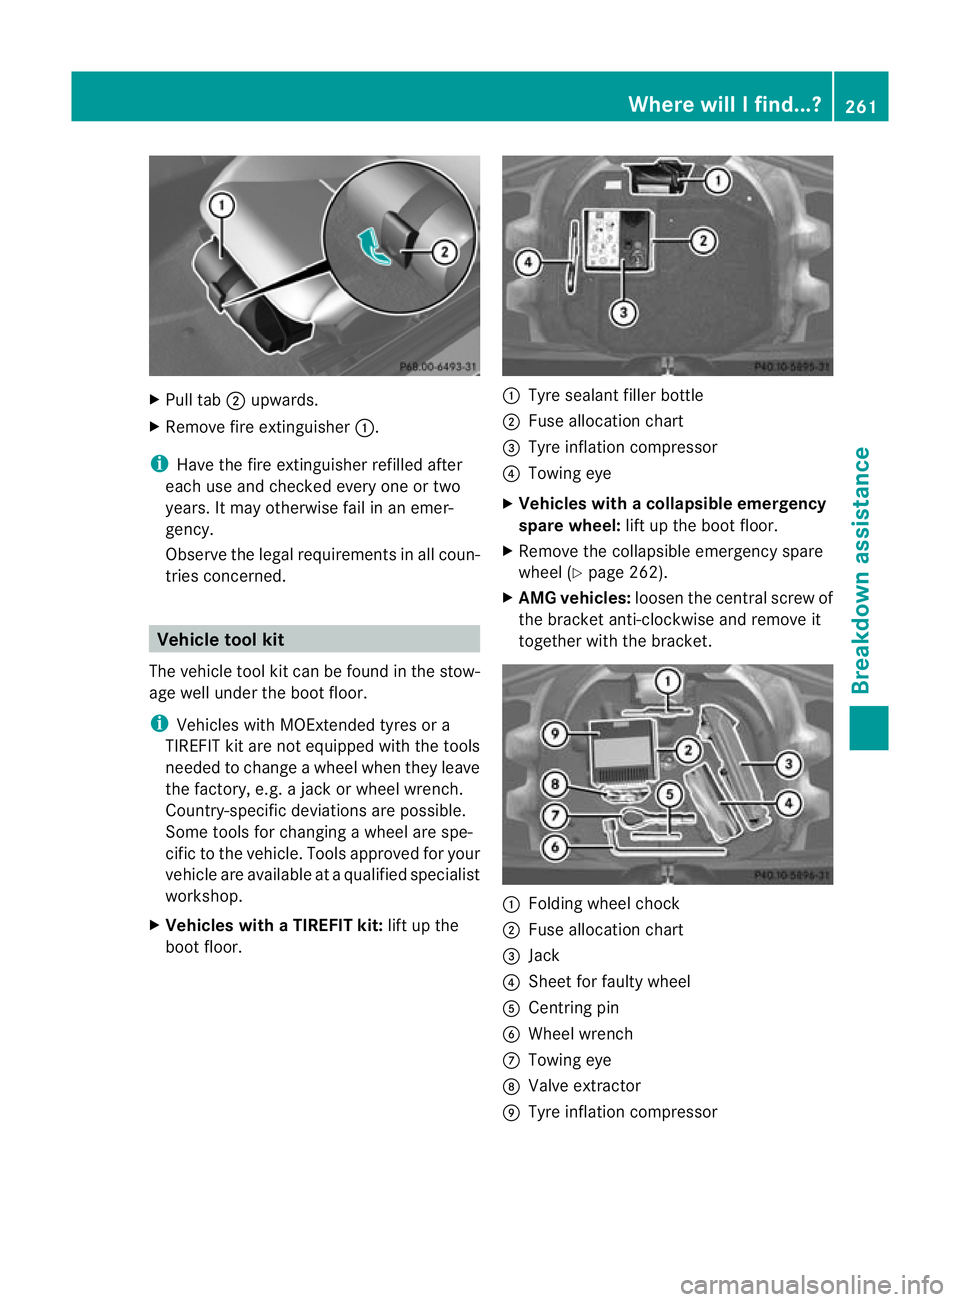
Pull tab ;upwards.
X Remove fire extinguisher :.
i Have the fire extinguisher refilled after
each use and checked every one or two
years. It may otherwise fail in an emer-
gency.
Observe the legal requirement sinall coun-
tries concerned. Vehicle tool kit
The vehicle tool kit can be found in the stow-
age well under the boot floor.
i Vehicles with MOExtended tyres or a
TIREFIT kit are not equipped with the tools
needed to change a wheel when they leave
the factory, e.g. a jack or wheel wrench.
Country-specific deviations are possible.
Some tools for changing awheel are spe-
cific to the vehicle. Tools approved for your
vehicle are available at a qualified specialist
workshop.
X Vehicles with a TIREFIT kit: lift up the
boot floor. :
Tyre sealant filler bottle
; Fuse allocation chart
= Tyre inflation compressor
? Towing eye
X Vehicles with acollapsible emergency
spare wheel: lift up the boot floor.
X Remove the collapsible emergency spare
wheel (Y page 262).
X AMG vehicles: loosenthe central screw of
the bracket anti-clockwise and remove it
together with the bracket. :
Folding wheel chock
; Fuse allocation chart
= Jack
? Sheet for faulty wheel
A Centring pin
B Wheel wrench
C Towing eye
D Valve extractor
E Tyre inflation compressor Where will I find...?
261Breakdown assistance
Page 285 of 321

loaded and result in a fire. Have the cause
traced and rectified at a qualified specialist
workshop.
The fuses in your vehicle serve to close down
faulty circuits. If afuse blows, all the compo-
nents on the circuit and their functions stop
operating.
Blown fuses must be replace dwith fuses of
the same rating, which you can recognise by
the colour and fuse rating. The fuse ratings
are listed in the fuse allocation chart.
If the newly inserted fuse also blows, have the
cause traced and rectified at a qualified spe-
cialist workshop, e.g. a Mercedes-Benz
Service Centre.
! Only use fuses that have been approved
for Mercedes-Ben zvehicles and which
have the correct fuse rating for the system
concerned. Otherwise, components or sys-
tems could be damaged. Before replacing a fuse
X Park the vehicle and apply the electric park-
ing brake.
X Switch off all electrical consumers.
X Remove the key from the ignition lock.
The fuses are located in various fuse boxes:
R fuse box in the engine compartment on the
left-hand side of the vehicle, when viewed
in the direction of travel
R fuse box in the boot behind the partition
trim
The fuse allocation chart is located in the
vehicle tool kit (Y page 261) in the stowage
compartment under the boot floor. Fuse box in the engine compartment
X Make sure that the windscreen wipers are
turned off. G
WARNING
Make sure that the windscreen wipers are
turned off and the key is pulled out of the igni-
tion lock before you open the cover of the fuse
box. Otherwise, the windscreen wipers and
the wiper rods above the cover could be set
in motion .This could lead to you or others
being injured by the wiper rods.
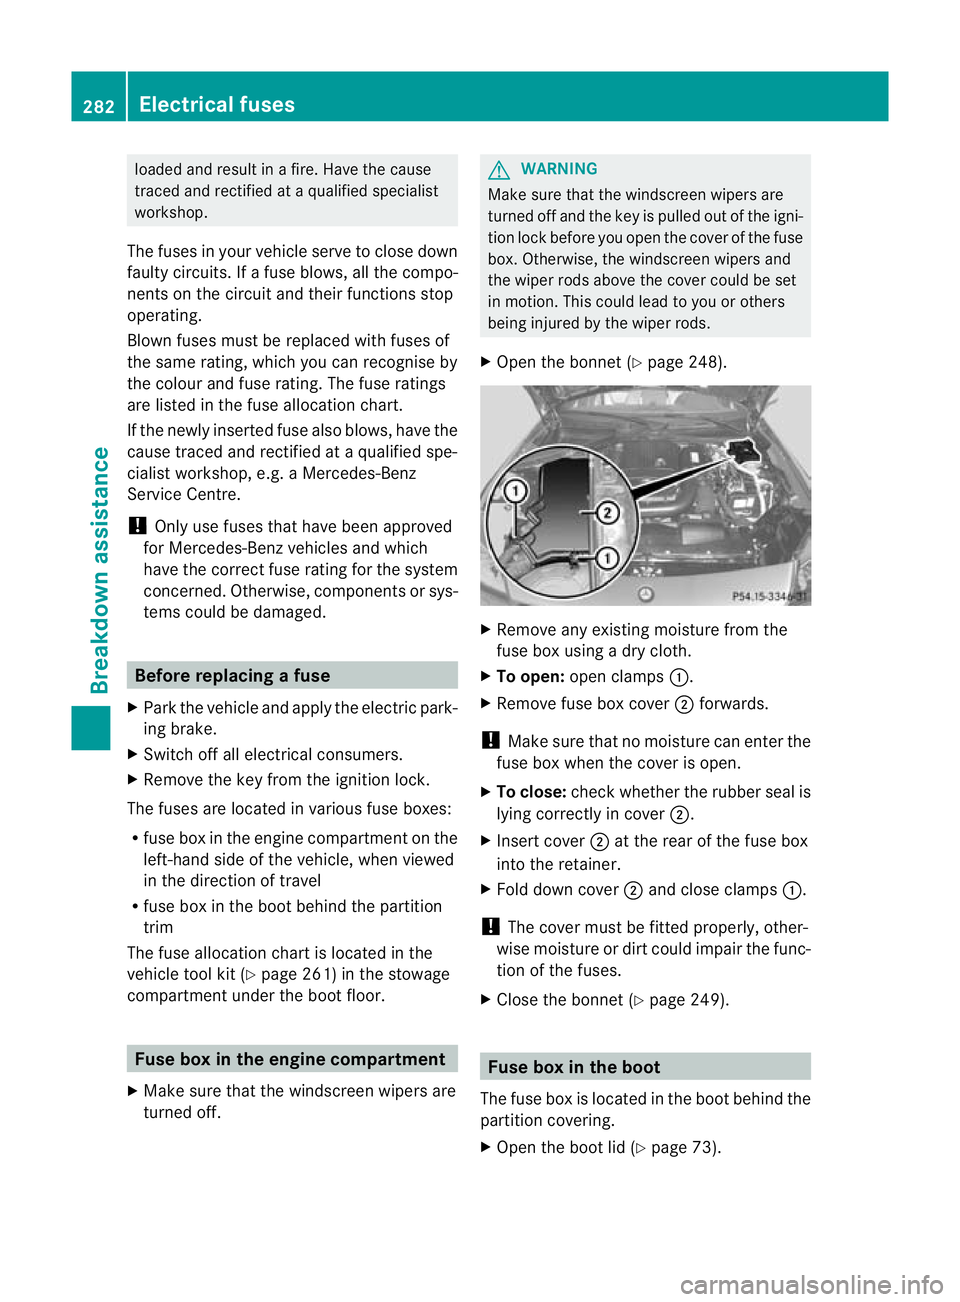
X Open the bonnet (Y page 248). X
Remove any existing moisture from the
fuse box using a dry cloth.
X To open: open clamps :.
X Remove fuse box cover ;forwards.
! Make sure that no moisture can enter the
fuse box when the cover is open.
X To close: check whether the rubber seal is
lying correctly in cover ;.
X Insert cover ;at the rear of the fuse box
into the retainer.
X Fold down cover ;and close clamps :.
! The cover must be fitted properly, other-
wise moisture or dirt could impair the func-
tion of the fuses.
X Close the bonnet (Y page 249). Fuse box in the boot
The fuse box is located in the boot behind the
partition covering.
X Open the boot lid (Y page 73).282
Electrical fusesBreakdown assistance