ignition MERCEDES-BENZ SLK ROADSTER 2014 Owner's Manual
[x] Cancel search | Manufacturer: MERCEDES-BENZ, Model Year: 2014, Model line: SLK ROADSTER, Model: MERCEDES-BENZ SLK ROADSTER 2014Pages: 357, PDF Size: 10.22 MB
Page 87 of 357
G
WARNING
The reversing function does not react:
R to soft, light and thin objects, e.g. small fin-
gers
R while resetting
This means that the reversing feature cannot
prevent someone being trapped in these sit-
uations. There is a risk of injury.
When closing, make sure that no parts of the
body are in the closing area. If someone
becomes trapped, press the switch to open
the side window again. Opening and closing the side win-
dows in the front
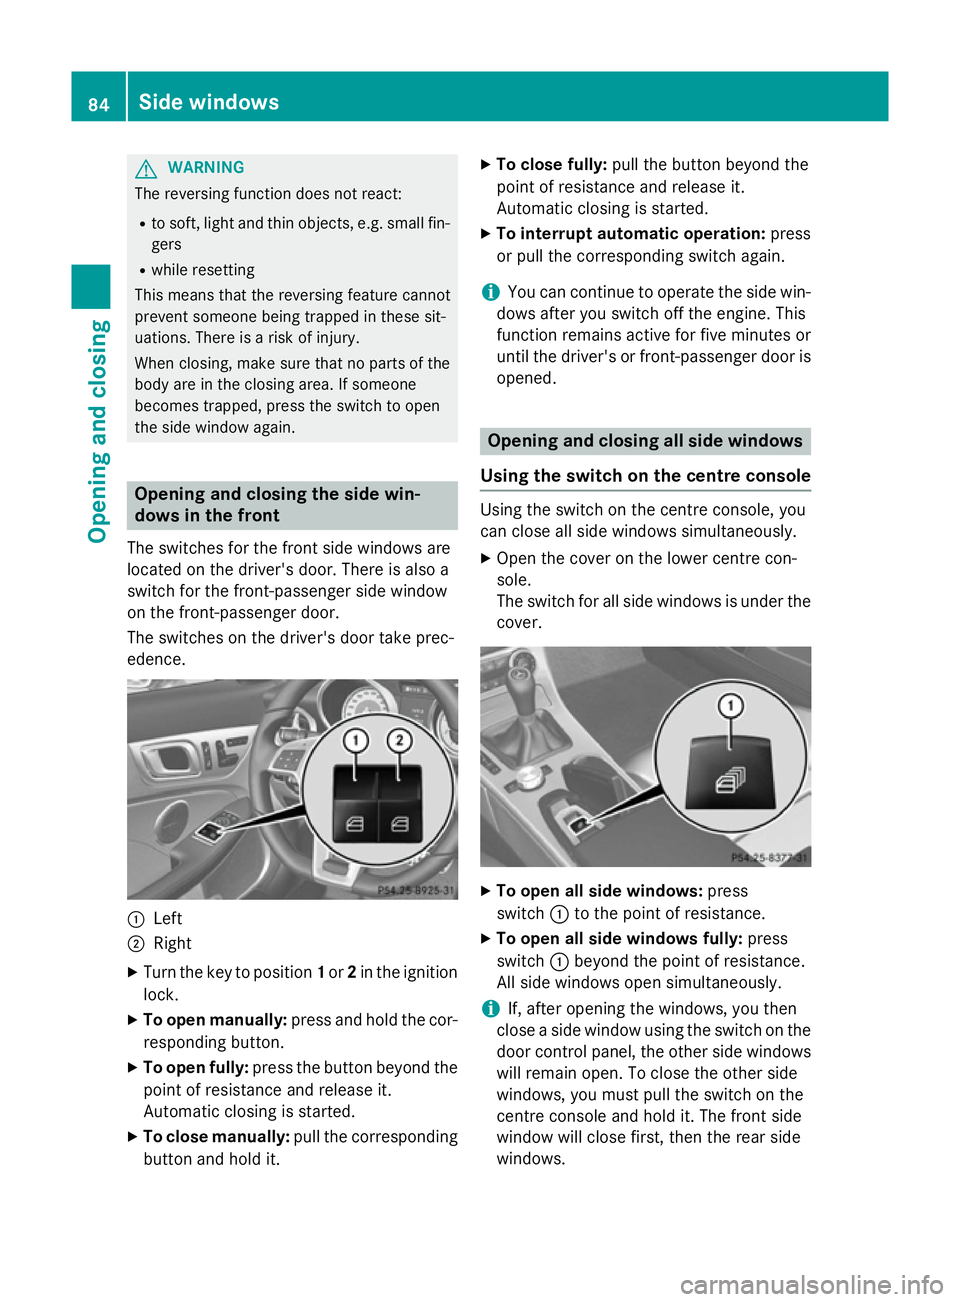
The switches for the front side windows are
located on the driver's door. There is also a
switch for the front-passenger side window
on the front-passenger door.
The switches on the driver's door take prec-
edence. :
Left
; Right
X Turn the key to position 1or 2in the ignition
lock.
X To open manually: press and hold the cor-
responding button.
X To open fully: press the button beyond the
point of resistance and release it.
Automatic closing is started.
X To close manually: pull the corresponding
button and hold it. X
To close fully: pull the button beyond the
point of resistance and release it.
Automatic closing is started.
X To interrupt automatic operation: press
or pull the corresponding switch again.
i You can continue to operate the side win-
dows after you switch off the engine. This
function remains active for five minutes or
until the driver's or front-passenger door is opened. Opening and closing all side windows
Using the switch on the centre console Using the switch on the centre console, you
can close all side windows simultaneously.
X Open the cover on the lower centre con-
sole.
The switch for all side windows is under the
cover. X
To open all side windows: press
switch :to the point of resistance.
X To open all side windows fully: press
switch :beyond the point of resistance.
All side windows open simultaneously.
i If, after opening the windows, you then
close a side window using the switch on the door control panel, the other side windows
will remain open. To close the other side
windows, you must pull the switch on the
centre console and hold it. The front side
window will close first, then the rear side
windows. 84
Side windowsOpening and closing
Page 89 of 357
Resetting the side windows
If a side window can no longer be closed fully, you must reset it.
X Close all doors.
X Turn the key to position 1or 2in the ignition
lock.
X Pull the corresponding switch on the door
control panel until the side window is com-
pletely closed. (Y page 84)
X Hold the switch for an additional second.
If the side window opens again slightly:
X immediately pull the corresponding switch
on the door control panel until the side win-
dow is completely closed (Y page 84).
X Hold the switch for an additional second.
X If the corresponding side window remains
closed after the button has been released,
the side window has been reset correctly. If this is not the case, repeat the steps aboveagain. 86
Side windowsOpening and closing
Page 91 of 357
R
there is sufficient upward clearance, as
the roof swings upwards.
R there is sufficient clearance behind the
vehicle, as the boot lid swings backwards beyond the bumper.
R the boot is only loaded to below the boot
separator.
R the boot separator is not pushed up by
the load.
R the boot separator is closed.
R the boot lid is closed.
R the outside temperature is above Ò15 †.
You could otherwise damage the roof, boot
and other parts of the vehicle.
i The vehicle's dimensions when opening/
closing the roof (Y page 349).
i Make sure that the roof and rear window
are dry and clean before opening the roof.
Otherwise, water or dirt could enter the
vehicle interior or boot. Opening and closing using the roof
switch
Important safety notes G
WARNING
When opening or closing the roof, body parts could be trapped by, for example, the roof
mechanism, boot lid or side windows. There is a risk of injury.
When raising or lowering the roof, make sure
that no body parts are in the vicinity of moving
components. If someone becomes trapped,
release the button. Opening and closing X
Secure the vehicle against rolling away
(Y page 162).
X Close the boot separator (Y page 90).
X Close the boot lid.
X Turn the key to position 2in the ignition
lock.
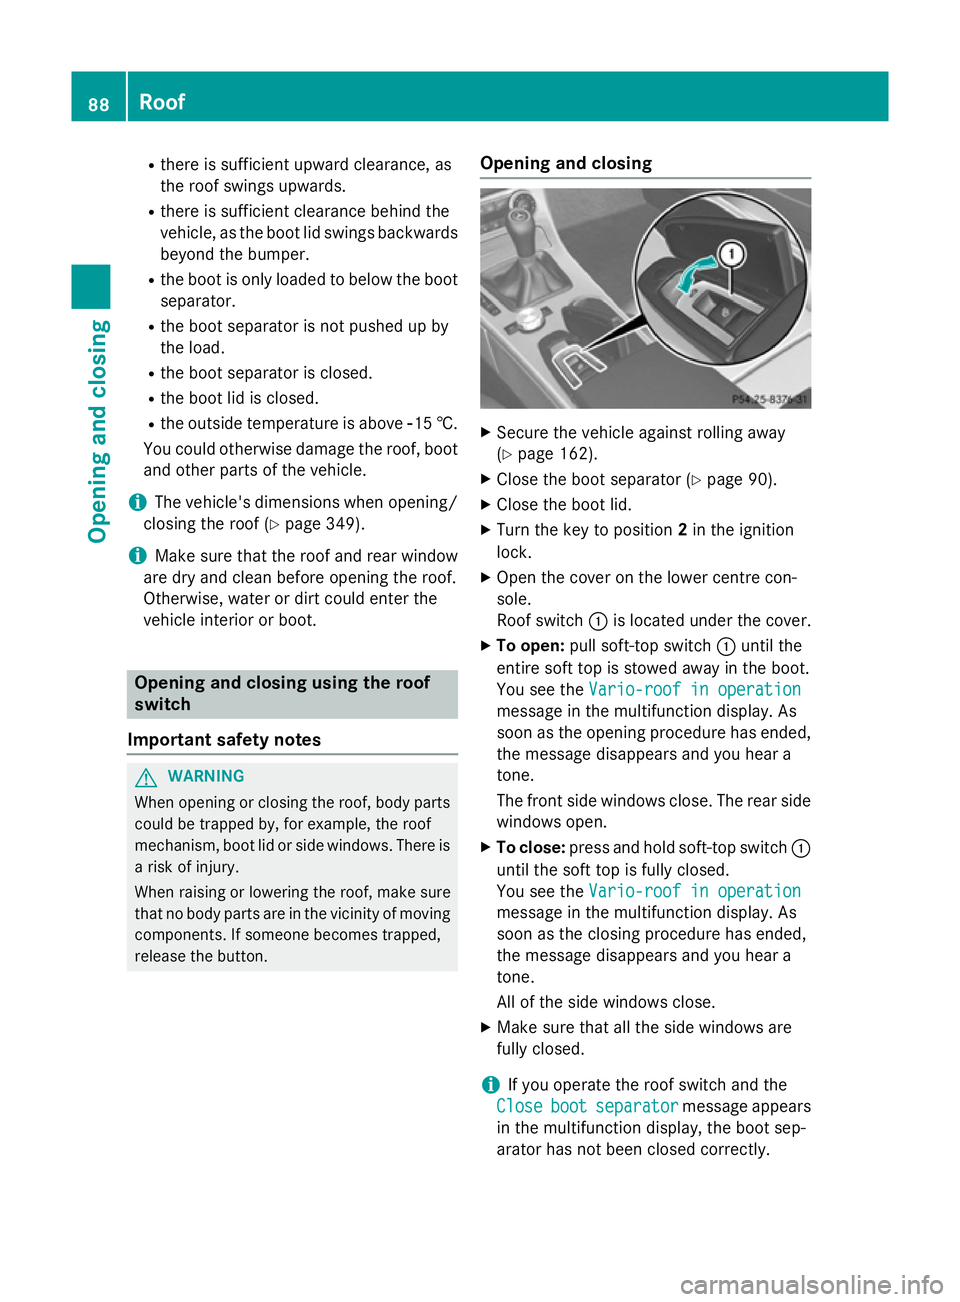
X Open the cover on the lower centre con-
sole.
Roof switch :is located under the cover.
X To open: pull soft-top switch :until the
entire soft top is stowed away in the boot.
You see the Vario-roof in operation
Vario-roof in operation
message in the multifunction display. As
soon as the opening procedure has ended,
the message disappears and you hear a
tone.
The front side windows close. The rear side windows open.
X To close: press and hold soft-top switch :
until the soft top is fully closed.
You see the Vario-roof in operation Vario-roof in operation
message in the multifunction display. As
soon as the closing procedure has ended,
the message disappears and you hear a
tone.
All of the side windows close.
X Make sure that all the side windows are
fully closed.
i If you operate the roof switch and the
Close Close boot bootseparator
separator message appears
in the multifunction display, the boot sep-
arator has not been closed correctly. 88
RoofOpening and closing
Page 92 of 357
Opening and closing with the key
Important safety notes G
WARNING
When opening or closing the roof, body parts could be trapped by, for example, the roof
mechanism, boot lid or side windows. There is a risk of injury.
When raising or lowering the roof, make sure
that no body parts are in the vicinity of moving
components. If someone becomes trapped,
release the button.
Opening and closing X
Close the boot separator (Y page 89).
X Close the boot lid (Y page 81).
X Point the tip of the key at the driver's door
handle.
X To open: press and hold the %button
on the key until the roof is fully opened.
The roof and the rear side windows open.
The front side windows close.
X To interrupt the opening procedure:
release the %button.
X To open the front side windows: press
and hold the %button on the key again.
X To close: press and hold the &button
on the key until the roof is fully closed.
The roof and the side windows close.
X To interrupt the closing procedure:
release the &button.
i The key cannot be used to open the roof if
the roof is closed and the boot separator is
open. Instead, all of the side windows open or close simultaneously (Y page 84). Addi-
tionally, the Close Closeboot
bootseparator
separator mes-
sage appears in the multifunction display. Locking the roof again
Important safety notes G
WARNING
If you do not fully open/close the soft top, the soft-top hydraulics depressurise after a short time. This causes the soft top to lower unex-
pectedly and may cause you or others to be
trapped. There is a risk of injury.
Always open or close the soft top completely.
The roof is not locked if:
R the K symbol and the Vario-roof Vario-roofin
in
operation
operation message appears in the multi-
function display
R the K symbol and the Open/close
Open/close
vario-roof completely
vario-roof completely message
appear and you hear a warning tone.
R you hear a warning tone for up to 10 sec-
onds when pulling away or while driving.
Locking You can lock the roof again if it is not locked
fully.
X Pull over and stop the vehicle safely as soon
as possible, paying attention to road and
traffic conditions.
X Make sure the key is in position 2in the
ignition lock.
X Press the roof switch (Y page 88). Boot separator
General notes !
To avoid damaging the roof or luggage
when folding back the roof, you should:
R only load the boot to below the boot sep-
arator
R not place any objects on or in front of the
boot separator Roof
89Opening and closing Z
Page 95 of 357
Only fold AIRGUIDE in/out while the vehicle is
stationary.
! AIRGUIDE can only be positioned cor-
rectly by folding it in or out. AIRGUIDE can-
not be dismantled. Do not try to remove
AIRGUIDE from its anchorage. Otherwise,
you could damage AIRGUIDE or the vehicle.
AIRGUIDE can be folded out or back in from
the driver's side or passenger side.
When operating AIRGUIDE, preferably stand
on the side of the vehicle away from the traffic
after you have stopped the vehicle in accord- ance with road and traffic conditions.
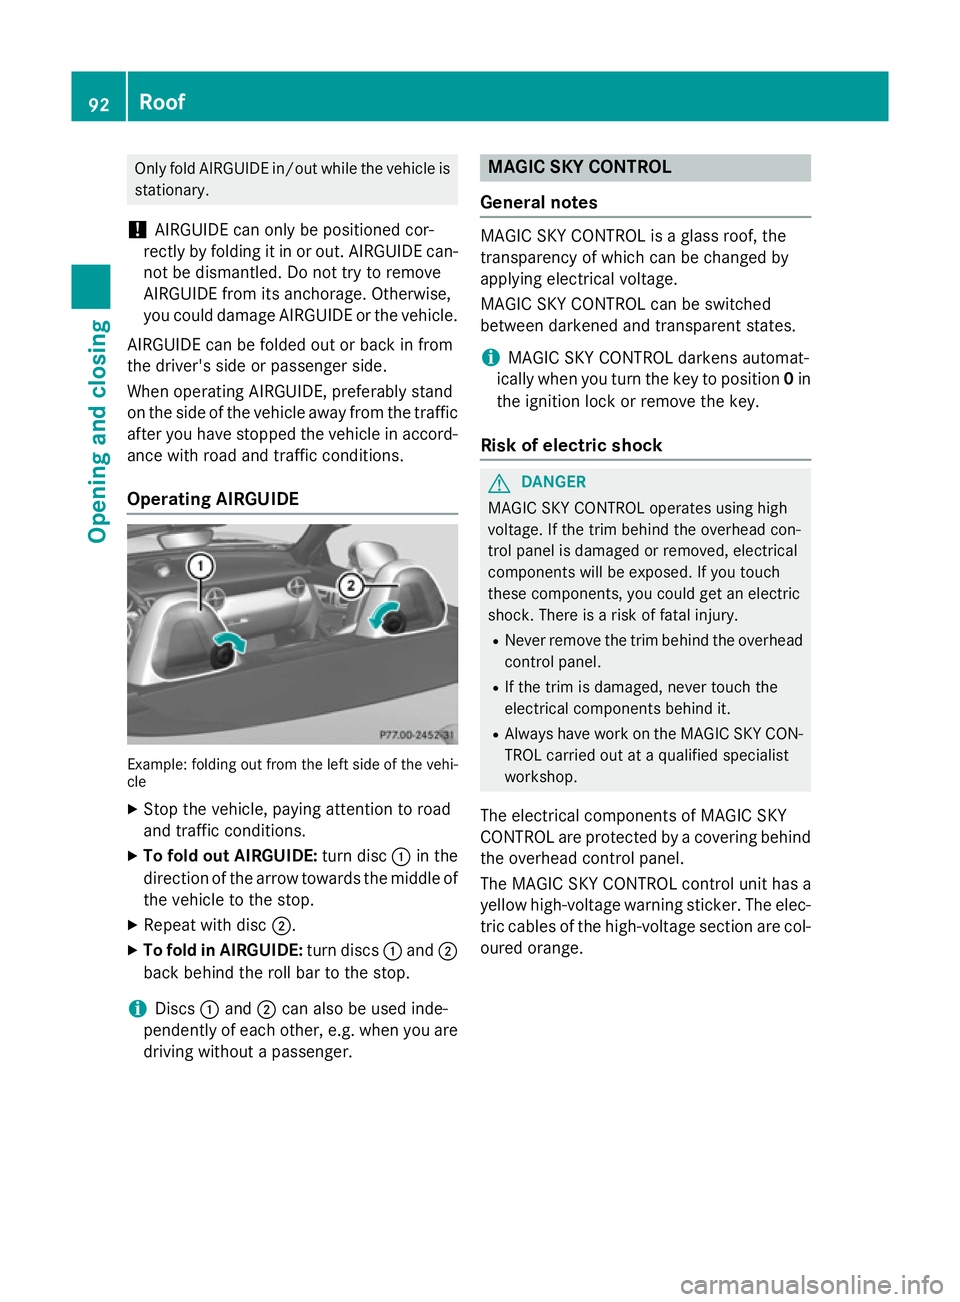
Operating AIRGUIDE Example: folding out from the left side of the vehi-
cle
X Stop the vehicle, paying attention to road
and traffic conditions.
X To fold out AIRGUIDE: turn disc:in the
direction of the arrow towards the middle of
the vehicle to the stop.
X Repeat with disc ;.
X To fold in AIRGUIDE: turn discs:and ;
back behind the roll bar to the stop.
i Discs
:and ;can also be used inde-
pendently of each other, e.g. when you are driving without a passenger. MAGIC SKY CONTROL
General notes MAGIC SKY CONTROL is a glass roof, the
transparency of which can be changed by
applying electrical voltage.
MAGIC SKY CONTROL can be switched
between darkened and transparent states.
i MAGIC SKY CONTROL darkens automat-
ically when you turn the key to position 0in
the ignition lock or remove the key.
Risk of electric shock G
DANGER
MAGIC SKY CONTROL operates using high
voltage. If the trim behind the overhead con-
trol panel is damaged or removed, electrical
components will be exposed. If you touch
these components, you could get an electric
shock. There is a risk of fatal injury.
R Never remove the trim behind the overhead
control panel.
R If the trim is damaged, never touch the
electrical components behind it.
R Always have work on the MAGIC SKY CON-
TROL carried out at a qualified specialist
workshop.
The electrical components of MAGIC SKY
CONTROL are protected by a covering behind the overhead control panel.
The MAGIC SKY CONTROL control unit has a
yellow high-voltage warning sticker. The elec-
tric cables of the high-voltage section are col- oured orange. 92
RoofOpening and closing
Page 96 of 357
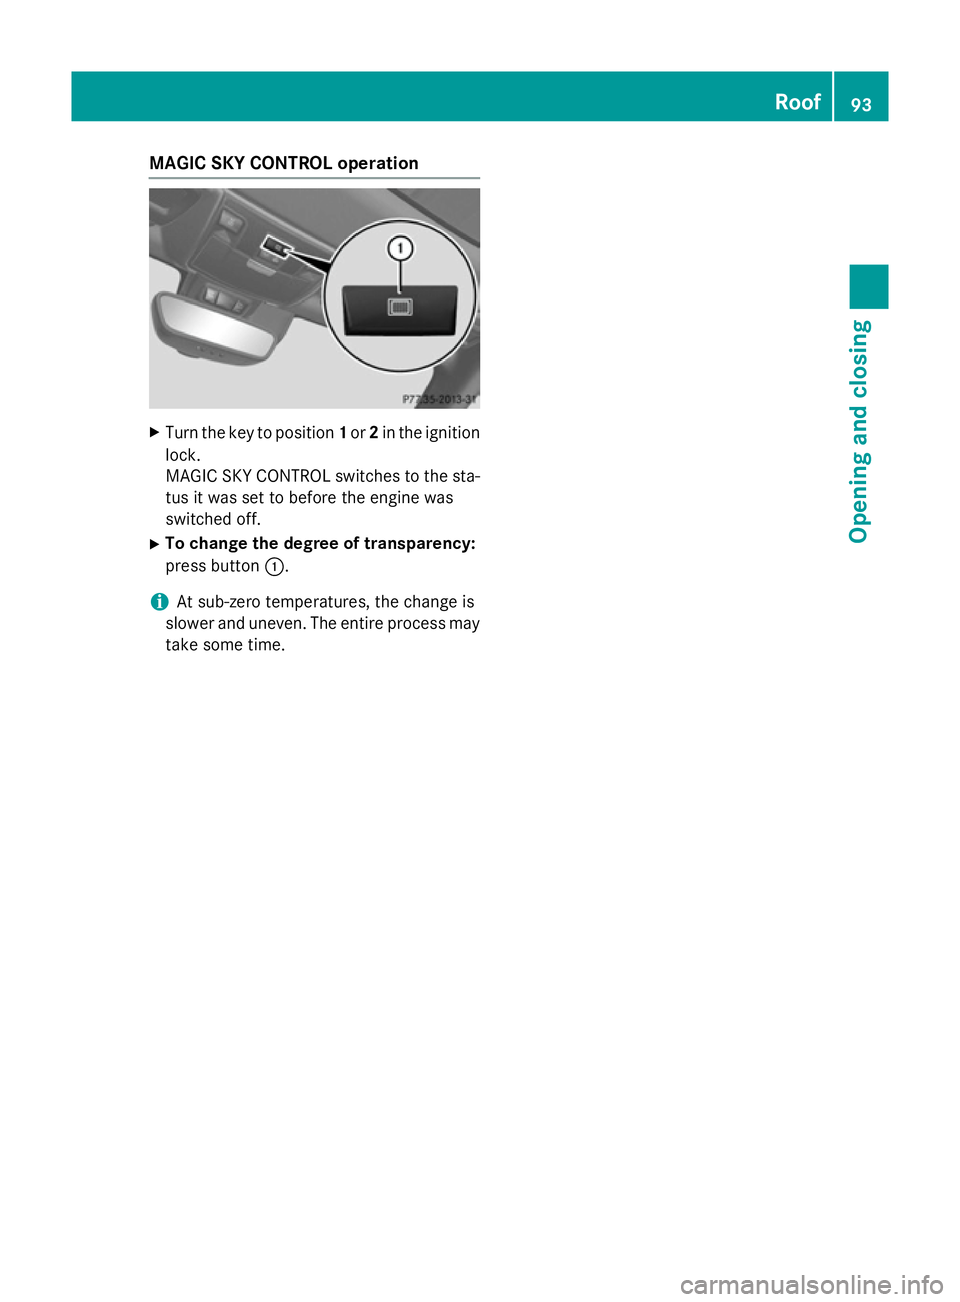
MAGIC SKY CONTROL operation
X
Turn the key to position 1or 2in the ignition
lock.
MAGIC SKY CONTROL switches to the sta-
tus it was set to before the engine was
switched off.
X To change the degree of transparency:
press button :.
i At sub-zero temperatures, the change is
slower and uneven. The entire process may
take some time. Roof
93Opening and closing Z
Page 97 of 357
Problems with the roof
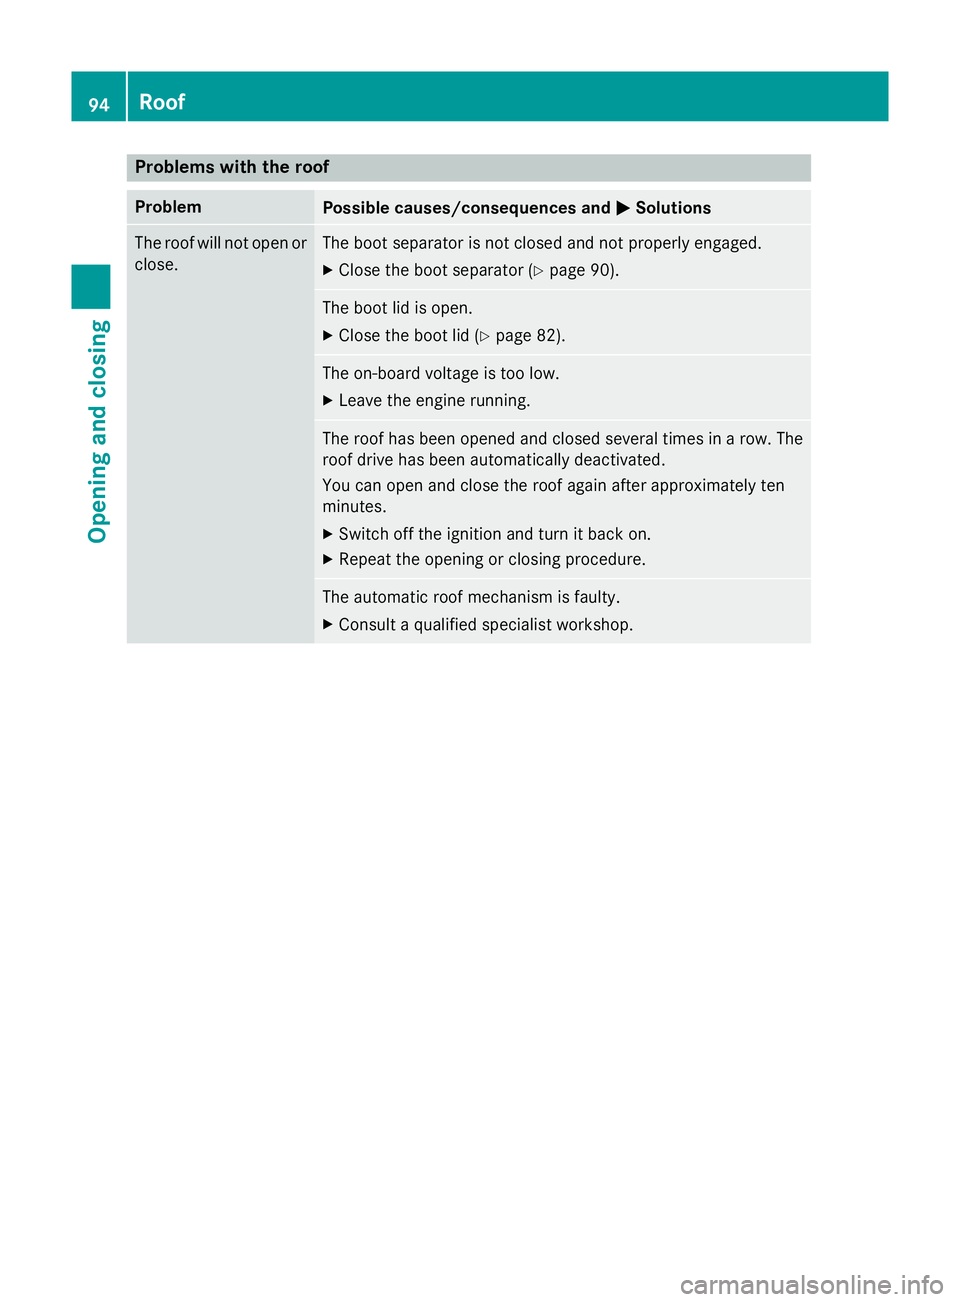
Problem
Possible causes/consequences and
M
MSolutions The roof will not open or
close. The boot separator is not closed and not properly engaged.
X Close the boot separator (Y page 90). The boot lid is open.
X Close the boot lid (Y page 82). The on-board voltage is too low.
X Leave the engine running. The roof has been opened and closed several times in a row. The
roof drive has been automatically deactivated.
You can open and close the roof again after approximately ten
minutes.
X Switch off the ignition and turn it back on.
X Repeat the opening or closing procedure. The automatic roof mechanism is faulty.
X Consult a qualified specialist workshop. 94
RoofOpening and closing
Page 100 of 357
Seats
Important safety notes
G
WARNING
If children adjust the seats, they could
become trapped, especially if they are unat-
tended. There is a risk of injury.
When leaving the vehicle, always take the key with you and lock the vehicle. Never leave
children unattended in the vehicle.
The seats can still be adjusted when there is
no key in the ignition lock. G
WARNING
When adjusting a seat, you or another vehicle occupant could become trapped by the guiderail of the seat, for instance. There is a risk of
injury.
Make sure that no one has any part of their
body within the sweep of the seat when
adjusting it.
Observe the safety notes on "Airbags"
(Y page 45) and "Children in the Vehicle"
(Y page 51). G
WARNING
If the driver's seat is not engaged, it can move unexpectedly while the vehicle is in motion.
This could cause you to lose control of the
vehicle. There is a risk of an accident.
Always make sure that the driver's seat is
engaged before starting the engine. G
WARNING
If you adjust the seat height carelessly, you or other vehicle occupants could be trapped andthereby injured. Children in particular could
accidentally press the electrical seat adjust-
ment buttons and become trapped. There is a
risk of injury.
While moving the seats, make sure that your
hands or other body parts do not get under the
lever assembly of the seat adjustment sys-
tem. G
WARNING
The head restraints cannot provide the inten-
ded protection unless they are fitted and
adjusted correctly. There is an increased risk of injury to the head and neck in the event of
an accident or sudden braking, for example.
Always drive with the head restraints fitted.
Ensure that the centre of the head restraints
support the back of each vehicle occupant's
head at eye level before driving off. G
WARNING
You could lose control of the vehicle while
driving if you:
R adjust the driver's seat, steering wheel or
mirror
R fasten the seat belt.
There is a risk of an accident.
Adjust the driver's seat, steering wheel or
mirror and fasten the seat belt before starting
the engine.
! To avoid damage to the seats and the seat
heating, observe the following information:
R do not spill any liquids on the seats. If
liquid is spilled on the seats, dry them as
soon as possible.
R if the seat covers are damp or wet, do not
switch on the seat heating. The seat
heating should also not be used to dry
the seats.
R clean the seat covers as recommended;
see the "Interior care" section.
R do not transport heavy loads on the
seats. Do not place sharp objects on the
seat cushions, e.g. knives, nails or tools. The seats should only be occupied by
passengers, if possible.
R when the seat heating is in operation, do
not cover the seats with insulating mate- rials, e.g. blankets, coats, bags, seat cov-
ers, child seats or booster seats.
! Make sure that there are no objects in the
footwell under or behind the seats when
moving the seats back. There is a risk that Seats
97Seats, steering wheel and mirrors Z
Page 102 of 357
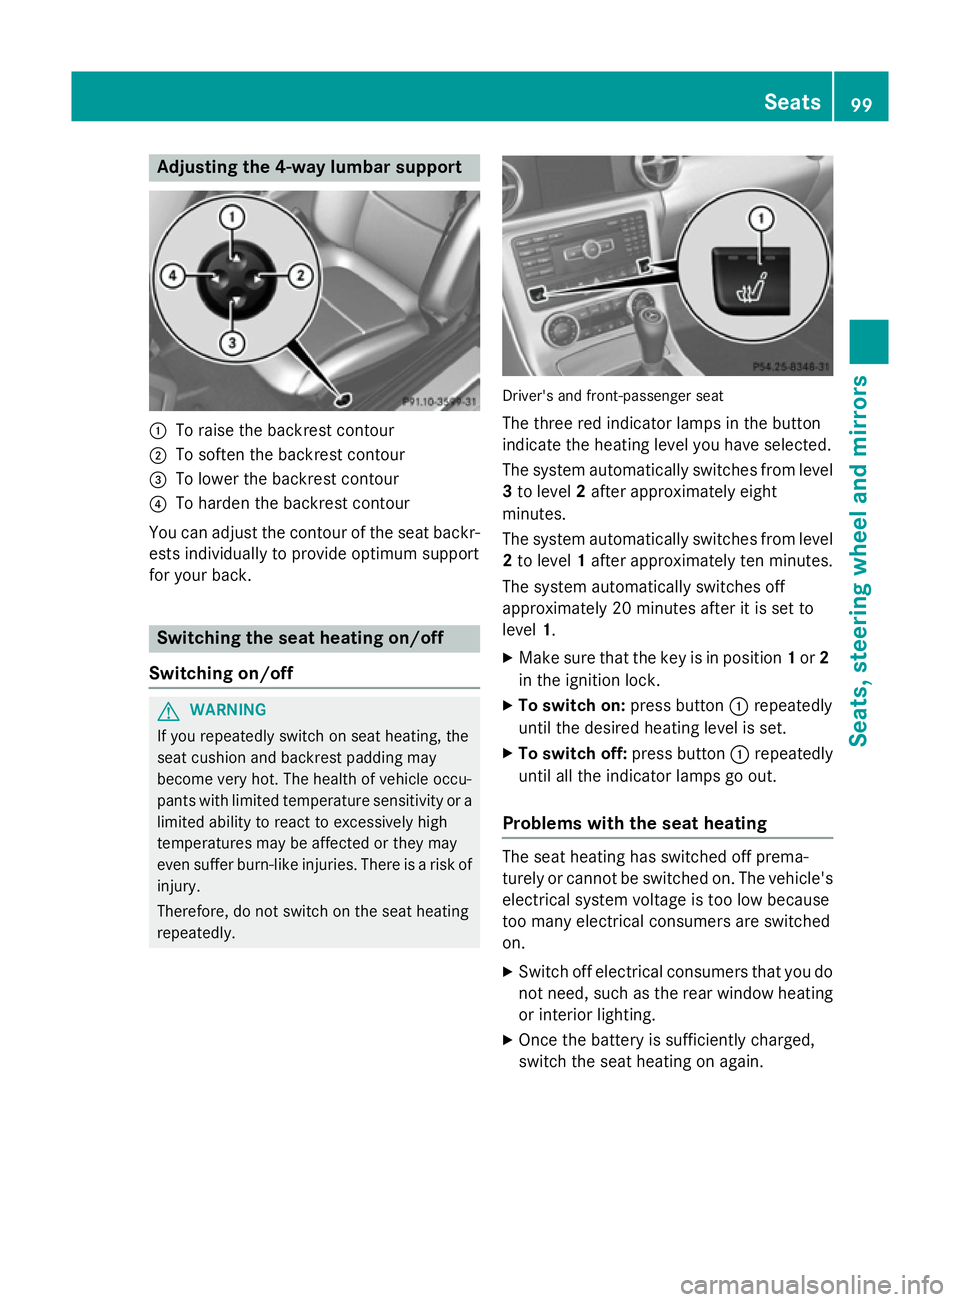
Adjusting the 4-way lumbar support
:
To raise the backrest contour
; To soften the backrest contour
= To lower the backrest contour
? To harden the backrest contour
You can adjust the contour of the seat backr-
ests individually to provide optimum support
for your back. Switching the seat heating on/off
Switching on/off G
WARNING
If you repeatedly switch on seat heating, the
seat cushion and backrest padding may
become very hot. The health of vehicle occu-
pants with limited temperature sensitivity or a limited ability to react to excessively high
temperatures may be affected or they may
even suffer burn-like injuries. There is a risk of
injury.
Therefore, do not switch on the seat heating
repeatedly. Driver's and front-passenger seat
The three red indicator lamps in the button
indicate the heating level you have selected.
The system automatically switches from level 3 to level 2after approximately eight
minutes.
The system automatically switches from level
2 to level 1after approximately ten minutes.
The system automatically switches off
approximately 20 minutes after it is set to
level 1.
X Make sure that the key is in position 1or 2
in the ignition lock.
X To switch on: press button:repeatedly
until the desired heating level is set.
X To switch off: press button:repeatedly
until all the indicator lamps go out.
Problems with the seat heating The seat heating has switched off prema-
turely or cannot be switched on. The vehicle's
electrical system voltage is too low because
too many electrical consumers are switched
on.
X Switch off electrical consumers that you do
not need, such as the rear window heating
or interior lighting.
X Once the battery is sufficiently charged,
switch the seat heating on again. Seats
99Seats, steering wheel and mirrors Z
Page 103 of 357
AIRSCARF
Activating/deactivating G
WARNING
When AIRSCARF is switched on, very hot air
can flow from the vents in the head restraints. This could result in burns in the immediate
vicinity of the air vents. There is a risk of injury.
Reduce the heater output before it becomes
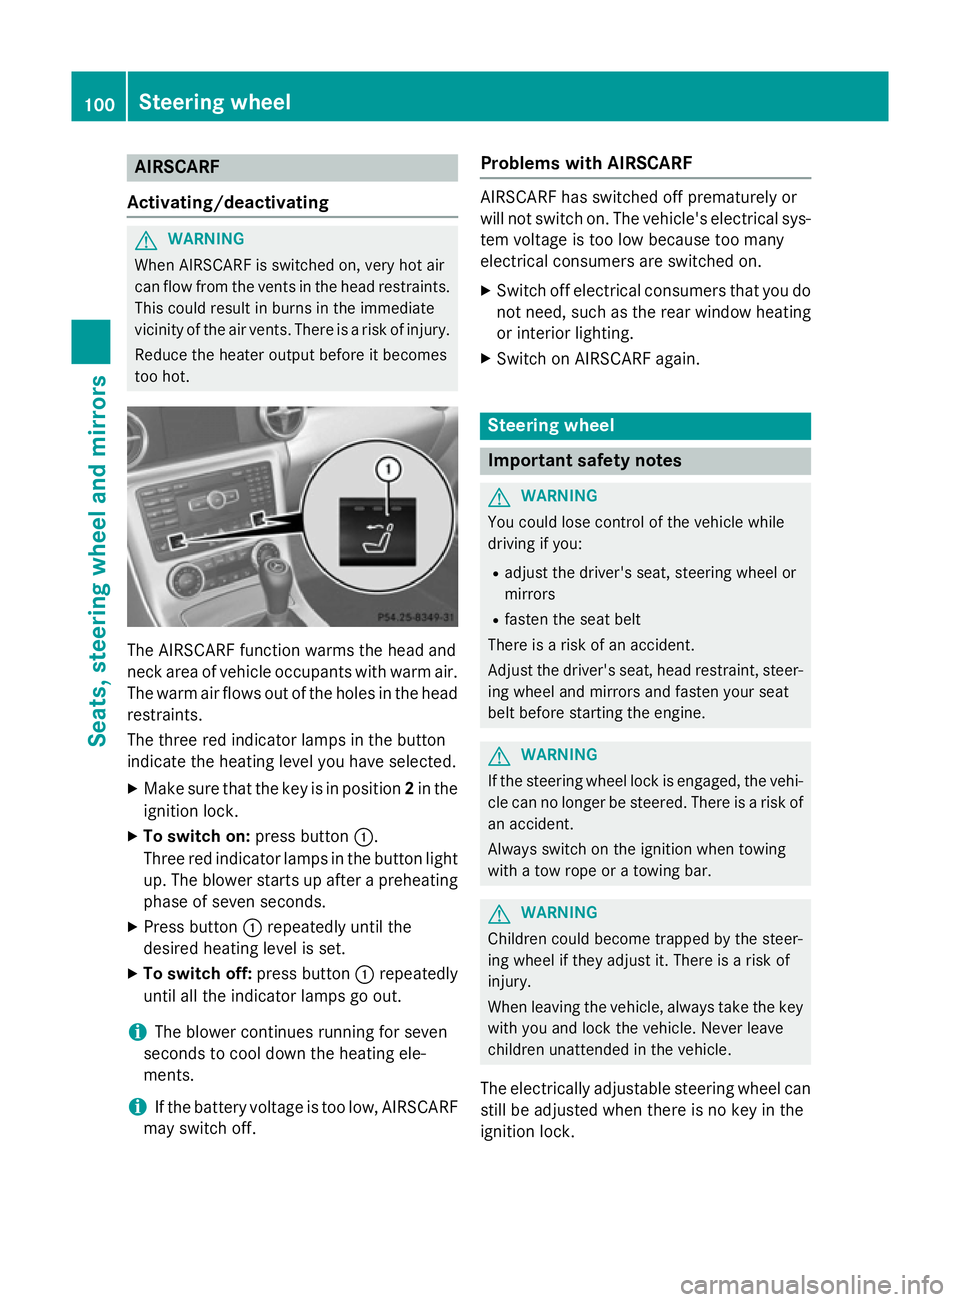
too hot. The AIRSCARF function warms the head and
neck area of vehicle occupants with warm air.
The warm air flows out of the holes in the head restraints.
The three red indicator lamps in the button
indicate the heating level you have selected.
X Make sure that the key is in position 2in the
ignition lock.
X To switch on: press button:.
Three red indicator lamps in the button light up. The blower starts up after a preheating
phase of seven seconds.
X Press button :repeatedly until the
desired heating level is set.
X To switch off: press button:repeatedly
until all the indicator lamps go out.
i The blower continues running for seven
seconds to cool down the heating ele-
ments.
i If the battery voltage is too low, AIRSCARF
may switch off. Problems with AIRSCARF AIRSCARF has switched off prematurely or
will not switch on. The vehicle's electrical sys-
tem voltage is too low because too many
electrical consumers are switched on.
X Switch off electrical consumers that you do
not need, such as the rear window heating
or interior lighting.
X Switch on AIRSCARF again. Steering wheel
Important safety notes
G
WARNING
You could lose control of the vehicle while
driving if you:
R adjust the driver's seat, steering wheel or
mirrors
R fasten the seat belt
There is a risk of an accident.
Adjust the driver's seat, head restraint, steer-
ing wheel and mirrors and fasten your seat
belt before starting the engine. G
WARNING
If the steering wheel lock is engaged, the vehi- cle can no longer be steered. There is a risk of
an accident.
Always switch on the ignition when towing
with a tow rope or a towing bar. G
WARNING
Children could become trapped by the steer-
ing wheel if they adjust it. There is a risk of
injury.
When leaving the vehicle, always take the key with you and lock the vehicle. Never leave
children unattended in the vehicle.
The electrically adjustable steering wheel can
still be adjusted when there is no key in the
ignition lock. 100
Steering wheelSeats
, steering wheel and mirrors