clutch MERCEDES-BENZ SLK ROADSTER 2014 Owners Manual
[x] Cancel search | Manufacturer: MERCEDES-BENZ, Model Year: 2014, Model line: SLK ROADSTER, Model: MERCEDES-BENZ SLK ROADSTER 2014Pages: 357, PDF Size: 10.22 MB
Page 147 of 357
Manual transmission
X
Depress the brake pedal and keep it
depressed.
X Fully depress the clutch pedal.
X Shift to neutral N.
i You can only start the engine when the
clutch pedal is fully depressed.
Automatic transmission X
Shift the transmission to position P.
The transmission position indicator in the
multifunction display shows P.
i You can also start the engine when the
transmission is in position N.
Starting procedure with the key X
To start a petrol engine: turn the key to
position 3in the ignition lock (Y page 141)
and release it as soon as the engine is run-
ning.
X To start a diesel engine: turn the key to
position 2in the ignition lock (Y page 141).
The % preglow indicator lamp in the
instrument cluster lights up.
X When the %preglow indicator lamp
goes out, turn the key to position 3
(Y page 141) and release it as soon as the
engine is running.
i To start the engine using the key instead
of KEYLESS-GO, pull the Start/Stop button
out of the ignition lock.
i You can start the engine without preglow
if the engine is warm.
Using KEYLESS-GO to start the engine i
The Start/Stop button can be used to
start the vehicle manually without inserting
the key into the ignition lock. The key must
be in the vehicle and the Start/Stop button must be inserted in the ignition lock. This
mode for starting the engine operates inde- pendently of the ECO start/stop automatic
engine start function.
X Depress the brake pedal and keep it
depressed.
X To start a petrol engine: press the Start/
Stop button once (Y page 141).
The engine starts.
X To start a diesel engine: press the Start/
Stop button once (Y page 141).
Preglow is activated and the engine starts. Pulling away
Manual transmission !
Change gear in good time and avoid spin-
ning the wheels. Otherwise, you could dam- age the vehicle.
X Depress the brake pedal and keep it
depressed.
X Depress the clutch pedal fully.
X Shift to either first gear or reverse gear R.
X Release the electric parking brake
(Y page 163).
X Release the brake pedal.
X Slowly release the clutch pedal and gently
depress the accelerator pedal.
i Follow the shift recommendations in the
multifunction display for an economical
driving style (Y page 152).
i The vehicle locks centrally once you have
pulled away. The locking knobs in the doors
drop down.
You can open the doors from the inside at
any time.
You can also deactivate the automatic lock- ing feature (Y page 216).
Automatic transmission G
WARNING
If the engine speed is above the idling speed
and you engage transmission position Dor R, 144
DrivingDriving and parking
Page 150 of 357
ECO symbol appears in the multifunction
display.
In vehicles with a colour multifunction dis-
play, the èECO symbol appears in yel-
low in the multifunction display after the
fourth automatic engine start. When the
è ECO symbol is shown in green in the
multifunction display, automatic engine
switch-off is again possible.
i AMG vehicles:
the number of consecu-
tive automatic engine stops is unlimited.
i The HOLD function can be activated if the
engine has been switched off automati-
cally. It is then not necessary to continue
applying the brakes during the automatic
stop phase. When you depress the accel-
erator pedal, the engine starts automati-
cally and the braking effect of the HOLD
function is deactivated.
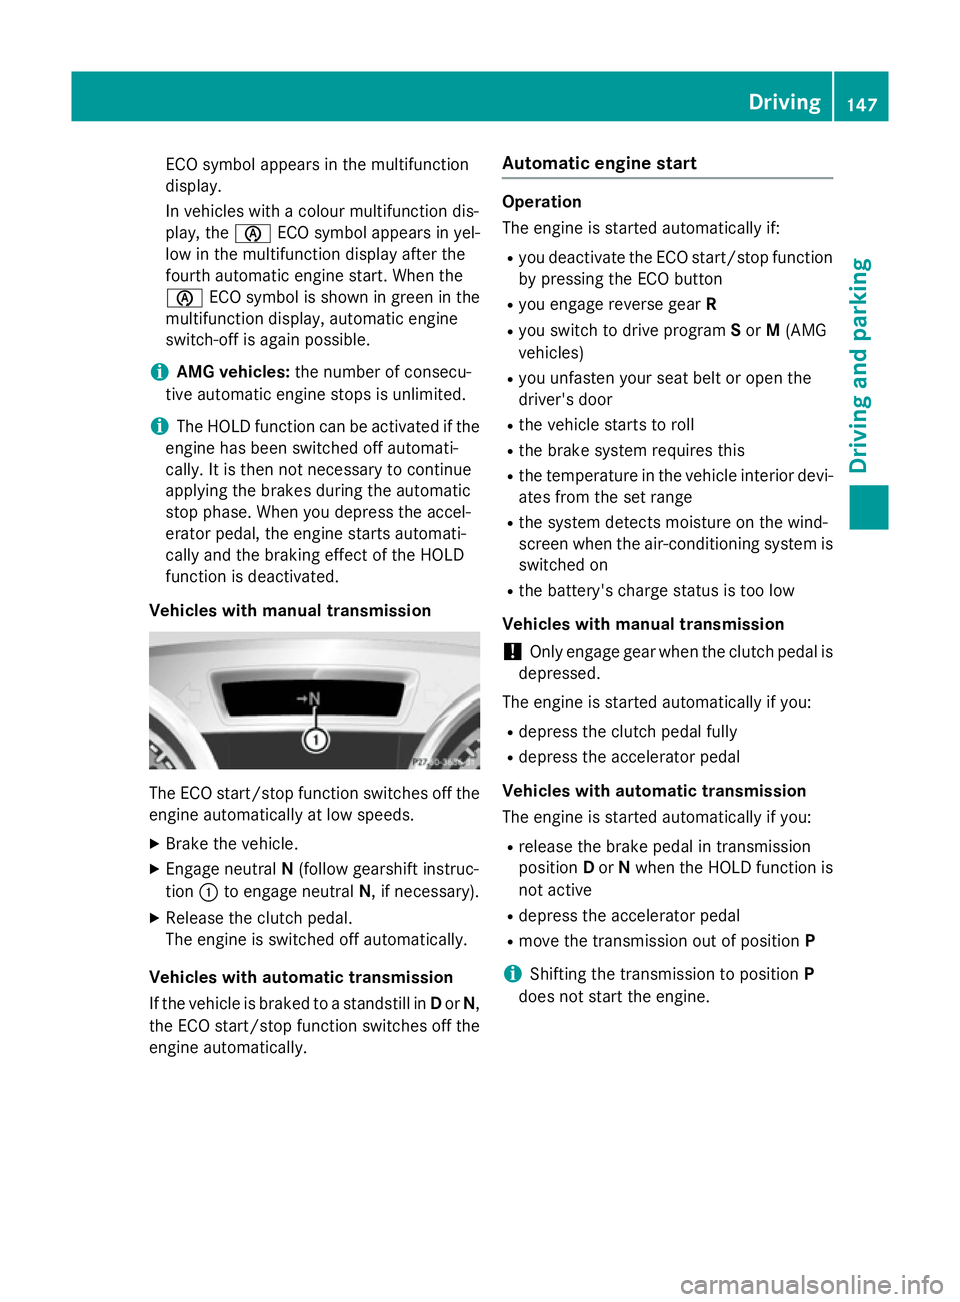
Vehicles with manual transmission The ECO start/stop function switches off the
engine automatically at low speeds.
X Brake the vehicle.
X Engage neutral N(follow gearshift instruc-
tion :to engage neutral N, if necessary).
X Release the clutch pedal.
The engine is switched off automatically.
Vehicles with automatic transmission
If the vehicle is braked to a standstill in Dor N,
the ECO start/stop function switches off the engine automatically. Automatic engine start Operation
The engine is started automatically if:
R
you deactivate the ECO start/stop function
by pressing the ECO button
R you engage reverse gear R
R you switch to drive program Sor M(AMG
vehicles)
R you unfasten your seat belt or open the
driver's door
R the vehicle starts to roll
R the brake system requires this
R the temperature in the vehicle interior devi-
ates from the set range
R the system detects moisture on the wind-
screen when the air-conditioning system is
switched on
R the battery's charge status is too low
Vehicles with manual transmission
! Only engage gear when the clutch pedal is
depressed.
The engine is started automatically if you:
R depress the clutch pedal fully
R depress the accelerator pedal
Vehicles with automatic transmission
The engine is started automatically if you: R release the brake pedal in transmission
position Dor Nwhen the HOLD function is
not active
R depress the accelerator pedal
R move the transmission out of position P
i Shifting the transmission to position
P
does not start the engine. Driving
147Driving an d parking Z
Page 154 of 357
Problem
Possible causes/consequences and
M
MSolutions The coolant tempera-
ture display is showing
more than 120 †. The
coolant warning lamp
may also be on and a
warning tone may
sound. The coolant level is too low. The coolant is too hot and the engine
is no longer being cooled sufficiently.
X Stop as soon as possible and allow the engine and the coolant to
cool down.
X Check the coolant level (Y page 283). Observe the warning
notes as you do so and top up the coolant if necessary. If the coolant level is correct, the engine radiator fan may be faulty.
The coolant is too hot and the engine is no longer being cooled
sufficiently.
X If the coolant temperature is below 120 †, you can continue
driving to the nearest qualified specialist workshop.
X Avoid heavy loads on the engine as you do so, e.g. driving in
mountainous terrain and stop-start traffic. Manual transmission
Gear lever
! Only engage gear when the clutch pedal is
depressed.
! When shifting between
5thand 6thgear,
you should always push the gear lever all
the way to the right. Otherwise, you could
shift unintentionally into 3rdor4th gear
and damage the transmission.
If you shift down at too high a speed (trans-
mission braking), this can cause the engine to overrev, leading to engine damage.
Do not use the clutch bite point to keep the
vehicle stationary on uphill gradients.
There is otherwise a risk of damaging the
clutch. Gear lever
k
Reverse gear
1 -6
Forward gears Engaging reverse gear
! Only shift into reverse gear
Rwhen the
vehicle is stationary. Otherwise, you could
damage the transmission.
X Stop the vehicle.
X Depress the clutch pedal fully.
X Select neutral N.
X Move the gear lever firmly to the left,
beyond the point of resistance, then for-
wards. Manual transmission
151Driving and parking Z
Page 156 of 357
Transmission positions
B Park position
This prevents the vehicle from roll-
ing away when stopped. Do not
shift the transmission into position
P (Y page 152) unless the vehicle is
stationary. The parking lock should not be used as a brake when park-
ing. In order to secure the vehicle,
always apply the electric parking
brake in addition to the parking
lock.
The key can only be removed if the transmission is in position P. If the
key is removed from the ignition
lock, the selector lever is locked. C Reverse gear
Only shift the transmission to
R
when the vehicle is stationary. A Neutral
Do not shift the transmission to
N
while driving. Otherwise, the auto-
matic transmission could be dam-
aged.
No power is transmitted from the
engine to the drive wheels.
Releasing the brake pedal will allow
you to move the vehicle freely, e.g. to push it or tow it.
If ESP ®
is deactivated or faulty:
only shift the transmission to posi-
tion Nif the vehicle is in danger of
skidding, e.g. on icy roads.
! Rolling in neutral
Ncan lead to
damage to the transmission. 7 Drive
The automatic transmission
changes gear automatically. All
forward gears are available. Driving tips
Changing gear The automatic transmission shifts to the indi-
vidual gears automatically when it is in trans-
mission position D. Gearshifting is deter-
mined by:
R the selected drive program (Y page 154)
R the position of the accelerator pedal
(Y page 153)
R the road speed
Accelerator pedal position Your style of driving influences how the auto-
matic transmission shifts gear:
R little throttle: early upshifts
R more throttle: late upshifts
Double-clutch function When shifting down, the double-clutch func-
tion is active regardless of the currently selec-
ted drive program. The double-clutch functionreduces load change reactions and is condu-cive to a sporty driving style. The sound gen-
erated by the double-clutch function depends
on the drive program selected.
Kickdown Use kickdown for maximum acceleration.
X Depress the accelerator pedal beyond the
pressure point.
The transmission shifts to a lower gear
depending on the engine speed.
X Ease off the accelerator pedal once the
desired speed is reached.
The automatic transmission shifts back up. Automatic transmission
153Driving and parking Z
Page 250 of 357
Display messages
Possible causes/consequences and
M
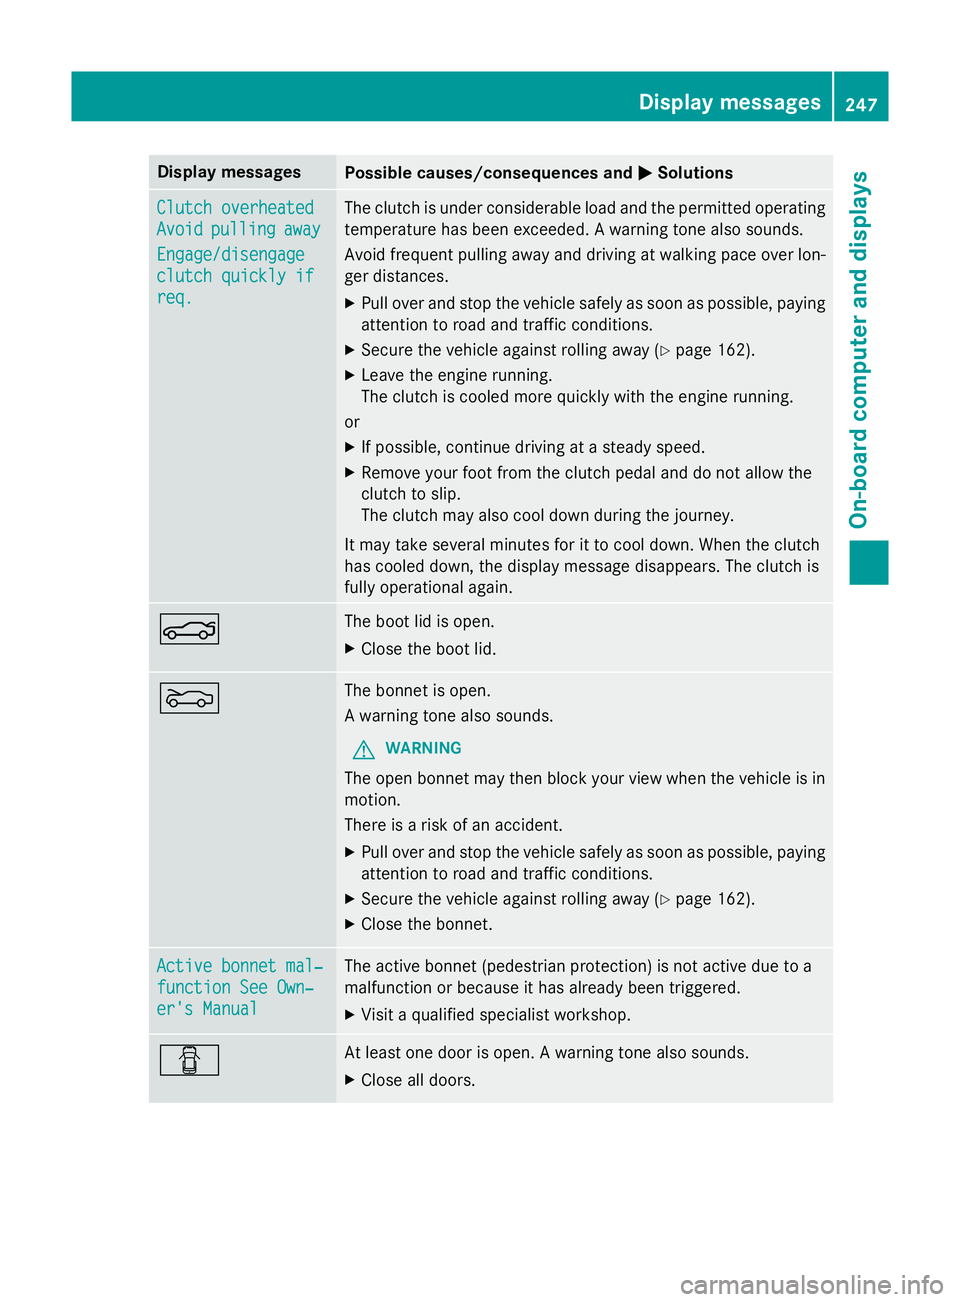
MSolutions Clutch overheated
Clutch overheated
Avoid Avoid
pulling
pulling away
away
Engage/disengage
Engage/disengage
clutch quickly if clutch quickly if
req. req. The clutch is under considerable load and the permitted operating
temperature has been exceeded. A warning tone also sounds.
Avoid frequent pulling away and driving at walking pace over lon-
ger distances.
X Pull over and stop the vehicle safely as soon as possible, paying
attention to road and traffic conditions.
X Secure the vehicle against rolling away (Y page 162).
X Leave the engine running.
The clutch is cooled more quickly with the engine running.
or X If possible, continue driving at a steady speed.
X Remove your foot from the clutch pedal and do not allow the
clutch to slip.
The clutch may also cool down during the journey.
It may take several minutes for it to cool down. When the clutch
has cooled down, the display message disappears. The clutch is
fully operational again. N The boot lid is open.
X Close the boot lid. M The bonnet is open.
A warning tone also sounds.
G WARNING
The open bonnet may then block your view when the vehicle is in
motion.
There is a risk of an accident.
X Pull over and stop the vehicle safely as soon as possible, paying
attention to road and traffic conditions.
X Secure the vehicle against rolling away (Y page 162).
X Close the bonnet. Active bonnet mal‐ Active bonnet mal‐
function See Own‐ function See Own‐
er's Manual er's Manual The active bonnet (pedestrian protection) is not active due to a
malfunction or because it has already been triggered.
X Visit a qualified specialist workshop. C At least one door is open. A warning tone also sounds.
X Close all doors. Display
messages
247On-board computer and displays Z
Page 308 of 357
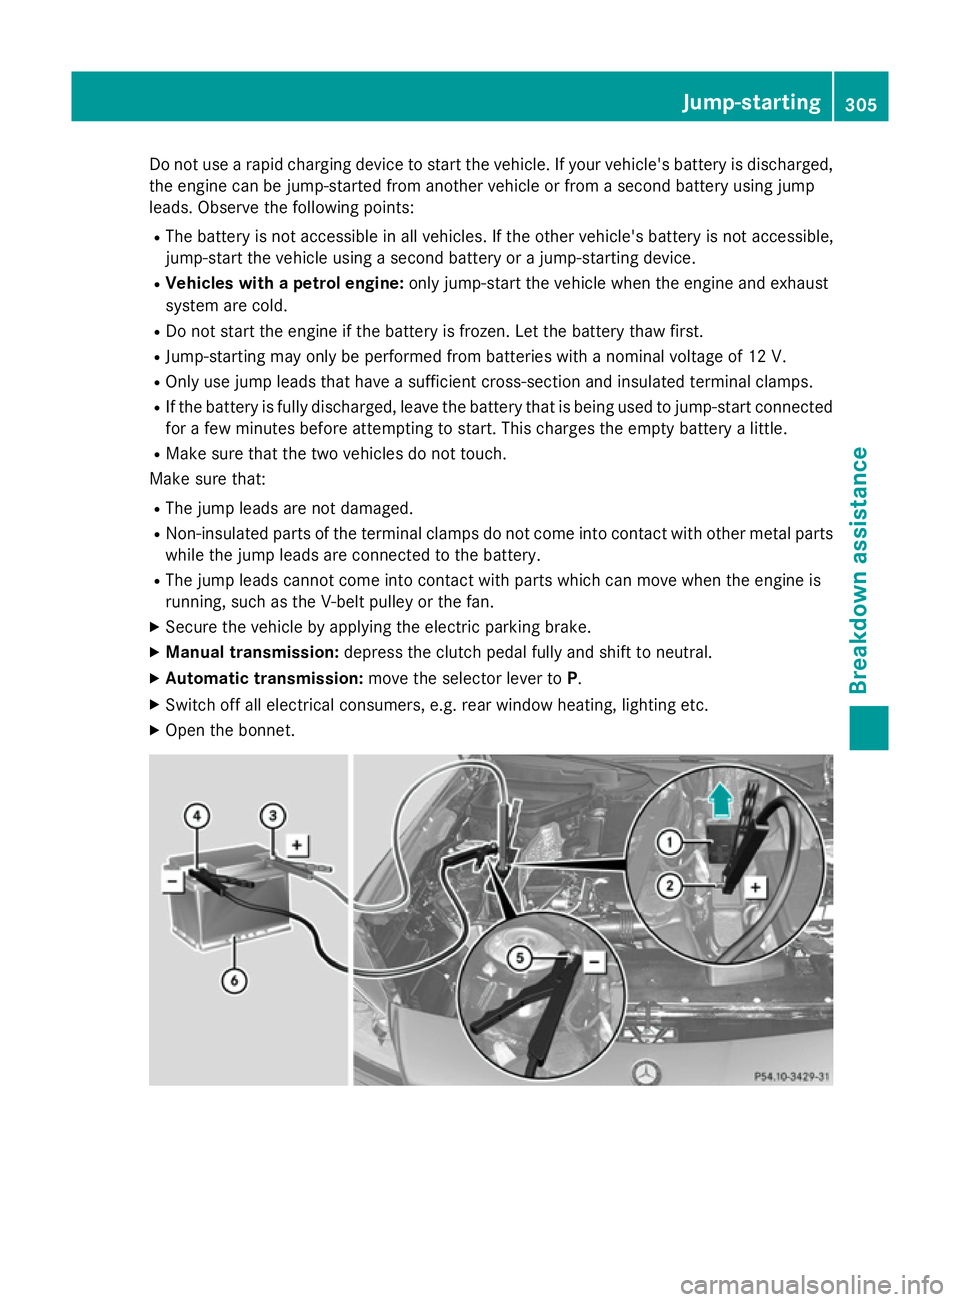
Do not use a rapid charging device to start the vehicle. If your vehicle's battery is discharged,
the engine can be jump-started from another vehicle or from a second battery using jump
leads. Observe the following points:
R The battery is not accessible in all vehicles. If the other vehicle's battery is not accessible,
jump-start the vehicle using a second battery or a jump-starting device.
R Vehicles with a petrol engine: only jump-start the vehicle when the engine and exhaust
system are cold.
R Do not start the engine if the battery is frozen. Let the battery thaw first.
R Jump-starting may only be performed from batteries with a nominal voltage of 12 V.
R Only use jump leads that have a sufficient cross-section and insulated terminal clamps.
R If the battery is fully discharged, leave the battery that is being used to jump-start connected
for a few minutes before attempting to start. This charges the empty battery a little.
R Make sure that the two vehicles do not touch.
Make sure that:
R The jump leads are not damaged.
R Non-insulated parts of the terminal clamps do not come into contact with other metal parts
while the jump leads are connected to the battery.
R The jump leads cannot come into contact with parts which can move when the engine is
running, such as the V-belt pulley or the fan.
X Secure the vehicle by applying the electric parking brake.
X Manual transmission: depress the clutch pedal fully and shift to neutral.
X Automatic transmission: move the selector lever toP.
X Switch off all electrical consumers, e.g. rear window heating, lighting etc.
X Open the bonnet. Jump-starting
305Breakdown assistance Z
Page 311 of 357
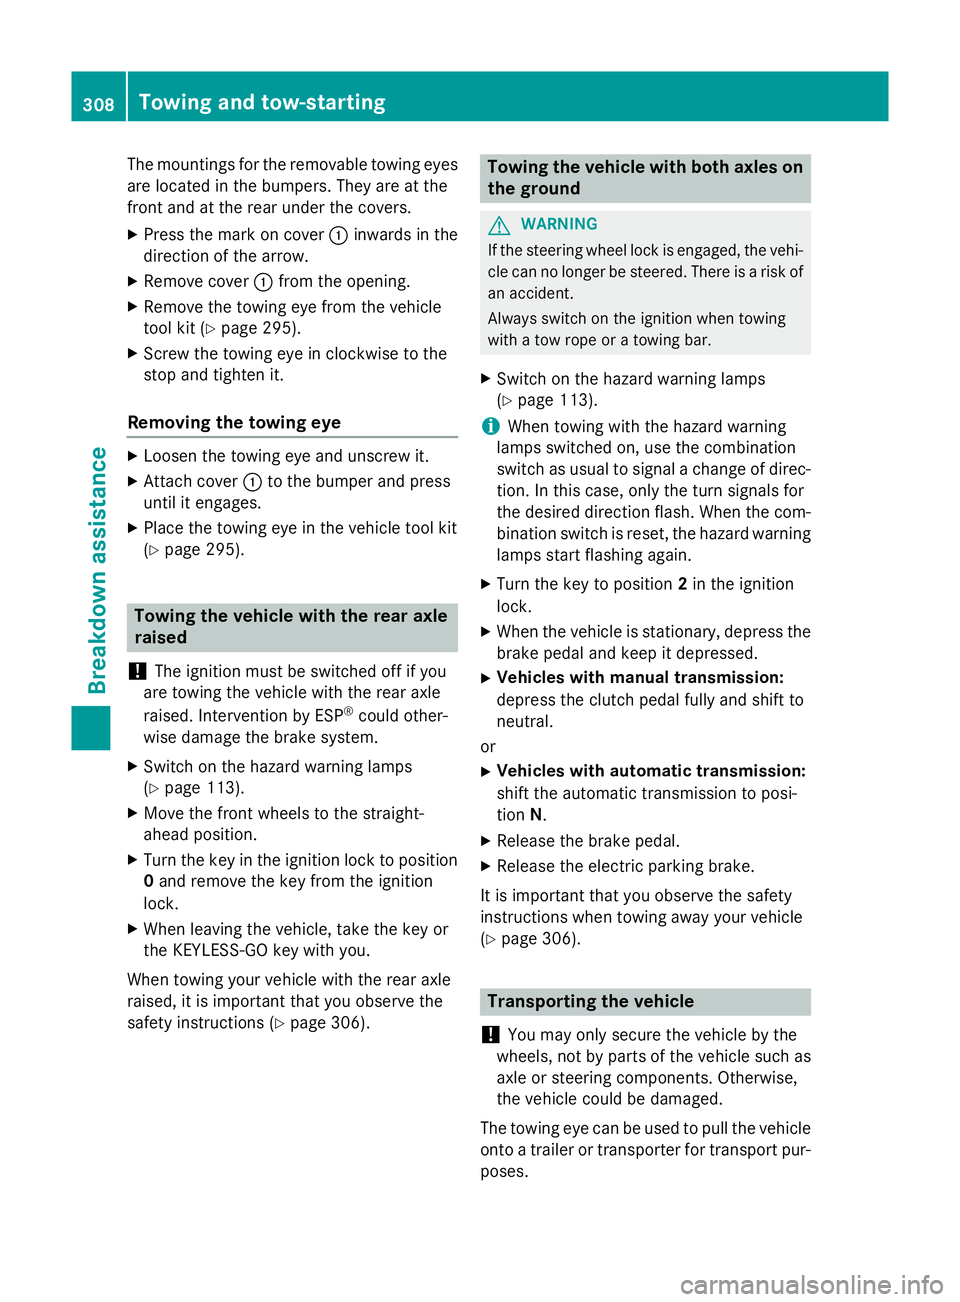
The mountings for the removable towing eyes
are located in the bumpers. They are at the
front and at the rear under the covers.
X Press the mark on cover :inwards in the
direction of the arrow.
X Remove cover :from the opening.
X Remove the towing eye from the vehicle
tool kit (Y page 295).
X Screw the towing eye in clockwise to the
stop and tighten it.
Removing the towing eye X
Loosen the towing eye and unscrew it.
X Attach cover :to the bumper and press
until it engages.
X Place the towing eye in the vehicle tool kit
(Y page 295). Towing the vehicle with the rear axle
raised
! The ignition must be switched off if you
are towing the vehicle with the rear axle
raised. Intervention by ESP ®
could other-
wise damage the brake system.
X Switch on the hazard warning lamps
(Y page 113).
X Move the front wheels to the straight-
ahead position.
X Turn the key in the ignition lock to position
0 and remove the key from the ignition
lock.
X When leaving the vehicle, take the key or
the KEYLESS-GO key with you.
When towing your vehicle with the rear axle
raised, it is important that you observe the
safety instructions (Y page 306). Towing the vehicle with both axles on
the ground G
WARNING
If the steering wheel lock is engaged, the vehi- cle can no longer be steered. There is a risk of
an accident.
Always switch on the ignition when towing
with a tow rope or a towing bar.
X Switch on the hazard warning lamps
(Y page 113).
i When towing with the hazard warning
lamps switched on, use the combination
switch as usual to signal a change of direc- tion. In this case, only the turn signals for
the desired direction flash. When the com- bination switch is reset, the hazard warning lamps start flashing again.
X Turn the key to position 2in the ignition
lock.
X When the vehicle is stationary, depress the
brake pedal and keep it depressed.
X Vehicles with manual transmission:
depress the clutch pedal fully and shift to
neutral.
or
X Vehicles with automatic transmission:
shift the automatic transmission to posi-
tion N.
X Release the brake pedal.
X Release the electric parking brake.
It is important that you observe the safety
instructions when towing away your vehicle
(Y page 306). Transporting the vehicle
! You may only secure the vehicle by the
wheels, not by parts of the vehicle such as
axle or steering components. Otherwise,
the vehicle could be damaged.
The towing eye can be used to pull the vehicle
onto a trailer or transporter for transport pur-
poses. 308
Towing and tow-startingBreakdown assistance
Page 312 of 357
X
Vehicles with manual transmission:
depress the clutch pedal fully and shift to
neutral.
X Vehicles with automatic transmission:
turn the key to position 2in the ignition
lock.
X Move the selector lever to N.
As soon as the vehicle is loaded: X Prevent the vehicle from rolling away by
applying the electric parking brake.
X Vehicles with manual transmission:
depress the clutch pedal fully and engage
first or reverse gear.
X Vehicles with automatic transmission:
move the selector lever to P.
X Turn the key in the ignition lock to position
0 and remove the key from the ignition
lock.
X Secure the vehicle. Tow-starting (emergency engine
starting)
! Do not tow-start vehicles with automatic
transmission. You could otherwise damage the automatic transmission.
i You can find information on "Jump-start-
ing" under (Y page 304).
Before tow-starting, the following conditions
must be fulfilled:
R the battery is connected
R the engine has cooled down
R the exhaust system has cooled down
When tow-starting, it is important that you
observe the safety notes (Y page 306)and the
legal requirements in each respective coun-
try.
X Switch on the hazard warning lamps
(Y page 113).
X Fit the towing eye (Y page 307).
X Secure the rigid towing bar or the towing
rope. X
Depress and hold the brake pedal.
X Turn the key to position 2in the ignition
lock.
X Depress the clutch pedal fully, engage sec-
ond gear and continue to keep the clutch
pedal fully depressed.
X Release the brake pedal.
X Tow-start the vehicle.
X Release the clutch pedal slowly; do not
depress the accelerator pedal while doing
so.
X When the engine has been started, imme-
diately depress the clutch pedal fully and
shift to neutral.
X Pull over at a suitable place and stop the
vehicle safely, paying attention to road and
traffic conditions.
X Depress the parking brake.
X Remove the rigid towing bar or towing rope.
X Remove the towing eye (Y page 308).
X Switch off the hazard warning lamps. Electrical fuses
Important safety notes
G
WARNING
If you manipulate, bridge or replace a faulty
fuse with a fuse of a higher amperage, the
electric cables could be overloaded. This may result in a fire. There is a risk of an accident
and injury.
Always replace faulty fuses with specified newfuses of the correct amperage.
! Only use fuses that have been approved
for Mercedes-Benz vehicles and which
have the correct fuse rating for the system concerned. Otherwise, components or sys-
tems could be damaged.
The fuses in your vehicle serve to disconnect
faulty circuits. If a fuse blows, all the compo- nents on the circuit and their functions will
fail. Electrical fuses
309Breakdown assis tance Z
Page 327 of 357
The wear patterns on the front and rear tyres
differ, depending on the operating conditions.
Interchange the wheels before a clear wear
pattern has formed on the tyres. Front tyres
typically wear more on the shoulders and the rear tyres in the centre.
On vehicles that have the same size front and
rear wheels, you can interchange the wheels
every 5,000 to 10,000 km depending on the
degree of tyre wear. Ensure the direction of
rotation is maintained.
Clean the contact surfaces of the wheel and
the brake disc thoroughly every time a wheel
is interchanged. Check the tyre pressure and, if necessary, restart the tyre pressure loss
warning system or the tyre pressure monitor. Direction of rotation
Tyres with a specified direction of rotation
have additional benefits, e.g. if there is a risk of aquaplaning. You will only gain these ben-
efits if the correct direction of rotation is
observed.
An arrow on the sidewall of the tyre indicates
its correct direction of rotation. Storing wheels
Store wheels that are not being used in a cool, dry and preferably dark place. Protect the
tyres against oil, grease, petrol and diesel. Cleaning the wheels
G
WARNING
The water jet of circular-jet nozzles (dirt grind- ers) can cause damage not visible from the
outside to tyres or chassis components. Com-
ponents damaged in this way can unexpect-
edly fail. There is a risk of an accident.
Do not use high-pressure cleaners with circu-
lar-jet nozzles to clean the vehicle. Have dam- aged tyres or chassis components replaced
immediately. Fitting a wheel
Preparing the vehicle X
Stop the vehicle on solid, non-slippery and
level ground.
X Apply the electric parking brake manually.
X Move the front wheels to the straight-
ahead position.
X Vehicles with manual transmission:
depress the clutch pedal fully and engage
first or reverse gear.
X Vehicles with automatic transmission:
move the selector lever to P.
X Switch off the engine.
X Vehicles without KEYLESS-GO: remove
the key from the ignition lock.
X Vehicles with KEYLESS-GO: open the
driver's door.
The on-board electronics now have status
0. This is the same as the key having been removed.
X Vehicles with KEYLESS-GO: remove the
Start/Stop button from the ignition lock
(Y page 141).
X If included in the vehicle equipment,
remove the tyre-change tool kit from the
vehicle.
X Secure the vehicle to prevent it from rolling
away.
i Not all vehicles are fitted with a tyre-
change tool kit. For information on which
tools are required to perform a wheel
change on your vehicle, consult a
Mercedes-Benz Service Centre.
Necessary wheel-changing tools may
include, for example:
R jack
R wheel chock
R wheel wrench 324
Changing a wheelWheels and tyres