low beam MERCEDES-BENZ SLK ROADSTER 2014 Owners Manual
[x] Cancel search | Manufacturer: MERCEDES-BENZ, Model Year: 2014, Model line: SLK ROADSTER, Model: MERCEDES-BENZ SLK ROADSTER 2014Pages: 357, PDF Size: 10.22 MB
Page 7 of 357
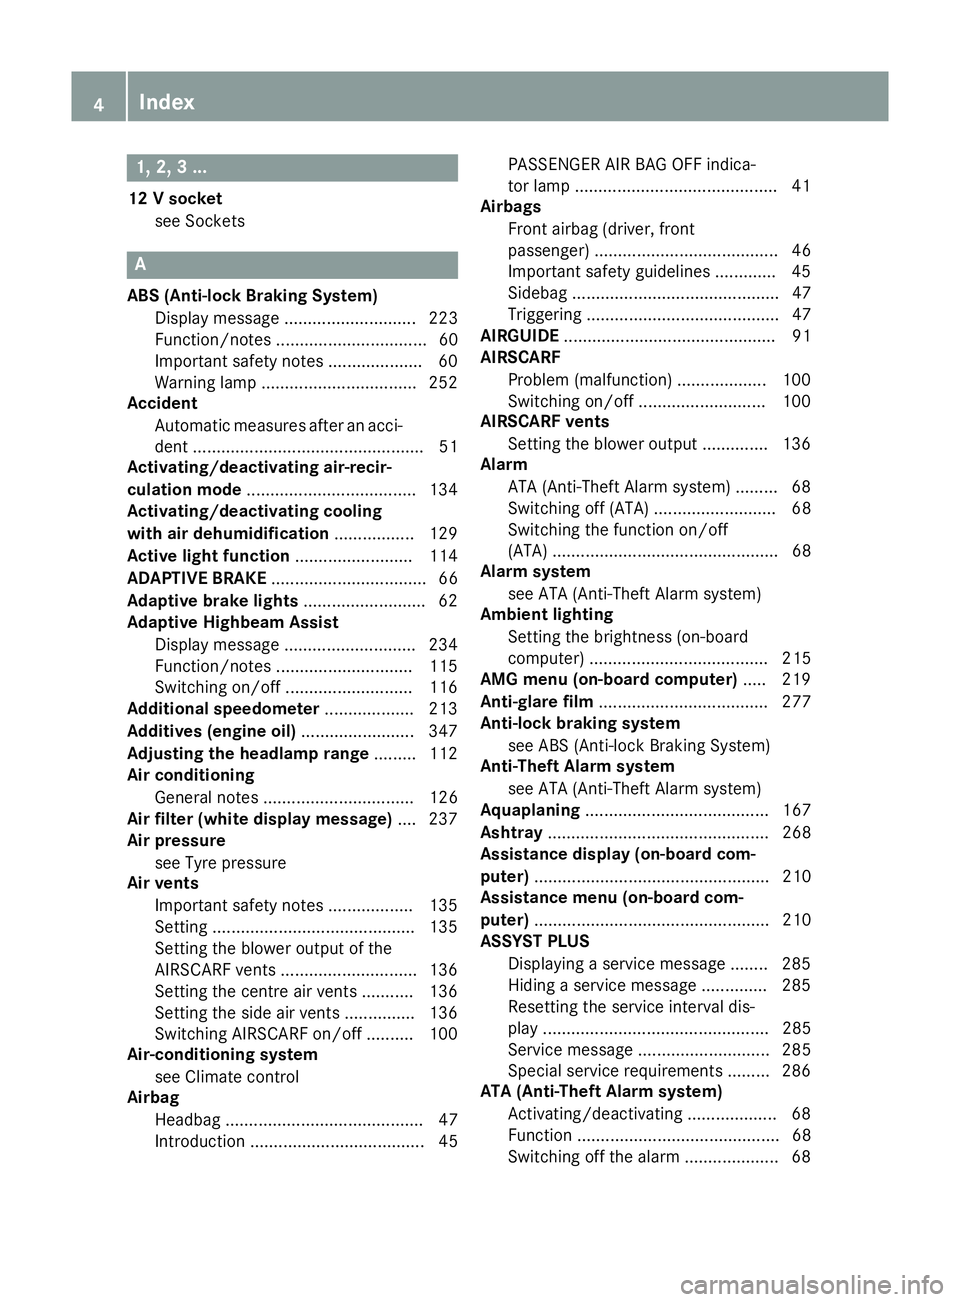
1, 2, 3 ...
12 V socket see Sockets A
ABS (Anti-lock Braking System) Display message ............................ 223
Function/notes ................................ 60
Important safety notes .................... 60
Warning lamp .................................2 52
Accident
Automatic measures after an acci-
dent ................................................. 51
Activating/deactivating air-recir-
culation mode ................................... .134
Activating/deactivating cooling
with air dehumidification ................. 129
Active light function ......................... 114
ADAPTIVE BRAKE ................................. 66
Adaptive brake lights .......................... 62
Adaptive Highbeam Assist
Display message ............................ 234
Function/notes ............................ .115
Switching on/off ........................... 116
Additional speedometer ................... 213
Additives (engine oil) ........................ 347
Adjusting the headlamp range ......... 112
Air conditioning
General notes ................................ 126
Air filter (white display message) .... 237
Air pressure
see Tyre pressure
Air vents
Important safety notes .................. 135
Setting .......................................... .135
Setting the blower output of the
AIRSCARF vents ............................ .136
Setting the centre air vents ........... 136
Setting the side air vents .............. .136
Switching AIRSCARF on/off .......... 100
Air-conditioning system
see Climate control
Airbag
Headbag .......................................... 47
Introduction ..................................... 45 PASSENGER AIR BAG OFF indica-
tor lamp ..........................................
.41
Airbags
Front airbag (driver, front
passenger ) ....................................... 46
Important safety gu idelines ............ .45
Sidebag ............................................ 47
Triggering ......................................... 47
AIRGUIDE ............................................. 91
AIRSCARF
Problem (malfunction) ................... 100
Switching on/of f........................... 100
AIRSCARF vents
Setting the blower output .............. 136
Alarm
ATA (Anti-Theft Alarm system )......... 68
Switching off (ATA) .......................... 68
Switching the function on/off
(ATA) ................................................ 68
Alarm system
see ATA (Anti-Theft Alarm system)
Ambient lighting
Setting the brightness (on-board
computer) ...................................... 215
AMG menu (on-board computer) ..... 219
Anti-glare film .................................... 277
Anti-lock braking system
see ABS (Anti-lock Braking System)
Anti-Theft Alarm system
see ATA (Anti-Theft Alarm system)
Aquaplaning ....................................... 167
Ashtray ............................................... 268
Assistance display (on-board com-
puter) .................................................. 210
Assistance menu (on-board com-
puter) .................................................. 210
ASSYST PLUS
Displaying a service message ........ 285
Hiding a service message .............. 285
Resetting the service interval dis-
play ................................................ 285
Service message ............................ 285
Special service requirements ......... 286
ATA (Anti-Theft Alarm system)
Activating/deactivating ................... 68
Function ........................................... 68
Switching off the alarm .................... 68 4
Index
Page 9 of 357
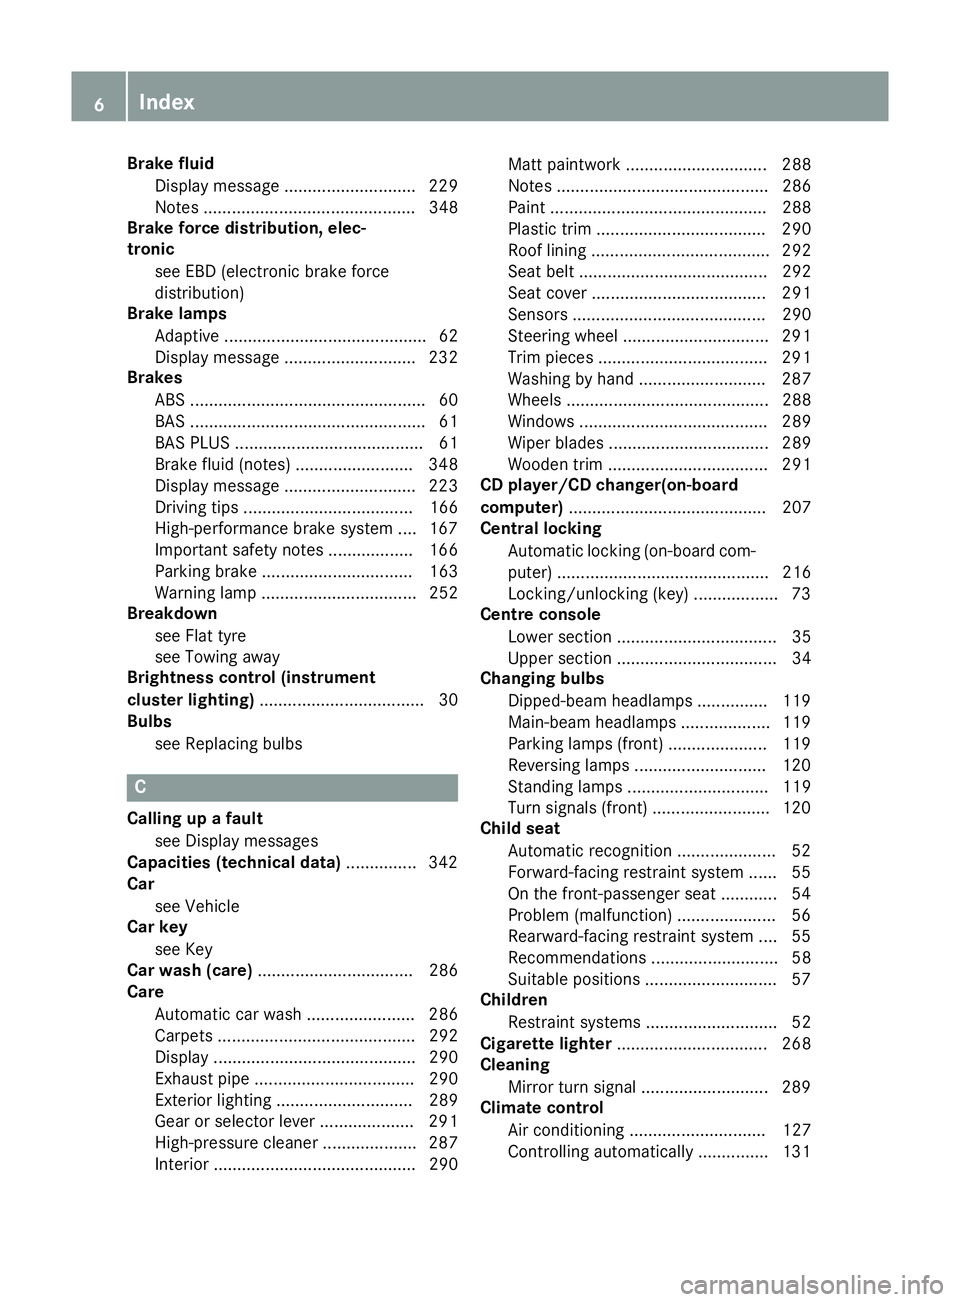
Brake fluid
Display message ............................ 229
Notes ............................................. 348
Brake force distribution, elec-
tronic
see EBD (electronic brake force
distribution)
Brake lamps
Adaptive ........................................... 62
Display message ............................ 232
Brakes
ABS .................................................. 60
BAS .................................................. 61
BAS PLUS ........................................ 61
Brake fluid (notes) ......................... 348
Display message ............................ 223
Driving tips .................................... 166
High-performance brake system .... 167
Important safety notes .................. 166
Parking brake ................................ 163
Warning lamp ................................. 252
Breakdown
see Flat tyre
see Towing away
Brightness control (instrument
cluster lighting) ................................... 30
Bulbs
see Replacing bulbs C
Calling up a fault see Display messages
Capacities (technical data) ............... 342
Car
see Vehicle
Car key
see Key
Car wash (care) ................................. 286
Care
Automatic car wash ....................... 286
Carpets .......................................... 292
Display ........................................... 290
Exhaust pipe .................................. 290
Exterior lighting ............................. 289
Gear or selector lever .................... 291
High-pressure cleaner .................... 287
Interior ........................................... 290 Matt paintwork .............................. 288
Note
s............................................. 286
Paint .............................................. 288
Plastic trim .................................... 290
Roof lining ...................................... 292
Seat belt ........................................ 292
Seat cove r..................................... 291
Sensors ......................................... 290
Steering wheel ............................... 291
Trim pieces .................................... 291
Washing by hand ........................... 287
Wheels ........................................... 288
Windows ........................................ 289
Wiper blades .................................. 289
Wooden trim .................................. 291
CD player/CD changer(on-board
computer) .......................................... 207
Central locking
Automatic locking (on-board com-puter) ............................................. 216
Locking/unlocking (key) .................. 73
Centre console
Lower section .................................. 35
Upper section .................................. 34
Changing bulbs
Dipped-beam headlamp s............... 119
Main-beam headlamp s................... 119
Parking lamps (front) ..................... 119
Reversing lamps ............................ 120
Standing lamps .............................. 119
Turn signals (front) ......................... 120
Child seat
Automatic recognition ..................... 52
Forward-facing restraint system ...... 55
On the front-passenger seat ............ 54
Problem (malfunction) ..................... 56
Rearward-facing restraint system .... 55
Recommendations ........................... 58
Suitable positions ............................ 57
Children
Restraint systems ............................ 52
Cigarette lighter ................................ 268
Cleaning
Mirror turn signal ........................... 289
Climate control
Air conditioning ............................. 127
Controlling automaticall y............... 131 6
Index
Page 35 of 357
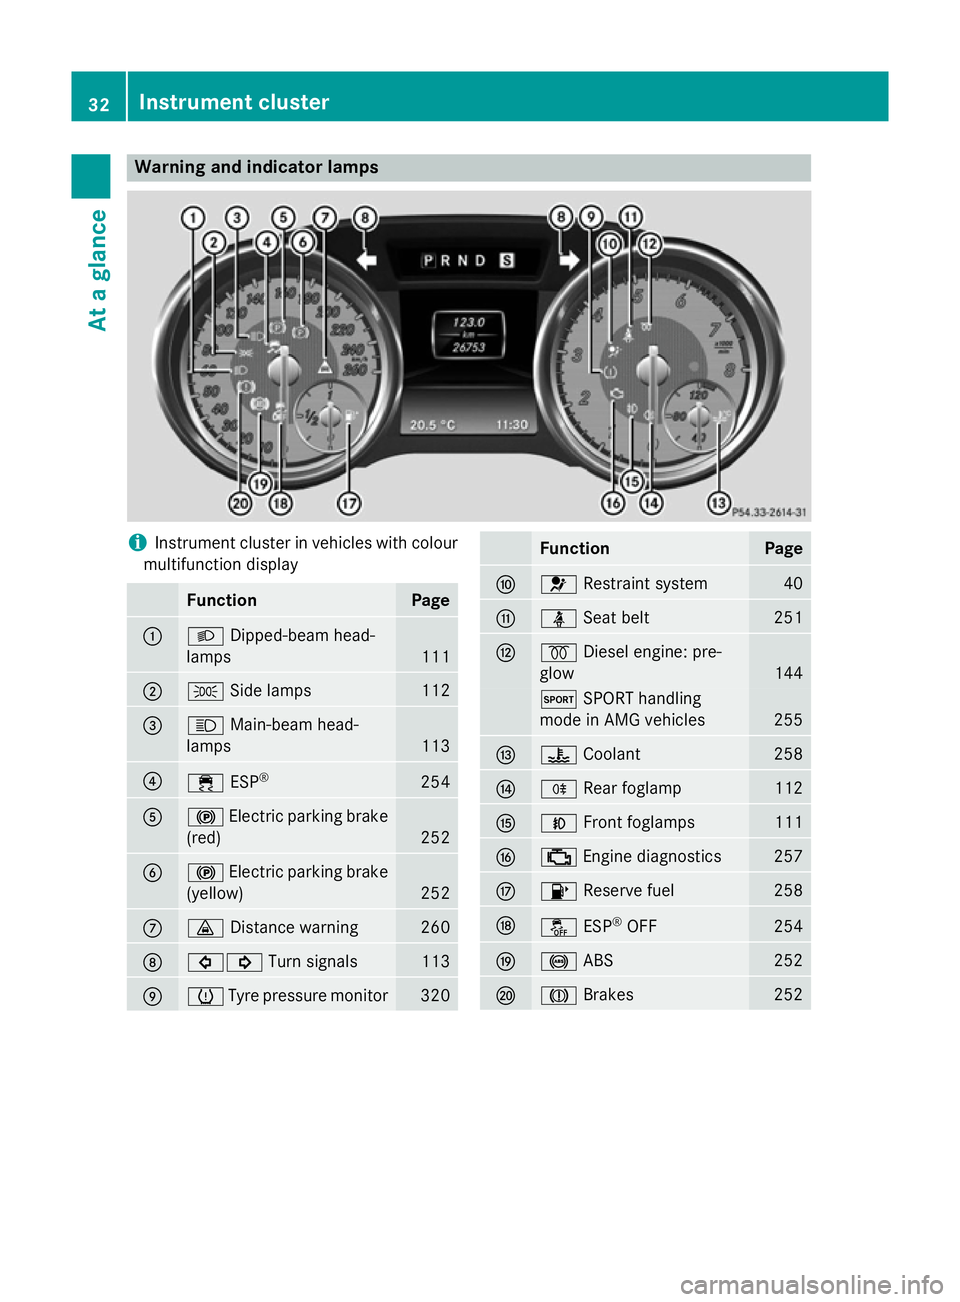
Warning and indicator lamps
i
Instrument cluster in vehicles with colour
multifunction display Function Page
:
L
Dipped-beam head-
lamps 111
;
T
Side lamps 112
=
K
Main-beam head-
lamps 113
?
÷
ESP® 254
A
!
Electric parking brake
(red) 252
B
!
Electric parking brake
(yellow) 252
C
·
Distance warning 260
D
#!
Turn signals 113
E
h
Tyre pressure monitor 320 Function Page
F
6
Restraint system 40
G
ü
Seat belt 251
H
%
Diesel engine: pre-
glow 144
M
SPORT handling
mode in AMG vehicles 255
I
?
Coolant 258
J
R
Rear foglamp 112
K
N
Front foglamps 111
L
;
Engine diagnostics 257
M
8
Reserve fuel 258
N
å
ESP®
OFF 254
O
!
ABS 252
P
J
Brakes 25232
Instrument clusterAt a glance
Page 115 of 357
users to see you. They can be operated
together with the side lamps or together with the side lamps and dipped-beam headlamps.
X To switch on the foglamps: turn the key
in the ignition lock to position 2or start the
engine.
X Turn the light switch to LorÃ.
X Press the Nbutton.
The green Nindicator lamp in the instru-
ment cluster lights up.
X To switch off the front foglamps: press
the N button.
The green Nindicator lamp in the instru-
ment cluster goes out.
Only vehicles with front foglamps are equip-
ped with the "Foglamp" function; for how to
operate the foglamps on vehicles with the
Intelligent Light System (Y page 115).
Rear foglamp
The rear foglamp improves the visibility of
your vehicle in heavy fog for the following
traffic. Please observe the country-specific
laws on the use of rear foglamps.
X To switch on the rear foglamp: turn the
key in the ignition lock to position 2or start
the engine.
X Turn the light switch to LorÃ.
X Press the Rbutton.
The yellow Rindicator lamp in the
instrument cluster lights up.
X To switch off the rear foglamp: press the
R button.
The yellow Rindicator lamp in the
instrument cluster goes out.
Side lamps ! If the battery has been excessively dis-
charged, the side lamps or parking lamps
are automatically switched off to enable
the next engine start. Always park your
vehicle safely and sufficiently lit according
to legal standards. Avoid the continuous
use of the Tside lamps for several
hours. If possible, switch on the Xright
or the Wleft parking lamp. X
To switch on: turn the light switch to T.
The green Tindicator lamp in the instru-
ment cluster lights up.
Parking lamps
Switching on the parking lamps ensures that
the corresponding side of the vehicle is illu-
minated.
X To switch on the parking lamps: the key
is not in the ignition lock or it is in posi-
tion 0.
X Turn the light switch to W(left-hand side
of the vehicle) or X(right-hand side of
the vehicle).
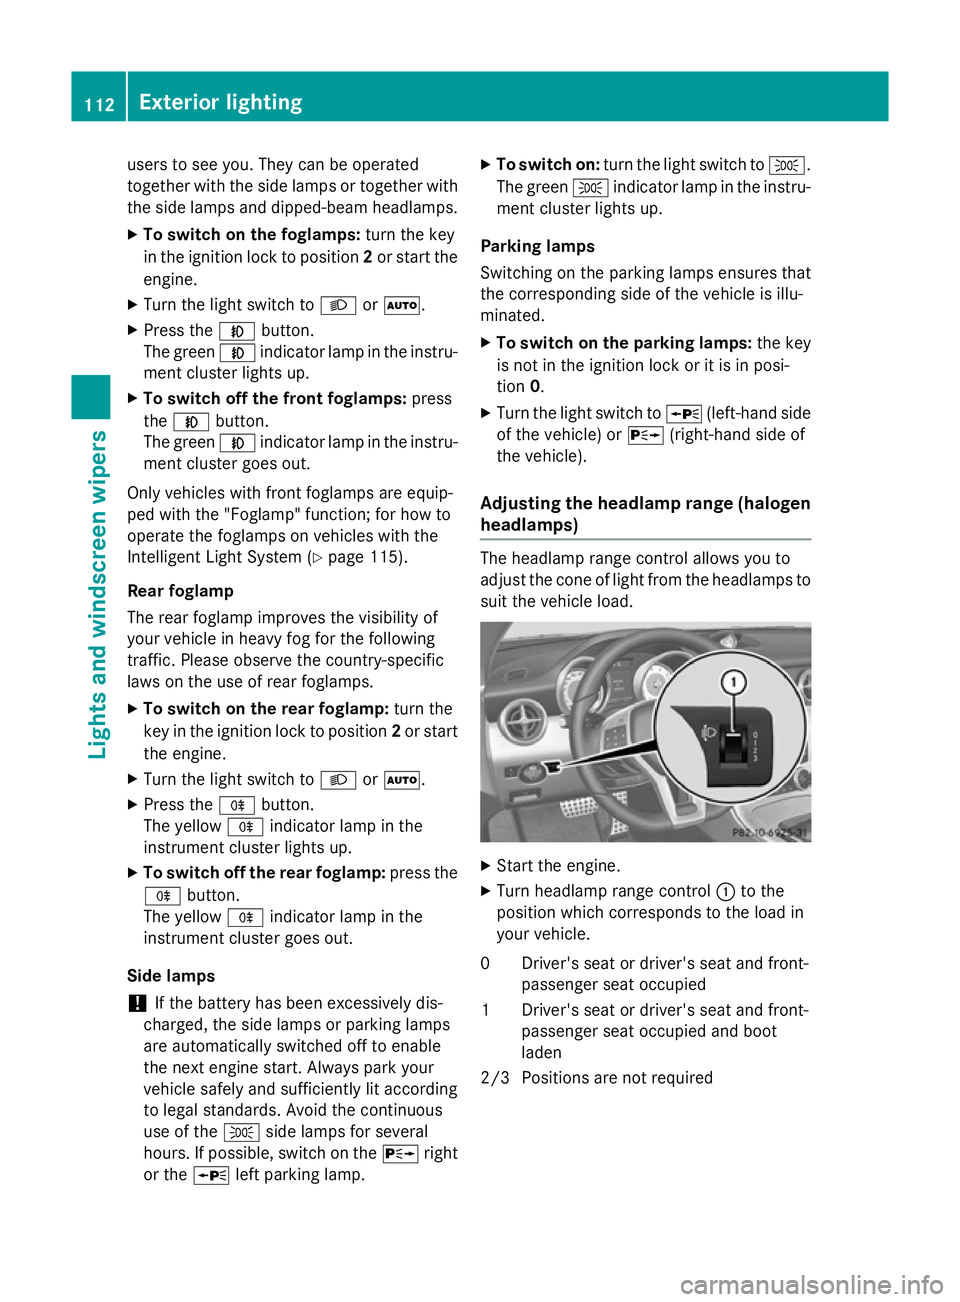
Adjusting the headlamp range (halogen headlamps) The headlamp range control allows you to
adjust the cone of light from the headlamps to
suit the vehicle load. X
Start the engine.
X Turn headlamp range control :to the
position which corresponds to the load in
your vehicle.
0D river's seat or driver's seat and front-
passenger seat occupied
1D river's seat or driver's seat and front-
passenger seat occupied and boot
laden
2/3 Positions are not required 112
Exterior lightingLights and windscreen wipers
Page 117 of 357
ated five times (Y
page 120) while the lights
are on and the engine is running. When you
switch off the ignition, the automatic head-
lamp cleaning system is reset and counting is
resumed from 0. Intelligent Light System
General notes The Intelligent Light System is a system that
adjusts the headlamps automatically to suit
the prevailing driving and weather conditions. It offers advanced functions for improved illu-
mination of the road surface, e.g. depending
on the vehicle speed or weather conditions.
The system includes the active light function, cornering light function, motorway mode and
extended range foglamps. The system is only active when it is dark.
You can activate or deactivate the "IntelligentLight System" using the on-board computer
(Y page 214).
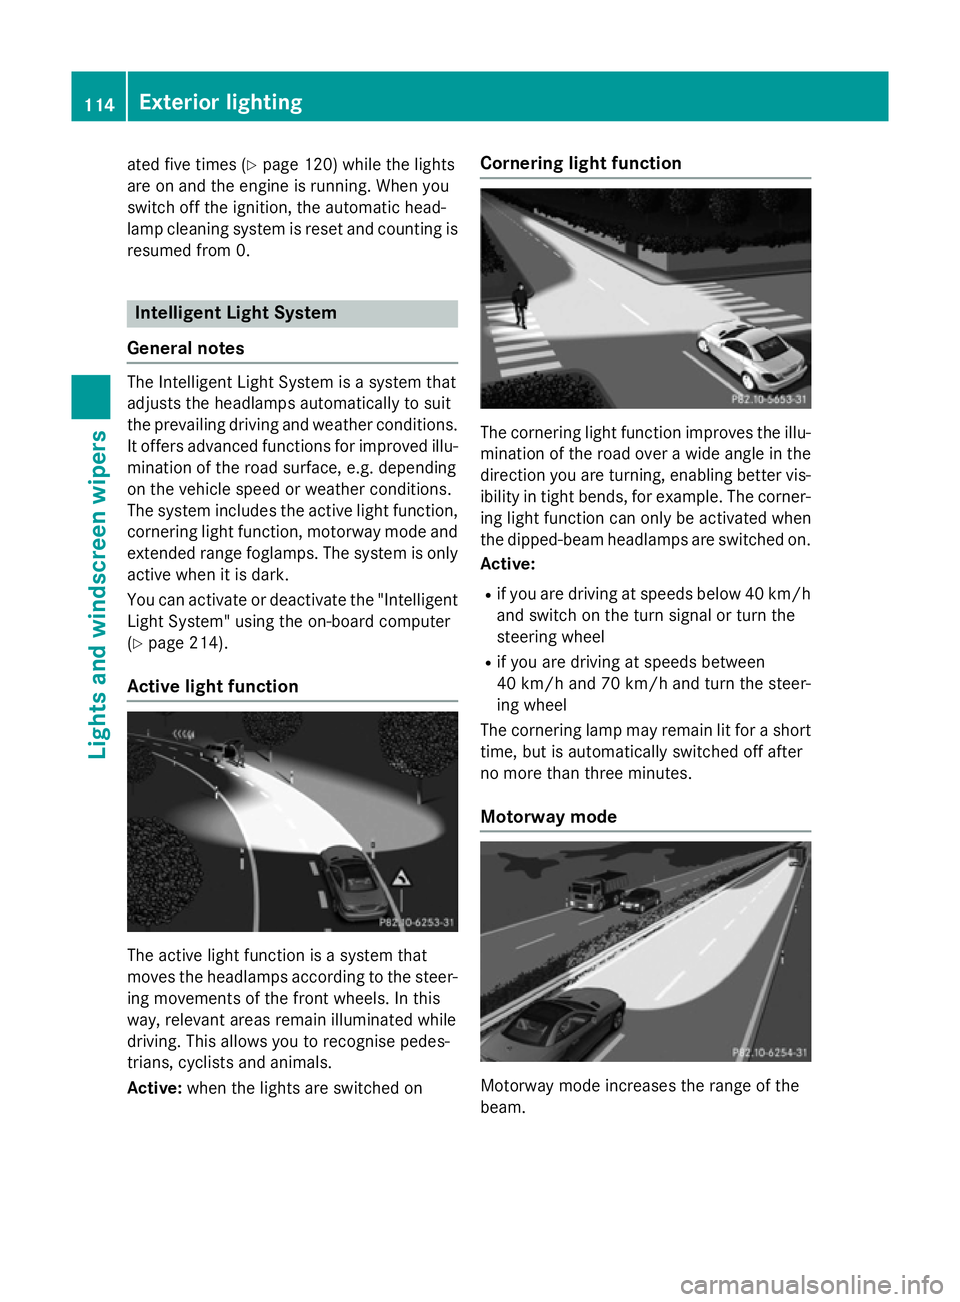
Active light function The active light function is a system that
moves the headlamps according to the steer-
ing movements of the front wheels. In this
way, relevant areas remain illuminated while
driving. This allows you to recognise pedes-
trians, cyclists and animals.
Active: when the lights are switched on Cornering light function
The cornering light function improves the illu-
mination of the road over a wide angle in the direction you are turning, enabling better vis-
ibility in tight bends, for example. The corner- ing light function can only be activated when
the dipped-beam headlamps are switched on.
Active:
R if you are driving at speeds below 40 km/h
and switch on the turn signal or turn the
steering wheel
R if you are driving at speeds between
40 km/h and 70 km/h and turn the steer-
ing wheel
The cornering lamp may remain lit for a short
time, but is automatically switched off after
no more than three minutes.
Motorway mode Motorway mode increases the range of the
beam.114
Exterior lightingLights and windscreen wipers
Page 118 of 357
Active:
R
if you are driving at speeds above
110 km/h and do not make any large steer- ing movements for at least 1,000 m
R if you are driving at speeds above
130 km/h
Not active: if you are driving at speeds below
80 km/h following activation
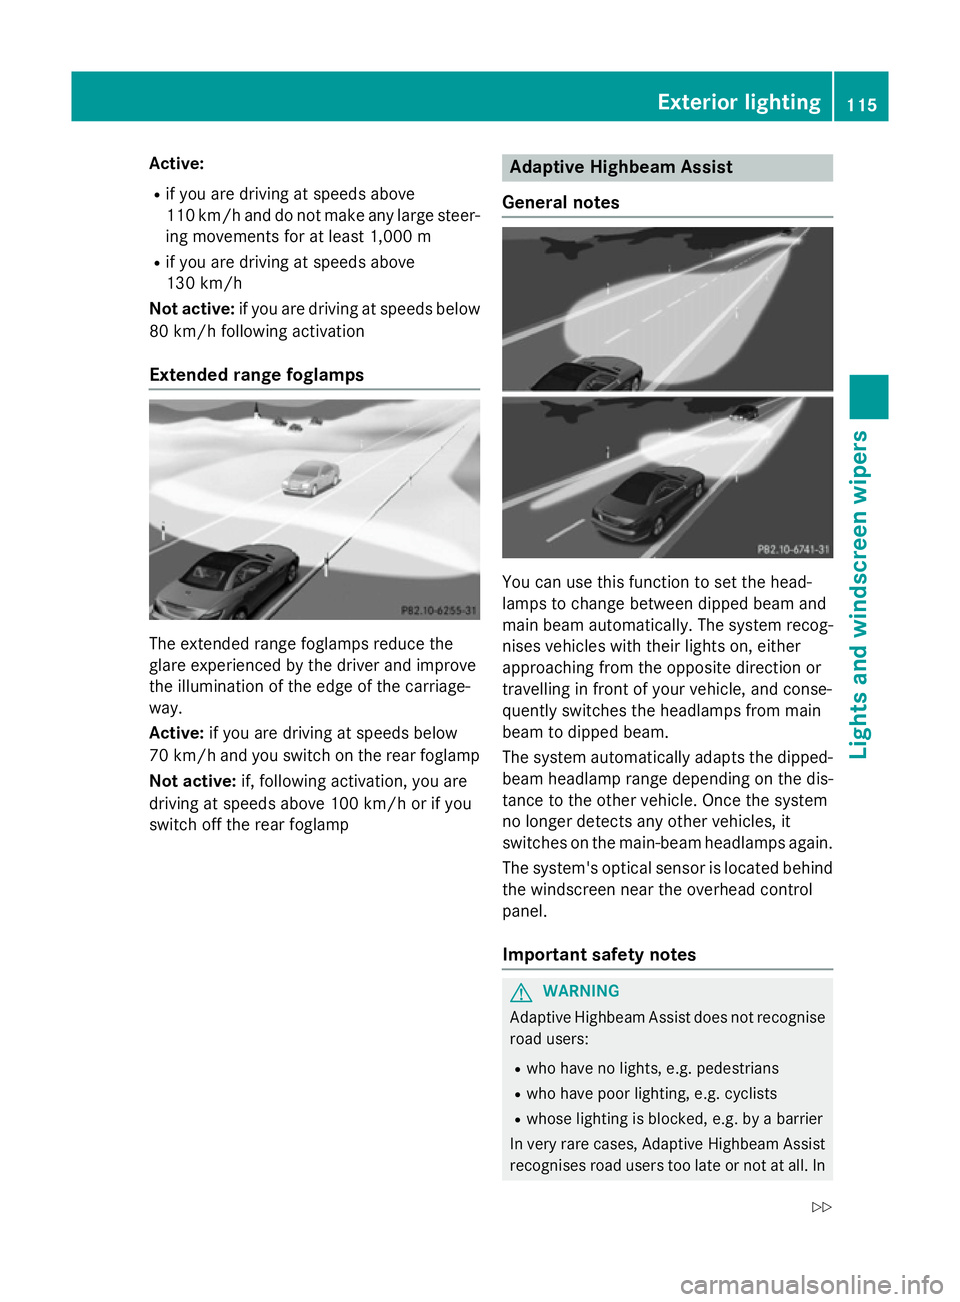
Extended range foglamps The extended range foglamps reduce the
glare experienced by the driver and improve
the illumination of the edge of the carriage-
way.
Active:
if you are driving at speeds below
70 km/h and you switch on the rear foglamp
Not active: if, following activation, you are
driving at speeds above 100 km/h or if you
switch off the rear foglamp Adaptive Highbeam Assist
General notes You can use this function to set the head-
lamps to change between dipped beam and
main beam automatically. The system recog-
nises vehicles with their lights on, either
approaching from the opposite direction or
travelling in front of your vehicle, and conse-
quently switches the headlamps from main
beam to dipped beam.
The system automatically adapts the dipped- beam headlamp range depending on the dis-
tance to the other vehicle. Once the system
no longer detects any other vehicles, it
switches on the main-beam headlamps again.
The system's optical sensor is located behind
the windscreen near the overhead control
panel.
Important safety notes G
WARNING
Adaptive Highbeam Assist does not recognise road users:
R who have no lights, e.g. pedestrians
R who have poor lighting, e.g. cyclists
R whose lighting is blocked, e.g. by a barrier
In very rare cases, Adaptive Highbeam Assist
recognises road users too late or not at all. In Exterior lighting
115Lights and windscreen wipers
Z
Page 119 of 357
this, or in similar situations, the automatic
main-beam headlamps will not be deactivated or activated regardless. There is a risk of an
accident.
Always carefully observe the traffic conditions
and switch off the main-beam headlamps in
good time.
Adaptive Highbeam Assist cannot take into
account road, weather or traffic conditions.
Adaptive Highbeam Assist is only an aid. You are responsible for adjusting the vehicle's
lighting to the prevailing light, visibility and
traffic conditions.
In particular, the detection of obstacles can
be restricted if there is:
R poor visibility, e.g. due to fog, heavy rain or
snow
R dirt on the sensors or if the sensors are
obscured
Activating Adaptive Highbeam Assist X
To switch on: turn the light switch to Ã.
X Press the combination switch beyond the
pressure point in the direction of arrow :.
The _ indicator lamp in the multifunc-
tion display lights up when it is dark and the light sensor activates the dipped-beam
headlamps.
If you are driving at speeds above 25 km/h:
The headlamp range is set automatically
depending on the distance between the
vehicle and other road users.
If you are driving at speeds above approx-
imately 30 km/h and no other road users
are recognised:
The main-beam headlamps are switched on
automatically. The Kindicator lamp in
the instrument cluster also lights up.
If you are driving at speeds below 25 km/h
or other road users are recognised or the
roads are adequately lit:
The main-beam headlamps are switched off automatically. The Kindicator lamp in
the instrument cluster goes out. The _indicator lamp in the multifunction display
remains lit.
X To switch off: move the combination
switch back to its normal position or move the light switch to another position.
The _ indicator lamp in the multifunc-
tion display goes out. Headlamps misted up on the inside
Certain climatic and physical conditions may
cause moisture to form in the headlamp. This
moisture does not affect the functionality of
the headlamp. Interior lighting
Overview of interior lighting
Overhead control panel
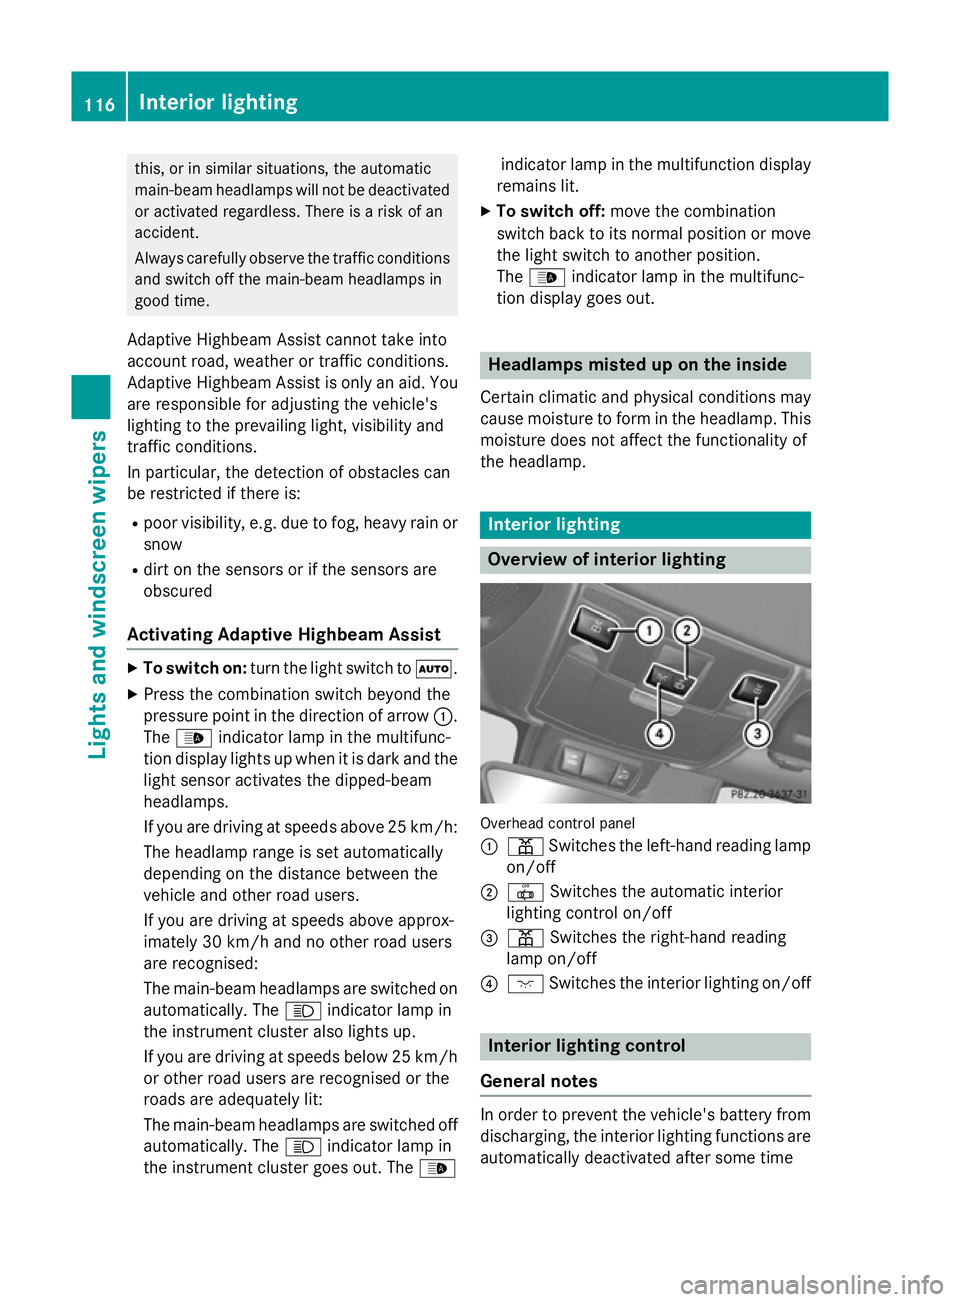
:
p Switches the left-hand reading lamp
on/off
; | Switches the automatic interior
lighting control on/off
= p Switches the right-hand reading
lamp on/off
? c Switches the interior lighting on/off Interior lighting control
General notes In order to prevent the vehicle's battery from
discharging, the interior lighting functions are
automatically deactivated after some time 116
Interior lightingLights and
windscreen wipers
Page 121 of 357
bulbs of the same type and the specified volt-
age.
Marks on the glass tube reduce the service
life of the bulbs. Do not touch the glass tube
with your bare hands. If necessary, clean the glass tube when cold with alcohol or spirit and
rub it off with a lint-free cloth.
Protect bulbs from moisture during opera-
tion. Do not allow bulbs to come into contact
with liquids.
There are bulbs other than the xenon bulbs
that you cannot replace yourself. Replace
only the bulbs listed (Y page 118). Have the
bulbs that you cannot replace yourself
replaced at a qualified specialist workshop.
If you require assistance replacing bulbs, con-
sult a qualified specialist workshop.
If the new bulb still does not light up, consult a qualified specialist workshop.
Bulbs and lamps are an important aspect of
vehicle safety. You must therefore make sure
that these function correctly at all times.
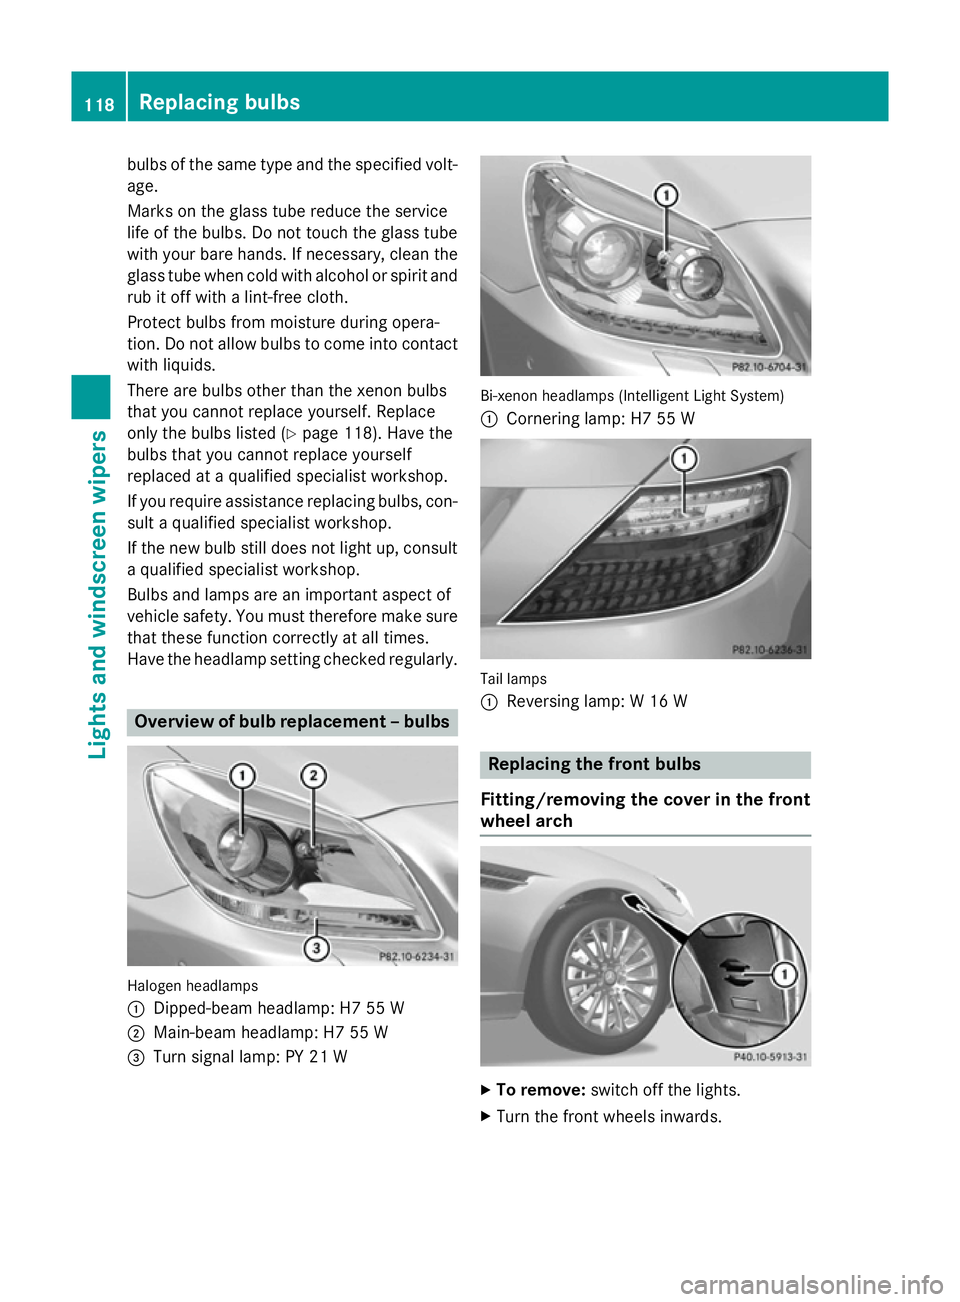
Have the headlamp setting checked regularly. Overview of bulb replacement – bulbs
Halogen headlamps
:
Dipped-beam headlamp: H7 55 W
; Main-beam headlamp: H7 55 W
= Turn signal lamp: PY 21 W Bi-xenon headlamps (Intelligent Light System)
:
Cornering lamp: H7 55 W Tail lamps
:
Reversing lamp: W 16 W Replacing the front bulbs
Fitting/removing the cover in the front
wheel arch X
To remove: switch off the lights.
X Turn the front wheels inwards. 118
Replacing bulbsLights and windscreen wipers
Page 206 of 357
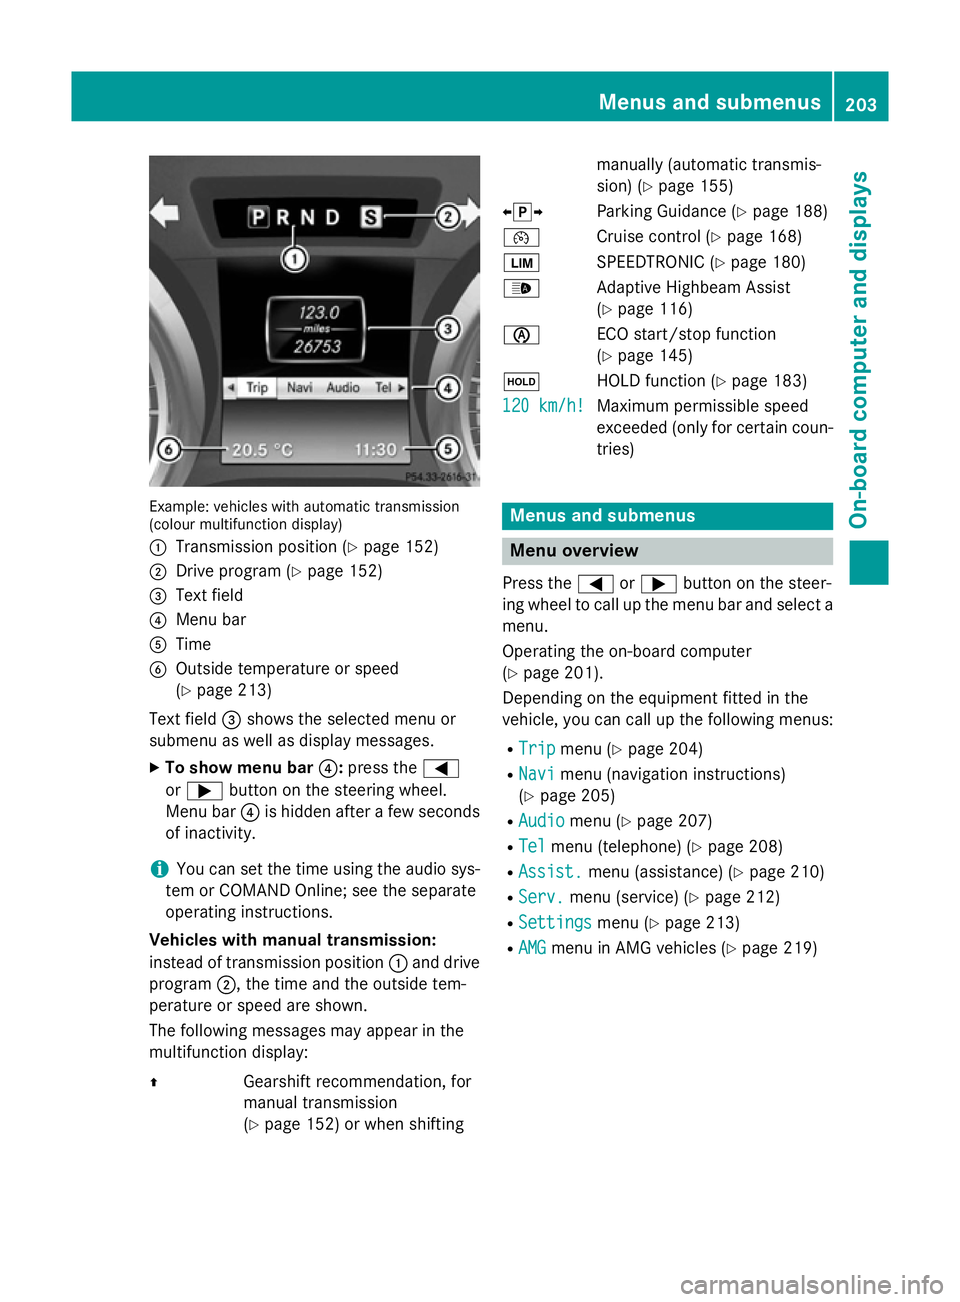
Example: vehicles with automatic transmission
(colour multifunction display)
: Transmission position (Y page 152)
; Drive program (Y page 152)
= Text field
? Menu bar
A Time
B Outside temperature or speed
(Ypage 213)
Text field =shows the selected menu or
submenu as well as display messages.
X To show menu bar ?:press the =
or ; button on the steering wheel.
Menu bar ?is hidden after a few seconds
of inactivity.
i You can set the time using the audio sys-
tem or COMAND Online; see the separate
operating instructions.
Vehicles with manual transmission:
instead of transmission position :and drive
program ;, the time and the outside tem-
perature or speed are shown.
The following messages may appear in the
multifunction display:
Z Gearshift recommendation, for
manual transmission
(Y page 152) or when shifting manually (automatic transmis-
sion) (Y
page 155)
XjY Parking Guidance (Y page 188)
¯ Cruise control (Y page 168)
È SPEEDTRONIC (Y page 180)
_ Adaptive Highbeam Assist
(Ypage 116)
è ECO start/stop function
(Ypage 145)
ë HOLD function (Y page 183)
120 km/h! 120 km/h! Maximum permissible speed
exceeded (only for certain coun-
tries) Menus and submenus
Menu overview
Press the =or; button on the steer-
ing wheel to call up the menu bar and select a
menu.
Operating the on-board computer
(Y page 201).
Depending on the equipment fitted in the
vehicle, you can call up the following menus:
R Trip Trip menu (Y page 204)
R Navi
Navi menu (navigation instructions)
(Y page 205)
R Audio
Audio menu (Y page 207)
R Tel
Tel menu (telephone) (Y page 208)
R Assist.
Assist. menu (assistance) (Y page 210)
R Serv.
Serv. menu (service) (Y page 212)
R Settings
Settings menu (Ypage 213)
R AMG
AMG menu in AMG vehicles (Y page 219) Menus and submenus
203On-board computer and displays Z
Page 217 of 357
You can determine whether the multifunction
display permanently shows your speed or the outside temperature.
X Press the =or; button on the steer-
ing wheel to select the Settings
Settingsmenu.
X Press the :or9 button to select the
Instrument cluster
Instrument cluster submenu.
X Press ato confirm.
X Press the :or9 button to select the
Permanent display
Permanent display function.
You will see the selected setting outside
outside
temperature
temperature orDig. speedo [mph]
Dig. speedo [mph].
X Press the abutton to save the setting.
i The speed is displayed in mph.
Lights Setting the daytime driving lights
The
Daytime driving lights
Daytime driving lights function can
only be switched on with the engine turned
off.
X Press the =or; button on the steer-
ing wheel to select the Settings
Settings menu.
X Press the :or9 button to select the
Lights Lights submenu.
X Press ato confirm.
X Press the :or9 button to select the
Daytime driving lights
Daytime driving lights function.
Vehicles with a black and white multifunc-
tion display: you will see the selected set-
ting on onoroff off.
Vehicles with a colour multifunction dis-
play: if the Daytime driving lights
Daytime driving lights
function has been switched on, the cone of
light and the Wsymbol in the multifunc-
tion display are shown in orange.
X Press the abutton to save the setting.
Further information on daytime driving lights
(Y page 111). Switching the Intelligent Light System
on/off
X Press the =or; button on the steer-
ing wheel to select the Settings
Settings menu.
X Press the :or9 button to select the
Lights Lights submenu.
X Press ato confirm.
X Press the :or9 button to select the
Intell. Light System
Intell. Light System function.
Vehicles with a black and white multifunc-
tion display: you will see the selected set-
ting on
onoroff
off.
Vehicles with a colour multifunction dis-
play: if the Intell. Light System
Intell. Light System func-
tion has been switched on, the cone of light
and the Lsymbol in the multifunction
display are shown in orange.
X Press the abutton to save the setting.
When you activate the Intell.
Intell.Light
LightSys‐
Sys‐
tem
tem, you activate the following functions:
R Motorway mode
R Active light function
R Cornering light function
R Extended range foglamps
If you set the dipped-beam headlamps for
driving on the right/left, the multifunction
display shows the Intell.
Intell. Light LightSystem:
System:
system inoperative Inactive for
system inoperative Inactive for
left-side traffic
left-side traffic orIntell. Light
Intell. Light
System:
System: System
Systeminoperative
inoperative Inactive
Inactive
for right-side traffic
for right-side traffic display message
instead of the Intell.
Intell.Light
LightSystem
System func-
tion in the Lights
Lightssubmenu (Y page 214).
Further information on the Intelligent Light
System (Y page 114).
Setting the dipped-beam headlamps for
driving on the left/right
X Press the =or; button on the steer-
ing wheel to select the Settings
Settingsmenu.
X Press the :or9 button to select the
Lights
Lights submenu.
X Press ato confirm. 214
Menus and submenusOn-board computer and displays