inflation pressure MERCEDES-BENZ SLS AMG GT COUPE 2015 C197 Owner's Manual
[x] Cancel search | Manufacturer: MERCEDES-BENZ, Model Year: 2015, Model line: SLS AMG GT COUPE, Model: MERCEDES-BENZ SLS AMG GT COUPE 2015 C197Pages: 290, PDF Size: 6.24 MB
Page 239 of 290
you should start th
eengineu nless you are
inflatin gthe tire in an enclosed space. X
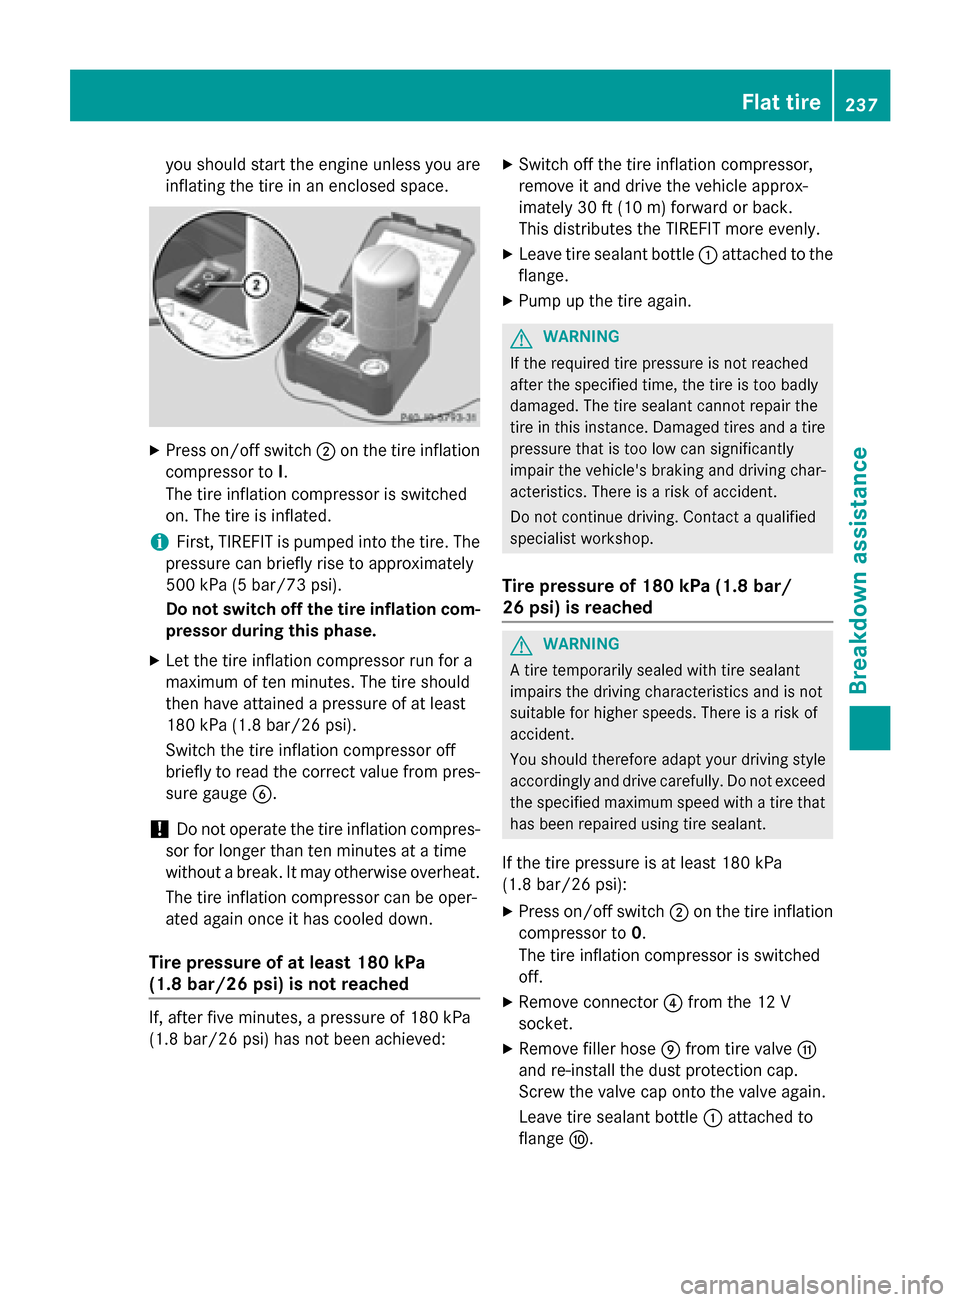
Press on/off switch 0044on th etirei nflation
compressor to I.
The tire inflation compressor is switched
on .The tire is inflated.
i First
,TIREFI Tisp umped into th etire. The
pressur ecan briefl yrisetoa pproximately
50 0k Pa(5 bar/73 psi).
Do not switch off th etirei nflation com-
pressor during this phase.
X Let th etirei nflation compressor run fo ra
maximum of te nminutes. The tire should
then hav eattained apressur eofatl east
18 0k Pa (1.8 ba r/26psi).
Switch the tire inflation compressor off
briefly to read the correct value from pres- sure gauge 0084.
! Do not operate the tire inflation compres-
sor for longe rthan ten minute satatime
without abreak. It may otherwise overheat.
The tire inflation compressor can be oper-
ated again once it has coole ddown.
Tire pressure of at leas t180 kPa
(1.8 bar/2 6psi) is not reached If, after five minutes,
apressure of 180 kPa
(1.8 bar/26 psi )has not bee nachieved: X
Switch off the tire inflation compressor,
remove it and drive the vehicle approx-
imately 30 ft (10 m) forward or back.
Thi sd istributes the TIREFIT more evenly.
X Leave tire sealant bottle 0043attache dtothe
flange.
X Pump up the tire again. G
WARNING
If the required tire pressure is not reached
after the specified time, the tire is too badly
damaged. The tire sealant cannot repair the
tire in this instance. Damaged tires and atire
pressure that is too low can significantly
impair the vehicle's braking and driving char-
acteristics. There is arisk of accident.
Do not continue driving. Contact aqualified
specialist workshop.
Tire pressure of 180 kPa (1.8 bar/
26 psi) is reached G
WARNING
At ire temporarily sealed with tire sealant
impairs the driving characteristics and is not
suitabl efor higher speeds. There is arisk of
accident.
You should therefore adapt you rdriving style
accordingl yand drive carefully .Donot exceed
the specified maximu mspee dwithatire that
has bee nrepaired using tire sealant.
If the tire pressure is at least 180 kPa
(1.8 bar/26 psi): X Press on/off switch 0044on the tire inflation
compressor to 0.
The tire inflation compressor is switched
off.
X Remove connector 0085from the 12 V
socket.
X Remove filler hose 006Dfrom tire valve 006F
and re-instal lthe dus tprotectio ncap.
Screw the valve cap onto the valve again.
Leave tire sealant bottle 0043attache dto
flange 006E. Flat tire
237Breakdow nassistance Z
Page 240 of 290
X
Stow the TIREFIT kit in asafea nd accessi-
bl ep lace in the vehicle.
X Pul lawa yimmediately.
The maximum speed for atire seale dwitht ire
sealant is 50 mph (80 km/h). The uppe rpart
of the TIREFIT sticke rmustb ea ffixe dtot he
instrument cluster in the driver' sfield of
vision.
! After use, exces
sTIREFIT may run ou tof
the fille rhose. Thi scould cause stains.
X Stop afte rdriving for approximatel yten
minutes and check the tire pressure with
the tire inflation compressor.
The tire pressure mus tnow be at least
130 kPa (1.3 bar/19 psi).
i On tire
stha tare equipped with atire pres-
sure sensor (tire pressure monitor) ,the use
of sealant can lead to malfunction mes-
sages and incorrect displays. Therefore,
us ep ressure gauge 0084in the TIREFIT kit to
check and correct the tire pressure. G
WARNING
If the required tire pressure is not reached
afte rdriving for ashort period, the tire is too
badl ydam aged .The tire sealant canno trepair
the tire in this instance. Damaged tire sand a
tire pressure tha tist oo lo wcan significantly
impai rthe vehicle's braking and driving char-
acteristics. There is ariskofa ccident.
Do not continu edriving .Contact aquali fied
specialist workshop.
X Correct the tire pressure if it is stil latleast
130 kPa (1.3 bar/20 psi )(fort he values,
see the Tire and Loading Information plac-
ard on the driver' ssideB -pillar or tire pres-
sure table on the fue lfille rflap).
To increase the tire pressure: switch on
the tire inflation compressor.
To reduc ethe tire pressure: openrelease
screw 006B.
! The manufacturer doe
snot guarantee
tha talltire damag ecan be repaired using
the TIREFIT kit, particularly in the cas eofcuts and puncture
swithad iameter of more
tha nfou rm illimeters or on the sidewall. The
manufacturer is not responsible for dam-
ag ec aused by inappropriate us eofthe
TIREFIT kit.
X Drive to the neares tworksho pand have the
tire changed there.
X Hav ethe tire sealant bottl ereplaced as
soo naspossible at aquali fied specialist
workshop, e.g. at an authorized Mercedes- Benz Center. H
Environmental note
Hav ethe used tire sealant bottl edisposed of
professionally ,e.g. at an authorized
Mercedes-Benz Center.
X Hav ethe TIREFIT kit replaced every four
years at aquali fied specialist workshop,
e.g. an authorized Mercedes-Benz Center. Battery (vehicle)
Important safety notes
Specia ltool sand expert knowledge are
required when working on the battery ,e.g.
removal and installing .You shoul dtherefore
have al lworki nvolving the battery carrie dout
at aq uali fied specialist workshop. G
WARNING
Wor kcarrie doutincorrectl yonthe battery
can lead ,for example, to ashort circuit and
thu sdam aget he vehicl eelectronics. Thi scan
lead to function restrictions applying to
safety-relevant systems ,e.g. the lighting sys-
tem, ABS (anti-lock braking system) or ESP ®
(Electronic Stability Program). The operating
safety of your vehicl emay be restricted. You
could lose contro lofthe vehicle, for example:
R braking
R in the event of abrup tsteering maneuver
and/or when the vehicle's speed is not
adapted to the roa dconditions
There is ariskofana ccident. 238
Battery (vehicle)Breakdown assistance
Page 255 of 290
Snow chains
G
WARNING
If snow chains are installed to the front
wheels, they may drag against the vehicle
body or chassis components. This could
cause damage to the vehicle or the tires.
There is arisk of an accident.
To avoid hazardous situations:
R never install snow chains to the front
wheels
R always install snow chains in pairs to the
rear wheels.
! On some tire sizes there is not enough
space for snow chains. To avoid damage to
the vehicle or tires, observe the "Wheel and tire combinations" section under "Tires and
wheels".
For safety reasons, Mercedes-Benz recom-
mends that you only use snow chains that
have been specially approved for your vehicle by Mercedes-Benz, or are of acorresponding
standard of quality.
R You may not attach snow chains to all
wheel-tire combination ,see the informa-
tion under "Wheels and tires" in the "Tech-
nical data" section.
R Only use snow chains when driving on
roads completely covered by snow.
Remove the snow chains as soon as possi- ble when you come to aroad that is not
snow-covered.
R Local regulations may restrictt he use of
snow chains. Observe the appropriate reg- ulations if you wish to mount snow chains.
R Do not exceed the maximum permissible
speed of 30 mph (50 km/h).
i You can deactivate ESP ®
(Y page 55)
when pulling away with snow chains instal-
led. You can thereby allow the wheels to
spin in acontrolled manner, achieving an
increased driving force (cuttinga ction). Tire pressure
Tire pressures
pecifications
Important safety notes G
WARNING
Underinflated or overinflated tires pose the
following risks:
R the tires may burst, especially as the load
and vehicle speed increase.
R the tires may wear excessively and/or
unevenly, which may greatly impair tire
traction.
R the driving characteristics, as well as steer-
ing and braking, may be greatly impaired.
There is arisk of an accident.
Follow recommended tire inflation pressures
and check the pressure of all the tires includ-
ing the spare wheel:
R monthly, at least
R if the load changes
R before beginning along journey
R under different operating conditions, e.g.
off-road driving
If necessary, correct the tire pressure.
i The specifications on the sample Tire and
Loading Information placard and tire pres-
sure tables are examples. Tire pressure
specifications are vehicle-specific and may
deviate from the data shown here. The tire pressure specifications that are valid for
your vehicle can be found on the Tire and
Loading Information placard and tire pres-
sure table on the vehicle.
General notes The recommended tire pressures for the tires
mounted at the factory can be found on the
labels described here.
Further information on tire pressures can be
obtained at aqualified specialist workshop. Tire pressure
253Wheels and tires Z
Page 259 of 290
monitor only functions if the correct sensors
are installed on all wheels.
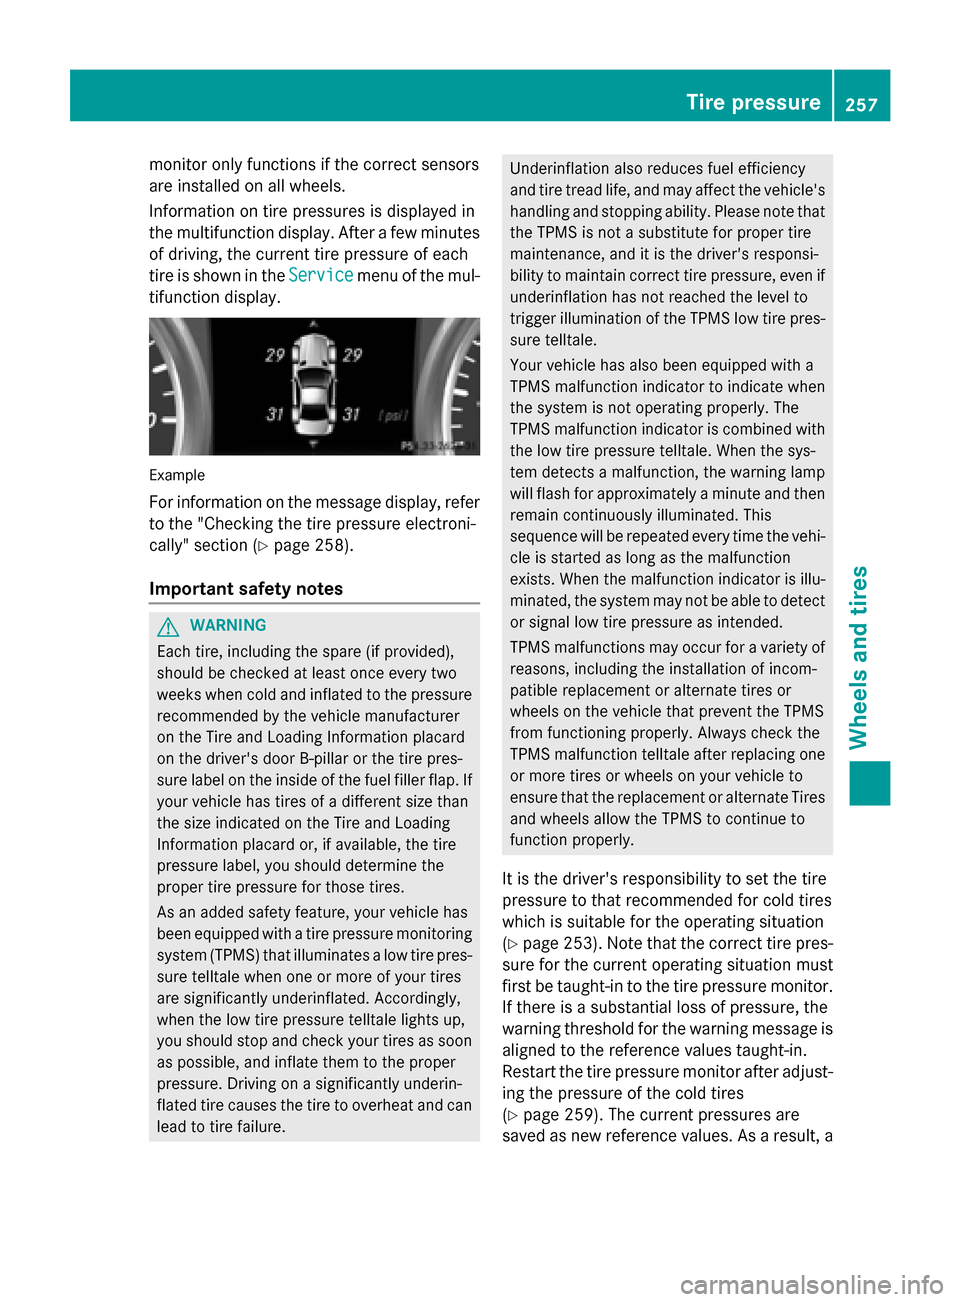
Information on tire pressures is displayed in
the multifunction display.A fterafew minutes
of driving, the current tire pressure of each
tire is show nintheService Service menu of the mul-
tifunction display. Example
For informatio nonthe message display,r efer
to the "Checking the tire pressure electroni-
cally" section (Y page258).
Important safety notes G
WARNING
Each tire, including the spare (if provided),
should be checked at least once every two
weeks when cold and inflated to the pressure recommended by the vehicl emanufacturer
on the Tire and Loading Information placard
on the driver' sdoor B-pillar or the tire pres-
sure label on the inside of the fuel filler flap .If
yourv ehiclehas tires of adifferent size than
the size indicated on the Tire and Loading
Information placard or, if available, the tire
pressure label, you should determine the
prope rtire pressure for those tires.
As an added safety feature ,you rv ehicl ehas
been equippe dwithatire pressure monitoring
system (TPMS) that illuminates alow tire pres-
sure telltal ewhen one or more of yourt ires
are significantly underinflated. Accordingly,
when the low tire pressure telltal elights up,
you should stop and check yourt ires as soon
as possible, and inflate them to the proper
pressure. Driving on asignificantly underin-
flated tire cause sthe tire to overhea tand can
leadtot ire failure. Underinflation alsor
educes fuel efficiency
and tire tread life ,and may affect the vehicle's
handling and stopping ability .Please note that
the TPMS is not asubstitute for prope rtire
maintenance, and it is the driver' sresponsi-
bility to maintai ncorrect tire pressure, even if
underinflation has not reache dthe level to
trigger illumination of the TPMS low tire pres-
sure telltale.
Yourv ehiclehas alsob een equippe dwith a
TPMS malfunction indicator to indicate when
the system is not operating properly. The
TPMS malfunction indicator is combined with
the low tire pressure telltale. When the sys-
tem detects amalfunction, the warning lamp
willf lashf or approximatel yaminute and then
remai ncontinuously illuminated. This
sequence willber epeated every time the vehi-
cle is started as long as the malfunction
exists. When the malfunction indicator is illu-
minated, the system may not be abletod etect
or signa llow tire pressure as intended.
TPMS malfunctions may occur for avariety of
reasons, including the installation of incom-
patible replacement or alternate tires or
wheels on the vehicl ethat prevent the TPMS
from functioning properly. Always check the
TPMS malfunction telltal eafter replacing one
or more tires or wheels on yourv ehicleto
ensure that the replacement or alternate Tires
and wheels allow the TPMS to continue to
function properly.
It is the driver' sresponsibility to set the tire
pressure to that recommended for cold tires
which is suitable for the operating situation
(Y page2 53).Note that the correct tire pres-
sure for the current operating situation must
first be taught-in to the tire pressure monitor.
If there is asubstantial loss of pressure, the
warning threshol dfor the warning message is
aligned to the reference values taught-in.
Restart the tire pressure monitor after adjust-
ing the pressure of the cold tires
(Y page2 59).The current pressures are
saved as new reference values. As aresult, a Tire pressure
257Wheelsand tires Z
Page 270 of 290
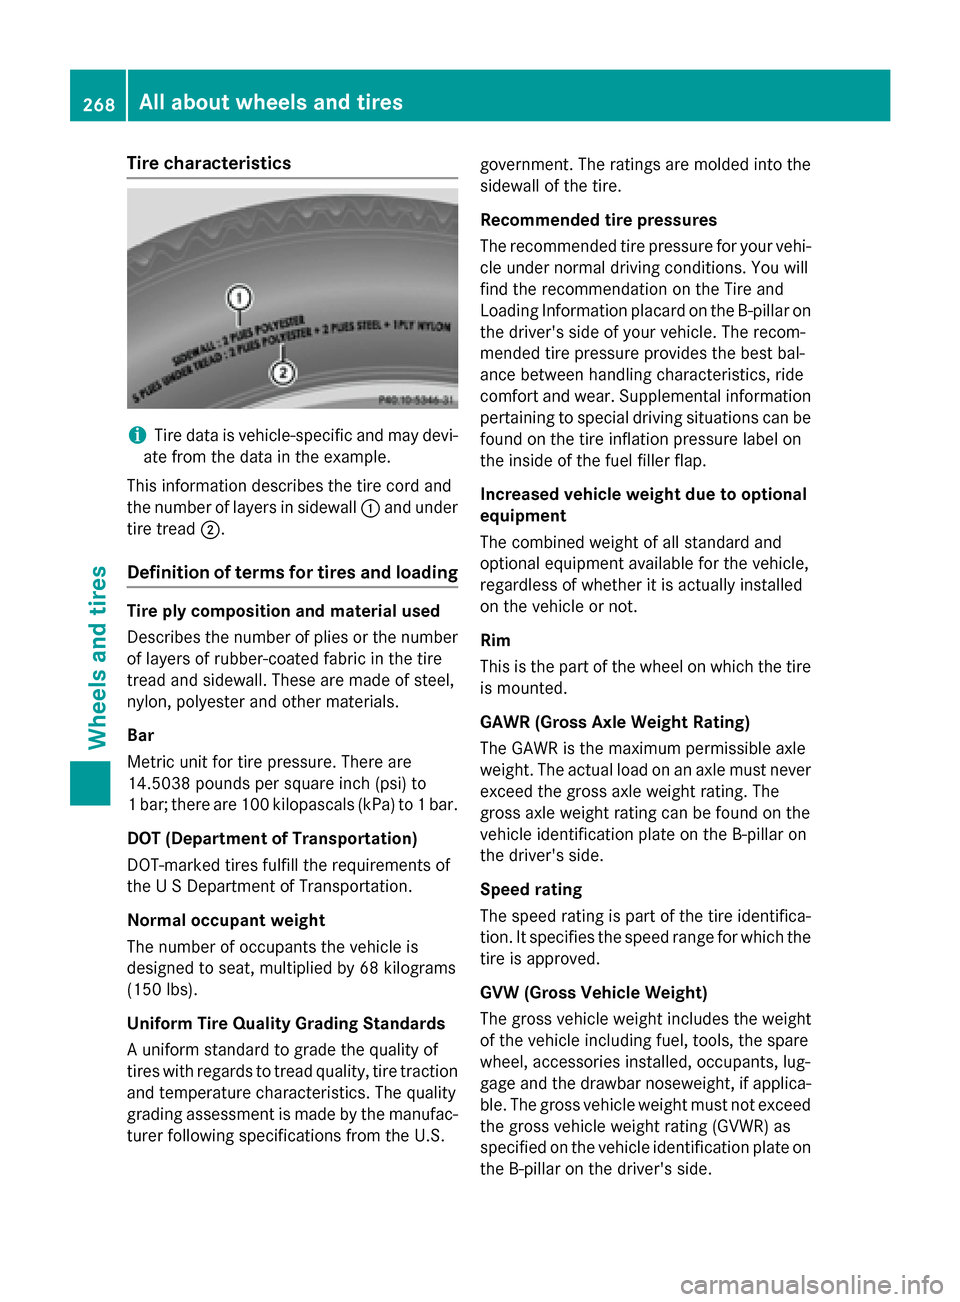
Tire characteristics
i
Tire data is vehicle-specific and ma
ydevi-
ate fro mthe data in the example.
Thi sinformatio ndescribe sthe tire cord and
the numbe roflayer sins idewall 0043and under
tire tread 0044.
Definition of terms fo rtire sa nd loading Tire ply composition and material used
Describes the numbe rofpliesor the number
of layers of rubber-coate dfabricint he tire
trea dand sidewall .These ar emadeofs teel,
nylon, polyeste rand othe rmaterials.
Bar
Metric uni tfor tire pressure. There are
14.503 8pound sp ersquare inch (psi )to
1b ar;ther eare100 kilopascal s(kPa) to 1bar.
DO T(De partmen tofTransportation)
DOT-marked tire sfulfill the requirements of
the USD epartment of Transportation.
Normal occupant weight
The numbe rofoccupants the vehicl eis
designe dtoseat, multiplied b y68k ilograms
(15 0lbs).
Uniform Tire Quality Grading Standards
Au nifor mstandard to grade the quality of
tire swithr egards to trea dquali ty,tire traction
and temperatur echaracteristics. The quality
grading assessment is made by the manufac-
turer following specifications fro mthe U.S. government. The rating
saremolde dinto the
sidewall of the tire.
Recommende dtire pressures
The recommende dtire pressure for your vehi-
cle under normal driving conditions. Yo uwill
find the recommendatio nonthe Tire and
Loading Informatio nplacard on the B-pillar on
the driver's side of your vehicle. The recom-
mended tire pressure provides the best bal-
ance between handling characteristics, ride
comfort and wear .Supplemental information
pertaining to special driving situations can be
found on the tire inflation pressure labe lon
the insid eofthe fuel fille rflap.
Increase dvehicle weight due to optional
equipment
The combine dweigh tofa llstandard and
optional equipment availabl efor the vehicle,
regardles sofwhether it is actually installed
on the vehicl eornot.
Rim
Thi sist he part of the whee lonwhich the tire
is mounted.
GAWR (Gros sAxleW eight Rating)
The GAW Risthe maximum permissibl eaxle
weight. The actual load on an axl emustn ever
exceed the gross axl eweigh trating .The
gross axl eweigh trating can be found on the
vehicl eide ntification plate on the B-pillar on
the driver's side.
Speed rating
The spee drating is part of the tire identifica-
tion. It specifie sthe spee drange for which the
tire is approved.
GVW (Gros sVehicle Weight)
The gross vehicl eweigh tincludes the weight
of the vehicl eincluding fuel ,tools, the spare
wheel, accessorie sinstalled, occupants, lug-
gage and the drawbar noseweight, if applica-
ble. The gross vehicl eweigh tmustn ot exceed
the gross vehicl eweigh trating (GVWR )as
specifie donthe vehicl eide ntification plate on
the B-pillar on the driver's side. 268
Al
la bout wheels an dtiresWheel sand tires