jump start MERCEDES-BENZ SLS AMG ROADSTER 2012 Owners Manual
[x] Cancel search | Manufacturer: MERCEDES-BENZ, Model Year: 2012, Model line: SLS AMG ROADSTER, Model: MERCEDES-BENZ SLS AMG ROADSTER 2012Pages: 288, PDF Size: 18.46 MB
Page 7 of 288
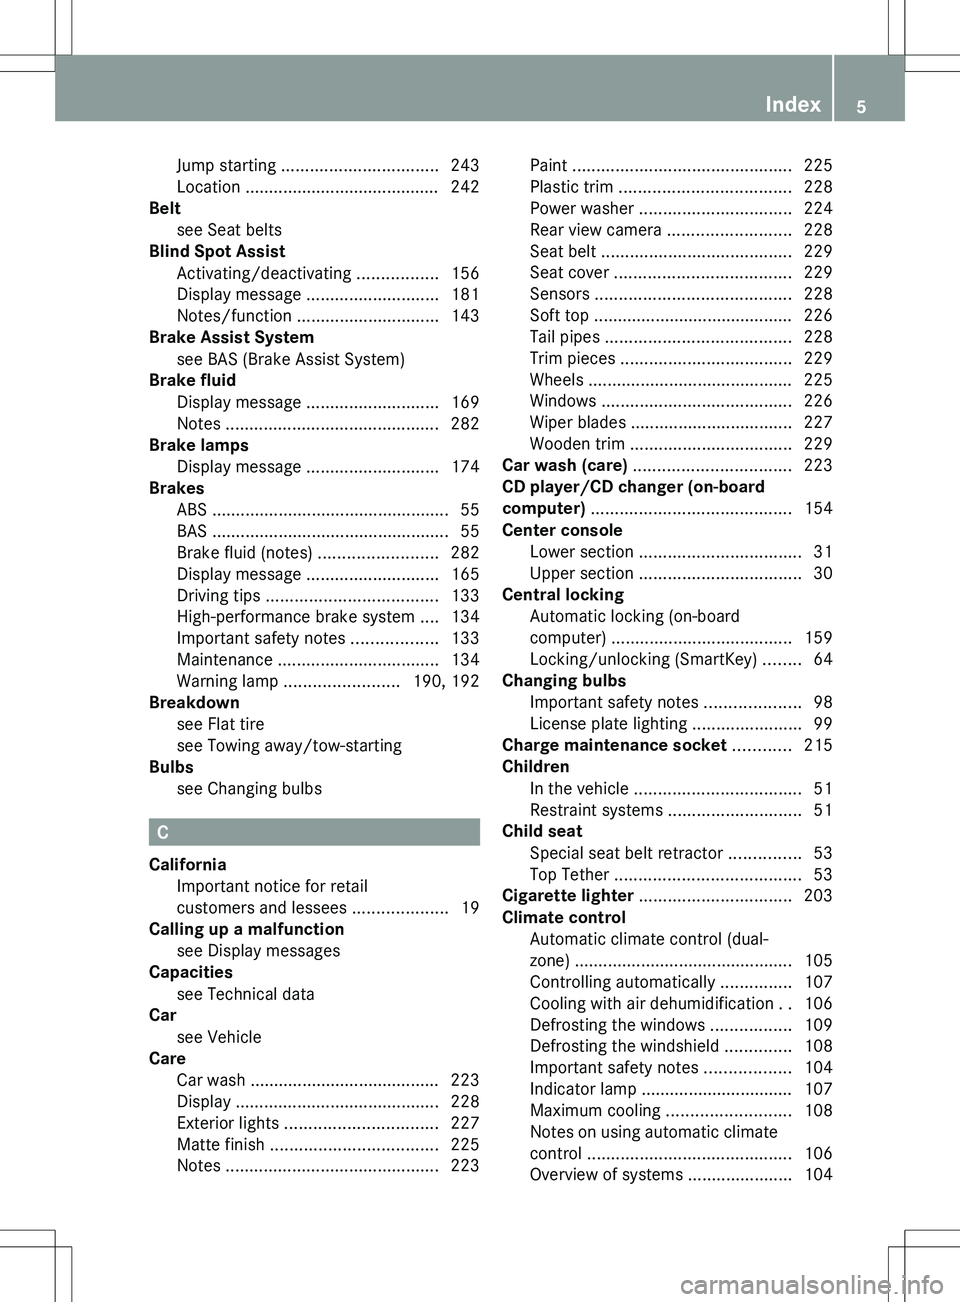
Jump starting ................................. 243
Location ......................................... 242
Belt
see Seat belts
Blind Spot Assist
Activating/deactivating .................156
Display message ............................ 181
Notes/function .............................. 143
Brake Assist System
see BAS (Brake Assist System)
Brake fluid
Display message ............................ 169
Notes ............................................. 282
Brake lamps
Display message ............................ 174
Brakes
ABS .................................................. 55
BAS .................................................. 55
Brake fluid (notes) .........................282
Display message ............................ 165
Driving tips .................................... 133
High-performance brake system ....134
Important safety notes ..................133
Maintenance .................................. 134
Warning lamp ........................ 190, 192
Breakdown
see Flat tire
see Towing away/tow-starting
Bulbs
see Changing bulbs
C
California Important notice for retail
customers and lessees ....................19
Calling up a malfunction
see Display messages
Capacities
see Technical data
Car
see Vehicle
Care
Car wash ........................................ 223
Display ........................................... 228
Exterior lights ................................ 227
Matte finish ................................... 225
Notes ............................................. 223
Paint .............................................. 225
Plastic trim .................................... 228
Power washer ................................ 224
Rear view camera .......................... 228
Seat belt ........................................ 229
Seat cover ..................................... 229
Sensors ......................................... 228
Soft top .......................................... 226
Tail pipes ....................................... 228
Trim pieces .................................... 229
Wheels ........................................... 225
Windows ........................................ 226
Wiper blades .................................. 227
Wooden trim .................................. 229
Car wash (care) ................................. 223
CD player/CD changer (on-board
computer) .......................................... 154
Center console Lower section .................................. 31
Upper section .................................. 30
Central locking
Automatic locking (on-board
computer) ...................................... 159
Locking/unlocking (SmartKey) ........64
Changing bulbs
Important safety notes ....................98
License plate lighting .......................99
Charge maintenance socket ............ 215
Children In the vehicle ................................... 51
Restraint systems ............................ 51
Child seat
Special seat belt retractor ...............53
Top Tether ....................................... 53
Cigarette lighter ................................ 203
Climate control Automatic climate control (dual-
zone) .............................................. 105
Controlling automatically ...............107
Cooling with air dehumidification ..106
Defrosting the windows .................109
Defrosting the windshield ..............108
Important safety notes ..................104
Indicator lamp ................................ 107
Maximum cooling .......................... 108
Notes on using automatic climate
control ........................................... 106
Overview of systems ......................104Index5
Page 11 of 288
Fuel tankCapacity ........................................ 280
Problem (malfunction) ...................129
Fuse box
Front-passenger footwell ...............247
Rear compartment .........................248
Fuses
Allocation chart ............................. 247
Before changing ............................. 247
Important safety notes ..................247
G
Garage door opener Clearing the memory .....................215
Notes ............................................. 212
Opening/closing the garage door ..215
Programming (button in the rear-
view mirror) ................................... 213
Gasoline ............................................. 127
Gear indicator .................................... 121
Genuine Mercedes-Benz parts ......... 276
Glove box ........................................... 200
H
Handbrake see Parking brake
Hazard warning lamps ........................ 96
Head bags ............................................ 41
Headlamp cleaning system Notes ............................................. 284
Headlamps
Adding fluid to cleaning system .....221
Cleaning system (function) ..............97
Fogging up ....................................... 97
see Automatic headlamp mode
Head level heating (AIRSCARF) .......... 87
Heating see Climate control
High-beam headlamps
Display message ............................ 175
Switching on/off .............................. 96
Hill start assist .................................. 117
Hood Closing ........................................... 219
Display message ............................ 183
Opening ......................................... 218
Hydroplaning ..................................... 135
I
Ignition lock ....................................... 115
Immobilizer .......................................... 59
Indicator lamps see Warning and indicator lamps
Indicators
see Turn signals
Instrument cluster
Overview .......................................... 27
Settings ......................................... 157
Warning and indicator lamps ...........28
Instrument cluster lighting .............. 158
Instrument lighting see Instrument cluster lighting
Interior lighting
Automatic control ............................ 97
Delayed switch-off (on-board
computer) ...................................... 159
Emergency lighting ..........................98
Manual control ................................. 98
Overview .......................................... 97
Reading lamp ................................... 97
J
Jack Storage location ............................ 232
Using ............................................. 237
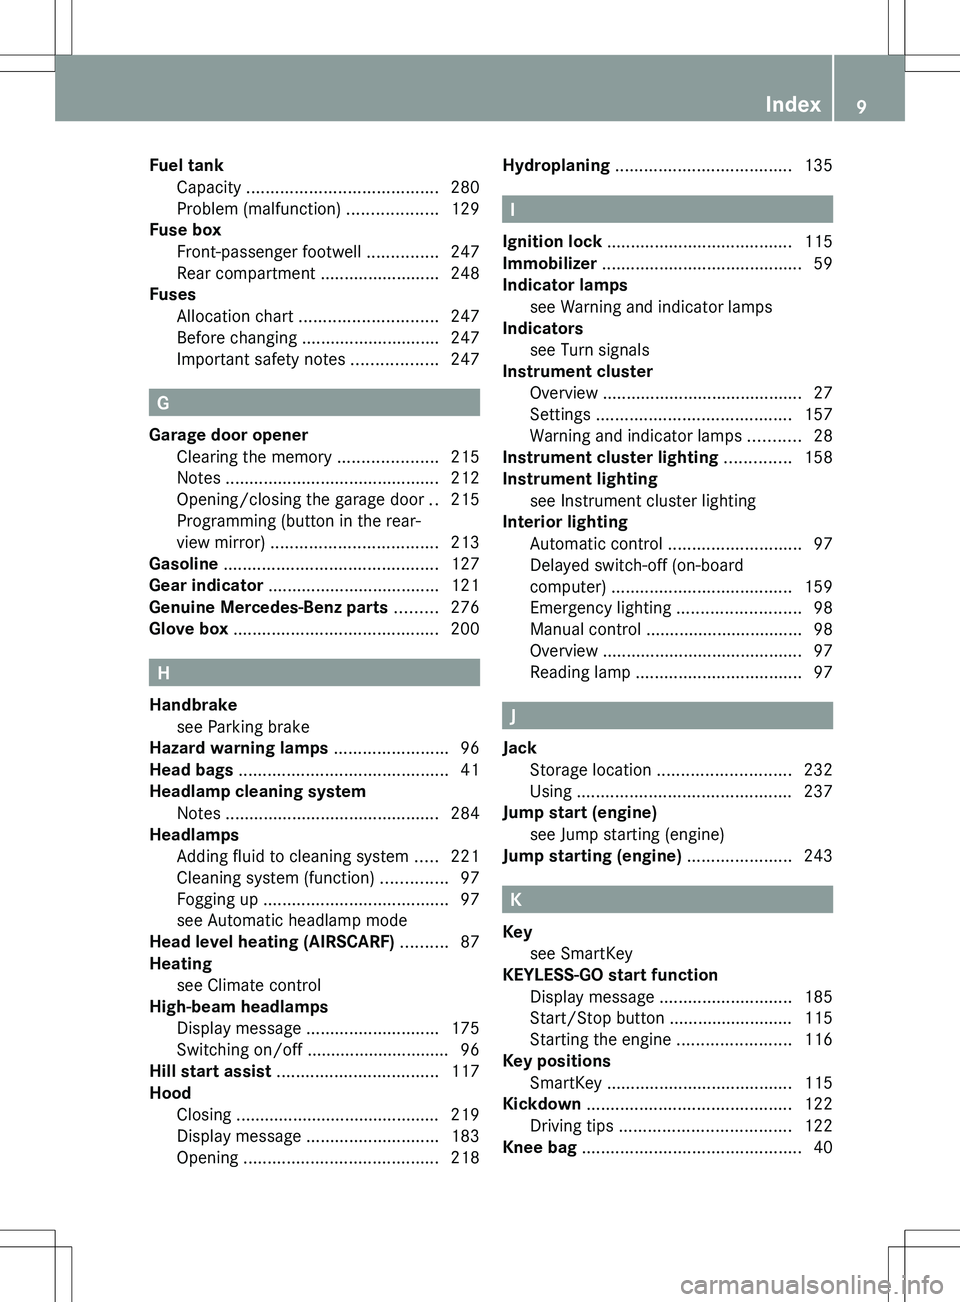
Jump start (engine)
see Jump starting (engine)
Jump starting (engine) ...................... 243
K
Key see SmartKey
KEYLESS-GO start function
Display message ............................ 185
Start/Stop button .......................... 115
Starting the engine ........................116
Key positions
SmartKey ....................................... 115
Kickdown ........................................... 122
Driving tips .................................... 122
Knee bag .............................................. 40
Index9
Page 70 of 288
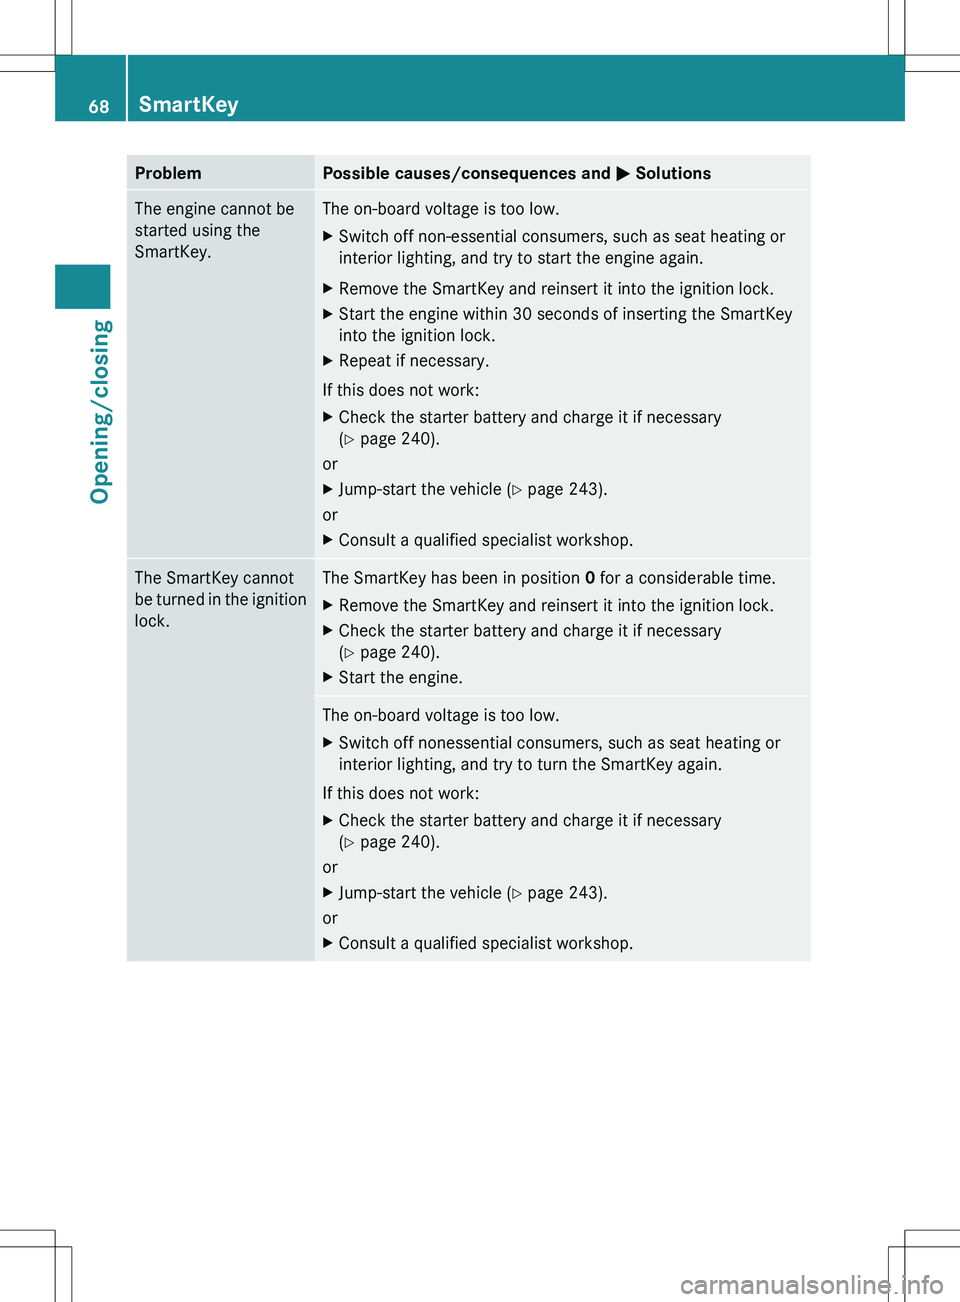
ProblemPossible causes/consequences and M SolutionsThe engine cannot be
started using the
SmartKey.The on-board voltage is too low.XSwitch off non-essential consumers, such as seat heating or
interior lighting, and try to start the engine again.XRemove the SmartKey and reinsert it into the ignition lock.XStart the engine within 30 seconds of inserting the SmartKey
into the ignition lock.XRepeat if necessary.
If this does not work:
XCheck the starter battery and charge it if necessary
( Y page 240).
or
XJump-start the vehicle ( Y page 243).
or
XConsult a qualified specialist workshop.The SmartKey cannot
be turned in the ignition
lock.The SmartKey has been in position 0 for a considerable time.XRemove the SmartKey and reinsert it into the ignition lock.XCheck the starter battery and charge it if necessary
( Y page 240).XStart the engine.The on-board voltage is too low.XSwitch off nonessential consumers, such as seat heating or
interior lighting, and try to turn the SmartKey again.
If this does not work:
XCheck the starter battery and charge it if necessary
( Y page 240).
or
XJump-start the vehicle ( Y page 243).
or
XConsult a qualified specialist workshop.68SmartKeyOpening/closing
Page 120 of 288
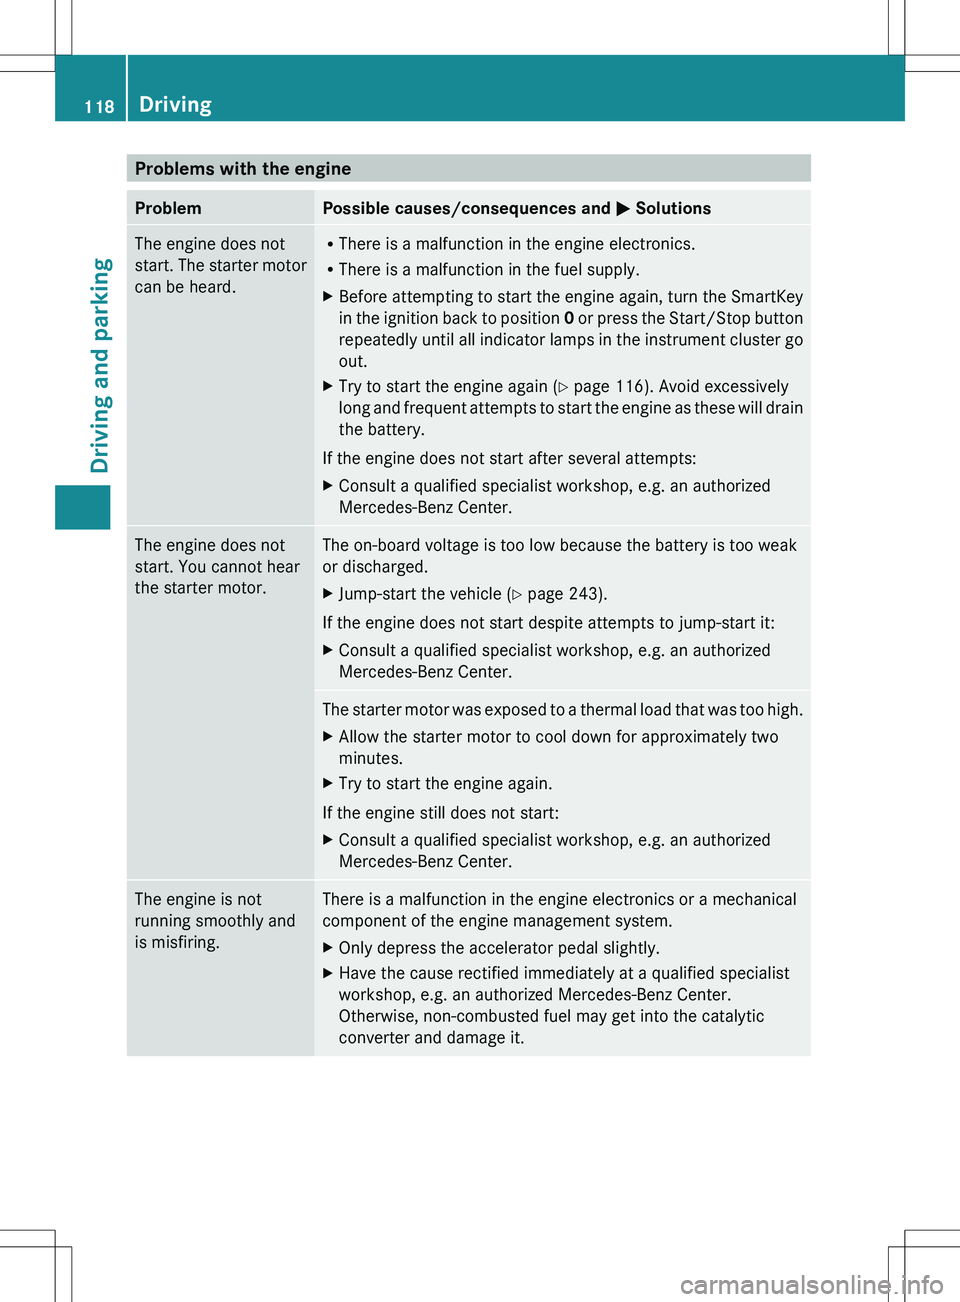
Problems with the engineProblemPossible causes/consequences and M SolutionsThe engine does not
start. The starter motor
can be heard.R There is a malfunction in the engine electronics.
R There is a malfunction in the fuel supply.XBefore attempting to start the engine again, turn the SmartKey
in the ignition back to position 0 or press the Start/Stop button
repeatedly until all indicator lamps in the instrument cluster go
out.XTry to start the engine again ( Y page 116). Avoid excessively
long and frequent attempts to start the engine as these will drain
the battery.
If the engine does not start after several attempts:
XConsult a qualified specialist workshop, e.g. an authorized
Mercedes-Benz Center.The engine does not
start. You cannot hear
the starter motor.The on-board voltage is too low because the battery is too weak
or discharged.XJump-start the vehicle ( Y page 243).
If the engine does not start despite attempts to jump-start it:
XConsult a qualified specialist workshop, e.g. an authorized
Mercedes-Benz Center.The starter motor was exposed to a thermal load that was too high.XAllow the starter motor to cool down for approximately two
minutes.XTry to start the engine again.
If the engine still does not start:
XConsult a qualified specialist workshop, e.g. an authorized
Mercedes-Benz Center.The engine is not
running smoothly and
is misfiring.There is a malfunction in the engine electronics or a mechanical
component of the engine management system.XOnly depress the accelerator pedal slightly.XHave the cause rectified immediately at a qualified specialist
workshop, e.g. an authorized Mercedes-Benz Center.
Otherwise, non-combusted fuel may get into the catalytic
converter and damage it.118DrivingDriving and parking
Page 233 of 288

Useful information ............................232
Where will I find...? ...........................232
Flat tire .............................................. 233
Battery ............................................... 240
Jump-starting .................................... 243
Towing and tow-starting ..................244
Fuses .................................................. 247231Breakdown assistance
Page 244 of 288
Mercedes-Benz recommends that you do not
carry out work on batteries yourself, e.g.
removing or charging. Always have this work
performed at a qualified specialist workshop,
e.g. an authorized Mercedes-Benz Center.
i If the battery power supply has been
interrupted, e.g. if the battery has been
reconnected, you must reset the function
for automatically folding the exterior
mirrors in/out by folding the mirrors out
once ( Y page 90).
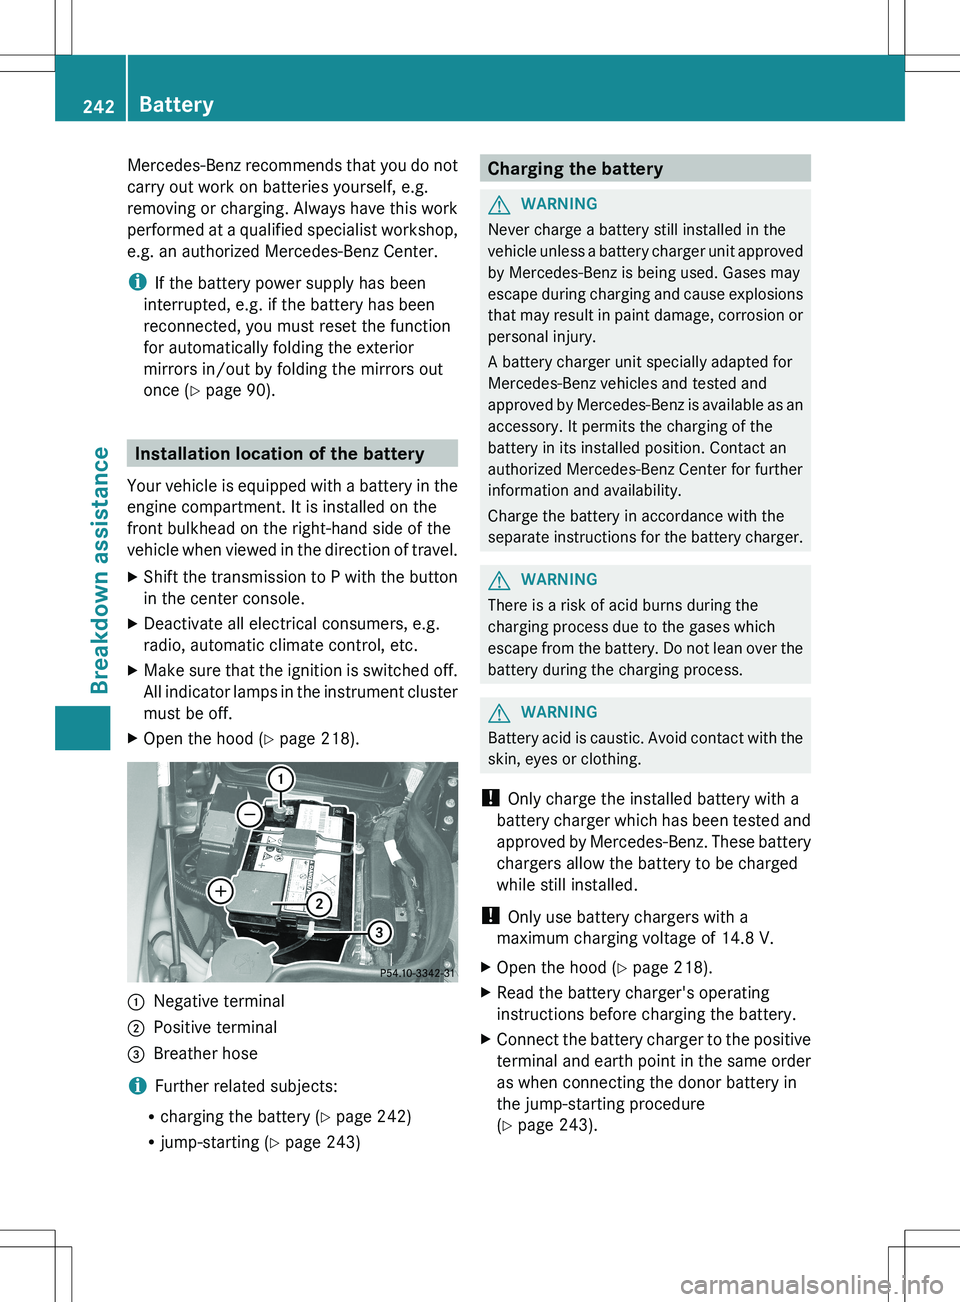
Installation location of the battery
Your vehicle is equipped with a battery in the
engine compartment. It is installed on the
front bulkhead on the right-hand side of the
vehicle when viewed in the direction of travel.
XShift the transmission to P with the button
in the center console.XDeactivate all electrical consumers, e.g.
radio, automatic climate control, etc.XMake sure that the ignition is switched off.
All indicator lamps in the instrument cluster
must be off.XOpen the hood ( Y page 218).:Negative terminal;Positive terminal=Breather hose
i Further related subjects:
R charging the battery ( Y page 242)
R jump-starting ( Y page 243)
Charging the batteryGWARNING
Never charge a battery still installed in the
vehicle unless a battery charger unit approved
by Mercedes-Benz is being used. Gases may
escape during charging and cause explosions
that may result in paint damage, corrosion or
personal injury.
A battery charger unit specially adapted for
Mercedes-Benz vehicles and tested and
approved by Mercedes-Benz is available as an
accessory. It permits the charging of the
battery in its installed position. Contact an
authorized Mercedes-Benz Center for further
information and availability.
Charge the battery in accordance with the
separate instructions for the battery charger.
GWARNING
There is a risk of acid burns during the
charging process due to the gases which
escape from the battery. Do not lean over the
battery during the charging process.
GWARNING
Battery acid is caustic. Avoid contact with the
skin, eyes or clothing.
! Only charge the installed battery with a
battery charger which has been tested and
approved by Mercedes-Benz. These battery
chargers allow the battery to be charged
while still installed.
! Only use battery chargers with a
maximum charging voltage of 14.8 V.
XOpen the hood ( Y page 218).XRead the battery charger's operating
instructions before charging the battery.XConnect the battery charger to the positive
terminal and earth point in the same order
as when connecting the donor battery in
the jump-starting procedure
( Y page 243).242BatteryBreakdown assistance
Page 245 of 288
Jump-startingGWARNING
Failure to follow these directions will cause damage to the electronic components, and can lead
to a battery explosion and severe injury or death.
Never lean over batteries while connecting or jump starting. You might get injured.
Battery fluid contains sulfuric acid. Do not allow this fluid to come in contact with eyes, skin or
clothing. In case it does, immediately flush affected area with water, and seek medical help if
necessary.
A battery will also produce hydrogen gas, which is flammable and explosive. Keep flames or
sparks away from battery, avoid improper connection of jumper cables, smoking, etc.
Attempting to jump start a frozen battery can result in it exploding, causing personal injury.
Read all instructions before proceeding.
! Avoid repeated and lengthy starting attempts. Otherwise, non-combusted fuel may
damage the catalytic converter and create a risk of fire.
Do not use a rapid charging device to start the vehicle.
Make sure the jumper cables are not damaged.
Make sure the jumper cables are not touching any other metal objects when they are
connected to the battery.
If your vehicle's battery is discharged, the engine can be jump-started from another vehicle
or from a second battery using jumper cables.
Observe the following points:
XThe battery is not accessible in all vehicles. If the other vehicle's battery is not accessible,
jump-start the vehicle using a second battery or a jump-starting device.XYou may only jump-start the vehicle when the engine and catalytic converter are cold.XDo not start the engine if the battery is frozen. Let the battery thaw first.XJump-starting may only be performed from batteries with a nominal voltage of 12 V.XOnly use jumper cables which have a sufficient cross-section and insulated terminal clamps.XMake sure that the jumper cables cannot come into contact with parts, such as the pulley
or the fan. These parts move when the engine is started and while it is running.XIf the battery is fully discharged, leave the battery that is being used to jump-start connected
for a few minutes before attempting to start. This charges the empty battery a little.
i Jumper cables and further information about jump-starting can be obtained from any
authorized Mercedes-Benz Center, for example.
XMake sure that the two vehicles do not touch.XPress the electric parking brake handle.XShift the transmission to P with the button in the center console.XDeactivate all electrical consumers, e.g. radio, automatic climate control, etc.XOpen the hood ( Y page 218).Jump-starting243Breakdown assistanceZ
Page 246 of 288
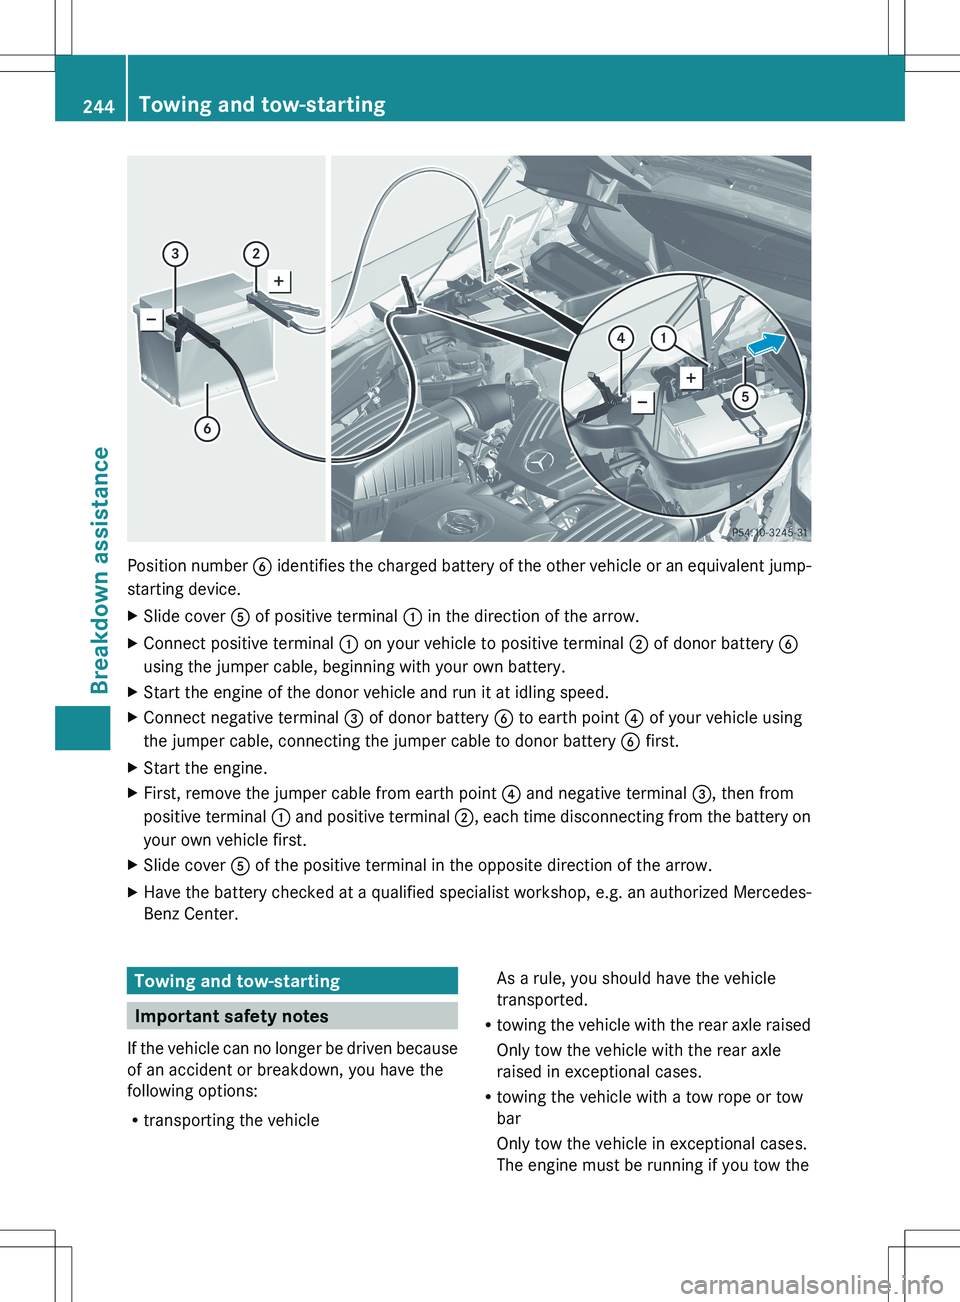
Position number B identifies the charged battery of the other vehicle or an equivalent jump-
starting device.
XSlide cover A of positive terminal : in the direction of the arrow.XConnect positive terminal : on your vehicle to positive terminal ; of donor battery B
using the jumper cable, beginning with your own battery.XStart the engine of the donor vehicle and run it at idling speed.XConnect negative terminal = of donor battery B to earth point ? of your vehicle using
the jumper cable, connecting the jumper cable to donor battery B first.XStart the engine.XFirst, remove the jumper cable from earth point ? and negative terminal =, then from
positive terminal : and positive terminal ;, each time disconnecting from the battery on
your own vehicle first.XSlide cover A of the positive terminal in the opposite direction of the arrow.XHave the battery checked at a qualified specialist workshop, e.g. an authorized Mercedes-
Benz Center.Towing and tow-starting
Important safety notes
If the vehicle can no longer be driven because
of an accident or breakdown, you have the
following options:
R transporting the vehicle
As a rule, you should have the vehicle
transported.
R towing the vehicle with the rear axle raised
Only tow the vehicle with the rear axle
raised in exceptional cases.
R towing the vehicle with a tow rope or tow
bar
Only tow the vehicle in exceptional cases.
The engine must be running if you tow the244Towing and tow-startingBreakdown assistance
Page 247 of 288
vehicle with a tow rope or tow bar. Observe
the following notes.GWARNING
If the brake system is malfunctioning, you
must use a rigid tow bar to tow the vehicle.
Before towing away, make sure that the
steering can be moved and is not locked.
If there is a malfunction in the power supply
or the vehicle's electrical system, you must
not tow the vehicle.
GWARNING
The following can occur if the vehicle is towed:
R the engine may not start.
R the on-board electronics may fail.
R the battery voltage may drop too much.
In these cases, the rear axle will be locked.
As a result, you might lose control of the
vehicle, cause an accident and injure yourself
and others.
! Use the SmartKey instead of the Start/
Stop button when towing the vehicle.
Start the engine and keep it running. Turn
the SmartKey to position 2 in the ignition.
Set the transmission to N using the E-
SELECT lever. Make sure that you then
leave the SmartKey in position 2.
Check the transmission position in the
instrument cluster.
! Make sure that the electric parking brake
is released. If the electric parking brake is
faulty, visit a qualified specialist workshop.
Mercedes-Benz recommends that you use
an authorized Mercedes-Benz Center for
this purpose.
! When towing, pull away slowly and
smoothly. If the tractive power is too high,
the vehicles could be damaged.
! Only secure the tow rope or tow bar at the
towing eyes. Otherwise, the vehicle could
be damaged.
! Do not use the towing eye for recovery,
as this could damage the vehicle. If in
doubt, recover the vehicle with a crane.
! You may only tow the vehicle a maximum
distance of 30 miles (50 km). A towing
speed of 30 mph (50 km/h) must not be
exceeded.
For towing distances over 30 miles
(50 km), the vehicle must loaded onto a
transporter.
! Do not tow with sling-type equipment.
This could damage the vehicle.
! Tow-starting the vehicle is not permitted.
The transmission may otherwise be
damaged.
Also observe the following notes:
R if the engine does not start, try jump-
starting it ( Y page 243). Tow-starting the
vehicle is not permitted.
R if it is not possible to jump-start the vehicle,
have it transported to the nearest qualified
specialist workshop, e.g. an authorized
Mercedes-Benz Center.
R if the transmission has been damaged,
have the vehicle transported to the nearest
qualified specialist workshop, e.g. an
authorized Mercedes-Benz Center.
Observe the display messages in the
instrument cluster.
Installing/removing the towing eye
Installing the towing eye
XTake the towing eye and the wheel
wrench 17
out of the wheel-change tool kit
( Y page 232).
The bracket for the removable towing eye is
in the bumper at the front. It is located under
the cover.
17 Not included in the scope of delivery.Towing and tow-starting245Breakdown assistanceZ