turn signal MERCEDES-BENZ SLS AMG ROADSTER 2012 Owners Manual
[x] Cancel search | Manufacturer: MERCEDES-BENZ, Model Year: 2012, Model line: SLS AMG ROADSTER, Model: MERCEDES-BENZ SLS AMG ROADSTER 2012Pages: 288, PDF Size: 18.46 MB
Page 11 of 288
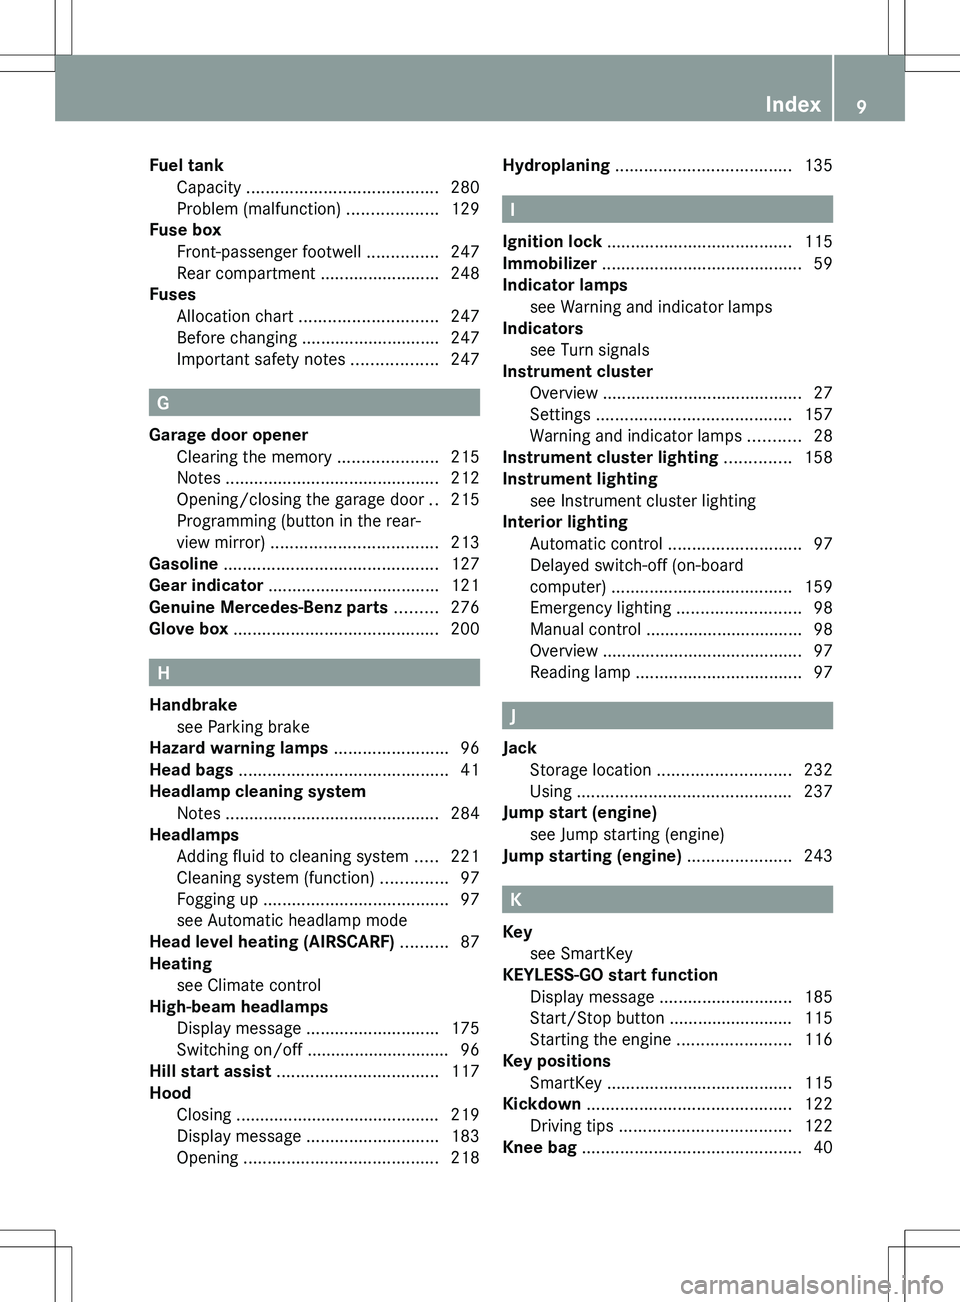
Fuel tankCapacity ........................................ 280
Problem (malfunction) ...................129
Fuse box
Front-passenger footwell ...............247
Rear compartment .........................248
Fuses
Allocation chart ............................. 247
Before changing ............................. 247
Important safety notes ..................247
G
Garage door opener Clearing the memory .....................215
Notes ............................................. 212
Opening/closing the garage door ..215
Programming (button in the rear-
view mirror) ................................... 213
Gasoline ............................................. 127
Gear indicator .................................... 121
Genuine Mercedes-Benz parts ......... 276
Glove box ........................................... 200
H
Handbrake see Parking brake
Hazard warning lamps ........................ 96
Head bags ............................................ 41
Headlamp cleaning system Notes ............................................. 284
Headlamps
Adding fluid to cleaning system .....221
Cleaning system (function) ..............97
Fogging up ....................................... 97
see Automatic headlamp mode
Head level heating (AIRSCARF) .......... 87
Heating see Climate control
High-beam headlamps
Display message ............................ 175
Switching on/off .............................. 96
Hill start assist .................................. 117
Hood Closing ........................................... 219
Display message ............................ 183
Opening ......................................... 218
Hydroplaning ..................................... 135
I
Ignition lock ....................................... 115
Immobilizer .......................................... 59
Indicator lamps see Warning and indicator lamps
Indicators
see Turn signals
Instrument cluster
Overview .......................................... 27
Settings ......................................... 157
Warning and indicator lamps ...........28
Instrument cluster lighting .............. 158
Instrument lighting see Instrument cluster lighting
Interior lighting
Automatic control ............................ 97
Delayed switch-off (on-board
computer) ...................................... 159
Emergency lighting ..........................98
Manual control ................................. 98
Overview .......................................... 97
Reading lamp ................................... 97
J
Jack Storage location ............................ 232
Using ............................................. 237
Jump start (engine)
see Jump starting (engine)
Jump starting (engine) ...................... 243
K
Key see SmartKey
KEYLESS-GO start function
Display message ............................ 185
Start/Stop button .......................... 115
Starting the engine ........................116
Key positions
SmartKey ....................................... 115
Kickdown ........................................... 122
Driving tips .................................... 122
Knee bag .............................................. 40
Index9
Page 12 of 288
L
Lamps see Warning and indicator lamps
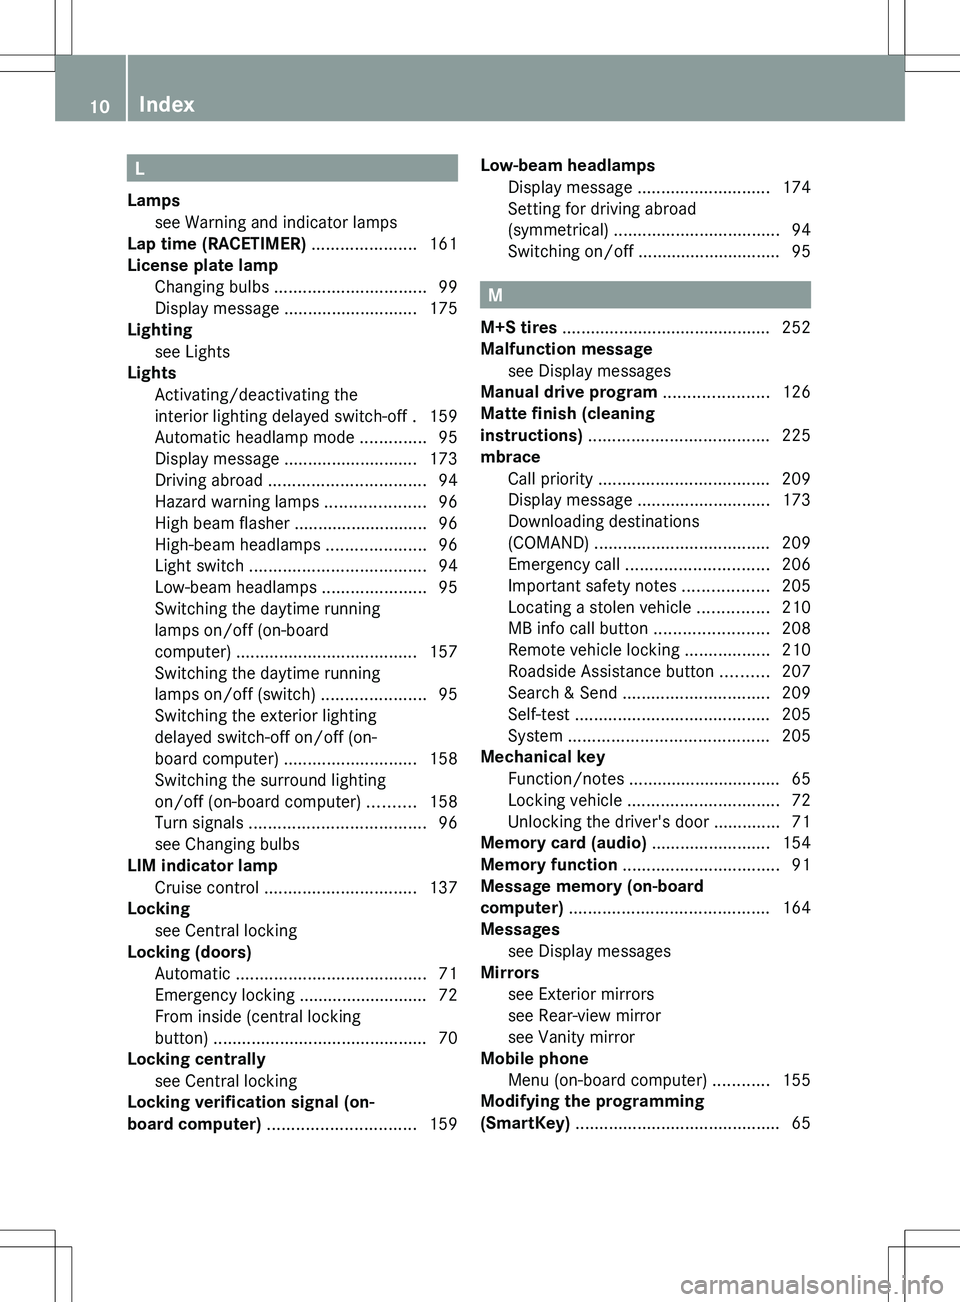
Lap time (RACETIMER) ...................... 161
License plate lamp Changing bulbs ................................ 99
Display message ............................ 175
Lighting
see Lights
Lights
Activating/deactivating the
interior lighting delayed switch-off . 159
Automatic headlamp mode ..............95
Display message ............................ 173
Driving abroad ................................. 94
Hazard warning lamps .....................96
High beam flasher ............................ 96
High-beam headlamps .....................96
Light switch ..................................... 94
Low-beam headlamps ......................95
Switching the daytime running
lamps on/off (on-board
computer) ...................................... 157
Switching the daytime running
lamps on/off (switch) ......................95
Switching the exterior lighting
delayed switch-off on/off (on-
board computer) ............................ 158
Switching the surround lighting
on/off (on-board computer) ..........158
Turn signals ..................................... 96
see Changing bulbs
LIM indicator lamp
Cruise control ................................ 137
Locking
see Central locking
Locking (doors)
Automatic ........................................ 71
Emergency locking ........................... 72
From inside (central locking
button) ............................................. 70
Locking centrally
see Central locking
Locking verification signal (on-
board computer) ............................... 159Low-beam headlamps
Display message ............................ 174
Setting for driving abroad
(symmetrical) ................................... 94
Switching on/off .............................. 95
M
M+S tires ............................................ 252
Malfunction message see Display messages
Manual drive program ...................... 126
Matte finish (cleaning
instructions) ...................................... 225
mbrace Call priority .................................... 209
Display message ............................ 173
Downloading destinations
(COMAND) ..................................... 209
Emergency call .............................. 206
Important safety notes ..................205
Locating a stolen vehicle ...............210
MB info call button ........................208
Remote vehicle locking ..................210
Roadside Assistance button ..........207
Search & Send ............................... 209
Self-test ......................................... 205
System .......................................... 205
Mechanical key
Function/notes ................................ 65
Locking vehicle ................................ 72
Unlocking the driver's door ..............71
Memory card (audio) ......................... 154
Memory function ................................. 91
Message memory (on-board
computer) .......................................... 164
Messages see Display messages
Mirrors
see Exterior mirrors
see Rear-view mirror
see Vanity mirror
Mobile phone
Menu (on-board computer) ............155
Modifying the programming
(SmartKey) ........................................... 65
10Index
Page 18 of 288
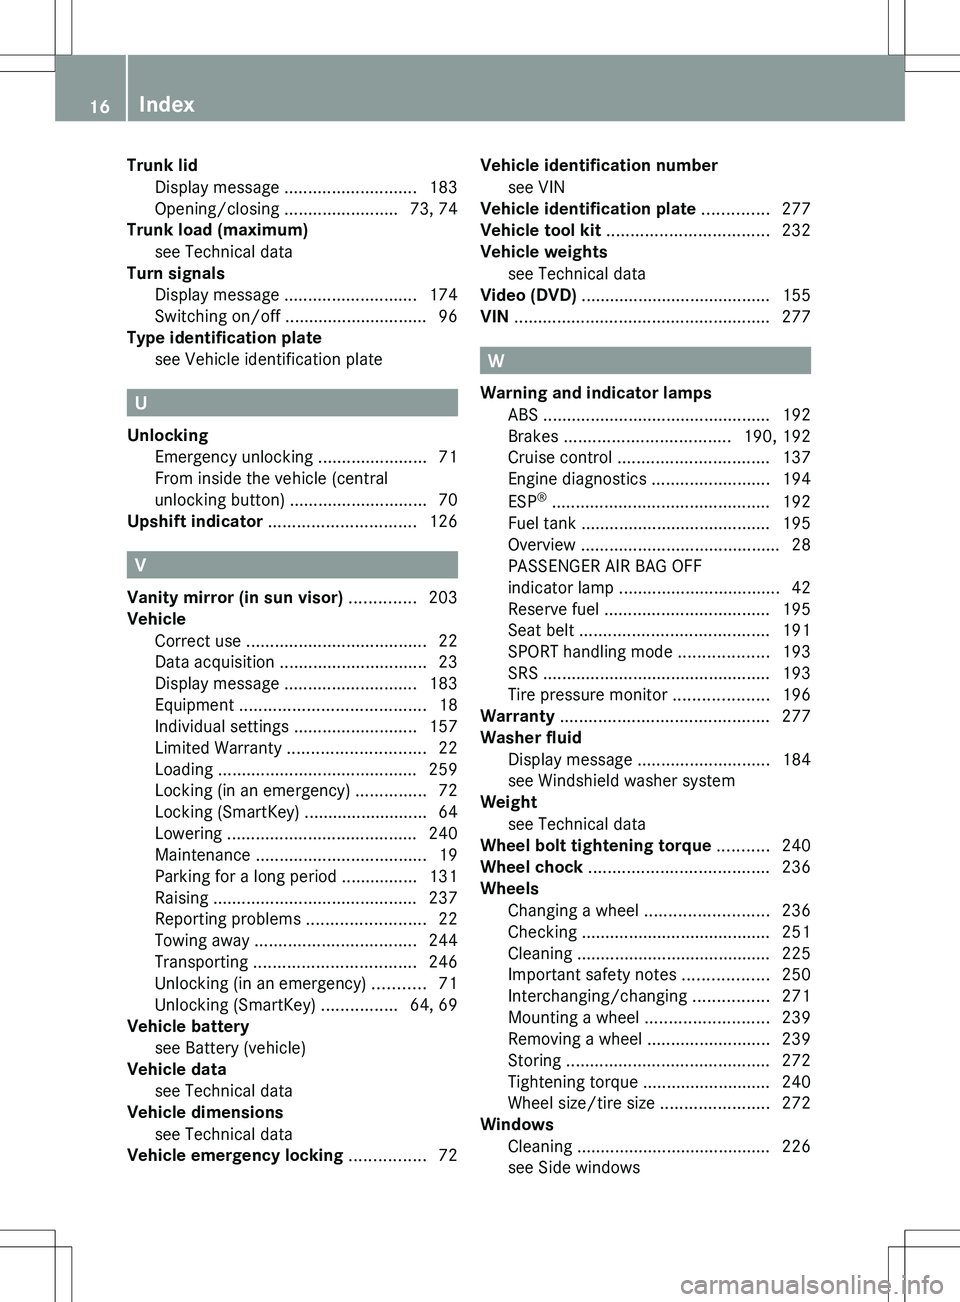
Trunk lidDisplay message ............................ 183
Opening/closing ........................73, 74
Trunk load (maximum)
see Technical data
Turn signals
Display message ............................ 174
Switching on/off .............................. 96
Type identification plate
see Vehicle identification plate
U
Unlocking Emergency unlocking .......................71
From inside the vehicle (central
unlocking button) ............................. 70
Upshift indicator ............................... 126
V
Vanity mirror (in sun visor) .............. 203
Vehicle Correct use ...................................... 22
Data acquisition ............................... 23
Display message ............................ 183
Equipment ....................................... 18
Individual settings ..........................157
Limited Warranty ............................. 22
Loading .......................................... 259
Locking (in an emergency) ...............72
Locking (SmartKey) .......................... 64
Lowering ........................................ 240
Maintenance .................................... 19
Parking for a long period ................ 131
Raising ........................................... 237
Reporting problems .........................22
Towing away .................................. 244
Transporting .................................. 246
Unlocking (in an emergency) ...........71
Unlocking (SmartKey) ................64, 69
Vehicle battery
see Battery (vehicle)
Vehicle data
see Technical data
Vehicle dimensions
see Technical data
Vehicle emergency locking ................ 72
Vehicle identification number
see VIN
Vehicle identification plate .............. 277
Vehicle tool kit .................................. 232
Vehicle weights see Technical data
Video (DVD) ........................................ 155
VIN ...................................................... 277
W
Warning and indicator lamps ABS ................................................ 192
Brakes ................................... 190, 192
Cruise control ................................ 137
Engine diagnostics .........................194
ESP ®
.............................................. 192
Fuel tank ........................................ 195
Overview .......................................... 28
PASSENGER AIR BAG OFF
indicator lamp .................................. 42
Reserve fuel ................................... 195
Seat belt ........................................ 191
SPORT handling mode ...................193
SRS ................................................ 193
Tire pressure monitor ....................196
Warranty ............................................ 277
Washer fluid Display message ............................ 184
see Windshield washer system
Weight
see Technical data
Wheel bolt tightening torque ........... 240
Wheel chock ...................................... 236
Wheels Changing a wheel .......................... 236
Checking ........................................ 251
Cleaning ......................................... 225
Important safety notes ..................250
Interchanging/changing ................271
Mounting a wheel .......................... 239
Removing a wheel ..........................239
Storing ........................................... 272
Tightening torque ........................... 240
Wheel size/tire size .......................272
Windows
Cleaning ......................................... 226
see Side windows
16Index
Page 30 of 288
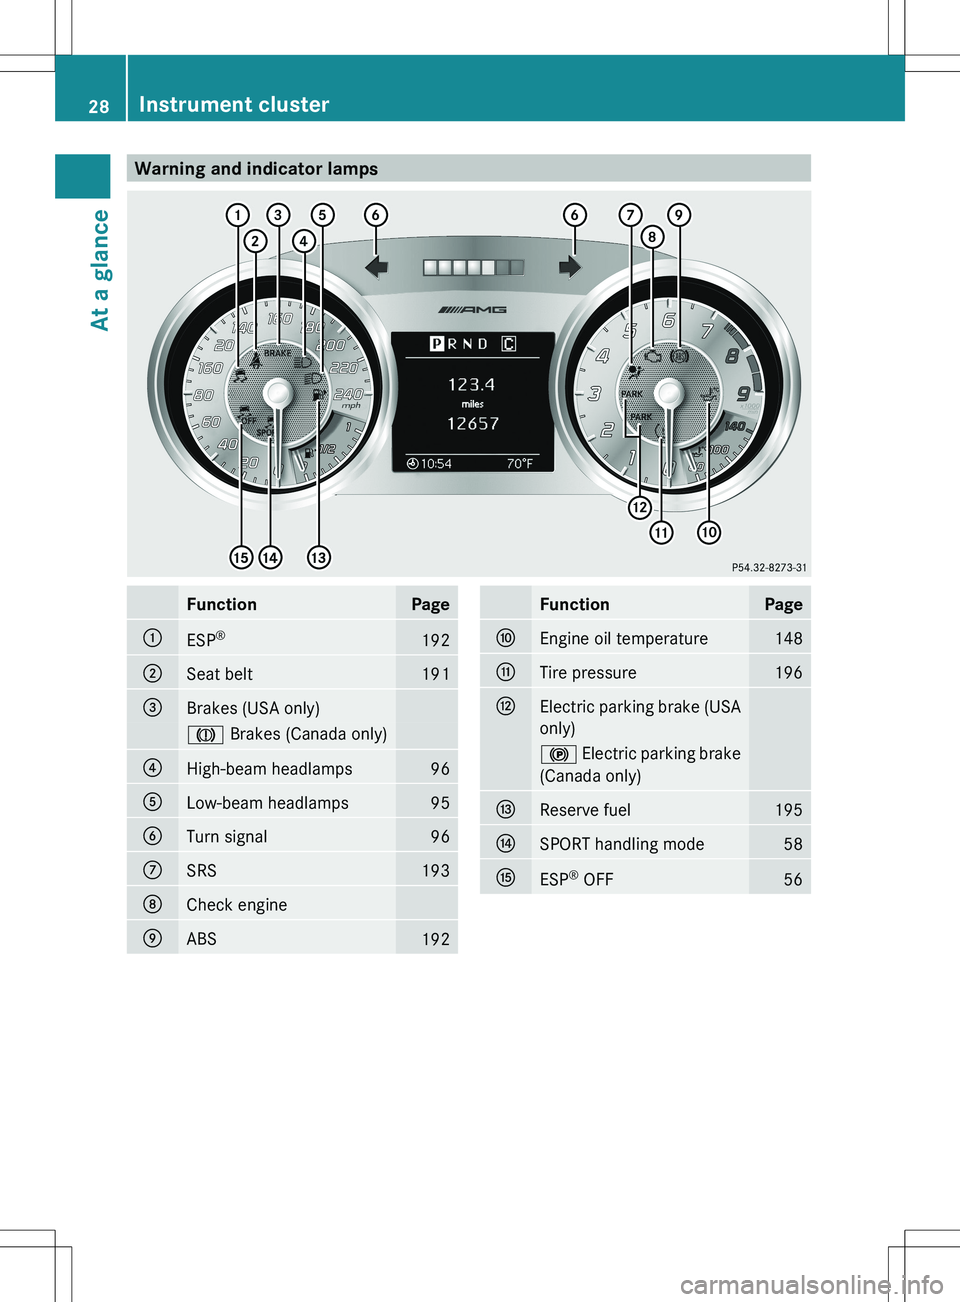
Warning and indicator lampsFunctionPage:ESP®192;Seat belt191=Brakes (USA only)J
Brakes (Canada only)?High-beam headlamps96ALow-beam headlamps95BTurn signal96CSRS193DCheck engineEABS192FunctionPageFEngine oil temperature148GTire pressure196HElectric parking brake (USA
only)! Electric parking brake
(Canada only)IReserve fuel195JSPORT handling mode58KESP ®
OFF5628Instrument clusterAt a glance
Page 62 of 288
iIf the alarm stays on for more than
30 seconds, the mbrace 2
system initiates
a call to the Customer Assistance Center
automatically. The emergency call system
initiates the call provided that:
R you have subscribed to the mbrace
service
R the mbrace service has been activated
properly
R the required mobile phone, power supply
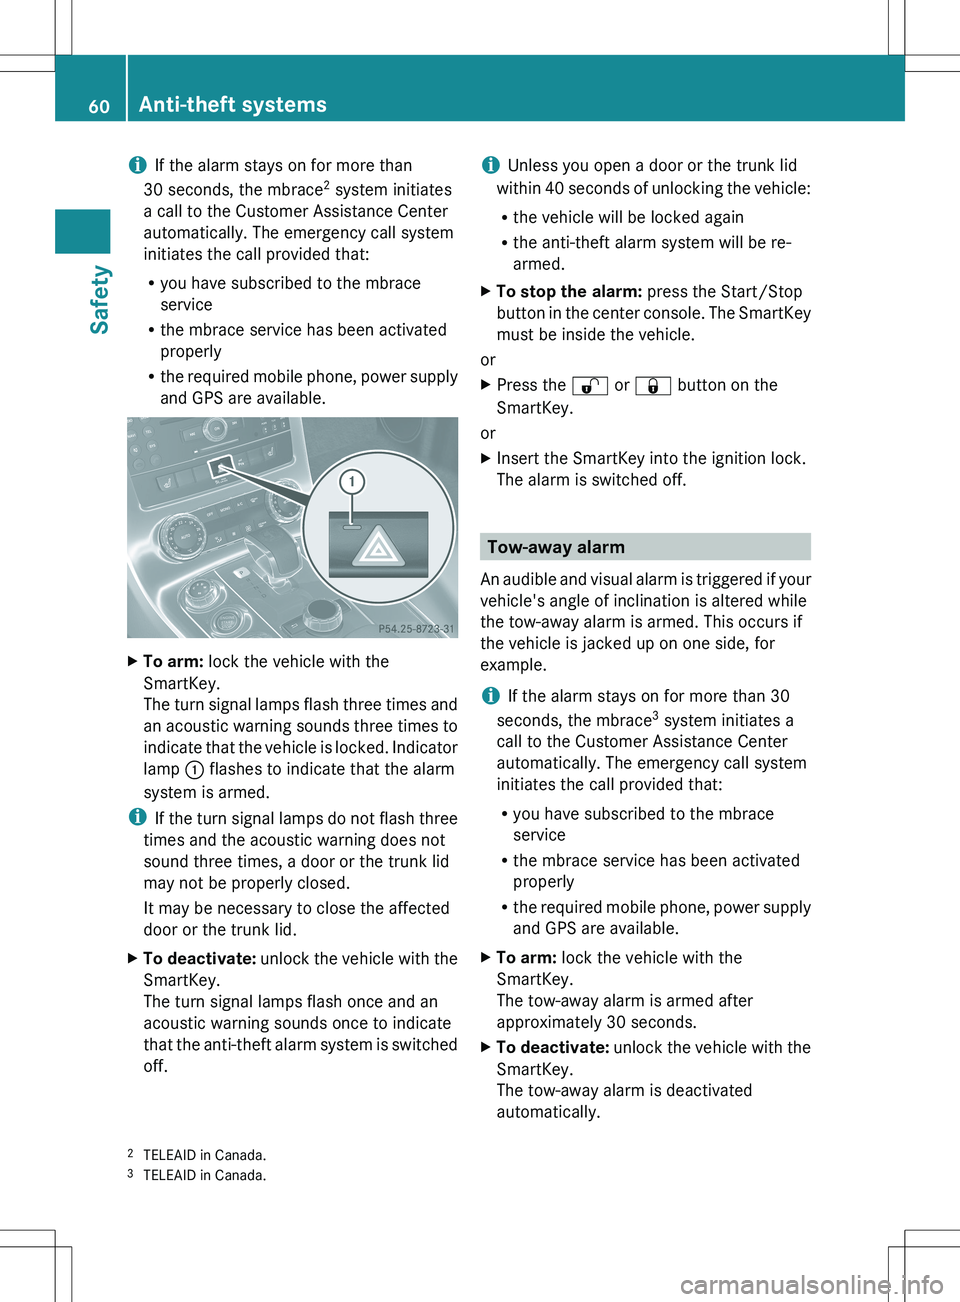
and GPS are available.XTo arm: lock the vehicle with the
SmartKey.
The turn signal lamps flash three times and
an acoustic warning sounds three times to
indicate that the vehicle is locked. Indicator
lamp : flashes to indicate that the alarm
system is armed.
i If the turn signal lamps do not flash three
times and the acoustic warning does not
sound three times, a door or the trunk lid
may not be properly closed.
It may be necessary to close the affected
door or the trunk lid.
XTo deactivate: unlock the vehicle with the
SmartKey.
The turn signal lamps flash once and an
acoustic warning sounds once to indicate
that the anti-theft alarm system is switched
off.i Unless you open a door or the trunk lid
within 40 seconds of unlocking the vehicle:
R the vehicle will be locked again
R the anti-theft alarm system will be re-
armed.XTo stop the alarm: press the Start/Stop
button in the center console. The SmartKey
must be inside the vehicle.
or
XPress the % or & button on the
SmartKey.
or
XInsert the SmartKey into the ignition lock.
The alarm is switched off.
Tow-away alarm
An audible and visual alarm is triggered if your
vehicle's angle of inclination is altered while
the tow-away alarm is armed. This occurs if
the vehicle is jacked up on one side, for
example.
i If the alarm stays on for more than 30
seconds, the mbrace 3
system initiates a
call to the Customer Assistance Center
automatically. The emergency call system
initiates the call provided that:
R you have subscribed to the mbrace
service
R the mbrace service has been activated
properly
R the required mobile phone, power supply
and GPS are available.
XTo arm: lock the vehicle with the
SmartKey.
The tow-away alarm is armed after
approximately 30 seconds.XTo deactivate: unlock the vehicle with the
SmartKey.
The tow-away alarm is deactivated
automatically.2 TELEAID in Canada.
3 TELEAID in Canada.60Anti-theft systemsSafety
Page 66 of 288
Useful information
i This Operator's Manual describes all
models and all standard and optional
equipment of your vehicle available at the
time of publication of the Operator's
Manual. Country-specific differences are
possible. Please note that your vehicle may
not be equipped with all features
described. This also applies to safety-
related systems and functions.
i Please read the information on qualified
specialist workshops ( Y page 21).
SmartKey
Key function
General notes
i USA only:
This device complies with Part 15 of the
FCC Rules. Operation is subject to the
following two conditions:
1. This device may not cause harmful
interference, and
2. this device must accept any interference
received, including interference that may
cause undesired operation.
Any unauthorized modification to this
device could void the user’s authority to
operate the equipment.
The Product label with FCC ID and IC
certification number can be found in the
battery case of the SmartKey.
i Canada only:
This device complies with RSS-210 of
Industry Canada. Operation is subject to
the following two conditions:
1. This device may not cause interference,
and
2. this device must accept any interference
received, including interference that may
cause undesired operation of the device.
Any unauthorized modification to this
device could void the user’s authority to
operate the equipment.
The Product label with FCC ID and IC
certification number can be found in the
battery case of the SmartKey.
Locking and unlocking centrally
The SmartKey centrally locks/unlocks:
R the doors
R the trunk lid
R the fuel filler flap
R the glove box
R the stowage/telephone compartment
under the armrest
GWARNING
If children are left unsupervised in the vehicle,
they could:
R open a door locked from inside the vehicle
R start the vehicle using a key which has been
left in the vehicle
R release the parking brake
They could thereby endanger themselves and
others. Never leave children unsupervised in
the vehicle. Always take the key with you
when leaving the vehicle, even if you are only
leaving it for a short time.
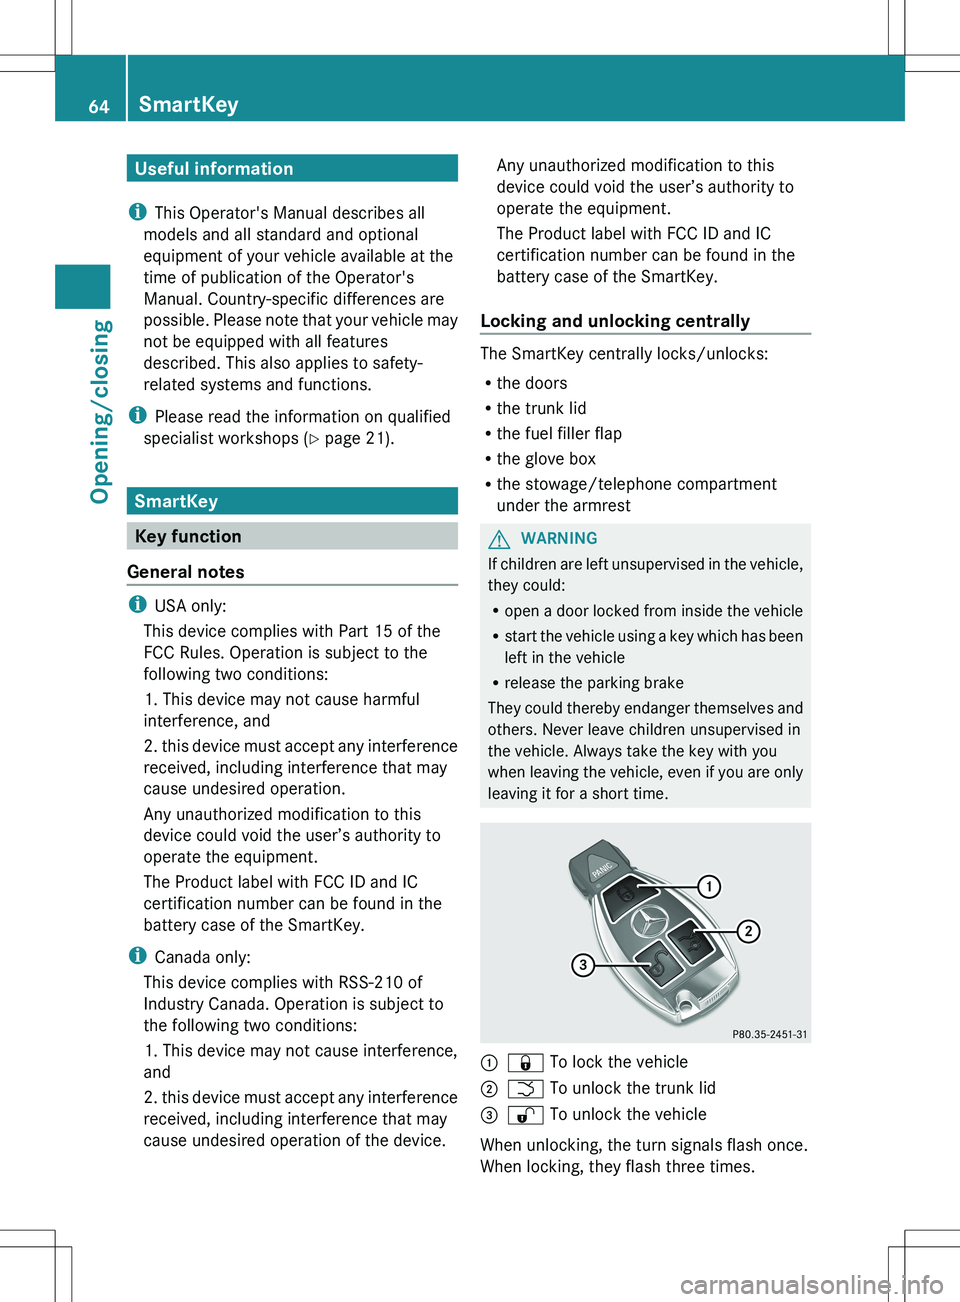
:& To lock the vehicle;F To unlock the trunk lid=% To unlock the vehicle
When unlocking, the turn signals flash once.
When locking, they flash three times.
64SmartKeyOpening/closing
Page 67 of 288
When it is dark, the surround lighting also
comes on if it is activated in the on-board
computer ( Y page 158).
You can also set an audible signal to confirm
that the vehicle has been locked or unlocked.
The audible signal can be activated and
deactivated using the on-board computer
( Y page 159).XTo unlock centrally: press the %
button.
If you do not open the vehicle within
approximately 40 seconds of unlocking:
R the vehicle is locked again.
R the anti-theft alarm system is armed again.
XTo lock centrally: press the & button.
Changing the settings of the locking
system
You can change the setting of the locking
system in such a way that only the driver's
door and the fuel filler flap are unlocked. This
is useful if you frequently travel on your own.
XTo change the setting: press and hold
down the % and & buttons
simultaneously for approximately six
seconds until the battery check lamp
( Y page 66) flashes twice.
The SmartKey now functions as follows:
XTo unlock the driver's door: press the
% button once.XTo unlock centrally: press the %
button twice.XTo lock centrally: press the & button.
Restoring the factory settings
XPress the % and & buttons
simultaneously for approximately six
seconds until the battery check lamp
flashes twice.Mechanical key
General notes
If the vehicle can no longer be locked or
unlocked with the SmartKey, use the
mechanical key.
If you use the mechanical key to unlock and
open the driver's door, the anti-theft alarm
system will be triggered ( Y page 59).
There are several ways to turn off the alarm:
XPress the % or & button on the
SmartKey.
or
XInsert the SmartKey into the ignition lock.XTo unlock the fuel filler flap: insert the
SmartKey into the ignition lock.
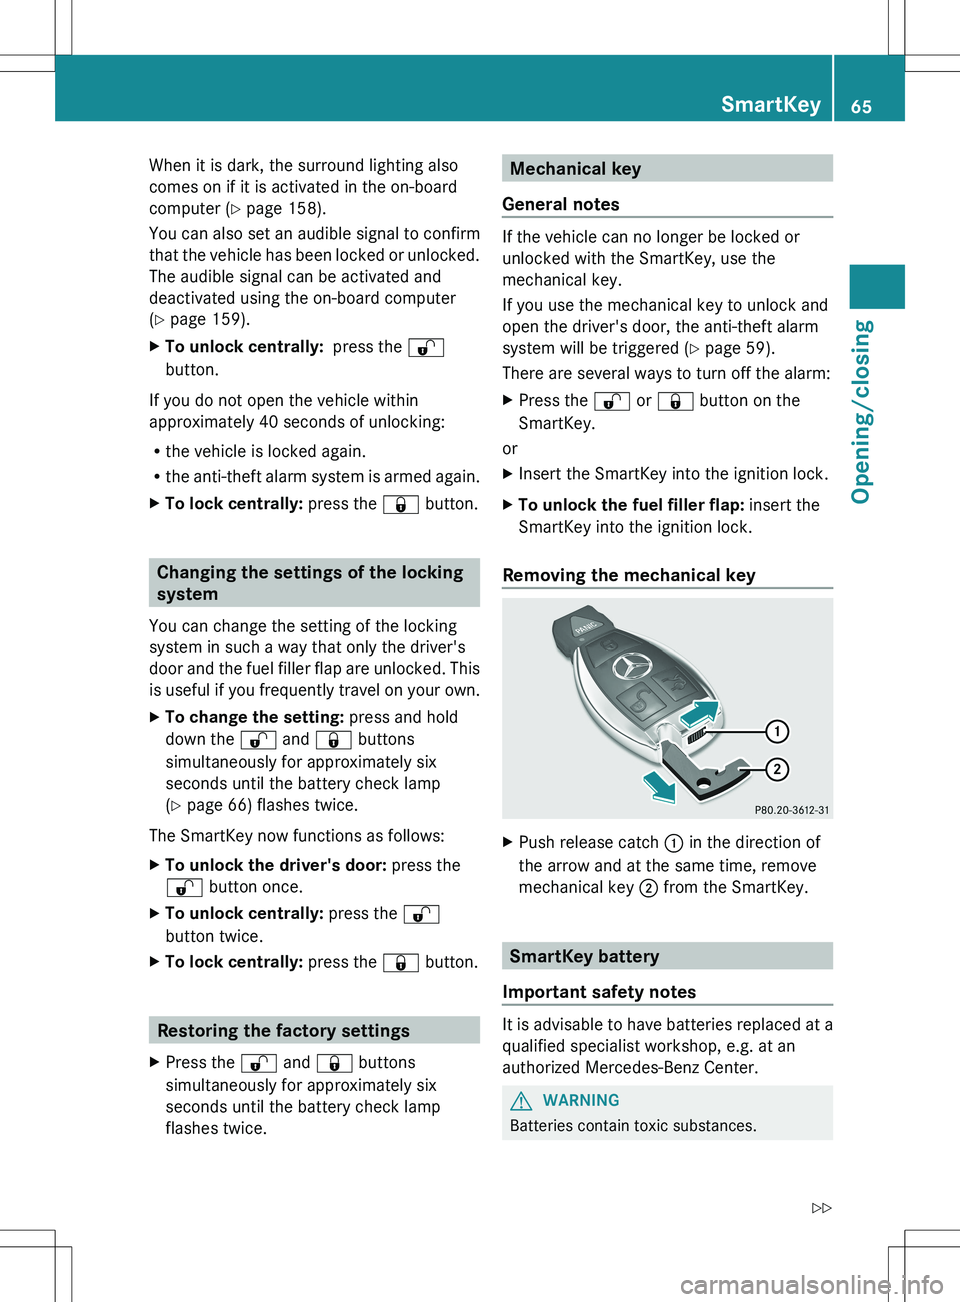
Removing the mechanical key
XPush release catch : in the direction of
the arrow and at the same time, remove
mechanical key ; from the SmartKey.
SmartKey battery
Important safety notes
It is advisable to have batteries replaced at a
qualified specialist workshop, e.g. at an
authorized Mercedes-Benz Center.
GWARNING
Batteries contain toxic substances.
SmartKey65Opening/closingZ
Page 96 of 288
Useful information
i This Operator's Manual describes all
models and all standard and optional
equipment of your vehicle available at the
time of publication of the Operator's
Manual. Country-specific differences are
possible. Please note that your vehicle may
not be equipped with all features
described. This also applies to safety-
related systems and functions.
i Please read the information on qualified
specialist workshops ( Y page 21).
Exterior lighting
Important safety notes
For reasons of safety, Mercedes-Benz
recommends that you drive with the lights
switched on even during the daytime. In some
countries, operation of the headlamps varies
due to legal requirements and self-imposed
obligations.
Information about driving abroad
Converting to symmetrical low beam
when driving abroad: switch the headlamps
to symmetrical low beam in countries in
which traffic drives on the opposite side of the
road to the country where the vehicle is
registered. This prevents glare to oncoming
traffic. Symmetrical lights do not illuminate
as large an area of the edge of the road.
Have the headlamps converted at a qualified
specialist workshop, e.g. an authorized
Mercedes-Benz Center, as close to the border
as possible before driving in these countries.
Converting to asymmetrical low beam
after returning: have the headlamps
converted back to asymmetrical low beam at
a qualified specialist workshop, e.g. an
authorized Mercedes-Benz Center, as soon as
possible after crossing the border again.
Light switch
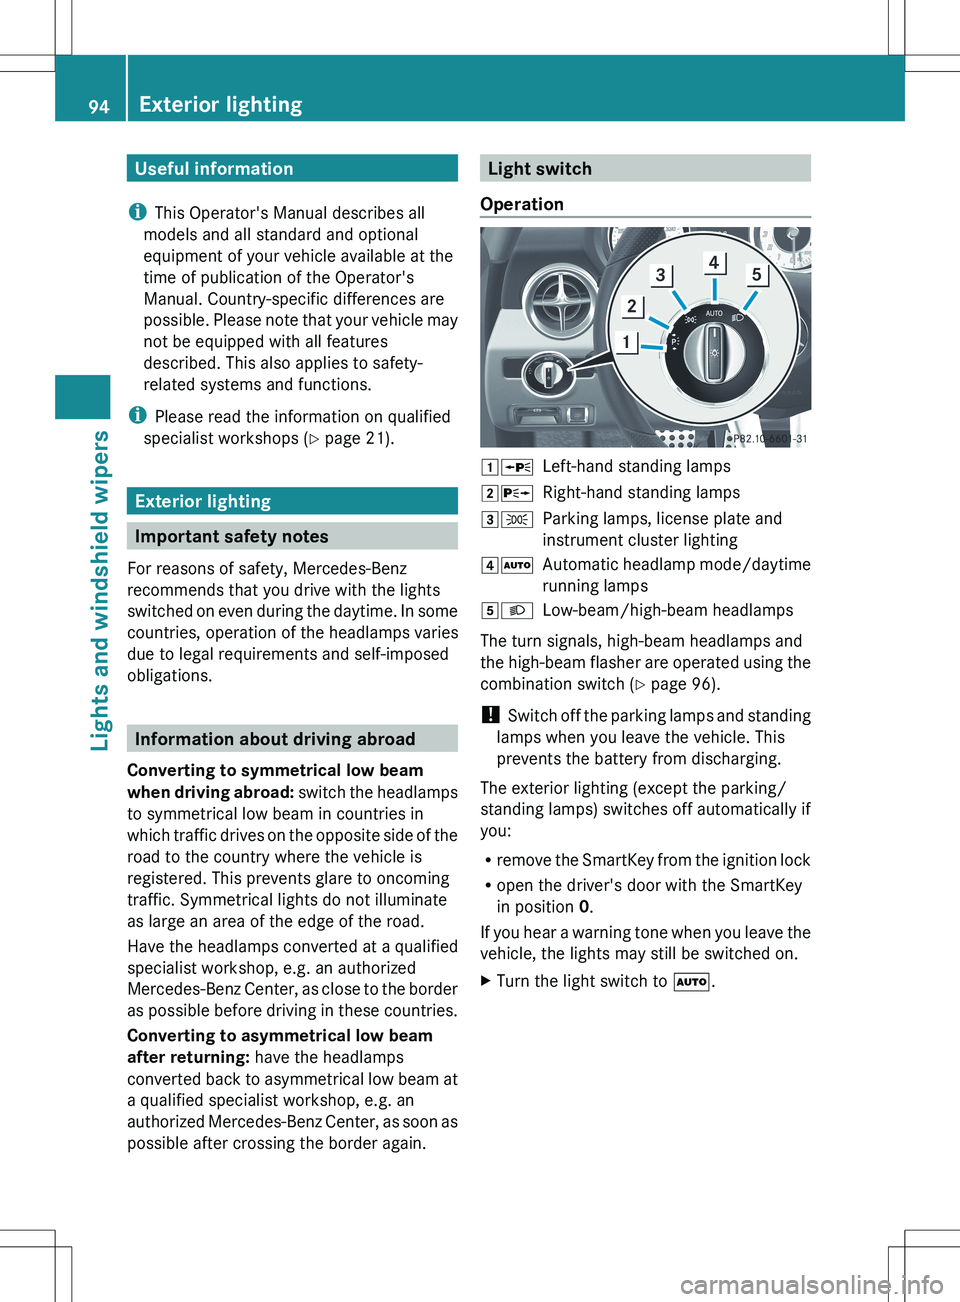
Operation1 WLeft-hand standing lamps2XRight-hand standing lamps3TParking lamps, license plate and
instrument cluster lighting4 ÃAutomatic headlamp mode/daytime
running lamps5 LLow-beam/high-beam headlamps
The turn signals, high-beam headlamps and
the high-beam flasher are operated using the
combination switch ( Y page 96).
! Switch off the parking lamps and standing
lamps when you leave the vehicle. This
prevents the battery from discharging.
The exterior lighting (except the parking/
standing lamps) switches off automatically if
you:
R remove the SmartKey from the ignition lock
R open the driver's door with the SmartKey
in position 0.
If you hear a warning tone when you leave the
vehicle, the lights may still be switched on.
XTurn the light switch to Ã.94Exterior lightingLights and windshield wipers
Page 98 of 288
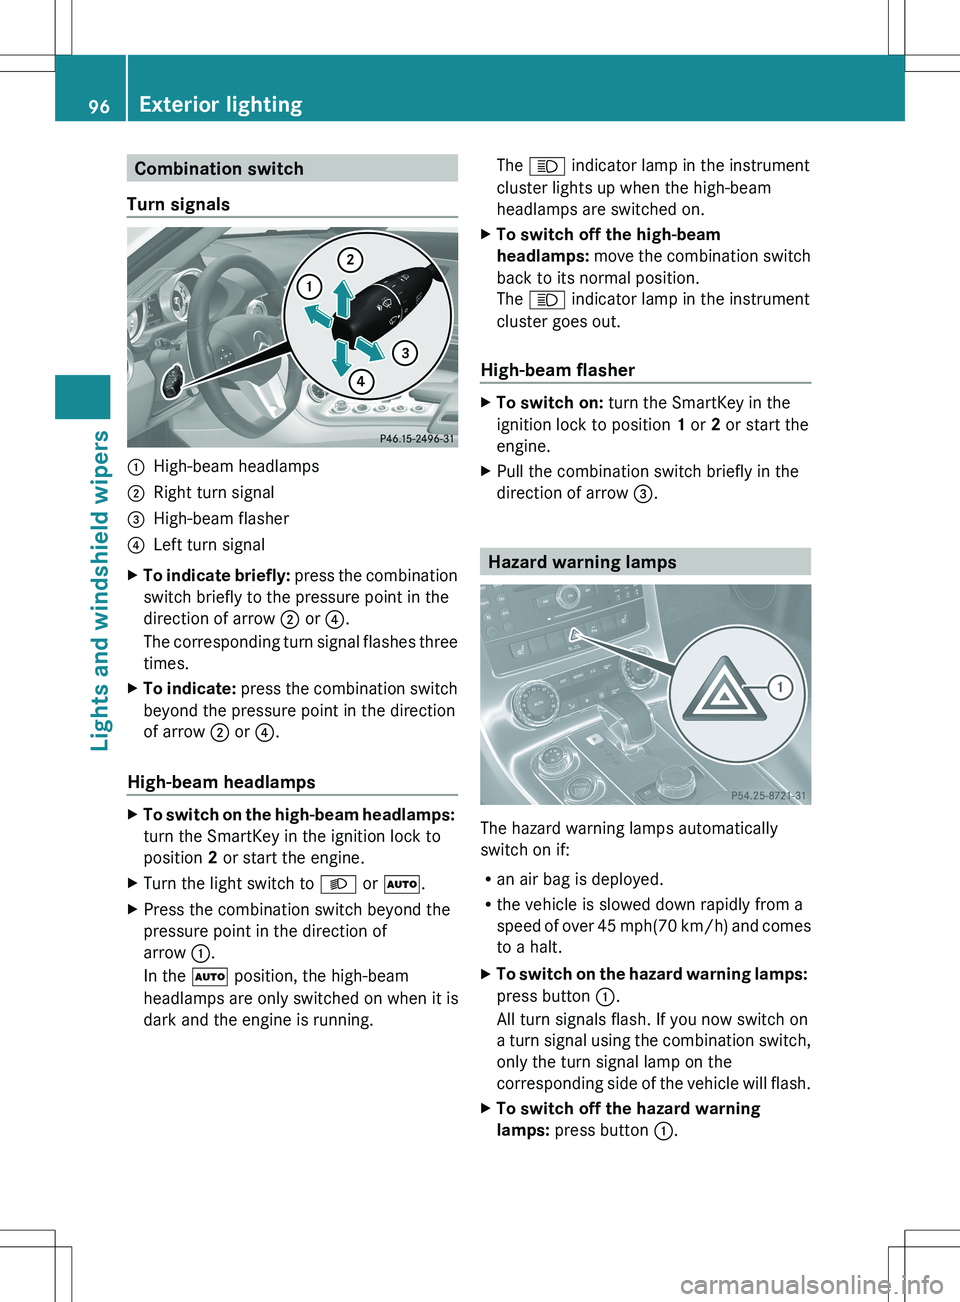
Combination switch
Turn signals:High-beam headlamps;Right turn signal=High-beam flasher?Left turn signalXTo indicate briefly: press the combination
switch briefly to the pressure point in the
direction of arrow ; or ?.
The corresponding turn signal flashes three
times.XTo indicate: press the combination switch
beyond the pressure point in the direction
of arrow ; or ?.
High-beam headlamps
XTo switch on the high-beam headlamps:
turn the SmartKey in the ignition lock to
position 2 or start the engine.XTurn the light switch to L or à .XPress the combination switch beyond the
pressure point in the direction of
arrow :.
In the à position, the high-beam
headlamps are only switched on when it is
dark and the engine is running.The K indicator lamp in the instrument
cluster lights up when the high-beam
headlamps are switched on.XTo switch off the high-beam
headlamps: move the combination switch
back to its normal position.
The K indicator lamp in the instrument
cluster goes out.
High-beam flasher
XTo switch on: turn the SmartKey in the
ignition lock to position 1 or 2 or start the
engine.XPull the combination switch briefly in the
direction of arrow =.
Hazard warning lamps
The hazard warning lamps automatically
switch on if:
R an air bag is deployed.
R the vehicle is slowed down rapidly from a
speed of over 45 mph (70 km/h) and comes
to a halt.
XTo switch on the hazard warning lamps:
press button :.
All turn signals flash. If you now switch on
a turn signal using the combination switch,
only the turn signal lamp on the
corresponding side of the vehicle will flash.XTo switch off the hazard warning
lamps: press button :.96Exterior lightingLights and windshield wipers
Page 145 of 288
GWARNING
The rear view camera is only an aid, and may
display obstacles:
R from a distorted perspective
R incorrectly
R not at all.
The rear view camera does not relieve you of
the responsibility to take care. Take all
necessary care and pay particular attention to
the traffic conditions. The rear view camera
may not show objects that:
R are very near to the rear bumper
R are underneath the rear bumper
You are responsible for safety at all times and
must continue to pay attention to your
immediate surroundings when parking and
maneuvering. This includes the area behind,
in front of, and next to the vehicle. You could
otherwise put yourself and/or others in
danger.
GWARNING
The rear view camera does not work or does
not work properly if:
R it is raining heavily or if it is snowing or
foggy.
R it is night or if you are parking/
maneuvering your vehicle in a very dark
area.
R very bright white light is shining on the
camera.
R the immediate vicinity is illuminated with
fluorescent light (the display of the
COMAND system can flicker).
R the temperature changes abruptly, for
example if you drive out of the cold into a
heated garage (condensation on the lens).
R the camera lens is dirty or covered.
R the rear of your vehicle is damaged.
In this case, have the position and the
setting of the camera checked at a
specialist workshop. Mercedes-Benz
recommends that you consult a Mercedes-
Benz Center for this purpose.
Do not use the rear view camera in these
situations. You could otherwise injure
yourself and other people and/or cause
damage - including damage to your vehicle -
while parking/maneuvering.
Activating the rear view cameraXEnsure that key position 2 has been
selected with the Start/Stop button.XMake sure that the "rear view camera"
function is selected in COMAND (see the
separate operating instructions for
COMAND).XEngage reverse gear.
The COMAND display shows the area
behind the vehicle.
You can also switch off the display of the area
behind the vehicle in the COMAND display.
Blind Spot Assist
Important safety notes
Blind Spot Assist uses a radar sensor system
to monitor the areas on both sides of your
vehicle. It assists you from a speed of
approximately 20 mph(30 km/h). A warning
display in the exterior mirrors draws your
attention to vehicles detected in the
monitored area. If you then switch on the
corresponding turn signal to change lane, you
will also receive an optical and audible
collision warning. For this purpose, Blind Spot
Assist uses sensors in the rear bumper.
GWARNING
Blind Spot Assist is only an aid designed to
assist driving. It may fail to detect some
vehicles and is no substitute for attentive
driving.
Blind Spot Assist cannot detect road and
traffic conditions. It may fail to detect narrow
vehicles, such as motorcycles or bicycles, or
may only detect them too late.
Monitoring may be affected by dirty sensors,
strong spray or poor visibility caused by snow,
Driving systems143Driving and parkingZ