wheel size MERCEDES-BENZ SPRINTER 2014 MY14 Operator’s Manual
[x] Cancel search | Manufacturer: MERCEDES-BENZ, Model Year: 2014, Model line: SPRINTER, Model: MERCEDES-BENZ SPRINTER 2014Pages: 338, PDF Size: 6.78 MB
Page 21 of 338
Bar (definition)
............................... 304
Changing a wheel .......................... 307
Characteristics .............................. 304
Checking ........................................ 287
Definition of terms .........................304
Direction of rotatio n...................... 308
Distribution of the vehicle occu-
pants (definition) ............................ 307
DOT, Tire Identification Number
(TIN) .............................................. .304
DOT (Department of Transporta-
tion) (definition) ............................. 305
GAWR (Gross Axle Weight Rating)
(definition) ..................................... 305
GTW (Gross Trailer Weight) (defi-
nition) ............................................ 305
GVW (Gross Vehicle Weight) (def-
inition) ........................................... 305
GVWR (Gross Vehicle Weight Rat-
ing) (definition) .............................. 305
Important safety notes ..................286
Increased vehicle weight due to
optional equipment (definition) ......305
Kilopascal (kPa) (definition) ...........305
Labeling (overview )........................ 301
Load bearing index (definition) ......306
Load index ..................................... 303
Load index (definition) ...................306
M+S tires ....................................... 288
Maximum loaded vehicle weight
(definition) ..................................... 305
Maximum load on a tire (defini-
tion) ............................................... 306
Maximum permissible tire pres-
sure (definition) ............................. 306
Maximum tire loa d......................... 303
Maximum tire load (definition) .......306
Optional equipment weight (defi-
nition) ............................................ 306
PSI (pounds per square inch) (def-
inition) ........................................... 306
Replacing ....................................... 307
Service life ..................................... 288
Sidewall (definition) .......................306
Speed rating (definition) ................305
Storing ........................................... 308
Structure and characteristics
(definition) ..................................... 304Summer tires
................................. 288
TIN (Tire Identification Number)
(definition) ..................................... 306
Tire bead (definition) ......................306
Tire pressure (definition) ................306
Tire pressures (recommended )...... 305
Tire size (data) ............................... 297
Tire size designation, load-bearing
capacity, speed rating .................... 302
Tire tread ....................................... 287
Tire tread (definition) .....................306
Total load limit (definition) .............307
Traction (definition) .......................307
TWR (permissible trailer drawbar
noseweight) (definition) .................307
Uniform Tire Quality Grading
Standards (definition) ....................305
Unladen weight (definition) ............306
valve, Snap-In ................................ 292
Wear indicator (definition) .............307
Wheel rim (definition) ....................305
Top Tether ............................................ 53
Touchshift (automatic transmis-
sion) .................................................... 145
Tow-away alarm Arming/deactivating ........................63
Deactivating .................................... .63
Operation ........................................ .63
Towing
If the vehicle is stuck .....................282
Important safety guidelines ...........279
Installing/removing the towing
eye ................................................ .280
In the event of malfunctions ..........281
With a raised front or rear axle ......281
Towing a trailer
Axle load, permissible ....................333
Cleaning the trailer tow hitch ......... 271
Coupling up a trailer ......................176
Decoupling a trailer .......................177
Driving tips .................................... 173
Important safety notes ..................173
Installing and removing the ball
coupling ......................................... 175
Notes on retrofitting ......................332
Power supply ................................. 179
Trailer loads ................................... 333 Index
19
Page 46 of 338
Air bags
Important safety notes G
WARNING
To reduce the risk of injury when the front air
bags inflate, it is very important for the driver
and co-driver to always be in a properly seated
position and to wear their respective seat
belt.
For maximum protection in the event of a col-
lision always be in normal seated position with
your back against the seat backrest. Fasten
your seat belt and make sure it is properly
positioned on your body.
Since the air bag inflates with considerable
speed and force, a proper seating position
and correct positioning of the hands on the
steering wheel will help to keep you at a safe
distance from the air bag. Occupants who are
not wearing their seat belt, are not seated
properly or are too close to the air bag can be
seriously injured or killed by an air bag as it
inflates with great force instantaneously:
R Sit with the seat belt properly fastened in a
position that is as upright as possible with
your back against the seat backrest.
R Move the driver's seat as far back as pos-
sible, still permitting proper operation of
vehicle controls. The distance from the
center of the driver's chest to the center of
the air bag cover on the steering wheel
must be at least 10 inches (25 cm) or more.
You should be able to accomplish this by
adjusting the seat and steering wheel. If
you have any difficulties, please contact a
qualified specialist workshop.
R Do not lean your head or chest close to the
steering wheel or instrument panel.
R Keep hands on the outside of the steering
wheel rim. Placing hands and arms inside
the rim can increase the risk and potential
severity of hand/arm injury when the driver
front air bag inflates. R
Move the co-driver's seat as far as possible
away from the instrument panel when the
seat is occupied.
R Occupants, especially children, should
never place their bodies or lean their heads
in the area of the door where the side
impact air bag inflates. This could result in
serious injuries or death should the side
impact air bag be deployed. Always sit as
upright as possible, wear the seat belt prop-
erly and use an appropriately sized infant
restraint, toddler restraint, or booster seat
recommended for the size and weight of the
child.
R Children twelve years old and under must
never travel on the co-driver's seat. They
will otherwise be struck by the co-driver's
front air bag when it inflates in a crash. This
could result in serious or fatal injury.
Failure to follow these instructions can result
in severe injuries to you or other occupants.
If you sell your vehicle, it is important that you
make the buyer aware of this safety informa-
tion. Be sure to give the buyer this Operator's
Manual. G
WARNING
The air bag parts are hot after the airbag has
been deployed. There is a risk of injury.
Do not touch the air bag parts. Have the
deployed air bags replaced at a qualified spe-
cialist workshop as soon as possible.
i If the vehicle is still in running condition,
have it towed to a qualified specialist work-
shop. G
WARNING
If you modify the air bag covers or affix objects
such as stickers to them, the air bags may not
function correctly. There is an increased risk
of injury.
Never modify the air bag covers or affix
objects to them. 44
Occupant safetySafety
Page 59 of 338
switched on. The lamp goes out when the
engine starts running.
Braking If ABS intervenes when braking, you will feel
a pulsating in the brake pedal.
The pulsating brake pedal can be an indica-
tion of hazardous road conditions and func-
tions as a reminder to take extra care while
driving.
X If ABS intervenes: continue to depress the
brake pedal with force until the braking sit-
uation is over.
X To make a full brake application:
depress the brake pedal with full force. BAS (Brake Assist System)
G
WARNING
If BAS is malfunctioning, the braking distance
in an emergency braking situation is
increased. There is a risk of an accident.
In an emergency braking situation, depress
the brake pedal with full force. ABS prevents
the wheels from locking.
Vehicles without steering wheel buttons: if
the BAS driving safety system is malfunction-
ing, the 003Dwarning lamp lights up while the
engine is running (Y page 221).
BAS operates in emergency braking situa-
tions. If you depress the brake quickly, BAS
automatically increases the brake pressure,
thereby reducing the stopping distance.
The brakes will function as usual once you
release the brake pedal. BAS is deactivated. EBD (electronic brake force distribu-
tion)
G
WARNING
If EBD has malfunctioned, the rear wheels can
still lock, e.g. under full braking. This
increases the risk of skidding and an accident. You should therefore adapt your driving style
to the different handling characteristics. Have
the brake system checked at a qualified spe-
cialist workshop.
EBD monitors and controls the brake pres-
sure to the rear wheels. This enables EBD to
improve handling during braking.
Observe the information on warning and indi-
cator lamps (Y page 221). ESP
®
(Electronic Stability Program)
Observe the important safety guidelines for
the driving safety system (Y page 56). G
WARNING
If ESP ®
is malfunctioning it will not provide
any vehicle stabilization. There is an increased
risk of skidding or of an accident.
Exercise caution when continuing to drive.
Have ESP ®
checked at a qualified specialist
workshop.
! Only operate the vehicle briefly (maxi-
mum of 10 seconds) on a brake dynamom-
eter. The key must be turned to position 1
in the ignition lock during this time. You
could otherwise damage the drive train or
the brake system.
! Do not run the vehicle on a roller dyna-
mometer (e.g. for performance tests). If
you must operate the vehicle on a roller
dynamometer, please consult a qualified
specialist workshop in advance. You could
otherwise damage the drive train or the
brake system.
If ESP ®
is malfunctioning, the 0089warning
lamp lights up while the engine is running and
the engine power may be reduced
(Y page 221).
Only use wheels with the recommended tire
sizes. Only then will ESP ®
function properly.
If you select the drive program S+on a vehicle
with an AGILITY SELECT switch, ESP ®
only
stabilizes the vehicle to a limited degree. Driving safety systems
57Safety Z
Page 91 of 338
Mirrors
Rear-view mirror
X
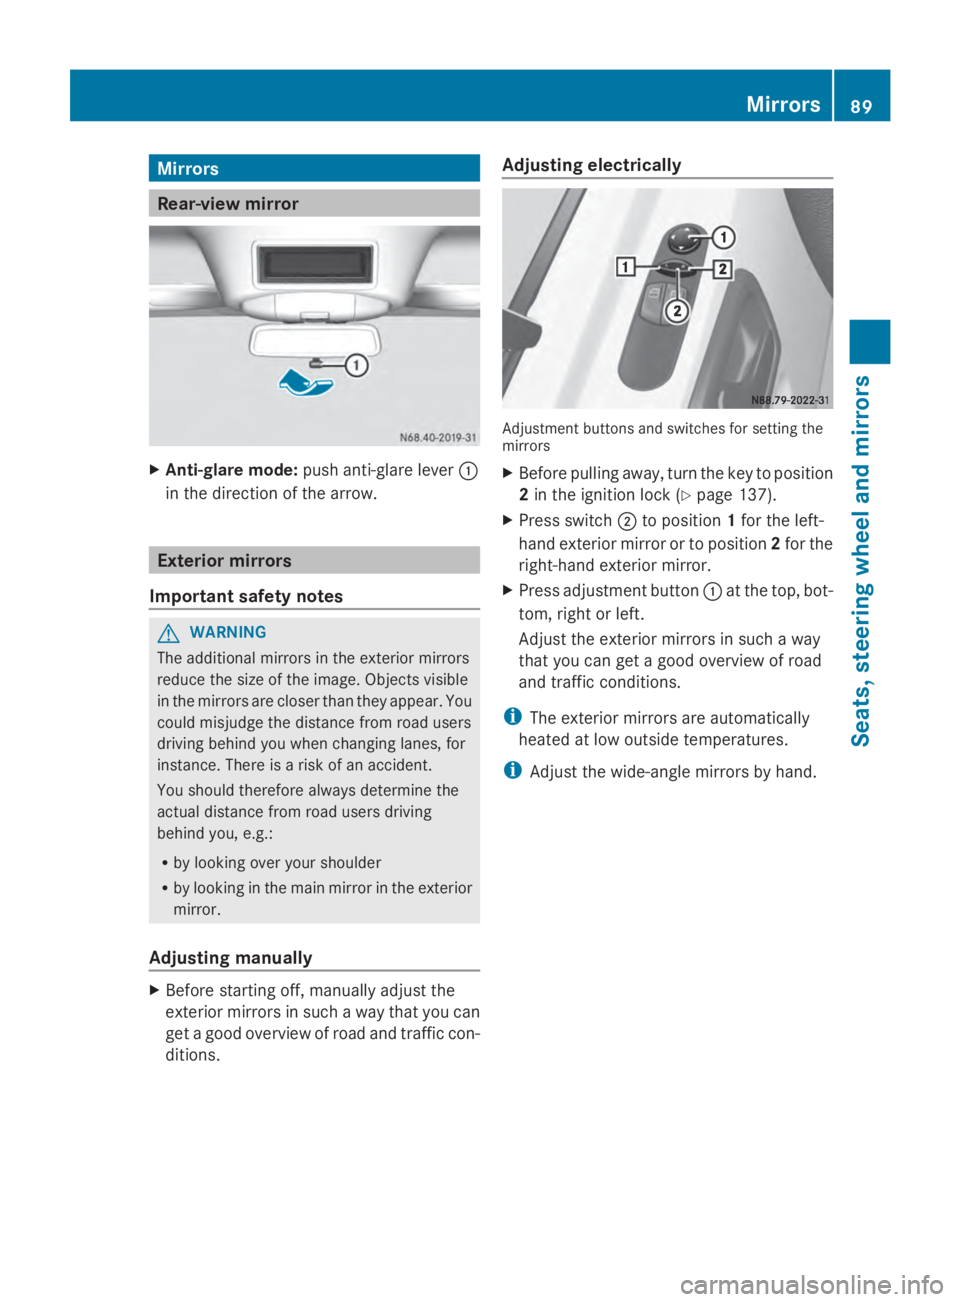
Anti-glare mode: push anti-glare lever 0043
in the direction of the arrow. Exterior mirrors
Important safety notes G
WARNING
The additional mirrors in the exterior mirrors
reduce the size of the image. Objects visible
in the mirrors are closer than they appear. You
could misjudge the distance from road users
driving behind you when changing lanes, for
instance. There is a risk of an accident.
You should therefore always determine the
actual distance from road users driving
behind you, e.g.:
R by looking over your shoulder
R by looking in the main mirror in the exterior
mirror.
Adjusting manually X
Before starting off, manually adjust the
exterior mirrors in such a way that you can
get a good overview of road and traffic con-
ditions. Adjusting electrically
Adjustment buttons and switches for setting the
mirrors
X
Before pulling away, turn the key to position
2in the ignition lock (Y page 137).
X Press switch 0044to position 1for the left-
hand exterior mirror or to position 2for the
right-hand exterior mirror.
X Press adjustment button 0043at the top, bot-
tom, right or left.
Adjust the exterior mirrors in such a way
that you can get a good overview of road
and traffic conditions.
i The exterior mirrors are automatically
heated at low outside temperatures.
i Adjust the wide-angle mirrors by hand. Mirrors
89Seats, steering wheel and mirrors Z
Page 157 of 338
here on the inside title page. Details can be
found in the Maintenance Booklet. Short journey
! If the vehicle is predominantly used for
short-distance driving, this could lead to a
malfunction in the automatic cleaning func-
tion for the diesel particle filter. As a result,
fuel may accumulate in the engine oil and
cause engine failure.
Therefore, if you mainly drive short distan-
ces, you should drive on a highway or on
rural roads for 20 minutes every 310 miles
(500 km). This ensures sufficient regener-
ation of the diesel particle filter.
Therefore, if you mainly drive short distances,
drive on a freeway or an inter-urban road for
20 minutes every 300 miles (500 km). This
facilitates the diesel particle filter's burn-off
process. Speed limiter
G
WARNING
Exceeding the stated tire load-bearing capa-
city and the approved maximum speed could
lead to tire damage or the tire bursting. There
is a risk of accident.
Therefore, only use tire types and sizes
approved for your vehicle model. Observe the
tire load rating and speed rating required for
your vehicle.
As the driver, you must find out about the
maximum speed of the vehicle and the result-
ing permissible maximum speed of the tires
(tire and tire pressure). In particular, also
observe the tire approval regulations for each
country.
You must not exceed the speed limit for the
tires listed in the tire pressure tables. You can
find information on tire pressures in the
"Wheels and tires" section (Y page 290).You can permanently limit the maximum
speed of your vehicle to 75 mph (120 km/h).
We recommend that you use an authorized
Sprinter Dealer for the programming of the
maximum speed.
Before overtaking, take into consideration
that the engine speed limiter prevents the
speed increasing beyond the programmed
maximum speed. Travel abroad
Service An extensive network of authorized Sprinter
Dealers is also at your disposal when you are
traveling abroad. Nevertheless, please bear
in mind that service facilities or replacement
parts may not always be immediately availa-
ble. You can obtain a list of workshops at any
authorized Sprinter Dealer.
Fuel
In some countries, only fuels with a higher
sulfur content are available.
Unsuitable fuel can cause engine damage.
Information on fuel (Y
page 320).
Low-beam headlamps If you are traveling in countries where vehi-
cles are driven on the opposite side of the
road to that in which the vehicle is registered,
you will need to:
R
have the halogen headlamps partially
masked
R have the Bi-Xenon headlamps set to sym-
metrical low beam
This prevents glare to oncoming traffic and no
longer illuminates the edge of the road to the
same height and distance.
Have the headlamps masked or adjusted at a
qualified specialist workshop before you
cross the border, but as close to it as possi-
ble. Driving tips
155Driving and parking Z
Page 244 of 338
Useful information
This Operator's Manual describes all models
as well as standard and optional equipment
of your vehicle that were available at the time
of going to print. Country-specific variations
are possible. Note that your vehicle may not
be equipped with all of the described func-
tions. This also applies to systems and func-
tions relevant to safety.
Read the information on qualified specialist
workshops (Y page 26). Loading guidelines
Important safety notes
G
WARNING
As a result of improperly placed or unevenly
distributed loads, the center of gravity of the
load being transported may be too high or too
far back. This can significantly impair handling
as well as steering and braking characteris-
tics. There is a risk of an accident.
Always make sure that the center of gravity of
the load is:
R between the axles
and
R as low as possible, near the rear axle. G
WARNING
When objects are unsecured or inadequately
secured, they can slip, turn over or be thrown
about, striking vehicle occupants. This also
applies to:
R luggage or loads
R a rear bench seat which has been removed
and is being transported in the vehicle in an
exceptional case.
There is a risk of injury, particularly in the
event of braking maneuvers or abrupt
changes in direction.
Always stow objects in such a way that they
cannot be tossed about. Before traveling,
secure objects, luggage or loads to prevent them slipping or tipping over. If you remove a
rear bench seat, it is advisable to store it out-
side the vehicle.
G
WARNING
When the permissible wheel loads, axle loads
and/or the maximum permissible gross vehi-
cle weight are exceeded, driving safety is
compromised. The handling as well as steer-
ing and braking characteristics may be signif-
icantly impaired. Overloaded tires may over-
heat, causing them to burst. There is a risk of
an accident.
When transporting a load, always observe the
permissible wheel loads, axle loads and the
maximum permissible gross vehicle weight
for the vehicle (including occupants). G
WARNING
When you load the roof, the center of gravity
of the vehicle rises and the driving character-
istics change. If you exceed the maximum roof
load, the driving characteristics, as well as
steering and braking, will be greatly impaired.
There is a risk of an accident.
Never exceed the maximum roof load and
adjust your driving style.
! If you are using a roof carrier, observe the
maximum roof load and maximum roof car-
rier load.
You will find information about the maximum
roof load in the "Technical data" section
(Y page 331 )and information about roof car-
riers in the "Carrier systems" section
(Y page 247).
R Do not stack luggage or loads higher than
the backrests.
R Stow objects preferably in the cargo com-
partment.
R When transporting luggage, always use the
cargo tie-down rings and a parcel net, if
present.
R Use cargo tie-down rings and fasteners
which are suitable for the weight and size
of the load. 242
Loading guidelinesTransporting loads
Page 269 of 338
If you do not unscrew the caps for cleaning,
there is a risk of short circuit.
The breathers in the caps and the cell ven-
tilation tubes must be open. Otherwise, gas
cannot escape.
X Only clean the battery casing with a com-
mercially available cleaning product. Care
Notes on care
G
WARNING
If you use openings in the bodywork or
detachable parts as steps, you could:
R slip and/or fall
R damage the vehicle and cause yourself to
fall.
There is a risk of injury.
Always use secure climbing aids, e.g. a suita-
ble ladder.
! For cleaning your vehicle, do not use any
of the following:
R dry, rough or hard cloths
R abrasive cleaning agents
R solvents
R cleaning agents containing solvents
Do not scrub.
Do not touch the surfaces or protective
films with hard objects, e.g. a ring or ice
scraper. You could otherwise scratch or
damage the surfaces and protective film.
! Do not park the vehicle for an extended
period straight after cleaning it, particularly
after having cleaned the wheels with wheel
cleaner. Wheel cleaners could cause
increased corrosion of the brake discs and
brake pads/linings. For this reason, you
should drive for a few minutes after clean-
ing. Braking heats the brake discs and the
brake pads/linings, thus drying them. The
vehicle can then be parked. H
Environmental note
Only clean your vehicle at specially designed
wash bays. Dispose of empty containers and
used cleaning products in an environmentally
responsible manner. H
Environmental note
Dispose of empty packaging and cleaning
cloths in an environmentally responsible man-
ner.
Regular care of your vehicle is a condition for
retaining the quality in the long term.
Use care products and cleaning agents rec-
ommended and approved for Sprinter vehi-
cles. Washing the vehicle and cleaning the
paintwork
Automatic car wash G
WARNING
Braking efficiency is reduced after washing
the vehicle. There is a risk of an accident.
After the vehicle has been washed, brake
carefully while paying attention to the traffic
conditions until full braking power is restored.
! Never clean your vehicle in a Touchless
Automatic Car Wash as these use special
cleaning agents. These cleaning agents can
damage the paintwork or plastic parts.
! Make sure that the automatic car wash is
suitable for the size of the vehicle.
Before washing the vehicle in an automatic
car wash, fold in the exterior mirrors and
remove any additional antennas. Other-
wise, the exterior mirror, antenna or the
vehicle itself could be damaged.
Make sure that the exterior mirrors are fully
folded out again and that any additional
antennas are re-installed when you leave
the automatic car wash. Care
267Maintenance and care Z
Page 288 of 338
Useful information
This Operator's Manual describes all models
as well as standard and optional equipment
of your vehicle that were available at the time
of going to print. Country-specific variations
are possible. Note that your vehicle may not
be equipped with all of the described func-
tions. This also applies to systems and func-
tions relevant to safety.
Read the information on qualified specialist
workshops (Y page 26). Important safety notes
G
Warning
A flat tire severely impairs the driving, steer-
ing and braking characteristics of the vehicle.
There is a risk of an accident.
do not drive with a flat tire. Immediately
replace the flat tire with your spare wheel, or
consult a qualified specialist workshop. G
WARNING
If wheels and tires of the wrong size are used,
the wheel brakes or suspension components
may be damaged. There is a risk of an acci-
dent.
Always replace wheels and tires with those
that fulfill the specifications of the original
part.
When replacing wheels, make sure to use the
correct:
R designation
R model
When replacing tires, make sure to use the
correct:
R designation
R manufacturer
R model
Accessories that are not approved for your
vehicle or are not being used correctly can
impair operating safety. Before purchasing and using non-approved
accessories, visit a qualified specialist work-
shop and inquire about:
R
suitability
R legal stipulations
R factory recommendations
Contact an authorized Sprinter dealer if you
require information on tested and recom-
mended wheels and tires for summer and
winter driving. Advice on purchasing and car-
ing for tires is also available there.
Information on tire and wheel dimensions and
types as well as the recommended tire pres-
sure for your vehicle can be found in the "Tire
pressure" section (Y page 297).
This data can also be found on the Tire and
Loading Information placard on the B-pillar.
Modifications to the brake system or wheels
are not permitted. The use of wheel spacers
or brake dust shields is not permitted. This
invalidates the general operating permit for
the vehicle.
i Further information on wheels and tires
can be obtained at any qualified specialist
workshop. Operation
Information for a journey
If the vehicle is heavily laden, check the tire
pressures, and correct them, if necessary.
While driving, pay attention to vibrations,
noises and unusual handling characteristics,
e.g. pulling to one side. This may indicate that
the wheels or tires are damaged. If you sus-
pect that a tire is defective, reduce your
speed immediately. Stop the vehicle as soon
as possible to check the wheels and tires for
damage. Hidden tire damage could also be
causing the unusual handling characteristics.
If you find no signs of damage, have the tires
and wheels checked at a qualified specialist
workshop. 286
OperationWheels and tires
Page 290 of 338
case, the tire is so worn that it must be
replaced. Selecting, mounting and renewing
tires
R Only mount tires and wheels of the same
type and make.
R Only mount tires of the correct size onto
the wheels.
R Break in new tires at moderate speeds for
the first 65 miles (100 km).
R Do not drive with tires which have too little
tread depth, as this significantly reduces
the traction on wet roads (hydroplaning).
R Replace the tires after 6 years at the latest,
regardless of wear. This also applies to the
spare wheel. Operation in winter
General notes
Have your vehicle winterproofed at a qualified
specialist workshop at the onset of winter.
Prior to the onset of winter, ensure that snow
chains are stowed in the vehicle
(Y page 289).
Observe the notes in the "Changing a wheel"
section (Y page 307). Driving with summer tires
At temperatures below 45 ‡(+7 †), summer
tires lose elasticity and therefore traction and
braking power. Change the tires on your vehi-
cle to M+S tire. Using summer tires at very
cold temperatures could cause tears to form,
thereby damaging the tires permanently. We
cannot accept responsibility for this type of
damage. M+S tires
G
WARNING
Wheel and tire dimensions as well as the type
of tire can vary between the spare wheel and
the wheel to be replaced. When the spare
wheel is mounted, driving characteristics may
be severely affected. There is a risk of an acci-
dent.
In order to reduce risks:
R you should therefore adapt your driving
style and drive carefully.
R never mount more than one spare wheel
that differs from the wheel to be replaced.
R only use a spare wheel that differs from the
wheel to be replaced for a short time.
R do not deactivate ESP ®
.
R have a spare wheel that differs from the
wheel that has been changed replaced at
the nearest qualified specialist workshop.
You must observe the correct wheel and
tire dimensions as well as the wheel type. G
WARNING
M+S tires with a tire tread depth of less than
00CF in (4 mm) are not suitable for use in winter
and do not provide sufficient traction. There
is a risk of an accident.
M+S tires with a tread depth of less than 00CF
in (4 mm) must be replaced immediately.
At temperatures below 45 ‡(+7 †), use win-
ter tires or all-season tires. Both types of tire
are identified by the M+S marking.
Only winter tires bearing the 004Dsnowflake
symbol in addition to the M+S marking pro-
vide the best possible grip in wintry road con-
ditions.
Only these tires will allow driving safety sys-
tems such as ABS and ESP ®
to function opti-
mally in winter. These tires have been devel-
oped specifically for driving in snow.
For safe driving, use M+S tires of the same
make and tread pattern on all wheels. 288
Operation in winterWheels and tires
Page 295 of 338
information table or the tire pressure table
(Y
page 290).
X If the tire pressure is too low, increase it to
the recommended value.
X If the tire pressure is too high, release air
by pressing down the metal pin in the valve.
Use the tip of a pen, for example. Then,
check the tire pressure again using the tire
pressure gauge.
X Screw the valve cap onto the valve.
X Repeat the steps for the other tires. Tire pressure monitor
Important safety notes G
WARNING
Each tire, including the spare (if provided),
should be checked at least once a month
when cold and inflated to the pressure rec-
ommended by the vehicle manufacturer on
the Tire and Loading Information placard on
the driver's door B-pillar or the tire pressure
label on the inside of the fuel filler flap. If your
vehicle has tires of a different size than the
size indicated on the Tire and Loading Infor-
mation placard or the tire pressure label, you
should determine the proper tire pressure for
those tires.
As an added safety feature, your vehicle has
been equipped with a tire pressure monitoring
system (TPMS) that illuminates a low tire pres-
sure telltale when one or more of your tires
are significantly underinflated. Accordingly,
when the low tire pressure telltale illuminates,
you should stop and check your tires as soon
as possible, and inflate them to the proper
pressure. Driving on a significantly underin-
flated tire causes the tire to overheat and can
lead to tire failure. Underinflation also
reduces fuel efficiency and tire tread life, and
may affect the vehicle's handling and stop-
ping ability.
Please note that the TPMS is not a substitute
for proper tire maintenance, and it is the driv-
er's responsibility to maintain correct tire pressure, even if underinflation has not
reached the level to trigger illumination of the
TPMS low tire pressure telltale.
USA only:
Your vehicle has also been equipped with a
TPMS malfunction indicator to indicate if the
system is not operating properly. The TPMS
malfunction indicator is combined with the
low tire pressure telltale. When the system
detects a malfunction, the warning lamp will
flash for approximately a minute and then
remain continuously illuminated. This
sequence will be repeated every time the vehi-
cle is started as long as the malfunction
exists.
When the malfunction indicator is illuminated,
the system may not be able to detect or signal
low tire pressure as intended. TPMS malfunc-
tions may occur for a variety of reasons,
including the mounting of incompatible
replacement or alternate tires or wheels on
the vehicle that prevent the TPMS from func-
tioning properly. Always check the TPMS mal-
function telltale after replacing one or more
tires or wheels on your vehicle to ensure that
the replacement or alternate tires and wheels
allow the TPMS to continue to function prop-
erly.
Vehicles with a tire pressure monitor are
equipped with sensors in the wheels that
monitor the tire pressure of all four tires. The
tire pressure monitor monitors the pressure
in all four tires; you set this pressure when
you activate the tire pressure monitor. The
tire pressure monitor warns you when the
pressure drops in one or more of the tires. The
tire pressure monitor only functions if the
corresponding sensors are installed to all
wheels.
You should always adjust the tire pressure
according to the vehicle load. Restart the tire
pressure monitor if you change the tire pres-
sure.
The tire pressure monitor does not warn you
if a tire pressure is incorrect. Observe the Tire pressure
293Wheels and tires Z